Page 2
Repotting Basil In Pots
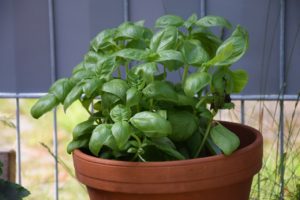
The seedlings are now growing vigorously and measure a few inches tall. Great! Or perhaps you decided to purchase young plants at the farmers’ market to save some time.
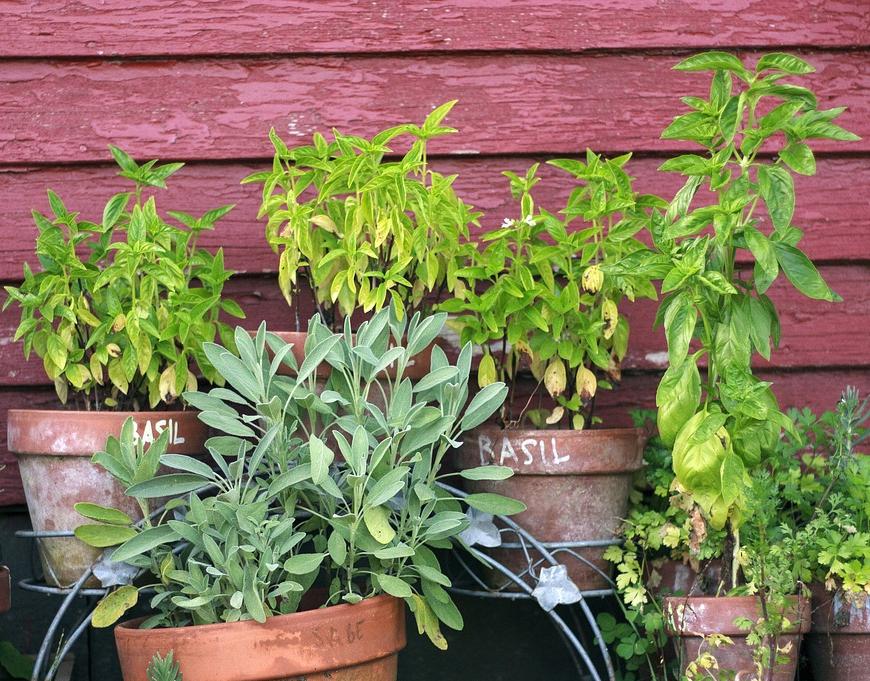
Decide how you’re going to group them in pots. You could keep all the sweet basils together in one pot. Another pot can hold lemon, Thai, and ‘Cardinal’ basils. The flavors won’t “combine”; each variety will retain its characteristic flavor.
Three 4″ pots, with approximately 6 stems in total, will comfortably fit in a 12″ pot. That volume of soil will hold nutrients for a while and give the roots room to expand without feeling too cramped. That assumes you’ll be cutting basil a few times a week during the summer months. Basil that grows without pruning can get quite large and might require daily watering. The more foliage on the plants, the faster the soil dries out.
Basil grown indoors is more easily managed when grown in pots 6-7″ wide, with 3-5 stems per pot. A smaller variety, such as ‘Yevani’, does well in a 4½-5″ pot.
The Soil
Fill a clean pot with lightly dampened fresh potting soil to within a few inches of the rim. Potting soil has larger particles than seedling mixtures to facilitate drainage in larger pots. If there’s a large proportion of pine fines or perlite in the soil, you might need to add more peat moss, compost, or pasteurized loamy clay to help the soil hold moisture.
Pine fines make the soil drain very fast because of the large air pore space between the particles. Most of the bagged soil products I’ve bought over the past few years have had more pine fines (or “wood products”) and less water holding material (peat moss) than I prefer.
Firm the soil lightly so it doesn’t settle over time.
Score the Root Ball

Scoring the root ball of a transplant.
Water the plants first, then remove them from their pots. Keep the labels with the plants to identify the varieties.
Use a knife, a rock, or a stick to score the root ball a few times, top to bottom, 1/8-1/4″ deep. Light damage to the root causes it to branch out from the pericycle, a layer of cells inside the root. This increases the root system, helping establish the plant faster. Do this every time you transplant something (a basil plant, an azalea, a butterfly bush). Use a cultivator or a fork to pry some of the roots away from a tightly packed mass.
The only water available to a new transplant is that which is present in the original root ball. And that can get used up pretty fast on a warm breezy day. Although surrounding soil might be quite moist, a dry root ball can’t absorb enough water to make up for moisture lost during transpiration. Eventually, the plant will root out. But scoring the root ball encourages the plant to “grab” the surrounding soil much faster.
Add Plants
Dig a hole in the soil, closer to the edge of the 12″ pot than to the center, and plant one of the basils. The plant’s original soil surface should be visible after potting up, level with the surrounding soil. The stem could rot if the root ball is too low in the soil.
Repeat the process for the other 2 pots of basil. Plant them close to the edge of the pot, equally spaced. Firm the soil against the roots, and water them in, using lightly warmed water. At this stage, you don’t need to saturate the entire pot of soil. As the roots grow deeper into the soil, increase the quantity of water provided.
A Small Pot of Dwarf Basil

Dwarf ‘Boxwood’ basil.
A dwarf basil, such as ‘Yevani’, ‘Minette’, ‘Boxwood’, or ‘Marseillais Dwarf’, looks charming in a 6″ clay pot.
Clay pots develop an aged look, with green algae and mineral deposits marking the sides. I’m never in a rush to clean it off. As moisture seeps through the clay pot, it carries with it dissolved fertilizer salts. The water evaporates from the pot, leaving behind a white material called efflorescence.
In fact, my customers liked the look of these pots, and I often stored them in a damp spot to start the aging process.
A plant in a pot that is shorter than it is wide (an azalea pot) displays better. To me, it looks anchored, more stable.
Soil in clay pots dries faster than soil in plastic pots, so check it daily.
Maintenance For Basil In Pots
With minimal care, basil in pots will grow very quickly in warm weather. It won’t be long before you can start clipping leaves or stems. Here are some tips for growing beautiful basil in pots.
Light For Basil In Pots

Basil likes direct sunshine outdoors for at least 6 hours per day. In a hot climate, place the pot where it will get morning to early afternoon sun and light shade during the hottest part of the day. Turn it every few days so all sides receive good light.
Many gardeners grow basil indoors. Artificial lights running 16 to 18 hours a day provide enough light for basil in pots. Place the top of the plant as close to the tubes as possible—within a few inches—as long as it can’t feel any heat. Fixtures that hold two 4′ long tubes emit much more light than smaller fixtures or bulbs. Use “daylight” LED or fluorescent tubes.
Maybe your sunny bay window is the perfect place to grow basil indoors.
Temperature
Basil is native to warm climates from Southeast Asia to India and Iran, and possibly central Africa. It has naturalized around the Mediterranean Sea, from France, Italy, Greece, and around to the northern African coast.
Frosty weather will certainly kill it, but even warmer temperatures in the 50’s F will cause it to decline. True, that’s not even close to frost, but basil is super-sensitive. It prefers temperatures in the 70’s and 80’s.
One advantage of a very hot summer is the fact that Basil Downy Mildew does not prosper at temperatures above the mid 90’s. When nights remain warm, the relative humidity stays too low for BDM to germinate, except during rainy weather.
Indoor basil struggles at 60-65° in the winter. I place small pots of basil on top of the 80° aquarium at night until the house warms up a bit. Then they go back to the sunny kitchen window for several hours of sun.
Watering Basil In Pots
Keep the soil lightly moist, but not wet, especially as the plants grow large. Basil wilts miserably when the soil runs dry, but watering immediately usually revives it. If this becomes a common practice, though, the stress will show up as brown-edged leaves, yellowing leaves, and dying stems.
On the other hand, constantly wet soil—from overwatering or from sitting in a saucer of water—injures the roots by cutting off the air supply. Dead root hairs can’t take up water. Without a steady supply of water moving up from the roots, leaves lose turgidity and collapse in a wilt. Cold, wet soil hastens basil’s demise.
Even though the soil is moist, the plant can look just as wilted as a bone-dry plant. A wilted pot of basil is less likely to recover if the cause was waterlogged soil. Roots need oxygen as much as they need water. Without an adequate supply of oxygen, plants can’t respire or grow new roots.
Lifting your potted plants can indicate whether they’re wet or dry. Eventually, you’ll develop a “feel” for what they should weigh.
Although the top of the soil might feel dry, the soil could be moist enough 2″ below the surface. Insert your finger into the soil to get a more accurate assessment of the soil’s condition. If you detect any dampness, don’t water yet.
A new 12″ pot might need water every 2 or 3 days after planting, as long as the young plants aren’t wilting. But, as the roots fill the pot and the foliage grows, check the planter more often. Warm, sunny, breezy days will quickly dry the soil, necessitating daily watering.
Dealing With Slugs and Snails
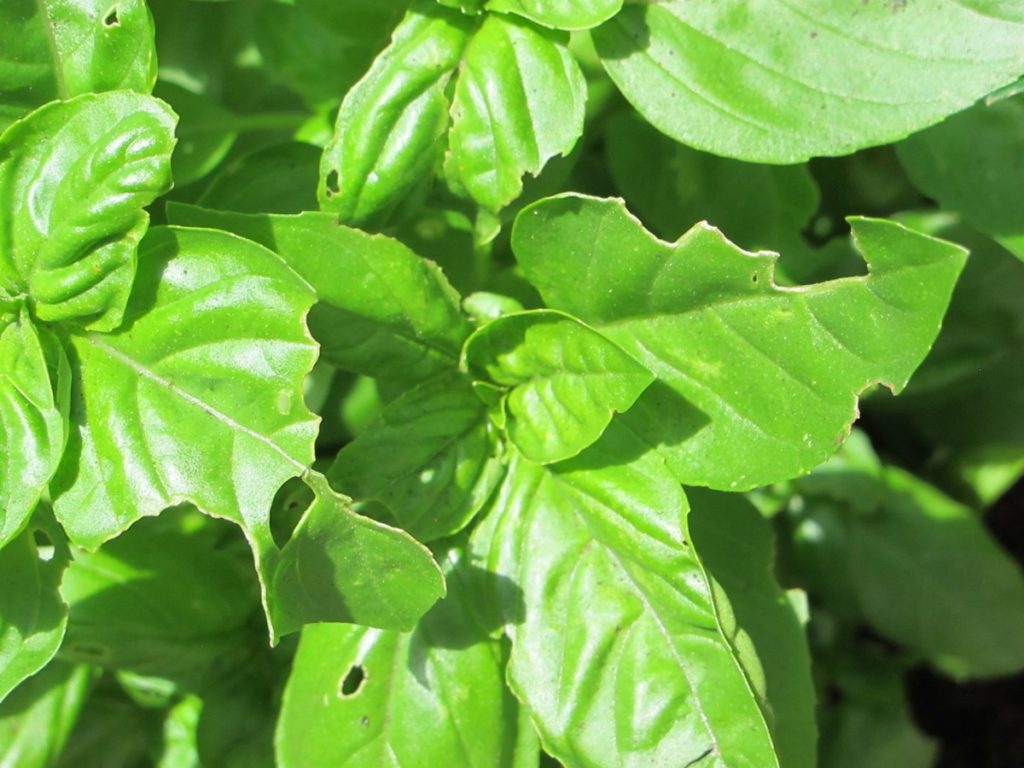
In damp weather or with irrigation outdoors, young basil seedlings and plants attract slugs and snails. These mollusks retreat to cool shade during the day and emerge at night to feed. Consequently, we usually don’t see what’s causing the damage.
-

- Sweet basil with slug damage.
-
- A slug.
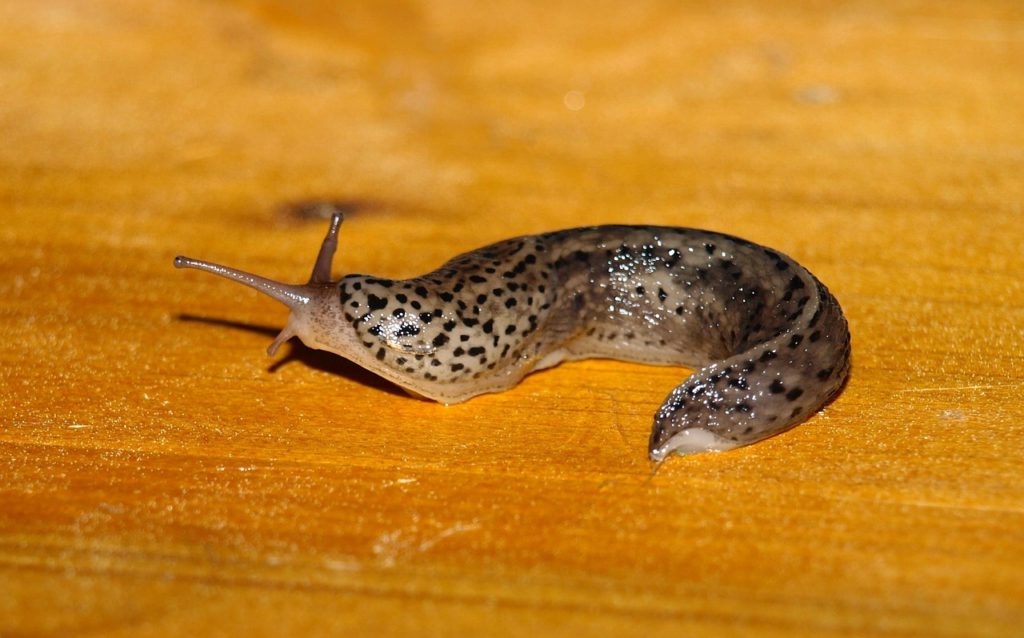
- Be on the lookout and bait them a short distance away with organic Sluggo. This OMRI-listed product contains only iron phosphate.
- Look under the bottoms of the pots, where slugs often hide.
- Lay a board on the ground, where the slugs hide after feeding through the night. Early in the morning, slice them in half with an old knife or a rock—humanely done fast!
- Never use salt in the garden.
Rinse the leaves very well before using. It happens rarely, but slugs can transmit a serious disease if consumed.
Caterpillars
Now and then I’ll find a caterpillar feeding on the foliage. Some hide in the soil during the daytime and come to the surface at night.
If you can’t find the pest, spray with Bt (Bacillus thuringiensis). Larvae of moths and butterflies ingesting some of the Bt will die. It’s perfectly safe to use on edibles. Rinse before consuming. Read the label.
Fertilizer For Basil In Pots
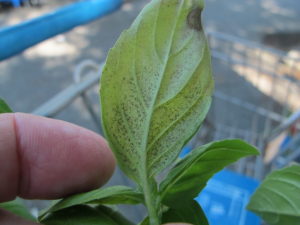
Yellow leaves indicate low levels of soil fertility, particularly nitrogen, and they taste awful.
As a leafy herb, basil requires more frequent fertilization than woody herbs. A deficiency of nitrogen commonly causes yellowing of the leaves, starting at the bottom of the plant (photo, above). The rest of the plant lacks a vibrant green color. Only fully colored leaves taste good. Yellow or pale green leaves are bitter and will not complement those vine-ripened tomatoes.
Earthworm castings, fish emulsion, Sea-Plus, and sea-and-farm products are some of the high-nitrogen organic options available.
Nitrogen is the first of the 3 primary macronutrients listed on the label: Nitrogen—Phosphorus (phosphate)—Potassium (potash), or N-P-K and always in that order. Neglected plants respond faster with soluble synthetic fertilizer. But don’t wait for the plant to give you a sign that it needs to be fertilized. At that point, the plant is already beyond the “hidden hunger” stage and is in serious nutritional deficit.
Basil in larger pots should be on a regular fertilization schedule, every 2 or 3 weeks, during warm weather. Smaller pots will need fertilizer every 2 weeks. In rainy weather, or with frequent irrigation, you might have to fertilize more often because nitrogen is very mobile and rapidly leached from the soil.
By using different products throughout the season, the plants will get a wide variety of the micronutrients required. One product, for example, might have more iron or manganese than the others.
Controlled Release Fertilizer
For those who forget to fertilize, use timed release products. But remember to add another dose after 2 or 3 months, before deficiency symptoms show up. A small amount of fertilizer is released from the prills with each irrigation. I prefer to place the prills in a few small holes an inch deep, then covered.
Timed release fertilizer is released more rapidly at high temperatures. Even though the label indicates the product can last for 4 months at 70°F, it might be used up within 2 or 3 months at 80° or 85°.
Different Kinds of Nitrogen
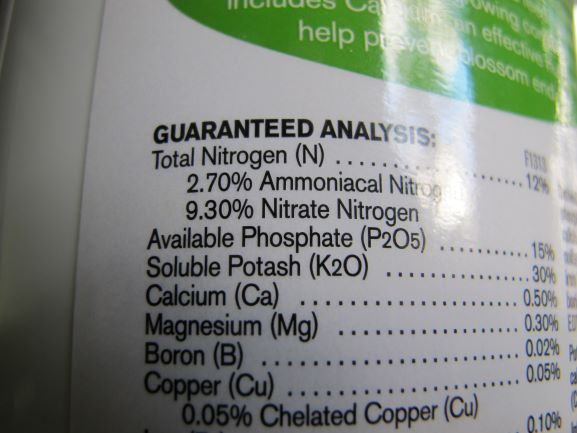
A fertilizer label showing 2 kinds of nitrogen.
Look for a higher nitrogen content for leafy herbs. The first number on the label should be higher than the middle or the last of the 3 numbers.
Nitrogen in the nitrate form will keep the plant more compact, and it tends to slightly raise the soil pH over time. Ammoniacal and urea forms of nitrogen push fast, tender growth. They also lower the pH of the soil over time.
A fertilizer label (photo, above) lists the percentages of the types of nitrogen contained in this product. Most of the fertilizers I use have some of both, but more of the nitrate nitrogen.
Harvesting and Hormones
Plants with lots of foliage can be harvested at a young age. If you need a couple of leaves for salad, or a small handful for a tomato dish or pizza, go ahead and snip individual leaves or cut part of a stem. Good growing conditions encourage the cut stem to branch out into a few new branches that can be harvested later.
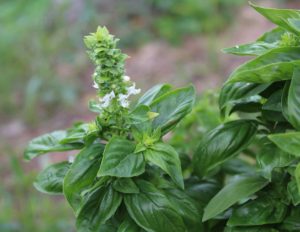
Pinch the flowers and a few inches of the stem. Bees and hummingbirds love the flowers.
Cutting back the growing tip removes hormones that inhibit side branching. Auxins concentrated in the stem tips help maintain “apical dominance”, ensuring maturing tip growth. On older plants, flower buds begin developing at the tips of the stems. The farther back you cut a stem, the lower the concentration of those hormones, and, therefore, the more leaves will grow before the new stems flower.
Many customers have said that even though they removed all the flower buds, the basil still went right to flower. Try removing more of the stem—a few nodes down from the tip, at least.
Removing 2/3 of the stem might be necessary in order to get another good crop of leaves. Snipping off the buds is not good enough! Getting rid of more of the hormones by cutting back farther diminishes their influence on the remaining part of the stem.
“But It Keeps Trying To Flower!”
Remember, basil is an annual. The seed germinates, the plant grows leaves, then flowers, and those flowers set seed…all within one growing season. That’s the definition of an annual. So, the plant flowers to accomplish its mission in life, which is to make seeds. At some point you have to decide if it’s worth keeping an older pot of basil that refuses to cooperate.
Before giving up on it entirely, however, try cutting back all the stems to 4″ from the soil several days after fertilizing it. By getting all those nutrients into the roots, the plant might make another attempt to send out a flush of perfect green foliage.
When nights begin cooling down in late summer or early autumn, take the pot indoors at night if it continues producing good foliage. It wouldn’t be a bad idea to establish a young pot of basil toward the end of summer, while the days are still long. It could provide fresh basil for months after the first one has been retired.
About That Basil Downy Mildew
BDM sporangia.
BDM is one reason why I grow basil in pots, and it’s the main one. You might have guessed that basil is a must-have in our kitchen.
When the disease has made an appearance in the neighborhood, it’s time to start taking the pots indoors for the night. Even though you’ve recognized some of the symptoms of BDM on your potted basil, you can stop the disease in its tracks simply by taking it indoors.
Snip off the discolored leaves. BDM is not considered to be a human health hazard, unless there’s a true allergy to it.
Growing Basil Outdoors
If you must leave your pots of basil outside, place them where the air circulation is very good. Try growing them on a raised deck, on the patio by the breezy corner of the house, or on a large paved surface. A basil plant growing near the siding of the house might benefit from warmth (lower humidity) radiating from the house at night.
Add small pine bark nuggets as a mulch so there’s less humidity under the plant. Also, when harvesting, clip inner stems to open the structure of the plant. This permits better air circulation through the canopy.
Avoid areas where greenery in the garden or solid structures might hamper the flow of air. When planting them in the garden, choose a location on the edge of the garden. And cross your fingers. You never know; this year BDM might never show up!
Toward the end of the growing season, let the plants go to flower and seed. Hummingbirds will visit the flowers and American goldfinches living in the area will find the seeds and appreciate your kind gesture.
Concluding
Luckily, there’s an easy fix when BDM shows up in your location. It takes a little work to maintain, but growing basil in pots works every time! If the new BDM resistant varieties are not available or you can’t find seeds, try growing basil in pots and taking them indoors for the night.
Page 1: Why Should We Grow Basil In Pots?, How To Recognize Basil Downy Mildew, Easy Solution: Basil In Pots (New Varieties), Long-Time Favorite Herb (Varieties Included), and Basil In Pots: Potting Up (Shopping for Basil Transplants, Growing Basil from Seed)
Page 2: Repotting Basil In Pots (The Soil, Score the Root Ball, Add Plants, A Small Pot of Dwarf Basil), Maintenance For Basil In Pots (Light For Basil In Pots, Temperature, Watering Basil In Pots, Dealing With Slugs and Snails (Caterpillars), Fertilizer For Basil In Pots, Harvesting and Hormones), and About That Basil Downy Mildew (Growing Basil Outdoors)