Tag Archive | insects

Patches For Pollinators: Less Grass To Mow

2022


patches for pollinators


Patches For Pollinators


In this article, I’ll describe how new garden spaces and “Patches for Pollinators” have decreased mowing time, while providing nectar and pollen for pollinators and seeds for songbirds. Also included is information about several insects found in the gardens this summer.

A common theme running through The Farm In My Yard is my goal of replacing much of the lawn with layered gardens, including trees, shrubs, perennials, bulbs, and annuals. Flowers and more natural surroundings attract bees and butterflies, toads and birds.

All the rest of the animal kingdom are showing up as well. Mice, moles, and voles…snakes and rabbits…foxes and deer. Lots of praying mantises, five-lined skinks, ladybugs, fireflies, and many insects I’ve never seen before. Occasionally, a cat sits patiently under the bird feeder until he’s shooed off. And some pests, too, such as…


…Japanese Beetles
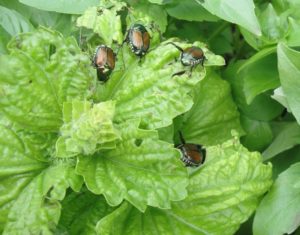
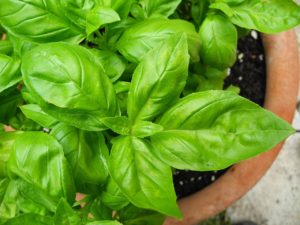
lettuce-leaf basil, Japanese beetles

Lettuce-leaf basil ‘Tuscany’, with Japanese beetles.

Japanese beetles (Popillia japonica), accidentally imported into the U.S., were first spotted in New Jersey in 1916. They’re present here (northern NC) in enormous numbers this year and demonstrate a particular fondness for my lettuce-leaf basil, marigolds, blueberries, and raspberries. But they will feed on hundreds of species, including linden, cherry, plum, birch, rose, grape, and hollyhock.

To prevent “skeletonized” foliage on farmers’-market-bound basil, I cover the plants with an old sheer curtain to exclude the beetles. Future plans include growing berries and other susceptible plants under insect screening, with allowances made for bumble bees to pollinate the flowers.

Although a few birds eat them, the damage these beetles do to the landscape and to my inventory far outweighs their benefit.

Japanese Beetle Life Cycle

With regular rainstorms, soil stays softer, allowing female beetles to repeatedly lay eggs deeper into the soil in July and August. There, the eggs and young grubs are not stressed by hot, dry soil. White C-shaped grubs feed voraciously on healthy roots (particularly those of lawn grasses), and, in autumn, descend deeper into the ground, protected from severe cold.

In spring, grubs rise closer to the surface to continue feeding. In late spring, well-fed larvae pupate in the ground, and adult beetles emerge in early summer. Moist soil—from rain or irrigation—contributes to this beetle’s success. Where the ground is soft and moist in summer and fall, you can count on large populations of Japanese beetles the following year.

Incidentally, chewed plant tissues emit certain scents which attract even more beetles. That’s why we find them congregating in large numbers in the tops of blueberry bushes or in rose flowers.

Applying Milky Spore powder, a bacterium, to the property (grass and gardens) in early autumn kills grubs feeding on roots. This remedy isn’t 100% effective because beetles fly in from quite a distance—miles, in fact. At the very least, there will be fewer grubs devouring roots in your landscape. If you can encourage the entire neighborhood to apply Milky Spore, everyone will benefit. Except Japanese beetles. Moles, by the way, feed on these grubs. Plenty of those around, as well.

Other than that, I’m not fertilizing the lawn, applying any chemicals, or reseeding. In the future, I might work on a limited amount of presentable lawn close to the house. But for now, since the lawn comprises about 75% weeds and undesirable grasses, I’m just cutting it. Besides, much of that ground will be turned over, amended, and planted with something other than grass.


Less Grass To Mow With Patches For Pollinators


New Gardens

When I bought the house in late 2021, the lawn covered about half the property, taking 5½-6 hours to cut with a walk-behind self-propelled mulching mower. Part of the lawn’s square footage has been taken up by the many plants installed last fall and winter. They’re the beginnings of new gardens, which will expand as I propagate perennials, seed the annuals, and plant drifts of new shrubs. Space taken up by low-maintenance gardens will decrease the time required to cut grass.
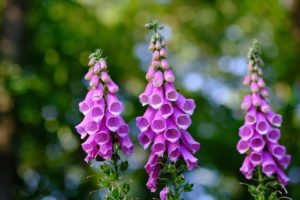
 

foxglove

Foxglove.


Several white oaks (Quercus alba) tower over the property, providing a high canopy for proposed shady gardens underneath. About 200 tiny foxgloves just began germinating from seeds sown in a pot. Some will be sold at the market, and many will be planted in morning sun or under the trees’ dappled shade.

Foxglove (Digitalis purpurea) is toxic to most warm-blooded animals, including rabbits and deer. (It is a source of pharmaceuticals, but only under a doctor’s care.) The greatest risk to these plants is from dead twigs falling from the old oak trees.

Foxglove is a biennial, and, if happy, drops seeds at the end of its growth cycle for a self-sustaining colony of plants with stately flower spikes, from cream and pink, and rose to purple. It blooms in spring to early summer, then sheds seeds and dies. After those tiny seeds germinate in summer, young plants will remain dormant in winter. They’ll bloom the following spring, thus repeating the cycle. Insects and hummingbirds gain sustenance from the flowers.

From Crape Myrtle To Virginia Sweetspire
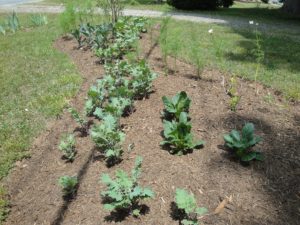
 

patches for pollinators, garden bed with flowers and edible greens

‘Red Russian’ kale, komatsuna, and tiny itea, foreground, plus kales, collards, cosmos, and crape myrtle, toward the back, after planting and mulching.


Growing plants from seed is one way to economically fill a large garden bed. I started a new garden last fall, close to the street, where I planted a pink crape myrtle (Lagerstroemia indica) and 2 tiny Virginia sweetspires (Itea virginica ‘Henry’s Garnet’) brought from Charlotte.

Early this year, I turned over the ground to a depth of 10″ between the shrubs and beyond, and added leaf mold and black topsoil from the woods. Also incorporated into the soil was a generous portion of chopped oak leaves stored in trash bags since the previous autumn.

All this loosening of the soil and the additional materials created a raised bed about 22′ long and 6-8′ wide. It’s an irregular shape with a curved outline. And, naturally, it will be enlarged over the years.
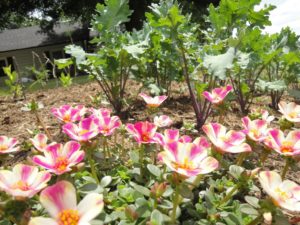
purslane, pink and white flowers

Purslane and ‘Red Russian’ kale.

This garden is where I’d planned to have a mass of large light pink cosmos. So, I grew ‘Cupcakes Blush’ from seed and planted about 40 of them in 2 groups. Between them, I added dozens of blue-gray ‘Lacinato’ kale, the similar but more purple ‘Dazzling Blue’ dinosaur kale, and the frilly ‘Red Russian’ kale. Behind the crape myrtle, I planted 10 collards, with rounded light grayish-green leaves. On the end, near the itea, I added a few clumps of komatsuna ‘Green Giant’, with broadly rounded dark green leaves. These plants complement each other in both color and form, and all the greens (kale, collards, komatsuna) are edible.

I picked up a purslane at a local roadside stand. It had solid deep pink flowers on a low, spreading plant. But the heat, apparently, turned the new flowers pink and white striped. So, I stuck that into the “pink garden”, and put a few cuttings near it, which are now growing.

Not In the Pink

I won’t grow ‘Cupcakes Blush’ cosmos again because it took too long to grow and fill out. It didn’t have the number of flowers hyped in the catalog, and fewer than half were light pink!

The fast-growing greens are winners in both vegetable and flower gardens. They’ll look even better when paired with blooming violas in fall and winter. The fact that they survived at all during this overheated summer is a marvel. Adding ‘Scarlet Frills’ mustard greens (edible) will echo the burgundy fall color of the iteas and crape myrtle.
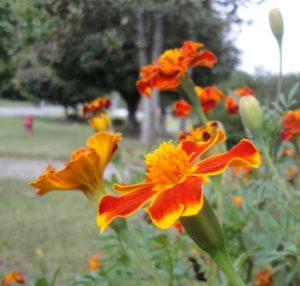
 

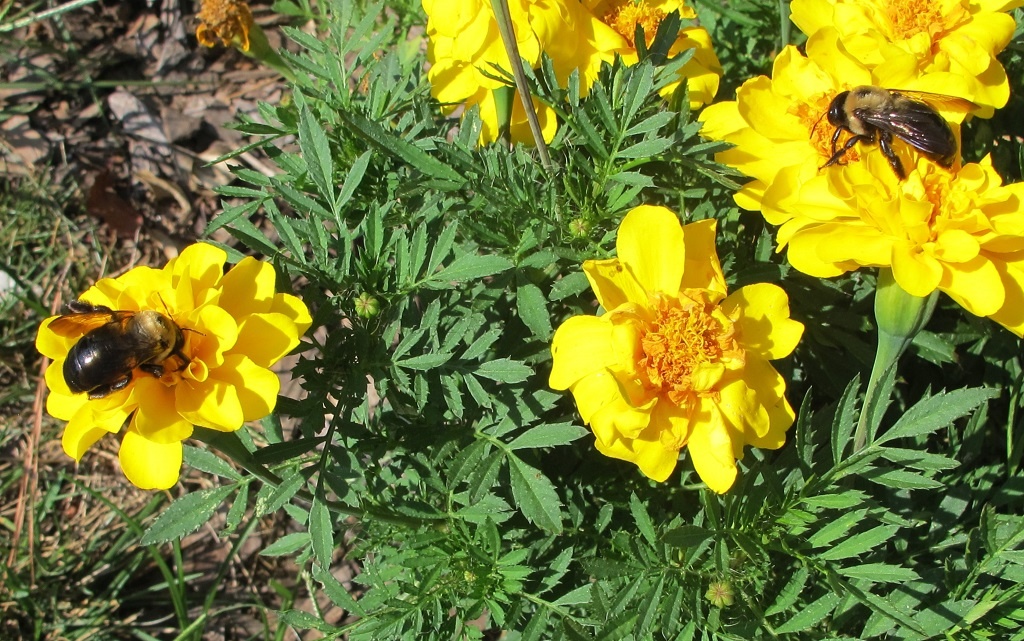
Marigolds.


***Update***: Close to 2½-3 months of frost-free weather is just too long to put up with plants that aren’t delivering. So, all the “pink” cosmos were taken out in early August, and replaced with dwarf marigolds (photo, above), dwarf ‘Cosmic Orange’ cosmos, and coppery-leaved coleus. Much better. But the pink purslane will have to move. The crape myrtle bloomed very lightly this first season in the garden. 8/6/2022


Vegetable Gardens

This property includes a sizable fenced garden, partially shaded by the oaks on the east side of the house. As the sun’s arc shifts through the year, the garden receives more or less sun than it did the previous month.

Last autumn, I stuffed oak leaves into large trash bags, and stored them next to the foundation over the winter. In early February, I incorporated a few of those bags of leaves into the top 12″ of this garden’s soil, along with aged cow manure. After planting the greens, a thick layer of oak leaves was applied as a mulch, keeping soil moist, cooler, and weed-free. By late spring, the greatly improved soil was well-populated by earthworms, and the organic matter will continue to break down for months to come.

I’ll dig and amend more of this garden and add cool season greens, such as spinach, Swiss chard, green onions, and leeks. And peas, of course—the edible-podded ‘Sugar Snap’ and a variety of snow pea called ‘Oregon Giant’. It’ll receive more hours of sun after the trees defoliate. The brassicas (arugula, broccoli, miniature broccoli ‘Happy Rich’, Brussels sprouts, cabbage, cauliflower, collards, kale, mustard greens, pac choi, and others), or cruciferous crops, figure prominently in autumn and winter gardens and in the kitchen.

Hostas brought from Maryland a decade ago grow plump in the composted soil on the shadiest end of the garden. I’ll add more varieties of hostas here, safe from deer, until it’s time to pot them up for the market.

Miniature Broccoli ‘Happy Rich’
 

mini broccoli 'Happy Rich'

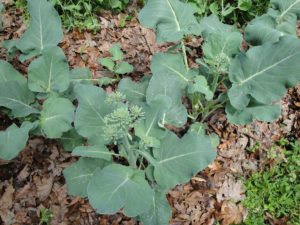
Miniature broccoli ‘Happy Rich’ planted 14-16″ apart, with peas behind them.


Brassicas (plants in the Brassicaceae family) appreciate moist, well-composted soil, generous portions of aged cow manure, and neutral pH. Here in USDA zone 7, many types of greens can grow in cold weather, even through the winter. I plant several kinds of brassicas every fall. During severely cold periods, a loose covering of clear plastic keeps the foliage in good condition.

Late last winter and in spring, I set out about 30 plants of miniature broccoli ‘Happy Rich’ on the north end of the garden, farthest from the oaks. While the trees were leafless, the plants grew in full sun. Now, in summer, these brassicas enjoy a couple of hours of mid-day shade from the hot sun.

This is one of my all-time favorite vegetables. Maybe even the favorite. I eat this versatile broccoli a few times a week, sell some at the Elkin Farmers’ Market, and donate a bunch when the market hosts cooking demonstrations. Great sweet flavor, and super healthy!

(***Update***: These same plants produced small harvests into mid-November. Then, with cooler weather, leaves grew larger. Unusually cold fall weather—up to 20 degrees colder than average—has caused them to decline earlier than expected. However, after the oaks dropped their leaves, the broccoli grew more vigorously, almost until Christmas, 2022. That’s why ‘Happy Rich’ is my favorite vegetable—9 months of harvests!)

‘Happy Rich’ and Insects
 

harlequin bugs on cabbage

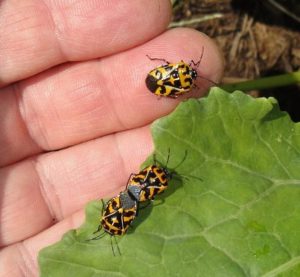
Harlequin bugs on cabbage.


‘Happy Rich’ branches out after each cut, producing more stems, leaves, and small heads to harvest. Four species of caterpillars (from 3 species of moths and 1 butterfly) prove quite troublesome all season long, even beyond the first frosts. To prevent them from ruining the brassicas, I spray every 7-10 days with Bt (Bacillus thuringiensis). This isn’t a chemical, but a naturally occurring bacterium that kills larvae of moths and butterflies.

Bright orange and black harlequin bugs (photo, above) also feed on brassicas, spotting and distorting the heads and leaves. I squish them when I see them.
 

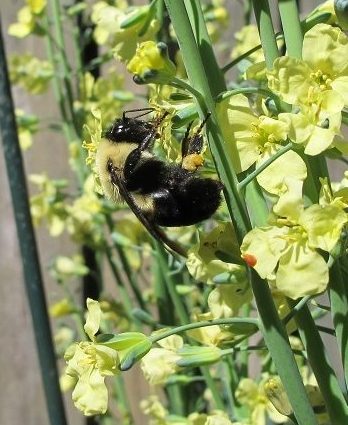
patches for pollinators, bumble bee on broccoli flowers

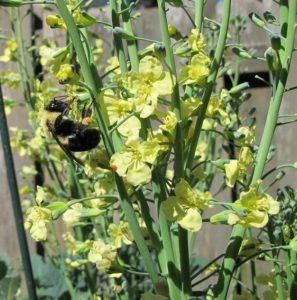
Broccoli ‘Arcadia’ and a bumble bee in spring.


As the plants finish up their last harvests now and in spring, some of the stems will bloom. Beneficial insects, especially bumble bees, honey bees, sweat bees, and tiny braconid wasps, collect nectar and pollen from the flowers. Heading broccoli has yellow flowers, but ‘Happy Rich’ has pure white flowers on stems up to 5′ tall.

Tomatoes

After warm weather had settled into the area, I planted several tomatoes and peppers among the mini broccoli plants.
 

tomatoes protected from deer

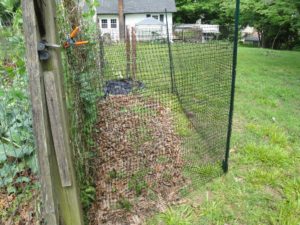
A small garden for cherry tomatoes.


Another section, north of the garden, gets sunlight longer into the season. There, I secured posts and strung deer netting between them (photo, above). It’s a narrow space, so deer won’t jump into it. This small area has a few cherry tomatoes, which can lean against the stronger existing fence, where edible-podded peas grew from late winter to early summer. You can see the pea vines growing through the fence.

Tobacco Hornworms
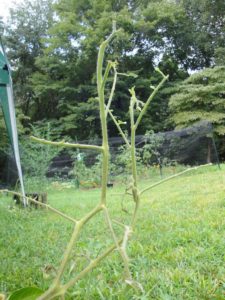
Tomato plant denuded by tobacco hornworm.

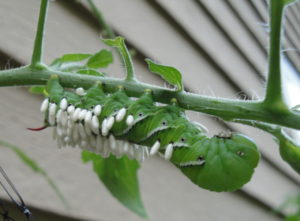
If one of your tomato plants seems a lot less leafy than it did yesterday, it might have a tobacco hornworm (slash markings) or a tomato hornworm (V-shaped markings). This very hungry caterpillar is the larval stage of a hawkmoth. A few weeks after a ‘German Johnson’ tomato went into the garden, it suddenly lost all its foliage. I’ve seen this before and knew to search for a 4″-long green caterpillar.

Several hornworms were found munching on the tomatoes this season. Most were carrying the pupae of a parasitic wasp and had stopped feeding. These pupae look like small grains of white rice. A female wasp lays eggs on or in the caterpillar. The eggs hatch into tiny larvae, which eat the inner tissues of the caterpillar, weakening or killing their host. Those should be left alone.

The few that hadn’t been parasitized lived out their lives on old tomato plants tossed behind the gardens. Birds or other animals might eat them.

Two dozen tomato plants that weren’t good enough to sell found homes in a few other areas around the property. Most are surrounded by posts and deer netting, although the deer did find—and destroy—90% of the big sunflowers meant for the winter songbirds… …


***Tomato Update***:

(This section added 9/4/2022.)

Tomatoes generally are underproducing. Those getting just an hour more sun are yielding fairly well, but not abundantly. Gardeners in this region experienced devastating blights on tomatoes from frequent rainstorms and persistent humidity.

After planting cleaned up not-quite-dead tomato plants, I sprayed them with a solution of dissolved aspirin. Here’s another link. They recovered better than I had any hope of expecting. Although not receiving the recommended biweekly spraying, they’re still producing fruits.

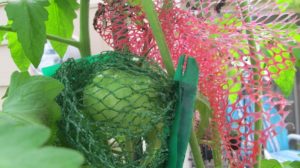
Later in the season, tomatoes had sun scald due to the sparse foliage, so I shaded new fruits with mesh bags, old peat pots, or large cucumber leaves. Sun scald causes tomatoes to rot.
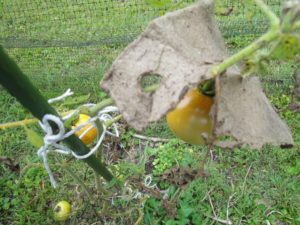
 

tomato shaded with peat pot to prevent sun scald

Tomato shaded by old peat pot.


Headings

Page 1: Patches For Pollinators (Japanese Beetles, Japanese Beetle Life Cycle), Less Grass To Mow With Patches For Pollinators (New Gardens, From Crape Myrtle To Virginia Sweetspire, Not In the Pink, Vegetable Gardens, Miniature Broccoli ‘Happy Rich’, ‘Happy Rich’ and Insects, Tomatoes, Tobacco Hornworms, Tomato Update)

Page 2: Long Vines That Might Smother the Grass (Next To the Tree Stumps), Patches For Pollinators: Don’t Mow Here (Weeds To Watch, Early Patches For Pollinators, Late Spring and Summer Patches For Pollinators, Patches For Pollinators: Living Proof, The Saddleback Caterpillar), The Pretty Moths and Butterflies

Return to the top

Seedlings For Your Garden: 12 Tips


2022


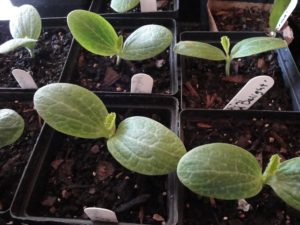
seedlings, zucchini


Starting Seedlings For Your Garden


Busy spring! This lengthy article focuses on starting and caring for seedlings and getting them established in the garden. If I’m not working on the seedlings, I’m working in the gardens, creating new beds and expanding those started last fall and winter. Winter weather was delightfully mild to allow planting right through the cold season. The weeds and I have come to an understanding, and in the next article, I’ll tell you how in “Patches for Pollinators”.

Foremost on the agenda has been starting plants to sell at our local Elkin Farmers’ Market. It’s been a challenge this year, keeping plants in good condition with high heat, heavy humidity, and frequent rainstorms. If I had a climate-controlled greenhouse, there might have been fewer losses. But, for the most part, my company, Wellspring Gardens, is producing more seedlings than I can sell at the market.

Some of that overproduction is destined for the vegetable gardens. It will yield small harvests of produce to sell at the market in addition to what’s needed in the kitchen. This is new territory for me, adding produce to the plants offered at the farmers’ market.

I might even consider canning, which I’ve never done…but let’s not get ahead of ourselves. That would be helpful, though, considering the rapidly rising prices at the grocery store. For that reason alone—the impact of rampant inflation on our wallets—it’s wise to learn how to grow at least a few vegetables.


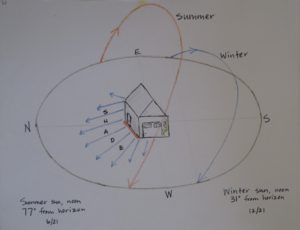
sun's path

The sun’s path across the sky, Charlotte NC.


Watching how the sun tracks across the sky from month to month reveals good spots for the sun worshipers and areas where leafy greens should thrive in partial sun. This is my first summer in this house. The massive oak trees create shifting shade patterns that cause me to periodically rethink the plans.

So, let’s begin!


12 Tips For Starting Seeds


1. Start with clean materials for seedlings.


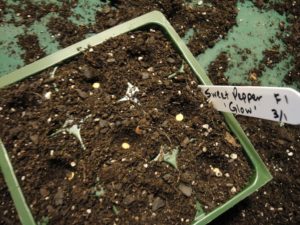
pepper 'Glow' seeds and cell pack

Sweet pepper ‘Glow’, started in 9-cell packs.


This calls for packaged seedling mix or fine-grained potting soil. Don’t use “dirt” from the garden, with its pathogens, insects, weed seeds, and worms that disrupt soil structure around tiny roots. In addition to the unknowns lurking in garden soil, its high clay content causes drainage issues in containers.

Soil used previously for potted plants is not a good medium for your seedlings. It’s often depleted of nutrients, might contain pathogens, and the organic matter has partially decomposed. If it’s only one season old, it’s probably safe for potted annuals, when mixed with fresh potting soil, or incorporated into the backfill for that new sourwood tree. Or simply throw it under the shrubs or into the compost pile.

Because seedlings are susceptible to soil-borne diseases, play it safe and start with pasteurized bagged seedling mix or potting soil. This, however, doesn’t guarantee a successful outcome, as many disease spores are air-borne. But we can increase the odds of success by using clean materials.

When reusing cell packs, pots, and flats for seeding, wash them in a 10% bleach solution, and rinse well before proceeding. Don’t smoke around plants, and wash hands thoroughly before working with them. Tobacco and other plants in the nightshade family (Solanaceae, including tomato, pepper, eggplant, and potato) can fall prey to the same disease organisms. Spores can transfer from tobacco products to your hands to the plants.


Pasteurizing Potting Soil

For bagged soil that’s questionable, you can pasteurize it in the oven. Don’t heat soil that contains timed release fertilizers. Use an oven-safe covered pot or baking dish, wet the soil, and heat the oven to 200°F. When the soil registers 140° on a meat thermometer, lower the oven temperature and maintain soil at that temperature for 30 minutes. This kills most pathogens. Wait for it to dry somewhat and to cool thoroughly before using. Various websites recommend different temperature levels from 140° to 300°. At the high end, beneficial microbes are killed off as well.

Let it cool down outdoors. Considering the pervasive “earthy” odor coming from hot soil, you might prefer buying a new bag of seedling mix or accept a small risk with the open bag in the garage.

Another method of pasteurizing (not sterilizing) soil is to place a heat-resistant container of soil in a black plastic bag. Place the bag in a sunny place outdoors on a warm day, and let the sun do the work for you. This is called solarization, and can raise the temperature inside the bag to 140-160°F. To prevent damage to the beneficial microbes, take the temperature, and maintain it at 140° for 30 minutes, opening the bag a bit to prevent overheating.

Most bagged potting soils and seedling mixes already have been heat-treated to eliminate pests. Close the bag securely and store in a cool dark place. The last and only time I pasteurized soil was nearly 50 years ago because that’s what the experts recommended.


2. Grow disease resistant varieties…


While fungicide and bactericide formulations—both organic and conventional—are available, I’d rather grow disease resistant varieties and not rely on spraying. Keep in mind that resistance is not 100% effective, particularly when plants are exposed to stressful weather or cultural conditions.

Certain varieties are more flavorful than others, but all well-grown fruits and vegetables from your own garden taste better than those purchased from grocery stores. Picked when vine-ripened perfect, anything coming from the garden will be superior to what’s found elsewhere except, perhaps, at farmers’ markets and farm stands. Freshly picked produce also has the highest nutrient content.

Digging in the garden is great exercise; proceed slowly at first. Working outside in nature feels good, and self-sufficiency is never amiss. A few steps from the back door gathering a green onion, spinach, dinosaur kale, and a little ripe sweet pepper for the veggie omelet is more rewarding than I can describe. You’ll see!

Those are just a few of the many benefits of growing our own vegetables. Using disease resistant varieties, if available, makes the job so much easier. Many new gardeners gave up after having suffered the disappointment of losing an entire crop to early blight or bacterial leaf spot. And we also have to deal with deer, rabbits, and insects!

Although this article concentrates primarily on edibles, flowering plants also have their own set of disease organisms. Again, look for resistant varieties, grow them in conditions that don’t favor infection, and look for remedies at the garden center.


…Especially Tomato Seedlings

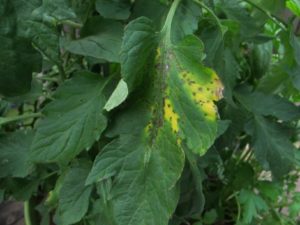
tomato disease septoria?

Disease beginning on ‘Rutgers’ tomato.

Tomatoes and peppers, two of the most popular crops for home vegetable gardens, are vulnerable to many diseases. They’re caused by fungal, bacterial, or viral pathogens. In some areas, nematodes also can be a problem. Usually, we can harvest some fruits before disease claims them, but resistant plants last longer in the garden. Plants infected with viruses should be removed and destroyed. For fungal and bacterial pathogens, products at garden centers will help. Always read the labels.

Tomato diseases include Alternaria stem canker, early blight, late blight (Phytophthora; very few varieties are resistant to this one), Fusarium wilt, grey leaf spot, leaf mold, tobacco mosaic virus, tomato mosaic virus, tomato spotted wilt virus, and Verticillium wilt. Catalog listings use initials to indicate disease resistance. For tomatoes, AS, EB, LB, F, GLS, LM, TMV, ToMV, TSWV, and V, respectively, represent those diseases.

Tomatoes are weedy plants and normally produce good crops, despite many organisms that target them. Peppers are susceptible to several races of bacterial leaf spot, and basil to basil downy mildew. Some zinnias are plagued by powdery mildew. Weather conditions, such as high humidity and frequent rain, exacerbate these disease problems.

Most hybrid (or “F1”) tomatoes have some resistance to one or more pathogens, but not to all of them. ‘Big Beef Plus’ is resistant to a wide variety of diseases. ‘Damsel’ and ‘Defiant PhR’ are resistant to late blight. Hybrid seeds carry a higher price than open pollinated varieties due to the cost of research that developed them and the extra steps needed to produce hybrid seeds each year.

It’s so hot out there!


shading tomato flowers


If you live in a hot climate, look for tomato varieties that have been bred to produce better at high temperatures. The pollen in tomatoes and peppers, and others, can die at high temperatures. While these plants are comfortable at 65-80°F, pollen dies above 88°, 90°, or 92°, depending on the cultivar. No pollination = no fruits! A reference to “heat” or to the “south” in the plant’s variety name indicates its higher tolerance for heat.

Researchers are investigating thermo-tolerant genetics in wild tomato species (Solanum pimpinellifolium) and incorporating them in tomato breeding programs.

One trick to preserve viable pollen is lightly shading the plant in the hot afternoon hours. Attach shade fabric—a black woven mesh—to a support over and on the west side of the tomato or pepper plants. This provides a decrease of up to several degrees in hot climates or temporarily during a heat wave. In the photo, above, mesh bags from the grocery store protect fruits from squirrels and sun scald, and lightly shade new flowers and their pollen from high heat.

The young ‘Estiva’ tomato plants (“estiva” refers to summer), a hybrid bred for heat tolerance and great taste, lost most of their diseased bottom leaves in heavy rains, but those little fruits are still growing! I’ll plant them out this weekend, after the temperatures drop well below the 108° heat index value we have now. Recent weather has been in the record-breaking mid- to high 90’s F, with high humidity. Not my favorite conditions to dig in the garden…so I don’t.  I was not bred for heat tolerance!

***Update***: ‘Estiva’ tomatoes endured this hot summer and produced fruits past the first fall frosts. I covered them on chilly nights to ripen the last of the fruits. These were among the last tomatoes to succumb to the cold, in mid-November. Autumn 2022

A Few More Tomato Tips

Your best defense against tomato disease, in addition to growing disease resistant varieties, includes these tips:

  • Stake them. Tall indeterminate types need a 6-8′ tall stake, taller for some.
  • Space them farther apart, at least 3½-4′.
  • Thin the vines to 3 or 4 main stems by removing excess suckers.
  • Remove leaves on the bottom 12″ of the plants after they’ve become established.
  • Locate them where a breeze blows through the garden. These first 5 tips address increasing air circulation around and through the tomato plants.
  • Give them lots of direct sun—a minimum of 7 or 8 hours. The more sun they receive, the shorter the window of opportunity for pathogens to germinate on damp leaf surfaces.
  • Mulch the soil under the plants to prevent disease spores lying dormant in the soil from splashing onto and infecting the foliage. More on Page 4.
  • Water in the morning to early afternoon so all foliage is dry going into the night. Try to keep the foliage dry at all times and avoid handling wet foliage.
  • Water established plants heavily (1½”/week) when needed, but avoid giving little sips every day. Young seedlings need more frequent watering until their root systems expand.
  • Clip off leaves that show early symptoms (yellowing, spotting), and dip your pruners in alcohol when moving from plant to plant.
  • Don’t smoke near the garden, and wash hands thoroughly before working with plants.
  • Rotate your crops. Don’t plant a member of the Solanaceae family where any members have grown in the past 3-4 years. There’s more about crop rotation on Page 4.

All plants grown with good soil preparation, good air circulation, proper watering techniques, adequate sun, and appropriate fertilization are less stressed. Less stress equates to lower infection rates.

Growing Heirloom Seedlings


Heirloom tomatoes are always in demand because of their exceptionally good flavor. Heirlooms are open pollinated, which means gardeners can save seeds from fully ripened fruits each year for the next season’s garden. Because they’re not F1 hybrids but have been breeding true, for the most part, for many decades, heirlooms retain their traits from one generation to the next.

These varieties, however, don’t have much built-in disease resistance. Nevertheless, I’m growing a few heirlooms, and spacing them 4′ apart for improved air circulation. We’ll see what happens.

Commercially grown tomatoes must be able to survive long distance transportation and handling without damage. They’re picked early, when green or first showing color. Varieties of these tomatoes have skins that normally are tougher.

Heirloom tomatoes have more desirable thinner skins and, therefore, travel poorly. So, you won’t see them in grocery stores unless those stores buy from local farms. Heirloom tomatoes from the grocery store might cost $5.00/lb. or more! So, yes, it is worth growing a couple of heirloom tomato plants in our gardens.

A few prolonged and heavy rainy periods this spring almost wiped out certain tomato varieties, namely ‘Carmello’, ‘Brandywine’, and ‘German Johnson’. I still have a few that show less damage than others. ‘Black Krim’ and ‘Cherokee Purple’ are doing fairly well, although they are heirlooms. Most of the remaining plants will be set in the garden. There’s usually a breeze blowing through the property, and by spacing them appropriately, I should get plenty of fruits.


Basil Downy Mildew


basil downy mildew

First symptom of BDM: yellow blotches between the main veins.


Although this dreaded disease targets only basil, it hasn’t appeared yet this year. But I’m prepared.

Last year, I grew ‘Rutgers Obsession DMR’ (DMR = Downy Mildew Resistant), an acceptable substitute for our beloved ‘Genovese’ and other susceptible sweet basils. Last year’s ‘Obsession’ did not develop any basil downy mildew (BDM)—not one speck—although wet and humid weather presented a worthy challenge. Other basil varieties in the ground or in pots succumbed to the disease within a week of infection…even young seedlings.

This year, I’m growing ‘Rutgers Obsession DMR’ and also ‘Rutgers Devotion DMR’ outside all summer. In addition, I’m seeding the old favorites, including ‘Genovese’, ‘Italian Large Leaf’, Thai basil ‘Siam Queen’, ‘Marseillais Dwarf’, and ‘Tuscany’, a lettuce-leaf basil. A few non-resistant basil plants will come indoors at night when warranted, as described below. But I’ll stop seeding susceptible varieties, except for a few pots, and concentrate on the resistant ones for the farmers’ market if the disease appears in the neighborhood.

Several other BDM resistant varieties can be purchased as seeds or as started plants.

Avoid High Humidity

basil seedlings in clay pot

Healthy sweet basil, in a pot.

If you want to grow your favorite basil varieties that are not resistant to BDM, there is a way to prevent a total loss.

BDM spores move up from the south on the breeze or on infected plants shipped into the area. The spores don’t overwinter in cold climates. If spores land on a susceptible variety, they need a relative humidity above 80-85% for a couple of hours in order to germinate.

Even during pleasant weather, the relative humidity can reach 90% or higher in the 2-3 hours around dawn. That’s when the temperature is usually the coolest and, therefore, the relative humidity is the highest.

When plants show early symptoms of BDM, remove the affected leaves. Take potted basil plants indoors for the night, every night. Indoor conditions never reach those high humidity levels, so you can still grow your preferred basil varieties successfully with a little effort. Remember to place the plants back outdoors after the sun has been up for a couple of hours.

Follow this regimen during rainy weather, although the plants might need to spend a day or two inside. Find the brightest spot to keep them during their temporary stay indoors. If possible, provide some artificial light. Unless it’s wilting, avoid watering basil indoors. Less sunlight means the plant won’t be photosynthesizing optimally or using much water, and wet soil can initiate root rot.


Headings

Page 1: 1. Start with clean materials for seedlings. (Pasteurizing Potting Soil), 2. Grow disease resistant varieties… (…Especially Tomato Seedlings, It’s so hot out there!, A Few More Tomato Tips, Growing Heirloom Seedlings, Basil Downy Mildew, Avoid High Humidity)

Page 2: 3. Timing is important for seedlings. (The Fall Growing Season, Keeping Records, The Cooperative Extension Service, Starting Seedlings Outdoors, Don’t Start Seedlings Too Early, Cool Season Crops, Extending the Growing Season, Seedlings Transplanted Into Bigger Pots, Bunching Onions, The Brassicas, Brassicas In My Garden, Lettuce), 4. Is the temperature suitable for seedlings? (Miniature Incandescent Lights For Warmth, Water Temperature)

Page 3: 5. Start seedlings in small batches. (My Simple Infrastructure), 6. Seedlings need strong light. (Growing Seedlings Under Shop Lights), 7. Cull the weaklings and anomalies. 8. Prevent damping-off disease from killing your seedlings. (Actinovate), 9. Seedlings and plants need fertilizer. (The Elements, Read the Label)

Page 4: 10. Prepare the soil for your transplants. (Start With Good Drainage, Air Pore Space, Gypsum and Lime, Add Nutrient-Rich Amendments, Bury It), 11. Try succession planting for maximum yield. (Crop Rotation, Mulch), 12. Stop the pests before they ruin your garden. (Slugs and Snails, Larvae of Moths and Butterflies, Spider Mites and Thrips, Deer and Rabbits), Concluding

Return to the top of Page 1

Plant Trees To Transform Your Landscape, Part 2


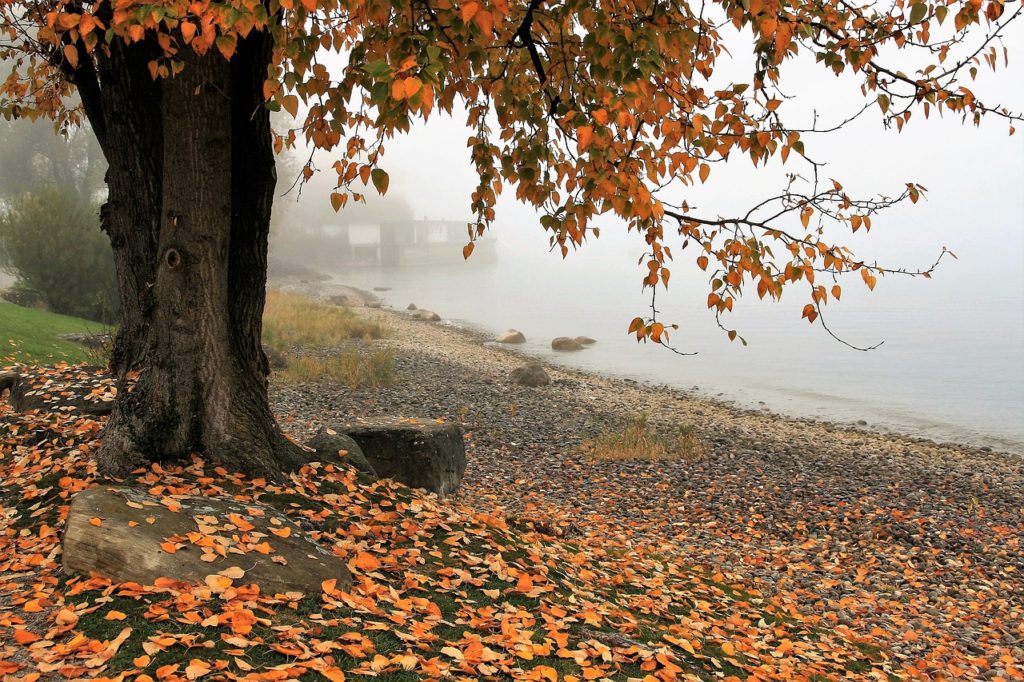
Autumn Lake Tree Nature Leaf - pasja1000 / Pixabay


After reading Part 1 of “Plant Trees to Transform Your Landscape”, you’ve located the best spot where a tree will shade the house from brutal summer sun. Recommendations and practices presented here are based on climate and soil in the eastern part of the United States, where I live and garden, but the basic principles apply everywhere.

If your main objectives are shade, attracting wildlife, and less grass to mow, include masses of shrubs and perennials in the landscape plan as well. This article concentrates on planting trees, the dominant features in the landscape.


Native Plants vs. the Non-Natives


The choices offered in garden centers can be narrowed down to native species and non-native, or exotic, species. Within each of those groups are the original species and the cultivars (cultivated varieties). Developed by plant breeders, cultivars exhibit more ornamental or desirable—or just different—characteristics than the species.

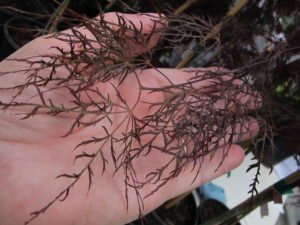
Japanes maple Red Filigree Lace

‘Red Filigree Lace’, a delicate cultivar of Japanese maple.

Non-native plants originated in a different country or perhaps only a few hundred miles away. If the plant doesn’t occur naturally in your geographic region, it’s non-native, although some gardeners restrict use of the term to plants evolving in another country.

There are many beautiful plants, exotic to our shores, which we’ve enjoyed in our gardens. Japanese snowbell (Styrax japonica), Stewartia pseudocamellia, and the dizzying assortment of Japanese maples (Acer palmatum) are just too hard to pass up. You can compromise, if you wish, by including both natives and exotics.

To most garden center visitors, none of this matters. We buy plants that solve problems and look pretty in our yards. But, to explain the relevance of native species, I’d like to expand the subject.


The Benefits of Native Species

First, native plants require less pampering to get them established.

Species that evolved locally can tolerate fluctuations in weather patterns. Temperature extremes, rainfall, humidity, soil types, altitude, wind patterns, and local fauna shaped today’s ecosystems.

Second, gardeners concerned about local pollinators choose plants that foster bees, butterflies, and other animals that pollinate farm crops and wild vegetation.

Every third bite of food we consume is attributable to pollinators. But, you might make the case that since most crops are alien to this country, it shouldn’t matter whether we use native or non-native trees. But we need to consider what larval insects consume, and that’s foliage and other plant parts. Thousands of species—not just bees—pollinate our farms, orchards, fields, and forests.

Egg-laying female moths and butterflies, beetles, and other insects are very selective and seek the natives they evolved with to supply sustenance for the following generation.

Incidentally, honey bees are not native to this part of the world. They will, however, forage from plants grown here, many of which are related to the plants they evolved with.

Making a Case For Single Flowers


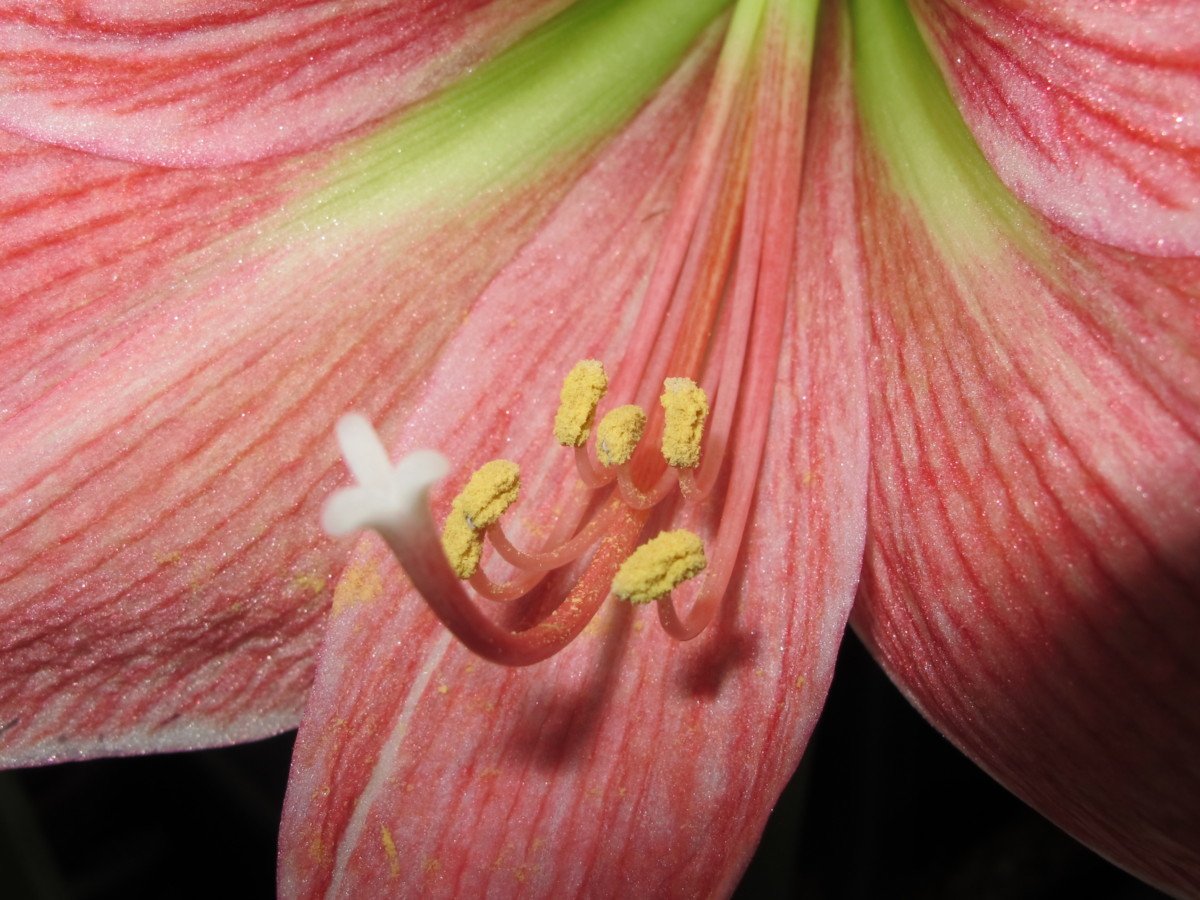
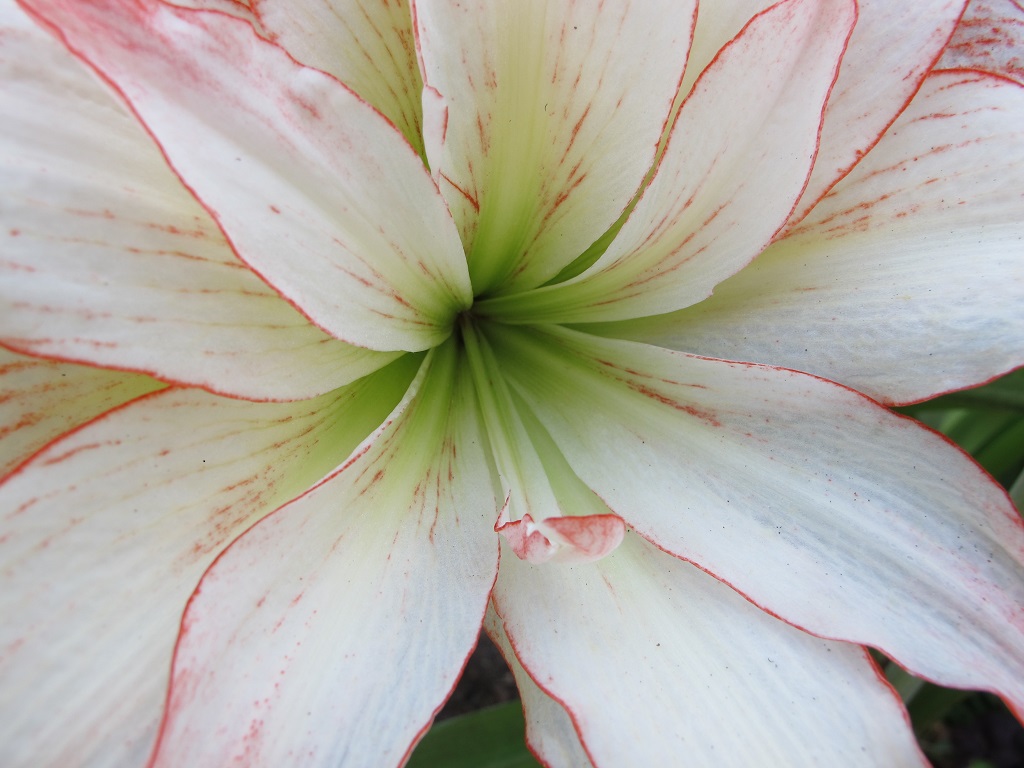
Flowers attract pollinators, which reap the harvest of nectar and pollen. But many double- and triple-petaled flowers have lost their nectaries, stigmas, and/or pollen-tipped stamens. Photos above clearly illustrate the loss of reproductive parts in a double amaryllis cultivar. If these hybridized doubles and triples have lost the ability to reproduce sexually, they can’t make seeds. They must instead be propagated asexually, or vegetatively, by cuttings, division, grafts, or tissue culture.

The anthers, supported by filaments, bear the pollen; the male portion of the flower, collectively, is called the stamen. Female parts comprise the stigma, supported by the style, and the ovary, with its ovules, deeper within the receptacle; the female portion is called the pistil.

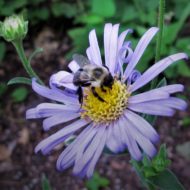
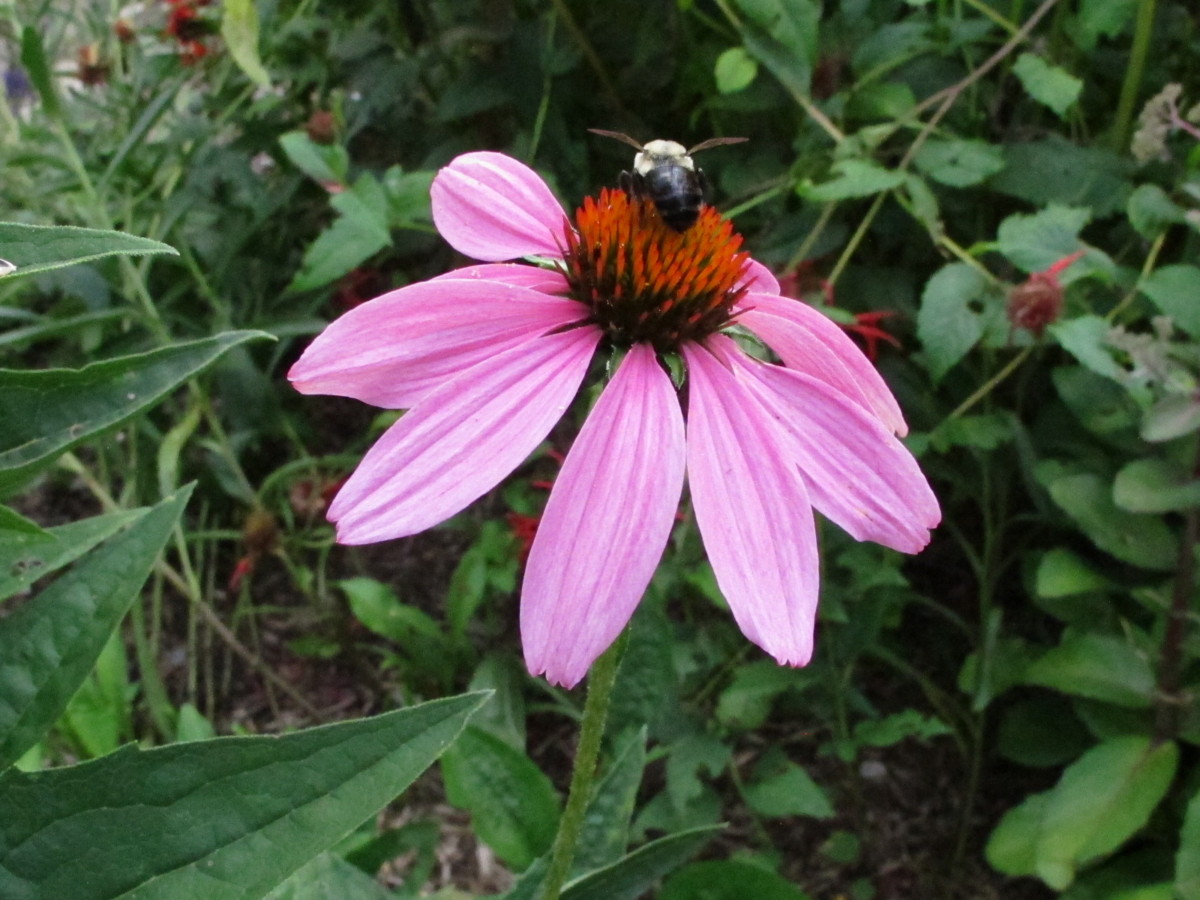
Not all dense flower heads are pollinator wastelands, though. Species in the Asteraceae family, for example, have flowers that normally look full. This family includes all the composites, such as aster, coneflower, daisy, dandelion, rudbeckia, and sunflower. Their dense inflorescences are composed of small florets arranged in a head, called a capitulum. But the original species also have the necessary reproductive parts. The composites are one of the most successful groups of plants and are found on every continent except Antarctica.

At a local garden center last year, I watched bumble bees that were quick to land on thickly-petaled hybrid red coneflowers (Echinacea). They were equally hasty in their departure! The bees stayed on the red flowers for a fraction of a second, while they lingered on the less frilly flowers of other cultivars, mining several florets in each flower for their treasure.

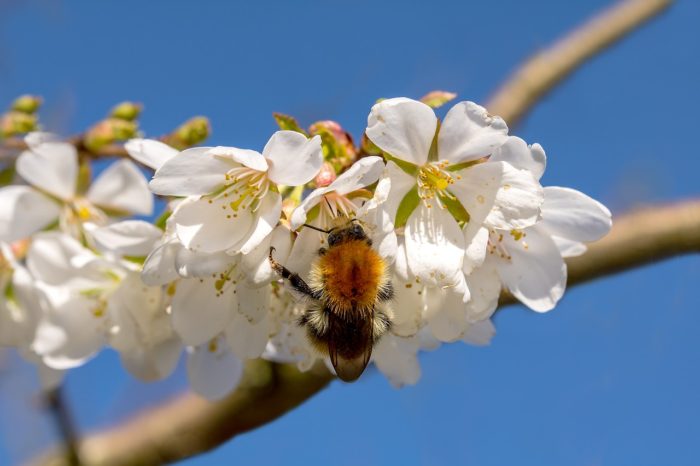
Pollinators waste precious energy visiting barren double-flowered hybrids. True, not all doubles lack nectar and pollen. For the pollinators’ sake, though, select more species or varieties with simple flowers. Natural selection favors plants that set seed, of course, which is why most native plants have simpler flowers.

Photos below show examples of single-flowering cultivars. If you see a boss of stamens and pistils in the flowers, those plants can probably supply pollen and nectar to the pollinators. This is a fine point, granted, but one that is critically important to populations of pollinators, given the preponderance of double-flowering hybrids at garden centers.


Third, planting a multitude of native species helps secure the future of threatened or endangered insects and animals.

In many regions, songbird populations have declined by half due to human intervention. Some have disappeared entirely. Trees and shrubs that provide shelter, nesting sites, berries or seeds, and which host insects, can help bring back the birds. Abundant biodiversity is a valid protection against the domino collapse of interdependent species.

Civilization has claimed much of the insects’ natural environments, so each of us can play a small part in rebuilding habitats. Annual butterfly counts show drastic declines. Monarch butterflies, in particular, now have less territory available in Mexico, a major overwintering site, than in the past, when they migrated by the millions.

Maintaining brush piles for overwintering insects and animals will help repopulate your landscape early in the season. Hauling those materials off to the recycling center, however, is sure death for the insects tucked inside. Fewer insects = fewer birds and other animals.

Fourth, incorporating native plants into the landscape helps keep the entire food chain intact.

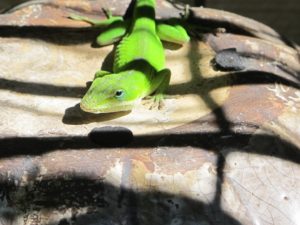
anole lizard

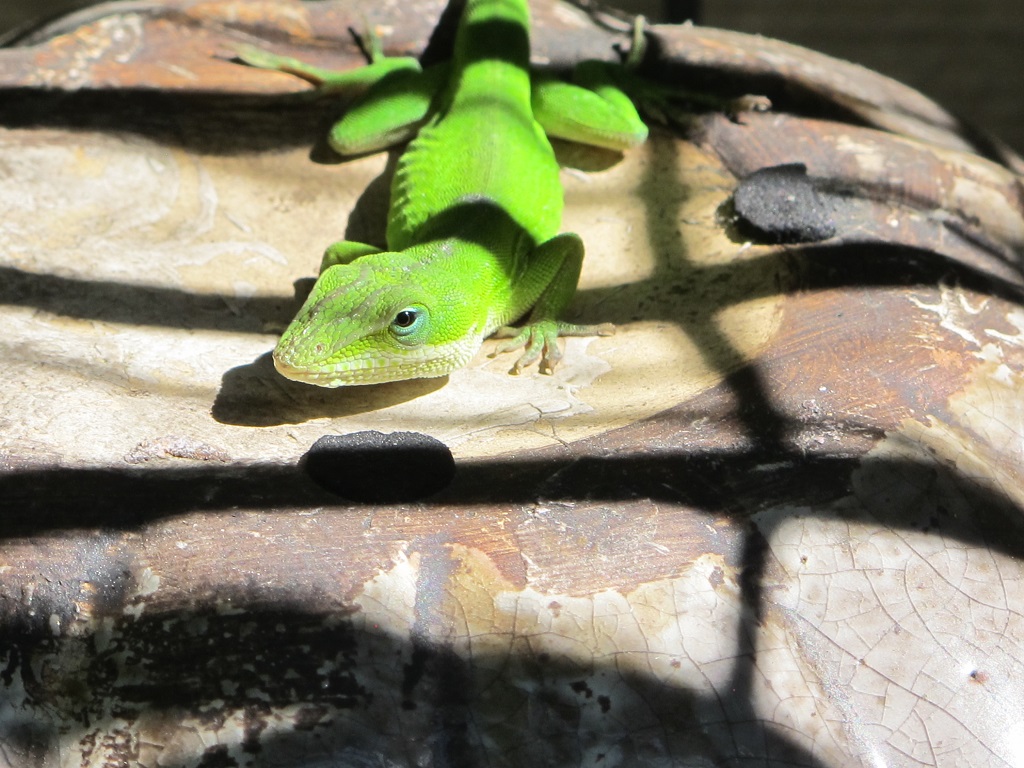
A green anole basking in morning sun.

Insects feeding on plants become food for frogs, lizards, birds, and mammals. They, in turn, become food for snakes, hawks, foxes, and other predators. In many ecosystems, insects native to the region are the foundation on which the entire food chain is based.

A rich diversity of plant material supports an enormous number of insect and animal species. Left undisturbed, populations find a balance among themselves. On the other hand, life in monoculture, such as a lawn, is sparse. Unfortunately, countless urban and suburban neighborhoods have become dead zones with all their natural vegetation bulldozed to the ground.

As we spray, mow, burn, or build in natural environments, species will continue their rapid decline. Certainly, we need places to live and work, but we can also “give back” by planting for wildlife instead of continually killing it off.

Check with your state’s native plant society, native plant finders, BeeCity USA, and the local agricultural extension service for information. In addition to these sources, find a knowledgeable salesperson at the garden center for practical advice and sources of plant material. Garden shows might feature vendors specializing in native plants as this branch of horticulture grows.


Native Species and Nativars


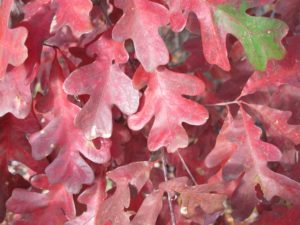
trees, red leaves in fall, native white oak

Red fall color in a native white oak tree.


Plant breeders have brought to the marketplace many cultivars of our native species. These nativars might have purple or red foliage instead of green, or double flowers instead of single. Perhaps they mature at a shorter height than the original species, making them a better fit for small properties.

Garden centers often stock varieties of native species, although those selling native plants might also stock the original species. By a comfortable margin, though, most of the trees and shrubs in U.S. garden centers are cultivars of non-native species. Many originated in Asia, a treasure trove of tempting horticultural novelties.

Red Leaves and Wildlife


native trees, dogwood, red leaves, flower buds

Red fall color and flower buds on native flowering dogwood.


Many trees develop red or burgundy fall foliage. Species native to the eastern U.S. with red fall foliage include sourwood (Oxydendrum arboreum), flowering dogwood (Cornus florida), black gum (Nyssa sylvatica), red maple (Acer rubrum), sugar maple (Acer saccharum), red oaks (Quercus rubra, Q. coccinea), and white oak (Quercus alba).

Beautiful fall color lures camera-toting visitors each year to the mountains, to New England, and to the Blue Ridge Parkway. The U.S. National Park Service provides an interactive map which tracks the progression of fall color.

Red- or purple-leaved cultivars sporting this color all summer are in high demand at garden centers. But if the point of planting trees and shrubs is for wildlife, we want to be sure the plants we choose will attract them. Each plant species has a particular menu of chemical compounds in their tissues that either attract or repel insects and animals. Organisms evolved a tolerance for these compounds…or they didn’t!

Purple and red leaves often repel insects due to their high levels of anthocyanins, the red pigments in the foliage. So, that defeats the purpose, doesn’t it? Not necessarily; these trees might have had green leaves that hosted insects before leaves turned red. Or insects simply tolerate the red pigments.

Oak trees support huge numbers of insects, birds, and mammals at various times during the year. This one genus, Quercus, hosts hundreds of species of moths and butterflies, although they often turn red in the fall.

Before planting a cultivar that stays red all season, though, find out if insects, such as mature caterpillars, will eat the leaves. This indicates that it could host insects for their entire life cycle. If all the larvae are tiny, however, when some larger individuals are expected, most might have crawled off to greener pastures.

If bees spend time working a flower and don’t fly off immediately after landing, that plant could be a good choice. Similarly, holes in the leaves indicate that the plant can host insects. Resources at the local university’s entomology department or botanical garden might have information that could help you choose plants that support wildlife.

The Untold Story

I’ve been packing the past couple of weeks, preparing to move to a rural location in northern North Carolina. I took a break from the work and sat on the deck, listening to the birds and insects.

One of those sounds was the hum of an approaching ruby-throated hummingbird, the only species summering in this area. Four feet away, and less than 4″ long, this tiny bird landed on a twig of the potted native dogwood tree, sitting right next to me. He then hovered near the flower buds (photo, above, with last year’s fall color), and I could see his tongue working the buds, one after another. These buds are tightly closed, yet he found something worth gathering, despite the presence of other flowers nearby.

Within a minute, another hummingbird arrived for the same reason, apparently. The two tiny birds fought for feeding rights, and the second one flew away after some impressive aerial maneuvering among the twigs. The first hummingbird continued searching for hidden sustenance held inside those buds. I’ve never seen this behavior.

My point is this: there’s much about the natural world that remains unobserved—a mystery to us—perhaps lending more credibility to the importance of using native plants in our gardens. (This section added 10/6/21.)


Deciduous Trees For the Eastern U.S.


Here’s a partial list of native and non-native trees that support wildlife. Large deciduous shrubs can substitute for trees in smaller spaces. Many other species might suit your purpose, so visit a few nurseries to see what’s available.

Most trees are sold in large plastic nursery pots, although you might also see freshly dug trees with their roots wrapped in burlap (“b&b”, or balled and burlapped).

  • American hop hornbeam (Ostrya)
  • basswood (Tilia)
  • birch (Betula)
  • black gum (Nyssa)
  • Carolina silverbell (Halesia)
  • chaste tree (Vitex)
  • cherry and plum (Prunus)
  • crabapple (Malus)
  • crape myrtle (Lagerstroemia)
  • dogwood (Cornus)
  • franklin tree (Franklinia)
  • fringe tree (Chionanthus)
  • hornbeam (Carpinus)
  • magnolia (Magnolia)
  • maple (Acer)
  • oak (Quercus)
  • poplar, cottonwood (Populus)
  • redbud (Cercis)
  • serviceberry (Amelanchier)
  • sourwood (Oxydendrum)
  • willow (Salix)
  • winterberry (Ilex verticillata)
  • witch hazel (Hamamelis)


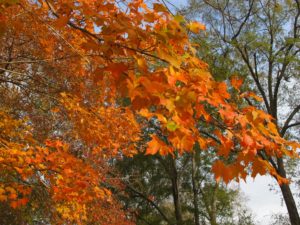
maple trees fall color

Native red maple can have yellow, orange, or red fall color.


Most of the trees listed above have small- or medium-sized species or varieties. Compare suitability of native and non-native species within the genus. The familiar weeping willow, for example, is non-native and quite messy in the landscape. But smaller native willows behave better and host a large number of moths and butterflies.

Research disease resistance, flowers for pollinators, fruits for animals, sun or shade preferences, and soil types. Consider planting species that drop excessive amounts of fruit, acorns, or seedpods farther from the house and paved surfaces.

Also look into the tree’s habit of growth. A specimen with horizontal branches softens the strong vertical lines of a house. Pay close attention to utility poles and wires. Don’t plant trees near them that the utility company will butcher in future years.

Trees with invasive surface roots should be reserved for areas far from structures, pipes, and vegetable gardens. Find out from your town how close to the street or the property line you’re permitted to plant trees. Don’t forget to call 8-1-1 to locate underground utilities before digging.

Chionanthus, the fringe tree (photo, below), is a beautiful bloomer for gardens. This multi-stem plant has 2 species commonly available (C. virginicus, C. retusus), one native and the other from Asia. Male plants have larger flowers, but females set deep blue fruits for birds. The plants, however, are rarely sexed at the nursery.


fringe tree with white flowers

Fringe tree.


The Hollies

Gardeners have used hollies in gardens for centuries. We can choose among deciduous and evergreen species.

Holly Red Christmas Winter Berry - 165106 / PixabayThe hollies (Ilex spp.) are another genus of primarily dioecious (Latin for “two houses”) plants that fruit on female plants. They ordinarily require a male plant, or pollenizer, to set fruit, although holly pollenizers (the males) themselves do not set fruit. Modern breeding techniques have yielded several cultivars that can make berries without pollination.

Ask your nursery salesperson for specifics regarding the need for pollenizers and how close they should be planted to female hollies. Choose the male hollies carefully; they must be closely related to the female holly and bloom at the same time. Incidentally, holly flowers are often nicely fragrant, and the bees love them! Just don’t shear them off after the buds have formed. Pruning should be minimal if you want flowers and fruits. And bees.


The Curious Case of Crape Myrtle

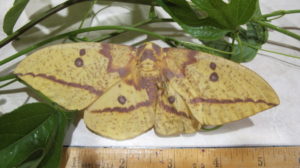
imperial moth

The Imperial moth.

Lagerstroemia indica is an extremely popular landscape tree or shrub in USDA zones 7-9. Crape myrtle, from China and Korea, was first introduced to the southeastern U.S. over 200 years ago. Adapting readily to our hot, humid summers and sometimes drought, it blooms for months despite the adversity.

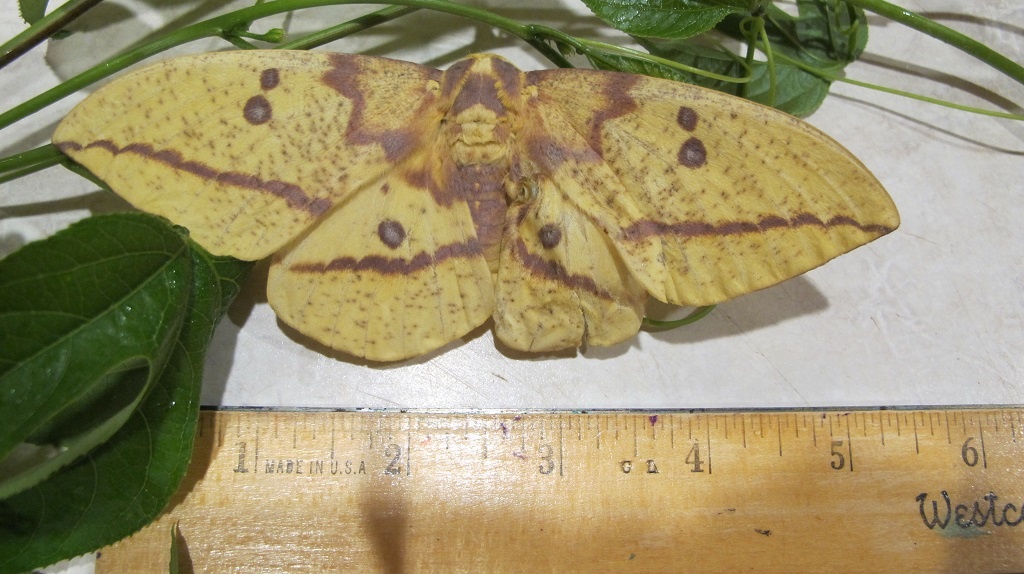
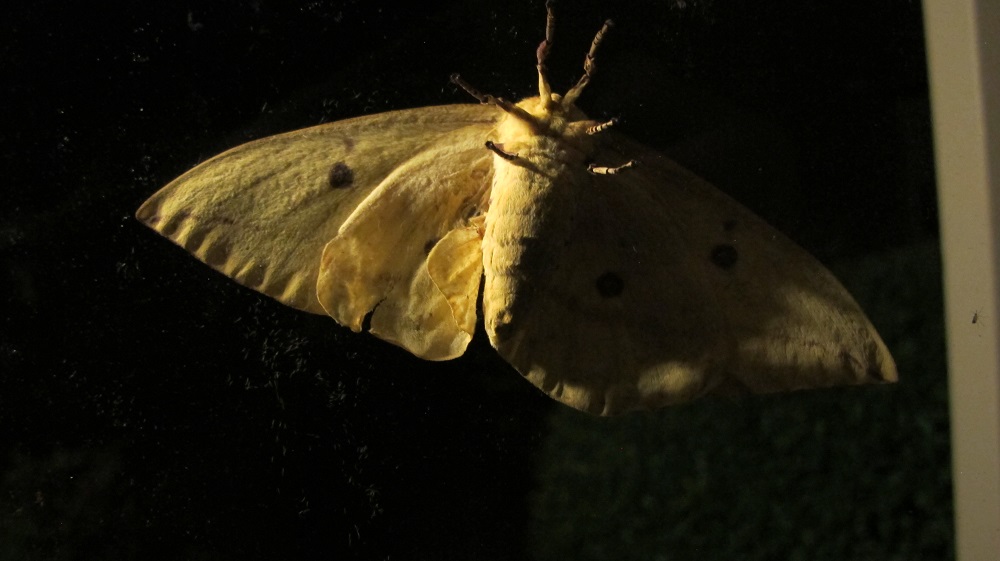
What makes this non-native plant peculiar is a native moth’s preference for its leaves even when offered a multitude of its local favorites. Last year, I raised caterpillars of the huge Imperial moth. They went for the crape myrtle every time, ignoring all the others. Unless female moths instinctively target this species to host their young, the caterpillars will not likely eat these trees to the bone any time soon.

Several songbirds, including American goldfinches and juncos, feed on the seedpods.


Evergreens

You might prefer an evergreen specimen instead of a tree that drops its leaves in autumn. Look into arborvitae, chamaecyparis, hemlock, certain holly species, juniper, pine, rhododendron, spruce, and yew. Consider the shade evergreens will cast in winter, and whether sunlight might be blocked from entering windows or melting ice on the driveway.

Although not all evergreens are native to this part of the country, they make suitable nesting places and provide shelter in inclement weather. A dense border of evergreens can block fierce winter wind for a considerable distance downwind.

Soon after moving into the Maryland house in the 1980’s, I planted a chamaecyparis with deep green whorled foliage. Although it was supposed to get only 6′ tall according to the nursery, it grew to about 20′, when it was cut down by the people who bought the house from me. I left it in the front yard because birds raised a few families among its evergreen branches every year. And it looked gorgeous in the snow.


trees in the snow, my house in Maryland

Chamaecyparis on the right, after 2010 blizzard. Sourwood on the left.


Good Looks


If you’re landscaping purely for aesthetics, plant a tree with characteristics that appeal to you. It’s your property, after all. Besides, all trees provide cover and nesting opportunities, even if they’re passed up by caterpillars.

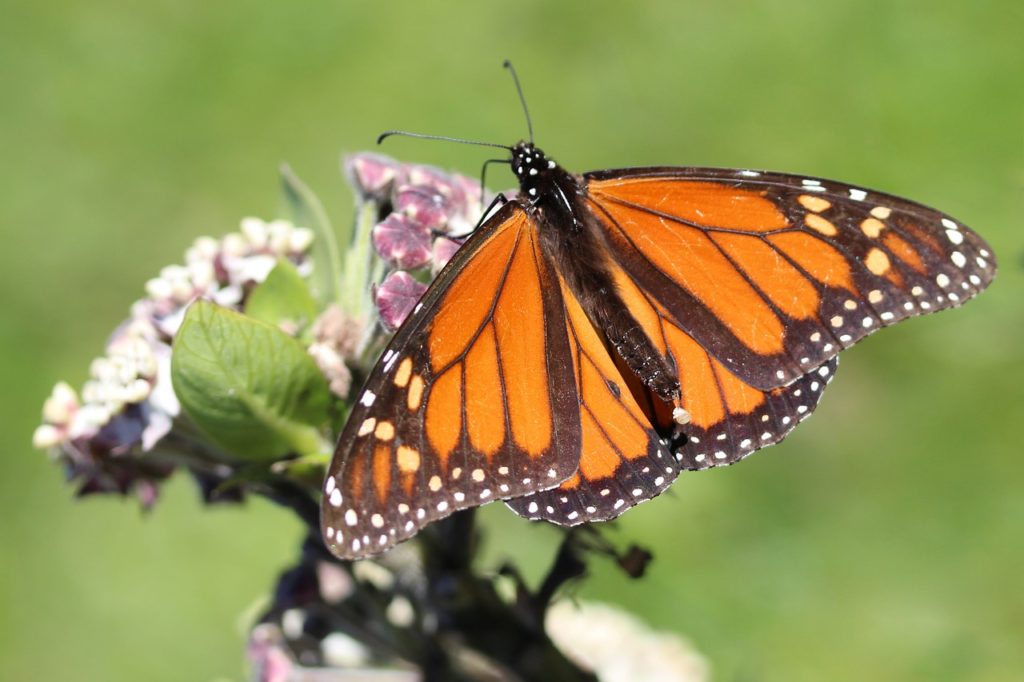
Perhaps elsewhere you could grow perennials that offer food to wildlife. Planting a bed of milkweeds among the shrubs, for example, will help the monarch butterflies (photo, below).

While you might not consider insects important in your landscape, and, in fact, have invested considerable time and expense eradicating them, they are primary links in the food chain. A healthy landscape hosts a complex assortment of insects and animals. And with the rate at which natural habitats are losing out to development, it’s no wonder we see fewer ladybugs, butterflies, and songbirds in our neighborhoods.

Creating welcoming landscapes provides resting places for migrating birds. But they need natural corridors all along their path in order to find food and perching opportunities. We can help by planting at least part of our property with them in mind—every one of us! Provide food, water, and trees to rest in, and you might catch a glimpse of a bird you’ve never seen before.

I urge you to adopt a new attitude toward welcoming wildlife. You don’t need 10 acres to make a difference. A well-planted fraction of an acre will encourage many kinds of insects and animals to reside there. If you let them eat your plants and the sprayer hasn’t been used once this year, well done!


Monarch Butterfly Laying An Egg - Chesna / Pixabay

Monarch butterfly on milkweed.


Before Planting Trees


Let’s imagine a 2-story house and an appropriately proportional medium-sized tree. Your landscape plan calls for locating this tree off the southwest corner in the front of the house.

To prevent branches from rubbing against the siding in the future, you’ll want to plant the tree far enough from the house. Divide the mature spread of the tree by 2. Because plants tend to grow larger than the dimensions printed on the label, add a few feet to the measurement. So, a tree with a mature spread of 25-30′ should be planted 15′ or more from the corner.

While that little tree might look lonely out there, it will grow. Maybe that’s the extent of your garden project this fall. Or perhaps you’d like to develop a full garden on that side of the house with an underplanting of shrubs, perennials, and ground covers.

Walking a pathway through the garden to the side yard will feel like a walk through a park. This is a good solution where space is limited between your house and the neighbor’s. Consider your neighbor, though, and don’t plant too close to the property line. Perhaps the two of you could create an appealing garden that fills the space between both houses.


But first, it’s soil prepplease turn to page 2…


Headings:

Page 1: Are You Ready To Plant Trees?, Native Plants vs. the Non-Natives (The Benefits of Native Species, Native Species and Nativars, Red Leaves and Wildlife, The Untold Story), Deciduous Trees For the Eastern U.S. (The Hollies, The Curious Case of Crape Myrtle, Evergreens), Good Looks, and Before Planting Trees

Page 2: Soil Preparation For Trees (Slope, Outline the Bed, Heavy Clay, “How Deep?”, Adding Amendments, Organic Matter, and Time To Plant Trees (Trees In Pots, B&B Trees, Backfill, Edge, Mulch, And Water)

Return to the top

Herb Gardens: How To Grow Herbs In Pots


2021

updated 3/14/2024


Herb Gardens: The Scents and Flavors of Summer


herb gardens


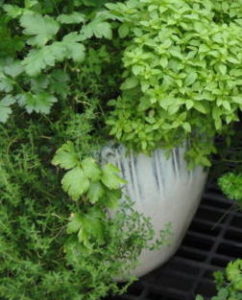
Fresh ‘Genovese’ basil for the garden salad…savory French thyme on grilled fish…chives and flat parsley to enliven the egg salad and browned potatoes. Yummy! This lengthy article describes how you can plant and enjoy growing herb gardens in containers. Growing potted herbs on the balcony or the sunny patio is the perfect solution if you have no garden space.

Potted herb gardens can be moved around to get just the right amount of sunlight the plants need. They can enjoy the morning sun on one side of the deck, and a few additional hours of afternoon sun on the other. As the sun’s arc changes from one season to the next, you can reposition the plants to capture the most light.

Several years ago, a gentleman asked me to pot herbs into a large strawberry jar. He traveled frequently between his residence and a summer home at the beach. Because he was a keen cook, he planned to take this herb garden with him to the next kitchen, wherever it was. So, if not prohibited where you’ll be traveling, consider taking your herb garden with you on your next road trip!


The Gift That Keeps On Giving

Place herb gardens on the picnic table for family and guests to sample as they enjoy the day’s barbecue. And then, in autumn, you can continue the harvest by growing them in sunny windows indoors.

Using herbs to flavor foods might help you kick the salt habit, or at least decrease its consumption. In addition to their wonderful flavors, herbs have high concentrations of beneficial antioxidants, which contribute to our well-being. In decreasing order, oregano, rosemary, parsley, basil, and thyme contain the most antioxidants among the common herbs.

I’ve sold herb gardens as wedding or birthday presents, for Mother’s Day, Father’s Day, Christmas, and as housewarming gifts. Families purchased herb gardens for retiring parents, who planned to devote more time to gardening. Over decades of selling potted plants, I estimate that about half of these delightful combinations were given as gifts.


Choosing the Right Containers for Herb Gardens


clay pots


Style and Size

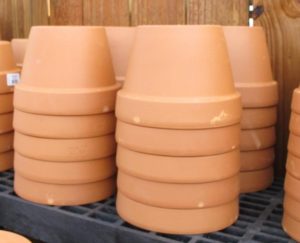
Visit any well-stocked garden center and you’ll see an extensive selection of terra cotta (clay), stoneware, ceramic, wood, and inexpensive plastic pots. Containers are available in all sizes and shapes. Plain or ornate finishes reflect modern, rustic, or classic styles. You’ll also find containers specially fitted for deck railings or for hanging on a wall. Plant a half whiskey barrel with one or more mint varieties, and let them take over…in the pot, that is.

Some ceramics are glazed with materials that should not be used with edible plants. There might be a sticker on the bottom indicating this.

rabbit

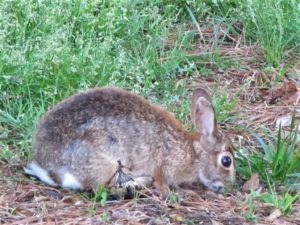
Rabbits are cute, but…

Small clay pots dry out faster than large non-porous pots. Just one day too many in direct sun without water could kill the plants. Lining a clay pot with food-grade plastic and poking a few holes in the bottom will slow the evaporation to a degree. To be sure, your herb gardens—especially small ones—will need daily checking.

Potting herbs in hanging baskets is a great solution if you live where deer and rabbits are waiting for the instant you turn your back. They’re particularly attracted to parsley, cilantro, and dill.

Herbs need excellent drainage, so always choose pots that have holes in the bottom. Other than that requirement, just select the pots that appeal to you. Many gardeners look for a consistent style, favoring pots that harmonize with each other and with the setting.


Window Boxes


clay pots for herb gardens

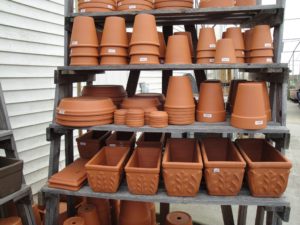
Clay pots for herb gardens.


A popular container for herb gardens is the window box. Window boxes come in many styles, from quite simple to highly ornate. They’re available in terra cotta (lower shelf in photo, above), plastic, and lined or unlined wood. Plastic containers often have plugs in the drainage holes; remove them to ensure proper drainage.

You can hang them outside windows in securely anchored frames; lighter weight containers are a safer bet. Or simply place them on a brick wall, along a sidewalk, or at the edge of a sunny patio. Several herbs in clay pots look charming clustered together on a table. Where wind is a concern, use heavier pots, but don’t place them where they could blow off the balcony to the sidewalk and harm someone.

Cracking

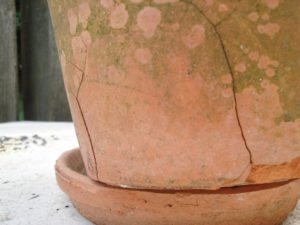
Handle clay pots carefully so they won’t crack. Clay pots might tolerate one or a few seasons of freezing weather; eventually most will begin to spall or crack. When clay absorbs water, and the water expands as it freezes, the clay degrades. Denser terra cotta (Italian for “baked earth”) survives more winters than softer clay.

This clay pot (photo, right) spent almost a decade outside, and it cracked this past winter. Until it crumbles, it will serve some purpose in the garden. I usually used Italian clay pots for my plant business and acknowledge that even better-quality pottery has limits.

Switching herbs into frost-resistant pots where winters are cold is one option. Other options include growing them indoors, in a cold frame, or in a conservatory—in other words, where the pots won’t freeze.

Tuscan Style

Years ago, I planted two herb gardens for a customer in Potomac, Maryland. They sat on a low stone wall surrounding a sunny Mediterranean-style garden. The Italian clay window boxes were over 4′ long and weighed more than 50 pounds empty. They were beautiful when finished—all those shades of green, purple, gray, variegated white and yellow—and the fragrances!

Even without flowers, potted herb gardens have their own unmistakable charm. Green algae and that white coating (efflorescence, from mineral salts) building up on clay pots won’t harm the plants but will amplify the rustic factor. And, yes, you can clean it off if you prefer.


Long Toms

Long toms, also called rose pots, are taller than they are wide (top shelf and part of next one, in photo under “Window Boxes”). Variegated lemon thyme or prostrate rosemary cascading over the side are perfect choices.

These pots are available in tiny sizes only 2″ wide, but 4″, 5″, and 6″ pots are more useful. Offer small herb containers as party favors for special occasions or use them to assign seating around the table.

While in Maryland, I potted herbs into 3″ stainless steel long toms for the tables at a popular seafood restaurant. I switched them out every couple of weeks.

I used to purchase clay long toms from a wholesale supplier in Baltimore. They normally came without drainage holes, so I added them, using a reversible drill and a masonry bit. Easy.


Plain Pots

azalea pots for herb gardens

“Azalea” pots are 3/4 as tall as they are wide.

Reusing what you have sitting around the garage is most economical.

Clean out those 12″ hanging baskets that held annuals last year, and repurpose them for herb gardens, with or without the wires. Green plastic pots last longer than white ones, which degrade faster in direct sun.

Empty the tired old soil into the shrub gardens and purchase new potting soil for your project. Some plants, particularly basil, are susceptible to several soil borne diseases. Starting with clean materials, therefore, is critical for their success. Wipe down used pots with a 10% bleach solution, rinse, and air-dry…for basil, at least.

Azalea pots are a bit shorter than they are wide and lend a more anchored look to potted plants. I prefer azalea pots over standard pots (height = width). It’s a personal choice, of course. You can pot them up with one plant or use a larger pot for a few plants.

Topiary

Rosemary and lavender topiary standards (the lollipop shape) look great in clay azalea pots, with some moss growing on the soil surface. Grow them indoors, in full sun, where they’re protected from hard winter freezes. But keeping them outdoors—even in chilly weather—ensures they get enough direct sunlight.

Try training the woody herbs “quasi-bonsai” style, with knobby stems, a few little weeds, and a fallen “log” embedded in the moss. Allowing the clay to mellow with algae and efflorescence, and those pots aren’t so plain after all.


Strawberry Pots


herbs in a strawberry jar

Lemon thyme in a clay strawberry jar.


Planting a strawberry jar is a bit more complicated, so it deserves a post of its own. If your attempts at planting a strawberry pot have been less than successful, refer to this article for solutions.


Pot Color

A fine point often overlooked in container gardening is the color of the pot. In summer, with scorching sun bearing down on a dark pot, that heat transfers to the soil. Consequently, the root system will be sparse on the hot side of the pot. Plants are happier without this stress.

You can alleviate their discomfort by shading the root system in summer with smaller pots of heat tolerant plants, such as dwarf zinnias or vinca. Or use white pots in hot weather to lower the temperature.

In autumn, I plant cool season greens and herbs in black nursery pots. Dark colors absorb more energy from the sun. Warming the soil a moderate amount helps limit the deep freeze in winter. The longer the roots can function, the more foliage I’ll be able to pick.

Curiously, clay pots with moist soil can feel cooler to the touch. This is due to evaporative cooling, where the temperature decreases as water evaporates from the surface. So, even in hot weather, a clay pot won’t feel as hot as most other pots. Your skin performs the same function.

Choosing pot colors might not be an option. Alternatively, plant herbs that dislike heat (such as cilantro) on the cooler north (northern hemisphere) or east side of the pot.


Choosing the Right Plants for Herb Gardens


A Proper Fit

First, decide which herbs you want to grow. Look for smaller varieties of the herbs you use in cooking, choosing young but well-rooted transplants. These will adapt better to containers than full size varieties. Sometimes there’s not much choice; maybe only ‘Italian Large Leaf’ basil is available. Okay, I’d rather have it than no basil at all, so there are 4 options when using large-growing herbs:

  1. use fewer herbs in the herb garden to make room for the big basil
  2. keep the basil in the combination pot, but cut it back more frequently
  3. find a larger pot for the herb garden
  4. grow this large basil by itself

We need to find a balance between plant size and available space relative to what other plants need. You can fit a few plants together, but they suffer when cramming all the herbs you like into too small a container. Plants growing in pots, however, don’t grow as large as those in the ground.


Seeds and Transplants

Seeds can be sown directly in the pots, but thin them once they sprout. Remember that some species are very slow to germinate, and you most likely will have better success with transplants. For new gardeners, I suggest buying young plants for now, and perhaps experimenting with seeds during the summer. But if the herbs you need are available only as seed, go for it.

Garden centers and farmers’ markets offer a wide variety of herbs grown as transplants. Some growers start them from seed, cuttings, or plugs (very young plants) several times a year. In one growing season, you might find dozens of varieties of basil alone! So, shop around for the local herb lady, and request certain plants she might grow for you.

I included a section on Propagating Herbs, which you’ll find on Page 5.


What’s the Difference Between Herbs and Spices?


Although we use the two terms interchangeably, there is a difference between them. Herbs are leaves of edible plants, and the focus of this article. Spices comprise all other parts of edible plants—bark, seeds, roots, fruits, and flower parts.

Cilantro leaves and coriander seeds come from the same plant, but those interested in this minor technicality differentiate between the herb and the spice.

Turmeric, ginger, vanilla extract, nutmeg, cinnamon, and black pepper are spices that we keep in the pantry. Saffron, the world’s most expensive spice, comes from the 3 threadlike female parts in a fall-blooming Crocus sativus flower.


Return to the top of Page 1

Headings:

Page 1: The Gift That Keeps On Giving, Choosing the Right Containers for Herb Gardens (Style and Size, Window Boxes, Long Toms, Plain Pots, Pot Color), Choosing the Right Plants for Herb Gardens (A Proper Fit, Seeds and Transplants, What’s the Difference Between Herbs and Spices?)

Page 2: Which Herbs Are Annuals? Biennials? Perennials?

Page 3: Herb Gardens Close To the Kitchen, Combination Pots, Potting Up Herb Gardens, How To Maintain Herb Gardens (Light, Natural Sunlight, Artificial Light)

Page 4: Tips For Watering Herb Gardens (Transpiration, Why Plants Wilt, Testing for Moisture, From Season To Season, Water Temperature), Fertilizing Herb Gardens (Organic or Synthetic?, Macronutrients and Micronutrients, How Often To Fertilize Herbs, When We Don’t Fertilize, The Taste Test), Temperature (As Temperatures Change)

Page 5: Common Pests (Better Options To Eradicate Pests, Bacillus Thuringiensis, Horticultural Oil, Organic Sluggo, Plain Water), Girth Control (It’s Thyme For Drying, Which Herbs Dry Well?), Renovating Herb Gardens (Propagating Herbs)


Fall Cleanup: Brush Piles For Wildlife


Brush Piles and The Fall Cleanup


trees in fall color

Autumn in NC.


Fall weather has debuted in most regions of the northern temperate zone. And frost has kissed the peaks of the higher elevations in western North Carolina. But, before you gather the tools, the leaf bags, and the kids for the fall cleanup, consider being a little less tidy this year. I’ll explain how to do this when constructing a few brush piles in the garden.

“What? Why?” you might ask. Sure, the gardens always look neat and orderly after the fall cleanup, while the plants remain dormant and bare. But at what cost?

While cooling weather invigorates, it also sends signals to local wildlife that they must prepare for winter, or they will perish. Food and water for those remaining active, shelter from the elements, and protection from predators will become life-or-death issues for these organisms over the coming months.

Plants benefit from a layer of organic matter on the ground below them. It insulates their root systems from severe cold and holds moisture in the soil. A covering over the soil also prevents topsoil from blowing away. As the material decomposes, plants absorb valuable nutrients. This natural mulch also provides nutrients for earthworms and soil microbes, which contribute to the biological health of the soil. “I’m with you so far, Mother Nature.”

“Okay, so I’ll mulch the gardens.” Well…that’s better than nothing, but it’s not quite the same.


And Here’s Why:


caterpillar and dogwood twig

This caterpillar mimics a dogwood twig.


In each region, thousands of species of beneficial spiders, insects, and other animals rely on that garden debris over the harsh winter months. It protects them from temperature extremes, icy storms, and desiccation. It protects them from certain death, which is inevitable when that debris is hauled off to the recycling center.

Imagine how many butterfly chrysalises or praying mantis eggs will be carted off to their doom. Or the enormous number of native bees seeking refuge inside and among dead plant stems.

And what’s the buzzword of the decade in gardening circles around the world? Right: Pollinators! But are we doing them a favor by removing them and the debris they’re sheltering in? We are not.


What We Can Do About It

maintain brush piles after fall cleanupDormant insects remaining on the property, protected in brush piles all winter, will restock the garden in the spring. Otherwise, the landscape is pretty lifeless, until bees, beetles, butterflies, and moths gradually move back to your garden months later. But there won’t be nearly as many of them if so many were removed with the fall cleanup.

Begin construction of new brush piles by mid- to late summer. Caterpillars crawling around will find them suitable resting places and pupate among the twigs for a long winter nap. Some insects overwinter as adults, briefly emerging on warm winter days to feed. Leaving the shelters in place all year, however, is the best option, and one which benefits many insects and animals.

Consider letting nature behave closer to the way it was intended, the way it evolved over time. Who doesn’t want more butterflies and birds flying around the garden? This complex web of life in your own neighborhood will improve as a result. More insects to pollinate the vegetables, fruit trees, and natural stands of vegetation. And more food for frogs and baby birds. More beauty, more interest, more life!


Brush Piles For the Birds


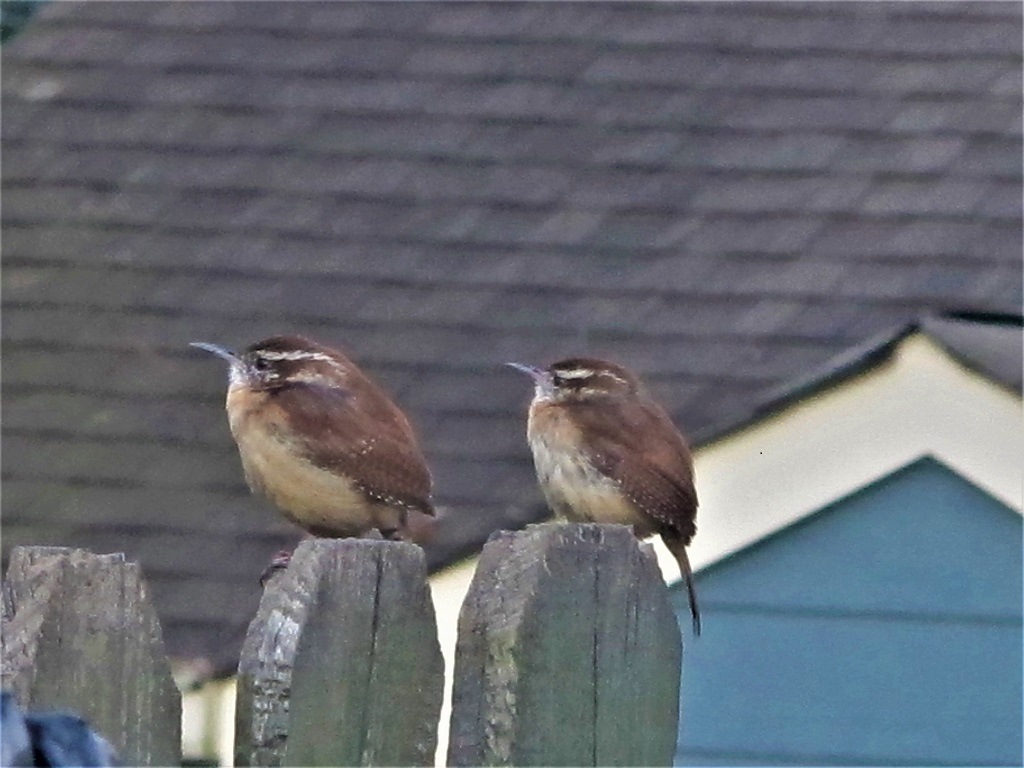
carolina wrens often shelter in brush piles

Carolina wren, a tiny bird with a mighty voice.


Birds (including wrens, cardinals, juncos, thrashers, robins, sparrows, mourning doves, and towhees) often forage close to the ground. All my life, I’ve been fascinated by birds and by all of nature. We’ve watched them search through leaf litter and brush piles for worms, seeds, insects, and other sources of food. They also will find materials for nest-building activities in late winter and spring.

Some birds seek shelter among the piles of twigs when storms blow in. And they’re handy places to hide when predatory hawks are spotted overhead. Wrens are particularly active around these structures, so you might want to construct one within view of the house.


Any Other Benefits?

There are ecological benefits of keeping in place the biomass produced on your property. Considering the “carbon footprint”, nature’s mulch is an improvement on bringing in bagged mulch that had to be processed and transported to your retailer and then to your home.

Truth be told, though, I often used mulch in gardens that I installed for customers. But I also planted a variety of evergreen and deciduous material, flowering plants, and ground covers. These gardens hosted a rich assortment of indigenous insects and animals, even after the fall cleanup.

And, of course, you won’t need as many of those yard bags often seen lining residential curbsides. Imagine the savings in resources by making brush piles on your property: plastic bags, paper bags, and time, gasoline, and money spent picking up mulch or paying the town to recycle garden debris. Recycling is better than the landfill, but not removing debris from the property is even better.

Another bonus is the compost that gathers under the pile as organic materials break down. Scoop it out and use it in the vegetable garden or in potted plants. Replenish with leaves and twigs as the material reduces to compost. You might want to start a separate compost pile for leaves, weeds, twigs, and kitchen vegetable scraps and eggshells. Or simply bury the kitchen scraps in a hole in the garden. If earthworms are active, they’ll consume it within a week or two.

It’s entertaining, for many of us, to watch the birds on a cold winter day. Provide a source of clean water and a bird feeder to attract them to your yard.


white woodland allium, forest

Undisturbed environments provide habitat for overwintering insects and animals.


“But what will the neighbors say?”


I realize this requires a leap of tradition to implement. One suggestion is to edge the beds and to keep grass neatly mown. Plant up a few colorful pots for the summer and winter seasons. This will indicate that the gardener living there does care about her property and that her brush piles are intentional. Maybe the neighbors will take a cue and do likewise; mention the pollinators! And the carbon footprint!

If space permits, keep a few brush piles in the back yard, out of public view. If you have space only in the front, perhaps you can hide your Pollinator Palace behind some shrubs.


Suburban Life

Now, if you have a homeowner’s association to deal with, you can keep the front yard looking presentable and still be ecologically correct. Even in the city, constructing attractive twig sculptures as “garden art” can serve several purposes at the same time. I’ve seen twigs and leaves molded into animal shapes and simple mounds.

During the fall cleanup, rake or use a mulching mower and direct the chopped leaves under the trees and shrubs and into flower gardens. Smaller pieces of material decompose faster and are less conspicuous. Then place a 1″-2″ layer of shredded hardwood mulch or pine bark nuggets over the chopped leaves. Nice and tidy. Earthworms will feast on those leafy bits while the worms are still active, and insects will hide in the debris.

Move fallen twigs and dead stems to the piles out of view. If you’re absolutely overwhelmed with too much material, choose which parts will go to the recycling center. But if you notice a mantis egg case or butterfly chrysalises, cut those parts of the stems and add them to your brush pile or tuck them among the shrubs.


spring landscape


Replacing Grass with Mixed Plantings

Making brush piles is a natural part of the fall cleanup in rural areas. But many of us live where expansive lawns, trees, and HOA’s predominate. By adding shrub borders and undergrowth, though, more birds, mammals, and insects will make your garden their home.

A verdant, layered landscape naturally provides more opportunities for insects and animals to find food and shelter. This kind of environment supports the rich biodiversity that is becoming increasingly rare as suburbs gobble up more territory. We can help by providing conditions that attract wildlife: food and water, shelter, and places to raise offspring. For starters, let the dandelions bloom! If you see a large area of clover, mow around it and let the honey bees collect nectar and pollen. And, of course, avoid using pesticides in the landscape.

Replacing grass with trees, shrubs, perennials, bulbs, and annuals gives me the greatest satisfaction. And, no, it doesn’t have to look like “a jungle out there”. Well-designed and diversified borders are very attractive, and they bring biological activity within view. They also add to the property value!

Being connected to nature is an innate need that benefits us psychologically. And shrub borders afford a measure of privacy in communities where houses line up with little space in between.

You’ll enjoy seasonal blooms, dazzling fall color, winter structure, and the promise of spring in delicately unfolding leaves. While we enjoy the beauty of the garden, the wildlife will have found a welcoming home for generations to come.


Brush Piles: Basic Construction


brush piles, simple piles of twigs


There’s no formula for building these brush piles. Frankly, anything will work. Make it large enough, though. Several feet on each side will do, and 2′ or 3′ tall to begin with. Smaller lodgings will function well enough for pupating insects.

If you have the space, however, construct something more substantial. A large twiggy brush pile in the old Maryland garden discouraged deer from jumping over the fence in that location. And all kinds of animals found food and shelter there.

Removing all the dead stems and leaves during the fall cleanup severely reduces populations of these little critters. Advancing up the food chain, fewer caterpillars and beetles means less food for larger insects, frogs, and birds…which means less food for snakes, bigger birds, and foxes. So, that means less life overall in the garden.


Multiple Brush Piles


Several habitats around a spacious yard are better than one big brush pile. Think of a little caterpillar roaming around, looking for a place to pupate in late summer. Close, in his case, is better than far.

Caterpillars are in a race against time when looking for their winter homes. As masters of camouflage, chrysalises often look like dead leaves or sticks, blending in with the surroundings. But caterpillars traveling a greater distance have a higher risk of being consumed by predators.

The gulf fritillary’s chrysalis (photo, above) is difficult to detect on plants that are dying down in autumn. Unfortunately, this one pupated on the door frame, and ended up as dinner for a local lizard.


The Process

Autumn leaves for brush piles

Oak leaves keep a more open, airy structure.

First, lay down a bed of fallen leaves. Then pile large branches on the leaves, and add twigs, and more leaves on top. Add some perennial stems from the front yard, and the frosted zinnias and seedy marigolds. Simple!

Add more branches, leaves, and twigs through the season. The shelter doesn’t need to be airtight. Insects and animals will find nooks and crannies to hide in. Adding a layer of evergreen boughs on top and on the windward side will help keep the pile dry for the inhabitants inside.

Keep some openings large enough for birds to enter when they need shelter from a predator. Chipmunks, mice, toads, and reptiles also will enjoy your efforts. Some are likely to hibernate in the soil under the brush pile.

The old potting soil from the summer pots can be used in the gardens, where organic components will continue to break down and improve the soil. Or place it on the windy side of the shelter.


Perennials In Place, Then To the Brush Piles


If possible, let the herbaceous perennials, such as black-eyed Susan (Rudbeckia hirta, R. fulgida), coneflower (Echinacea), tickseed (Coreopsis), goldenrod (Solidago), asters, and ornamental grasses remain in place as they go dormant. Bees and other pollinators will busily collect pollen and nectar as long as the flowers produce it. Birds will pick at the seedheads in autumn and winter.

Insects that fed on plants during the summer will shelter or lay eggs on or near them for next year’s generation. A good time to cut back the dead plant stems is in late winter or early spring, just before new growth begins. If you must remove the stems earlier, add them to the brush piles. But leaving the dead plants standing in place distributes the habitats—and the sheltering wildlife—throughout the property.


An Attitude Adjustment


While the fall cleanup has been the normal practice for generations of homeowners, the consequences include diminished populations of wildlife. Most of the plants that feed us and animal life require insects to pollinate them. Disposing overwintering insects in enormous bags for curbside pickup, however, eliminates huge numbers of beneficial organisms.


And then we wonder why there aren’t as many fireflies and ladybugs, moths and butterflies, frogs, lizards, and birds as there were in generations past.


Fewer caterpillars and beetles will support fewer toads and birds. It’s as simple as that. Bird populations in several types of ecosystems are disappearing at an astonishingly rapid rate. Loss of habitat is part of the cause, but we can start to reverse that trend by simply adopting a fresh attitude toward wildlife. Appreciate it. Encourage it. Nurture it. Where you live.

Watch Douglas W. Tallamy’s videos or pick up a copy of his book, Bringing Nature Home, for inspiration and lists of plants that attract wildlife. Also, there are loads of pictures of insects, and a strong emphasis on using native plants. On the back cover:


“…Douglas Tallamy presents a powerful and compelling illustration of how the choices we make as gardeners can profoundly impact the diversity of life in our yards, towns and on our planet.”


gulf fritillary butterfly

Female gulf fritillary butterfly.

Return to the top

Dividing Chives: Easily Done!


updated 1/28/2024


Here’s How To Divide and Rejuvenate Chives


Potted chives, about to be divided.


There are few plants that are easier to manage than chives. This herb, in the onion family (Amaryllidaceae), benefits from an occasional division. And as autumn approaches, a rejuvenated plant will reward you with a fresh crop of flavorful leaves until the snow flies.

Chives (Allium schoenoprasum) is super hardy, growing as a perennial in USDA plant hardiness zones 3 to 9. In the colder zones, it behaves as a herbaceous perennial, dying back to the soil after some hard freezes. A few months later, new leaves emerge from dormant bulbs in the ground when the soil begins warming up. Wherever I’ve lived, it has always been the first herb to sprout new foliage in late winter or early spring.

Here in zone 7 North Carolina, pot-grown chives has some usable foliage through most of the winter. If grown in a protected area or next to a south-facing wall (northern hemisphere), it will retain some foliage in cold weather. Potted chives is less winter hardy, by one or two zones, than those grown in the ground because the roots are fully exposed to cold air temperatures.

The term, “chives”, is from the French word cive, which derives from the Latin word for onion, cepa.

Some gardeners use the singular form of the word, “chive”, and others prefer using “chives” for both singular and plural applications. Your choice. Similar to the terms “species” and “impatiens”, I add the “s” at the end.


Why Divide Chives?


After a few years of growth, the small bulbs in the soil become very crowded. One year, the chives will look fine, and the next year it might fail to emerge at all. By dividing the clump every 2-3 years, the younger and more vigorous bulbs will have a chance to grow. Those old bulbs might already have decomposed, so you won’t see them in the soil.

Wet soil exacerbates any problems it might have, so plant it where the drainage is good, in a raised bed, or in a clay pot. In fact, chives can tolerate quite dry soil, and it doesn’t mind being potbound. But for the best growth, keep potted chives damp to lightly moist. It needs full sun—6 hours or more each day—to grow well.

Another reason to divide chives is to provide more plants for the garden, to give away, or to sell at the neighborhood yard sale. Perhaps you’d like to add a division to the strawberry jar you’re filling with herbs. Chives responds very quickly after division.

If onion aphids have weakened your chives early in the season, removing all the foliage is an option. That would be another good time to divide the plant, perhaps waiting until after the blooms fade. I’ve never had a problem with onion aphids after spring.

***Update***: These tiny young onion aphids (photo, below) hitched a ride on the potted chives brought indoors last month. So, I cut back the plant and moved it outside, after feeding a few aphids to the betta. The other chives on the deck already are beginning to show new leaves. 2/5/2021


onion aphids

Onion aphids from chives.


How To Divide Chives


The Pot

This process begins with digging up the clump or unpotting the potted chives. The plant in the photos has been growing in a 6½” clay azalea pot (shorter than wide—about 5″ tall). I will replant the same pot with one of the divisions, after cleaning it. Replanting in a dirty pot will make the next plant more difficult to remove. The new root ball will get stuck on the debris tightly clinging to the walls.

Another issue to consider is the shape of the pot. If the top curves inward, the root ball won’t slip beyond the narrow section, and you’ll have to cut straight or tapering sides to get the root ball out of the pot.

If you want to use Grandma’s ceramic pot, simply grow the chives in a plastic pot, with holes, that fits inside the prettier one. While double-potting lets you use a decorative pot without a drainage hole, remember to empty water collecting in the bottom.

Plastic or frost resistant ceramic pots are fine, but use one that is small to medium in size. A big pot holds a large volume of soil that stays wet in a rainy period or in the cold. The excess moisture could kill your chives unless you’ve added extra drainage material. Chives grows nicely with a few other herbs in a window box.


Cut It Back


cutting chives' leaves

Cutting leaves right above soil level.


Cut off all the foliage, down to about 1/2″ from the soil surface. While it might appear extreme, this plant won’t skip a beat. Already, a day after cutting back this plant, it has grown 1/3″ (photo at the end).

Removing the foliage makes the process easier and neater. Also, there’s less stress on the roots because they won’t have to supply water to the foliage. Take the good leaves to the kitchen, and add them to baked potatoes for dinner, or to eggs, a salad, or soup. You’ll have long leaves to snip from rejuvenated plants within a couple of weeks, depending on weather.

Look for leek moth larvae, immature insects that sometimes bore into the hollow leaves or burrow inside and destroy the bulbs. This insect is native to Europe and Asia, but also is found in North America, where it can become invasive.


Divide and Multiply

If you’re removing your chives from the ground, dig a few inches from the base of the clump, and about 8″ deep. Tease off loose soil and put the earthworms back in the garden. Don’t worry about some lost roots; chives’ roots regrow very fast.


The root ball in a potted plant will become very congested with tightly packed roots, both dead and alive. Use an old serrated knife to slice off the outer edges of the root system. And remove that center part if there are no bulbs there. Compost this tired soil or toss it under the shrubs.

An old clump of chives often grows outward, while the center dies out. Identify the places where natural divisions can be separated. Now divide the plant. Use the knife to make a few or several divisions. I kept 12 to 20 shoots in each division. If you want, you could cut smaller divisions for more plants.


Potting Up


Place a wad of polyester fiberfill over the pot’s drainage hole. A small bag can be purchased for a few dollars at hobby shops. Because it’s synthetic, it doesn’t break down and can be reused. The PF prevents soil erosion, leaving all the soil in the pot. Also, sowbugs, earthworms, and other critters will not be able to gain entrance to the soil through the drainage hole. But water will drain freely.

Add some potting soil to the pot and hollow out a depression for the fresh division. The soil line should be about 1/2″ to 1″ below the rim of the pot. Firm the soil around the roots to prevent settling or air channels through the soil. Add more soil if needed. But don’t bury the crown of the plant any deeper than it was growing before the division.

Water the plant and place the pot in the sun. Done! Wasn’t that easy?


Growing Chives Indoors


Light

Chives grows easily in a sunny window, where it gets at least 6 hours of direct sun. Abundant sunshine allows optimal photosynthesis and keeps the plant growing strong. Lack of adequate sun causes thin, weak growth that falls over.

Artificial light can help on cloudy days. Place the plant close to a light source to supplement the natural light it gets, but not so close that it can feel the heat.


Temperature

Even if the windowsill is chilly on winter nights, the plant should thrive there. Chives growing indoors should stay in leaf all season, even though those growing outdoors will go dormant. Cooler winter temperatures (45° to 65°F) indoors keep the plant shorter and in better condition. It will bloom in spring only if it has received enough cold, so don’t expect flowers.

If you must keep chives indoors in the summer, set the pot back several inches from the glass so it doesn’t overheat.


Water

Keep the soil damp. Water thoroughly, and then let it dry a bit. After 10 or 15 minutes, empty excess water that remains in a saucer. Chives can grow in a pot as small as 4″ across and doesn’t mind being potbound for some time. A full plant in a small pot requires water more often.


Fertilizer

Every 6 weeks, from mid-fall through winter, apply a dilute (1/4 to 1/2 strength) solution of fertilizer if the plant continues growing.

From spring through early fall, fertilize every 3 or 4 weeks at about half the strength recommended on the package. Chives just isn’t that fussy. Wait 5 or 6 weeks after dividing before starting to fertilize. Chives planted in the garden might need fertilizer only once or twice during the growing season.


Tips for Harvesting Chives


When cutting the leaves, cut the entire leaf, almost down to the soil. The bulbs will soon generate new growth. If you cut the tips off a bunch of leaves, all the ends of those leaves will turn yellow.

Intercalary meristematic tissues right above the bulbs permit regrowth of the leaf from the ground up.


chives in flower

Chives in flower.


Chives flowers in spring (or early summer in northern zones) after being exposed to several weeks of a cold winter. It’s very pretty in bloom, with pinkish purple flowers on sturdy stalks. It looks like their cousins, the ornamental Alliums, grown from bulbs planted in autumn.

This herb’s flowers produce generous amounts of nectar, attracting beneficial insects. Chives’ flowers are edible. Simply pull some of the little florets off the head and use as a garnish. Young flowers have a milder flavor than those that have been open for a few days.

The stalk, or peduncle, that the flower is attached to is quite tough, and not edible for most purposes. Hold the base of the plant and pull out the entire flower stem.


Chives from Seed


As a monocot, chives produces flower parts in multiples of threes. So, each floret has 6 petals and the seed capsule is 3-lobed.

Different varieties of chives have similar flavor, but some have finer foliage than others. ‘Dolores’ has thin foliage, while ‘Purly’ and ‘Staro’ have wider leaves.


garlic chives going to seed

Garlic chives going to seed.


And there’s garlic chives, Allium tuberosum, with a distinct mild garlic flavor. Very nice in salads, but it will spread all over the place if the seedheads are not removed (photo, above). It also spreads underground more vigorously than onion chives.

Garlic chives grows in zones 4 through 9. Its pretty white flowers appear later than onion chives. Enjoy the flowers for a few days but remove them before seeds develop. Most wild animals do not feed on chives.

Garlic chives has leaves that are flattened, while onion chives has leaves that are cylindrical in cross-section.

Growing chives from seed is quite easy. Sow chives about 1/4″ deep in moist potting soil. You can use market packs or individual 3½-4″ pots, with 10 or so seeds sown together. Some growers sow dozens of seeds in one pot for a faster sale.

As soon as the seeds germinate, give them full direct sun for strong plants. They can be planted out after hardening off the seedlings, and they’ll tolerate light frost at a young age.


                               *     *     *     *     *     *     *     *


Chives has been used for 5,000 years by civilizations in both the Old World and the New World. The foliage is high in Vitamin C, carotenoids, and manganese. It’s very high in Vitamin K. Because we normally don’t consume chives in large quantities, it’s not considered a major source of nutrients.

Dividing chives is an easy project for a cool end-of-summer day. Clipped fresh chives is very nice on a chilly day with a baked potato, melted cheese, crumbled bacon, topped with barely cooked broccoli…and butter… Enjoy!


chives, the day after division

Chives, a day after dividing the original plant.


Return to the top

The Imperial Moth: A Magnificent Creature!


What Is This Big Yellow and Purple Moth?


Imperial moth

Dorsal view of the Imperial moth on the glass storm door.


Most of us follow some sort of routine after sunset or before retiring for the evening. First, I bring the bird feeder indoors. If I don’t, the raccoons will surely empty it—every last seed. Once, a few years ago, they had removed the feeder from the hook and entirely disassembled it.

Second, I turn on the front porch light, and, later, secure the storm door. If I hadn’t done this a couple of nights ago, I would have missed this visitor. In the few seconds it took to grab the camera, the moth had already slid partway down the glass. I’ve never seen one of these Imperial moths, and it was an impressive sight!

After taking photographs, I gently nudged the moth into a glass bowl for the night. She didn’t seem terribly eager to fly away, and didn’t require much encouragement. The plan included show-and-tell with a couple of neighbors the next morning before releasing the moth to the trees down the block.


This Imperial Moth Is a Big One


Imperial moth

This female moth has a 5.5″ wingspan.


This Imperial moth has a wingspan of 5.5″, although adults normally measure from 3″ to 7″ wide. This one is a female. Males have more purplish-brown spotting on their wings. Another distinction involves the antennae on males, which are feathered in order to more easily detect pheromones given off by females.

In formal circles, she is known as Eacles imperialis imperialis (Drury, 1773). The Imperial moth is found in rural and suburban habitats from Argentina north to New England, and, in the United States, from the Rocky Mountains east to the Atlantic Ocean.

In the northern U.S. and Canada, its populations have been in decline since the mid 1900’s due to artificial lighting, pesticides, and diminishing habitat. This moth is quite common throughout the mid Atlantic region.


Life Cycle of the Imperial Moth: 4 Stages


1. The Egg

A small caterpillar emerges from the yellow egg in 10 to 14 days, consuming its shell (chorion). But the young caterpillars might roam for a few days, I’ve read, before settling down on the branch of choice. (***Update***: Eggs can hatch within a day or two, as documented under “They Hatched!”, below.)


2. The Five Instars

When it emerges from the shell, the larva can puff itself up to about 1/3″ long, appearing larger. The black spines (scoli) at the head and the posterior end might ward off predators.

After feeding for a while, the larva is ready to molt. The caterpillar attaches silk to the main vein of the leaf, and grasps the silk with its legs and prolegs. Each time the caterpillar molts, it expands, and the exoskeleton firms up. Sometimes the larvae eat their exoskeletons for the protein content.

As members of the Saturniidae family (the giant silkworms), Imperial moth larvae undergo 5 instars. During the first instar, the larvae are orange with black crossbands, and have short hairs. They grow darker after each molt, although there are regional variations and subspecies.

By the last instar, the caterpillars are 3.5″ to 5″ long. Color morphs will be dark brown, burgundy, or green, and they have long hairs and shorter spines. In sensitive people, these hairs and bristles can cause a rash.

The dark colored larvae have white spiracle patches, while green caterpillars have yellow spiracle patches. Spiracles are breathing pores, located in a line down each side of the caterpillar.

The University of Florida has excellent photographs at their website.

Food Sources

Larvae of the Imperial moth feed on native oak, maple, sweet gum, sassafras, and pine trees. Some websites indicate the caterpillars’ preference for pine trees. They also feed on eucalyptus, box elder, and Norway spruce. Less commonly, the larvae feed on elm, hickory, persimmon, honey locust, and many others.

This caterpillar is a favorite food source for birds.


3. The Pupa

After the 5th instar has matured, it burrows into the ground to pupate. The Imperial moth does not make a cocoon, as other silk moths do. The overwintering pupa is dark reddish brown to black, and has appendages on the posterior end that help it rise in the soil just before the adult emerges. While buried, it is not vulnerable to birds, although burrowing animals might eat it.


4. The Adult Moth

Adults emerge, usually at dawn, to mate. In the northern part of their range, adults appear in mid-summer (June-August). In the southern part of their range, they emerge over a longer period of time, from April through October.

Imperial moths have only one brood per year. In warm areas where they’re found, some observers have stated that they have 2 broods. But it is believed that the one brood is actually emerging over a prolonged period of time.

Males appear before the females. After mating, female Imperial moths lay eggs on foliage at dusk.


A Mommy Moth!


The Imperial moth

This is the ventral surface of the moth, and what I saw first. “Oh, wow!”


It appeared that the right hindwing had been damaged. So, I didn’t think she had recently emerged from her pupa. Imperial moths live only a week or two, for the sole purpose of mating and laying eggs. Their mouth parts have been reduced, preventing them from feeding. Neither the male nor the female takes sustenance as an adult.

To make the Imperial moth more comfortable during her overnight accommodations, I added some greenery from the garden. No, not for the purpose of providing food. I just thought she would feel more at home, while being held captive, until she could return to her natural habitat. Incidentally, people also benefit, psychologically, when we’re in the presence of living plants.

There was a surprise the next morning. A dozen eggs had fallen under the greens to the bottom of the bowl. So, dutiful subject that I am, I will place them on the leaves of an appropriate tree.

What fun! (Behemoth or Beshemoth?)

(***Update***: Over the past week or so, I’ve noticed a few more Imperial moths flying through the yard. Two of them were eagerly followed by hungry birds, but I didn’t see the birds catch them. 8/3/2020).


yellow moth eggs

Here are some of the eggs.


They Hatched!


caterpillars eating maple leafBy yesterday morning (7/25), about 2/3 of the dozen eggs had hatched. That was unexpected! So, I took a few leaves from the red maple tree (Acer rubrum) by the mailbox and placed them in the bowl. This morning, it was clear that they had begun eating. The edges of the leaves were nibbled (photo, right), and tiny dark feces fell to the bottom.

(***Update***: When I read that Imperial moths can be raised in captivity, I decided to keep the eggs. I assume that Mommy Moth laid the rest of her clutch after I’d released her. 8/4/2020)

The remaining eggs hatched last night, and those caterpillars were visibly smaller, but only slightly so, than their older siblings. I brought them to the kitchen table to photograph them. If they weren’t eating (the maple leaf, that is), they headed toward the brightly lit patio door, requiring persistent redirection. This reminded me of sea turtle hatchlings scurrying instinctively toward the water.


First Silk For the Imperial Moth

I gathered all but a few of the caterpillars, placing them and a maple leaf in a bag for release. At the maple tree, I placed each one on a leaf, until it “stuck”.

Newly hatched larvae attach themselves to the leaf with a fine silk thread, apparently not just during molting. When I picked up the tiny caterpillars to place them on the leaves, I could feel the resistance of an invisible thread. Smart little caterpillars.


White Hairs

Something else I noticed concerned those hairs on the caterpillar. All caterpillars had the black scoli and many white hairs. Most of those hairs seemed to be somewhat irregularly placed on the caterpillar, although others were extensions of the scoli. And, coincidentally, the maple leaves had fine white trichomes (extensions of the epidermis) on the back of the leaf, mostly along the main veins. The trichomes and many of the hairs on the larvae looked exactly alike.

It looked as though they might have picked up some of those trichomes, because some caterpillars had several hairs around their heads, and others had very few. Most hairs on the segments appeared to have been randomly placed and at odd angles to each other.


caterpillars, maple trichomes

Caterpillars and trichomes on maple leaf.


***Update***:  The following section was added 9/14/2020.


New Food For the Imperial Moth


imperial moth caterpillar

This caterpillar has been feeding on crape myrtle. No hairs!


For a few days, I added different types of leaves to see if the caterpillars demonstrated a preference. They were not interested in loropetalum, oak, holly, or passiflora. They did, however, love the crape myrtle—more than they liked the native maple. When offered a buffet of several kinds of freshly picked leaves, including maple, the caterpillars ate only the crape myrtle. How perplexing that the caterpillars preferred this non-native tree (Lagerstroemia indica)! And, surprisingly, they lost all their white hairs (photo, above) after feeding on crape myrtle for a few days.

To attract more wildlife to your property, plant a large number of native plants. As we’ve seen with this imperial moth, our native insects and birds will feed on some non-natives as well. But the best bet is to plant more natives than exotic species of plants. Choose plants that flower at various times of the year to attract more species of insects and animals. And plant them in multiples; a single specimen plant might not get the attention from a female insect looking for a nursery to host her young. Contact your local native plant society for plant species recommendations.

Keep in mind that lawn chemicals and insecticides could kill imperial moths while they’re pupating in the ground.

I released the caterpillars to a 6′ crape myrtle. This plant had volunteered in the front garden from seed and was transplanted into a 5-gallon pot. The larvae regrew those fine white hairs and now all caterpillars are thriving in their new home!


Mature imperial moth caterpillar on crape myrtle stem.

Imperial moth caterpillar on crape myrtle in the Charlotte garden.


Return to the top

Bees and Butterflies: At Home In Your Garden


National Pollinator Week: June 22-28, 2020


lavender, for bees and butterflies

Lavender and honey bees.


In 2007, the U.S. Senate passed a bill designating one week in June as National Pollinator Week. This legislation recognizes the importance of pollinators, including bees and butterflies, in our food supply and in the health of all ecosystems.

Every third bite of food we consume is directly attributable to pollinators. The global economic value is worth between $300 billion and $600 billion per year. Around 85% of all flowering plants are pollinated by insects, ensuring the regeneration of forests and fields as well as high yielding edible crops.

Our morning coffee beans are primarily self-pollinated, depending on crop species. Introducing bees, however, can increase the yields and lower costs of production.

In tropical regions of South America, Africa, Indonesia, and, more recently Australia, a tiny midge is responsible for pollinating cacao trees, bringing us chocolate. Chocolate contributes, incredibly, $100 billion annually to the global economy.

In the southern hemisphere, pollinator awareness programs take place in November. The Australian Government’s Department of the Environment recognizes November 8-15 as their pollinator week for 2020. Many countries throughout the world observe this initiative, and local organizations sponsor programs to raise awareness.

An outdoor project can be an enjoyable and healthy way to use our time. Having the children participate will teach them valuable skills they will carry with them wherever they live.


And, if there’s one thing we could use more of, it’s nature.


bee box

A bee house.


What Bees and Butterflies Need
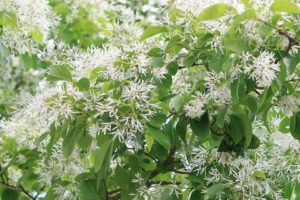
 

All living creatures need food and water, shelter, and a place to raise their young. By adapting the way we maintain the property around our homes, we can achieve both an attractive landscape and one that fosters populations of wild creatures. Currently, 40% of the insect pollinator species are at risk of extinction. A few of us can make a small difference in our neighborhood; millions of us can really shake it up!

Houses—entire communities—generally have been built after felling all the native trees, bulldozing the rest, and covering the ground with a high maintenance lawn. Streams were diverted to concrete pipes underground, taking habitat from frogs, salamanders, and turtles. Where this tradition is changing, developers are roping off and protecting native stands of trees and understory species.

Maybe the builder spotted in a fast growing silver maple, a row of clipped hollies along the foundation, and a couple of forsythias in the back. Well, that won’t do much for all the bees and butterflies, or for the hummingbirds, bats, moths, and beetles that pollinate our crops and wild plants. And right there, in this yard and in that yard, lie the broken links in the food chain. Our monocultured and unnaturally manicured properties are sold as low maintenance, but there’s little life there.


The Missing Elements


dragonfly


We concentrate instead on creating an “indoor oasis”, untroubled that the quiet stillness outside the door is not what Mother Nature had intended. No birds chirping or warbling…no cicadas or katydids…no lizards leaping for their dinner…nowhere for the dragonfly to land.

Yes, we need more nature in our lives. By cultivating a relationship with the natural world, there’s more than just a pretty sight beyond the living room windows. There’s life. Birds will continue to follow million-year-old migration paths. Mason bees and swallowtail butterflies will secure homes for their young. And there will be less talk of scarcity.

Need to feel better? Try gardening!


1. A Garden of Annuals for Bees and Butterflies


marigolds for bees and butterflies

Bumble bees in the marigolds.


Maybe this week’s goal is to carve out a section of the big lawn in the sunny back yard, and plant a flower garden. Mid summer isn’t too late for annuals, either from seeds or from transplants. Or, for now, consider how your family can use the property in the future. It’s always a good time to decrease the amount of lawn space we have to mow, fertilize, and treat for insects and diseases.

Be sure to plant significant drifts of flowers instead of a dot of zinnias here and a couple of marigolds over there. Large blocks of similar colors are more likely to get attention from pollinators. If your space is limited, though, there are some options. Sunny windowbox gardens and pots filled with bright colorful flowers will generate interest from the pollinators. Or perhaps there’s room for hanging baskets.

Each pollinator has its own preferences. Hummingbirds are attracted to the color red, but bees can’t see it. Bees are initially attracted to blue, yellow, and white, and then will visit a red flower nearby. Hummingbirds can feed from long tubular flowers, but hover flies need short little flowers.

At night, moths can detect white or pale colored sweet-smelling flowers that are open at that time. Almond flowers are pollinated primarily by honey bees, and tomatoes by bumble bees. Butterflies are especially interested in landing platforms, such as those found on plants with wide, flat flowers.


What Is An Annual?

An annual grows from a seed that germinates, generally, in spring or summer. It grows for several weeks to a few months, matures, and then begins to flower. Many species of annuals bloom all summer, until frost ends their lives in autumn, roots and all. But, by then, the plant will have set seed, with help from the local pollinators. An annual completes its life cycle within one growing season.

Those seeds will remain dormant over the winter, protected by their seed coats. With favorable weather conditions next spring, some of the seeds will germinate. Many, however, will be consumed by small mammals, birds, and insects.


What Do Pollinators Do?


bumble bee on passiflora

Bumble bees on passion flower vine. Arrangement of flower parts facilitates pollination.
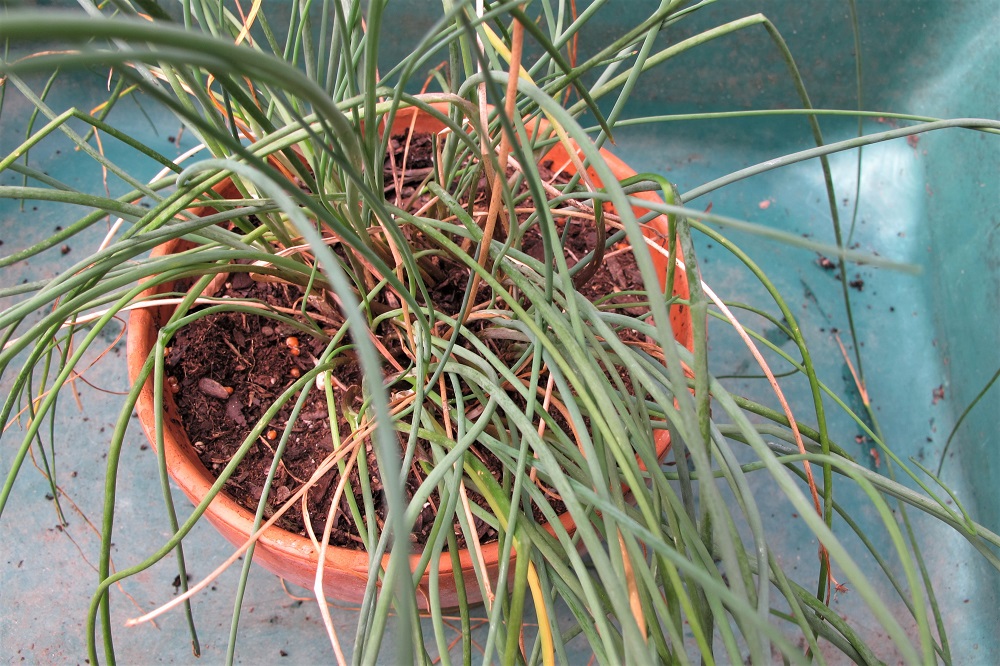
 

Bees and butterflies, and other pollinators, transfer pollen grains from the male anthers of a flower to the stigma, the female part of a flower. Sometimes male and female flowers grow in separate flowers on the same plant (that’s a monoecious plant). And other plants have either all male or all female flowers (dioecious plants). Some have both male and female reproductive elements within each flower (perfect flowers).

Pollinators don’t do this intentionally. Instead, their goal is to collect the flowers’ pollen and nectar. They inadvertently pick up the pollen on their hairs or wings, after being lured in by the flowers and the sweet nectar. Then the pollinators transfer pollen from flower to flower, from plant to plant, as they forage. Thus, they enable fertilization of the ovules, germ cells in the ovary of the female flower.

The male and the female parents must be the same species in order for their chromosomes to be compatible. However, interspecific and intergeneric hybrids sometimes do occur among closely related individuals.

The end result is a ripe fruit with viable seeds. That could be a zinnia’s seedpod, for example, or a blueberry, a peach, or a tulip poplar’s samara.

Cross Pollination

Ah, the genius of nature. Pollen grains and stigmas in many species mature at different times, preventing self-pollination.
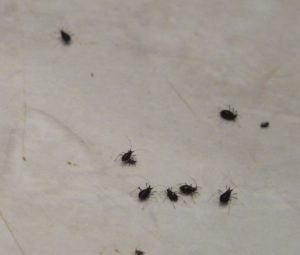
Moving pollen among different plants of the same species permits cross-pollination, resulting in stronger genetics and, potentially, a better future for the species. Apple trees and blueberries are two crops that benefit from cross-pollination.
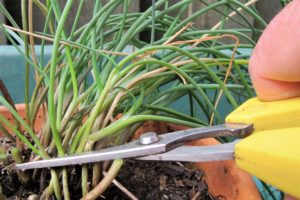
 

Single? Double? Triple?


double pink vinca--less nectar for bees and butterflies

Catharanthus ‘Soiree Double Pink’, an annual vinca. Extra petals replace reproductive parts.


Flowers with single rows of petals usually have more pollen and nectaries than those with a more complicated petal structure. Plant breeders all over the world have brought to market thousands of these kinds of fluffy triple-flowered hybrids, and they are beautiful. That’s fine, for aesthetics.

But, for bees and butterflies, there’s less treasure for them in flowers filled with petals. Reproductive structures that produce nectar and pollen are often reduced and replaced with additional petals (photo, above). Collecting pollen or nectar from these packed doubles is less efficient, and requires extra visits to gather sufficient quantities. So, pollinators will look for more desirable plants elsewhere, to conserve energy, and avoid such anomalies of nature.

When choosing the varieties for your annual garden, keep these details in mind. Gardens loaded with heavy producers of nectar and pollen (in other words, single flowers) will better serve the pollinators that visit them.

Sunflowers

sunflower seeds for birds, bees and butterfliesMany varieties of recent sunflower introductions have been hybridized to grow flowers with very little or no viable pollen at all. When looking through catalogs, make note of the ones called “pollenless”. These varieties will make less of a mess on the credenza and won’t cause you to sneeze. But they have little to offer bees and butterflies.

Pollenless sunflowers won’t develop mature seeds filled with sustenance for birds and other animals. If pollinators and full seedpods are what you want, ask the seed supplier for varieties that make edible seeds, not just edible flowers.

These varieties of sunflowers will attract pollinators and make edible seeds: ‘Big Smile’, ‘Black Peredovik’, ‘Chocolate’, ‘Giganteus’, ‘Hopi Black Dye’, and ‘Kong Hybrid’. Also, ‘Mammoth Grey Stripe’, ‘Mammoth Russian’, ‘Paul Bunyan’, ‘Royal’, ‘Royal Hybrid 1121’, ‘Sunzilla’, ‘Super Snack’, and ‘Titan’.

Sunflowers have a row of showy ray florets surrounding the disc florets. Disc florets open slowly over time, from the outer edge to the center, ensuring many visits from different pollinators.

The Asteraceae family is perhaps the largest, with 1900 genera and over 32,000 species. (The orchid family is its main rival, but no one knows exactly how many species are in either family.) Members of this extended family include sunflowers, dianthus, lettuce, coreopsis, marigold, zinnia, coneflower, gerbera daisy, chrysanthemum, and shasta daisy.


Where to Plant?


squash flowers

Thin peduncle (flower stalk) under summer squash flower indicates a male flower. A female flower has a rounded peduncle.


A large bed of color around the patio or the mailbox, a free-standing raised bed, and a border close to the vegetable garden are just some of the possibilities. Farmers often include wide bands of wildflowers alongside their fields of crops for better pollination and heavier yields.

One plant that attracts all sorts of pollinators is ‘African blue’ basil. This is a sterile herb—unable to set seed—so it flowers constantly. Other varieties of sweet or flavored basils customarily are used in the kitchen. Plant an ‘African blue’ basil in early summer, close to tomatoes, peppers, and squash to encourage bees to visit the veggies. And let it flower.

Check with local garden centers to see what they have available. Ask for help choosing annuals—seeds or transplants—that attract pollinators.

Before you do any digging, ask your municipality (call 8-1-1) to mark underground utilities. Whether you’ll be tilling the area or digging it by hand, you’ll certainly want to avoid damaging any of those lines.

Locate the garden where a source of water is easily accessible. New transplants and young seedlings will need consistent moisture until they’re established. During summer drought, water the bed thoroughly every week or so.

Sun or Shade?


fuchsia flowers

Fuchsia flowers.


Find an area that gets full sun if you want lots of flowers. Full sun is at least 6 hours, but annuals will positively thrive in more sun than that. Summer annuals blooming heavily in sun will attract the most pollinators.

But several species prefer shade, such as impatiens. The ‘Imara’ impatiens, resistant to impatiens downy mildew, provides a carpet of color under the trees and shrubs. This plant attracts bees and butterflies, and also hummingbirds.

Where summers aren’t too hot, the fuchsia baskets (photo, above) will entice the hummingbirds to visit every day, like clockwork. This plant does well in dappled shade or early morning sun. And it likes moist soil. As the temperatures climb and fuchsia fails, hummingbirds will flock to the single petunias and salvias, which need lots of sun. They also visit herbs in bloom, including basil and lavender.


How Big Is Big?

hummingbird at feeder

Hummingbird.

With proper soil preparation and regular maintenance, a plot that measures 10′ x 6′ can become a magnet for pollinating insects. The flowers will buzz with activity from perhaps dozens of species of bees and butterflies, and moths and hummingbirds, too.

This country is home to over 4,000 species of bees alone! More than 20,000 species live around the globe. Some live in colonies, and many are solitary creatures. Interestingly, the honey bee is not native to the United States. It was brought by European settlers hundreds of years ago and proliferated throughout the country.

To increase the activity and the number of pollinating species lured in, make the bed even larger. And include more variety in the plants selected. Use masses of the same plant, and repeat elsewhere in the garden, if you want. Planting larger blocks of a particular color or flower type will attract more pollinators than scattering them about.

If this is your first gardening effort, keep the garden a manageable size so you’re not overwhelmed. There will be maintenance involved! Weeds, no doubt, will have to be pulled. And your garden will need fertilizer a few times through the growing season for the best results. An inch or two of mulch will help cool the soil, retain moisture, and restrain weeds. You can always expand the area as you gain confidence in your skills.

Container Gardens

Even in a very limited space, some of the local bees and butterflies will find the lovely combination pots on your balcony or the patio. Use bright colors, and have your camera ready—for the flowers and their visitors. Once they find their preferred flowers, pollinators will come back day after day.

Remove seedpods to encourage more flowers to develop, although finches and other birds will feed on seeds remaining on stalks late in the season. Fertilize regularly to keep the plants in prime condition. Plants in containers might need daily watering.


Added Benefits

  • Vegetables and Fruits


bee and blueberry flower

Blueberry flowers.


Insects are on a constant lookout for sources of pollen and nectar. You might discover your fruit trees, blueberries, and vegetable crops yielding heavier harvests since installing a flower garden.

Edible crops and plants growing naturally in or around your property will benefit from complete pollination because of the larger populations of pollinators. Include plants whose flowers attract pollinators early and late in the growing season, as well as during the summer months.


I grow many kinds of greens (photos, above) in the cool seasons. Before they’re replaced with summer crops, I allow them to go to flower in late winter to early spring. Most are biennials in the Brassicaceae family, including kale, collards, broccoli, arugula, and mustard greens. Although they don’t require pollination for a harvest, the cruciferous flowers provide pollen and nectar for bees, braconid wasps, hover flies, and other pollinators at the time of year when little else is available.

Pansies and violas provide sustenance for bees that emerge on pleasant winter days. These colorful cold-tolerant biennials grow in garden beds and in containers.

  • Braconid Wasps

braconid wasp, aphids

Braconid wasp.

The tiny non-stinging braconid wasps are hardly noticeable, but they help keep populations of live-bearing aphids in check. A female braconid wasp deposits an egg in or on an aphid. After hatching, the wasp larva consumes the tissues, killing the aphid. One braconid wasp can parasitize 200 aphids in her brief lifetime. Adults emerge to mate, and a new generation of females will begin hunting aphids.

Pollen is an important food source for the braconid wasps, which will feed on some aphids as well. So, even these tiny insects help pollinate plants.

Photo at right shows a wasp about to deposit some eggs. White aphids have been parasitized, and the others are alive. I’ve often seen leaves with a hundred aphid mummies (the aphid’s empty exoskeleton) attached, with no living aphids.

Planting a wide variety of flowers helps these beneficial insects. Self sustaining populations of beneficials contribute to the overall health of your garden, reducing or eliminating the need for pesticides.

  • For the Birds

Let’s not forget about the birds! Although most species, other than hummingbirds, don’t play a major role in pollinating plants, songbirds certainly have a place in any natural ecosystem. We can play an important part, in our own yards, by maintaining an environment that fosters healthy populations of native animals.

ruby crowned kinglet

The tiny ruby-crowned kinglet at a winter feeder.

The numbers of many species of birds are declining, due primarily to human interference. We’ve removed their habitat in favor of expansive lawns and non-native trees and shrubs. And we’ve killed off their food sources by spraying pesticides every time a “bug” shows up. Can we please adopt a new attitude?

After all, birds help by consuming huge numbers of insect pests that otherwise could destroy crops or damage potted plants. Birds and bats keep mosquitoes and moths in check. More insects in the garden will support more avian activity.

Restoring healthy populations of all native animals and insects will return balance to the ecosystem. Sometimes, though, the songbirds fall prey to foxes, snakes, or hawks. Predator and prey: yes, folks, that’s how it works.

There are many benefits to living in modern society, but loss of habitat for wild creatures is not one of them. Letting nature be is a crucial step in re-establishing native populations and preventing extinctions.

Let ‘Em Seed About

Finches, sparrows, and chickadees feast on seeds that develop after the flowers fade. So, don’t be too hasty to deadhead the last round of flowers. Allow them to remain in place through the fall and winter, so the birds have another food source available when they need it. Birds will soon recognize your property as a wellspring of year-round sustenance.

Bright yellow and black American goldfinches are fond of zinnias, cosmos, salvias, and asters that have gone to seed. In late summer and autumn, the finches, northern cardinals, thrashers, blue jays, and other animals eagerly consume seeds atop the black-eyed Susans and tall sunflowers. And you might notice plants germinating next spring from seeds the birds overlooked.

Water


butterfly on lily pad


Include a source of clean water for the birds. A birdbath in the garden is fine, or you could keep a large plant saucer on the deck. Change the water frequently to prevent mosquito wrigglers from reaching adulthood.

The bees and butterflies also will appreciate a small saucer of water on a hot summer day. Place a flat rock island in the water for safe sipping. A mud puddle, just a bare patch of wet sandy clay, provides moisture and minerals for butterflies.

  • Cut Flowers

Another benefit of growing a garden of annuals is the almost endless supply of cut flowers for indoor arrangements. Include plans to expand the garden next year, to keep the pollinators happy, too. Check with your agricultural extension service to see which flowers last longest in a vase.

Try Some Of These For the Bees and Butterflies

Ageratum, alyssum, bachelor’s button, cleome, cosmos, fuchsia (hummingbirds), herbs, impatiens, lantana, marigold, and pentas. Rudbeckia (annual and perennial varieties of black-eyed Susan), salvia (annual and perennial types, a hummingbird favorite), some of the sunflowers, tithonia, verbena, and zinnia.


Headings

Page 1: National Pollinator Week, June 22-28, 2020, What Pollinators Need (The Missing Elements), and A Garden of Annuals for Bees and Butterflies (What Is An Annual?, What Do Pollinators Do?, Cross Pollination, Single-Double-Triple?, Sunflowers, Where To Plant?, Sun or Shade?, How Big Is Big?, Added Benefits, Vegetables and Fruits, Braconid Wasps, For the Birds, Cut Flowers)

Page 2: Perennial Favorites For Bees and Butterflies, Lavender, Herbs, Brush Piles, Go Native, A Comprehensive Garden Plan (Dream, Plan, and Implement, On the Right Path, Stone, Diversify, Some Native Woody Plants, Asking for Help, Dig In!, Small Is Beautiful), and Links

Return to the top

A Passion For The Gulf Fritillary Butterfly


2019


The Gulf Fritillary Butterfly


gulf fritillary butterfly

Female gulf fritillary butterfly.


At the Hendersonville Garden Jubilee in May, I bought a small Passiflora vine as a gesture of support for Bee City USA. One third of the food we eat and 80% to 90% of all flowering plants rely on pollinators to set fruit and, therefore, to reproduce. Bees are efficient pollinators, but other insects and animals, including butterflies, beetles, moths, bats, and hummingbirds, also provide this service. This article concentrates on attracting the gulf fritillary butterfly to your garden.


bumble bee on passiflora

Bumble bees love this passionflower vine (Passiflora).


Passiflora incarnata


Planting the passionflower vine had to be delayed until late summer, after the siding replacement had been completed. And then the plant took off! 

Passionflower vine (Passiflora incarnata), also called maypop, is the primary food source for larvae of the beautiful gulf fritillary butterfly. This herbaceous perennial is native to the southeastern quadrant of the U.S., in USDA zones 5 to 9. A substantial vine, growing to 20′ in length, it blooms from late spring to late summer. Its pale purple 3″ flowers yield kiwi-size yellow-orange fruits from which you can make jams and jellies, although I haven’t tried it.

Other species of Passiflora can host larval fritillary populations, but some are toxic and will kill the caterpillars. So, choose carefully! Usually, the female senses chemicals with her antennae and determines suitability of a particular plant for oviposition (depositing the eggs).

Passionflower vines also host the variegated fritillary, the Mexican fritillary, the Julia butterfly, and the zebra longwing. I was hopeful but not overly optimistic that the caterpillars would show up this late in the season. But I have since learned that caterpillar activity of the gulf fritillary ordinarily takes place in late summer.


gulf fritillary butterfly cqterpillar

Caterpillar of gulf fritillary butterfly.


If You Plant It, They Will Come


It wasn’t long before the vine had wrapped its tendrils around the coleus and the Salvia coccinea planted only 2′ away.

I saw the bright orange butterflies a few times this summer, flying around the gardens. But now they visited the vine almost every day to lay eggs, and then the nearby hanging basket of flowers to sip nectar. Adults feed only on nectar, including flowers of lantana, zinnia, Buddleia (butterfly bush), salvia, and Liatris.


zinnia, calibrachoa basket

Hanging basket with zinnias and calibrachoa.


Soon, holes appeared in the leaves…already?…and then bigger holes. Success! Long gone are the days when I would have implemented measures to “remedy” this behavior.

Close inspection revealed several orange caterpillars with purplish stripes and black bristly projections. Then more appeared, wave after wave, as the older ones matured and crawled away to pupate. I would not have thought that a plant this small could sustain more than 40 caterpillars over a few short months. But it did, although some chrysalises have succumbed to a fungal disease. Recently I noticed more small caterpillars, even though we’ve already had a light frost.

Thank goodness, I thought, because this garden isn’t large enough for this vigorous vine. These caterpillars and their voracious appetites will help keep this young plant in bounds. The plan is to dig it up and to transplant it to a bigger garden, when I move. I’ll remove all that I see, or they will take over the neighbors’ gardens as well.


Life Cycle of the Gulf Fritillary Butterfly


gulf fritillary butterfly egg on tendril

Butterfly egg attached to tendril of the vine.

Gulf fritillaries (Agraulis vanillae) are commonly found in open sunny habitat, grasslands, woodlands, fields, and in gardens. These subtropical butterflies range from Texas to Florida and migrate north from Missouri to Delaware. This butterfly is also found in Central America and in Hawaii.

The gulf fritillary and the zebra butterflies belong to a group called the longwings (Heliconiinae). Larvae of both species feed on passionflower vines. Although the gulf fritillary resembles other fritillaries, it is, in fact one of the longwings. Other fritillary larvae (meadow and great spangled) feed on wild violets.

Predators avoid longwing butterflies due to several odorous chemicals produced in abdominal glands. Passionflowers contain poisons (alkaloids, cyanogenic glycosides), which are picked up by the caterpillars. These chemicals make them distasteful to birds and other animals, but less so in the gulf fritillary.

After mating and consuming protein-rich pollen for several days, the female butterflies lay eggs on passionflower vines. This caterpillar prefers mature foliage, if it is plentiful, leaving other butterfly caterpillars to feed on the young leaves at the tips. I’ve read conflicting information, which states their preference for the young growth tips of the vines. There, the plant doesn’t produce nectaries on its foliage, which attract ants that defend the plant from butterflies and larvae.

Adults measure about 2 1/2″ to 3 1/2″ wide, with females being larger and a bit darker than the males. Females also have more pronounced markings, and both have white spots on the undersides of their wings.


gulf fritillary butterfly on lantana

Gulf fritillary butterfly on lantana.


Eggs and Larvae

Eggs are yellow when first laid. They hatch in 3 to 8 days, depending on temperature.

The caterpillar molts 4 or 5 times over the next 11 to 20 days, and then crawls to a suitable point of attachment for its chrysalis. For 5 to 12 days, according to the websites I read, the caterpillar pupates. But the chrysalis by the front door (below, right) has been hanging around for at least 2 weeks. It is alive; it reacts when I nudge it. A small sign just under the doorbell, where the pupa resides, requests “Please Do Not Disturb.”


The small chrysalis, at only 1 1/8″ in length, could easily be mistaken for leafy debris. But hanging on the door trim or on the shutters, it becomes conspicuous. In fact, the first chrysalis I saw, also on the door trim, had been partially eaten, probably by a resident lizard. Although I’m tempted to move them to the shrubs to “save” them, it’s better to let nature decide. If this were a rare species, I might think differently. (***Update***: Well, someone dined on this chrysalis, too! 11/2019.)

Adults typically live for a few to several weeks in warm weather, and longer in cooler temperatures. This butterfly prefers warmer regions, and dies when it gets close to 20°F. The gulf fritillary butterfly can produce several generations per year in warm winter zones.


Typical Butterfly Life Cycle


The typical life cycle of a butterfly:

  • starts as an egg,
  • which hatches into a caterpillar (the larval stage),
  • which pupates in the chrysalis (the pupal stage), undergoing metamorphosis,
  • and then emerges as the adult butterfly.

The gulf fritillary overwinters in cooler zones as adults. Do them a big favor and build a brush pile where they can find shelter in cold and inclement weather. Simply stack piles of twigs, branches, straw, and weeds, and let fallen leaves blow in. Birds, insects, and other creatures will appreciate this kind gesture. And you’ll get some compost out of it.

I give the results of this small experiment Four Stars, an A+. As I mentioned earlier, I was pleasantly surprised by how readily the butterflies found the passionflower vine, and by the number of caterpillars feeding from it. If you’ve been considering what to plant to attract pollinators or pretty butterflies, you won’t go wrong with this one. Just give it some space!


passion flower vine eaten by caterpillars

What remains of the Passiflora. Good job, caterpillars!


Return to the top

How To Transplant Houseplants

2019


Time To Transplant Houseplants?


potting soil, how to transplant houseplants


As the end of the growing season approaches, we need to prioritize all the chores that need attention. Do the houseplants require transplanting? The plants that summered outdoors must come back inside soon, before frost damages the foliage or kills the plants.

They’ve been luxuriating on the porch, in higher humidity and brighter light than they usually receive inside. It’s no wonder they look fabulous! So, reintroduce them to indoor conditions while the days are still somewhat long and before the furnace kicks on and dries the air.

Perennials that looked picture perfect in May now look a little stressed after those record high temperatures. And the tired vegetable garden needs fresh compost or aged manure before setting the fall crops.

In a few weeks, flowering bulbs will arrive at garden centers…with pansies, violas, snapdragons, dusty miller, and Heuchera, trailing ivy, and hardy grasses. You’ve been dreaming of those beautiful combination planters, like the ones you saw last autumn at the garden center. But first things first.


Should We Transplant Houseplants Now?


Let’s start with the houseplants. Exposing tropicals to cooling temperatures outdoors, as autumn takes hold, could stress your houseplants. And some of those plants are pleading for attention right now.

While certain plants can tolerate cooler temperatures (cyclamen, ferns, English ivy, succulents, ponytail palm), others can’t. The aroids (peace lily, Dieffenbachia, Anthurium, Philodendron, Alocasia, Chinese evergreen, pothos), prayer plants (Calathea, Maranta), and some of the begonias, for example, should come indoors before temperatures dip below 60°F.

Although they won’t be killed by a few nights in the 50’s, or even the 40’s, you don’t want to prolong their discomfort. Chilling stresses many of our tropical houseplants, and can rot roots and disfigure foliage.


Inspect Them First


Scale on Ficus neriifolia (leaves are 7/16″ wide).

You probably won’t need to transplant houseplants, summering on the porch, that were repotted in the spring. All you need to do now is to inspect them for insects and spider mites before bringing them indoors. Check the bottom of the pot for slugs and sowbugs hiding around the drainage hole.

Clean up the leaves, too, and remove any that are discolored, insect-eaten, or damaged. Peel away the entire leaf, so none of the leaf stems (petioles) remain that later will turn yellow or brown.

After the inspection, clean the pots, wash the saucers, and place the plants in front of the windows where they seemed to thrive last winter.


Horticultural Oil

The dwarf Ficus neriifolia contracted a scale infestation, so I sprayed it with a horticultural oil solution. For insects and mites, horticultural oil works very well. It smothers the pests and is safe to use on most plants, including edibles.

Wiping the horticultural oil solution on smooth leaves (fiddle-leaf fig, pothos, peace lily) with a soft sponge removes dust, grime, and residue from water and fertilizers. It gives them a nice luster without appearing artificial. Read the label; I prefer to use less oil than is recommended on the label—to start with, anyway. Horticultural oil makes surfaces slippery, so be careful.


fiddle-leaf fig

The fiddle-leaf fig, Ficus lyrata.


Do Your Houseplants Actually Need Bigger Pots?


potted plant bonsai

Evergreen bonsai.

Knowing if the plant needs repotting, when to repot, and how large a pot to use is half the battle.

Does it wilt often? Perhaps instead of repotting, the plant needs to be deeply watered. Or maybe the roots have rotted in waterlogged soil, or the water rushes right through without moistening the soil.

I’ve seen a lot of dead plants over the years, and many simply were in pots that were too large. “Aren’t we supposed to transplant houseplants every year, just like our children outgrow their shoes every year?” No; once they have matured, plants can stay potbound for quite some time.

“If I transplant houseplants into bigger pots, won’t that make them grow faster and bigger?” No, another myth! If you transplant houseplants into pots twice the size they need, they more likely will die faster.

Large pots hold large quantities of soil and water. When the moisture is not used by the plant, the sodden mass just sits there, cutting off the oxygen supply and rotting the roots. So, if the entire volume is not tightly filled with roots, the plant doesn’t need to be repotted.

Many houseplants like being potbound. English ivy (Hedera helix), pothos (Epipremnum aureum), Philodendron, palm trees, Ficus trees, African violets, succulents, snake plants (formerly Sansevieria, now Dracaena), and bonsai prefer somewhat cramped quarters. Many potted herbs (rosemary, lavender, chives, sage, thyme) also fare better when potbound. But, in order to ensure good health, gardeners must provide nutrients according to the needs of the particular plant, and according to the time of year.

It’s helpful to know the habits and preferences for each kind of plant. For example, although the 4′ tall variegated snake plant (Dracaena trifasciata ‘Laurentii’) eventually will need a 10″ or 12″ pot, its cousin, the dwarf bird’s nest species (D. hahnii), can stay in a 4″ or 5″ pot for many years!


Fertilizing Houseplants

Most tropical plants spending the winter indoors won’t need fertilizer until late winter or early spring. If they continue to grow and look healthy, and they’re receiving good light, though, diluted solutions (1/4 to 1/2 strength) can be added every 4 to 6 weeks. Err on the side of using less fertilizer in winter.

As long as they’re properly watered and fertilized, your plants can remain perfectly happy while potbound. In fact, they’re easier to manage this way, since there’s less likelihood of overwatering. But you’ll have to water more frequently.

Look for products formulated for foliage houseplants or for flowering plants. They’re available in several forms: timed-release prills (use a low dose from fall through winter), liquids, granules, and soluble crystals. Read the label.


Fungus Gnats

Plants in smaller pots are less susceptible to diseases, root rot from overwatering, and fungus gnats. Ever have those annoying little “fruit flies” around your houseplants? The simplest remedy is to allow the soil surface to dry out.

Female fungus gnats lay eggs on moist soil. When the tiny larval worms emerge, they eat small roots, sap on cuttings, fungus, and organic matter in the top inch or two of the soil. Let the surface of the soil dry before watering again, and you’ll have fewer fungus gnats. See if adding a 1/2-1″ layer of pine fines as a mulch might prevent gnats from laying eggs.

Yellow sticky cards are good for catching flying insects. A card placed horizontally near the plants, on the pot’s rim, or in a sunny window attracts the most gnats.


Save the Spider!

spider plant

A green spider plant.

The spider plant in the 4″ pot that your girlfriend gave you two months ago is literally crawling out of the pot. She propagated it from one of her own plants, so it has sentimental value.

Spider plants, related to other strong-rooted Asparagaceae (formerly Liliaceae) family members, develop roots that circle around the inside of the pot. The vigorously growing roots raise the entire plant higher in the pot, opening up air spaces around the root ball. This dries out the finer roots, and water gushes immediately through the drainage holes without moistening the soil. Clearly, it’s time to work on this one.


When Should I Transplant Houseplants?


A good time to transplant houseplants is in spring to mid- or late summer. Plants that recover slowly (for example, succulents) should be repotted, if needed, by mid-summer. In autumn and winter, plants receive fewer hours of daylight, photosynthesizing at a reduced level. Our slower growing tropicals don’t grow much foliage in autumn and in winter. And roots also are reluctant to grow.

Cooler temperatures, compared to the balmy summer days spent on the porch, cause systems to slow down. So, trying to force plants to grow at a time when they’re entering semi-dormancy often does more harm than good. Plopping a plant’s almost dormant root system into wet soil and expecting it to grow is asking the plant to do something against its nature. It would rather stay semi-dormant.

greenhouseProviding a greenhouse atmosphere—warm, humid, and sunny—keeps your houseplants in much better condition, even through the shortest days of winter. Optimal light levels increase rates of photosynthesis, respiration, and transpiration. As a result, they might grow almost as fast as they did in June.

But most of us deal with dryer air, energy-saving chilly nights, and dim lighting (in the plants’ eyes) until the hyacinths bloom outside.

Plants, both indoors and out, take on renewed vigor once the days lengthen closer to springtime. Some of us humans do, too.


How Big Should the Pots Be?


succulent dish garden

Succulent dish garden in ceramic bonsai tray.

I’ve grown dwarf peperomias and miniature succulents, such as Echeveria minima and Haworthia truncata, in 2″ pots for many years. Since the succulents are prone to rot in wet soil, keeping them very potbound decreases the chances. There simply isn’t that much soil in the little clay pot, and it dries fast in direct sunlight.

Most of the succulents I enjoy growing are on the small side, anyway. Almost all are in 1½” to 4″ pots, and others have been planted in larger, but shallow, bonsai trays (photo, right).

I brought with me from Maryland a 4½” pot of Drimiopsis kirkii, one of the leopard lilies, and it has yet to be repotted into a larger pot, 6 years later. Its cousin, Drimiopsis maculata, however, grows from bulbs which multiply faster than those of D. kirkii. So D. maculata gets divided more often, but they’re still in 4½” pots.

Dracaena hahnii, the dwarf snake plant, lived happily for years in a 4½” pot. The small, glossy-leaved Spathiphyllum wallissii would have complained if it had been bumped up into anything larger than its 6½” plastic pot.


pink cyc.

We’ve had this miniature cyclamen for years.


A pink flowering miniature cyclamen stays in its 4½” pot (photo, above), year after year. It is now coming out of dormancy and beginning to grow new foliage, contrary to what most other plants are doing. That’s because its growth cycle calls for cool to cold, but not freezing, temperatures in order to set flower buds. It will be fertilized accordingly, for a full canopy of marbled leaves.

The plant’s habit and its root structure help determine the required pot size. In general, transplant houseplants into pots that are only 1″ to 2″ wider, and only if they need it.


The Old Weeping Fig

weeping fig

Variegated weeping fig.

A weeping fig (Ficus benjamina), given time, will grow to the ceiling. Instead of raising the roof, its height can be managed by “aesthetically” cutting stems back in the spring, when it will respond faster.

I grew a variegated weeping fig in a 14″ pot for about 15 years, in front of a big window that received a few hours of morning sun. When the tree grew to almost 8′ tall, above the top of the window, I pruned it back a few feet. Then, when it regrew, all the foliage was once again in the sun and at eye level.


African Violets


African violet

A healthy African violet.


African violets (Saintpaulia ionantha) are happy to stay in 4″ pots for years. Miniature African violets need smaller pots than that.

A rule of thumb for pot size and an African violet is to plant it in a pot that is 1/3 the spread of the foliage. So, a 4″ pot will accommodate a plant that is 12″ wide. Plants in top condition might take a slightly larger pot, but you have to pay very close attention to moisture and soil drainage.

“What should I do with an African violet that has a long trunk?”

As these plants grow new leaves from the top of the rosette, older leaves lower on the stem die off. That’s part of their natural growth pattern. When the plant develops a trunk, it’s time to make an adjustment. But don’t do this if the plant is slowing its growth. Spring to mid-summer is a better time for this procedure.

Remove the plant from its pot and slice off the bottom third of the root ball. Shave off a small amount from the sides as well. Wash the pot, check the plant for insects (mealybugs, especially), and treat with horticultural oil if necessary.

Place a small amount of African violet potting soil in the bottom of the pot. These plants like peat moss in their mix. Set the plant in the pot, and fill in the sides with more soil, using a chop stick to firm soil in the gap.

Part of the trunk will now be loosely covered with soil, and it will grow new roots. The top of the root ball should be lower in the pot than it grew previously. (Yes, this is exactly what we don’t ordinarily recommend.) Water it in, using lukewarm (about 85°F) water. Keeping the soil too wet will rot the trunk and the roots.

Use the kitchen sink sprayer to wash soil off the leaves, using lukewarm water. Towel off the water drops, and let the plant dry in a warm location.

It’s less stressful for these plants if this is done every year or two, before the trunk grows a few inches tall. But I have seen perfectly happy violets with long stems curling over the edge of their pots.

“What are those marks on the leaves?”

Water the soil—always lukewarm for African violets—and avoid wetting the leaves. If water splashes on the leaves, absorb it with a towel, and let the plant dry in a warm place. As drops of water chill on this plant’s leaves, unsightly tan or brown rings and lines will be left behind.

Grow African violets at 70 to 74°, and fertilize regularly with a product formulated for this genus.


Less Is More

stack of clay pots, transplant houseplantsMove miniature species of plants into something only 1/2″ to 1″ larger, if they need it. I know; that doesn’t seem like it could make much of a difference. But for the plant whose roots, in the wild, might be crammed between layers of sedimentary rock on a blustery cliff, 1/2″ is plenty.

Large-growing plants require new pots up to 2″ wider in diameter. Peace lily (robust varieties of Spathiphyllum), weeping fig (Ficus benjamina), Chinese evergreen (Aglaonema spp.), and larger palm species can be moved from 6″ starter pots into 8″ pots. And, importantly, this assumes that the roots tightly fill the smaller pot.

Many of the tropicals will survive and prosper over the next several months, even while very potbound. If they’re already in 8″ pots, they’ll likely be fine until spring, when they can be potted on if needed. The 6′ tall fiddle-leaf fig in an 8″ nursery pot, though, can go into a 10″ pot, since the heated sunroom has floor-to-ceiling windows. Sunny conditions encourage plants to grow new roots, but carefully monitor soil moisture. Avoid watering houseplants (especially succulents) on cloudy days.

If growing conditions in your home are not ideal, but plants absolutely need to be repotted, transplant them now, before fall, into slightly larger pots. Wait until spring to transplant large houseplants, if it’s needed at all.

Houseplants don’t require repotting every year. Once they have attained a mature size, they no longer need to be moved into progressively larger pots. Instead, regularly fertilizing with products formulated for houseplants will supply all the nutrients they need.


Headings:

Page 1: Should We Transplant Houseplants Now?, Inspect Them First, Do Your Plants Actually Need Bigger Pots? (Fertilizing Houseplants, Fungus Gnats, Save the Spider!), When Should I Transplant Houseplants?, How Big Should the Pots Be? (The Old Weeping Fig, African Violets, Less Is More)

Page 2: Prepare for Transplant (Root Insects, Speaking of Spider Plants, Roots-Air-Water-Light) and Potting Up (Score the Root Ball, Potting Soil, Begin Filling the Pot, Downsizing, Water It In)


Return to the top


Tips For Planting a Wire Hanging Basket


2019


Tips For Planting a Wire Hanging Basket


hanging basket, zinnia, calibrachoa, yellow, purple

The 16″ wire hanging basket with purple calibrachoa, yellow and white zinnias, and yellow mecardonia.


Now that the weather has settled, it’s time to plant the hanging basket. Okay, it’s 43°F in Helena, Montana, so you’ll have to wait a while. But here in Charlotte, it’s already 90°. We’ve had beautiful spring weather for weeks now, and gardens all over town are showing new life.

It is confirmed once again that I could never move back to a colder winter climate. Picking tomatoes here in early June is commonplace rather than a rarity. In the past, I’ve lived where a ripe tomato for a Fourth of July barbecue won neighborhood kudos! It’s not the summer heat I look forward to but rather the longer growing season and greens that grow through the winter.

I bought several pots of annuals two weeks ago but haven’t planted them. The plan is to refresh the wire hanging basket, and to fill the front beds with color. Complicating matters, though, is when the new siding will be installed. Our building has been rescheduled to a much earlier date, so no gardening will take place until the work has been completed.


A Few Preliminaries


Can I Reuse Old Potting Soil In the New Hanging Basket?

The hanging basket that held blooming violas and a few perennials over the winter will be emptied. The old soil, which still has value in the garden, will be dug into one of the flower beds. Organic components (peat moss and fine pine bark, primarily) break down, enriching the soil.

Used potting soil can be broken up and thrown under the shrubs or topdressed in a thin layer on the lawn. More options include adding it to the compost pile and using it in the backfill when planting trees and shrubs. I never throw away old potting soil, and, of course, I’ll save the perennials. But for new hanging baskets, use fresh potting soil for the best results.

Soil in large planters can be used again if it still has good tilth and hasn’t been waterlogged. It’s good idea, however, to replace the top third of soil. If diseased plants grew in it, I would discard the soil.


Refresh/Reuse

paint colors

If the metal frame looks a bit tattered, now is the time to clean and dry it. Buy a can of spray paint, in the color of your choice, and freshen it up. Look for one that will stick to the finish on the frame. Some are metal; others are vinyl-covered metal.

Maybe your mother the artist has some ideas about color. Jazz it up a little in a shady spot, or color-coordinate the paint color with the flower colors. If you prefer classic black or bright white, those are fine, too. By the way, wire hanging baskets are also called “English Garden” baskets.

For a frame that looks only a little scuffed, try using a solution of horticultural oil (more concentrated than you would use for insects) wiped over the frame. I’ve used the oil to freshen used plastic pots, which often looked like new again. Be careful—horticultural oil makes surfaces slippery.


Line the Liner

Wire baskets are available with reinforced green sheet moss, but more often with a coconut fiber liner. I’ve used both, and have found the coco liners to be more durable, although I prefer the color of the moss.

If you need a new liner, garden centers stock both pre-formed liners and bulk rolls that can be cut to the length desired. Before shopping, measure the curve of your hanging basket, adding a bit extra, for a proper fit.

A Simple Trick

Here’s a trick I’ve used for many years: line the inside of the coco liner with a sheet of plastic. Reuse an empty mulch or potting soil bag, cut so it extends above the rim. The excess will be trimmed after planting. Now, punch several holes around the bottom third of the plastic to allow for drainage. In hot or dry climates, consider leaving the bottom 1″ to 1 1/2″ of the plastic intact. The soil and plants will absorb water that collects in the reservoir.

coconut

Coconut: source of coir for potting soils and coco liners for baskets.

This offers a few advantages. First, the plastic prevents soil contact with the coco fiber, delaying decomposition. A thick liner, made from coconut husks, will last an additional year or two.

Second, plastic prevents rapid evaporation of moisture from the soil. Plastic stops the hot dry wind from reaching the soil.

Third, plastic slows down infiltration of icy cold wind, delaying chilling of the soil in winter combinations.

And, fourth, soil won’t be lost through the thin, loosely woven spots in the liner. See if you can double up on the coco liner in those spots. And face the dark side of the plastic, if there is one, outward. This is less conspicuous than a bright yellow beacon peering out from the between the fibers.

Other Options

Perhaps you have other materials hanging around the shed that can substitute for a coco liner. A few layers of burlap, landscape fabric, an old blanket, or that unused fiber grow pot could work for this growing season. Still, I would line it with a plastic sheet for the reasons stated above.


wire basket, fabric liner

A repurposed grow pot, now used as a liner for the hanging basket.


Where To Place the Hanging Basket


bracket for hanging basket

Notice how weight is distributed along the vertical part on the left, pushing bracket against the wall.


Have you decided where the shepherd’s hook will be placed? Have you already installed a sturdy bracket on the fence or deck post? Well-constructed wrought iron is costly, but it lasts a long time. Look for the thicker, heavier hooks and brackets. Visit the hardware store for special anchors and instructions if attaching the bracket to a brick surface.

Make sure the bracket or the hook is large enough to accommodate your hanging basket. This isn’t a concern with smaller baskets but is often overlooked for the large ones. Hardware is available in different sizes, so measure first, or you might find that the large hanging basket you want to use won’t fit onto the shepherd’s hook you already have.

Sometimes it’s hard to determine whether the vertical part of the bracket should be placed above or below the horizontal part. Securing the vertical side below the horizontal arm, as in the image above, helps direct the force against the wall. The bracket is less likely to pull away from the wall or post.


Sun Or Shade?


House, tree in front


Pay close attention to the number of hours of direct sunlight the chosen location will receive. As the sun changes its path across the sky from one month to the next, the amount of sunlight will vary. A location near the front door might get lots of sun in April but could be in almost full shade once the trees leaf out.

Don’t expect a blazing burst of color from plants that need 7 or 8 hours of sun if you place the hanging basket under the semi-shady deck. Plant tags often erroneously indicate “partial sun/full sun” for plants that really need full sun. Partial sun to us gardeners, by the way, is 4 hours of sun.

Ask salespeople at the garden center for advice about light requirements. Petunia, verbena, calibrachoa, lantana, zinnia, and scaevola need full sun. Lobelia, bacopa, browallia, torenia, and some of the begonias will do well in morning sun and bright afternoon shade in this hot climate. Caladium, anthurium, ‘Non-Stop’ tuberous begonias, ferns, and foliage plants can take various levels of shade.


Choosing Plants For Your Hanging Basket


Plants have upright, mounding, or trailing habits. For smaller baskets, perhaps only mounding and trailing plants will fit. If single-variety monoculture is your preference (for example, a 12″ pot of purple Wave petunias or a 10″ pot of sky blue lobelias), go for it.


Geranium flower.


If you want a pot of zonal geraniums, avoid hanging it so high that all you see is the bottoms of the leaves and the pot. Place it with the flowers at eye level or enhance it with some trailing vinca vine and a few mounding white or yellow calibrachoas. Adding a trailing element creates greater interest.

salvia black and bloom

Stately Salvia ‘Black and Bloom’ attracts hummingbirds, butterflies, and bees.

The 16″ wire hanging basket, for the shepherd’s hook in the front garden, can hold 6 to 10 plants. A large perennial Salvia ‘Black and Bloom’ (photo, right; hummingbirds visit every morning!) grows in the bed behind the basket, next to a yellow-tipped arborvitae.

So, the color scheme will include blue ‘Laguna’ (heat-tolerant) Lobelia, purple calibrachoa (million bells, a small cousin of petunia), little yellow Mecardonia, and a few golden yellow and white (powdery mildew resistant) Zinnia angustifolia.

A Heuchera with orange-ish foliage might remain in the pot, if the color plays nicely with others. (A passionflower I had bought earlier in Hendersonville survived the summer in a tiny 2″ pot.)

I use this color combination in the fall, sometimes, when planting violas. It borrows from both the warm and the cool color palettes. When in doubt, combine colors next to each other on the color wheel (for example, red-orange-yellow [warm colors], or pink-blue-purple [cool colors]) or opposite each other (red-green, blue-orange, purple-yellow). Adding white calms everything down when using several colors.

(***Update***: While the annuals awaited completion of the siding installation, a few of them perished. It happens. I plugged the survivors into the basket and fertilized them. Six weeks later, you can see how nicely it filled out. That’s the basket, at the top of this article. And I planted the passionflower, a vigorous vine, in the garden for the gulf fritillary butterflies. Autumn, 2019.)


zinnia ang.

Zinnia angustifolia ‘Star’ series, disease resistant.


Consider These Color Combinations:

  • red-white
  • yellow-white. These first two options make clean, crisp combinations.
  • chartreuse, green, orange, and white look good together
  • shades of yellow-orange-cream
  • blue-yellow-white
  • red-white-yellow
  • silver or gray and shades of pink
  • purple-blue-silver-pink-white
  • lavender-purple-white
  • warm maroon-peach-coral-cream-sky blue

Generally, I avoid using gray/silver with pale yellow. Orange and pink together don’t do anything for me.

We tend to gravitate toward our favorite colors, so try adding varieties you haven’t tried before. See if you can introduce foliage color (caladium, coleus, lysimachia, heuchera, sweet potato vine, begonia) that echoes the color of a flower.

A contrast between flower and foliage forms might also bring greater interest. Adding fine foliage or delicate flowers (nierembergia, diascia, bacopa, lobelia, alyssum, euphorbia ‘Diamond Frost’, mondo grass) contrasts effectively with bolder textures.


Headings

Page 1: Tips For Planting a Wire Hanging Basket, A Few Preliminaries (Can I Reuse Old Potting Soil In the New Hanging Basket?, Refresh/Reuse, Line the Liner), Where To Place the Hanging Basket (Sun Or Shade?), and Choosing Plants For Your Hanging Basket (Consider These Color Combinations)

Page 2: Ready to Start?, Time To Play In the “Dirt”, Timed-Release Fertilizer, and Maintaining the Hanging Basket (Water, Soluble Fertilizer, Deadheading, New Varieties, Pruning Your Hanging Basket, Insects and Spider Mites, Slugs, Deer!)

Return to the top

Grow a Potted Tomato: A Step-By-Step Guide


How To Grow a Potted Tomato


young tomato plants

Young tomato plants.


This year’s plan is to grow two potted tomato plants on the deck, inside the fence and away from deer. But less than a week ago, it snowed! For the near future, we’ll be having temperatures in the 70’s F, and in the 50’s at night. It’s time!

Judging by the numbers of people shopping at the garden centers, I’m not the only optimist out there. Always check your local forecast to see if it’s safe to plant tender edibles. Our friends in the North are still shoveling snow. Sorry, guys. Here are today’s purchases, and the step-by-step guide on page 2.


potted tomato


Tomatoes


Warm temperatures turn thoughts to tomato plants, so off to the garden center I went. Since we rarely buy tomatoes from the grocery store in the winter, we’ve been looking forward to this moment.

In one of the pots, I’ll include a young flat-leaf parsley and a sweet basil I bought at the grocery store a few weeks ago. The two herbs will be planted on the south side of the heirloom ‘Rutgers’ tomato, so they won’t be shaded. I’ll remove tomato leaves that interfere with the herbs. In case raccoons and squirrels set their sights on a lovely ripe fruit, bird netting wrapped around the fruiting plants will deter them.

Unfortunately, direct sunlight is decreasing in the vegetable garden, next to the house, as the trees to the south grow larger. Even so, the new ‘Sun Gold’ cherry tomato will go into the garden; if any tomato will produce a crop, ‘Sun Gold’ will. Besides, it did well enough last year. It produces loads of bright orange super sweet tomatoes, great for salads and snacking. Bet you can’t eat just one!


Basil


Tuscany basil

‘Tuscany’ basil.

The garden center also had ‘Tuscany’ basil, a light green lettuce-leaf type, with huge puckered leaves. It is wonderfully sweet and lightly spicy, with a hint of fresh anise flavor. ‘Genovese’ and lettuce-leaf basil are among my favorites for Tomato-Basil Salad.

And I added to the cart a pot of ‘Siam Queen’ Thai basil, for the baked salmon. Basil needs warmer temperatures, so they’ll stay in pots for a while, and come inside at night. Potted basil will come indoors even in summer, during rainy or humid weather. That’s when Basil downy mildew becomes a problem.

Curly parsley, a rogue seedling with last year’s flat-leaf parsley, and arugula survived the winter and still look good enough to hold onto for a while. The enclosed deck is a warmer microclimate, where winter temperatures are always higher than on the other side of the fence.

Although there’s some potting soil around, I’ll need more to fill those large pots and a few others. So, I bought the largest bag of soil the garden center carries. There’s enough packaged fertilizer left over from last year.


Caterpillars, Anyone?


I always keep a supply of Bt for battling the caterpillar invasions. Bacillus thuringiensis (Bt) is an organic alternative to substances I’d rather not consume, yet many people still consider it a “chemical”. It is not. Bt is a naturally occurring bacterium. An occasional spraying with Bt on the cole crops (kale, broccoli, cabbage, etc.) and on parsley and dill will save them from utter destruction!


tobacco hornworm

The tobacco hornworm on a tomato leaf.


Sometimes, 1 or 2 tobacco hornworms attack our tomato plants. They look very similar to the tomato hornworm, which has V-shaped markings instead of the tobacco hornworm’s slashes (photo, above). They’re difficult to see because they blend so well with the foliage.

Left undisturbed, these larvae will develop into a type of hawk moth. But this very hungry caterpillar, as it grows, consumes large quantities of leaves, and leaves behind…well, you know what it leaves behind.

This nature nerd, as a young student, kept a tiny caterpillar indoors, and supplied daily rations of tomato leaves. Well, it grew enormous and wandered off to a secluded spot to pupate. My greatest fear was that my mother would find it. I finally found it, and donated it to a teacher’s Wardian case.

Spraying with Bt kills these hidden caterpillars if you can’t find them. It is more effective, however, when used on young caterpillars. But, if they have little things on their skin that look like grains of rice (photo, above), just pluck off the caterpillars and place them in the shrubs. A small female parasitic wasp laid eggs on or in the caterpillar, and the wasp larvae fed on and will soon kill the caterpillars. The “rice” grains are pupating wasps. And some little animal might appreciate a morsel such as this.


tomatoes


Big Pots


I bought two 7′ tall stakes and two 20″ diameter lime green pots, at first considered somewhat disagreeable, but now perfectly acceptable. This shade of green blends in with the greens and browns on the deck. When summer heat is a problem, light colors reflect some of the hot sun bearing down on the pots. This helps moderate soil temperature, which rises in a dark pot. Conversely, in the winter, black pots absorb warmth, keeping hardy herbs and cool season greens happy.

Discounted prices on vegetable transplants accomplished their intended effect: I bought more than I had planned. So, now there are 2 sweet peppers to plant, one a “green-to-red-when-ripe” bell, and the other a ‘Lunchbox’ orange.


Peppers


Lunchbox peppers

‘Lunchbox’ sweet peppers.


‘Lunchbox’ peppers are small and colorful (red, orange, or yellow—a separate color on each plant). I add them to omelets, salads, stir-fries, shrimp and vegetables with rice, and pizza.

They add great color accents as well as a higher vitamin C content than green peppers. In fact, one medium-large ripe lunchbox pepper has 100% of the RDA for Vitamin C.

It takes almost 3 weeks longer for a pepper to mature from the green stage to the colorful one. Normally, I would have waited a week or two for the pepper plants, but they were on sale…and it has been quite mild…

(“Weather Alert: severe thunderstorm watch, possible large hail, winds gusting to 60 miles per hour”. Time to move some things around outside.)


One More Tomato

The heirloom ‘Black Prince’ tomato is not as susceptible to cracking as some of the other black tomatoes. And the fruits are smaller. This one substitutes for the ‘Black Krim’ I was looking for.

If ‘Black Prince’ doesn’t do well enough, I’ll pull it out and plant something else. That’s one of the many advantages of living where the growing season is long. (***Update***: The ‘Black Prince’ has grown taller than the 7′ stake, and it is loaded with medium-sized fruits! I’ve already picked more than 20 richly flavored “black” tomatoes. Photo at end of Page 2. June 25, 2019)


And Zucchini

zucchini

Zucchini with fruits.

The fourth of the four-for-$10 deal is a zucchini called ‘Black Beauty’. The seedlings have barely grown beyond the seed leaf stage, and they, with the basil, come indoors at night.

A 50-pound bag of aged cow manure rounded out the purchase.

I’ll plant the zucchini into a nursery pot, and later into the garden. But for now, the garden is still packed with cool season vegetables and greens.


Headings

Page 1: How To Grow a Potted Tomato, Tomatoes, Basil, Caterpillars, Anyone?, Big Pots (Peppers, One More Tomato, And Zucchini)

Page 2: A Step-By-Step Guide To Planting a Potted Tomato, Maintaining Your Potted Tomato, Temperature, Watering a Potted Tomato, Fertilizing a Potted Tomato, (How Often?, Blossom End Rot), Limiting the Suckers On Your Potted Tomato

Return to the top

Starting Seeds for Cool Season Greens


Starting Seeds for Cool Season Greens 


dinosaur kale, 7/18/19


The coldest part of winter has passed for most of us, and it’s time to start seeds for cool season greens. Late winter transitioning to spring is my favorite time of the year. That’s when I start seeds for early harvests. This article covers details for growing some of the early greens, particularly spinach and the brassicas. On Page 3 is a recipe for a veggie omelet, an easy way to get more greens into the diet.

If the garden were bare, I would have started seeds a few weeks ago. But the greens in the vegetable garden continue to offer harvests. Unfortunately, the “list of wants” from the seed catalog is far more extensive than the garden’s square footage can accommodate! It’s time for the last harvest of collards for soup; that’ll open up some space.

While we’re harvesting established cool season greens, I’ll start several new crops indoors. These plants will be plugged into the garden as space opens up. But the seedlings will not be kept in their little pots very long; this stresses the plants and causes them to bolt, or to flower prematurely. (Photo, above: dinosaur kale germinated at night; it will green up in the sunlight.)


The First of the Cool Season Greens: Spinach


spinach 'Monstrueux de Viroflay' in pot

Young spinach ‘Monstrueux de Viroflay’.


I would have sown spinach directly into the garden by now, but we’ve had a long run of chilly rain. The soil is so wet that it’s doubtful any seedlings would even be tempted to germinate. At this time of the year, pay close attention to the weather forecasts. Conditions could deviate considerably from the averages.

It’s not good to dig in soil this wet anyway. That would drive out air spaces and ruin the tilth of the soil by compacting it. 

As temperatures begin to moderate, slugs come out in force and will decimate any seedlings that dare to grow in this weather. Rain: good for slugs. Sluggo: bad for slugs! Organic Sluggo pellets attract and kill slugs and snails. This version of the product contains materials (iron phosphate) that add nutrients to the soil. Check the label, though; Sluggo has other products with added ingredients. The organic option is safe to use around the edibles.


Spinach From Seed Is Easy!

Spinach germinates readily, from 50°F up to the mid 70’s (soil temperature), as soon as the ground can be worked in late winter or early spring. For better chances of success, choose varieties that are disease resistant and slow-bolting. In well-prepared soil, spinach is one of the easiest crops to seed directly into the garden.

Prepare the bed by incorporating 2″ to 3″ of compost and/or aged manure into the top 5″ of soil. Spinach prefers soil pH near neutral, from 6.5 to 7.3. A soil test will indicate how much lime, if any, should be added to raise the pH.

For baby leaf harvest, sow the seeds thickly in a patch, about 1″ apart. For full-size leaves, space the seeds a few inches apart, with rows 8-10″ apart. Crowding the seeds too closely or poor soil will result in a disappointing crop.

‘Monstrueux de Viroflay’

There’s a wonderful variety called ‘Monstrueux de Viroflay’ (photos, above and below), a French heirloom dating to 1866. It grows very large for spinach, up to 20″ tall with 10″ leaves, and should be spaced several inches apart.

Viroflay, or Monster, as it is often called, is lower in oxalic acid, or oxalates, than other spinach varieties. It might be acceptable for people with health concerns that prohibit spinach consumption. Check with your doctor.

Keep the soil moist and add organic fertilizers, such as fish emulsion, Sea-Plus, or earthworm castings, every 2 weeks. In cold soil, however, liquid synthetic fertilizers high in nitrogen work better than the organics. Microbes in the soil break down organic material and make those nutrients available to plant roots. But microbes are dormant in cold soil, so they can’t perform this vital service. They’ll become more active as the soil warms up in late winter or early spring.


spinach seedlings

‘Monstrueux de Viroflay’ spinach seedlings.

Spinach Bowl

Another option is to sow seeds directly into a 14″ wide, 6″ deep bowl filled with fresh potting soil (photo, above). The pot has drainage holes. Portability allows me to bring the pot indoors on especially cold nights while the cool season greens are beginning to germinate. And moisture levels can be carefully monitored.

Since the sappy crooked pine tree that shaded the deck from afternoon sun has been cut down, conditions on the fenced-in deck are more favorable to growing vegetables in containers.

Fill the pot with potting soil to within an inch of the rim. Simply scatter seeds on the surface, a couple of inches apart for smaller varieties and a few inches apart for Viroflay. Cover with another 1/3″ to 1/2″ of soil. Water…and wait… Spinach’s two seed leaves, the cotyledons, are easily differentiated from other seedlings by their long narrow shape. Thin as necessary; you can eat the culls.

Don’t neglect fertilizing potted greens. Rain and irrigation quickly wash nitrogen out of the soil.


Harvesting Spinach

Spinach.

Harvesting the crowns begins within 4 or 5 weeks, depending on weather and soil fertility. Pick individual leaves at any age, allowing the central growing tip to continue producing new leaves. Or cut the entire plant at the soil line before flower buds begin to grow.

By sowing new crops of spinach every week or two, you’ll have continuous harvests of spinach, as long as the weather favors growth.

Spinach quickly bolts, or goes to flower, at temperatures above 75°. Dry or nutrient-poor soil stresses the plants. And spinach will flower prematurely if the plants are stressed by growing too close together.

Harvest the entire plant if you notice flower buds forming. Cutting off the flowers will not stimulate spinach to grow a new bunch of leaves. Instead, start more seeds.

Use spinach steamed as a side dish, or in sauces, soups, smoothies, salads, pasta dishes, or an omelet.


And Then the Brassicas


cool season greens grown as microgreens

These microgreens are mostly brassicas.


The Brassicaceae family is a huge group of edibles. It includes arugula, broccoli, Brussels sprouts, cabbage, cauliflower, collards, kale, komatsuna, mizuna, mustard greens, pac choi, radish, tatsoi, turnip, and others.

All members have similarly notched seed leaves, or cotyledons. Those are the first two heart-shaped leaves to emerge from the seeds (photo, above). Because the seed leaves are already formed inside the seed, the little plant can begin photosynthesizing—and feeding itself—immediately upon germination. True leaves, which develop after the seed leaves, are also similar for most of the cruciferous vegetables. That’s why it’s important to label your pots so you can distinguish “this” seedling from “this other similar looking” seedling.
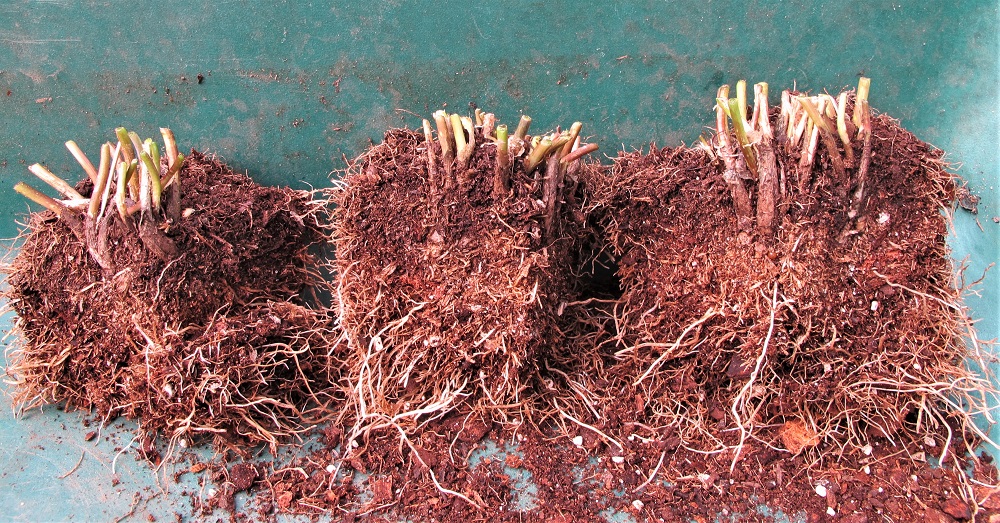
 

Include On the Label:

  • the name of the crop (dinosaur kale)
  • the name of the cultivar (‘Black Magic’)
  • the date of sowing (brassicas germinate in less than a week if sown indoors)

Store leftover seeds in their original packets, and make sure the cultivar name is included on the label. Store in a cool, dry place, such as the refrigerator. Most seeds of cool season greens are viable for 2 years or so. If not already indicated, mark the year of purchase on the packet.

It’s helpful to keep a record of the varieties you’ve tried and liked or disliked. Include how you started the seeds (in 4″ pots or cell-packs, under lights, directly in the garden), the dates you seeded and transplanted, and the weather conditions. Include notes on what was successful and what wasn’t, and possible explanations. Did the seeds germinate and then keel over and die (damping-off disease)? Did critters eat your cool season greens as soon as they started growing? Should the seeds have been started earlier? Or later?

There are successes and failures in every gardener’s life. Being able to pinpoint the reasons for a disappointing crop will enable you to be more watchful or to try a different approach next time. Check with your local cooperative extension office, through state land-grant colleges and universities, for advice. Failure is a learning experience, not a reason to stop trying!


Damping-Off

Damping-off disease can appear soon after germination. Sometimes, diseased seedlings don’t even appear above the soil, looking as though the seeds didn’t sprout at all. The small seedling develops a narrowed brown spot on the stem. Then the top of the plant falls over, and the seedling dies. This is caused by several species of fungus, whose spores are in the air, in the soil, in the water, or on the seeds themselves.
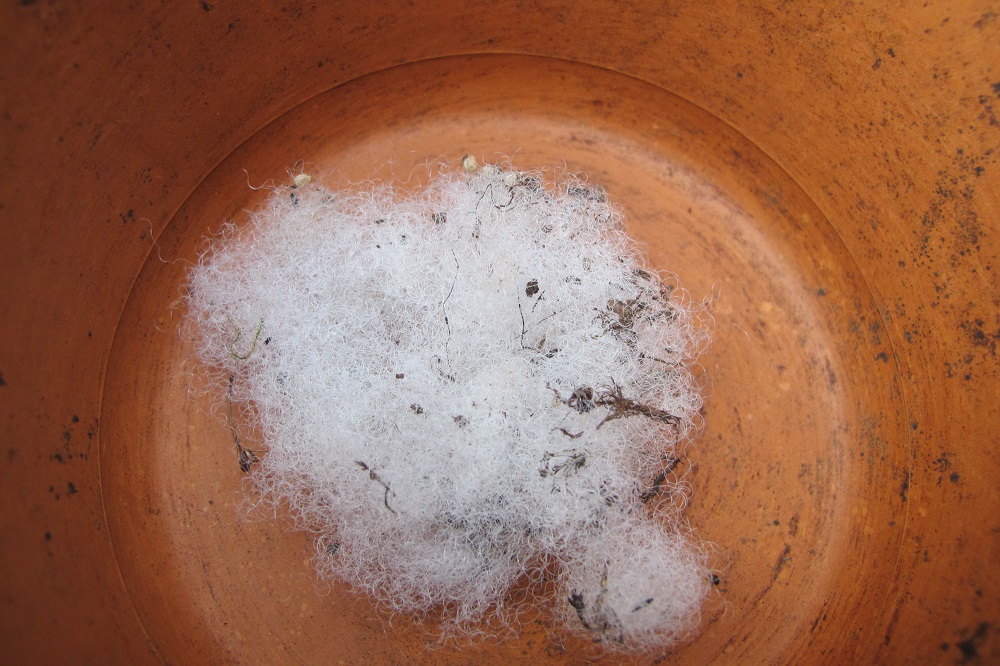
Damping-off often accompanies:

  • poor air circulation
  • high humidity
  • crowding
  • low light
  • low temperatures
  • reusing old soil
  • and overwatering

Space the seeds farther apart, run a small fan nearby, water in the morning, and increase the temperature and light levels if they’re low.

The first time I used the organic biological fungicide called Actinovate, life became a bit sweeter. It is costly, but a much safer option than chemical fungicides. And, with the number of seedlings I grow each year, a wise investment. Make up a small amount of the solution when needed and apply from a spray bottle or a small watering can when sowing the seeds and as soon as the seeds germinate. Always exercise caution when using sprays, and read the labels.


Caterpillars on Cool Season Greens

When the weather warms up in mid- or late spring, you’ll notice butterflies and moths flying around your cool season greens. How nice, you might think. But those lovely insects are on a mission, and that mission is to find suitable plants on which to lay their eggs.


Most of the brassicas are targeted by the female:

  • Cabbage Moth (or Diamondback Moth)
  • Cabbage Looper
  • the velvety green Imported Cabbageworm (also called the Small White Butterfly or Cabbage White Butterfly—white with black markings). Look for them lined up on the leaf’s midrib.
  • Cross-striped Cabbageworm (fine black stripes across the back, yellow stripe on the sides).
  • A few other species target particular brassicas or are limited geographically.

Here in my North Carolina garden, the 1¼” long Imported Cabbageworm has been the most commonly seen caterpillar on the brassicas. It is well-camouflaged in the green foliage. But for the past couple of years, populations of the Cross-striped Cabbageworm have been increasing. They’re especially pesky when lodged among the broccoli florets. Sometimes I don’t see them until I begin cutting the broccoli (just remove them). Inspecting the produce and spraying Bt regularly takes care of that.

Eggs hatch in a few days to a week, and immediately get to work chewing little holes and then bigger holes in your broccoli, kale, and other brassicas.


Harlequin bugs on cabbage


Another insect feeding on brassicas is the black and orange harlequin bug (photo, above). I squish them when I see them, although they’ll see you approaching them and will try to hide. They cause whitish blotches and distortions in the foliage.

Bacillus Thuringiensis (Bt)

As soon as you notice the white moths and butterflies flitting near the brassicas, it’s time to get the sprayer bottle ready. The imported cabbageworm is the larval stage of a butterfly and the one you’ll see in the daytime. The other caterpillars are moth larvae and are active at dusk or at night.

Mix up a solution of Bt, Bacillus thuringiensis, available from the garden center. Dipel and Thuricide are brand names for Bt. It doesn’t take long for these voracious little caterpillars to inflict considerable damage to your plants, so don’t delay.

Spray both the upper and lower surfaces of the foliage, occasionally agitating the solution. Begin spraying a few days after first seeing the moths, or certainly when you see holes appearing. Set the sprayer nozzle to a very fine spray; larger drops of water will bead off the waxy foliage. One or two drops of dish soap in the sprayer will help the solution stick to the foliage if you can’t get a fine spray.

It washes off in the rain, but any Bt clinging on the reverse (bottom leaf surface) might be enough for the current batch of caterpillars. Spray the brassicas every 5 to 10 days, as long as the insects are active.


sprayer


How Does Bt Work?

Bt is a naturally occurring bacterium that disrupts the caterpillar’s digestive system when ingested. The insects stop feeding immediately and die within a day or two. Spray as soon as you notice them because young caterpillars are more susceptible to Bt than older caterpillars.

Bt effectively rids the garden of moth and butterfly larvae, including swallowtails that eat parsley. Although they won’t bother your broccoli, black swallowtail larvae feed on parsley and its relatives in the Apiaceae family, including dill, cilantro, and bronze fennel.

The tradeoff? Fewer moths and butterflies, but more undamaged produce. I enjoy watching the black swallowtail butterflies, though, so I plant the large perennial bronze fennel for the caterpillars picked off the parsley and dill. Bt targets larvae of moths and butterflies, and nothing else.

After picking the crops, I sometimes let the caterpillars feast on the remains. Those caterpillars might feed another brood of baby birds or green anoles at that time of year. Once cold autumn weather has settled into the area, these caterpillars will no longer be around to bother the fall crop. Autumn is another delightful time to garden.

Bt is perfectly safe to use on edibles. Use up the diluted solution within a few days. Store Bt in a cool location out of the sun. Buy a small fresh bottle every couple of years, as this is a live organism, not a chemical.


Headings

Page 1: Starting Seeds for Cool Season Greens, The First of the Cool Season Greens: Spinach (Spinach from Seed Is Easy!, ‘Monstrueux de Viroflay’, Spinach Bowl, Harvesting Spinach), And Then the Brassicas (Include On the Label, Damping-Off, Caterpillars on Cool Season Greens, Bacillus Thuringiensis [Bt], How Does Bt Work?)

Page 2: Broccoli (Improve the Soil for Cool Season Greens, Harvesting and Side Shoots, When the Brassicas Bloom), Mini Broccoli (Early Sprouting Broccoli and ‘Spring Raab’, Broccoli ‘Happy Rich’, Who’s My Favorite?, Gai Lan and ‘De Cicco’, Sowing Seeds, Late Sprouting Broccoli)

Page 3: Dinosaur Kale, Hardening Off Cool Season Greens (Gradual Changes), Growing Plants Under Lights (More Tips Using Artificial Light), Getting More Cool Season Greens Into Your Diet, A Veggie Omelet Recipe Using Cool Season Greens

Return to the top

Time To Think About Fall Greens and Vegetables


Ready To Sow Fall Greens and Vegetables?


Lettuce Red Lettuce Green Lettuce - PMAnguita / Pixabay

Several varieties of head lettuces.


It’s hard to believe it’s already time to start seeds for fall greens and vegetables. I’ve been putting it off because of the hot weather we’ve been having. But, unless I want to buy transplants, seeds will have to be started soon. You folks up north probably have sown seeds for the broccoli and cauliflower by now, and certainly the Brussels Sprouts.

Here in North Carolina, fall seems a long time away, but in order for us to harvest those fall greens, we need to start sowing seeds now. Remember to locate your fall/winter garden where it will receive adequate sunlight. And, of course, I’ll sow successive crops through the rest of summer and early fall, as space permits.

Because we have a long growing season in the Carolinas, we can squeeze in another crop of summer vegetables. Zucchini, summer squash, cucumber, and beans can be sown again. But with the encroaching canopy of the trees on the berm, south of the garden, I’ll be planting only cool-season vegetables. The ‘Diva’ cucumber is loaded with fruits. And I will wait patiently for every last fruit to ripen on the tomatoes and peppers.

(***Update***: A few days ago, a large and dangerously crooked pine tree was taken down, and now there’s more afternoon sun for the tomatoes and peppers. More sun also gives us opportunities to grow containerized vegetables and fall greens inside the fence, protected from deer.)


If They Can’t Take the Heat


spinach in a bowl

Spinach.

Temperatures are still too hot to sow lettuce and spinach outdoors, so I’ll wait another week or two. It’s still in the 90’s! They can be started indoors, in air-conditioned space, if needed.

Check the temperature of the soil before sowing seeds in the garden. Direct sun beating down on the dark soil surface can raise the temperature too high and dry it out very quickly. Look for one of those “Easy Tunnels”, or fabricate something yourself, to partially shade the soil and the tender young seedlings. You can purchase knitted shade fabric, made from black polyethylene, from mail order suppliers. In the southern states, 30-50% shading should work during the late summer months. This could lower the temperature by 10° or 15°F. Keep the soil surface moist to ensure good germination and to cool it down.

The best germination occurs between 60° and 75°F for lettuce and spinach. I usually put transplants into the garden instead of sowing seeds directly because hungry slugs, snails, and cutworms find tiny seedlings very tender and delicious.

Organic Sluggo will bait the mollusks (slugs and snails) to their deaths, and Bacillus thuringiensis (Bt), sprayed on the seedlings, will kill cutworms. Slug baits made with iron phosphate, such as organic Sluggo, are far less harmful to pets and to people than products containing metaldehyde, so be sure to read the labels.

One way to gather up a whole lot of slugs is to place a board, maybe 1′ x 2′, over damp soil. Go out and check the underside early the next morning, old knife in hand, and cut them quickly in half or squish them any way you choose…but, don’t use salt in the garden!


Choosing Varieties of Fall Greens


botanical interests seeds 

Sowing seeds for fall greens and vegetables, which prefer cool weather, can be tricky in July’s heat. Look online or through seed catalogs for lettuce, spinach, broccoli, and other crops that are described as being heat tolerant varieties. Yes, all lettuce and broccoli varieties prefer cool temperatures, but some will take warmer or colder weather than others as they form heads. If you’re buying transplants, ask the grower.

Either way, plan to provide some sort of device that will lower the temperature during these last hot weeks of summer. For later harvests, I’ll sow seeds that grow cool and mature in cold weather, and they will not need the shade fabric. Plants grow better with more hours of direct sun as the temperatures cool down.

Check with your local agricultural extension office for recommendations or for a planting calendar.


Planting Young Transplants


Soil

turned soil

Rich, dark soil with lighter brown clumps of clay, before incorporating.

Starting a vegetable garden with soil that has not been conditioned could result in a mediocre or poor harvest. Fall greens grow faster and larger in well-prepared soil.

Garden soil for these crops needs additional organic matter (compost, composted cow manure), drainage material (pine fines, coarse sand), and sometimes lime. A soil test will indicate the need for lime.

Our fall greens are being planted in soil that has been worked for 6 years, so it’s in very good condition. I will, however, continue to add compost, fertilizer, or manure to the garden.

When digging soil, bring some of the lower-level clay up to the surface, and turn under the richer topsoil 4″ to 6″ deep (a few inches deeper for tomatoes, in spring). Over time, the clay soil on the surface will improve as mulch decomposes or when compost is added as a top dressing. Here you can see clumps of light brown clay that were brought to the surface of the soil (photo, above) before they were broken up.


Roots

Growers use pots and market packs of various sizes, including small 9-cell packs, 4-cell packs, 2″ peat pots and 4″ plastic pots. The smaller the root ball, the more carefully you will have to monitor the care.


An important step before planting is to rough up the outside of the root ball (photos, above). This slightly injures the inner root layer called the pericycle, stimulating the plant to quickly send out new lateral roots into the soil. Be careful not to so severely damage the root system that the plant can’t supply water to the leaves on a hot, sunny day. Do this for every plant that is about to be repotted or planted into the garden.

A root ball that’s tightly packed with roots can be shallowly scored down the sides in a few places. Use a knife, a rock, or even a twig. Or use a cultivator to pry out some of the roots.


To Bury or Not To Bury?

broccoli

Broccoli ‘Arcadia’ from 4-cell-pack.

Most young vegetable transplants can be placed an inch deeper into the soil, or up to the bottom leaves. If the plant is more mature and has developed a somewhat woody or tough stem, plant it at the same level it was growing in the pot. But always, if possible, choose younger transplants.

Older plants can be stressed by being potbound or underfertilized, and might go to flower or head up prematurely, yielding undersized harvests. Young plants will require more time to grow, but they will give you the largest heads of lettuce, broccoli, cauliflower, and cabbage. If in doubt, plant the top of the root ball level with the soil surface.

Firm the soil around the roots and stem using medium pressure. Humidity in the soil between the soil particles will encourage the stem to grow fine roots without interference from tightly packed soil. Watering the plant will help the soil settle in around the root system and provide much-needed moisture.


broccoli in winter

Broccoli ‘Arcadia’ in winter.


These are same broccoli ‘Arcadia’ plants photographed in late December (photo, above). Trees on the berm cast too much shade until leaves dropped off, delaying harvest. When the garden gets more sun, heads should form in mid to late winter.


Fertilizer

Planting fall greens and vegetables into late September, I mix a handful of granular organic vegetable fertilizer into the planting area. These crops grow beautifully with adequate nitrogen, so I will soon use higher nitrogen fish emulsion. Another application of fish emulsion will be made every 2-3 weeks through November, or every 2 weeks for potted greens.

mustard seedlings

Mustard seedlings in the garden.

Microbes in the soil break down organic compounds and make nutrients available to the roots. But, as the weather cools significantly, microbial activity slows down. I’ll use synthetic soluble fertilizers a few times in winter to keep the plants growing.

Greens and vegetables will grow all winter here, with some protection during very cold weather. This is worth the effort, since I can pick beautifully fresh kale and spinach for the Sunday omelet, or a big bunch of collards for collards soup.

Mustard ‘Florida Broadleaf’ was sown in late September, and germinated a few days later. The thinned seedlings will be used in soup, salad, or an omelet. Spinach sprouted about a week later.


Arugula


Love, love arugula! A forkful of salad greens that has a piece of arugula in it…mmm… The variety I prefer is ‘Astro’. It’s not as hot as the wild types, and it tolerates warmer temperatures. Arugula will self-sow if it likes where it’s growing. Just let it flower and set seed. The papery seed capsules release the seeds, which germinate within 2 weeks, during favorable weather, near the mother plant.

It grows well in morning sun, during warm weather, and in moist, rich soil. Those who are more adventurous than I might enjoy growing the hotter ‘Wasabi’. Arugula doesn’t look like a member of the family Brassicaceae, but it, too, is in that famous family.

You might have seen the term “cruciferous” being used when describing members of the family Brassicaceae. It refers to the flowers of these plants, which have 4 petals arranged in the shape of a crucifix. The terms brassica, cole crops, and crucifer (or cruciferous) refer to the same plants.


Broccoli


One of the most nutrient-rich foods, broccoli is a must in my garden. Nutrients include protein, Vitamins A, several B’s, C, K, minerals, fiber, and their famous phytonutrients. To say that we eat broccoli in one form or another every 2 or 3 days is not an exaggeration. Just ask Mother.
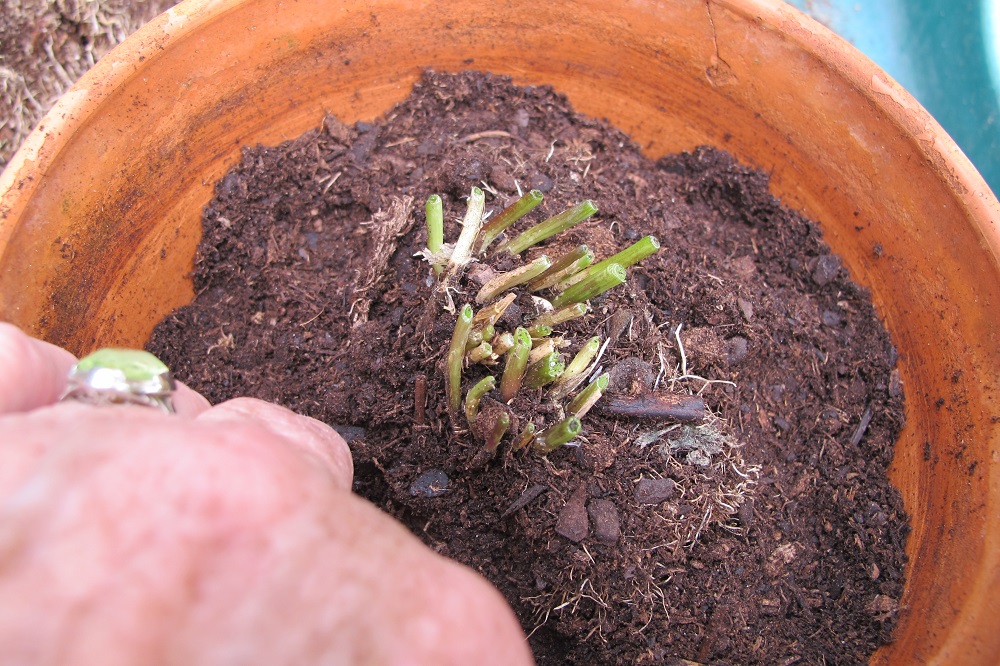
broccoli crowns

Broccoli crowns.

Heat and cold tolerance ranges from poor to excellent, depending on the cultivar. In this zone 7b area, ‘Imperial’ can be sown in July or planted as transplants from July through August; Johnny’s Selected Seeds’ catalog rates it “excellent” in heat tolerance for broccoli. Normally, broccoli grows best in cool weather, but you can extend the harvest by choosing 2 or 3 varieties that are suited to the weather at different times of the year.

The variety that will see us through the winter is cold-hardy ‘Arcadia’, which grows a large number of side shoots once the main head has been harvested. For that reason, don’t cut off too many leaves when you do harvest broccoli, because each of those leaves could be topped by another side shoot.

By the way, tender broccoli leaves are edible as well. Add them to soup, a smoothie, pasta, or a stir-fry. After the harvest is done, I keep the plants in the garden to flower. Bumble bees and other early risers are fond of this bounty, and the flowers are quite pretty!


broccoli flowers and bumblebee

Bumble bee visiting broccoli flowers in early spring.


Miniature Broccoli ‘Happy Rich’


broccoli happy rich, delicious fall greens

Broccoli ‘Happy Rich’.

I’ve grown ‘Happy Rich’ for many years. This plant grows a small head at the end of a stem, harvested ideally before the white flowers open. Each of those little green beads is a flower bud, and even if the buds start opening when the stems are picked, they’re still going to the kitchen.

The head will never get to the same size as regular broccoli, but the flavor is superb. Once the little heads have been cut off with 5″ to 8″ of the stem, the plant will branch out and grow more little heads. The stem, the leaves, and the head are edible—steamed, stir-fried, or added to soup or a pasta dish.

Two plants have been growing in the garden since the spring, and they don’t look very happy. It’s been a hot summer, so I didn’t expect them to survive this long.


Bt


caterpillars on broccoli

Cabbage worms on broccoli.


The white cabbage moths visit frequently—more frequently, alas, than I do with the bottle of Bt.

Bt is an abbreviation for Bacillus thuringiensis, a naturally-occurring bacterium that kills caterpillars of moths and butterflies (but not sawflies). Before you groan “no chemicals”, Bt is used by organic growers and it’s been around for decades. Perfectly safe, even for pollinators, and not a chemical.

All brassica crops are targeted by a few kinds of moths, which lay eggs on the leaves. They soon hatch into voraciously hungry and well-camouflaged caterpillars. After consuming some of the Bt, they stop feeding and die shortly thereafter. Young caterpillars are more easily controlled than older caterpillars. Thuricide and Dipel are two brand-name products with Bt as the active ingredient.


Return to the top

Page 1: Ready To Sow Fall Greens and Vegetables?, If They Can’t Take the Heat (Choosing Varieties of Fall Greens), Planting Young Transplants (Soil, Roots, To Bury Or Not To Bury?, Fertilizer), Arugula, Broccoli, and Miniature Broccoli ‘Happy Rich’ (Bt)

Page 2: Brussels Sprouts, Cabbage, Cauliflower, Collards, Kale, Lettuce, Nutritional Considerations of Fall Greens (Where’s the Beef?), and Only the Beginning

Vegetables in Containers: How To Grow Them

2018

No Garden Space? No Problem!


Growing Vegetables in Containers


peppers and green onions in a pot

Peppers and onions.


Before I started this blog, I managed the Edibles Department for a few years at an independent garden center in Charlotte, North Carolina. As some of our customers downsized to apartment living or to a condo with a balcony, they didn’t want to give up growing their own herbs and vegetables. So, they were glad to hear that they could grow vegetables in containers…as long as the balcony was on the right side of the building. And the right side for vegetables is the sunny side of the building.

Lack of direct sunlight and adequate growing space are limiting factors. Look around, though, and you might come up with some ideas. For example, some of our customers were given permission from their condo associations to garden in common areas. Running for open association board positions yourselves is one way to garner support. I encourage you to attend board meetings, bringing your neighbors, a plan, and a promise to maintain the site.

Neighborhood community gardens are another possibility, although there often is a waiting list. With so much emphasis on eating healthy foods, little pocket parks and community gardens are popping up all over the country.


For Your Convenience

damaged tomato, squirrel

A young tomato damaged by a squirrel.

Another reason to grow vegetables in containers is simply to have them close at hand when they’re needed. A few steps out the kitchen door to a handful of cherry tomatoes and a ripe ‘Flavorburst’ sweet pepper for today’s salad has its charms.

Keeping the pots elevated on the deck prevents some animals, such as deer and rabbits, from making off with the fruits of your labor. Won’t stop the raccoons, though. (***Update***: Or the squirrels; one thought this little green tomato had something to offer. Discard any fruits that have been chewed on by animals. If needed, I’ll wrap the potted tomato plants, growing on the deck, in bird netting. June, 2019.)


Sun? Not So Much


The choices for edibles in a shady spot are limited. The ones that might succeed in bright shade are arugula, cilantro, parsley, lemon balm (interesting research with Alzheimer’s), French sorrel, and seasonal leafy greens. With just a bit more sun, basil, rosemary, oregano, and maybe a cucumber plant could grow for you.

Reflected light counts, to a degree, including light bouncing off light-colored walls. And a white surface under the pots reflects more light onto the vegetables in containers.

Remember to monitor the sun’s path throughout the seasons. Once trees drop their leaves in the fall, your balcony or patio might receive more direct sunlight than it did in the summer. This opens up all kinds of possibilities for potted cool-season greens and vegetables. Pay close attention to expected temperature changes for the duration of your crops.

Fruiting plants, such as tomatoes, peppers, eggplants, and squash need at least 6, and preferably 7 or 8 hours of direct sun. These vegetables also need warm summery weather.


Approaching Summer Solstice

Our vegetable garden is now receiving the maximum amount of light, with the sun directly overhead. In the springtime of the last two years, heavy rains caused the tree canopy up on the berm, to the south, to swell with heavy, overhanging branches. Trees now cast considerable shade early and late in the day for most of the growing season. So, I planted fewer tomato plants and more greens.

Two large ‘Big Beef’ tomatoes are beginning to ripen, and a whole lot of ‘Sun Gold’ and ‘Mexico Midget’ cherry tomatoes. So, even with less than ideal conditions, there will be something to harvest.


At Julia’s Request

Several family members from New Jersey and California recently visited us in North Carolina. I promised Julia this article about growing summer vegetables in containers.


Vegetables In Containers: Which Ones?


Sweet and hot peppers, tomatoes, and eggplants can be grown in containers, as well as zucchini, yellow summer and Patty Pan squashes, cucumbers, and green beans. Also, it’s easy to grow most herbs in pots. Green onions, carrots, potatoes, and peas can grow in pots!

It’s just a matter of the details. One of those details is to look for dwarf or bush varieties of the crops you want to grow. There’s even a variety of corn (‘On Deck’) that grows in large pots.

One of the popular combinations I used to sell included a sweet or a hot pepper planted with two herbs. Theme combinations (‘Jalapeno’ pepper-cilantro-Greek oregano; ‘Carmen’ frying pepper-Italian oregano-dwarf parsley ‘Titan’) grew in 14″ pots. Customers found them irresistible if they were bearing fruit.

Growing more varieties of leafy greens in containers has become a priority as our garden becomes more shaded. In addition, greens can grow all year in regions with moderate winters.


Starting With Tomatoes


Much of the information in “Starting With Tomatoes” also applies to other vegetables in containers.


'Blueberry' tomato

Potted ‘Blueberry’ cherry tomato.


Beginning with America’s favorite, tomatoes grow well in pots. Will it be a beefsteak or a cherry? An heirloom or a modern hybrid? A slicer or a sauce-type? Determinate? Indeterminate (it keeps growing until frost, bearing fruit all summer)? Black, red, yellow, or orange? Striped or solid? There are many thousands of varieties of tomatoes to choose from!

potted 'Terenzo' tomato, with red fruits

‘Terenzo’ tomato.

A dwarf tomato called ‘Terenzo’ (photo, right) can grow in a 10″ hanging basket, but a ‘Cherokee Purple’ heirloom or a ‘Big Beef’ needs something considerably larger. For the large varieties, I use pots at least 20″ in diameter.

The long-vining indeterminate cherry types (‘Sun Gold’, ‘Black Cherry’, ‘Mexico Midget’) can grow in a pot as small as 14″ in diameter, but they’d be happier in bigger pots. You’ll need to pay closer attention to water and fertility when using smaller pots.


Vegetables In Containers: Types Of Pots

Each kind of pot has both advantages and disadvantages.

Summer vegetables generally fare better in larger pots rather than smaller pots. Although the pot looks enormous compared to the transplant’s diminutive size, don’t be tempted to plant more than one tomato per pot. You’ll be amazed how quickly that one tomato plant fills a 20″ pot. A new transplant in a large pot runs a greater risk of root rot during rainy weather. But, placing it under an overhang will prevent this loss. It’ll be different once more roots and foliage have grown.

An indeterminate tomato, such as ‘Cherokee Purple’, ‘Sun Gold’, or ‘Black Krim’, can share a 20″ diameter pot (photo, below) with a couple of herbs, such as parsley and oregano. Plant the tomato toward the back of the pot, on the north side (northern hemisphere), and plant the herbs near the southern rim.

Terra Cotta

Terra cotta looks good and has some weight. But clay is porous, so water vapor passes through the pot to the air outside, quickly drying the soil. If you want to use your large clay pots, you could line them with food-grade plastic and punch some holes in the bottom for drainage. This will slow down the evaporation process.

Certainly, use clay pots if you prefer, but prepare to water more often.

Ceramic Pots

Ceramics are beautiful and heavy, and can be expensive. Soil temperature rises uncomfortably on the sunny side unless the pot is shaded. Try using light colored pots in the summer, which will reflect most of the heat.

If you’re unsure of the safety of the glaze, line the inside of the pot with food-grade plastic bags, poking several holes in the bottom for drainage. But, I would choose a different pot if a sticker on the bottom warns “Not for direct contact with food”.

You could also plant the tomato in a large nursery pot, and then insert it into the decorative glazed container. Make sure both pots have drainage holes. This “double-potting” allows air circulation around the interior pot and eliminates concerns about questionable glazes.


vegetables in containers, green pot

Tomato ‘Rutgers’, sweet basil, and Italian parsley in a 20″ wide pot, April, 2019.


Plastic and Vinyl

These pots are inexpensive, readily available, and easily moved. They’re also the most likely to blow over in windy weather. But this is the first choice for most gardeners. Most of these pots last a few to several years in the sun, but, eventually, sunlight will degrade the material.

Wood Containers

Untreated cedar or redwood and half whiskey barrels are suitable for growing vegetables in containers. Check to make sure the pots drain freely.


Reservoirs and Other Considerations

Earth boxes and plastic pots often have built-in reservoirs or detachable saucers. And you can purchase caster kits and trellises for increased functionality. Some gardeners have the option to move their plants from the morning sun on one side of the deck to the afternoon sun on the other side; wheels make this so much easier.

Caution: some of the reservoirs are too deep before the water begins to exit the overflow hole, and can cause young plants to rot if the soil stays sodden all the time. You could drill a hole in the side, below the overflow hole, reducing the capacity of the reservoir. Or simply tilt the pot to allow excess water to drain. Older plants, full of foliage, will absorb water in the bottom of the planter, as long as it isn’t raining for several days straight.

Mosquitoes and Tree Roots

Add a piece of Mosquito Dunks to prevent mosquitoes from maturing in the secluded reservoir. They need only a few days in warm weather to complete their life cycle. Or tip the container to drain all excess water.

A pot sitting directly on soil anywhere near trees or shrubs will invite their roots to invade. Believe me, they will try to grow in that beautiful composted soil. Elevate the pot off the ground. This also facilitates drainage from the pot.

A few pieces of broken flagstone or “pot feet” raise the pots above the surface of the deck, helping to preserve the deck’s finish.

Saucers

Use saucers under the pots, but don’t let water remain in them for more than an hour. Plant roots need oxygen as much as they need water. Water in the saucer prevents air from entering the bottom of the pot.

Saucers aren’t absolutely necessary, but help if the soil has gone too dry. Just keep filling them until no more water is absorbed by the soil. In tall pots, though, the force of gravity will prevail over capillary action, preventing water from reaching the top of the root ball. So, you’ll also need to water the top portion of soil.

During long periods of rainy weather, I remove the saucers, or turn them upside down and keep them under the containers. This is impractical, however, if the pot weighs 50 pounds. Consider removing the saucer and using a few pieces of broken flagstone or brick to elevate the pots, if necessary.


Potting Soil

pot for new chives division

Reused polyester fiberfill covers the drainage hole.

Before filling the pot, place a small handful of polyester fiberfill (from a hobby store) over the drainage hole. This prevents soil from eroding through the hole, and prevents earthworms and other critters from entering. If you pull some of it through the hole to a point at the bottom, excess water will continue to drain. This is helpful for potted plants that rot easily during long stretches of rainy weather (succulents, lavender, thyme, sage). This synthetic material doesn’t rot, so it’s reusable.

Use a good quality potting soil that drains well, but has peat moss to hold moisture. In addition to the peat moss, the mixture will have perlite (white particles that help drainage), pine bark chips (drainage), lime (to adjust the pH), compost or a starter charge of fertilizer, and often a wetting agent (to help the soil absorb water).

Amending the Potting Soil

Feel free to experiment with mixtures of different materials. Soils with a lot of bark (pine fines) in the mix tend to dry out faster. You can mix in smaller-particle loamy topsoil, spongy peat moss, aged manure, or compost to help slow water loss. Water-absorbing crystals might help, too. But moisten them before you add them to the soil. If you don’t, you’ll understand why I italicized the word “before”.

Adding a layer of undyed mulch on top of the soil helps conserve water and keep the soil a bit cooler.

While some gardeners add rocks to the bottom of the pot, I never do. It was thought the rocks increased drainage, but the opposite is true; they create a perched water table in the layer of soil right above the rocks. Water percolating through the soil profile is held in this layer by capillarity, and often rots roots trying to grow there, limiting the useful volume of soil.


Headings

Page 1: Growing Vegetables In Containers, Sun? Not So Much, Vegetables In Containers: Which Ones?, and Starting With Tomatoes (Vegetables In Containers: Types Of Pots, Reservoirs and Other Considerations, Mosquitoes and Tree Roots, Saucers, Potting Soil (Amending the Potting Soil)…

Page 2: Transplanting the Tomato, Water, Going Away?, Staking, Fertilizing Vegetables In Containers, Blossom End Rot, On PH, Pollination), Peppers and Eggplants, Cucumbers, Squash (Squash Vine Borers), Green Onions (Bunching Onions from Seed), Leafy Greens, and Picking Vegetables In Containers

Return to the top

The Fiddle-Leaf Fig: Ficus Lyrata


“What’s Wrong With My Fiddle-Leaf Fig?”


There are few houseplants that exemplify architectural presence to the degree that Ficus lyrata does. Turn the pages in any home decor magazine or visit an online furniture showroom and you’ll see a statuesque fiddle-leaf fig in the corner of a perfectly-appointed living room. “That’s what mine used to look like,” you’re thinking, as you lament the pitiable specimen clinging to life in the spare bedroom.

Large plants can cost hundreds of dollars. Even a small bushy fiddle-leaf fig at the garden center can run $40.00 or more. It’s worthwhile to get this one right. The following suggestions might help.


Light


fiddle-leaf fig, Ficus lyrata

A fiddle-leaf fig grown as a standard.


Indoors, the fiddle-leaf fig prefers 2 or 3 hours of direct sunlight in the morning or early afternoon, and bright indirect light the rest of the day. During the summer months, keep the plant away from hot sun; it needs adequate air circulation between the plant and the window. Leaves can burn if they’re too close to the glass.

Skylights, light-colored floors and walls, and large windows that expose the plant to very bright indirect light for most of the day might provide enough light for the fig to remain reasonably healthy. But growth will be stronger in partial sun.

During the cooler months of the year, figs welcome a few more hours of direct sunlight.


Blame It On Hormones

The segment of a young stem (the internode) between leaf attachments (the nodes) will lengthen in response to lower light levels. Hormones cause cells in the shady side of the stem to elongate. That’s why the stem turns toward the light (phototropism).

A fully shaded stem will stretch as the plant searches for a stronger source of light. This stretch will be noticeable in the softer tip growth; woody stems won’t elongate.

If the leaves were stacked closely together at one point, and now they’re spaced farther apart along the stem, the plant is not getting as much light as it was before. Adequate sunlight keeps a plant more compact by preventing internode stretch.

Don’t place the plant in low light or in the corners of a room despite what you see in those magazines or in other media. If the fig tree doesn’t receive adequate light, it will begin to decline. One of the first signs that the plant is in decline is loss of leaves. And fig trees are notorious for signaling distress!


Watering the Fiddle-Leaf Fig


watering can

When the top 2″ or 3″ of soil in a large pot feels dry to the touch, it might be time to water. Don’t just feel the surface of the soil, though. You must feel the soil well below the surface. Although it feels dry on the top of the root ball, the soil could be moist enough 6″ down.

A narrow unfinished wooden dowel inserted most of the way into the soil will indicate the need for water if it comes up dry. Let it sit in place for 15-20 minutes before removing it.

Most moisture meters I’ve tested did not truly measure the moisture in the soil. The expensive models should be more accurate. Or lift the pot. After a while, you get a “feel” for how heavy a pot of moist soil weighs.

A full, leafy plant in a small pot dries faster than an overpotted sparsely-leaved plant. Don’t allow the entire root ball to go completely dry, but don’t keep it wet all the time either. If in doubt, don’t water, especially in cloudy weather. If there’s no sign of wilt, the fiddle-leaf fig can go another day or two without watering.

Never let the plant sit in a saucer of water for more than 20 minutes. Remove any water that is not absorbed through the drainage holes in that period of time. The soil in a tall pot will absorb water by capillarity up to a certain point. At that level, the force of gravity overpowers capillary action, so you will need to apply more water to the dry soil near the top.

A fig tree that is often overwatered or allowed to sit in water too long will suffer root rot and might not recover. Fungal infections from overwatering cause brown patches in older leaves. Eventually, all the leaves could fall off the tree.

Use water that is warmer than room temperature. In winter, lukewarm water for tropical plants keeps them more comfortable. Here, I keep indoor air temperatures between 60° and 68°F in winter. Water, tested with an aquarium thermometer, should read around 85° to 90° for plants such as figs, pothos, philodendron, Chinese evergreen, basil, alocasia, and African violet.

Water well enough to moisten the entire root ball. Not watering thoroughly results in dry soil lower in the pot, and roots there will die off. Applying small amounts of water a couple of times a week is not a good practice. Water thoroughly; then let the soil dry.


A Hasty Exit

Sometimes, water exits the drainage holes immediately after watering. In this case, the soil mass might have shrunk, which happens when soil has thoroughly dried out. Also, during transportation, the root ball might have shifted in the pot.

A gap has opened up between the inside of the pot and the outside of the root ball. Water finds the path of least resistance, following that air space to the holes at the bottom of the pot. But most of the soil stays dry. Fill the space with potting soil, using a dowel to firm in the new soil. Then the water will more slowly percolate through the root ball.


Humidity


sprayer


Fig trees, like many tropical plants, benefit from additional humidity when the air is dry. Simply grouping plants together will raise humidity in their vicinity, and all will benefit.

Using large saucers filled with pebbles and water will help raise humidity. The bottom of the pot should always be above the water level in the saucer. This arrangement is easier to maintain for smaller pots. If your home is especially dry, consider using a humidifier.

The positive effects of misting last only as long as there is a film of water on the leaves. And that’s only a few minutes. When water evaporates, a small amount of white mineral residue from the water persists on the leaf. It will build up over time but can be removed by wiping the leaves with a solution of horticultural oil on a soft cloth. Don’t use vegetable oil or mayonnaise. Look for horticultural oil. It’s a good idea to periodically wash the foliage to remove dust and grime.

Keeping foliage damp for long periods of time can initiate bacterial infections. Both young and older leaves can develop brown spots and yellow patches. These infected leaves will fall off.

Don’t place a fiddle-leaf fig where HVAC registers blow cold or hot dry air toward the foliage. Tender new leaves will turn brown on the edges. Louvered registers usually can be closed or use a deflector to change the direction of the air flow.

By the way, it’s normal for the fig tree to drop an older leaf or two now and then. As long as there is a net gain of healthy foliage, it’s probably not a concern.


Temperature  


Avoid placing fiddle-leaf figs in cold drafts. These plants, members of the mulberry family (Moraceae), originated in warm, humid areas of western Africa. They appreciate temperatures that are at least 63° to 65° at night and 68° to 70° in the daytime. But keep in mind that the higher the temperature, the lower the relative humidity.

If you keep your house in the mid 70’s in the winter, and are not uncomfortable dropping the temperature a few degrees, the higher relative humidity will benefit both you and your plants.


Fertilization


Plants purchased from garden centers are usually fertilized on a schedule, so ask a salesperson if your plant is due for fertilization. For the fiddle-leaf fig, and for all plants, it’s better to underfertilize than to overfertilize.
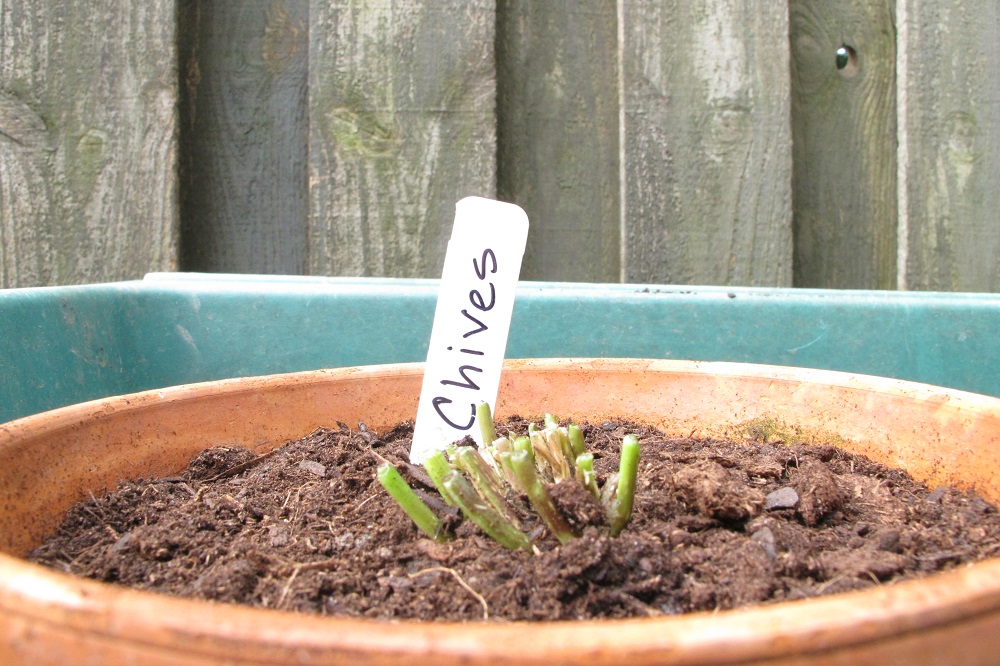
Too much fertilizer will burn the roots and could kill the plant. It will not make the plant grow faster! If you accidentally gave the plant too much fertilizer, flush a few to several gallons of clear water through the root system to flush out the excess. Use the fertile drained water in the garden rather than letting it go down the drain.

Use balanced fertilizers formulated for houseplants, such as 12-12-12 or 20-20-20, every 5 or 6 weeks during the growing season, usually March through October in the northern hemisphere. Follow dilution rates indicated on the package. Plants growing in less than ideal conditions, though, should be fertilized less often or at more diluted rates.

If the plant is in poor health, fertilize once at one-third the recommended rate, and try to improve the growing conditions. Wait to see how the plant responds before resuming the regular schedule. Fertilizing a plant that doesn’t need it or one that is frail (from something other than lack of nutrients) will exacerbate any problems it already has.

You won’t have to fertilize as often if you use slow-release (or timed-release) products. They simplify our gardening chores and are a great convenience. The prills are used up faster at warm temperatures and in moist conditions, such as when the plant is placed outdoors in the summer. For example, a timed-release product that says “6 months” on the label might need to be reapplied in 3-4 months at 85°.


Repotting  


When the roots are very crowded in the pot, it might be time to repot your plant. Consider doing this task in mid-spring to early summer. This will give your plant enough time to grow a strong root system before winter comes.

Don’t wait until autumn to do this, because shorter daylength and cooler indoor temperatures slow down plant processes. The fig will grow new roots very slowly, if at all, in average indoor conditions. That’s when a plant can suffer root rot. New soil that has no roots growing in it stays wet for a long period of time, which can damage nearby roots.

Choose a nursery (or ordinary plastic) pot that’s only 1-2″ larger in diameter. Score the outside of the root ball in several places with a knife. Or tease out roots from the surface of the root ball. This slight injury to the roots stimulates rapid re-rooting.

Don’t put a small plant into a huge pot thinking this will make it grow faster. It won’t.

All new soil goes below and around the original root ball, never on top of it. Heavily composted potting soil should have coarse sand and pine fines mixed in for better drainage. Firm it in well, filling all gaps between the root ball and the pot. For residential purposes, a large 7′ or 8′ tall plant can stay in a 14″ to 18″ pot indefinitely.

Since nutrition will be provided by fertilizer, there is no need to repot more often than every year or two while the plant is young. Recently repotted plants will not need fertilizer for at least 6 to 8 weeks, or until new soil has filled with roots.

Don’t worry if your fig is getting potbound. It’s easier to manage a fiddle-leaf fig in a somewhat tight pot. And it runs a lower risk of damage from overwatering.


Headings

Page 1: “What’s Wrong With My Fiddle-Leaf Fig?”, Light (Blame It On Hormones), Watering the Fiddle-Leaf Fig (A Hasty Exit), Humidity, Temperature, Fertilization, and Repotting

Page 2: But If You Want a Nicer Pot (Double-Potting), The Finishing Touches, Pruning the Fiddle-Leaf Fig (When To Prune), Outdoor Living (Before Moving Back Indoors), Insects and Mites, and Picture Perfect

Return to the top 

Pollinators: What’s All the Buzz About?


What’s All the Buzz About Pollinators?


Trips to the garden center and articles about landscaping and edible gardening. Radio garden programs and school field trips. What do they have in common?


fruit tree, honey bee


The subject of Pollinators will come up!


bee, pollenAnd for good reason: we rely on pollinators for more than a third of our entire food supply! Without the bees, butterflies, bats, and hummingbirds, we would not be able to feed our growing populations. Apple, peach, and nut trees, tomatoes and peppers. Zucchini, cucumbers, berry bushes, and farm animal feed. These are just a few crops that depend on these little critters. Trees, grasses, shrubs, and wildflowers also rely on pollinators for procreation.
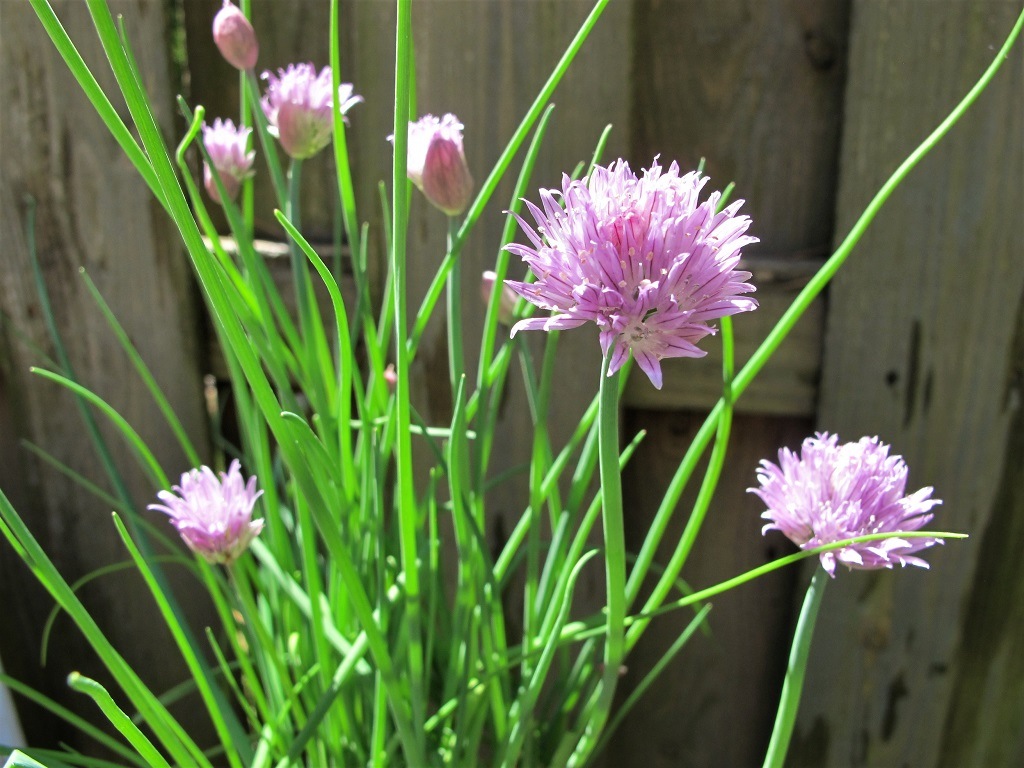
Pollinators are attracted to the flowers’ sweet nectar, for carbohydrates, and to pollen for proteins and lipids. Insects and other pollinators gather nectar and pollen from the flowers they visit. During this beneficial arrangement, called mutualism, they unintentionally transfer pollen grains from one flower to the next.


The Fruits of Pollination

Pollen (the male component) deposited onto a receptive stigma (female) in a flower belonging to the same species initiates the fruiting process. The half set of haploid chromosomes in ovules and sperm are recombined during fertilization. (This is not the kind of fertilization that involves nutrients). This restores the full diploid chromosome count. The ovary (fruit) grows and toughens, protecting the seeds until the fruits are harvested or the seeds dispersed.
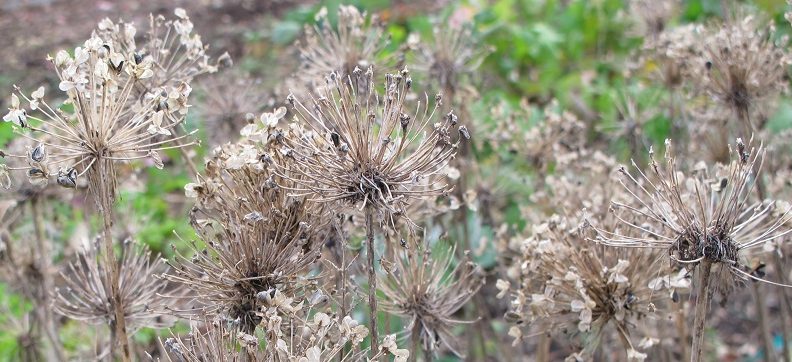
Fruits, though, aren’t limited to the recognizable apples, peaches, and pears on a grocery store shelf. Botanically, a fruit is any seed- or spore-bearing structure in flowering plants and other organisms. This includes wheat, a kernel of corn, a plump blueberry, a sweet cherry, or an heirloom tomato. Even fungi, including mushrooms, have “fruiting bodies”.

Animals attracted to these nutritious fruits aid in seed dispersal, although in many cases, the seeds themselves are consumed and digested.

And there are some anomalies in Mother Nature’s kingdom that permit us to call strawberries “fruits” or “berries”, although they are neither! The luscious little strawberry is the swollen receptacle, the part that connects the flower to the stem. The actual fruits, or achenes, are those little brown things on the outside. And there’s a seed inside each achene.

No pollination means no fruit in up to 80% of our edible crops!


Honey Bees


honeycomb, bees--pollinators

A honeycomb.


Honey bees (Apis mellifera) are not native to the Americas. They originated in Africa and migrated to Indonesia, Europe, and Asia. The early colonists brought them here, where they proliferated throughout the frontier, preceding the settlers’ expansion into new territory. Before this species was imported, thousands of other types of insects and animals pollinated flowers. And they still do!

As the nation’s population grew, more crops entered cultivation. Agriculture became even more dependent upon these easily domesticated pollinators.
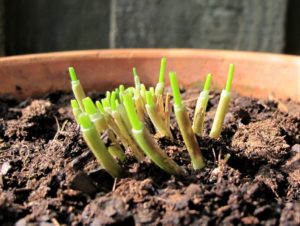
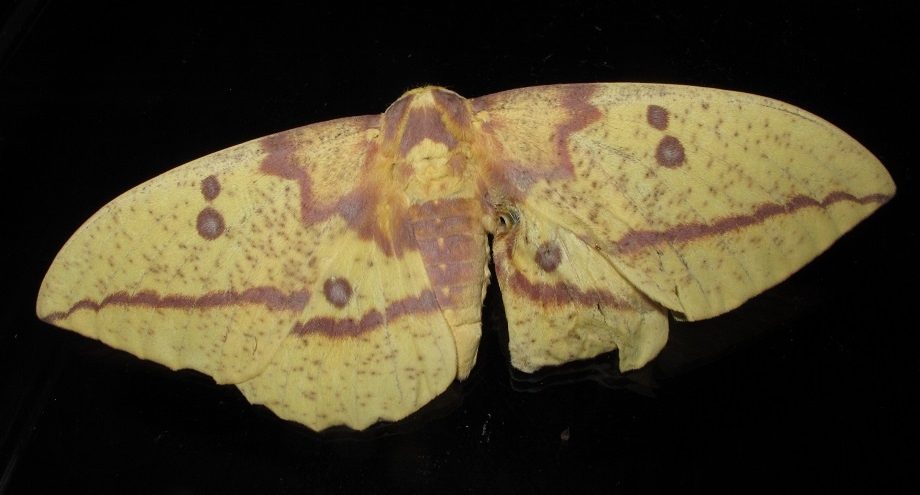
 

almonds

Almonds.


California’s almond harvest relies entirely on bee activity for nut production. In fact, beekeepers ship 75% of the country’s “beehives for hire” to flowering almond orchards to ensure a good crop.

Of the many thousands of bee species found worldwide, the honey bee is the only one that makes honey. Forager bees returning to the hive with nectar give this bounty to the processor bees. Processors pass the nectar among themselves, helping to lower the water content. Then they deposit the liquid into cells and fan it with their wings to concentrate the honey. After that, they cap the cells with wax to seal the compartment.

Forager bees mix their saliva with the pollen they collected, which the processors place in the cells. Once they’re capped, the mixture begins fermenting, resulting in a substance called bee bread. Both types of cells, with pollen and nectar, also contain enzymes from the bees. Nurse bees feed this bee bread to all larvae, and the colony can access it for sustenance during winter. Enriched bee bread, called royal jelly, is reserved for queen larvae. Not all the honey is harvested by beekeepers; most is kept in the hives.


Why All the Fuss About Pollinators?

A syndrome known as Colony Collapse Disorder has raised the alarm to protect the honey bees. It is not precisely known what prevents most of the bees from returning to the hives. However, it is known that the queen, the larvae, and the honey have been abandoned. Without help from the drones and worker bees, the colony fails.

This is not a new phenomenon, though. Farmers a hundred years ago reported losing up to 90% of their bees to this “disappearing disease”.

CCD was named around 2006, when sudden losses affected increasingly larger proportions of total hive counts. By then, some honey bee operations had lost 50 to 90% of their hives. For the next 8 years, farmers reported hive losses averaging 33% per year.


Current Research

Research has pointed to several possible explanations, although combinations of factors are probably in play. In 2013, the U.S. Department of Agriculture and the Environmental Protection Agency joined forces to monitor CCD.

Various avenues of research are being pursued involving mites, fungi, loss of habitat, and lack of genetic diversity. Additional issues include chemical contamination of food sources and agricultural pesticides, notably the controversial neonicotinoids and fungicides. The Varroa mite and phorid flies are being researched for diseases that they could be vectoring into the hives.

Another question centers on pollen’s nutritional content from our crops, which might be weakening immunity.

In 2006, the honey bee’s genetic code was sequenced, opening up molecular approaches to treating CCD. Continuing research projects, through surveys, samples, and mitigation techniques overseen by the USDA, are getting closer to solutions. Unfortunately, there are no definitive answers for now.

Courses of action currently being followed include using antibiotics, fumigants, and genetic stock showing immunity to disease.


bee on pink aster flower, pollinators

Honey bee on aster.


So, What Can We Do About It?


To Spray Or Not to Spray

We can manage our properties in ways that are less harmful to the bees’ health. First, consider whether or not we really need to spray every insect that shows up in our landscape. No, of course we don’t!

Maybe you’ve been using a certain product for the last 30 years because it has delivered a 100% kill rate. Overkill? Okay, then, now might be a good time to reassess the need for it. By the way, most municipal recycling stations take old or unwanted containers of chemicals. Please don’t throw them in the trash or pour them down the drain or in the yard!

Make some changes today that help restore ecological health and predator/prey balance to your landscape.

If there are only a few pests damaging your plants, hand-pick them. Cutting them in half or squashing them is more humane than salting them or dropping them in a bucket of soapy water. Never use salt in the garden. A strong spray of water from the hose will wash away most of the aphids.

It’s unrealistic to be entirely free of insect life. And no one wants to live in that world.


Try Using These

In my gardens, I rarely use anything stronger than horticultural oil, organic Sluggo, or Bt. All of them are available in garden centers. See if you can tolerate less than perfect foliage or fruit in return for a cleaner environment. As I grow older, imperfection becomes increasingly acceptable.

Investigate some of the organic options, which are gaining favor throughout the gardening world. The products I mentioned are available from some manufacturers that have been licensed to print the “OMRI” logo (Organic Materials Review Institute) on their labels. Some companies choose not to pay the licensing fee, but their products are “just as organic” as the OMRI products.

Most importantly, don’t spray plants when pollinators are actively visiting them. The products mentioned above do not harm honey bees if used according to label instructions. Follow them carefully, paying special attention to dilution rates and time of application.

Bt

Bt (Bacillus thuringiensis) is a naturally occurring bacterium that paralyzes the digestive system of moth and butterfly larvae by changing the pH in their gut. After ingesting some of the Bt, the caterpillar stops feeding and dies a day or two later. It is more effective on younger caterpillars.

kale with caterpillar holes

Dinosaur kale with caterpillar holes.

I use it on the brassicas (broccoli, kale, etc.) to prevent utter devastation by caterpillars. Not using it at all means more than just a few holes in the leaves. The leaves disappear!

It works on gypsy moths, canker worms, cabbage worms, cutworms, squash vine borers, tent caterpillars, and the “very hungry caterpillar” known as the tobacco hornworm, among others.

The tomato hornworm looks similar to the tobacco hornworm (photo, below), except it has V-shaped lines and a black “horn” instead of a red one. But, again, if you see entire tomato stems denuded of their leaves, look for that hornworm first before filling the sprayer. There might be only one or two on a large plant. (Tip: if you see their poop pellets, look above them.)

Different strains of Bt also control fungus gnats, potato beetles, mosquitoes, and nematodes.


tobacco hornworm

Tobacco hornworm with parasitic wasp pupae.
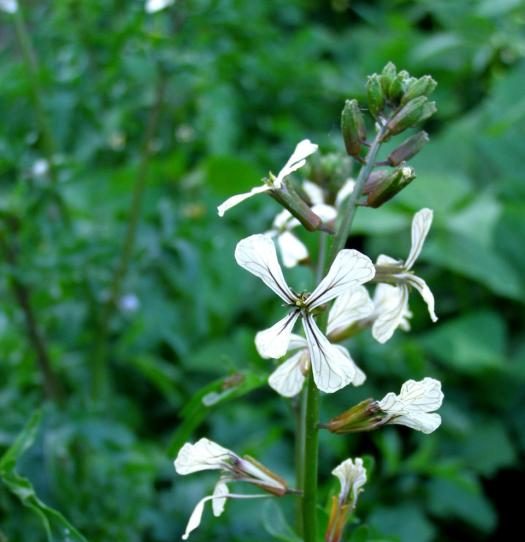
 

Braconid Wasps

This species of Braconid wasp, Cotesia congregata, will kill or severely weaken the tobacco hornworm (photo, above). First, a female wasp lays eggs on or in the caterpillar. After hatching, the wasp larvae feed on the caterpillar’s internal tissues, and then pupate in the white cocoons.

Although it looks menacing, there’s really no need to spray this one. Simply remove the weakened caterpillar to the shrubs. The adult wasps will emerge, and then a bird or a lizard might finish off the caterpillar. The adult form of the hornworm is a type of hawk moth.


Headings

Page 1: What’s All the Buzz About Pollinators? (The Fruits of Pollination), Honey Bees (Why All the Fuss About Pollinators?, Current Research), and So, What Can We Do About It? (To Spray Or Not To Spray, Try Using These, Bt, Braconid Wasps)

Page 2: Planting for Pollinators (For Bees, For Butterflies and Moths, For Hummingbirds), Pollinators In the Landscape (Plant Selection, Host Plants and Nectar Plants, The Importance of Native Plants for Pollinators, Water and Minerals, Shelter), Attracting Pollinators to Your Garden, and National Pollinator Week

Return to the top


Cilantro: Love It Or Hate It, And How To Grow It


Why We Either Love Or Hate Cilantro


Cilantro is one of those herbs that can elicit memories of mouth-watering foodie forays to Mexico, China, and India, or…maybe not! People who know it either love it or hate it. Count me among those in the latter category. But, as a grower, I included it in my farmers’ market inventory, displaying it downwind from where I stood.


young potted cilantro

Young potted cilantro.


Those who dislike cilantro have a spot in their genotype resulting in taste and olfactory receptors that can detect aldehyde compounds. This substance reminds us of soap or something metallic. About 15% to 20% are not keen to keep it in the kitchen, although in those countries where it is a dietary staple, a greater percentage of the population like it. Closer to 25% of my customers did not use cilantro.

Cilantro originated in Iran, and spread to southern Europe, northern Africa, and southeast Asia. It has been cultivated for several thousand years. In fact, the oldest remains of coriander were discovered in pottery found in a dry Israeli cave. They were dated to approximately 8,000 years ago!

This article describes some of the problems gardeners face when growing this plant and offers some solutions.


The Nature of Cilantro


bee on cilantro flower

Cilantro flowers.

The difference between cilantro and coriander (Coriandrum sativum) is based simply on which part of the plant you’re referring to. Cilantro refers to the leaves and coriander refers to the seed.

Cilantro is a short-lived annual that prefers cool weather. All parts are edible, including the roots, although leaves and seeds are consumed most often. Other parts might be bitter.

As a member of the Apiaceae family, its flowers are umbel-shaped, as indicated in the former name for the family, Umbelliferae. This family of plants also includes parsley, dill, chervil, celery, fennel, and carrot—all characterized by their umbrella-shaped flowers. The current family name is a clue that bees (such as the honey bee, Apis mellifera) are attracted to the flowers.


Cilantro Substitutes

Another plant with similar flavor grows better in the summer than most varieties of cilantro. Mexican coriander (Eryngium foetidum), also in the family Apiaceae, from Mexico to South America and the Caribbean, is popular in the cuisine of the area. Slow to grow from seed, culantro (with a “u”) develops leaves with raspy edges, so use the younger foliage in cooking.

Vietnamese coriander, Persicaria odorata, a perennial native to southeast Asia, also has cilantro-like flavor. It’s in the Polygonaceae family, and is related to the smartweeds and knotweeds.

Papalo (Porophyllum ruderale or P. tagetoides, in the Asteraceae family) is a herbaceous annual found in Central and South America. It has cilantro flavor, apparently with mint and arugula mixed in.

Although these herbs can substitute for cilantro, this article describes the cilantro we’re more familiar with, Coriandrum sativum.


Consider Climate


In the moderate climates of the southern U.S., cilantro planted in the autumn grows beautifully, but slows down as cold weather approaches. It often survives winter conditions with a little protection or with none at all. From the end of winter into spring, it resumes growth.

Before long, warm temperatures signal the plant to flower. When the new leaves become small and finely dissected, flowering will soon follow. Pull the whole plant and use the harvested leaves. Time to start a new crop! It is best used fresh; most flavor is lost when dried.

Successive crops of cilantro grow from spring through fall in the northern half of the country. A prolonged summertime heat wave, though, even far into the north, is the beginning of the end for this crop of cilantro. Try shading young plants during hot weather, and water with cold water to prolong the harvest.


Winter Protection


greenhouse for cool season vegetables

The small greenhouse in Maryland.


Cilantro is not likely to survive severely cold winters without the protection of a cold frame, a greenhouse, or a sunroom. Don’t coddle it with indoor temperatures that are comfortable for you. Grow it very cool, even cold (40’s to low 60’s F), for longevity and the best quality.

An unheated greenhouse offers adequate conditions for continued growth through the winter in the southern half of the country. Farther north, cilantro will grow in such a structure with minimal heating. Remember to open vents to prevent overheating in the daytime, and close them in mid to late afternoon.


Coriander


coriander (cilantro seeds)

Cilantro seedpods, or coriander.

If you’re growing cilantro for the seeds (coriander), let the plant mature naturally. Small white flower clusters will develop fruits, each of which contains 2 seeds. The round seedpods are fairly large and can be harvested when they are light brown and dry, but don’t wait until they start rolling away! Consider loosely wrapping the flower clusters with a fine mesh bag in order to catch the seeds.

Another way to harvest the seeds is to pull the plant and hang it upside down, in a mesh bag or a paper bag that permits air flow. Just make sure there are seeds already developing before you uproot the plant.

Or, let Mother Nature do her thing. Let the plant stay in the garden, go to flower, and set seed. The varieties of cilantro I’ve grown are open pollinated and not hybrids, so the next generation will look and taste like the parent generation. Ripened seeds will fall to the ground and germinate. But you might see young seedlings growing a few feet away, or at the end of the sidewalk. Maybe the critters that reside in your garden will be the only ones to reap this harvest.


What Cilantro Likes


cilantro

Cilantro leaves.


When growing cilantro, remember these 5 things: cool, young, fertile, moist, and fast. I’ll call them “Cilantro’s 5 Needs”. Customers often complained that the transplants they’d just bought from the garden center immediately went to seed. The following tips will help you grow a great crop of cilantro.

Keep a supply of seeds on hand, in case nurseries in your area don’t have the plants. Cilantro seeds germinate and grow rapidly. Starting cilantro from seed is one of the easiest projects for beginning gardeners. Seeds remain viable for a few years if they’re kept cool and dry.


1. Cool

Ask for cilantro in February or March, or whenever the “shoulder season” occurs where you live. Although that’s weeks before the last spring frost, that’s precisely what cilantro likes.

Make sure the plants are properly hardened off. That’s a process that gradually introduces cooler, sunnier, and breezier conditions to a greenhouse-grown plant. Any plant that is coddled in the warm, almost still environment inside a greenhouse is very likely to suffer stress or even death when suddenly exposed to the rigors of the outdoors.

During the cooler months of the year and during the transitional shoulder seasons, grow cilantro in full sun. At higher temperatures, provide direct sun in the morning hours, and light shade the rest of the day. You might have better results growing cilantro in the summer if it is planted in dappled sun or light afternoon shade cast by a tomato plant.

Because garden soil is cooler than soil in a pot, summer-grown cilantro will last longer if it’s planted in the ground. A thin layer of mulch will keep the soil a bit cooler.

Pot Color

herb pot.If your only option is growing cilantro in a pot, choose a light-colored pot during the warm months and a dark pot in the cooler months. Why? Because the color of the pot reflects or absorbs energy from the sun.

Summer sun beating down on a lovely cobalt blue ceramic pot can heat the soil to over 100°F. Conversely, a dark pot absorbs the sun’s energy in winter, and keeps the soil unfrozen a while longer.

If you want to include cilantro in a combination planter, plant the cilantro on the north or east side (in the northern hemisphere) of the pot. The soil there will be cooler than that on the south or west side.


2. Young

When purchasing plants from a grower, look for the youngest ones you can find. However, they shouldn’t be so young that the root system is too fragile to survive the transplant. Unless you need fresh cilantro now, avoid large plants in small pots.

If the plants are potbound, where roots tightly fill the pot, they are stressed. They should not stay in their little pots so long that the cramped quarters check their growth. If they have not been fertilized, or if they are showing signs that even a young plant’s leaves are getting finer in texture, they are stressed. And stressed cilantro plants flower—or bolt—prematurely. 

I’ve seen cilantro with one seed per pot and I’ve seen it sown with 50 seeds in a pot. You want to find the happy medium, the right number of seeds to give lots of leaves to pick, but not so many that they intensely compete with each other. When I grow cilantro for sale, I sow 3 to 5 seeds in a pot. 

Since cilantro is a short-lived plant to begin with, its days are numbered with any of those warning signs: tight pot, too many seeds, finely dissected leaves, poor color. And if they’re already in flower, plant them, pick what you can, and let the bees collect nectar and pollen…for a little while. You can try cutting them back hard. If weather is favorable, you might get some regrowth out of them, but not usually.


3. Fertile        

organic fertilizers

Organic fertilizers, including worm castings, bat guano, blood meal.

Dark green leafy herbs, such as parsley, basil, arugula, mint, and cilantro, need rich, fertile soil. Nitrogen, one of the primary macronutrients, is needed on a regular basis and in larger amounts than other nutrients.

Nitrogen is highly mobile, so it is easily washed through the soil by rain or irrigation. Potted leafy herbs should be fertilized every 1 1/2 to 3 weeks, depending on soil quality and pot size.

Without enough nitrogen, plants lose their rich green color and become pale. New growth slows down, and older leaves turn yellow and eventually die. More importantly, poorly colored leaves taste bitter or, at least, off-flavor.

Many plant experts recommend not fertilizing herbs, but I disagree. And, no, fertilizer doesn’t make cilantro toxic! Fertilizers break down into simpler molecules, and the plant recombines these molecules into compounds needed to carry out cellular processes.

N-P-K

For cilantro, use fertilizer that has a higher first number on the package. Examples: 10-6-4, 24-8-16, and fish emulsion’s 5-1-1. Those 3 numbers on the product label refer to the percentage content of Nitrogen, Phosphorus (phosphate), and Potassium (potash) in the formula. They always appear in that order on any label: N-P-K. 

Nitrogen is essential for building chlorophyll, the green pigment in foliage and stems. Phosphorus stimulates flower and fruit production, and root development. Potassium affects cell wall strength and hardiness. This is a simplified depiction of the roles these 3 major nutrients play; there are many other ways they contribute to plant growth and function.


4. Moist

Keep soil evenly moist—not too dry, which causes wilt, and not too wet, which rots the roots. Once root rot has claimed the root system, it will not recover. Make sure the soil drains well, and don’t let the plant sit in a saucer of water. A well-established potted plant likes to be thoroughly watered—that is, until water begins to exit the drainage hole.

Sometimes water rushes out the drainage hole immediately after application. This occurs when the soil has dried too much, causing the root ball to shrink from the inside of the pot. The next time the plant is watered, the water will find the path of least resistance, which is the air gap between the inside of the pot and the root ball. Most of the root ball will miss the opportunity to absorb water. Fill the gap with potting soil and use a wooden dowel to firm the soil, filling the space. This will slow down percolation, allowing the entire root system to pick up moisture.

Potting soils with a large percentage of coarse material, such as perlite and pine fines, drain and dry quickly. Products with finer particles, such as peat moss, compost, and loam, tend to hold water better.

Garden soil well-enriched with compost, aged manure, or planting mix encourages deep rooting. Lower levels of soil are cooler and have more moisture, contributing to a longer life for this herb. Cilantro is less susceptible to root damage in freezing weather when grown in the ground.

Cilantro doesn’t mind cool water from the tap or even refrigerated water, but never use warm or hot water. Check the temperature of water coming from a hose that has been sitting in the sun; it might be too hot for any plant!


5. Fast

An herb that completes its life cycle in a short period of time, like cilantro, can’t be forced to live as long as other plants do. It’s not in its nature! You can have cilantro almost year-round, though, if you start seeds every few weeks or purchase new transplants, if they’re available.

Weather permitting, sow a few seeds 4″ apart in a row, about 1/2″ deep. If the soil isn’t too cold, seeds should germinate in a week to 10 days. As the seedlings grow, thin to 1 or 2 plants per 4″ of row; thinnings can go right to the kitchen.

Another option is to experiment, sowing a few seeds in each of several spots around the garden. You’ll soon notice where they grow best in any particular season.

In soils with high clay content, loosen the bed to a depth of 12-14″, incorporating (not layering) pine fines or grit to increase drainage. Amending the top 6-8″ of the garden bed with lots of organic matter encourages roots to grow quickly. Apply fertilizer every few weeks to encourage leaf production.

You can begin harvesting some of the leaves soon after transplanting, or a month or so after seeding. Pick mature outer leaves first but allow the young leaves in the center of the rosette to continue growing.


Food Curry Indian Cuisine Asian - tortugadatacorp / Pixabay


Return to the top

Headings

Page 1: Why We Either Love Or Hate Cilantro, The Nature of Cilantro, Cilantro Substitutes, Consider Climate, Winter Protection, Coriander, and What Cilantro Likes (Cool, Young, Fertile, N-P-K, Moist, Fast)

Page 2: What Is Eating My Cilantro? (Rabbits and Deer, The Black Swallowtail Butterfly, Safe Haven, Raising Caterpillars, At The Olney Farmers’ and Artists’ Market), More Insects and Diseases (Insects and Nematodes, Diseases), and The Best Variety I’ve Grown

Aphids and Braconid Wasps

2018

Here Come the Aphids and Other Pests!


Springtime here in North Carolina was quite cool, but the temperatures are now in a more predictable, springlike pattern. For weeks now, we have been seeing outbreaks of certain insects, notably aphids.


ants and aphids

Ants feed on honeydew, the sweet excrement of aphids.


Onion Aphids


If you have chives, one of the first perennial herbs to emerge, you might notice aggregations of little black insects clinging to the leaves. Unless you look closely, you might think it’s just dirt. These onion aphids can be squished between your fingers, or use a strong squirt of water from the hose. Luckily, aphids are easily killed. If you must do something, mix up a solution of horticultural oil or insecticidal soap in a spray bottle.

There are around 5,000 species of aphids, and they come in almost every color of the rainbow. They are most common in temperate zones around the globe.

A mouthpart called the stylet pierces phloem tubes of stems and leaves, and sometimes roots, of a wide variety of plants. Phloem carries products of photosynthesis, rich with sugars and other nutrients in solution, so it’s no surprise aphids target the phloem tubes. Aphid saliva can distort the leaves, curling around and protecting the feeding insects from predators. Unchecked infestations can remove so much sustenance from a seedling that vigor is severely compromised.

The photograph above shows aphids, and ants feeding on their “honeydew”, or excrement. The presence of ants often is an indication that aphids are nearby. Ants fiercely protect aphids, and the food they generate, from predators.

Viral diseases are spread by aphids, and can kill your vegetables. This is why it’s so important to inspect your transplants by looking at the growing tip, the stems, and the reverse (bottom) of the leaf, where aphids tend to congregate. Look very closely, because the color of the aphid is often the color of the plant, a very effective camouflage.


Amazing Aphids

onion aphids

Onion aphids from chives.

Aphids reproduce asexually (no males; this is called parthenogenesis) by giving birth to cloned live female aphids (viviparity), or nymphs—lots of them. They bypass the egg-larva-pupa stages. And about a week later, those young aphids will begin to give live birth to another generation. So, you can see how their populations can build exponentially if unchecked.

When aphids are actively reproducing, they’re present in large numbers, feeding from those nutrient-rich phloem tubes. You might notice the honeydew deposited on the foliage below them. This clear layer of sweet and sticky residue often attracts ants. Eventually, black sooty mold spores will land on the honeydew and develop into a dark film that cuts off light to the leaves.

(***Update***: These black onion aphids in the photograph dropped off a chives plant that I had brought inside in January, 2021. Dinner for the betta.)

In autumn or when food becomes scarce, winged adult aphids mate, after which females will lay eggs. This ensures genetic diversity and broader territories. Eggs overwinter, and hatch into wingless females in spring.


Ladybugs


Now you might be wondering, “Why are there so many aphids so early in the year?” Populations of various insects build up in the local environment as numbers of predators gradually increase. You sometimes see a ladybug on a warm winter day, but it won’t be until all the “food is on the table” that you’ll see greater numbers of ladybugs and other predators coming in for the feast.

The larva, or immature form, of the ladybug is a grayish-black and orange crawler (photo, above) that resembles an alligator. Although the adults feed on aphids, the larvae consume huge numbers of them. Always identify the insects before deciding if they’re “good” or “bad”. Look up your local Agricultural Extension Service websites for excellent photographs and advice.


tiny praying mantis on wood hyacinth flowers

Tiny young praying mantis on flower of Hyacinthoides hispanica, the wood hyacinth.


Braconid Wasps


braconid wasp, aphids

Female braconid wasp preparing to inject eggs into aphids.


The ladybugs will be joined by many other beneficial spiders and insects, including green lacewings, hover flies, praying mantises, and the rarely noticed and underappreciated species of Braconid wasps. No, these wasps won’t make anyone run for cover. They’re hardly noticeable slender insects, and many are less than 1/8″ long.

Braconid wasps lay eggs inside the aphids, where the immature larvae kill the aphids by feeding on their tissues. That’s called endoparisitism. Then they transform into adult wasps, emerging from the dried aphid exoskeleton and flying away to mate and to carry on the family tradition. Depending on the species and temperature, it usually takes 2 to 3 weeks for the adult wasp to emerge.

Adults also occasionally consume aphids. Each female braconid wasp can parasitize about 200 aphids in her brief lifetime.


Aphid Mummies


aphid mummy

Aphid mummy.


What remains after the parasitic wasp emerges from the hollowed-out aphid is a black- or tan-colored shell, called an aphid mummy. If your eyesight is good, or with the help of a magnifying glass, you can see the hole where the wasp exited the aphid (photo, above).

Unless the aphid infestation is going to cause irreparable harm to the plant, let nature take its course, or just wash most of it away with water. Attacking every unidentified and supposedly “bad bug” with the arsenal you’ve assembled from the garden center upsets the balance that Mother Nature has provided. Accepting a blemish here and there is a small price to pay for choosing to foster a healthy ecological system in your own yard.

When harmful insects get way ahead of the game, though, it’s time to take appropriate action. But try to use a more benign approach that will accomplish the goal without poisoning the environment. Try squishing them or spraying a blast of water from the hose first. That should remove most of the insect pests.

If that’s not satisfactory, use a targeted application of insecticidal soap or horticultural oil, not a wholesale spraying of the entire garden. Over time, you’ll notice fewer insect pests and more beneficials as your property approaches a natural equilibrium between the two. But first, learn to identify the commonly found insects in your area—both the good ones and the bad ones.


Sustaining the Population

To keep populations of Braconid wasps around your property, you’ll need to provide the adults with sources of food when few aphids are around to sustain them. The adults look for nectar in the small flowers of the carrot family (Apiaceae), including parsley, cilantro, dill, and wild carrot.

broccoli arcadia flowers

Broccoli ‘Arcadia’ flowers, April 2020.

Their diet also includes nectar from flowers of brassicas, such as broccoli, kale, collards, arugula, and land cress, appearing in late winter to spring. The early flowers of fruit trees, shrubs, bulbs, and other plants also provide sustenance.

I don’t pull out the older spring blooming greens in the vegetable garden until the beneficial insects have had a chance to feed from them. Consider letting some of the early blooming garden weeds hang around for a while, pulling them before seeds mature.

Several generations of these little wasps will populate your garden each year. There are thousands of species of Braconid wasps, each one seeking battle with a particular enemy. Include a variety of native trees, shrubs, and flowers for the species of insects that are native to your area. Planting species that flower at different times of the year helps the insects gain a sustainable presence in your yard.

If you’ve ever seen how quickly aphids can take over, you’ll want to encourage Braconid wasps to remain on the property in order to control their populations. Avoid spraying anything in the garden, if at all possible, which kills beneficial insects as well as the harmful ones.


chives in flower

Chives in flower, after overwintering outdoors.


A Little Help For Our Friends


So, before you snip some leaves from your chives plant for tonight’s baked potato, look for these tiny black onion aphids. You might find some of the aphid mummies left behind on the chives or on the backs of the leaves of overwintering broccoli or kale.

Once you’ve learned how to identify braconid wasps, learn to live with these tiny warriors by providing what they need. Help them help you…


Return to the top