Page 2
A Step-By-Step Guide To Planting a Potted Tomato
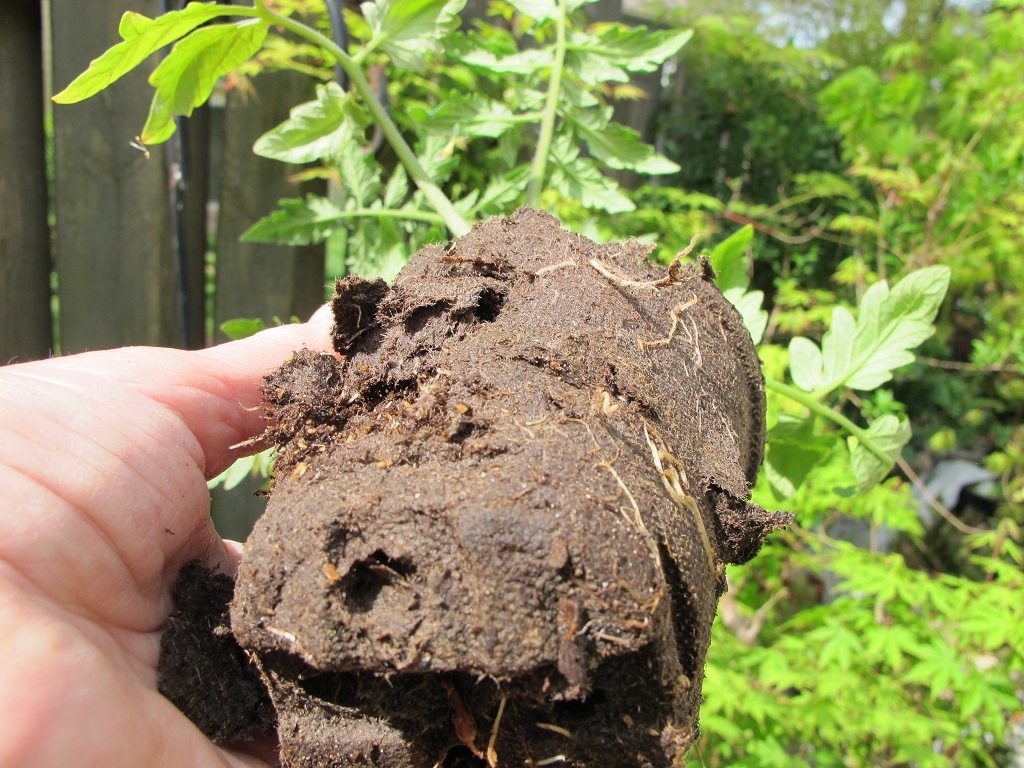
Make some holes in the peat pot before planting.
If you saved seeds from last year’s heirloom tomato, starting the seeds indoors provides an economical alternative to buying plants. Either way, here’s the step-by-step guide:
- Water the tomato in its original pot.
- Choose a large container for your potted tomato project. I use 20″ pots (approximately 18 gallons), or larger, for indeterminate tomatoes. A dwarf tomato, such as ‘Terenzo’, will live in a 2-gallon pot. When you see how often water is required for an indeterminate variety, you’ll see that a larger pot is best. Plus, it’s less likely to fall over in the wind.
- Find the right spot for your pot. Make sure there’s enough direct sunlight for tomatoes (6 hours minimum, 7 or 8 preferred), and access to a source of water. Keeping it close to the house or the back door, within view, will remind you to water.
- A potted tomato on a cart can be moved around to capture the sun as it becomes available.
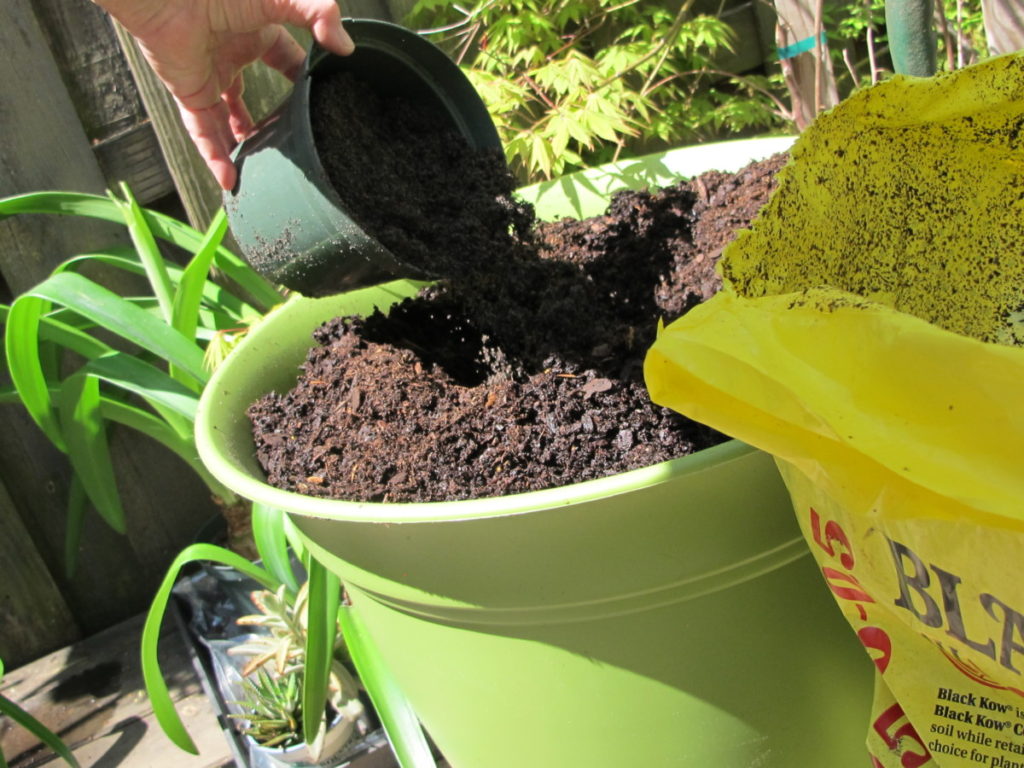
- Fill the pot most of the way to the rim with dampened, fresh potting soil. Firm it lightly as you fill the pot so the soil won’t settle.
- Add about a gallon of composted cow manure, and mix it with soil in the top third of the pot. Nutrients will filter down to the roots with irrigation.
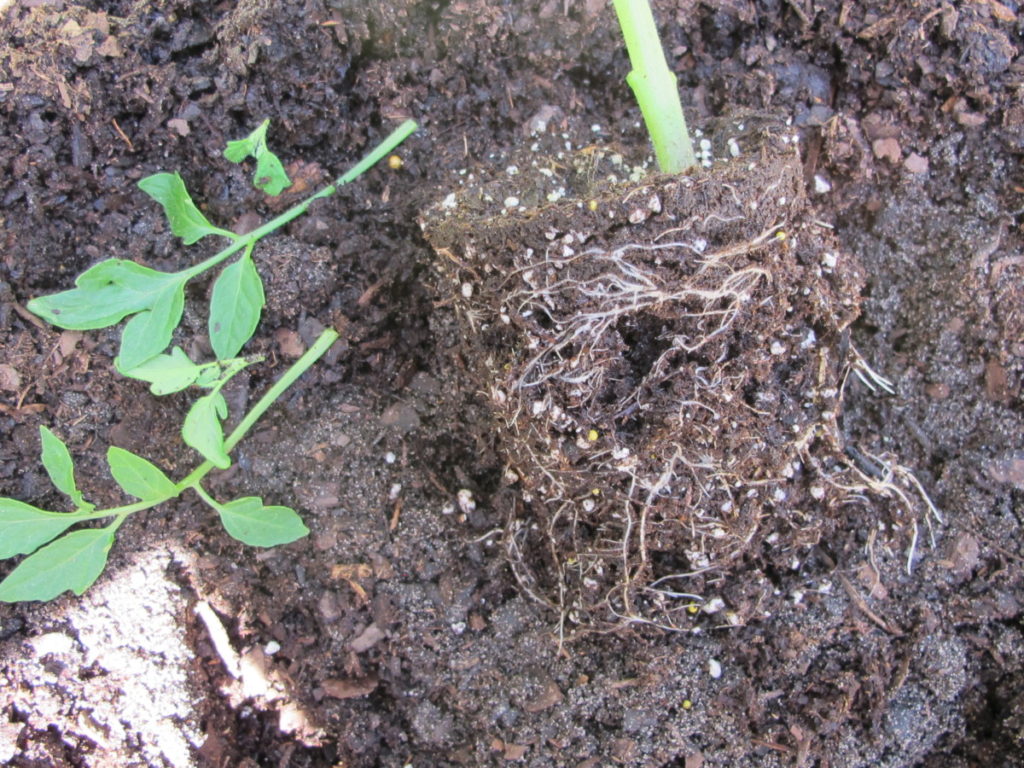
- Remove the tomato from its pot. Use a knife or a stick to score the outside of the root ball. This encourages new roots to grow quickly.
- Plant the tomato deeper into the soil than it was growing in the pot. In a few days, new roots will emerge from root initials along the tomato stem. Most other plants will die if you do this, so—only the tomato! It’s okay if just a few leaves on the top of the stem are showing above the soil.
- Firm the soil against the stem to stabilize it.
Continuing…
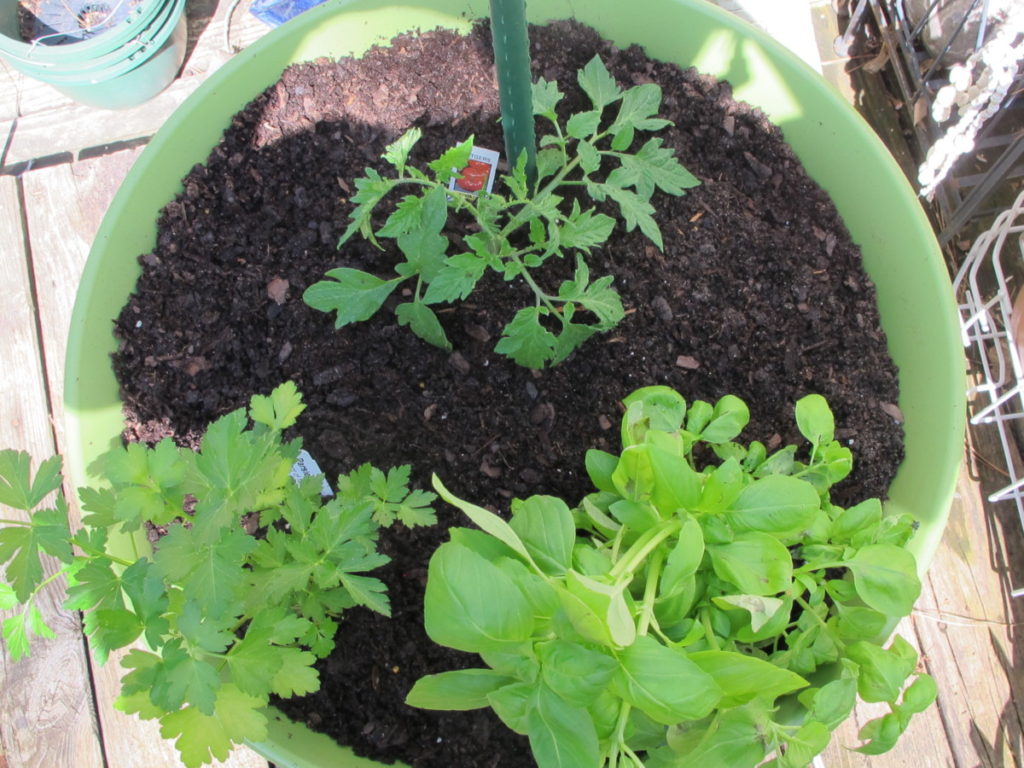
- Insert the stake a few inches behind the stem, to the bottom of the pot.
- Water the plant and some of the soil surrounding the roots. Don’t saturate the entire pot of soil. Not only will it take a while to dry, but all those nutrients will be flushed away. It won’t be long, though, before roots reach the bottom of the pot. If heavy rain is in the forecast, cover the soil in a newly potted tomato to prevent it from taking on too much water. The pots I’m using have attached saucers, but they don’t hold much water. In rainy weather, pot saucers of young plants might have to be emptied. But on a sunny day, a full-grown leafy tomato will absorb that extra water in next to no time.
- Insert the label on the north side of the plant, where it won’t fade in the hot sun. Keeping track of the cultivars’ names in a journal will make the selection easier next year. Include information such as planting date, weather, first fruit, disease concerns, flavor, yield, and an answer to “Would I grow it again?”
- Add about an inch of mulch to help conserve moisture.
- (***Update***: The potting soil is drying fast, and these tomatoes aren’t even close to being full-grown. The high percentage of pine fines created a medium with large air pore spaces. One remedy is to add some loamy clay from the garden. There is a risk of introducing weeds, of course, and possibly disease spores, but I’ll watch closely. 4/28/19)
-

- Fill pot with soil. I’m adding some aged cow manure.
-
- Remove lower leaves, and plant tomato lower in the soil.
-
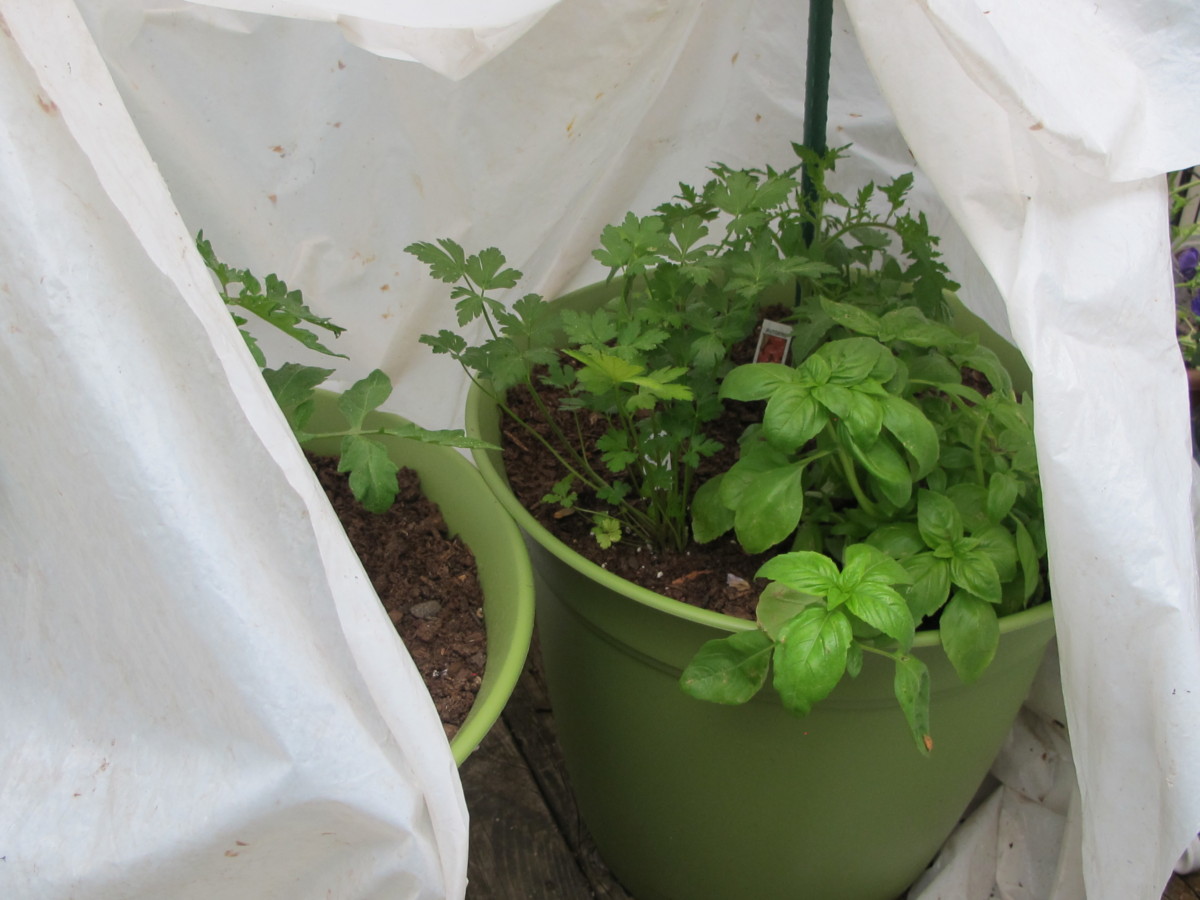
- This pot: tomato was planted toward the back, with parsley and basil in front. Stake was inserted behind the ‘Rutgers’ tomato.
Maintaining the Potted Tomato
Temperature
We live in USDA plant hardiness zone 7b/8a, so, according to the averages, our last spring frost falls on or about April 10. If you can’t move the potted tomato indoors on cold nights (below 50°F), cover it with a few layers of old sheets or large pieces of plastic. Although the potted tomato will survive an occasional night into the 40’s F, prolonged exposure weakens the plant.
Including the pot within the plastic sheet conserves warmth in the root zone. Avoid letting the plastic touch the foliage.
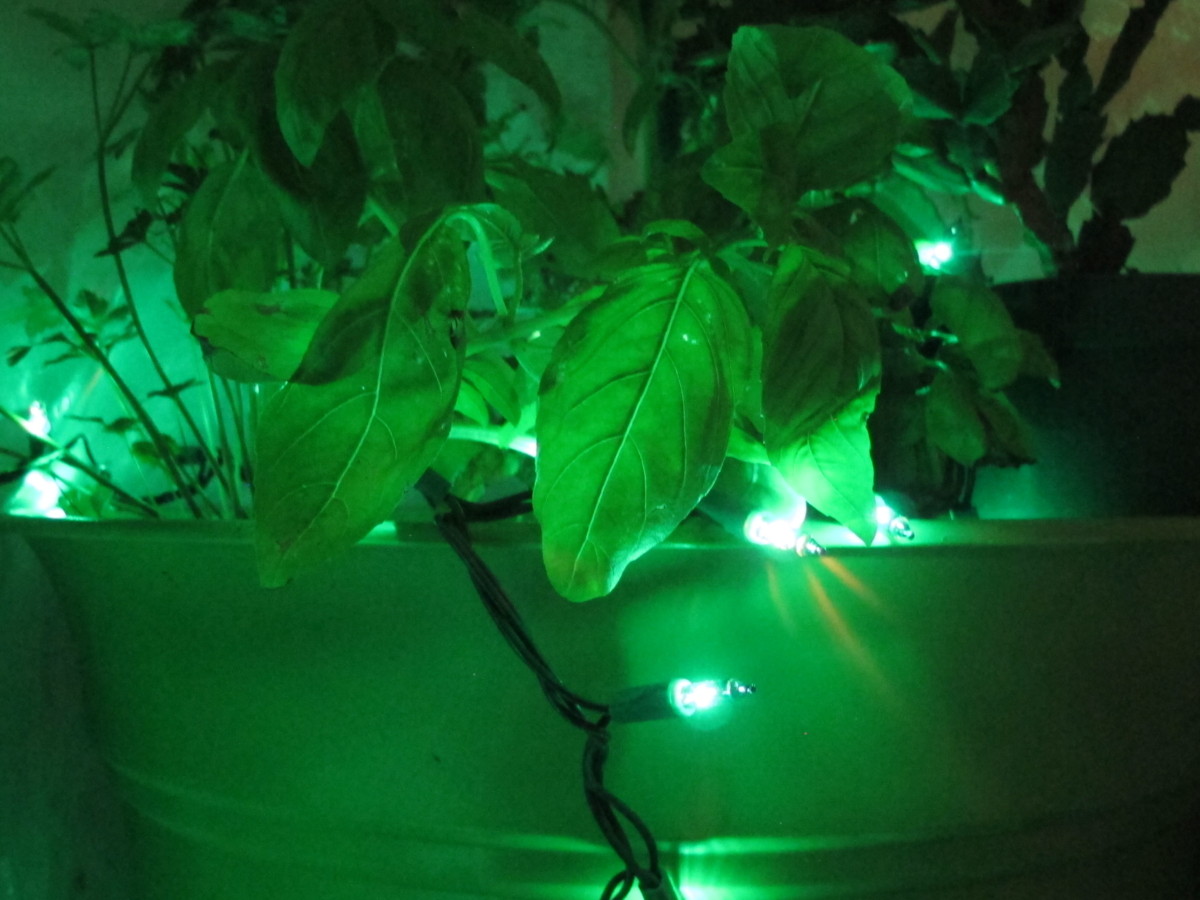
Have a string of indoor/outdoor miniature incandescent lights ready to add under the covering, just in case. I’ve been doing this for decades, and it really works! The lights give off gentle heat, raising the temperature around the plants by 5° to 20° F. Simply lay the string on the soil around but not touching the stem, and around the pot.
Heat rises, so you don’t need to wind the string up into the foliage. These Christmas lights will save tender plants from being damaged by very cold or frosty temperatures. Don’t forget to remove the covering in the morning. Heat builds up very fast under plastic once the sun hits it. (***Update***: In photographs, below, plastic sheeting tied to stakes protected young plants from recent heavy thunderstorms and cold temperatures last night. 4/16/19)
Watering the Potted Tomato
Water all the way through the soil, making sure all roots are moistened. As your potted tomato plant grows larger, the demand for water increases. It wilts readily if water is lacking.
A full-grown plant on a warm sunny day will need a few gallons of water! Don’t use the hot water that first comes from a hose sitting out in the sun. Overwatering a plant with ripening fruits can dilute flavor, and inconsistent watering could cause the fruits to crack.
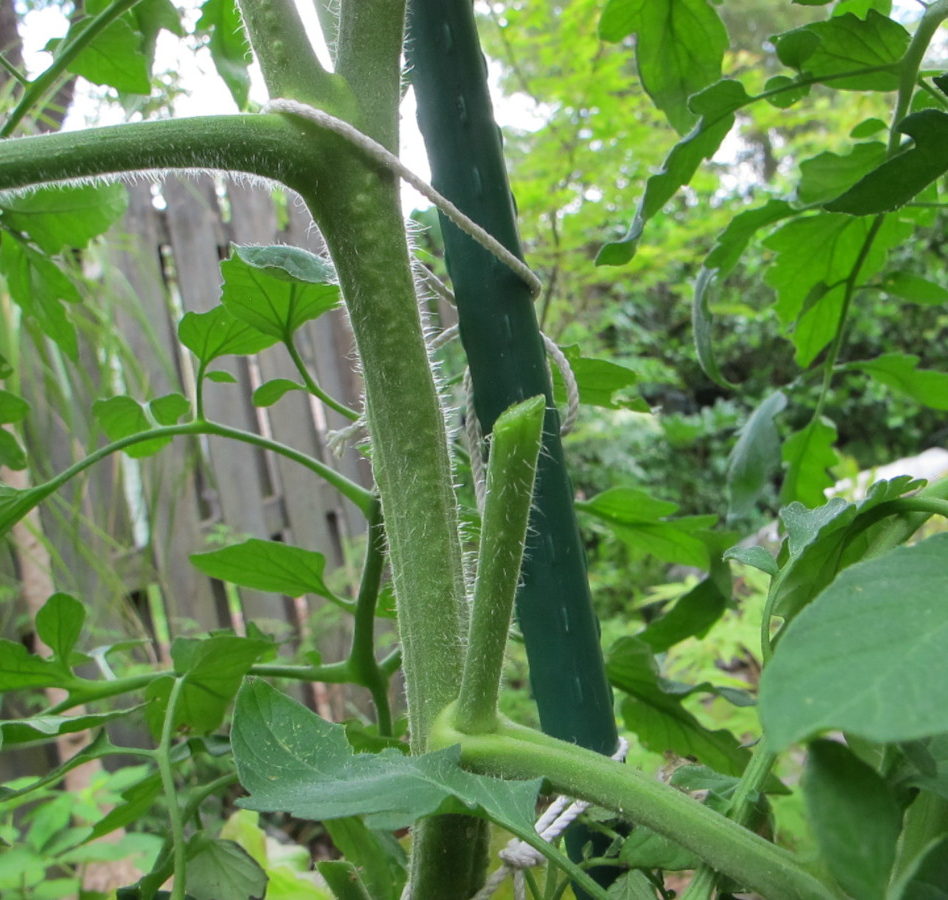
Tomatoes are weedy plants, so roots grow fast, and the top grows fast. Have some twist-ties, shoelaces, or soft twine handy to secure the stem to the stake. Don’t tie so tightly that the stem becomes constricted as it grows in diameter.
-
- Two large pots with tomatoes and herbs, before lights. Plastic protected young plants from heavy rain.
-
- Lights for warmth, especially under basil.
Fertilizing a Potted Tomato
Most potting soils have a starter charge of fertilizer in the mix. Some have controlled-release fertilizer prills included. Eventually, though, you’ll need to supplement what has been provided. Potted tomatoes need more frequent fertilization than plants grown in the ground.
I use 2 or 3 kinds of fertilizer for our tomatoes and peppers. One is a complete fertilizer, with all the major and minor nutrients. The other contains a high percentage of calcium. Maybe once or twice a season, I’ll use leftover fish emulsion or Sea-Plus.
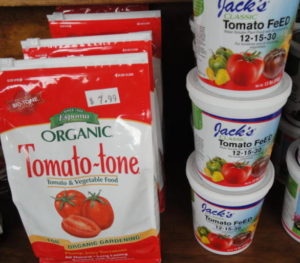
The complete fertilizer I like to use is Jack’s soluble Tomato Feed. The numbers on the label, 12-15-30 (N-P-K), indicate that this product contains 12% nitrogen, 15% phosphate, and 30% potash, in addition to some calcium and magnesium. These are the macro nutrients. The minor nutrients (boron, zinc, iron, manganese, molybdenum, chlorine, copper) help plants carry out hundreds of cellular functions. For tomatoes in particular, an adequate supply of all these nutrients contributes to full tomato flavor.
Avoid high-nitrogen fertilizers, which drive rapid, tender growth. Also, check the label for the types of nitrogen in the product. Ammoniacal- or urea-based nitrogen causes faster growth (stretching) than the nitrate form. Ammoniacal nitrogen also affects soil pH, making it more acidic over time. Products often have both kinds of nitrogen, but for best performance in potted tomatoes, look for a higher percentage of the nitrate form (photo, below, right).
-
- Tomato-tone and Tomato Feed for vegetables in containers.
-
- Tomato fertilizer label, showing kinds of nitrogen.

Blossom-End Rot
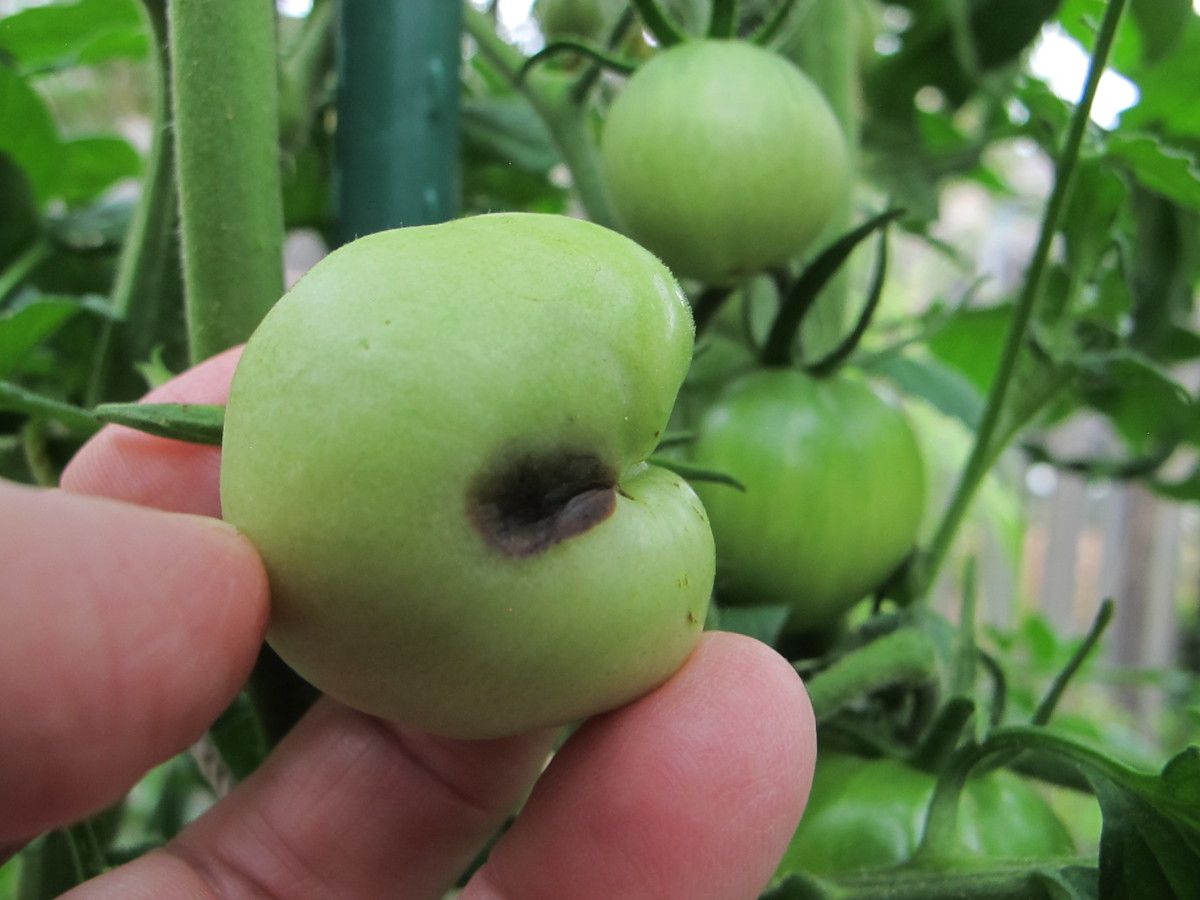
Blossom end rot on ‘Black Prince’ tomato.
Look for another tomato fertilizer that has a high calcium content (6% or 8%), such as Espoma’s organic Tomato-tone. Calcium helps prevent blossom-end rot (BER), which is a black rot that develops on the end of the tomato where the flower used to be. This nutrient can be absorbed by the plant’s roots only when it’s in solution, in the presence of water. So, never let the soil go dry.
Garden centers carry a few products that can be sprayed on the young fruits to prevent BER, but I haven’t tried them, and the reviews I’ve read aren’t encouraging. Also, changing varieties of tomatoes might solve the problem; some cultivars are more susceptible than others.
BER is not a disease, but a physiological reaction to calcium deficiency. Lack of calcium availability reduces cell membrane permeability, leading to collapsed cell structure in the fruit. New growth in the fruit is compromised, and the fruit usually rots before it ripens.
Blossom end rot happens for a few reasons:
- Uneven moisture in the soil. If extreme on either end (soil that is too dry or too wet) the roots can’t transport adequate quantities of calcium to distant parts, namely to the end of the fruit—the blossom end.
- Low calcium content in the soil. Use fertilizers that contain calcium. Overfertilizing in general will cause disruption in calcium uptake. Ground eggshells take longer to break down, so use a packaged product.
- Improper pH of the soil. Add agricultural lime (calcium carbonate) to raise the pH, if necessary. Gypsum (calcium sulfate) adds calcium if the pH already is in the recommended range. Flowers of sulfur lower the pH, making soil more acidic. Aim for pH levels around 6.0 to 6.8. Outside that range, nutrients are more difficult for the plant to access. Ideally, address the need to alter soil pH a few months before planting.
- Stagnant air flow, or high or low humidity around the plant. These conditions are often overlooked as a cause of BER. Transpiration is the flow of water from the roots, through the stems, to the leaves and fruits, and into the atmosphere through the stomata, or stomates. (Stomata [stoma, singular] are tiny openings in the plant’s epidermis that open and close in response to heat, light, humidity, wind, and soil moisture. They regulate gaseous exchanges between the leaf’s interior and the atmosphere.) Dissolved calcium moves in that stream of water, through the xylem tubes. The plant closes its stomates in low humidity to conserve moisture within the leaves. Although stomates generally open in high humidity, there is decreased “transpiration pull” because the humid atmosphere can’t pull moisture from the leaves. Since the far side of the fruit is the “last stop on the transpiration highway”, this is the likely place for problems to occur. If you always keep tomato plants against the wall or in a corner, and sometimes see BER, try moving them farther from the house for improved air circulation.
This spotted tomato (photo, above) was wedged between the stake and a main stem, restricting the amount of water and calcium that reached the fruit. Hence, BER. This is the only one of 40 fruits showing blossom end rot.
How Often?
Start fertilizing 3 weeks after potting up the young tomato. And then continue applying the fertilizer every 2 to 3 weeks. Long periods of rain can leach out a lot of the nutrients—particularly nitrogen—so you might have to fertilize more often.
The brands mentioned here are merely suggestions; you might have your own favorite fertilizers that have worked for you. I use Tomato Feed and Tomato-tone for most of the tomatoes’ needs, alternating between the two products.
Finally, save the chicken manure, earthworm castings, fish emulsion, dried blood, bat guano, and other high-nitrogen fertilizers that promote foliage growth for leafy greens and herbs. However, adding a small amount to your tomatoes won’t hurt.
Limiting the Suckers On Your Potted Tomato
-
- Index finger points to a sucker.

-
- Tomato sucker removed.
A potted tomato, if left unattended, will grow into a tangled mass of leaves and stems and branches. I allow 3 or 4 main stems to grow, but some gardeners prefer only 1 or 2.
Remove the sucker, growing from an axillary bud, which grows in the angle between the leaf and the stem. The plant won’t have to support all that greenery and can direct nutrients to developing fruits instead. Dappled sunlight falling on the fruits, especially on the black tomatoes, helps develop full color, and, therefore, high antioxidant content.
Some gardeners report that pruned plants yield fewer but larger fruits. I can’t confirm this, as I’ve always limited the number of main stems.
Also, perhaps most importantly in humid climates, there is less chance for disease to infect a thinned plant that permits better air circulation. And potted tomatoes dry fast, so limiting the top growth helps prevent undue water stress.
As long as tomatoes receive what they need, you’ll have tomatoes. If this is your first attempt at home grown tomatoes, you’re in for a treat. Those first vine-ripened tomatoes will be the ones whose flavor sets the standard for purchased tomatoes in the future. And, therefore, that’s why you’ll probably always grow tomato plants.
This information will get you off to a good start. Check with your local agricultural extension specialists for more information. They also can help you take a soil sample for testing.
Happy spring!

‘Black Prince’ tomato. After a few more days, the fruits will darken.
Headings
Page 1: How To Grow a Potted Tomato, Tomatoes, Basil, Caterpillars, Anyone?, Big Pots (Peppers, One More Tomato, And Zucchini)
Page 2: A Step-By-Step Guide To Planting a Potted Tomato, Maintaining Your Potted Tomato, Temperature, Watering a Potted Tomato, Fertilizing a Potted Tomato, (How Often?, Blossom End Rot), Limiting the Suckers On Your Potted Tomato