As you might know from reading The Farm In My Yard, I moved from Rockville, Maryland to Charlotte, North Carolina in 2013. I worked for a few years, while watching over my elderly mother. After she passed away in 2020, the search was on for a larger property in a smaller town. Must-haves included reasonably quiet surroundings, lots of nature, room to play in new gardens, and no HOA. This article includes information from a landscaper’s perspective that might be new to first-time property owners.
Success! In late October, I moved to a new home in northern North Carolina. A few obstacles didn’t stop my tireless realtor, Erika, from finding this (almost) perfect little house. There was Covid, for one, and the reluctance on the part of homeowners to list their homes for sale. Very few livable offerings in my price range came to the market. As soon as they did, they immediately went under contract.
As many buyers have done in this tight market, I made an offer on the property sight unseen. Well, truthfully, I did drive by the house before submitting an offer, and liked what I saw. Trees, woods, space, and sunlight—perfect for a gardener! The previous owners made some major improvements, saving me the trouble and the expense. But I had no idea what the interior looked like.
Inspections
When buying a house, have all the inspections done before closing, as recommended by your realtor or for your own peace of mind. Estimate the cost of necessary upgrades and repairs.
Particularly for older homes, check the roof and electrical, plumbing, and HVAC systems. Look for water damage and mold, pests and wood rot, foundation issues, adequate insulation, storage space, and evidence of ongoing maintenance.
Negative findings could nullify a contract or provide a basis for negotiation between your realtor and the listing agent.
The Lay Of the Land
Small towns, farms, and independent businesses dot the landscape in this part of Wilkes County. Several vineyards and state parks attract visitors to these lovely rolling hills. Drive along any of the scenic roads, and new vistas open at every turn; the Blue Ridge Parkway is only half an hour away. Beautiful countryside!
The big oaks frame a sunrise.
My new home, a one-story house built in the 1940’s, sits on 1¼ acres of mostly level land. The view from the front porch looks over a field, a few houses, and downslope toward a small stream. Stunning sunrises greet me from that direction almost daily.
Most of the trees’ leaves have fallen from the massive limbs of the native white and willow oaks (Quercus alba and Q. phellos). A few of these trees tower over the eastern border of the property. In the summer, those toward the west will shade the house from hot afternoon sun.
The mighty oaks came first, judging by their size, and then the house. If I were to name the property, “Quercus Magnus” would seem fitting.
Preliminary Plans For New Gardens
There’s plenty of space for the berries and the vegetables to bask in the sun. Plenty of space to raise shade-loving perennials in the fenced enclosure north of the great oaks. And plenty of space for gardens that will support birds, bugs, bees, and butterflies.
Deciding what to do first depends on the season, your climate, and the condition of the house and gardens. Priorities often reflect our occupations or interests, so artists might first set up a studio while contractors organize tools in the outbuildings. Growing families might rank bicycle storage, a big kitchen, and an extra bathroom at the top of the list.
And gardeners? Well, we look at soil quality, existing gardens, and sunlight. This gardener prefers a large, mostly blank slate. Others call it a lawn.
In April, I’d be concerned about starting seeds for the market, getting the summer vegetables and flowers planted, and cutting grass. But it’s December now. The yard needs tidying, houseplants need to find their homes, and, of course, we must bake Christmas cookies. Not to mention, those boxes won’t unpack themselves!
Moving into a house that doesn’t need major repairs eases the stress. To be sure, there are some improvements that can and will be made, but nothing that needs immediate attention. Wouldn’t mind a new kitchen with a dishwasher, Santa. (Chocolate chip or almond crescents?)
Trees and Shrubs
Poor Pruning Practices
Walking around the property will highlight issues that need attention. Check the trees and shrubs for dead or broken branches, or call a licensed arborist for a professional assessment. There are some dead twigs way up in these oaks. A brisk wind shakes them loose, so the truck stays parked under the carport. Fortunately, that debris falls short of the house.
Low branches that have been headed back.
Some of the daily fallout.
I’ll hire an arborist to clean up the trees and remove branches that have been headed back. Heading back, or bluntly cutting off the end of a branch, causes many epicormic shoots to form. Those are new growing tips emerging from buds concentrated close to the cut. The shoots also can cover the length of the branch. Epicormic shoots have weak connections to the branch and, over time, most will fail and fall from the plant (photos, above).
Similarly, topping trees is, in my opinion, not recommended. Yes, it reduces the height, temporarily, but topped trees in winter are hardly natural-looking and not attractive (photo, below). They, too, drop twigs over an extended period of time.
An expert arborist might be able to undo the damage from heading back or topping. However, removing the tree might be the most economical solution. Research appropriate tree species for your property and where to plant them. Keep in mind that plants almost always achieve dimensions larger than those indicated on the label. Your local agricultural extension office can help. Check with botanical gardens and sources such as your state’s native plant societies.
A topped tree.
The Root Of the Problem
Trees planted close to the foundation can threaten its structural integrity. Consider having them removed.
The same ruthlessness applies to the wrong tree in any space. Keeping silver maples or weeping willows close to the house, septic system, or underground utilities begs for trouble. This is where an arborist or a well-informed landscaper can recommend more fitting species and a pleasing design for better curb appeal. Call 8-1-1 to have underground utility lines marked.
Constricted
Look for old stakes and wires still looped around trunks or branches. Wooden posts rot, but wire and synthetic rope from clotheslines, fences, and hammocks persist.
As trunks and branches grow in girth, they attempt to grow around the obstruction, cutting off the vascular system inside the bark. This results in the death of those parts of the tree that cannot receive water from the roots. Early fall color on isolated branches might indicate trouble, such as pests or physical constriction.
In the Maryland garden, a dogwood tree died for no apparent reason. After cutting it down and opening the bark in several places, I found plastic rope deeply embedded in the trunk a few feet from the ground. Although the damage appeared several years after I had moved there, it eventually killed a beautiful dogwood.
Flares and Girdling Roots
Flare on an old oak tree.
Girdling root on maple tree and no trunk flare.
Most trees flare out where the trunk descends into the ground. If this flare is missing, see if soil has been piled up against the trunk, and remove it.
Construction around unprotected trees can deposit soil that cuts off the oxygen supply to the roots, resulting in the plant’s decline. As little as an additional 1-2″ can damage trees. Also, parking vehicles over the root system compacts the soil, impeding air and water penetration. Keep in mind that tree roots extend well beyond the dripline, or the edge of the canopy.
Check for a girdling root crossing over the trunk at the soil line or below it. As it grows, the root will hinder growth of that section of the trunk, making the trunk look straight-sided where it enters the ground. Cut it out before the tree tries to grow around it. Maples and other surface-rooting trees are notorious for this.
There’s no flare at the base of this maple tree (photo, above) and at least one large girding root is constricting the flow of water and nutrients from the soil. I noticed large dead limbs in the canopy, so the tree might be removed.
English Ivy
English ivy growing up an oak tree.
Vining English ivy (Hedera helix) is growing up a white oak’s trunk, using rootlets to cling to the bark. All the vines will be removed for 4 main reasons.
First, English ivy is a woody vine, so its stems will grow in girth just as a tree branch does. As they wrap around the tree trunk or the limbs and thicken over the years, the ivy stems will constrict tree growth, killing limbs and possibly the tree.
Second, the evergreen ivy holds moisture and debris close to the bark, and could encourage insects and diseases.
Third, as ivy scampers over the ground and up the trees, it provides safe haven for rodents. Birds of prey and other predators cannot see them. Here’s a red-shouldered hawk perched in a dogwood tree, looking for dinner.
Fourth, ivy competes with small native plants, crowding them out.
So the ivy must go.
Headings
Page 1: A New Home and New Gardens! (Inspections), The Lay Of the Land (Preliminary Plans For New Gardens), After Moving In, Trees and Shrubs (Poor Pruning Practices, The Root Of the Problem, Constricted, Flares and Girdling Roots, English Ivy)
Page 2: The Lawn (Safety First, Less Grass To Mow, Grass Clippings, Spontaneous Combustion), Drainage (Hold the Water), New Gardens for Old Plants (Virginia Sweetspire), More New Gardens and Less Lawn (The Black Walnut, The Ravine and the Woodland, Passionflower and Phlox ‘Minnie Pearl’)
Page 3: Planting a Few Trees (The Rule Of Thirds, Too Cold To Plant New Gardens?, Viola, Different Players—Same Script, All Those Leaves), A Welcome Surprise (A Firm Foundation, Heeling In, Iris, Chores Indoors), Christmas Already?, and Concluding
After reading Part 1 of “Plant Trees to Transform Your Landscape”, you’ve located the best spot where a tree will shade the house from brutal summer sun. Recommendations and practices presented here are based on climate and soil in the eastern part of the United States, where I live and garden, but the basic principles apply everywhere.
If your main objectives are shade, attracting wildlife, and less grass to mow, include masses of shrubs and perennials in the landscape plan as well. This article concentrates on planting trees, the dominant features in the landscape.
Native Plants vs. the Non-Natives
The choices offered in garden centers can be narrowed down to native species and non-native, or exotic, species. Within each of those groups are the original species and the cultivars (cultivated varieties). Developed by plant breeders, cultivars exhibit more ornamental or desirable—or just different—characteristics than the species.
‘Red Filigree Lace’, a delicate cultivar of Japanese maple.
Non-native plants originated in a different country or perhaps only a few hundred miles away. If the plant doesn’t occur naturally in your geographic region, it’s non-native, although some gardeners restrict use of the term to plants evolving in another country.
There are many beautiful plants, exotic to our shores, which we’ve enjoyed in our gardens. Japanese snowbell (Styrax japonica), Stewartia pseudocamellia, and the dizzying assortment of Japanese maples (Acer palmatum) are just too hard to pass up. You can compromise, if you wish, by including both natives and exotics.
To most garden center visitors, none of this matters. We buy plants that solve problems and look pretty in our yards. But, to explain the relevance of native species, I’d like to expand the subject.
The Benefits of Native Species
First, native plants require less pampering to get them established.
Species that evolved locally can tolerate fluctuations in weather patterns. Temperature extremes, rainfall, humidity, soil types, altitude, wind patterns, and local fauna shaped today’s ecosystems.
Second, gardeners concerned about local pollinators choose plants that foster bees, butterflies, and other animals that pollinate farm crops and wild vegetation.
Every third bite of food we consume is attributable to pollinators. But, you might make the case that since most crops are alien to this country, it shouldn’t matter whether we use native or non-native trees. But we need to consider what larval insects consume, and that’s foliage and other plant parts. Thousands of species—not just bees—pollinate our farms, orchards, fields, and forests.
Egg-laying female moths and butterflies, beetles, and other insects are very selective and seek the natives they evolved with to supply sustenance for the following generation.
Incidentally, honey bees are not native to this part of the world. They will, however, forage from plants grown here, many of which are related to the plants they evolved with.
Making a Case For Single Flowers
Amaryllis with yellow pollen and white stigma.
Double amaryllis with no anthers or stigma.
Flowers attract pollinators, which reap the harvest of nectar and pollen. But many double- and triple-petaled flowers have lost their nectaries, stigmas, and/or pollen-tipped stamens. Photos above clearly illustrate the loss of reproductive parts in a double amaryllis cultivar. If these hybridized doubles and triples have lost the ability to reproduce sexually, they can’t make seeds. They must instead be propagated asexually, or vegetatively, by cuttings, division, grafts, or tissue culture.
The anthers, supported by filaments, bear the pollen; the male portion of the flower, collectively, is called the stamen. Female parts comprise the stigma, supported by the style, and the ovary, with its ovules, deeper within the receptacle; the female portion is called the pistil.
Not all dense flower heads are pollinator wastelands, though. Species in the Asteraceae family, for example, have flowers that normally look full. This family includes all the composites, such as aster, coneflower, daisy, dandelion, rudbeckia, and sunflower. Their dense inflorescences are composed of small florets arranged in a head, called a capitulum. But the original species also have the necessary reproductive parts. The composites are one of the most successful groups of plants and are found on every continent except Antarctica.
At a local garden center last year, I watched bumble bees that were quick to land on thickly-petaled hybrid red coneflowers (Echinacea). They were equally hasty in their departure! The bees stayed on the red flowers for a fraction of a second, while they lingered on the less frilly flowers of other cultivars, mining several florets in each flower for their treasure.
Pollinators waste precious energy visiting barren double-flowered hybrids. True, not all doubles lack nectar and pollen. For the pollinators’ sake, though, select more species or varieties with simple flowers. Natural selection favors plants that set seed, of course, which is why most native plants have simpler flowers.
Photos below show examples of single-flowering cultivars. If you see a boss of stamens and pistils in the flowers, those plants can probably supply pollen and nectar to the pollinators. This is a fine point, granted, but one that is critically important to populations of pollinators, given the preponderance of double-flowering hybrids at garden centers.
Bumble bee on perennial aster.
Pollinator on fruit tree.
Purple coneflower (Echinacea) with bumble bee.
Third, planting a multitude of native species helps secure the future of threatened or endangered insects and animals.
In many regions, songbird populations have declined by half due to human intervention. Some have disappeared entirely. Trees and shrubs that provide shelter, nesting sites, berries or seeds, and which host insects, can help bring back the birds. Abundant biodiversity is a valid protection against the domino collapse of interdependent species.
Civilization has claimed much of the insects’ natural environments, so each of us can play a small part in rebuilding habitats. Annual butterfly counts show drastic declines. Monarch butterflies, in particular, now have less territory available in Mexico, a major overwintering site, than in the past, when they migrated by the millions.
Maintaining brush piles for overwintering insects and animals will help repopulate your landscape early in the season. Hauling those materials off to the recycling center, however, is sure death for the insects tucked inside. Fewer insects = fewer birds and other animals.
Fourth, incorporating native plants into the landscape helps keep the entire food chain intact.
A green anole basking in morning sun.
Insects feeding on plants become food for frogs, lizards, birds, and mammals. They, in turn, become food for snakes, hawks, foxes, and other predators. In many ecosystems, insects native to the region are the foundation on which the entire food chain is based.
A rich diversity of plant material supports an enormous number of insect and animal species. Left undisturbed, populations find a balance among themselves. On the other hand, life in monoculture, such as a lawn, is sparse. Unfortunately, countless urban and suburban neighborhoods have become dead zones with all their natural vegetation bulldozed to the ground.
As we spray, mow, burn, or build in natural environments, species will continue their rapid decline. Certainly, we need places to live and work, but we can also “give back” by planting for wildlife instead of continually killing it off.
Check with your state’s native plant society,native plant finders, BeeCity USA, and the local agricultural extension service for information. In addition to these sources, find a knowledgeable salesperson at the garden center for practical advice and sources of plant material. Garden shows might feature vendors specializing in native plants as this branch of horticulture grows.
Native Species and Nativars
Red fall color in a native white oak tree.
Plant breeders have brought to the marketplace many cultivars of our native species. These nativars might have purple or red foliage instead of green, or double flowers instead of single. Perhaps they mature at a shorter height than the original species, making them a better fit for small properties.
Garden centers often stock varieties of native species, although those selling native plants might also stock the original species. By a comfortable margin, though, most of the trees and shrubs in U.S. garden centers are cultivars of non-native species. Many originated in Asia, a treasure trove of tempting horticultural novelties.
Red Leaves and Wildlife
Red fall color and flower buds on native flowering dogwood.
Many trees develop red or burgundy fall foliage. Species native to the eastern U.S. with red fall foliage include sourwood (Oxydendrum arboreum), flowering dogwood (Cornus florida), black gum (Nyssa sylvatica), red maple (Acer rubrum), sugar maple (Acer saccharum), red oaks (Quercus rubra, Q. coccinea), and white oak (Quercus alba).
Red- or purple-leaved cultivars sporting this color all summer are in high demand at garden centers. But if the point of planting trees and shrubs is for wildlife, we want to be sure the plants we choose will attract them. Each plant species has a particular menu of chemical compounds in their tissues that either attract or repel insects and animals. Organisms evolved a tolerance for these compounds…or they didn’t!
Purple and red leaves often repel insects due to their high levels of anthocyanins, the red pigments in the foliage. So, that defeats the purpose, doesn’t it? Not necessarily; these trees might have had green leaves that hosted insects before leaves turned red. Or insects simply tolerate the red pigments.
Oak trees support huge numbers of insects, birds, and mammals at various times during the year. This one genus, Quercus, hosts hundreds of species of moths and butterflies, although they often turn red in the fall.
Before planting a cultivar that stays red all season, though, find out if insects, such as mature caterpillars, will eat the leaves. This indicates that it could host insects for their entire life cycle. If all the larvae are tiny, however, when some larger individuals are expected, most might have crawled off to greener pastures.
If bees spend time working a flower and don’t fly off immediately after landing, that plant could be a good choice. Similarly, holes in the leaves indicate that the plant can host insects. Resources at the local university’s entomology department or botanical garden might have information that could help you choose plants that support wildlife.
The Untold Story
I’ve been packing the past couple of weeks, preparing to move to a rural location in northern North Carolina. I took a break from the work and sat on the deck, listening to the birds and insects.
One of those sounds was the hum of an approaching ruby-throated hummingbird, the only species summering in this area. Four feet away, and less than 4″ long, this tiny bird landed on a twig of the potted native dogwood tree, sitting right next to me. He then hovered near the flower buds (photo, above, with last year’s fall color), and I could see his tongue working the buds, one after another. These buds are tightly closed, yet he found something worth gathering, despite the presence of other flowers nearby.
Within a minute, another hummingbird arrived for the same reason, apparently. The two tiny birds fought for feeding rights, and the second one flew away after some impressive aerial maneuvering among the twigs. The first hummingbird continued searching for hidden sustenance held inside those buds. I’ve never seen this behavior.
My point is this: there’s much about the natural world that remains unobserved—a mystery to us—perhaps lending more credibility to the importance of using native plants in our gardens. (This section added 10/6/21.)
Deciduous Trees For the Eastern U.S.
Here’s a partial list of native and non-native trees that support wildlife. Large deciduous shrubs can substitute for trees in smaller spaces. Many other species might suit your purpose, so visit a few nurseries to see what’s available.
Most trees are sold in large plastic nursery pots, although you might also see freshly dug trees with their roots wrapped in burlap (“b&b”, or balled and burlapped).
American hop hornbeam (Ostrya)
basswood (Tilia)
birch (Betula)
black gum (Nyssa)
Carolina silverbell (Halesia)
chaste tree (Vitex)
cherry and plum (Prunus)
crabapple (Malus)
crape myrtle (Lagerstroemia)
dogwood (Cornus)
franklin tree (Franklinia)
fringe tree (Chionanthus)
hornbeam (Carpinus)
magnolia (Magnolia)
maple (Acer)
oak (Quercus)
poplar, cottonwood (Populus)
redbud (Cercis)
serviceberry (Amelanchier)
sourwood (Oxydendrum)
willow (Salix)
winterberry (Ilex verticillata)
witch hazel (Hamamelis)
Native red maple can have yellow, orange, or red fall color.
Most of the trees listed above have small- or medium-sized species or varieties. Compare suitability of native and non-native species within the genus. The familiar weeping willow, for example, is non-native and quite messy in the landscape. But smaller native willows behave better and host a large number of moths and butterflies.
Research disease resistance, flowers for pollinators, fruits for animals, sun or shade preferences, and soil types. Consider planting species that drop excessive amounts of fruit, acorns, or seedpods farther from the house and paved surfaces.
Also look into the tree’s habit of growth. A specimen with horizontal branches softens the strong vertical lines of a house. Pay close attention to utility poles and wires. Don’t plant trees near them that the utility company will butcher in future years.
Trees with invasive surface roots should be reserved for areas far from structures, pipes, and vegetable gardens. Find out from your town how close to the street or the property line you’re permitted to plant trees. Don’t forget to call 8-1-1 to locate underground utilities before digging.
Chionanthus, the fringe tree (photo, below), is a beautiful bloomer for gardens. This multi-stem plant has 2 species commonly available (C. virginicus, C. retusus), one native and the other from Asia. Male plants have larger flowers, but females set deep blue fruits for birds. The plants, however, are rarely sexed at the nursery.
Fringe tree.
The Hollies
Gardeners have used hollies in gardens for centuries. We can choose among deciduous and evergreen species.
The hollies (Ilex spp.) are another genus of primarily dioecious (Latin for “two houses”) plants that fruit on female plants. They ordinarily require a male plant, or pollenizer, to set fruit, although holly pollenizers (the males) themselves do not set fruit. Modern breeding techniques have yielded several cultivars that can make berries without pollination.
Ask your nursery salesperson for specifics regarding the need for pollenizers and how close they should be planted to female hollies. Choose the male hollies carefully; they must be closely related to the female holly and bloom at the same time. Incidentally, holly flowers are often nicely fragrant, and the bees love them! Just don’t shear them off after the buds have formed. Pruning should be minimal if you want flowers and fruits. And bees.
The Curious Case of Crape Myrtle
The Imperial moth.
Lagerstroemia indica is an extremely popular landscape tree or shrub in USDA zones 7-9. Crape myrtle, from China and Korea, was first introduced to the southeastern U.S. over 200 years ago. Adapting readily to our hot, humid summers and sometimes drought, it blooms for months despite the adversity.
What makes this non-native plant peculiar is a native moth’s preference for its leaves even when offered a multitude of its local favorites. Last year, I raised caterpillars of the huge Imperial moth. They went for the crape myrtle every time, ignoring all the others. Unless female moths instinctively target this species to host their young, the caterpillars will not likely eat these trees to the bone any time soon.
Several songbirds, including American goldfinches and juncos, feed on the seedpods.
Evergreens
You might prefer an evergreen specimen instead of a tree that drops its leaves in autumn. Look into arborvitae, chamaecyparis, hemlock, certain holly species, juniper, pine, rhododendron, spruce, and yew. Consider the shade evergreens will cast in winter, and whether sunlight might be blocked from entering windows or melting ice on the driveway.
Although not all evergreens are native to this part of the country, they make suitable nesting places and provide shelter in inclement weather. A dense border of evergreens can block fierce winter wind for a considerable distance downwind.
Soon after moving into the Maryland house in the 1980’s, I planted a chamaecyparis with deep green whorled foliage. Although it was supposed to get only 6′ tall according to the nursery, it grew to about 20′, when it was cut down by the people who bought the house from me. I left it in the front yard because birds raised a few families among its evergreen branches every year. And it looked gorgeous in the snow.
Chamaecyparis on the right, after 2010 blizzard. Sourwood on the left.
Good Looks
If you’re landscaping purely for aesthetics, plant a tree with characteristics that appeal to you. It’s your property, after all. Besides, all trees provide cover and nesting opportunities, even if they’re passed up by caterpillars.
Perhaps elsewhere you could grow perennials that offer food to wildlife. Planting a bed of milkweeds among the shrubs, for example, will help the monarch butterflies (photo, below).
While you might not consider insects important in your landscape, and, in fact, have invested considerable time and expense eradicating them, they are primary links in the food chain. A healthy landscape hosts a complex assortment of insects and animals. And with the rate at which natural habitats are losing out to development, it’s no wonder we see fewer ladybugs, butterflies, and songbirds in our neighborhoods.
Creating welcoming landscapes provides resting places for migrating birds. But they need natural corridors all along their path in order to find food and perching opportunities. We can help by planting at least part of our property with them in mind—every one of us! Provide food, water, and trees to rest in, and you might catch a glimpse of a bird you’ve never seen before.
I urge you to adopt a new attitude toward welcoming wildlife. You don’t need 10 acres to make a difference. A well-planted fraction of an acre will encourage many kinds of insects and animals to reside there. If you let them eat your plants and the sprayer hasn’t been used once this year, well done!
Monarch butterfly on milkweed.
Before Planting Trees
Let’s imagine a 2-story house and an appropriately proportional medium-sized tree. Your landscape plan calls for locating this tree off the southwest corner in the front of the house.
To prevent branches from rubbing against the siding in the future, you’ll want to plant the tree far enough from the house. Divide the mature spread of the tree by 2. Because plants tend to grow larger than the dimensions printed on the label, add a few feet to the measurement. So, a tree with a mature spread of 25-30′ should be planted 15′ or more from the corner.
While that little tree might look lonely out there, it will grow. Maybe that’s the extent of your garden project this fall. Or perhaps you’d like to develop a full garden on that side of the house with an underplanting of shrubs, perennials, and ground covers.
Walking a pathway through the garden to the side yard will feel like a walk through a park. This is a good solution where space is limited between your house and the neighbor’s. Consider your neighbor, though, and don’t plant too close to the property line. Perhaps the two of you could create an appealing garden that fills the space between both houses.
But first, it’s soil prep…please turn to page 2…
Headings:
Page 1: Are You Ready To Plant Trees?, Native Plants vs. the Non-Natives (The Benefits of Native Species, Native Species and Nativars, Red Leaves and Wildlife, The Untold Story), Deciduous Trees For the Eastern U.S. (The Hollies, The Curious Case of Crape Myrtle, Evergreens), Good Looks, and Before Planting Trees
Page 2: Soil Preparation For Trees (Slope, Outline the Bed, Heavy Clay, “How Deep?”, Adding Amendments, Organic Matter, and Time To Plant Trees (Trees In Pots, B&B Trees, Backfill, Edge, Mulch, And Water)
Do you have an empty plot in the garden where you’ve wanted to plant something but aren’t sure what to plant? It’s too small for blueberries or raspberries. Tall plants will shade vegetables in the other raised beds, so you need something that stays rather short on this south side of the garden.
Here’s an option: strawberries!
Now that spring is in the air—and in your local garden centers—this is the perfect time to plant young strawberry plants. Nurseries are filling up with all sorts of temptations—hardy annuals, trees and shrubs, early greens and vegetables, and budded spring-flowering bulbs in pots. You might find young, well-rooted strawberries already leafing out.
Strawberry plants can be purchased from neighborhood nurseries and from specialty mail order companies. Some varieties are available as seeds, but most are bare-root plants sold in bundles or rooted plants in pots. Bare-root crowns are less expensive than potted plants but need to be planted right away. I don’t have room for 25 plants, so a few potted strawberries are good enough for now.
Strawberries, by the way, are not berries at all, but aggregate accessory fruits. Those little brown spots on the outside of the strawberry are the achenes, or ovaries of the flower, each containing a seed. The achenes are the true berries. The colorful part is an enlarged receptacle, the flower part that normally holds the ovary. But I’m quite sure no one will warm up to the term “strawreceptacle”.
U.S. per capita consumption of strawberries was a bit over 7 pounds in 2018, and that number is growing. North Carolina is third in the nation for strawberry production, after California and Florida. Among nations, top producers include the United States, China, Mexico, Turkey, and Egypt.
Types of Strawberries
Strawberry species are native to the Americas, Europe, and Asia. In the 1700’s, French botanists crossed the strawberry native to the eastern U.S. (Fragaria virginiana) with a Chilean species (F. chiloensis), yielding, eventually, most of today’s cultivars. That explains the “x”, representing an interspecific cross, in the name Fragaria x ananassa. Breeding efforts using genetics from several species have resulted in hundreds of varieties available today.
Strawberries grow within USDA zones 3 to 9. Some varieties prefer the cooler end of that range, and others need somewhat warmer climates. Most require at least 200 to 300 chill hours, when plants are exposed to cool temperatures between 32° and 45° F. Most strawberry plants stop fruiting above 75° or 80°.
Planting varieties that mature at different times prolongs the harvest, but place them in separate beds for ease of maintenance. Keep track of the varieties you’ll be growing in your garden.
There are 4 main groups of strawberries, with many varieties within each category. Look for disease resistance, and consider other characteristics, such as color, size of fruit, and time of harvest.
1. June-Bearing
These large-fruiting varieties bear heavily over a period of two weeks to a month in mid to late spring. They respond to a short daylength, having formed flower buds the previous autumn. The buds, though, stay dormant through winter, safely tucked inside the mulched plants.
For gardeners living in areas with a limited growing season, June-bearing strawberries are a good choice. Those who wish to preserve the fruits often select varieties from this group.
June-bearers develop many runners, or stolons, which root at the tips and grow new plants from there. The “matted row system” is commonly used on farms and in home gardens for this group of berries. Runners are permitted to roam about and root in at will, within the confines of the bed. Each year, the beds are thinned or renovated immediately following the harvest.
Because flowers will be snipped off over the first 4 to 6 weeks after a new planting, as recommended, June-bearers will have no fruits the first year. You can avoid this task by planting crowns of June-bearers later in the season, after they flower. They will bear fruits in the next spring season.
Although strawberries are short-lived herbaceous perennials, some commercial operations renew their stock every year, establishing young plants in a new location.
2. Everbearing
Everbearing strawberries have a large first crop, a smaller late crop (especially in areas with warm summers), and sometimes a few berries in between. They are not affected by daylength.
Berries in this group are smaller and not as abundant as June-bearing types. The total harvest is about the same as for June-bearing types, although it is spread out over time.
Remove flowers and runners the first 4 to 6 weeks after the initial planting. This will sacrifice the early harvest, but they will flower again and yield berries later in the season.
3. Day-Neutral
Day-neutral varieties produce strawberries through the growing season, and will flower regardless of daylength. Fruits are smaller and the plants don’t yield as heavily as the June-bearers.
As with the everbearers, remove flowers and runners that develop during the first 4 to 6 weeks after planting. They will flower again later and set fruits in the current season. Cooler temperatures might yield heavier crops in late summer.
4. Alpine
Alpine strawberry.
These are the smaller, oval-shaped berries carpeting the ground in their native northern hemisphere habitats. Sometimes called “fraises des bois“, French for “strawberries of the woods”, these strawberries often belong in the species Fragaria vesca, although several species of alpine strawberries are found around the world. They grow over a wide range of climates, in USDA zones 3 to 9.
Alpine strawberries tolerate some shade, and should be planted 24″ apart. They don’t grow a vigorous system of runners, but will propagate from seeds.
Some strawberry enthusiasts swear by these tiny morsels, and grow no others.
Preparing the Bed for Strawberries
Find garden space that gets full sun for the best yields. Strawberries start growing before the end of winter, when the sun is still low in the sky. Take this into consideration when locating your garden. In partial sun, foliage and fruits might be plagued by diseases that will ruin the crop.
Avoid low spots. Locate the beds on higher ground where cold air won’t collect and freeze the flowers. Try growing strawberries in containers if you don’t have garden space.
Don’t plant them where tomatoes, peppers, potatoes, or eggplants have grown in the past 5 years. Verticillium wilt disease from infected plants in the nightshade family (Solanaceae) can also infect strawberries (family Rosaceae).
Strawberries prefer sandy loam and must have well-drained soil. This is one reason you often see them growing in raised beds. Another benefit of raised beds is increased air circulation, which helps prevent diseases from spreading among the plants.
How To Configure the Beds
The Matted Row System
In the matted row system, strawberries are spaced 18″ apart down the middle of a 4′ wide bed. Spacing between the beds depends on the method of harvest and whether large tools (tiller, mower, wheelbarrow) will be required. For most home gardeners, 2′ or 3′ between beds serves that purpose.
June-bearing strawberries grow in matted rows, allowing their numerous runners to spread. Over the growing season, let plants fill in to a density of 4 or 5 plants per square foot. Heavy leaf canopy discourages weeds from growing in the bed, but overly congested growth encourages diseases.
The Hill or Mounded System
In this technique, crowns will be spaced in a zigzag manner 12″ apart, in mounds 8″ high. These hill systems are narrower than matted row systems, at about 24″ wide. This permits better air circulation and drainage around the plants. Disease prevention is of prime importance.
This method suits everbearing and day-neutral strawberries, which have fewer runners. In fact, websites recommend removing all runners in hills, forcing plants to grow lateral crowns next to the original plants.
Dig In!
Pine fines.
Compost.
Loosen the Clay
First, remove all vegetation where the strawberries will be planted. They don’t compete well with weeds.
Loosen the existing soil, breaking up the clay to a depth of about 12″. This is easier to do if the soil is damp. Don’t work the soil if it’s wet, though; that will collapse the air spaces between soil particles.
Add Drainage Material
Now, incorporate (don’t layer) 2″ to 4″ of pine fines, sometimes called soil conditioner, into the loosened soil. Pine fines (photo, above) are partially composted small bits of pine bark. Because they decompose very slowly, they help keep the soil open, improving drainage. Pine fines might not be available everywhere. See if you can find bags of “soil conditioners” that include pine fines.
Strawberries also like large-grained coarse sand (not play sand) added at this time.
Adjust PH, Peat Moss
Strawberries need acidic soil, with a pH range between 5.5 and 6.5. One or two inches of pre-moistened peat moss incorporated 8″ into the bed will help lower the pH in alkaline soil.
Your local agricultural extension office can analyze a soil test and make recommendations about pH and fertilizers. Some gardeners apply 10-10-10 fertilizer with the initial soil preparation.
Compost
Next comes the nutrient-rich compost. Incorporate 2″ or 3″ of compost into the top 4″ of soil. Placing it deeper in the soil will put it out of reach of the strawberry’s shallow roots.
Compost provides nutrients for the strawberries as well as for the microbes living in the soil. Microbes, active during the growing season, break down organic matter, making nutrients available to plant roots in a usable form. These microorganisms derive the benefit of carbohydrates from this relationship. Microorganisms also help plants fend off soil pathogens and contribute in other ways that scientists are now researching. In healthy gardens, billions of microorganisms occupy a small handful of soil!
For sandy soil, add more water-holding amendments, such as peat moss, pasteurized loam, and compost.
Rake the soil, filling in low spots.
Planting the Strawberries
Strawberry ‘Ozark Beauty’.
If you received bare-root plants, trim long roots to about 6″. Place the roots in a bowl of water for an hour, in the shade.
Although a raised bed is an efficient method of growing strawberries, they can be planted in level gardens. Pay special attention, though, to slope, drainage, and air circulation.
After preparing the soil, dig a hole for each plant, spreading out the roots and firming soil around them. The crown of the plant, where the leaves meet the roots, should be just above soil level.
Mulch
Once all the plants are in place, apply 2″ or 3″ of an airy mulch, such as pine straw or weed-free straw (photo, right). The traditional use of straw as a mulch might be where the term “strawberry” came from.
Don’t cover the crowns; give them space to emerge freely. This kind of material, rather than a heavier mulch, permits air circulation and lowers humidity around fruiting stems, helping prevent rot.
Mulch cools the soil, conserves moisture, and keeps the fruits clean as they grow. As it rots, it adds organic matter to the soil and will need to be replenished.
Using mulch in the growing season is optional, of course. In beds of June-bearing strawberries, a thick layer of mulch could hinder runners trying to root into the soil.
Another option used by many commercial growers and home gardeners is black plastic or fabric over the soil. This warms the soil rapidly in late winter and early spring. Commercial growers using “plasticulture” renovate the beds every year. If you’d rather not use plastic, you could use biodegradable black mulch. Using a soil cover might extend strawberry production. And weeds won’t stand a chance. Still, this is optional.
Water the bed, making sure the entire planting depth has been moistened.
In Their First Year
Most experts recommend removing all flowers during the first 4 to 6 weeks after planting. This concentrates energy in the roots and runners. For plants in the June-bearing group, however, there will be no harvest the first year if you planted them in early spring. But they should yield a bountiful harvest the next year.
Other groups of strawberries will develop more flowers in the months ahead. They will bear fruit later in their first season. For everbearing and day-neutral varieties, apply fertilizer after their first crop.
Water the beds every week if there isn’t substantial rainfall. Strawberries need 1″ to 2″ of water per week, most importantly after planting and during fruit set. Most of their roots are found in the top few inches of soil, so they are very susceptible to damage from drought.
Pollination
These early flowering plants attract bees and other pollinators. Strawberry flowers contain both male and female reproductive parts. Although they can self-pollinate or be pollinated by wind, strawberry flowers achieve more complete pollination from the activity of pollinating insects. This results in fruits that are plump and well-formed.
Headings
Page 1: Types of Strawberries (June-Bearing, Everbearing, Day-Neutral, Alpine), Preparing the Bed for Strawberries (How To Configure the Beds, The Matted Row System, The Hill or Mounded System, Dig In!), Planting the Strawberries, Mulch, and In Their First Year (Pollination)
Page 2: The Harvest, Renovating the Strawberry Bed, Varieties, Winter Protection, Potted Strawberries (The Pots and Potting Soil, Watering the Containers), Problems? (Insects and Mites, Slugs and Snails, Diseases), and Celebrate!
Well, it looks as though the heat is on, as we celebrate our nation’s 243rd birthday. And summer just got started! Enjoy your Independence Day barbecues with family and friends, but don’t neglect the garden annuals and other potted plants. They’re going to need more frequent watering at these temperatures.
Here are some things we can do to mitigate problems that come with extreme heat, followed by a list of heat tolerant annuals.
Mulch the Beds
Mulching the gardens will keep annuals and shrub borders looking fresh all summer. Mulch serves several purposes:
it retains moisture in the soil
the soil stays cooler without the sun beating down on it
it helps prevent weeds from germinating
mulch helps prevent soil erosion
it prevents mud and dormant disease spores from splashing onto the plants
long term, it breaks down and adds organic matter to the soil
and it looks good
If bags of mulch have been hanging around for a while, gases can build up that might damage tender young annuals. So, open the bags and let the gases escape. I recall mulching newly planted alyssum many years ago, and by the next morning, they looked as if they’d been fried!
Sometimes, termites are found in old bags of hardwood mulch. Once the contents are spread around the gardens, though, the termites probably will die from exposure or due to separation from the colony.
Types of Mulch
Pine straw under a tree.
There are many kinds of mulch available from garden centers. I’ve always liked the look of dark brown shredded hardwood mulch. On a slope, it holds better than pine bark nuggets because the fibers interlock. Large quantities of shredded hardwood used repeatedly, however, can cause manganese toxicity and it can drive up the soil’s pH. Limit the depth to only 1″ in flower gardens or 2″ around shrubs and trees.
It’s a good idea to switch to a pine bark product for a few years to avoid these imbalances. Rhododendrons, azaleas, blueberries, hollies, and other acid-loving plants prefer pine products. But, if you want to use shredded hardwood around these plants, don’t pile it on and use an acidifying fertilizer.
Grass clippings break down quickly when used as a mulch by itself or under another mulch product. They contain some nitrogen, gently released as it decomposes. Use a very thin layer around your plants because it can heat up significantly as decomposition begins. But grass clippings can carry residue from weed killers and other chemicals used on the lawn, so maybe the best thing to do is to leave them on the lawn itself.
Pine bark nuggets can last a few years, but, if you’re a tidy gardener, you’ll have to blow away or pick out fallen leaves. It’s graded according to particle size, from pine fines, to small and large nuggets. Pine straw is new to me, since moving to North Carolina, but I still prefer shredded hardwood.
Mulch should not be piled high in the garden. Two inches suffices for most applications, although pine straw is applied more thickly. Keep it away from the stems and trunks of the plants.
Tree leaves that fall in autumn make a protective layer for garden plants, although many will blow around in high wind. This is more acceptable in rural areas or where the gardens aren’t open to public view. Most homeowner associations will find this free source of natural mulch objectionable. You could use a mulching mower to chop the leaves into smaller pieces, rake them into gardens, and cover with an inch of a more attractive mulch. Earthworms and decomposition will make them disappear.
Gravel In the Garden
I’ve never used gravel as a mulch around plants, except for potted lavender or succulent dish gardens. It settles into the mud, and “gravel travels” on an incline.
In certain circumstances, such as in the desert southwest and in dry rock gardens, gravel is a good choice. Around dry stream beds and in paths, gravel and rocks add natural elements, but should be laid over landscape fabric to prevent settling into the soil. If using gravel on the surface of a walkway, look for the kind with angular rather than rounded edges; it is less likely to sink underfoot.
Landscape Fabric
I am not a fan of using landscape fabric under mulched plants. This barrier interrupts the natural decomposition that occurs where the mulch meets the soil. Without the fabric, earthworms ingest the partially decomposed material next to the soil surface, and deposit fertile castings (excrement) into lower levels of soil, improving it in the process. This is how it works in nature, accompanied by thriving populations of various microbes.
Leaves, fallen trees, and dead insects and animals contribute to a healthy environment on the forest floor as they decompose. Microbes, earthworms, rain, and freeze-thaw cycles help distribute nutrients through the soil profile.
As the mulch breaks down over the fabric, weed seeds blowing into the beds will readily germinate in this rich medium. So, most gardeners using landscape fabric will be disappointed when they see those dandelions, plantains, and weedy maple trees taking root there. Mulch, with or without landscape fabric, doesn’t entirely prevent weeds, but it will greatly reduce their numbers.
Water the Garden Beds
Marigolds planted by volunteers in Arbourgate Meadows, Charlotte NC.
Make sure the flower beds and the shrubs, especially new ones, get a deep soak now and then if rain is scarce. Unless your area receives a prolonged period of rain, passing showers will moisten only the mulch. In most soils, 1″ to 2″ of water per week ensures that deeply growing roots will get their share.
Watering a little bit every day or two will not produce deeply rooted plants. Unfortunately, shallow roots are susceptible to stress from not only dry soil but also from hot soil.
It’s always best to water early in the morning, so the foliage is dry going into the night. This lessens the likelihood of diseases infecting annuals and other plants. Some of the water applied during the heat of mid-day will be wasted because of rapid evaporation. But if you’ve forgotten, and the plants are wilting, water as soon as possible, regardless of the time of day!
For busy families, watering with soaker hoses or tubes and emitters saves time. By placing the water directly on the soil, or under the mulch, very little is lost to evaporation. These systems can be attached to a computerized control center at the faucet. Just be doubly careful, though, when digging nearby, that the spade doesn’t land on the soaker hose. But if it does, there are repair kits for that.
The kids might enjoy a sprinkler or Slip ‘n’ Slide on a hot Fourth of July, especially the ones under 35. For a softer landing on the slippery strip, water the lawn underneath it first.
About the Hose
A garden hose kept in the sun will significantly heat the water inside it. Spray it out over the grass until it’s cool enough to apply to the gardens. Water under the canopy and beyond the drip line of the plants. Watering heavily as needed will cool the soil…for a while, anyway.
Water and Potting Soil
Caladium, variegated English ivy, and ‘Prizm’ impatiens, before impatiens downy mildew came along. The new ‘Imara’ impatiens is downy mildew resistant.
The trend in gardening over the years leans toward growing annuals in pots for key areas around the yard. Gardeners also are decreasing the square footage devoted to annual garden beds.
Container gardening requires vigilance, because soil in pots generally dries faster than garden soil. Hanging baskets filled with thirsty annuals and small blooming pots on the picnic table probably will need daily watering in areas with intense summer heat. For this reason, I prefer using larger pots when possible, such as 12″ to 18″ hanging baskets.
Strawberry jars introduce verticality and a unique appearance. Look for smaller varieties of plants to fill these containers.
Adding a thin layer of mulch to potted plants has the same advantages as mulching the garden. I use 1/2″ of pine fines, and sometimes shredded hardwood.
Amendments For Annuals
Potting soil with a high percentage of coarse drainage material, such as pine fines or perlite, tends to dry quickly. The soil doesn’t hold water, due to the large air pore space between the particles. Supplementing the potting soil with compost, peat moss, fine coir, or even some clean loamy topsoil from the garden adds more particle surface area where water can cling. You don’t want to create a heavy soil, though, that doesn’t drain well enough.
Planting mix, above, with high levels of pine fines, is best used to improve garden soil. Potting soil tends to have more finely textured materials.
When I lived in Maryland, Leaf-gro was readily available to amend potting soil and garden beds. I used tons of it! It was pure, rich compost, and was the end product of all that yard debris (weeds, grass, leaves) sent to the recycling center.
An additional benefit of using garden loam is the introduction of root-friendly microbes and micro nutrients, although you might have to pull a weed now and then. I can see you shaking your finger and warning of soil pathogens and worms…yes, true. If you’re concerned, you can buy bagged products that have been pasteurized. Ask to see the contents, though. The last bag of “sandy loam” I purchased contained mostly finely ground pine bark and sawdust.
Water-holding crystals are another option for potted plants and garden beds. Read directions carefully. Don’t add dry crystals to a pot; they need to be pre-moistened. I never found them to be that effective, but these new potting soils with all those pine fines might be improved with them.
Amending After the Fact
Supplementing bagged potting soil is becoming common practice for my pots these days. For the potted tomatoes that were drying too fast,I scratched about a gallon of clay loam from the vegetable garden into the top layer of soil in each 20″ pot. With each watering, the fine particles will sift down through the pot, filling some of the pore spaces.
It seems to have worked. The tomatoes aren’t beginning to wilt by mid afternoon after watering in the morning. And, on some days, I can even skip a watering. Much better.
Fertilizing Annuals
Heat-tolerant plants growing in pots will run out of fertilizer within just 2 to 4 weeks, depending on soil quality. Frequent watering and rainstorms leach nitrogen, in particular, through the soil. And, once nitrogen levels drop too low, older leaves will turn yellow, the plant might become pale overall, and growth will slow down. Nitrogen is the macronutrient that is needed in greater quantities than any of the other nutrients.
Each plant species is different. Some need more phosphorus or iron or magnesium. Check the label for a comprehensive list of ingredients.
Many annuals are particular about soil pH; some need acidic soil, while others tolerate a higher pH. At either end of the scale, certain nutrients become unavailable to plants. Most plants, however, grow well enough over a fairly broad range. But, if you notice yellowing, consider taking a soil test and having the chemistry analyzed.
Garden centers stock many kinds of fertilizers. They’re available as soluble crystals, dry granules, liquid concentrates, and as slow-release (or timed-release) prills.
Fast growing annuals need regular applications of nutrients. Rather than a feast-or-famine regimen, put the plants on a schedule so they never show the effects of “hidden hunger”. This and other good horticultural practices will keep your plants in prime condition until the end of the season.
Slow-Release Fertilizer
At high temperatures, slow-release fertilizer is consumed faster than the label might indicate. So, a 6-month product might be depleted after 4 months at 85°. Instead of simply placing the prills on the hot soil surface in a pot, dig a few small holes between plants, add the prills, and cover them with about an inch of soil. This will keep them cooler and prevent rapid release of the fertilizer.
In gardens, slow-release fertilizer can be placed under the mulch, scattered over the root zone. A small amount is released as water percolates through the medium.
Pot Colors
As these plants grow, they will shade part of the pots’ surfaces as summer temperatures rise.
Roots growing on the sunny side of dark pots, in hot summers, can heat to the point of death. So, most plants prefer light colored pots that reflect energy from the sun. If you really want to use the new rust-brown pots by the front door, add plants that trail over the side of the pot, shading enough of it to make a difference.
Another option is to use an insert, a plastic pot that sits inside the pretty pot, with space for hot air to escape. Maybe your beautiful teal pots can be tucked under the tree near the pool and planted with shade loving annuals.
This isn’t a concern in most parts of the country, but in southern states, the plants will appreciate this detail. Choose heat tolerant annuals that are less likely to be damaged by these conditions.
Winter Pots
Conversely, in chilly winter climates, dark pots absorb the sun’s warmth, delaying freezing of the soil. Find out if your pots will tolerate frost, and make sure they drain freely. “Frost resistant” does not mean “frost proof”.
When I potted large planters for customers’ winter gardens, I included sheets of styrofoam in the shoulders and on the sides of the pot, which absorbed the soil expansion as it froze. Pots with straight or sloping sides, with no curved shoulders, allow freezing soil to heave upward, usually avoiding breakage. In Maryland winters, expensive concrete pots were most likely to survive the cold.
Evaporative Cooling
Efflorescence on clay pots.
Most terra cotta pottery is porous, allowing air and water to pass through the sides of the pot. Some clay pots, though, are fired at higher temperatures, making them non-porous.
A clay pot with moist soil stays relatively cool, as moisture wicks through the pot. As water evaporates, the surface of the pot feels cooler. The same principle applies to perspiration evaporating from your skin. So, decorative clay pots in the summer are another alternative. But, they dry out faster because of the moisture loss through the pot.
The pots in the photograph have a white mineral coating called efflorescence. When fertilizer salts in solution migrate through the clay, they crystallize as the water evaporates. It can be removed or enjoyed.
Nursery-Grown Landscape Plants
Because containerized nursery plants are watered daily in warm weather, growers use a mix comprising mostly fast-draining pine fines, sand, and perlite, with some organic matter (peat moss, ground coir, compost) for water retention.
During hot summer weather, it is important to get transplants established as quickly as possible. New roots reluctantly grow into the native soil, but can be encouraged to do so by scoring the root ball or by teasing out some of the roots on the sides. This causes slight injury to the roots, and stimulates the plant to quickly form new side roots from the pericycle, a layer of cells inside the root.
Also, amending garden soil with organic matter, such as nutrient-rich compost, and pine fines for better drainage creates a welcoming habitat for new roots. Heavy clay soil is not very accommodating and hinders rapid rooting. You want to give your plants soil that drains well and entices roots to grow deeply. If you’ve ever tried to dig in dry, compacted clay soil, you know why plants are slow to establish. Good soil preparation makes a huge difference!
Why New Plants Sometimes Fail
A newly planted ‘Soft Touch’ holly, azalea, or autumn fern needs to have water replenished in the root ball every day in hot breezy weather. Until new roots expand into the soil, plants are entirely dependent on you for their daily dose. Make sure the water isn’t too hot.
I often consulted with homeowners when their new plants failed. When the shrubs were unearthed, their roots often were quite dry.
One landscape I visited here in Charlotte had very large evergreens newly planted in front of the house. All were dead or dying during a prolonged drought. After a little digging, I saw that 95% of the root system on each plant was bone dry because there was no organic matter mixed into the heavy clay soil. And only one irrigation emitter was placed on the side of the root ball. Each plant this size would have required a few emitters.
To make matters worse, the soil had been backfilled in large clods, and not broken up at all. Any water that flowed from the emitter drained right into the crevices, bypassing the root system. Those large air-filled gaps dried exposed roots even more. Any moisture in the root ball was quickly wicked away by the clay. This costly disaster illustrates the need for thorough soil preparation: breaking up heavy soils, incorporating amendments (drainage materials, organic matter) for improved tilth, and firming the soil around the root ball.
The problem is this…
…and it’s a point that doesn’t get a lot of attention. Water is sucked into the tiny spaces between clay particles by capillarity. And what’s abundant in soils throughout much of the country? Clay! So, when the shrub’s potting soil that is mostly pine fines (with large air pore spaces) sits next to native soil that’s composed of mostly clay (with tiny air pore spaces) what happens to the water? That’s right! It’s pulled from the shrub’s potting soil into the surrounding clay.
Clay always wins! This is one explanation for nursery plants that fail, even though the surrounding soil in the bed feels damp.
The remedy for a shrub with a high percentage of pine fines and perlite in the pot is to work some of the native clay into the root ball. Poke some holes a few inches deep (try using a dibble) on the surface of the root ball and fill with a few handfuls of clay or loamy clay; water it in.
This improves the water-holding capacity of the soil inside the root ball. Granted, this is a fine point. But the principle was effective for the potted tomatoes, mentioned in “Amending After the Fact”, above.
When Can I Plant?
Shrubs and trees establish in the landscape faster in autumn, when soil temperatures are still warm enough to promote root growth. Even in chilly soil, in the 40’s F, roots can grow. Air temperatures are more moderate then, and rain falls more predictably. The next best time is early to mid spring, as the soil begins to warm and before the trees leaf out.
But plants can settle into the landscape during the summer, too, as long as soil preparation was adequate and water is provided when needed.That ‘Jelena’ witch hazel would much rather be in the ground than sitting in a black pot at the nursery on this Independence Day.
Summer annuals root quickly, but give them enough water to prevent wilt. They’ll probably need water every day until their roots grow more extensively through the soil. And give them enough to moisten the entire root ball and the surrounding soil. It takes only one sunny 90° day to dry that new plant to a crisp!
Reservoirs and Saucers
Most hanging baskets and large plastic pots have a reservoir or an attached saucer at the bottom. It holds an inch or two of water that the plant’s soil will gradually absorb by capillarity.
It isn’t necessary to drain it off in the summer, if the plant is full of foliage. Any water the soil can’t absorb within 30 minutes, however, should be poured off.
For young plants and for succulents or plants that like dry soil, the reservoir or the saucer should be drained. Pour the excess water onto other plants instead of wasting the nutrients. Even worse is to let dissolved fertilizer wash down the street to the storm drain, eventually polluting the local creek.
Another option is to remove the saucer and allow water to drain freely into the flower beds or the shrub border.
Planting Wire Baskets
When I plant a wire basket, I line the inside of the coco liner with a “repurposed” sheet of plastic, such as an empty mulch bag. The plastic prevents evaporation through the coco liner, and slows decomposition of the coco liner.
Be sure to punch holes through the plastic in several places to allow drainage. But leave the bottom inch or so intact, forming a reservoir to hold water a bit longer, until it’s absorbed by the plants.
(For decades, as owner of Wellspring Garden, I never bought trash bags. I saved all the empty bags from potting soil, amendments, and mulch for that purpose. Using less plastic is the way to go!)
So, It’s Your Turn To Host the Party
A trip to the garden center reveals plenty of options to dress up the landscape for the holiday:
full grown, colorful blooming baskets for the deck or the porch
a potted combination “drop-in” worthy of that gorgeous ceramic container near the front door
some large annuals, in 6″ or 8″ pots, for the garden, looking as if they’d been growing there for months
Finally, string some lights for evening ambiance, and add red, white, and blue accents to celebrate Old Glory. Don’t forget to bring greenery into the powder room, in a pretty pot, adorned with a small flag.
Headings
Page 1: Happy 4th of July!, Mulch the Beds (Types of Mulch, Gravel In the Garden, Landscape Fabric), Water the Garden Beds (About the Hose), Water and Potting Soil (Amendments For Annuals, Amending After the Fact, Fertilizing Annuals, Slow-Release Fertilizer), Pot Colors (Winter Pots, Evaporative Cooling), Nursery-Grown Landscape Plants (Why New Plants Sometimes Fail, When Can I Plant?), Reservoirs and Saucers (Planting Wire Hanging Baskets), and So, It’s Your Turn To Host the Party
Finding the Perfect Spot for Your Vegetable Garden
For the purpose of this post, I’ll assume that your vegetable garden will be flush with the surrounding lawn, rather than in a raised bed. However, sound horticultural principles apply to either method. Locate the garden where it gets lots of direct sunlight, and avoid low areas that collect water after heavy rain. Place it close to a source of water.
Now that you’ve found the perfect spot for your vegetable garden, you’re ready for Soil Prep 101. The types of crops you plant in any season are weather-dependent, so make sure weather patterns in your location suit the peppers, basil, kale, or cauliflower.
Although this article concentrates on preparing beds for vegetable gardens, the principles apply to other plants as well, including new shrub borders and flower gardens for pollinators. Page 2 of this article has tips for improving the soil’s tilth, or workability, for most garden projects.
Depending on your level of affinity for precise measurement, you can use either a measuring tape or simple paces to mark the dimensions of your garden. Gardeners who want to indulge in culinary experimentation by growing a wide variety of crops might regret not having made the vegetable garden large enough from the outset. Consider the possibility of expansion in the future.
How Much Sun Does the Vegetable Garden Need?
There is no substitute for sunlight. Without at least 6 hours of direct sun, the results will be disappointing. Anything less than that will reduce and delay the harvest.
Indirect, dappled, and filtered light don’t really count. In fact, during most of the growing season, fruiting plants perform so much better with 7 or 8 hours of sun, minimum! There are other types of crops that can be grown in less than full sun, including leafy greens (lettuce, arugula) and a few herbs (cilantro, parsley).
Layout
Tomato.
Someone out there is asking, “Do I run the rows (the long axes) east-to-west or south-to-north?” Good question! If your plans include growing several tomato plants and maybe some pole beans on a trellis, and you prefer one long plot that is accessible from both sides, I recommend east-to-west.
Long-term plants (tomatoes, peppers, etc.) will continue to get good sunlight all season. Spaced properly, they won’t cast as much shade on each other, especially as fall approaches and the sun sinks lower in the sky. But, if your garden receives sun all day, it won’t make much difference to main season crops.
Cool season crops, grown from fall through early spring, however, will get more sun when planted east-to-west. They’ll face the sun all day even though the days are short.
Taller plants should be planted on the north side of any plot (northern hemisphere), so they don’t shade smaller plants nearby. Some varieties of staked indeterminate tomatoes can grow 8′ tall!
Lettuce growing in a basket.
On properties where spatial considerations are limited, do what you can to provide enough direct sun to those crops you can’t live without. Your crops might not be lined up in neat rows, but rather planted individually in a sunny corner over here and another by the back gate. Doesn’t matter. Do what works for you!
Container-grown crops, such as this lettuce basket (photo, above), can be moved around as conditions change.
Multiple Vegetable Garden Beds
With ample space, a series of garden beds can be laid out in a grid. When deciding where the plants will go, always keep in mind that you want to prevent tall plants from shading short plants, with few exceptions. Using straight pathways makes maneuvering the wheelbarrow and equipment easier.
Crops that prefer cooler, part-shade conditions as the weather warms can be planted between the taller plants or in the partial shade they cast. Those include late spring lettuces, arugula, cilantro, and spinach.
Savoy cabbage.
Having several plots allows for crop rotation, planting one family of plants in Plot A this year, in Plot B next year, and so on. This helps prevent the soil from being severely depleted of certain micronutrients and from allowing populations of insects and diseases to build up.
The nightshade family (Solanaceae: tomato, pepper, eggplant, potato), the cucurbits (Cucurbitaceae: cucumber, summer squash, zucchini, melon, pumpkin), and the brassicas (Brassicaceae: broccoli, cabbage, cauliflower, kale, Brussels sprouts) are groups of plants that benefit from being rotated every 4 or more years.
To clarify, one member of a family (tomato, for example) should not be planted where any member of that family (tomato, pepper, eggplant, potato) has grown in the past few years.
This is a good reason to keep a record describing where you plant each crop every year, as well as documenting successes and losses. Knowing the family names that crops belong to also helps with crop rotation.
Seed Or Transplant?
Don’t go overboard if this is your first attempt. You’re not obligated to germinate every pack of seeds you bought. There’s always next season. Most seeds will remain viable for a few years if kept dry and cool.
Starting out with young tomato, pepper, or slow-growing parsley transplants might be more practical than growing them from seed, even though it is more expensive. You’ll find them at garden centers, farmers’ markets, and local hardware stores, and the growers often have good suggestions for cultivation.
If you’re late getting the vegetable garden going, transplants will save you several weeks of growing time. You can always supplement with fast sprouting varieties of seeds, such as those mentioned in the next section.
Starting plants from seed is a welcome challenge to many and is a source of fascination for children—and for adults, too. Don’t laugh, but, for me, it’s a thrill when the catalogs start showing up in the mailbox. I would never discourage you from exploring this facet of gardening. And, of course, there are so many excellent varieties available from seed that never show up in retail stores as transplants.
Seedlings For Vegetable Gardens Need Sun
Seedlings of fruiting crops need at least 6-8 hours of direct sunlight for strong growth. Use clean pots, pasteurized seed starting mix, and a waterproof tray. Provide the proper temperature for germination.
If you don’t have very sunny windows or a greenhouse, consider starting seeds under shop lights with daylight tubes. I use 4′ long fixtures that hold 2 tubes each. Seedlings growing very close to the tubes—only a few inches away—grow strong stems and roots.
Lettuces, arugula, and other leafy greens tolerate fewer hours of sun, although they appreciate full sun during the cooler months.
Avoid starting seeds too early in the season. This could result in leggy, weak plants that might not perform up to par in the garden.
Broccoli ‘Happy Rich’ and Arugula ‘Astro’ seeded into cell packs (late winter, 2022).
Seeding Directly Into the Garden
Some crops grow easily from seed sown directly into the vegetable garden. Peas and beans, for example, and radishes, beets, and carrots are just a few species that can be planted right into prepared ground. Dinosaur kale, mustard spinach, mesclun, leaf lettuce mixes, zucchini, spinach, and cucumbers are more crops that can be directly seeded.
Read all the information on the packet, paying special attention to when to start and how deeply to sow the seeds. Although these crops germinate readily, gardeners must still watch out for pests, both above and below ground, and turns in the weather.
Spacing the Plants
It’s important to calculate how much square footage each of your plants requires, or at least to get a rough idea. On graph paper, map the proposed garden to scale. Use the plants’ spacing recommendations found on the label or the seed packet for the amount of space needed.
With a 1/4″ grid, each square can represent 6″ or 12″ of garden space. The diagram is optional, but it can help in future years when considering crop rotation.
It’s better to have more than enough room rather than not enough;plants don’t respond well to crowding. The seemingly large gaps between the major crops can be interplanted with “ephemerals”—those plants that grow quickly and are harvested before the majors achieve full size. Examples include radishes and lettuce between tomato plants, or green onions and beets between autumn-grown Brussels sprouts.
If It Looks Like This…
Clay soil shrinks as it dries, creating surface cracking.
Soil that dries as hard as a brick is impossible to work with. You can thoroughly water the area the day before or start digging a day or two after a good rain. Avoid digging or walking in the garden when the soil is wet. This compresses the soil, squeezing out tiny channels of air space that are critical for healthy root growth.
Sandy soil that drains too fast should be amended with copious amounts of organic matter. Bagged topsoil is also available, but quality varies widely. The tiny clay particles in clay loam help hold water and nutrients in the soil.
In a large vegetable garden, plan for pathways every 4′ or 5′, and restrict foot traffic to those areas. Use pavers, flagstones, pine bark, or even that old pile of bricks for the pathways. You can get very creative with stonework, and your garden can be the neighborhood show-stopper, but don’t lay out the stones until the end of the soil prep process.
Page 1: Finding the Perfect Spot for Your Vegetable Garden, How Much Sun Does the Vegetable Garden Need?, Layout, Multiple Vegetable Garden Beds, Seed Or Transplant? (Seedlings For Vegetable Gardens Need Sun, Seeding Directly Into the Garden), Spacing the Plants, and If It Looks Like This…
Page 2: Remove Sod, Tilth, Soil Prep (The First Dig: Loosen the Clay, The Second Dig: Add Drainage Materials, Organic Matter vs. “Organic”, The Third Dig: Add Organic Matter), Fertilizers, Rake Smooth and Pave, Agricultural Extension and Soil Tests (To Lime Or Not to Lime, and What is pH?)
Along with the early daffodils comes really beautiful weather. It’s been sunny, the birds are singing…not too hot, not too cold. It’s time to prepare the soil. But first, we need to understand it.
Prepare the Soil
Herbs, vegetables, and flowers are going to be living—hopefully, thriving—in your garden for several months. For trees and shrubs, providing a good home will see them through the next decade, or the next century! It pays to give them the best conditions you can provide, and it all starts below the surface of the ground.
Axiom of the day: soil preparation is 90% of your effort.
If that sounds like work to you, you are correct! But you’re reading this presumably because past results have fallen short of expectations, and you want to improve your gardening skills. I’ve played in the “dirt” professionally for 50 years and can honestly assert: successful gardening depends on the health of the soil.
And here’s the good news. Thorough soil preparation will have benefits for many years to come. You won’t have to prepare the soil to this extent again.
The Soil Is Alive
Microbes
Seedlings in prepared soil.
Soil is more complex than meets the eye. There is a dynamic interplay among minerals, organic matter, air, and moisture. Earthworms, insects, nematodes, and tiny microbes also contribute. Healthy soil is teeming with life! These organisms play an important role in how soil functions. Without them, organic matter would not break down into those vital nutrients needed by all plants.
Vast mycelial mats of beneficial fungi, or mycorrhizae, live in close association with roots. Millions—or perhaps a billion—species of these beneficial microbes inhabit soils around the globe, many of which live within or around a particular species’ roots. Researchers estimate that there could be a trillion species of microbes living in air, soil, water, and living organisms.
Soil-borne mycorrhizae have enzymes that can unlock, or chelate, micronutrients tightly bound to soil particles, making them available to plants. These organisms can gather water and provide it to plants even though the plants’ roots don’t have direct access to moisture. And these microbes act as barriers to certain soil pathogens.
Bacillus, Streptomyces, and Pseudomonas are common bacterial microbes. Fungal mycorrhizae, such as Trichoderma, Hebeloma, and Glomus help roots absorb water and phosphorus. Other microbes, such as viruses and archaea, also inhabit the rhizosphere, the area surrounding the roots. Gardeners are familiar with the nitrogen-fixing bacteria (Rhizobium) that increase yields in legumes.
Scientists have only recently begun deciphering the enormous number of microbes and what they do for or to plants. Only a few plant families, including Brassicaeae, do not have associations with fungal mycorrhizae. Blueberries and other plants in the Ericaceae family (azalea, rhododendron) have very limited associations with mycorrhizae.
Microbes benefit from the symbiotic relationship with roots by getting carbohydrates in return. The numbers of microbes inhabiting just a tablespoonful of soil are staggering. Believe it or not, that’s greater than the number of people living on the planet! Of course, not all of these microbes are beneficial; many cause diseases in plants and animals.
Tilth
Nutrient-rich earthworm castings.
Consider yourself lucky if your soil has good tilth, or friability, to begin with. Perhaps all you’ll need to do to prepare it is to add compost, aged manure, or some fertilizer periodically.
Soil stays more biologically active over a long period of time if it is not disturbed by frequent tilling. Beneficial fungi and nematodes are especially sensitive to major disturbances. Simply scratching products into the soil surface and watering them in preserves existing microbial populations in the soil.
There are several soil types distributed throughout the United States. They’re determined primarily by the kind of bedrock beneath the surface, the kinds of vegetation growing there, climate, and management practices employed through the centuries. Minerals from rock, eroded by water and wind, will be deposited downstream or downwind.
Soil Composition
Soil is composed of:
mineral matter (rocks, sand, silt, clay)
organic matter (carbon-containing [once-living] compounds such as compost, aged manure, dead roots, dead organisms). Never use fresh manure; the ammonia content can harm plants, and it might harbor pathogens.
living organisms (such as earthworms, nematodes, microbes, insects)
air
water
Tilth and fertility are determined by relative proportions of these materials. All kinds of soils benefit from the addition of compost and other organic materials. I confess to going a little overboard on these amendments when I prepare the soil. But the plants look great!
You might be fortunate to start with soil that has good tilth. It already has physical characteristics which promote plant growth. Or experience indicates that the roots will need some encouragement to grow beyond the original root ball.
Soil that is a rocky clay, for example, dries to the consistency of brick, and will need lots of amendments to improve drainage and to encourage roots to grow vigorously. On the other hand, sandy soils need materials that will improve water and nutrient retention. Instead of repeatedly failing with plants that can’t adapt to your soil, try starting out with those that can. Working the garden over the years will condition the soil sufficiently so you’ll be able to grow more species.
Biennial foxglove (Digitalis purpurea).
Simply digging a hole in the ground, adding a cupful of compost, and plopping the plant in place won’t do the trick in heavy clay or rocky soils. Depth of topsoil, drainage patterns, ratio of clay to organic matter, air pore space (the space between particles), and, of course, fertility and pH, all enter into the equation.
The rich, black ground in our West Virginia garden needed no amendments at all; the foxgloves grew 7 feet tall! Still, I added organic matter every time new plants went into the ground.
From Awful to Awesome
First, the Awful Bit
Our first house in Maryland sat on the crest of a hill. Sunrises and sunsets were spectacular, but the soil was just awful. It was all clay and shale. Any organic matter that did exist blew away or washed down the slope. That “dirt” refused to yield even to the most enthusiastic shovel.
I created a vegetable garden farther down the slope, next to the greenhouse, that gave us fabulous crops of tomatoes and peppers. Digging in autumn leaves, vegetable scraps from the kitchen, and discarded material from my horticultural business greatly improved the soil. It didn’t take long for decomposition to begin and for the earthworms to show up.
Almost Awesome
A few years later, we moved farther south to a community that had been carved out of an old oak and hickory forest. Although the soil quality was better here than at the previous property, I continued to prepare the soil with every new project for the next 3 decades.
Before planting rhododendrons (like the one in the photo, below) in the afternoon shade, I added peat moss and pine fines to the soil. These materials were not merely thrown on top of the ground.Instead, generous quantities of amendments were incorporated (not layered) into the top 12″ to 18″ of existing soil. Then, I mixed nutrient-rich LeafGro (locally sourced compost) into the top 8″ of loosened soil.
This effort created a well-balanced mixture, composed of existing clay and loam, and the added peat moss, composted pine bark, and compost. After that, the soil remained undisturbed except for top dressings of fertilizer, compost, or mulch.
Rhododendron catawbiense.
I left the ditch behind the shrub border undisturbed, allowing rainwater to travel down the slope. Water that did not drain away would have meant death for the shallowly rooted rhododendrons.
Blueberries must have very acidic conditions, in a range from about 4.3 to 5.3 pH. Rhododendrons, azaleas, and hollies like their pH a bit higher than that, but still on the acidic side. Peat moss and pine fines incorporated into the soil helped provide the acidity and aeration.
This calibrachoa has chlorosis from high pH.
Petunia, calibrachoa, pansy, and viola also benefit from a lower (acidic) pH. Plants growing in soil with closer to neutral pH will have sickly yellowish leaves with green veins (photo, above).
A Shady Oasis
Gradually, most of the back yard grew into a private woodland. Japanese snowbell (Styrax japonica), paperbark maple (Acer griseum), Pieris, Abelia, Viburnum, Kolkwitzia, and a group of monarch birches (Betula maximowicziana) were the main players. And the rhododendrons and existing vegetation, of course.
Mulched pathways meandered under the cool canopy, and all sorts of shrubs and perennials luxuriated in that rich soil. There was a small pond, a greenhouse, and no grass to mow in the back yard. Awesome. (***Update***: As it often happens, subsequent owners of the house altered the property to suit their needs and removed almost all of those plants.)
Monitor Soil Health Over Time
Preparing the soil for vegetables is not difficult, and the results will last for years. Most varieties prosper in improved soil 10 to 14 inches deep. Lettuce and radishes need only 5 or 6 inches.
Using the space efficiently and intensively calls for carefully managing the soil. Vegetables grow quickly, fruit heavily, and, therefore, require frequent additions of nutrients.
Thoroughly preparing the existing soil will pay dividends, spelling the difference between getting a few vegetables from the garden (“Why bother?”) and having a truly abundant harvest (“Take some veggies, please!”). And, if you properly prepare the soil at the start, you’ll never have to repeat the effort to that degree.
Keep in mind, though, that, as organic matter breaks down and is absorbed by plants and other living things, you’ll need to add more compost. For top performance, plants need balanced fertilizers that are appropriate for specific uses, such as for vegetables, flowers, spring flowering bulbs, or the shrub border. That’s in addition to the compost or aged manure you originally used to prepare the soil. Lack of nutrients and compacted soils are among the top reasons for low crop yields.
Soil Testing
Contact your local Master Gardeners program, or the agricultural extension office, for information on soil testing. The results will indicate which amendments to add, and whether the pH is appropriate for the plants you want to grow. The report also includes a breakdown of the soil components: clay, silt, sand, and organic matter. Normally, I add more organic matter than soil tests recommended.
Soil pH is a measure of acidity or alkalinity. Neutral is 7.0, with acidic values below that and alkaline values above 7.0. A simple soil test will indicate pH and nutrient levels. Soil pH affects the availability of nutrients to plant roots, with most vegetables preferring pH levels between 6.0 and 7.3.
Years ago, a landscape client wanted to prepare the soil for a vegetable garden on the property she and her young family had just bought. She expressed concern for “bad things” in the ground, so I suggested that she ask for a lead test in addition to the basic tests. The cost of the basic test is very reasonable, but extra requests will raise the fee. No matter; it’s worth the cost.
The report showed a surprisingly high lead content in the soil, unusual for a newer home. So, you don’t want vegetables growing there! She submitted tests from different areas, and felt confident that the original spot was unique. Something probably had been dumped there before the house was built. Later, the family was going to have the contaminated soil professionally removed.
Lead Paint
In 1977, the Consumer Product Safety Commission banned the use of lead paint in residential properties. If you live near an industrial region, a busy highway, or where lead paint might be a concern, I strongly advise testing for lead before you prepare the soil. Local zoning authorities should have records on past property use. For more information, contact the National Lead Information Center at 800 424-5323.
Lead poses a serious health risk, especially to young children. There is no level of lead that is considered “safe enough”. And most of us grow our own vegetables for the health benefits, after all.
For now, gather your tools and your help, and pace yourselves. This is not something to be accomplished in the hour before your daughter’s softball game. So, you might as well turn it into a party—arrange for pizza delivery at the end of the day! You certainly will have deserved it.
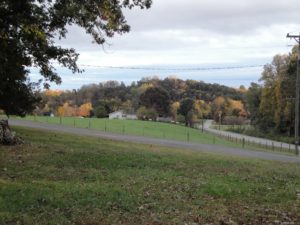
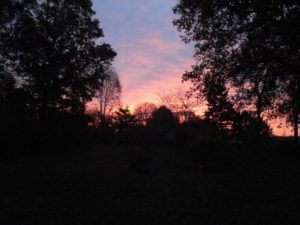

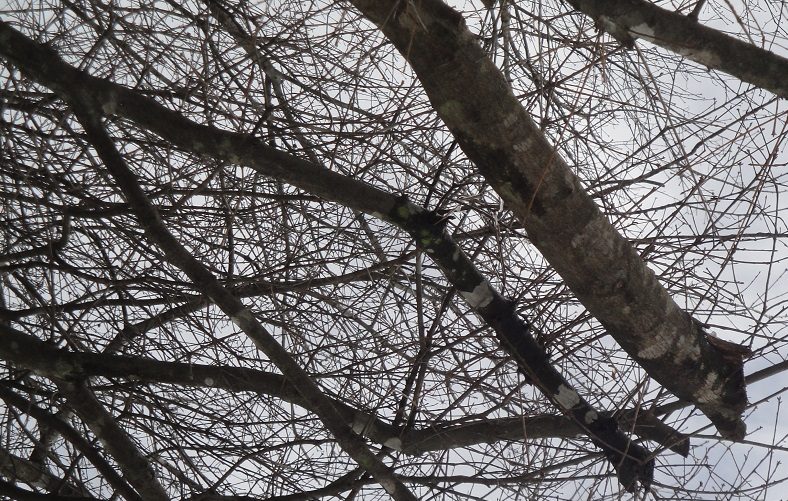
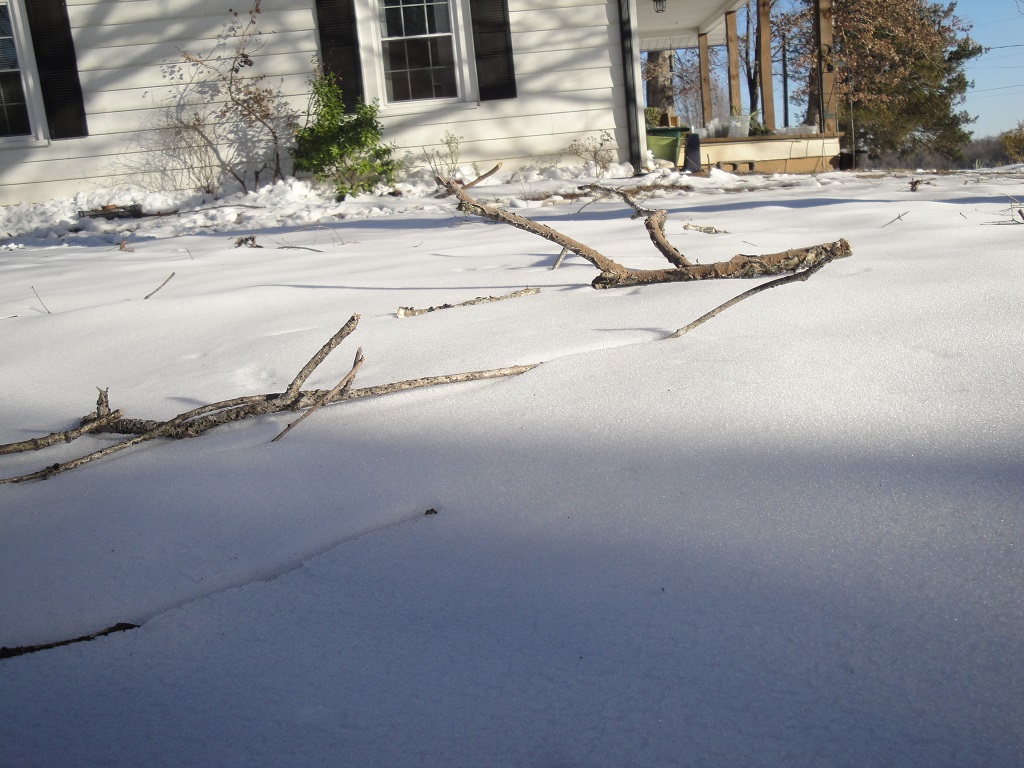

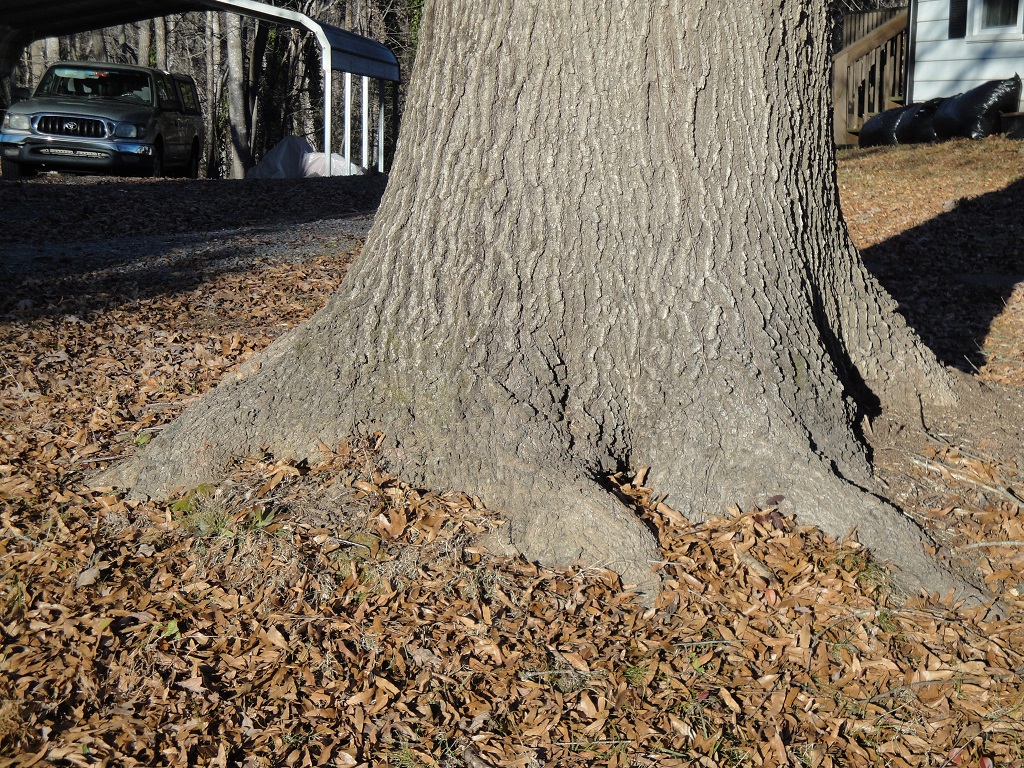
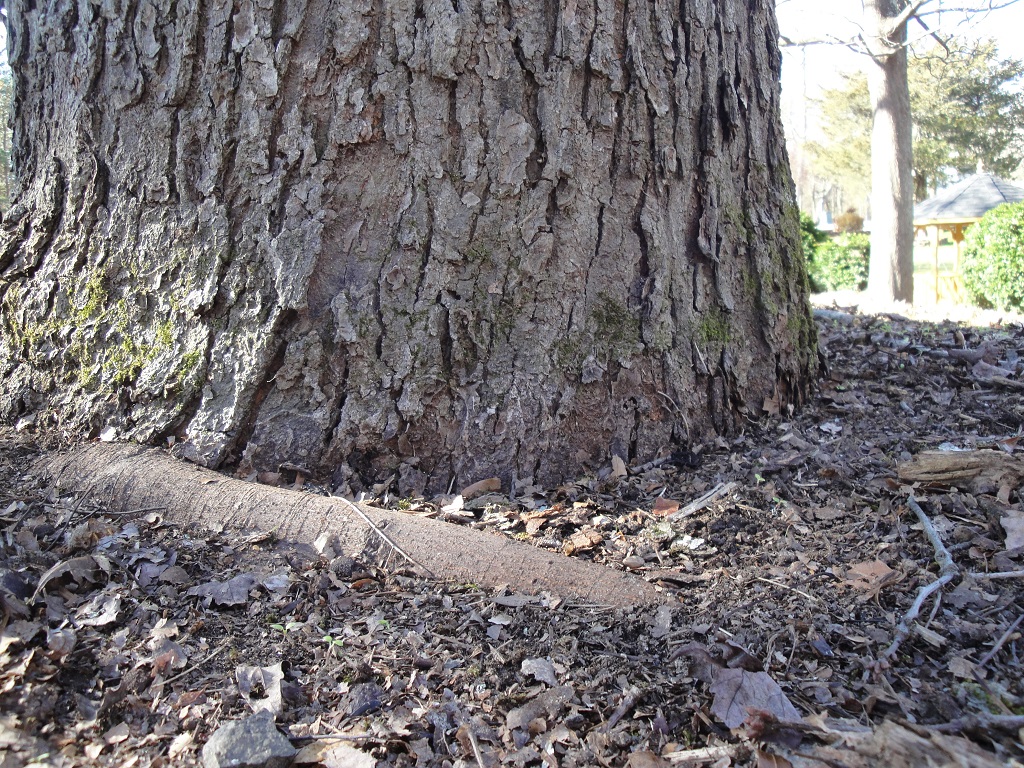
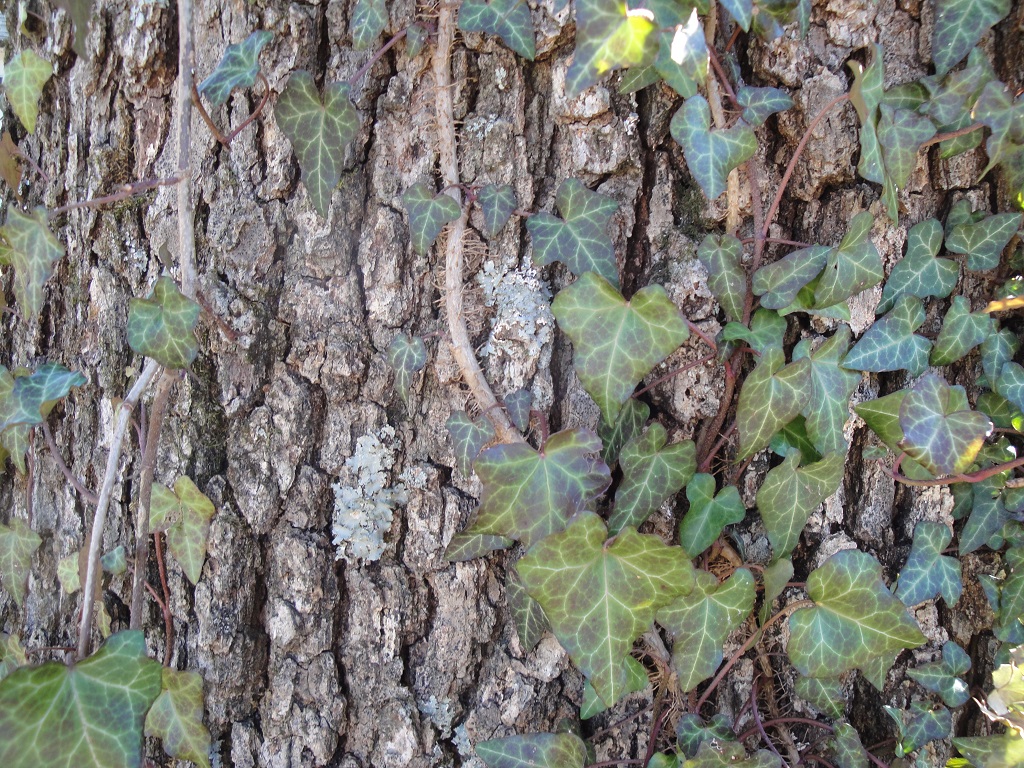
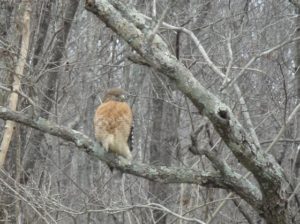 First, English ivy is a woody vine, so its stems will grow in girth just as a tree branch does. As they wrap around the tree trunk or the limbs and thicken over the years, the ivy stems will constrict tree growth, killing limbs and possibly the tree.
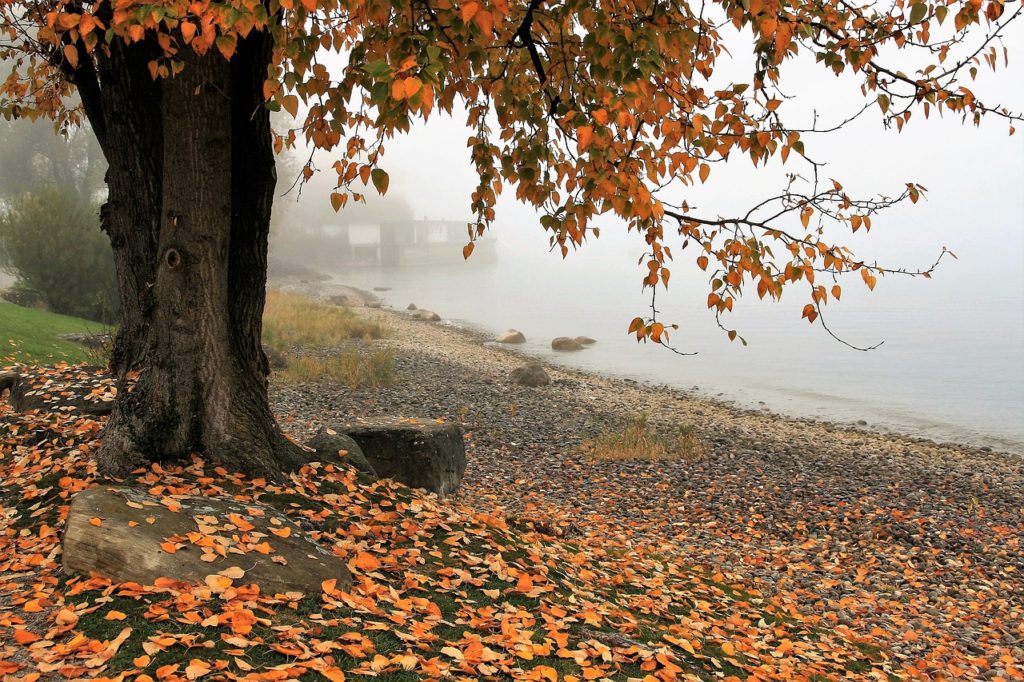


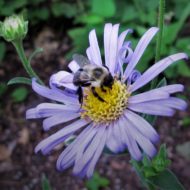

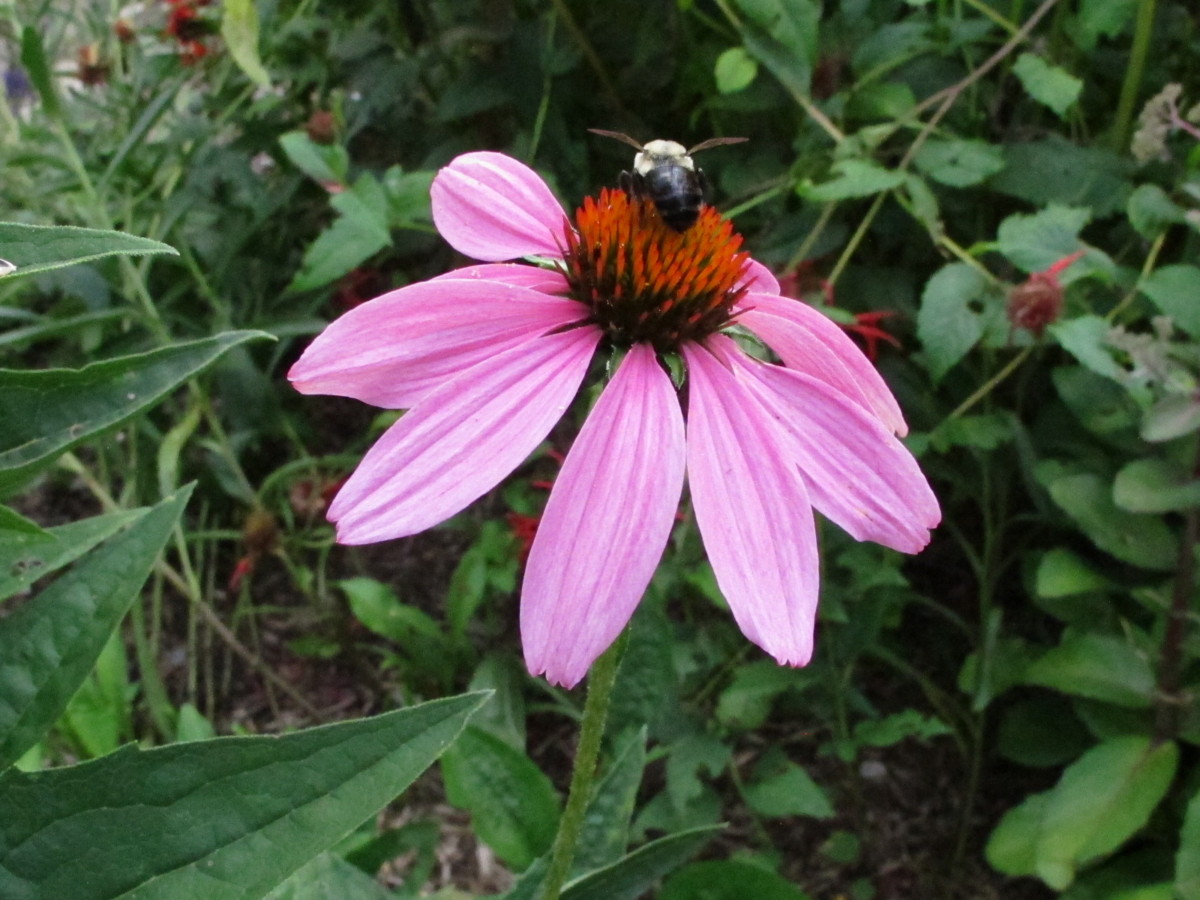

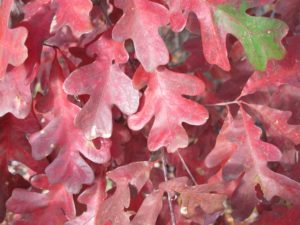
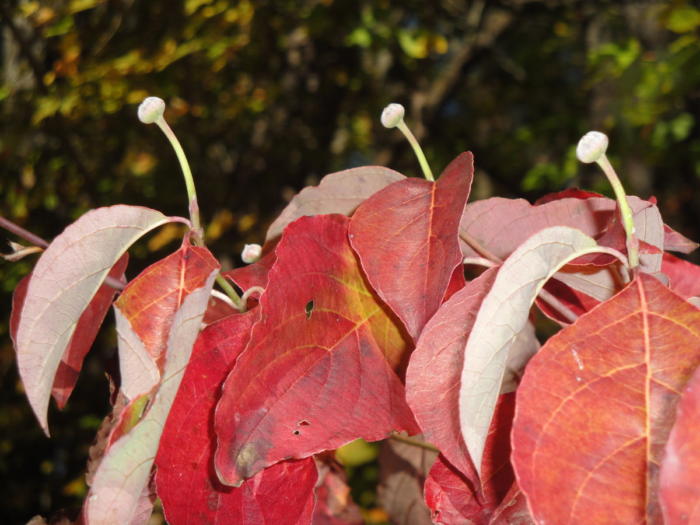
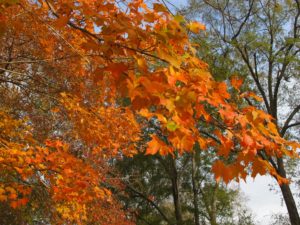

 The hollies (Ilex spp.) are another genus of primarily dioecious (Latin for “two houses”) plants that fruit on female plants. They ordinarily require a male plant, or pollenizer, to set fruit, although holly pollenizers (the males) themselves do not set fruit. Modern breeding techniques have yielded several cultivars that can make berries without pollination.
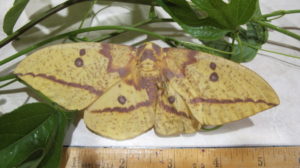
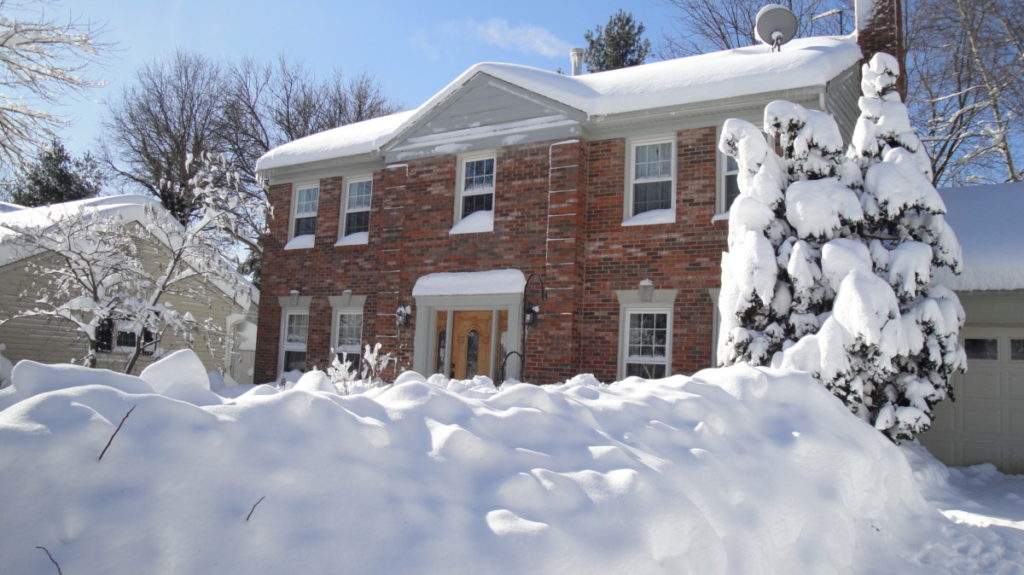

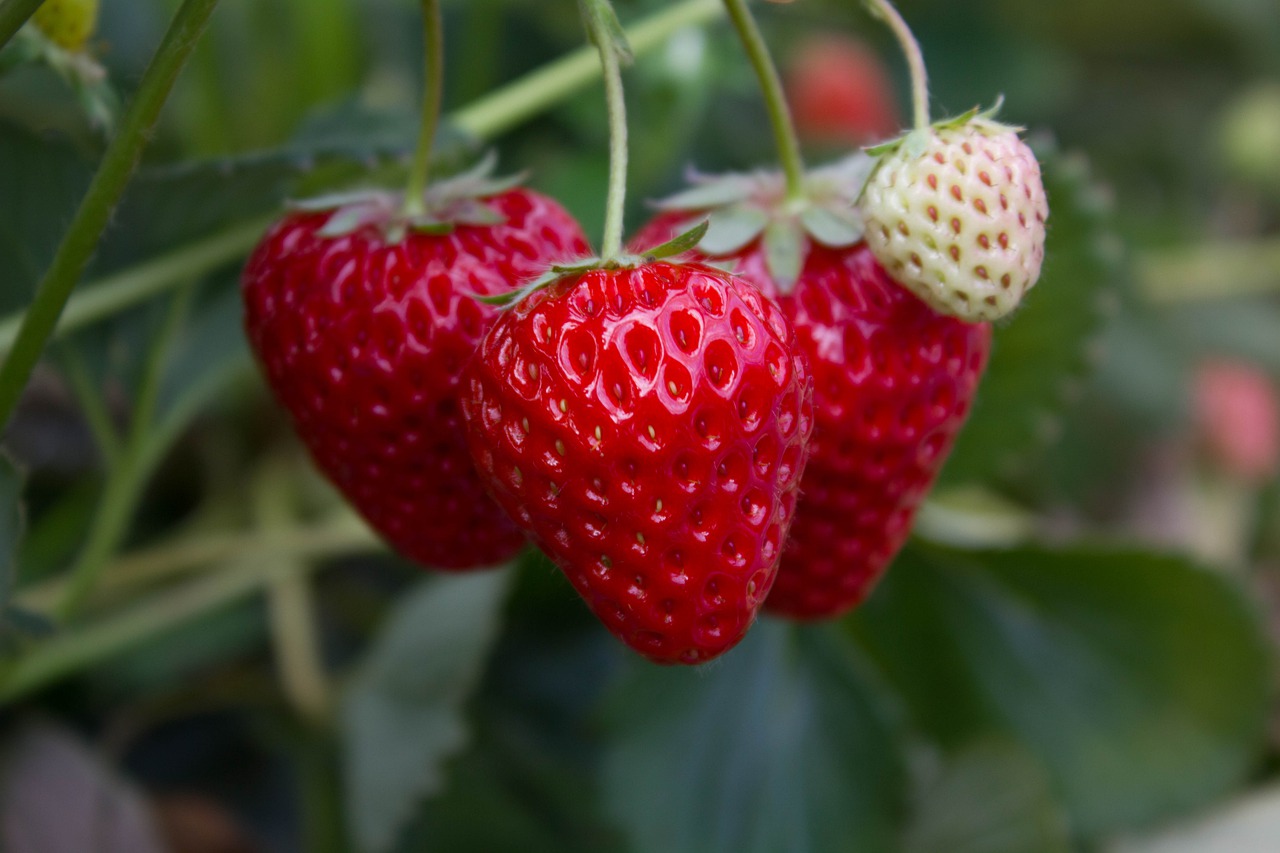

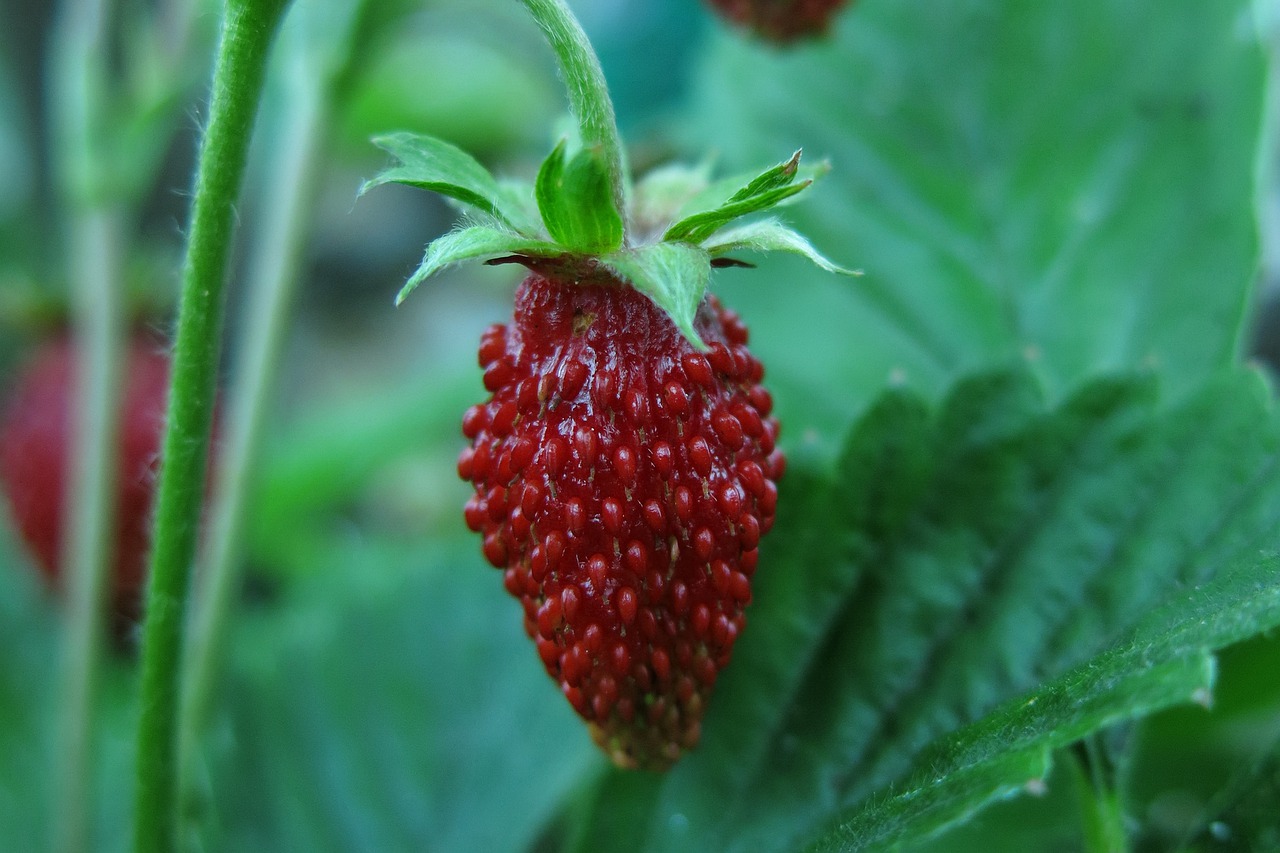
 Find garden space that gets full sun for the best yields. Strawberries start growing before the end of winter, when the sun is still low in the sky. Take this into consideration when locating your garden. In partial sun, foliage and fruits might be plagued by diseases that will ruin the crop.
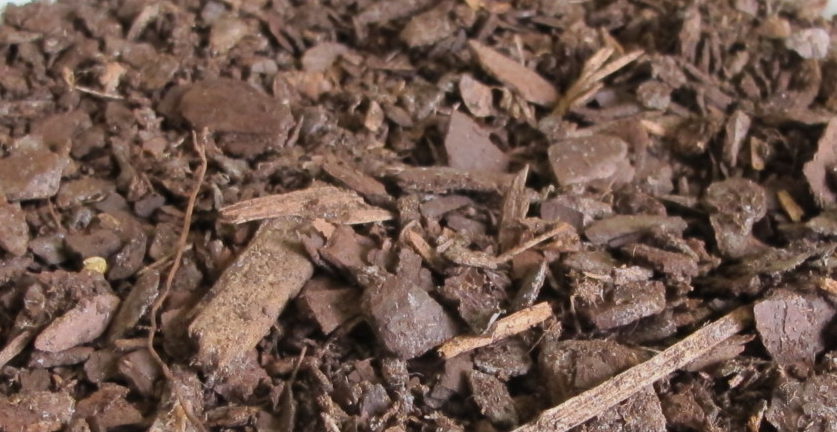
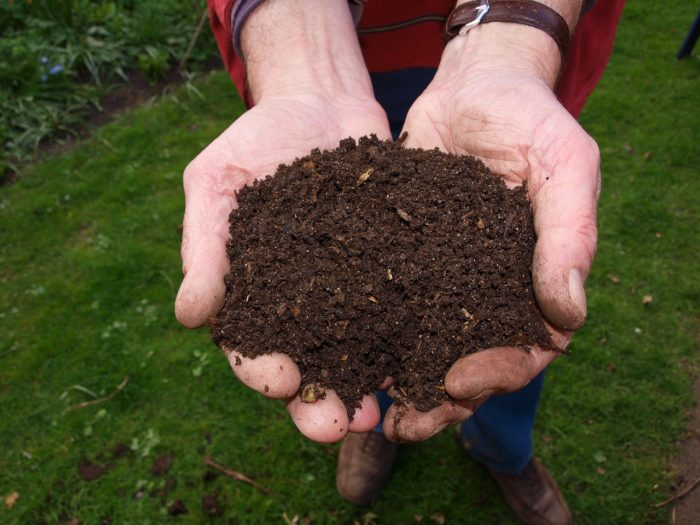
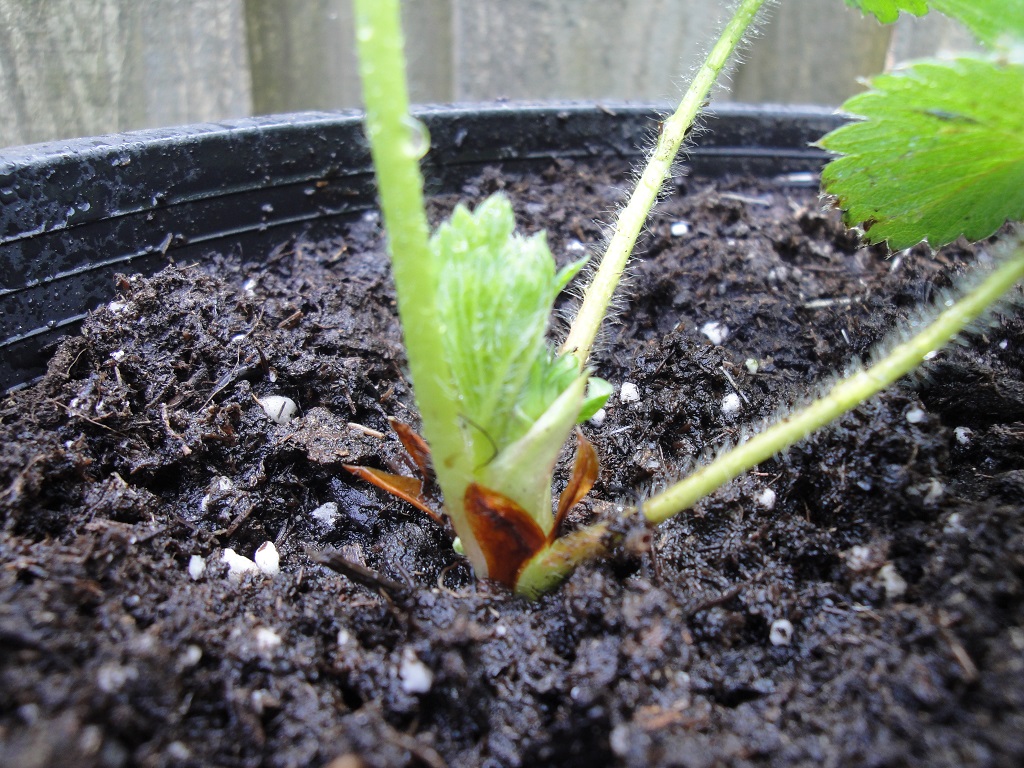


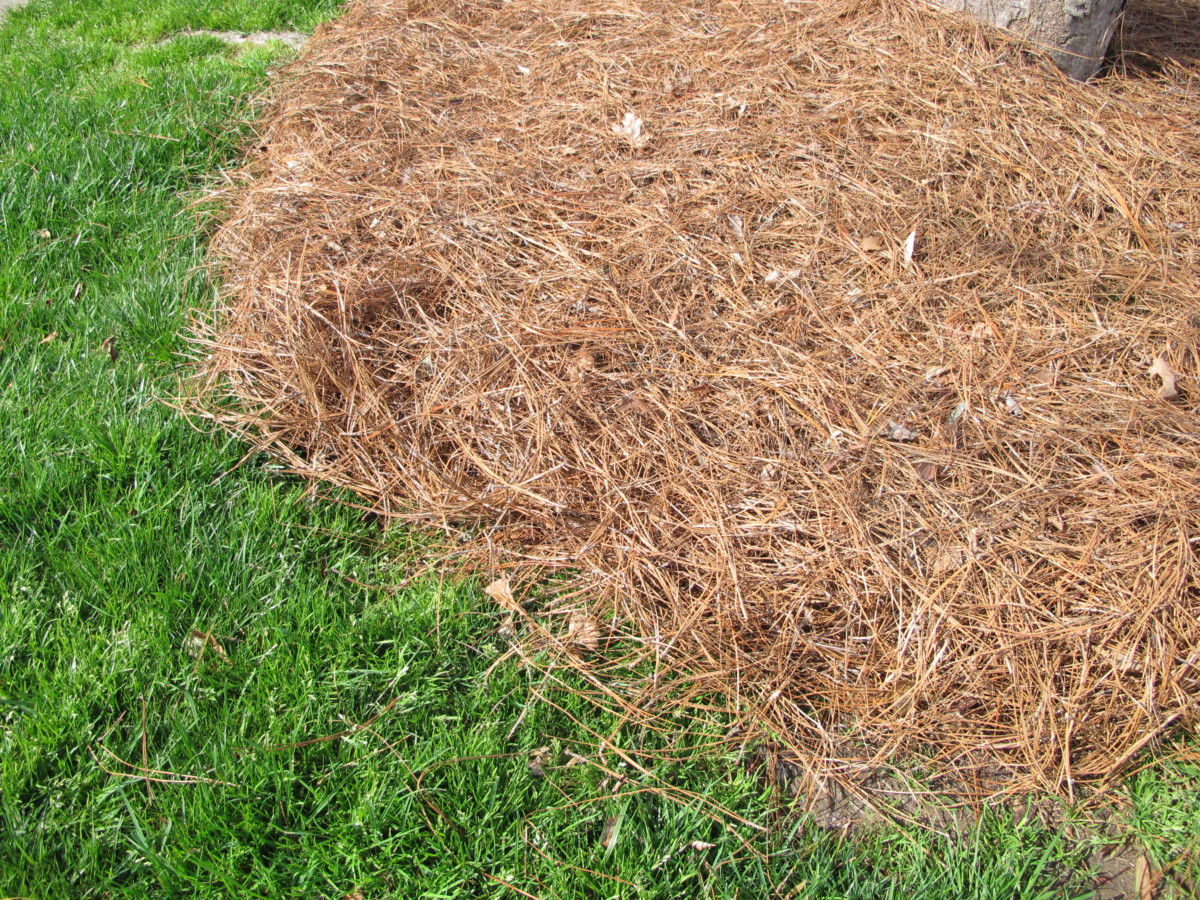
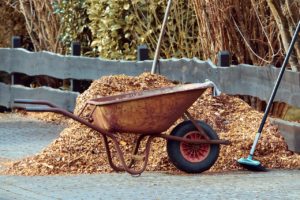

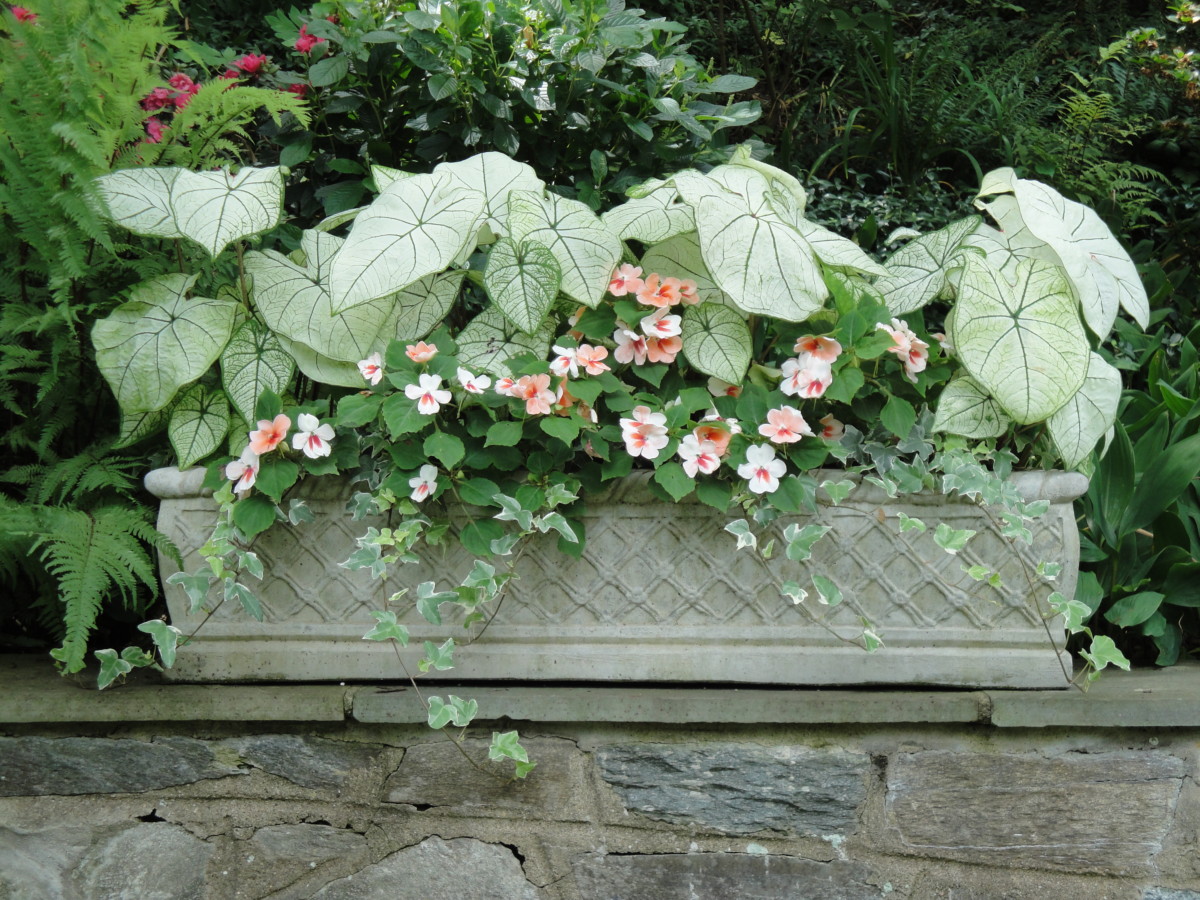

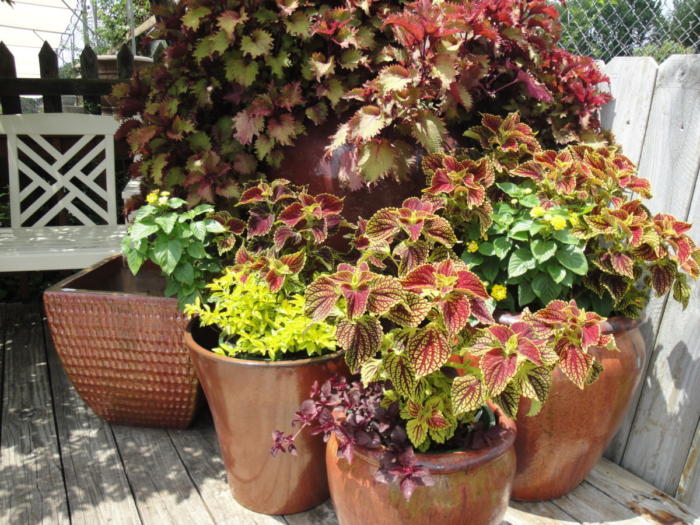


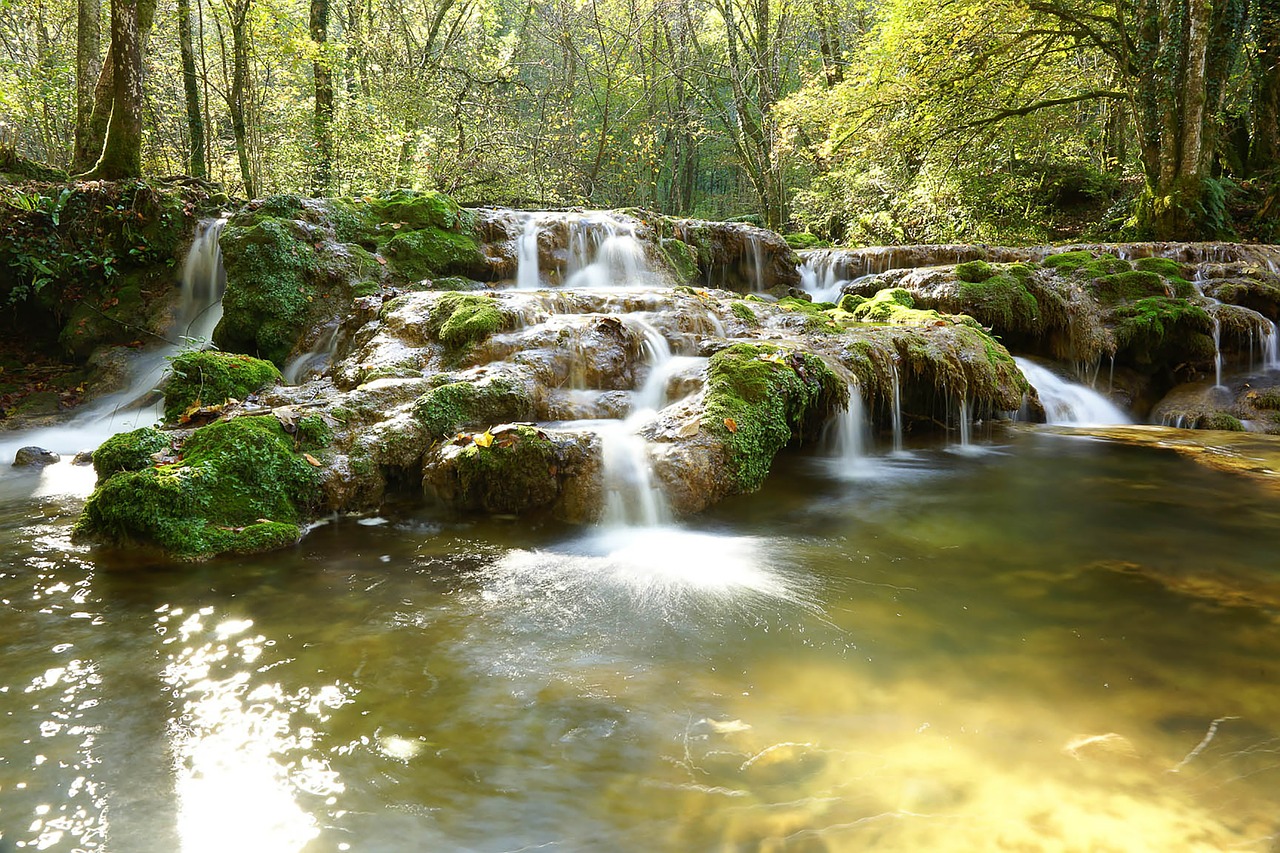

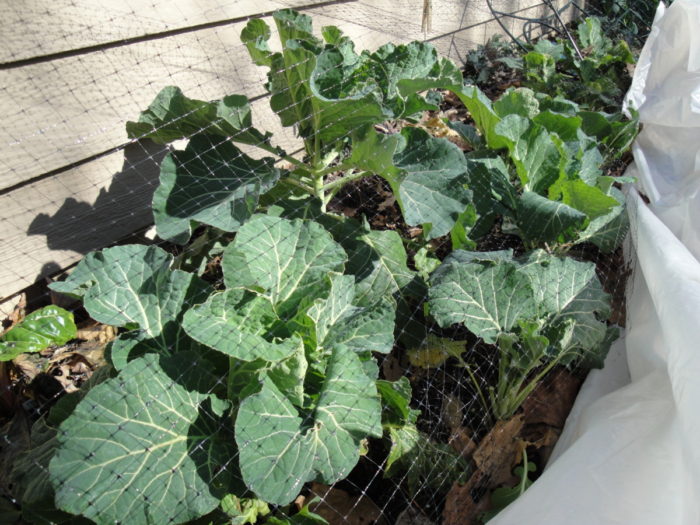
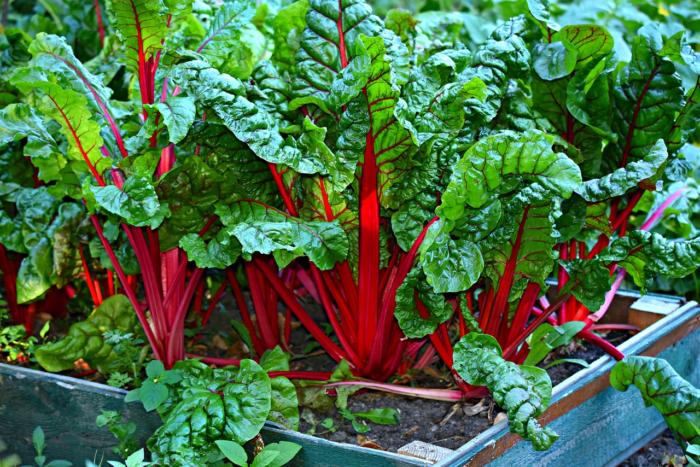
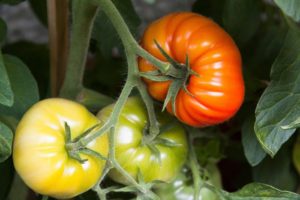
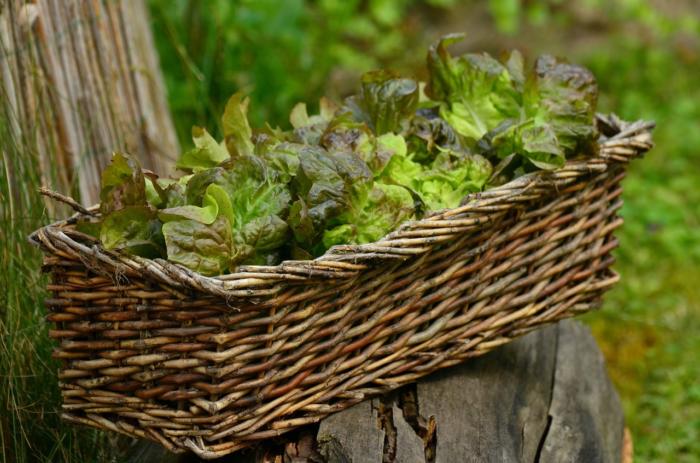


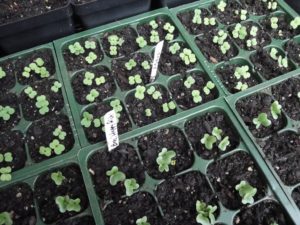

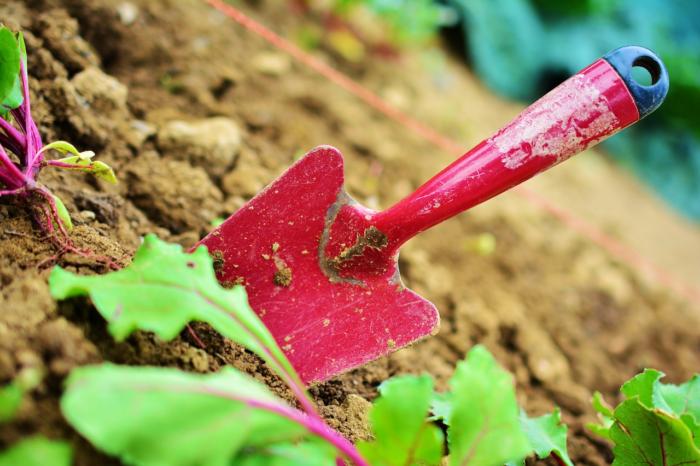
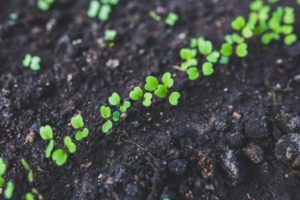
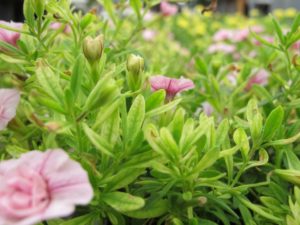
 In 1977, the Consumer Product Safety Commission banned the use of lead paint in residential properties. If you live near an industrial region, a busy highway, or where lead paint might be a concern, I strongly advise testing for lead before you prepare the soil. Local zoning authorities should have records on past property use. For more information, contact the National Lead Information Center at 800 424-5323.