Page 2
Remove Sod
Remove existing vegetation in the plot:
- Grass—you can transplant it elsewhere, but leave most of the soil behind (read on for another option). The top layers of soil have most of the organic matter and microbes, so keep as much of it in the plot as possible.
- Weeds and their roots. Dandelions and other vigorous perennial weeds often have taproots, which will resprout if not entirely removed.
- Your favorite aunt’s donation of reblooming iris rhizomes—definitely transplant elsewhere.
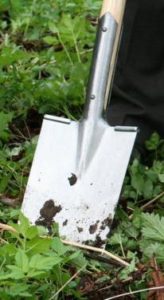
Garden spade.
A spade has a fairly sharp, straight cutting edge. Once you’ve mastered the technique, a good spade works well removing sod. Keep the blade parallel to the ground, slicing right under the surface. This should sever the crown of the grass from the roots. I also use a spade for edging garden beds and dividing perennials.
For large areas, rent a sod cutter or hire some help.
Off To a Good Start
Digging a small vegetable garden, maybe 5′ x 20′, can be done with hand tools. If you’re not accustomed to this kind of physical activity, don’t do it all at once. You can rent a rototiller for larger projects or consider hiring a professional gardener to get you started.
Keep in mind that once all the hard work has been done, you won’t have to exert this kind of effort again. In fact, soil structure and microbes benefit from not being disturbed to this degree. But I do recommend this initial conditioning of the soil, especially if your soil is poorly draining red clay.
Good soil for long-term vegetable gardening requires attentive management. I strongly believe in adding compost or other organic matter each time something is planted, even if the material is simply tucked under the mulch. Earthworms and microbes will take it from there.
Tilth
Now we have a clean slate. No, that doesn’t mean the ground is ready for planting. You haven’t done the hard work yet!
Soil amendments are not the same as fertilizers. We apply fertilizers regularly to maintain optimum nutrient levels as plants grow. Many types of amendments improve tilth, or the soil’s workability, and some contribute nutrient content as well.
Each of the next few steps will incrementally improve the condition of the soil, making it a pleasure to work with. Once this work is accomplished, your vegetable garden will stay in good tilth for many years to come. Need I mention the incomparable flavors of home-grown vegetables compared to the alternatives? It will be worth it, and, yes, it does count as exercise.
Your children might enjoy this new family activity. They’ll accumulate memories and learn valuable lessons that will stay with them for a lifetime—lessons they’ll pass on to their own families or friends.
Soil Prep
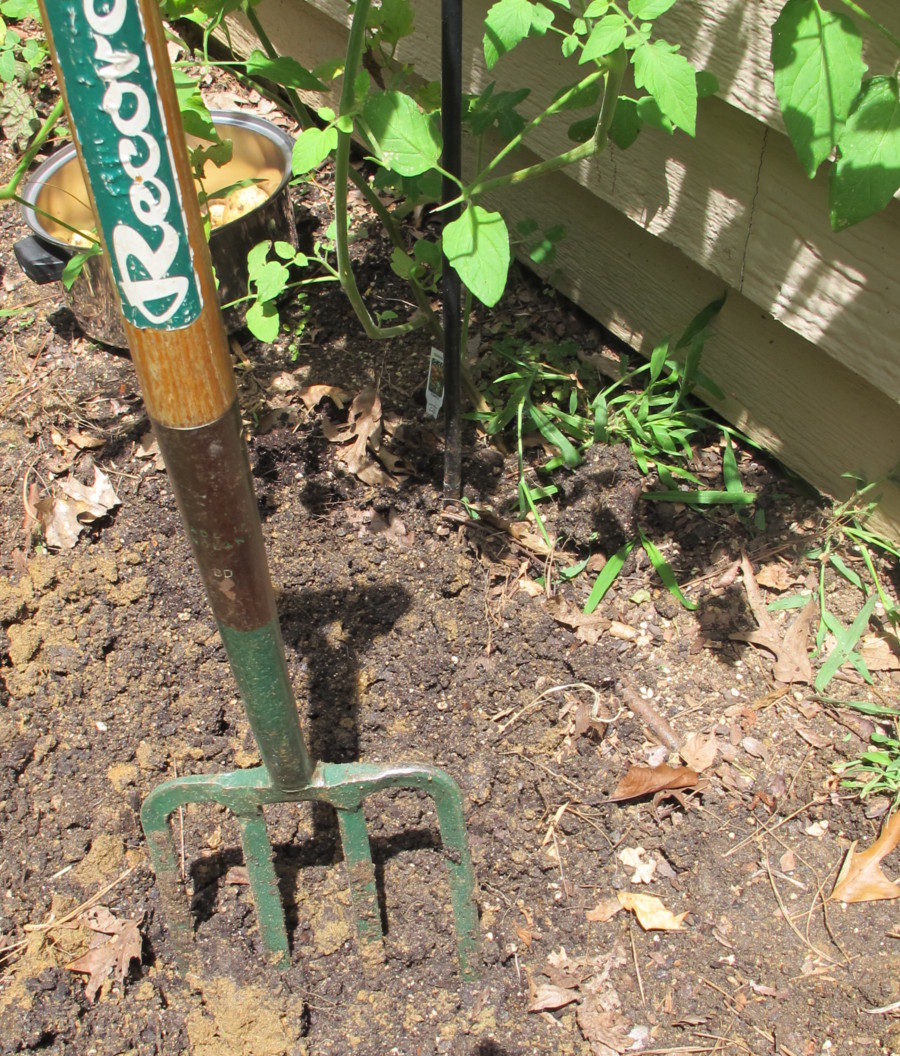
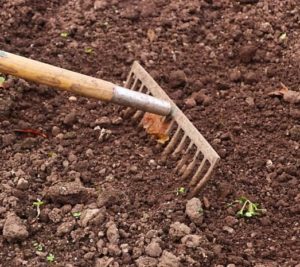
Garden fork.
One of my favorite tools is a D-handled garden fork (photo, right) that I’ve been using for at least 20 years. A garden fork has heavy tines and penetrates the soil more easily than a shovel does.
Don’t confuse this tool with the more delicately-tined pitchfork, which is good for pitching hay or turning compost.
A round-point shovel will suffice for soils that are naturally loamy and those that have been loosened before. But for new ground, I’ve always preferred my garden fork.
Don’t discount the quality of the tools. Good tools are costly, but they perform better in the garden. They can last a long time if given proper care. Rinse and dry the tools after each use, and store them out of the elements.
Some gardeners prefer long handles. I’m short, so my spades and fork have shorter handles with a “D” on the end for easy handling. The rakes and shovel, though, have longer handles for better leverage. For pruning small branches or cleaning up gardens, I use Felco’s bypass pruners.
The First Dig: Loosen the Clay
The first goal is to loosen the existing soil down to at least 8″ or 10”. Soils composed of heavy clay benefit from digging to a 12″ to 16″ depth. Break up the clods with the back of the shovel or fork, or chop them up into smaller clumps.
The grass that was removed earlier can be laid in pieces, upside down, in the bottom of the bed. It will rot. If the loosened bed isn’t deep enough, the grass will pop up again to remind you to cover it deeper next time.
Many have asked whether they should remove clay from the garden. It isn’t necessary. With the proper amendments incorporated into the soil, clay can turn into a beautiful, friable soil. In addition, clay’s small particles hold nutrients in the root zone.
The Second Dig: Add Drainage Materials
Now, cover the vegetable garden with a 3″ or 4″ layer of pine fines, sometimes called soil conditioner. Don’t use pine bark mulch; these pieces are too large and they haven’t been composted. Pine fines are small pieces of partially composted pine bark.
(***Update***: If pine fines aren’t available in your area, use a similar product. Here in northern North Carolina, Walmart stocks Expert Gardener’s Garden Soil. This is mostly pine fines with other products added, such as peat moss or coir. May, 2023)
For new ground, or in particularly stony or heavy clay soils, use closer to the 4″ measurement. Large stones can be removed, but anything smaller than an inch can remain.
Coarse sand, also called sharp or masonry sand, can be used in addition to or in place of some of the pine fines. Don’t use play sand; the grains are too fine and they’re rounded. If there’s a stone yard near you, stop in and ask for help. Be sure to mention that you need coarse sand for a vegetable garden.
Incorporate
Using the same tools, incorporate the pine fines (soil conditioner) into the full depth of loosened soil, breaking up more of the clods. Pine bark is composed of little pieces, from small particles to about 2/3″ long. This amendment is used primarily to facilitate drainage. The chips, mixed in with the clay, help keep the structure of the soil more open, allowing water, air, and roots to easily penetrate the soil.
If the soil still feels very “clayey”, add more pine fines.
Pine Fines Stick Around
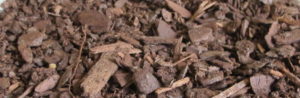
Pine fines.
There’s not much nutrient content in pine bark, but research indicates it might help deter disease-causing pathogens. Pine decomposes very slowly due to its resin content. Microorganisms that break down organic matter are more active close to the soil surface, where there’s more oxygen. But, in lower layers, the pine fines stay intact, maintaining better drainage for many years or decades.
Level the surface with a garden rake, filling in air pockets while breaking up the clods some more. You don’t need to make it perfectly smooth. In a minute or two, you’re going to add organic materials that increase the nutrient levels in the soil.
Materials that improve drainage through the soil do so by creating larger air pore spaces. Those spaces between soil particles allow air, water, and roots into the deeper layers of soil. Plants become stressed and don’t produce heavily in compacted clay.
Organic Matter vs. “Organic”
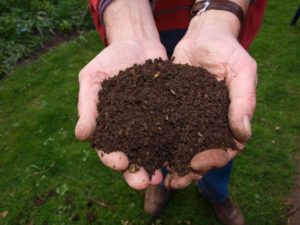
Compost.
Organic matter should not be confused with the term “certified organic”, which refers to the U. S. Department of Agriculture’s designation for products that meet strict standards of production.
Organic matter, on the other hand, is a general term for products originating in once-living carbon-based sources. Compost, composted cow manure (never use pet feces or fresh manure), peat moss, earthworm castings, and planting mixes contain organic matter.
In addition, “farm and ocean” products made from compost, fish emulsion, aged manure, dried blood, kelp, bone meal, shellfish (ask your doctor about allergies), and/or bat guano are available in bags. Many are also certified organic.
Soils high in organic matter hold higher levels of nitrogen available to plant roots. Microorganisms living in the soil release 20-60 pounds per acre of available nitrogen for each percentage point of organic matter. Microbes are less active in cold soil, so decomposition is slow or nonexistent in winter.
Avoid using composted manure products where you intend to grow root vegetables. The crop can end up growing in a distorted fashion, splitting, or covered in small roots.
Microbes
Some of the products mentioned are fairly expensive. But the soil microbes greatly benefit from them, and they improve the tilth each time they’re added. Starting a compost pile is an economical means of providing organic matter for your gardens.
Microbes form a symbiotic association with the crop’s root system and break down organic matter. They make the nutrients available to the roots over a period of time, taking a small amount of protein and carbohydrate in return. Fungal mycorrhizae, one group of microbes, don’t form mutualistic associations in some plants, including the brassicas. But all microbes help plants by processing organic matter.
Microbes also can transfer materials to plant roots even where roots aren’t growing. A complex network of fungal mycelia, growing through undisturbed soil and leaf litter, pick up and transport nutrients and water to plants, particularly woody plants.
It is more economical to use these materials only in the garden beds and not in the pathways.
Compost is a rich medium filled with nutrients, humus, and trillions of beneficial microbes. Free fertilizer! Start a compost pile composed of vegetable refuse from the kitchen, fallen leaves, leafy weeds, and small twigs. Don’t include pet feces, meat, bones, oil, or components that have been sprayed with chemicals. Adding to the compost pile through the year produces a continuous supply of “black gold” to use in gardens and in pots.
Consider Bulk Delivery
You might investigate local sources of high quality bulk materials that can be delivered to your site or dumped into the back of your pick-up truck. Be very specific about the products you want, and you should inspect them before you make the purchase. Reject any that contain fresh wood products (ground up pallets, tree trunks), as these will disrupt the availability of nitrogen until they decompose.
Ask fellow gardeners, landscapers, and your local Master Gardeners/Agricultural Extension agents for recommendations. These agents and soil amendment suppliers often operate booths at home and garden shows, usually in the spring, and will gladly provide information.
The Third Dig: Add Organic Matter
Spread the organic materials mentioned above in any combination you prefer to a depth of about 2″, where the plants will be growing. Don’t mix them deeply into the soil. Instead, incorporate them into the top 4″ to 6″ of the bed.
Expensive nutrients placed deeper in the soil will be beyond the reach of the young roots. Much of it will be wasted, leached away by rain or irrigation. But the nutrients near the surface will dissolve in water and filter down into the soil, where the roots can absorb them.
Without the addition of lots of organic matter and pine fines, the existing clay and sand mixture will give you a concrete-like medium, and you don’t want that.
Fertilizers
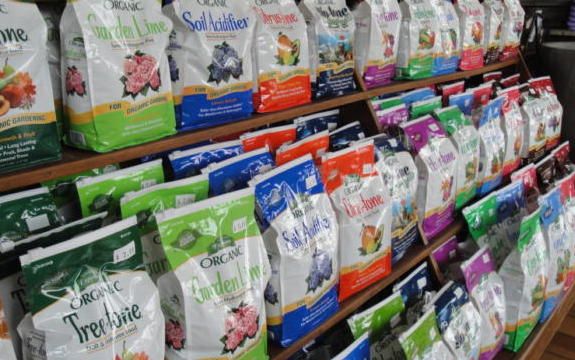
Organic fertilizers for specific purposes.
Some gardeners prefer adding granular fertilizer as they’re working up the soil. A soil test might recommend doing so, but don’t bury it deeply in the ground.
Another option is to do the soil prep, as detailed in the previous sections, and then apply a starter solution to new transplants.
As the crops grow, you’ll need to provide a side-dressing or a solution of fertilizer every month or so. My first choice is nutrient-rich organic fertilizers. They break down slowly, are not leached out of the soil as quickly as the synthetics, don’t burn roots, and the microbes love them.
I sometimes use soluble synthetic fertilizers, especially in late fall to early spring. Soil microbes are not active in cold soil, so they will not be able to break down organic materials and make nutrients available to the plants. Cool season vegetables and greens growing through the winter, therefore, receive an occasional solution of synthetic fertilizer.
Synthetic (chemical) fertilizers do not make the soil or the crops toxic. They break down to the same or very similar compounds that organics break down to. Because organisms in the soil benefit from products of decomposing organic materials, however, organics are my preference. Using chemical fertilizers exclusively in the garden harms soil microbes and earthworms.
Rake Smooth and Pave
Garden rake.
Almost done. Rake the surface smooth, filling in low spots. Now is the time to lay out the paving materials, if you’re using them, for the pathways.
Consider “planting” bricks or pavers at the edge of the garden, flush with the surrounding lawn. This makes a convenient mowing strip. Place them out far enough so future plant growth doesn’t shade and kill the grass.
You’ll notice how loosening the existing soil and adding the amendments fluffs up the garden bed. If you wanted raised beds, simply add staked cedar boards (avoid wood preservatives) or cinder block sides to the plot, et voilà! You’ve got raised beds!
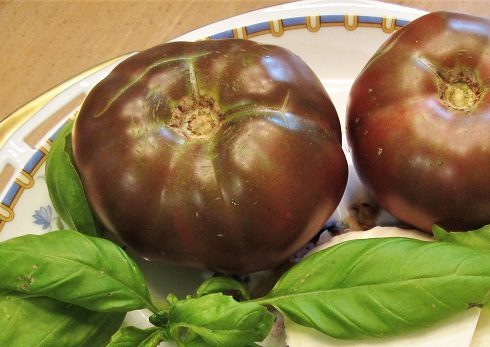
Now, take a good look at your work. You should be proud of yourself. That was hard work! In my next post, I’ll talk about the plants—the fun part. Trust me—all this work will have been worth it when you taste that first sun-ripened ‘Cherokee Purple’ tomato (photo, below). Or when you serve a salad that you can proudly tell your guests was grown in your own back yard.
Agricultural Extension Service and Soil Tests
The Master Gardeners program, sponsored by your county’s Agricultural Extension Service, is a great source of information. Their expertise is locally-based, and they can provide information for any problems you might have.
Ask them when they recommend taking a soil test and how to have it done. The results will indicate the need for nutrients and/or lime, according to the kinds of plants you want to grow. Most soil tests do not include results for nitrogen levels because this element leaches quickly through the soil with irrigation and it occurs in different forms. They also identify soil composition and whether you should add amendments. Instinct guides me, however, to add more organic matter than is generally recommended.
The extension service is associated with land-grant colleges in each state. Their agents have information on a wide variety of subjects, including beekeeping, forestry, invasive insects and plants, food preparation, raising chickens, and crop production.
To Lime Or Not to Lime
Limestone, primarily calcium carbonate, comprises skeletal remains of marine mollusks, corals, and minute organisms. Lime comes from land composed of carbonate sedimentary rock.

Apply ground limestone to the surface of the soil to raise the pH, letting the rain slowly wash it in. Lime works faster when incorporated into the soil, but it still needs months to fully take effect.
Without the recommendation on the soil test, I hesitate to say, “Just go ahead and add a few pounds”. The 4-minute lawn in the Maryland front yard was an anomaly; it needed sulfur every few years because the pH was too high. Most areas in the eastern U.S., though, require lime for lawns and most vegetable garden crops.
What is pH?
The pH is a numerical representation of the concentration of hydrogen ions. Essentially, it represents the soil’s acidity, and plants are quite particular about their pH. Most of our vegetables enjoy a pH of 6.0 to 7.5. On a scale from 0 to 14, 7 is neutral, lower numbers are acidic, and numbers above 7.0 are alkaline.
Values of pH outside the plant’s preferred range will render certain nutrients unavailable and others toxic, so it’s important to get it right. Blueberry shrubs require acidic soil, somewhere between 4.5 and 5.3; they very rarely need lime. Cole crops, on the other hand, love soil pH only slightly acidic to alkaline.
Soil that needs extra calcium or sulfur benefits from the addition of gypsum. Gypsum is calcium sulfate. It helps soil structure by flocculating tiny clay particles into larger aggregates. And it doesn’t change the pH. So, where soil pH is good for tomatoes and zucchini, additional calcium from gypsum improves the soil without making it more alkaline. Adequate soluble calcium levels help prevent blossom-end rot in tomatoes, peppers, and other vegetables.
Concluding
Although this sounds like too much work for a few vegetable plants in the summer, trust me. If you improve the soil as I recommend, your plants will look healthy and provide the best-tasting produce you’ve ever had…not just this year, but for many years to come.
Are you still with me? Assuming you haven’t decided to take up photography or stamp collecting instead of gardening, I’ll see you next time!
Headings
Page 1: Finding the Perfect Spot for Your Vegetable Garden, How Much Sun Does the Vegetable Garden Need?, Layout, Multiple Vegetable Garden Beds, Seed Or Transplant? (Seedlings for Vegetable Gardens Need Sun, Seeding Directly Into the Garden), Spacing the Plants, If It Looks Like This…
Page 2: Remove Sod, Tilth, Soil Prep (The First Dig: Loosen the Clay, The Second Dig: Add Drainage Materials, Organic Matter vs. “Organic”, The Third Dig: Add Organic Matter), Fertilizers, Rake Smooth and Pave, Agricultural Extension Soil Tests (To Lime Or Not to Lime, What is pH?)