Updated 11/23/2025

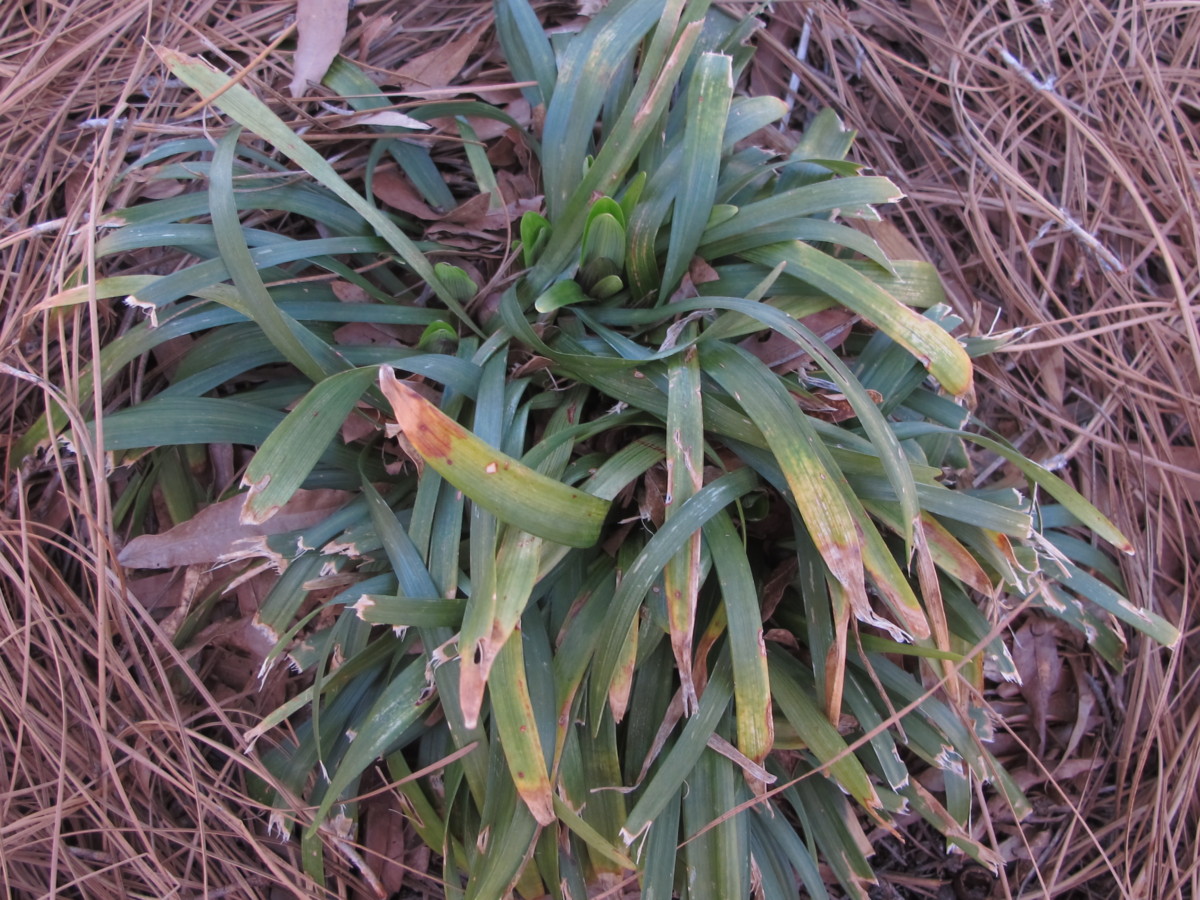
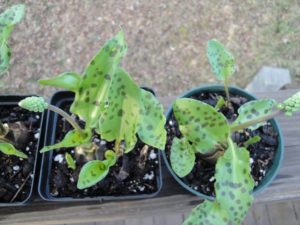
Drimiopsis maculata.
It happens to everyone. We’re busy with the kids’ activities, our jobs, or the weather isn’t convenient. Sometimes we just can’t get to all those chores on the list. These cool drizzly days before the gardening season kicks into gear provide the opportunity to tend some of those plants I’ve neglected for months or, admittedly, for years. The fact that they survived attests to the resilience of plants.
It’s rare when any of them actually die; that’s not a good look for someone who’s been in professional horticulture since 1973! But, after growing these plants for decades, I know how far they can go before reaching the point of no return. Not the best way to garden, but that’s reality for many of us.
This article describes several examples of the adaptability and the resilience of plants.
The Resilience of Plants: Confined Spaces
Drimiopsis Maculata
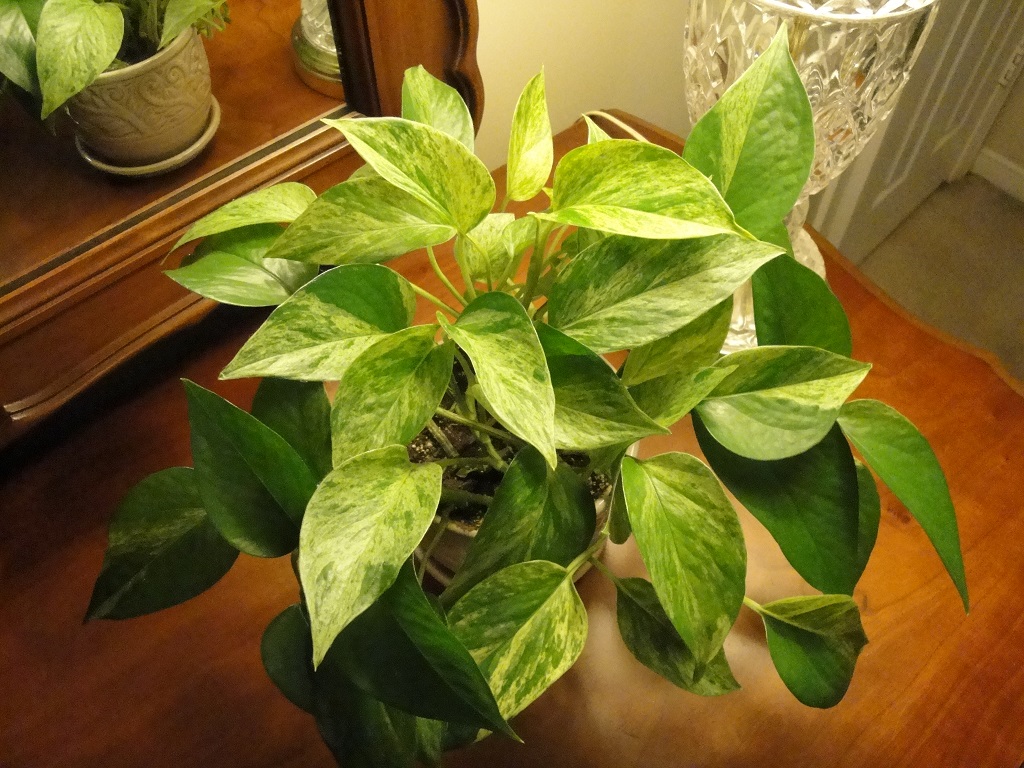
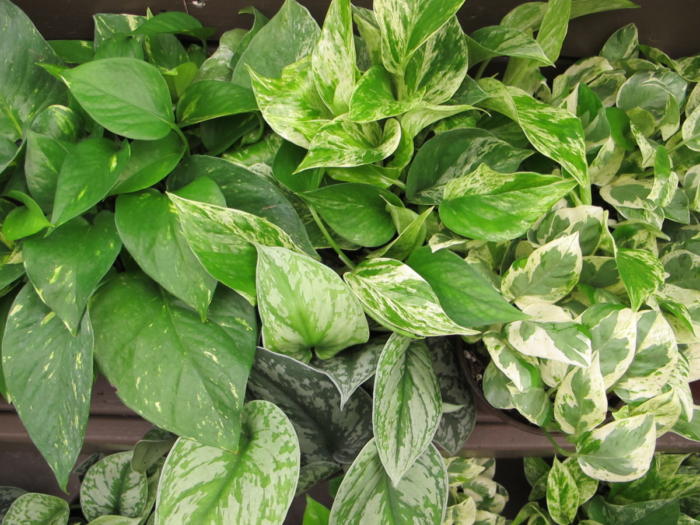
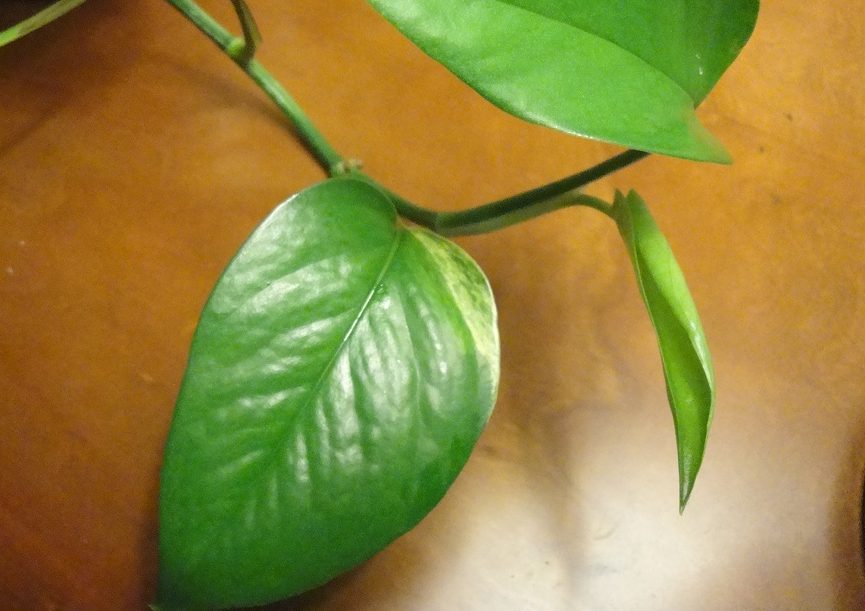
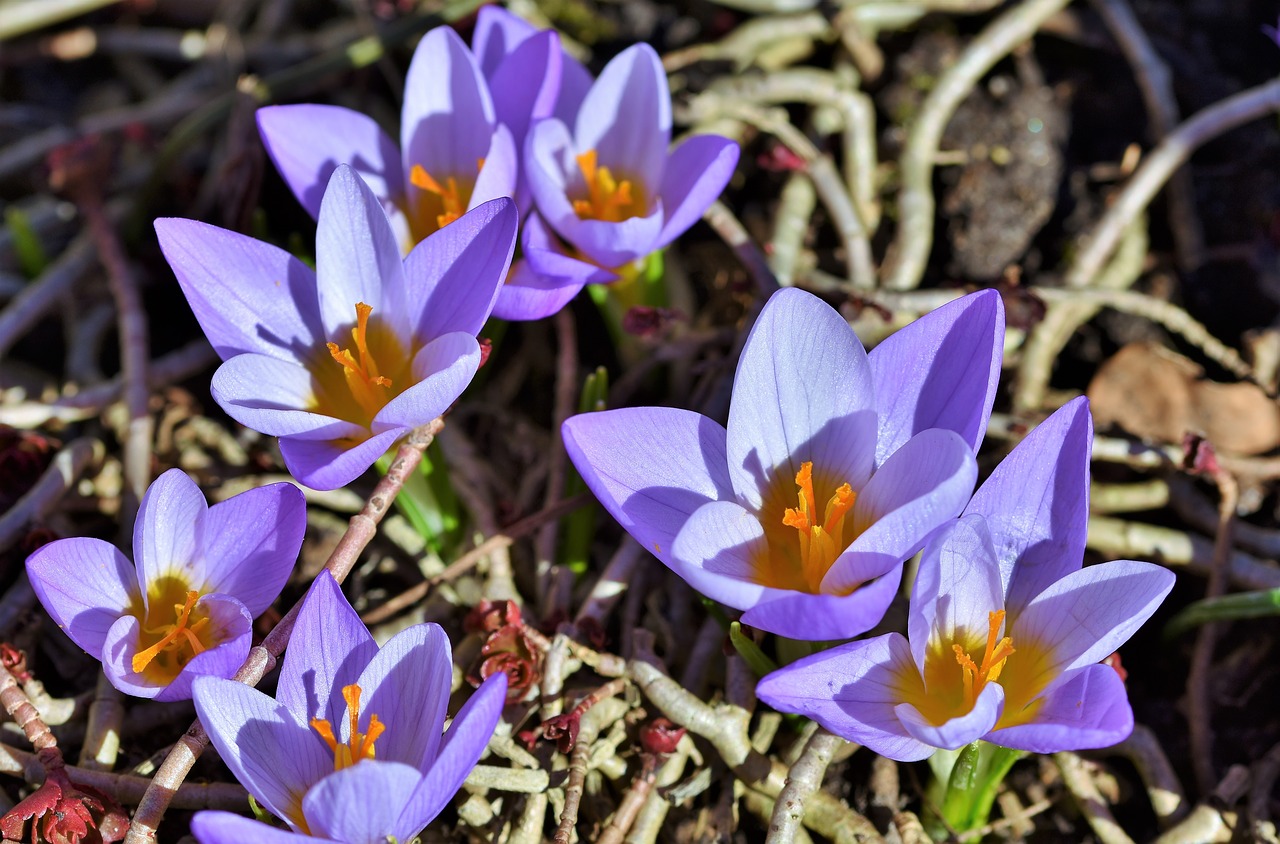
Drimiopsis maculata is one of the leopard lilies native to southern Africa. This species (photo, above) and 2 other leopard lilies that I grow (Ledebouria socialis and Drimiopsis kirkii) are perennials where winters don’t approach the freezing point. The specific epithet, maculata, refers to the deep purplish-green spots on new spring growth. Foliage grows from bulbs at or just below the soil surface. These 3 species are classified in the Asparagaceae family.
Indoors, they prefer cool temperatures from fall to spring, and shed some or all of the previous year’s foliage soon after New Year’s Day (northern hemisphere). Leopard lilies tolerate temperatures down into the 40’s F, so they’re spending the winter on the enclosed porch with only the sun, an additional plastic bubble and old sheets, and miniature incandescent Christmas lights for warmth. Although it might drop into the low teens outside the porch, nighttime temperatures won’t get below 45° under the bubble.
I simply don’t have enough direct sunlight indoors for hundreds of small plants. Anticipating that Arctic Blast (down to 4°F) on December 24, 2022, I moved all the tender plants indoors the night before. Good thing, because the power went out for a few hours at the coldest time of day, around dawn. No power, no lights, no plants! It’s only when outdoor temperatures drop below 10-12° that I consider moving tender plants from the enclosed porch to the warmth indoors.
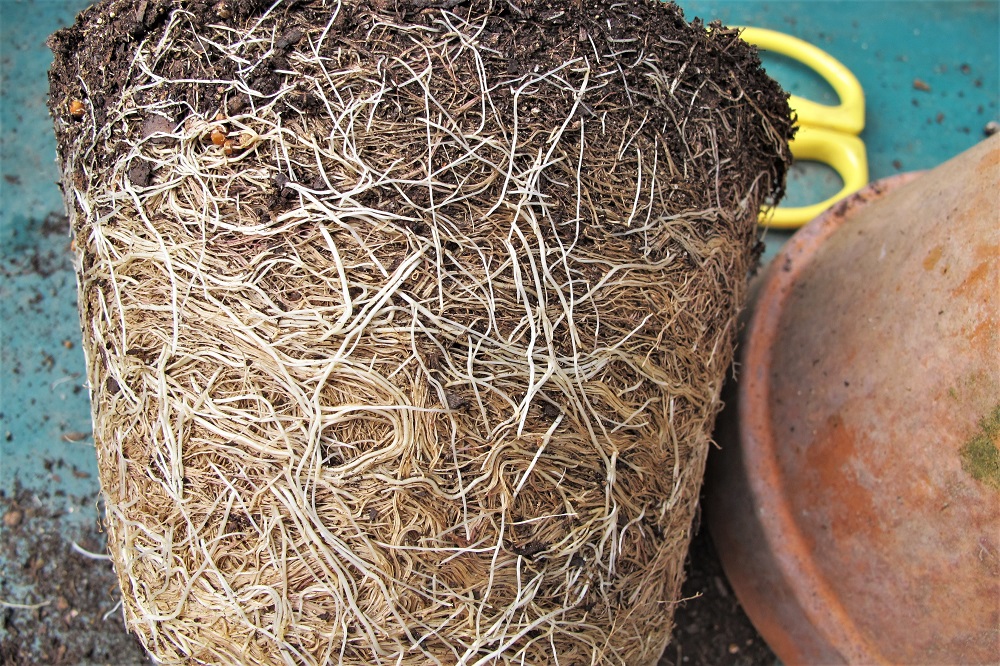
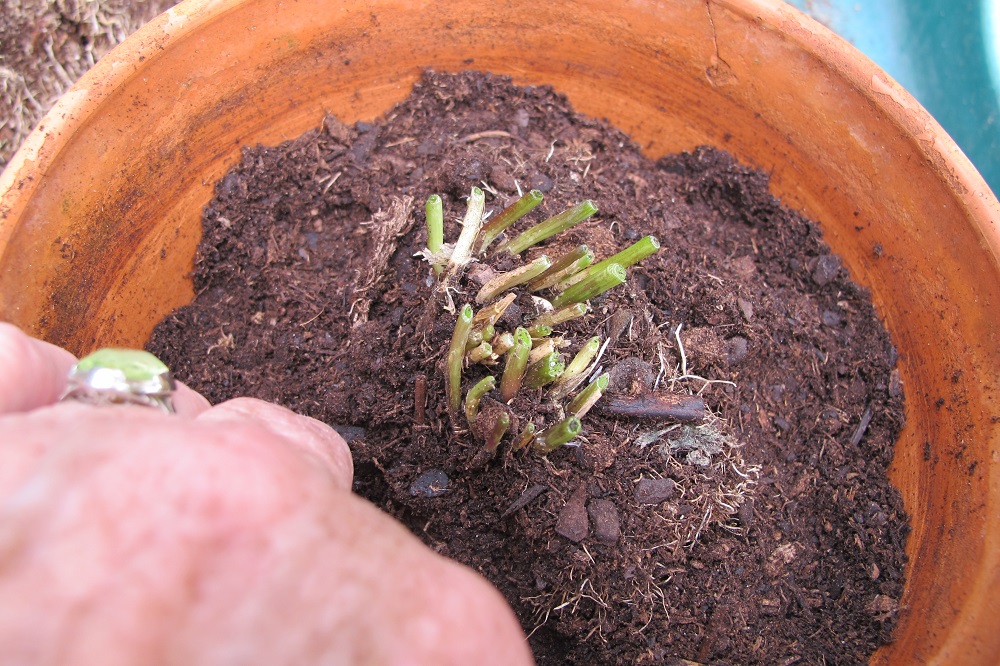
Repotting Drimiopsis
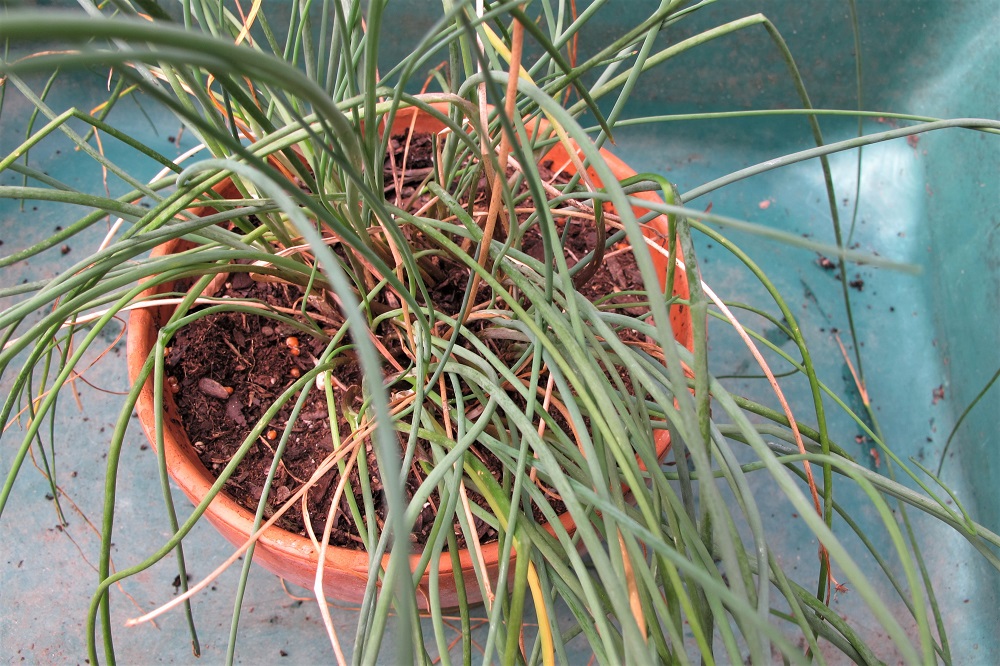
This clump and a few others stayed in 4½” pots for over a decade, since I last potted them up in Maryland. (I moved to North Carolina in 2013 and to this house in 2021.) They grew in only an inch of soil before I divided them in late summer, 2022. Because most of the organic matter had decomposed over that period of time, the level of the soil surface dropped a few inches lower in the pot.
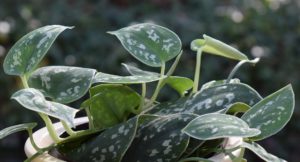
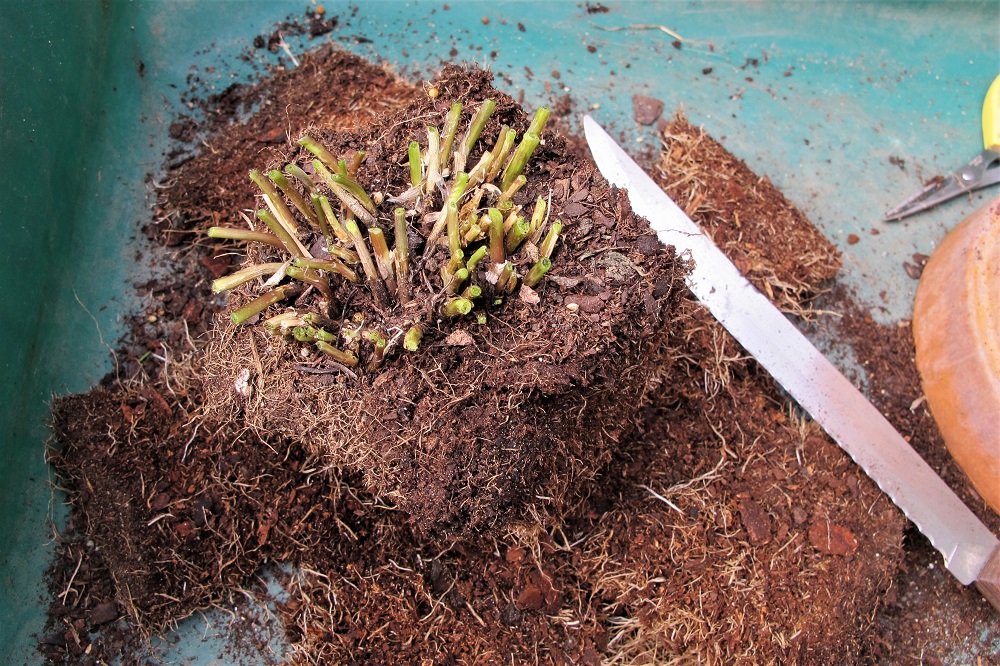
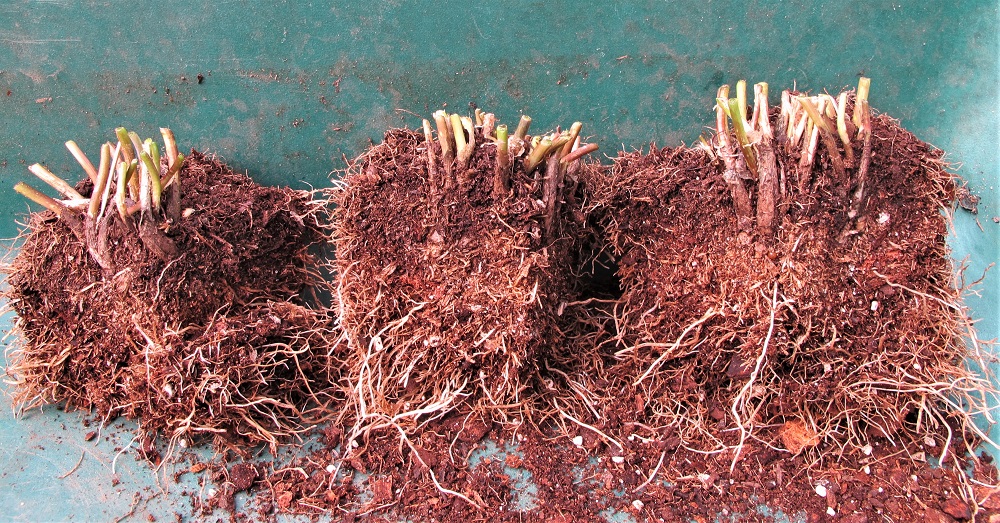
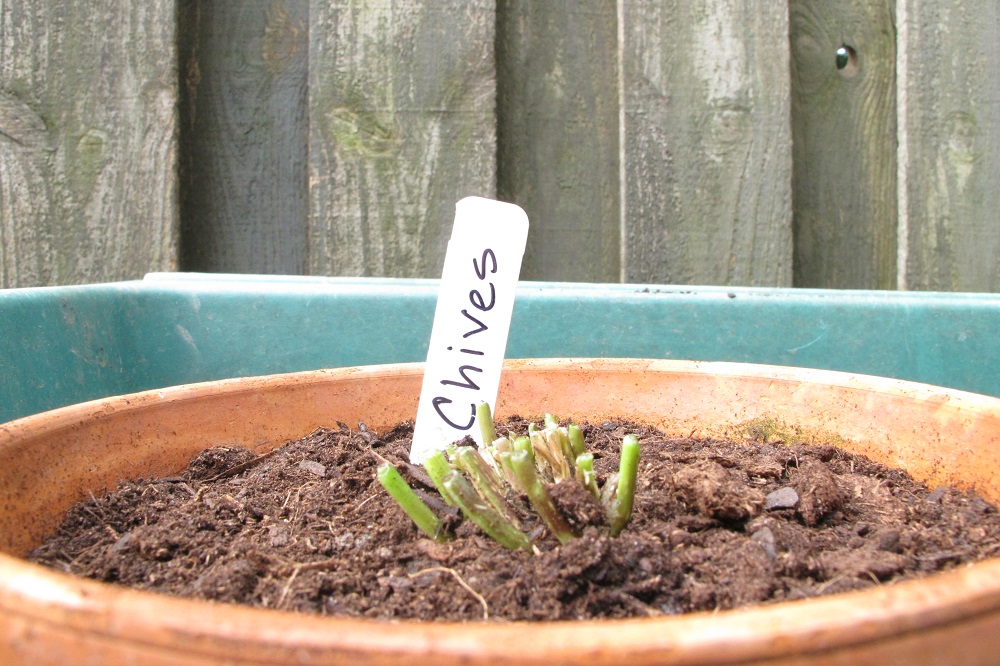
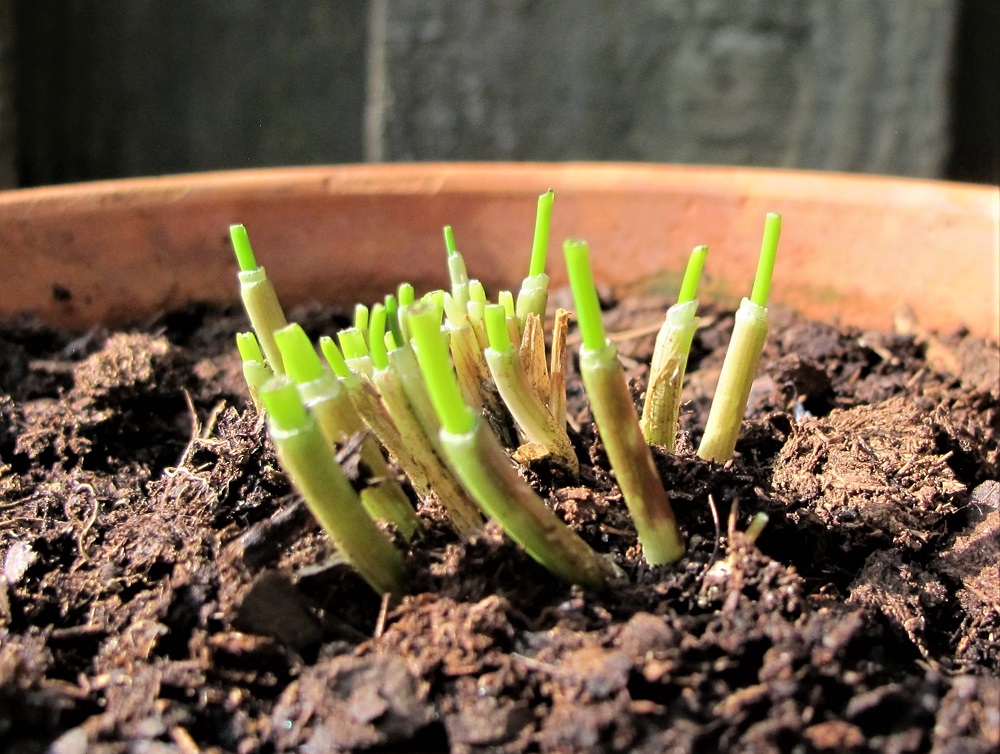
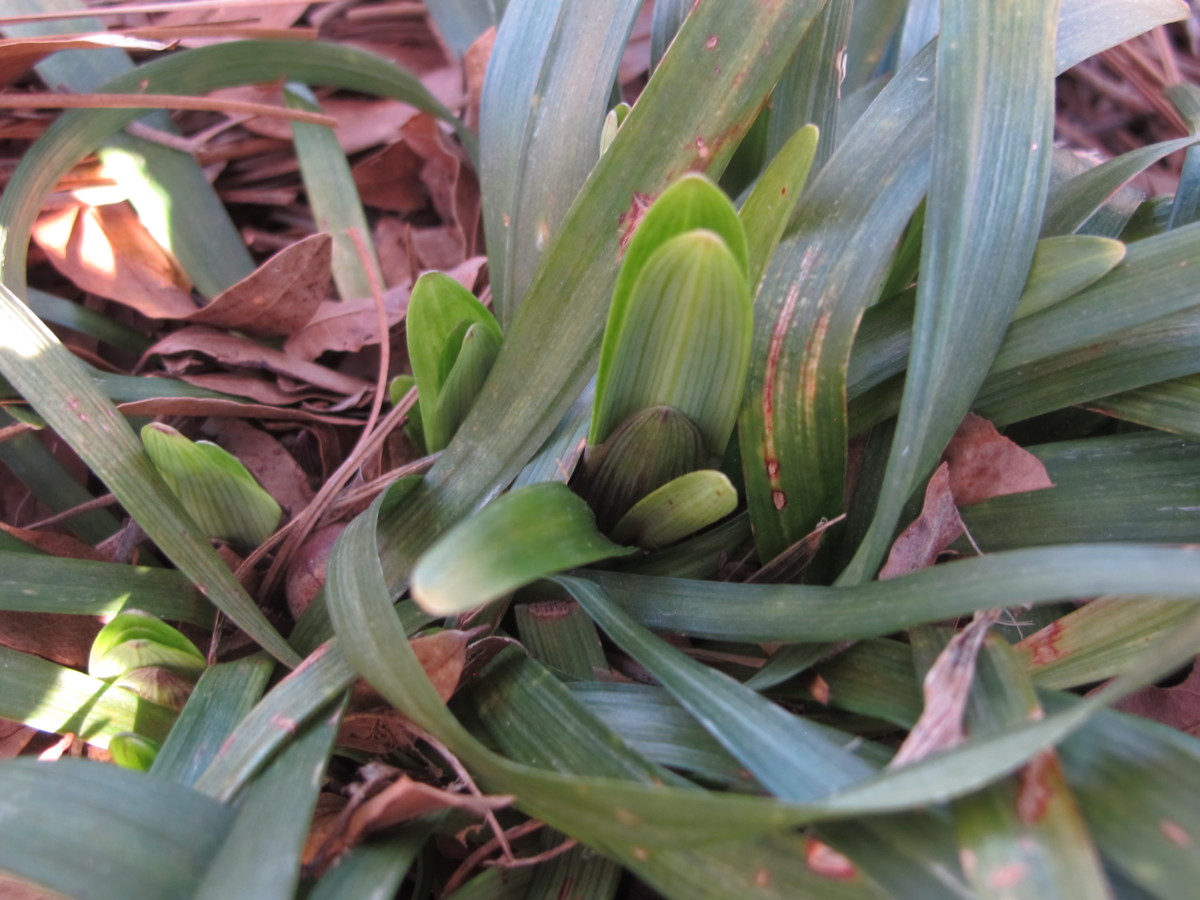
In late winter, the bulbs sprout shortly after repotting (photo, below). Drimiopsis maculata starts fresh every year after removing all old foliage and dividing the plant in January-early February. Normally, I repot plants in spring to mid-summer, but this species is amenable to transplanting at other times, given good growing conditions. Don’t overpot or keep it too moist, though, or it will rot.
New growth and flower buds on Drimiopsis maculata.
Classification Confusion
The lily family and related families include many species that demonstrate the resilience of plants. These are some of the toughest plants for problem spots in the garden. I also brought from Maryland several hostas (Asparagaceae family) that had stayed in 4½” pots for over a decade. They leafed out nicely every spring, but never attained a good size until after I’d planted them at this rural North Carolina property in the autumn of 2021.
More cousins of drimiopsis that tolerate some neglect include ponytail palm (Beaucarnea recurvata), daylilies (Hemerocallis spp.), liriope, grape hyacinth (Muscari spp.), agave, and asparagus fern.
Nomenclature in the huge lily family (Liliaceae) has undergone adjustments over recent decades. Genera of the original Liliaceae family have been redistributed among 10 families, all of which remain members of the same order, Liliales.
The new taxonomy is based on modern studies of molecular biology (genetics) rather than on the number of tepals or the placement of the ovary in the flowers (i.e., physical characteristics). Liliaceae hasn’t been entirely disbanded, according to the APG, the Angiosperm Phylogeny Group; fifteen genera are still classified in the Liliaceae family.
Binomial Nomenclature
Swedish botanist, physician, and taxonomist Carl Linnaeus (1707-1778), later Carl von Linné, categorized thousands of plant species in his 2-volume 1753 work, Species Plantarum. Incorporating some of the discoveries of Georg Eberhard Rumphius (German-born botanist) from the 1600’s, Species Plantarum is considered the first attempt at organizing plant species according to a hierarchical system of binomial nomenclature.
Briefly, binomial nomenclature is a system of identifying organisms by assigning them 2 names: a genus and a specific epithet. Together, the 2 terms represent a species. For example, Liriope muscari ‘Royal Purple’ is the scientific or botanical name for a certain variety of the species. “Lilyturf” is the common name that also can refer to other species of liriope and Ophiopogon. The genus (Liriope) is always capitalized, while the specific epithet (muscari) almost always begins with a lower-case letter. The species is italicized, but the variety or cultivar name (‘Royal Purple’) is not.
Everywhere around the world, gardeners and scientists use the same Latinized scientific name to identify a particular plant. On the other hand, its common name might refer to several different unrelated species. The genus name is often used as a common name, as in liriope, hosta, and drimiopsis, as long as the reference is clear.
The taxonomical hierarchy after species (genus + specific epithet) proceeds to family, order, class, phylum, and kingdom. Genetic similarities and differences determine whether 2 plants are related closely enough to group them in the same genus or separately. The closer 2 species appear on the phylogenetic tree, the more likely they’re able to interbreed.
With modern genetic research, taxonomists have reworked several other plant families, including Lamiaceae (many of the herbs we use daily) and Asteraceae (the composites, perhaps the largest family of plants).
Swiss Chard
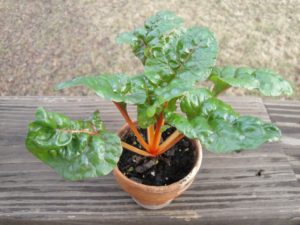
Swiss chard ‘Bright Lights’.
Here’s a little cutie that sits on the kitchen windowsill, right behind the sink. This Swiss chard ‘Bright Lights’ gets several hours of direct sunlight in the morning and early afternoon, and bright indirect light the rest of the day. Chilly nighttime temperatures don’t bother it. A tiny seedling found a temporary home in the nearest empty pot (the one in the photo) when I thinned it from a cluster of vegetable seedlings. And there it stayed.
What makes this plant special is the fact that I potted it up in March of 2022, into a tiny 2¼” clay pot. The other seedlings grew to their normal 18″ height. This one stands a diminutive 3″ tall.
I’m not keeping it for the purpose of harvesting leaves; there’s not much to pick, after all. It looks perfectly healthy, as long as it gets watered every 1-3 days, depending on temperature and sunlight. Every 3 weeks, I add a tablespoon of dilute fertilizer, such as Sea-Plus or fish emulsion—just enough to keep it in good color.
I’m curious to see how long this orange-stemmed miniaturized plant will last. Short-season (spinach, lettuce) or fast-growing (tomato) plants would not last long in such tiny quarters. Swiss chard is a foliage plant for almost a year before it flowers. Maybe that’s why it has shown this resilience over time. Now and then, a leaf turns yellow and is pinched off, but new foliage continues to grow.
***Update***: The little plant looked great for almost 20 months. Then I placed a taller plant in front of it for a few days, obscuring the Swiss chard from view… … It dried out and died.
Agave
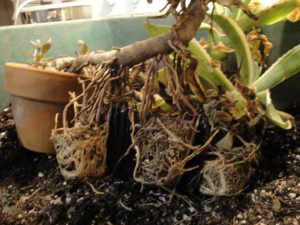
Another cousin of the lily family and a desert dweller, agave (in the Agavaceae family) is a very forgiving plant. I brought 2 varieties from Maryland. They slowly grew new leaves and strong stems with adventitious roots. Although confined in deteriorating 9-cell market packs for a long, long time (~15 years), their exploring roots took hold of anything near them that stayed still for a year.
In the photo, above, the last of the agaves rooted into a nearby clay pot and unoccupied cells of the (removed) market pack. The resilience of plants once again is demonstrated by this plant’s ability to survive without attention, and most of the time, without water.
I buried most of the long stem into a taller clay pot with barely damp potting soil and no additional water. I’ll water this one very sparingly until it shows signs of new growth. (***Update***: it rooted in, grew very well, and was sold a few months later at the farmers’ market. 7/11/2024)
Succulents and other plants native to dry, harsh climates are masters of survival. They store water in stems, roots, and swollen leaves protected by a thick, waxy epidermis. Species needing constant moisture would not have endured this neglect.
The Old Orchid
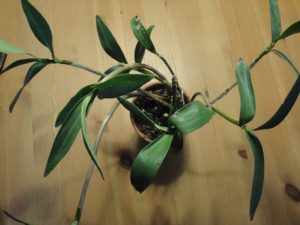
Dendrobium kingianum.
When I lived in Morgantown, West Virginia in the 1970’s, a friend and I drove out to The Glasshouse Works, over the border in Ohio. This nursery carried a dazzling assortment of plant species and varieties.
One of my purchases was a small orchid called Dendrobium kingianum. After returning home, I planted it in a 3″ clay pot. Every few years, I refresh the medium, using pine fines, long-fibered sphagnum moss, perlite, and a bit of potting soil.
It rarely blooms, and I propagate it when rooted plantlets form on the stems. An aerial plantlet is called a keiki, Hawaiian for “the little one”. It’s been nearly 50 years now, and the orchid still resides in that 3″ pot.
Bonsai
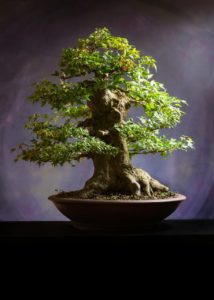
Bonsai are the ultimate in meticulous care, incredible beauty, and sometimes astonishing age. Many large botanical gardens have collections that truly are worth visiting. Specimens can be several hundred years old and grow in pots only a couple of inches deep. Or they might be trained on a carefully chosen slab of rock.
Plants trained as bonsai usually are woody perennials, either deciduous or evergreen shrubs and trees. Successful bonsai require very specific care in trimming, root pruning, watering, and fertilizing according to seasonal cycles. Most important is the degree of artistry that contributes to credibility, expressing the appearance of an exquisitely aged specimen.
Bonsai exemplify the resilience of plants, considering the regimen by which they’re maintained over decades or centuries. Each specimen requires a tailored set of precise horticultural skills to keep it alive and healthy.
(No, that’s not my plant in the photo, but this style of gardening deserves a mention.)
Headings
Page 1: The Resilience of Plants: Confined Spaces (Drimiopsis Maculata, Classification Confusion, Binomial Nomenclature, Swiss Chard, Agave, The Old Orchid, Bonsai)
Page 2: The Resilience of Plants: Opportunity (A Plant In a Strange Place, Young Lavender, Another Surprise Seedling), The Resilience of Plants: Recovery (Cryptanthus, Propagating Bromeliads, The Petunia, Giant Redwoods Define the Resilience of Plants, Wildfires)