Archives

Enclosing the Porch For Winter Growing

 2022

updated 3/13/2024


Enclosing the Porch for Growing Plants In Winter


Average Temperatures

Winter weather is in a rush to make its presence known here in northern North Carolina. Average nighttime low temperatures in October are in the 50’s F falling to the 40’s by the end of the month. In 2022, though, many nights were frosty. In this article, I’ll describe how enclosing the porch can add more growing space for sun-loving tender plants—those killed by freezing temperatures.

I moved to this beautiful acre outside Elkin, in USDA plant hardiness zone 7b, in October, 2021. The average lowest extreme temperatures in winter are 5-10° F, with January the coldest month. That won’t stop most gardeners from finding ways to extend the growing season, and, in fact, encourages us to do so.

Abnormally cold weather prompted me to gather all plants that would have been damaged or killed by frost. Both daytime and nighttime temperatures have fallen 10-20° below average on many days in October and November. On the other hand, we’ve also enjoyed a few shorts-and-tee-shirt days hovering well above average.


Priority: Plants
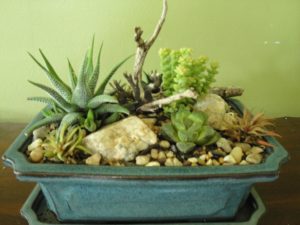
 

succulent dish garden

Succulents in this dish garden can begin stretching toward the light after less than a week in insufficient sunlight.


Priority went to succulents and tropical plants intolerant of cooling temperatures. Some I’ve had for decades and don’t want to lose. A collection that started in spring as 12 flats of tender plants blossomed to 40 by autumn.

Miniature succulents, succulent gardens in bonsai trays (photo, above), bromeliads, aroids (Alocasia, pothos, philodendron), amaryllis, leopard lilies (Drimiopsis, Ledebouria), tradescantias, ferns, ficus, begonias… I propagated all these houseplants for the farmers’ market, where I’ve been a vendor (“Wellspring Gardens”) since April, 2022.

Plants requiring warm temperatures fill every sunny window indoors. In the basement, more plants snuggle close to the 4′ fluorescent shop lights.

From autumn to spring, I carried many flats of houseplants outdoors to the sunny porch when it was warm enough, above 50° or 60°F. And later in the day, I brought them back indoors again. Almost every day. Winter ’21-’22 was quite mild.

That’s in addition to the dozens of flats of herbs and cool season greens (lettuce, spinach, arugula, broccoli, kale, etc.) started for the farmers’ markets and my own gardens. After 3-4 weeks of growth, they could safely be hardened off outdoors, exposed to colder temperatures—even frost—before planting or selling them.

The Best Option

I need an easier way to accommodate all these plants. A greenhouse is prohibitively expensive for now. Another option is to keep them outside, after enclosing the porch. In winter, this south-southwest-facing porch receives full sun from morning until sunset. Perfect!

How hard could it be to tack a big sheet of clear plastic to the structure? That will work in the daytime, when the sun’s out. But during cold overcast weather and at night, supplemental heat will be needed. Later in this article, you’ll see what I did to keep the tender plants comfortable.


Preliminary Plans


The goal was to create an inexpensive makeshift greenhouse environment from readily available materials, employing rudimentary carpentry skills. Winter winds, primarily from the west, can be fierce at times. This necessitated strong bracing for the structure to prevent the plastic from breaking loose.

At the hardware store, I bought a 12 x 100′ roll of clear 4-mil plastic for enclosing the porch and creating low tunnels in the garden for winter greens. You can find sheets and rolls of clear plastic in the paint department. Although it won’t last as long as greenhouse film, it is less expensive. A more attractive alternative is clear acrylic film, but I’m looking for the most economical solution for now.

Plastic degrades in sunlight, and faster in hot sunlight. So, if used on the porch only during the cold months, it should last 3-4 years. That’s based on many years’ experience using plastic to protect plants from cold winter weather.

(***Update***: Plastic used in the garden lasts longer than the plastic used to enclose the porch. After 2 full seasons, the porch plastic is showing signs of weakening in the hottest spot because the enclosed space heats up significantly, shortening the life of the plastic. If I don’t vent the plastic or open the front door and use a fan to blow the heat into the house, the porch heats up to 90-105° F on a sunny winter day. The air under plastic in the garden doesn’t get that hot because the plastic is removed or vented to prevent overheating the greens. January 14, 2024)

The plan is to leave the wooden support grid in place all year. After weather warms up in spring, I’ll remove the plastic panels, still stapled to their 1 x 2 x 8′ posts, clean them, and store them in the basement. In the future, enclosing the porch in permanent materials (floor-to-ceiling operable windows) is a strong possibility.


Enclosing the Porch: First, the Support System


Before cutting the plastic, I had to figure out how to put this whole thing together, preferably without piercing the aluminum siding. Where to start? How to seal it from drafts? What about a door?

The front porch measures approximately 20′ x 8′, so the 1 x 2″ x 8′ wood posts from the hardware store fit well. I used a hand saw for a few cuts. Posts with large knots, not visible when purchased in bundles, were returned to the store. Those are weak spots that could break in high winds. These posts have a smoother side—the side in contact with the plastic.
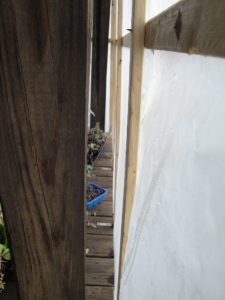
enclosing the porch

6 x 6″ timbers with 1 x 2″ x 8′ posts across the front of the porch.

Four 6 x 6″ timbers support the roof along the front edge of the porch, and the attic above is insulated. The timbers are secured 3″ inside the outer edge of the decking. Because the 1 x 2’s are attached at the top of the timbers and extend 8′ down, past the edge of the decking, the posts are slightly off vertical when viewed from the side.

I didn’t attach plastic directly to the bottom of the timbers because I wanted it to fall all the way to the ground on the 3 sides. That would help warm up the concrete block foundation and the ground underneath the decking. The goal was to retain the maximum amount of heat in the enclosed porch.

The porch is elevated 2 steps up from the ground. That made my time on the ladder somewhat less daunting. I took my time and was very careful. Safety first.


Brace Yourselves

Hardware included:

  • Hillman Red Exterior 8 x 1 5/8″ deck screws, with a special drill bit in the package
  • 3″ galvanized corner braces with smaller screws
  • a few nails

Although the deck screws are supposed to require “no pre-drilling”, a few of the 1 x 2’s split. I used a couple of nails to hold them together.
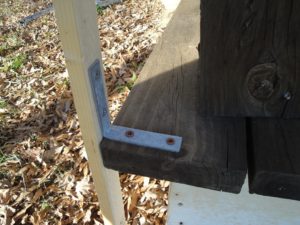
 

corner brace screwed to decking and post

Brace was placed with the edge of the post flush with the front edge of the floor.


Holding a 1 x 2 post firmly against the house and the edge of the floor, I positioned a brace, then marked where the first screw would go. The west and east sides would have five 1 x 2’s each.

I used a reversible drill to screw braces to the floor. For each of the east and west sides, one brace went next to the house, one on the outside corner, and one in the middle. The other 2 posts on each side were screwed to the edge of the decking without braces.

I used 2 longer deck screws—instead of the smaller screws in the package—for the horizontal half of the brace attached to the floor. This made a stronger attachment. Because the long screws would have gone through the 1 x 2’s and pierced the plastic, I used shorter screws on the vertical part of the brace (photo, above).


Next Up: The Vertical Posts

Once the braces had been secured on the west and east sides, the vertical 1 x 2″ posts were next. I attached five 1 x 2″ posts to the decking—about every 2′—on the west side and 5 more on the east side. Each post was screwed on at the bottom securely enough for it to stand straight. A carpenter’s level established true vertical and horizontal before I tightened the screws.

Then I fastened the middle horizontal post, and the top horizontal post as close to the ceiling (overhang) as possible. I can add more supports at any time, if necessary.

Where the ground level was higher near the house, I cut the posts so they stopped right above the soil. In other areas, the 8′ length doesn’t extend that close to the soil, but that’s okay. The excess plastic made a flange over the ground, on which I placed heavy pots and cinder blocks to block air infiltration. I haven’t trimmed any of the 12′ wide plastic, but I can play with that later. Incidentally, the flange helped keep the basement drier during a recent rainstorm. For now, it stays.
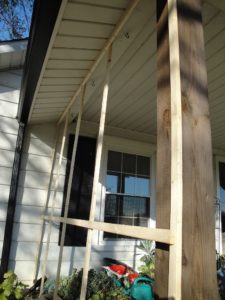
 

enclosing the porch, west side wood supports

The west side with 5 vertical and 2 horizontal 1 x 2″ x 8′ posts.


The braces and posts were sturdy, but there was too much play in the sides. So, I drilled another 3″ brace inside each of the upper 2 corners adjacent to the house, through the siding in the ceiling and into the vertical 1 x 2 (photo, below). A wooden beam hides under the siding. First, I hammered a nail through the aluminum, then replaced it with a deck screw, stabilizing the sides.

 

brace between ceiling and 1 x 2" post

Brace secures vertical post to the ceiling, near house. Clear tape, barely visible on the right, seals plastic to siding.


On the South Face

 

enclosing the porch, south side

Posts:                1        2        3        4            door            5        6        7        8


Here’s the 20′ south face of the porch. Imagine the vertical posts are numbered, from #1 at the left (west) corner to #8 at the right corner, with a larger gap in the middle for the “door”. The numbers don’t exactly correlate with the posts, but you get the idea. The door has not been finalized. Posts #1 and 8 were added previously to the corner timbers, when I worked on the east and west sides.

Across the front, I fastened braces to the floor and then added 2 middle posts on each side of the door (#2, 3, 6, 7). The other 2 new posts were fastened to the top of the inner 6 x 6″ timbers (#4, 5), and screwed directly to the edge of the decking. All 1 x 2″ x 8′ posts angled out slightly, below the edge of the floor.

Then the horizontal members went up: top and middle. Later, I had to remember to leave some extra plastic at the top of the outside corners to accommodate the slightly angled vertical posts (and longer dimension at the floor). Some of the posts were a bit bowed, so I’ll tape the gaps at the top from inside the porch.

At this point, all braces and support posts are in place. Progress!


Headings

Page 1: Enclosing the Porch for the Winter (Average Temperatures, Priority: Plants, The Best Option), Preliminary Plans, Enclosing the Porch: First, The Support System (Brace Yourselves, Next Up: The Vertical Posts, On the South Face)

Page 2: Enclosing the Porch: Second, Wrapping It Up (The West Side, The East and South Sides, How?), Warming Up to This, Enclosing the Porch: A Winter Retreat for Succulents (An Arctic Blast, and I Don’t Mean Fun Times with Santa, Blown Away Or Not?, Why Not LED’s?, Enclosing the Porch for Edible Plants, Potted Herbs and Tender Plants, Enclosing the Porch for Me, Too!)
Return to the top

Pothos: An Easy Houseplant for Beginners

2021


Of Pothos and Pandemics


The Year 2020 was one like no other. The threat of catching Covid-19 or the fear of passing it to others altered our lifestyles as nothing before had ever done.

Restaurants closed, schools closed, parking lots and streets were empty. People lost their jobs, businesses failed, and many tried to remotely fulfill the demands of work while caring for children at home. The U.S. Centers for Disease Control claims that over 500,000 people died, as of this writing, of or with Covid-19 since the pandemic began just over a year ago. Tragically, many of us lost friends or family members.

As vaccinations increase and infection rates decrease, some schools are opening their doors and life is inching back to normal. The pent-up demand for things we denied ourselves will heat up the economy this year—travel, lunches out with friends, shopping at brick and mortar stores…


The Joys of Gardening

Horticultural trade magazines report anywhere from 15 million to 30 million newcomers, last year, to the joys of gardening in the U.S. That’s huge!

Most garden centers got off to a dismal start last spring. But they more than made up for it as online ordering and curbside pick-ups became the new norm. Those where states deemed these companies “essential” were permitted to stay open.

Since we were spending more time at home, many chose to make their living spaces more comfortable. So, they upgraded kitchen counters or replaced drafty windows with a super-energy-saving model. Maybe you painted the family room one of those modern colors you’ve been wanting.


Psychological Well-Being

We also spruced up the landscape and brought home a few houseplants to brighten our indoor spaces. A strong connection between nature and our psychological well-being has been reported for decades. You don’t think so? Take a couple of your houseplants to work, if your desk is bare (of living things). Or buy an easy-going pothos and a pretty pot to put it in and see if your mood lightens.

A School Experiment

In 1999, while in Maryland, I planted a new landscape near the main entrance of a public middle school. No, this was not your run-of-the-mill row of sheared yews and a shade tree. Instead, I planted dwarf evergreens (varieties of cedar, chamaecyparis, and pine), a few ornamental grasses, and other plants in a large garden surrounded by paving. This garden surely would welcome the addition of a bronze timberwolf, the school’s mascot, if it shows up. Boulders and sculpted ground enhanced the impression, embellished with a few drifts of seasonal color. No need to water, as Hurricane Floyd moved in as I was finishing up!

The school’s principal enjoyed it so much that she asked me to plant an area near the teachers’ entrance, in the back of the building.

For the new garden, I dug out the old grass and weeds, and mounded up the improved soil for a gorgeous laceleaf Japanese maple, masses of ground covers and perennials, daffodils, and easy flowering shrubs. This new landscape covered large areas on both sides of the sidewalk leading to the entrance.

A young teacher approached me, and freely expressed his opinion that this project was “a complete waste of money”. I asked him to let me know if he felt the same way after the installation had been completed.

A few weeks later, while I was inspecting the garden, he spotted me and shared a few thoughts. Not only had he changed his mind, but he also started projects in his own garden. He said he wasn’t sure why, but that he “just liked walking through the garden” at the school—gently embraced by something beautiful and soothing. This is why parks and botanical gardens are so inviting.

We might not be able to define the effect, but it certainly leaves an impression. That’s the power of living with nature, and one gold star for Kim!


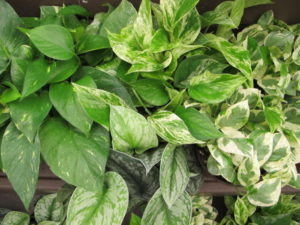
4 kinds of pothos

Four kinds of pothos, clockwise from top left: golden, ‘Marble Queen’, ‘Pearls and Jade’, and satin.


Getting Back To Work


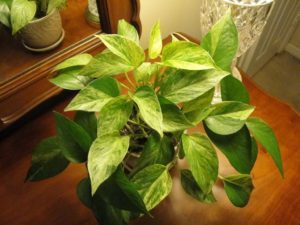
Try starting with an inexpensive plant that every garden center sells. A small pothos (poe’ thoss) costs only a few dollars. It used to be known as Scindapsus aureus, but the botanical name has been changed to Epipremnum aureum.

Several varieties can be found in garden centers or from specialty nurseries. The adaptable golden pothos and white-variegated ‘Marble Queen’ have been around for a long time. Two others with gray-green and white markings, ‘N’Joy’ and ‘Pearls and Jade’, are more recent introductions. ‘Neon’, with brilliant yellow-green leaves, is aptly named. And there’s ‘Harlequin’, with starkly contrasting deep green and crisp white foliage.

Philodendron Silva Container Plant - leoleobobeo / Pixabay

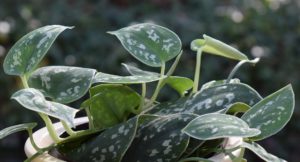
Silver pothos.

Variegation appears as streaks, spots, and margins in colors that contrast with the background.

Among the satin pothos (also called silver pothos) in the species Scindapsus pictus, several varieties sport glittery sliver markings (photo, right). ‘Argyraeus’, ‘Exotica’, and ‘Silver Ann’ have varying amounts of silver in their leaves. This species exhibits “reflective variegation”, where the silvery parts glimmer in the light due to air spaces below the upper layer of the leaf.


Family Traits


Pothos is related to philodendron, peace lily (Spathiphyllum), Chinese evergreen (Aglaonema), Alocasia, Anthurium, dieffenbachia, nephthytis, and many other aroids. Caladium and Colocasia, the elephant ears, are popular outdoor foliage plants for warm summers.

Species in the Araceae family evolved as vines and understory plants in primarily tropical and subtropical latitudes of southeast Asia, the western Pacific islands, Africa, Australia, and the Americas.

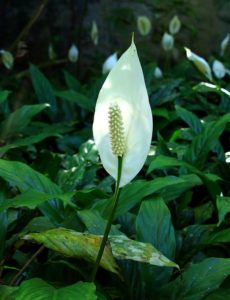
peace lily, flowers

Spathe and spadix of peace lily.

All have characteristic spadix flowers. The vining species must climb in order to develop adult foliage. At that stage, the large leaves are often lobed rather than heart-shaped. It’s only then—when plants mature—that pothos can flower. The inflorescence is composed of a spadix, with true flowers, surrounded by a leaf-like bract, called a spathe.

Although pothos rarely flowers indoors, other aroids will bloom if given good care. Their flowers are attractive and might be lightly scented, as in Spathiphyllum and anthurium. For most species, though, we ordinarily snip off the blooms to conserve energy. Flowers of certain members of the arum family, including early blooming skunk cabbage, are thermogenic; they can produce heat to melt snow and attract pollinators.

Aroids are toxic to animals, so exercise caution with children and pets. Calcium oxalate crystals in the cells irritate membranes. In natural habitats, this helps fend off animals.


Caring For Pothos Indoors


While living in Maryland, I kept a ‘Marble Queen’ pothos under a table lamp in a north-facing and fairly dim family room. This white-variegated plant grew in a 6″ pot sitting inside a decorative basket. A 12-watt compact fluorescent bulb, switched on for 4 or 5 hours in the evening, provided enough additional light for the plant to thrive in that spot for many years.

The plant received some indirect light from the windows several feet away. But, during the shortest days of winter, I kept the lamp on longer for this plant. For variegated plants, the more hours of light or the greater the intensity, the more vibrant the variegation. 

Pothos is often recommended for areas with low light, but not by me. It often declines when grown in low light because it is more susceptible to problems associated with overwatering. Plants are less photosynthetically active at lower light levels, so they won’t use as much water. Try to give them direct sunlight in the morning or filtered sun for a few hours a day, particularly from fall to spring. Plants that don’t like too much sun in summer love it in the winter, and that helps dry the soil. Increasing your plants’ light levels should result in more robust growth, a stronger root system, thicker stems, and brighter color.

In a room with skylights, large unobstructed windows, and light-colored surfaces, enough indirect light will reflect around the room to keep pothos happy. Aim for at least very bright indirect light for optimal growth and health. A brightly lit office should be fine for pothos.


Leaves Turn Toward the Light

A plant’s leaves naturally turn toward a source of light in a response called phototropism. This occurs when hormones on the shady side of the stem cause those cells to elongate, rotating the leaf or turning the stem toward the light.

Turning the pot every week or so encourages even growth. A thriving plant growing against a wall or on a shelf doesn’t need to be turned, however, if you’re satisfied with its appearance. But a plant that keeps facing its pretty leaves away from you and toward a bright window might need to be turned for a more pleasing presentation.


When Leaves Turn All Green


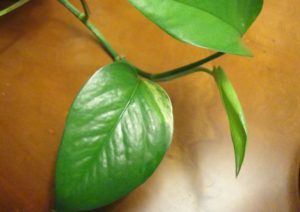
pothos

These leaves are losing the white variegation.


New foliage can turn solid green, either temporarily or permanently losing the variegation, depending on the cause.

Stems with all green leaves grow more vigorously than variegated-leaved stems. The reason is simple. Deep green leaves have more chlorophyll, which steps up the amount of carbohydrate (food) formed during photosynthesis. And that means faster growth.

In a pot of pothos with several rooted stems, the solid green ones will compete more successfully than the slower growing variegated stems. Although a few green stems add contrast, I limit the number allowed to grow.

Loss of Variegation

In the photo above, only a small amount of variegation remains in this stem. If plant cells can no longer reproduce the white parts of the leaf, the rest of the stem will have all-green leaves. In this case, I chose to cut back the stem. The plant gets plenty of light, so that stem was going to stay green. If the stump sprouts solid green leaves, I’ll remove the entire stem down to the root.

Another case where leaves lose variegation is when the plant is growing in low light. The plant will try to make up for reduced photosynthesis from lower light levels by adjusting the amount of chlorophyll produced in the foliage. At some point, the plant will sacrifice older growth in order to feed its younger leaves. Nitrogen and certain other nutrients are mobile and can move to the new leaves at the tip, keeping it alive. Brighter light should improve variegation in new foliage.


Headings

Page 1: Of Pothos and Pandemics (The Joys of Gardening, Psychological Well-Being, A School Experiment), Getting Back To Work, Family Traits, and Caring For Pothos Indoors (Leaves Turn Toward the Light, When Leaves Turn All Green, Loss of Variegation)

Page 2: Watering Pothos (“How can I tell when pothos needs water?”, Let It Wilt, Feel the Weight, When Water Can’t Drain, Water Temperature, Guttation), Potting Up (Why the Soil Surface Drops Lower, Insects and Spider Mites, Time For a Bigger Pot, When To Repot, The Process: How To Repot Pothos), Pruning Pothos (Prune the Stems Short, Pinning Down Long Stems), Propagating Pothos (In Water, In Soil), and Fertilizing Pothos


Return to the top

How To Transplant Houseplants

2019


Time To Transplant Houseplants?


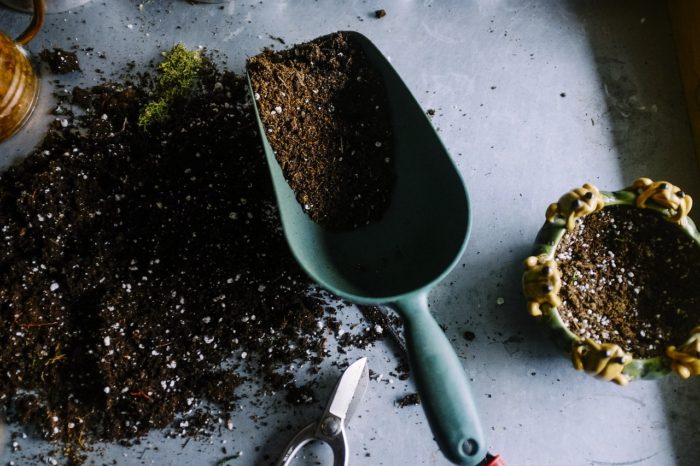
potting soil, how to transplant houseplants


As the end of the growing season approaches, we need to prioritize all the chores that need attention. Do the houseplants require transplanting? The plants that summered outdoors must come back inside soon, before frost damages the foliage or kills the plants.

They’ve been luxuriating on the porch, in higher humidity and brighter light than they usually receive inside. It’s no wonder they look fabulous! So, reintroduce them to indoor conditions while the days are still somewhat long and before the furnace kicks on and dries the air.

Perennials that looked picture perfect in May now look a little stressed after those record high temperatures. And the tired vegetable garden needs fresh compost or aged manure before setting the fall crops.

In a few weeks, flowering bulbs will arrive at garden centers…with pansies, violas, snapdragons, dusty miller, and Heuchera, trailing ivy, and hardy grasses. You’ve been dreaming of those beautiful combination planters, like the ones you saw last autumn at the garden center. But first things first.


Should We Transplant Houseplants Now?


Let’s start with the houseplants. Exposing tropicals to cooling temperatures outdoors, as autumn takes hold, could stress your houseplants. And some of those plants are pleading for attention right now.

While certain plants can tolerate cooler temperatures (cyclamen, ferns, English ivy, succulents, ponytail palm), others can’t. The aroids (peace lily, Dieffenbachia, Anthurium, Philodendron, Alocasia, Chinese evergreen, pothos), prayer plants (Calathea, Maranta), and some of the begonias, for example, should come indoors before temperatures dip below 60°F.

Although they won’t be killed by a few nights in the 50’s, or even the 40’s, you don’t want to prolong their discomfort. Chilling stresses many of our tropical houseplants, and can rot roots and disfigure foliage.


Inspect Them First


Scale on Ficus neriifolia (leaves are 7/16″ wide).

You probably won’t need to transplant houseplants, summering on the porch, that were repotted in the spring. All you need to do now is to inspect them for insects and spider mites before bringing them indoors. Check the bottom of the pot for slugs and sowbugs hiding around the drainage hole.

Clean up the leaves, too, and remove any that are discolored, insect-eaten, or damaged. Peel away the entire leaf, so none of the leaf stems (petioles) remain that later will turn yellow or brown.

After the inspection, clean the pots, wash the saucers, and place the plants in front of the windows where they seemed to thrive last winter.


Horticultural Oil

The dwarf Ficus neriifolia contracted a scale infestation, so I sprayed it with a horticultural oil solution. For insects and mites, horticultural oil works very well. It smothers the pests and is safe to use on most plants, including edibles.

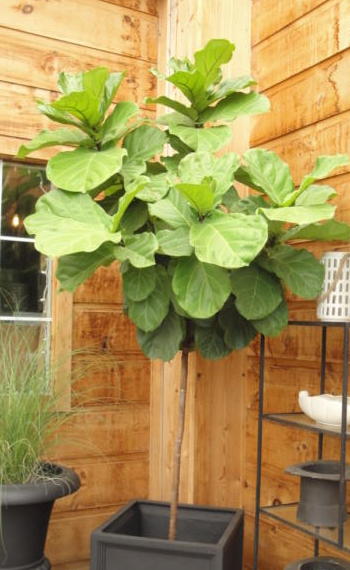
Wiping the horticultural oil solution on smooth leaves (fiddle-leaf fig, pothos, peace lily) with a soft sponge removes dust, grime, and residue from water and fertilizers. It gives them a nice luster without appearing artificial. Read the label; I prefer to use less oil than is recommended on the label—to start with, anyway. Horticultural oil makes surfaces slippery, so be careful.


fiddle-leaf fig

The fiddle-leaf fig, Ficus lyrata.


Do Your Houseplants Actually Need Bigger Pots?


potted plant bonsai

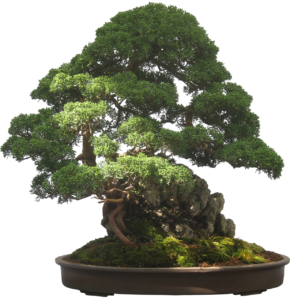
Evergreen bonsai.

Knowing if the plant needs repotting, when to repot, and how large a pot to use is half the battle.

Does it wilt often? Perhaps instead of repotting, the plant needs to be deeply watered. Or maybe the roots have rotted in waterlogged soil, or the water rushes right through without moistening the soil.

I’ve seen a lot of dead plants over the years, and many simply were in pots that were too large. “Aren’t we supposed to transplant houseplants every year, just like our children outgrow their shoes every year?” No; once they have matured, plants can stay potbound for quite some time.

“If I transplant houseplants into bigger pots, won’t that make them grow faster and bigger?” No, another myth! If you transplant houseplants into pots twice the size they need, they more likely will die faster.

Large pots hold large quantities of soil and water. When the moisture is not used by the plant, the sodden mass just sits there, cutting off the oxygen supply and rotting the roots. So, if the entire volume is not tightly filled with roots, the plant doesn’t need to be repotted.

Many houseplants like being potbound. English ivy (Hedera helix), pothos (Epipremnum aureum), Philodendron, palm trees, Ficus trees, African violets, succulents, snake plants (formerly Sansevieria, now Dracaena), and bonsai prefer somewhat cramped quarters. Many potted herbs (rosemary, lavender, chives, sage, thyme) also fare better when potbound. But, in order to ensure good health, gardeners must provide nutrients according to the needs of the particular plant, and according to the time of year.

It’s helpful to know the habits and preferences for each kind of plant. For example, although the 4′ tall variegated snake plant (Dracaena trifasciata ‘Laurentii’) eventually will need a 10″ or 12″ pot, its cousin, the dwarf bird’s nest species (D. hahnii), can stay in a 4″ or 5″ pot for many years!


Fertilizing Houseplants

Most tropical plants spending the winter indoors won’t need fertilizer until late winter or early spring. If they continue to grow and look healthy, and they’re receiving good light, though, diluted solutions (1/4 to 1/2 strength) can be added every 4 to 6 weeks. Err on the side of using less fertilizer in winter.

As long as they’re properly watered and fertilized, your plants can remain perfectly happy while potbound. In fact, they’re easier to manage this way, since there’s less likelihood of overwatering. But you’ll have to water more frequently.

Look for products formulated for foliage houseplants or for flowering plants. They’re available in several forms: timed-release prills (use a low dose from fall through winter), liquids, granules, and soluble crystals. Read the label.


Fungus Gnats

Plants in smaller pots are less susceptible to diseases, root rot from overwatering, and fungus gnats. Ever have those annoying little “fruit flies” around your houseplants? The simplest remedy is to allow the soil surface to dry out.

Female fungus gnats lay eggs on moist soil. When the tiny larval worms emerge, they eat small roots, sap on cuttings, fungus, and organic matter in the top inch or two of the soil. Let the surface of the soil dry before watering again, and you’ll have fewer fungus gnats. See if adding a 1/2-1″ layer of pine fines as a mulch might prevent gnats from laying eggs.

Yellow sticky cards are good for catching flying insects. A card placed horizontally near the plants, on the pot’s rim, or in a sunny window attracts the most gnats.


Save the Spider!

spider plant

A green spider plant.

The spider plant in the 4″ pot that your girlfriend gave you two months ago is literally crawling out of the pot. She propagated it from one of her own plants, so it has sentimental value.

Spider plants, related to other strong-rooted Asparagaceae (formerly Liliaceae) family members, develop roots that circle around the inside of the pot. The vigorously growing roots raise the entire plant higher in the pot, opening up air spaces around the root ball. This dries out the finer roots, and water gushes immediately through the drainage holes without moistening the soil. Clearly, it’s time to work on this one.


When Should I Transplant Houseplants?


A good time to transplant houseplants is in spring to mid- or late summer. Plants that recover slowly (for example, succulents) should be repotted, if needed, by mid-summer. In autumn and winter, plants receive fewer hours of daylight, photosynthesizing at a reduced level. Our slower growing tropicals don’t grow much foliage in autumn and in winter. And roots also are reluctant to grow.

Cooler temperatures, compared to the balmy summer days spent on the porch, cause systems to slow down. So, trying to force plants to grow at a time when they’re entering semi-dormancy often does more harm than good. Plopping a plant’s almost dormant root system into wet soil and expecting it to grow is asking the plant to do something against its nature. It would rather stay semi-dormant.

greenhouseProviding a greenhouse atmosphere—warm, humid, and sunny—keeps your houseplants in much better condition, even through the shortest days of winter. Optimal light levels increase rates of photosynthesis, respiration, and transpiration. As a result, they might grow almost as fast as they did in June.
But most of us deal with dryer air, energy-saving chilly nights, and dim lighting (in the plants’ eyes) until the hyacinths bloom outside.

Plants, both indoors and out, take on renewed vigor once the days lengthen closer to springtime. Some of us humans do, too.


How Big Should the Pots Be?


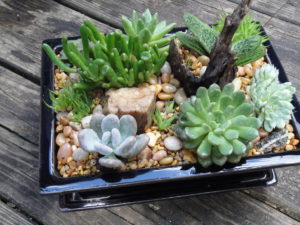
succulent dish garden

Succulent dish garden in ceramic bonsai tray.

I’ve grown dwarf peperomias and miniature succulents, such as Echeveria minima and Haworthia truncata, in 2″ pots for many years. Since the succulents are prone to rot in wet soil, keeping them very potbound decreases the chances. There simply isn’t that much soil in the little clay pot, and it dries fast in direct sunlight.

Most of the succulents I enjoy growing are on the small side, anyway. Almost all are in 1½” to 4″ pots, and others have been planted in larger, but shallow, bonsai trays (photo, right).

I brought with me from Maryland a 4½” pot of Drimiopsis kirkii, one of the leopard lilies, and it has yet to be repotted into a larger pot, 6 years later. Its cousin, Drimiopsis maculata, however, grows from bulbs which multiply faster than those of D. kirkii. So D. maculata gets divided more often, but they’re still in 4½” pots.

Dracaena hahnii, the dwarf snake plant, lived happily for years in a 4½” pot. The small, glossy-leaved Spathiphyllum wallissii would have complained if it had been bumped up into anything larger than its 6½” plastic pot.


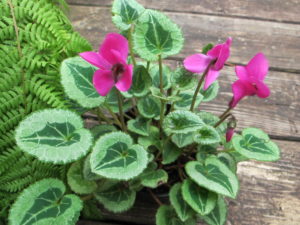
pink cyc.

We’ve had this miniature cyclamen for years.


A pink flowering miniature cyclamen stays in its 4½” pot (photo, above), year after year. It is now coming out of dormancy and beginning to grow new foliage, contrary to what most other plants are doing. That’s because its growth cycle calls for cool to cold, but not freezing, temperatures in order to set flower buds. It will be fertilized accordingly, for a full canopy of marbled leaves.

The plant’s habit and its root structure help determine the required pot size. In general, transplant houseplants into pots that are only 1″ to 2″ wider, and only if they need it.


The Old Weeping Fig

weeping fig

Variegated weeping fig.

A weeping fig (Ficus benjamina), given time, will grow to the ceiling. Instead of raising the roof, its height can be managed by “aesthetically” cutting stems back in the spring, when it will respond faster.

I grew a variegated weeping fig in a 14″ pot for about 15 years, in front of a big window that received a few hours of morning sun. When the tree grew to almost 8′ tall, above the top of the window, I pruned it back a few feet. Then, when it regrew, all the foliage was once again in the sun and at eye level.


African Violets


African violet

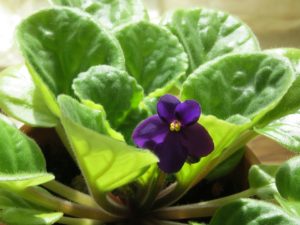
A healthy African violet.


African violets (Saintpaulia ionantha) are happy to stay in 4″ pots for years. Miniature African violets need smaller pots than that.

A rule of thumb for pot size and an African violet is to plant it in a pot that is 1/3 the spread of the foliage. So, a 4″ pot will accommodate a plant that is 12″ wide. Plants in top condition might take a slightly larger pot, but you have to pay very close attention to moisture and soil drainage.

“What should I do with an African violet that has a long trunk?”

As these plants grow new leaves from the top of the rosette, older leaves lower on the stem die off. That’s part of their natural growth pattern. When the plant develops a trunk, it’s time to make an adjustment. But don’t do this if the plant is slowing its growth. Spring to mid-summer is a better time for this procedure.

Remove the plant from its pot and slice off the bottom third of the root ball. Shave off a small amount from the sides as well. Wash the pot, check the plant for insects (mealybugs, especially), and treat with horticultural oil if necessary.

Place a small amount of African violet potting soil in the bottom of the pot. These plants like peat moss in their mix. Set the plant in the pot, and fill in the sides with more soil, using a chop stick to firm soil in the gap.

Part of the trunk will now be loosely covered with soil, and it will grow new roots. The top of the root ball should be lower in the pot than it grew previously. (Yes, this is exactly what we don’t ordinarily recommend.) Water it in, using lukewarm (about 85°F) water. Keeping the soil too wet will rot the trunk and the roots.

Use the kitchen sink sprayer to wash soil off the leaves, using lukewarm water. Towel off the water drops, and let the plant dry in a warm location.

It’s less stressful for these plants if this is done every year or two, before the trunk grows a few inches tall. But I have seen perfectly happy violets with long stems curling over the edge of their pots.

“What are those marks on the leaves?”

Water the soil—always lukewarm for African violets—and avoid wetting the leaves. If water splashes on the leaves, absorb it with a towel, and let the plant dry in a warm place. As drops of water chill on this plant’s leaves, unsightly tan or brown rings and lines will be left behind.

Grow African violets at 70 to 74°, and fertilize regularly with a product formulated for this genus.


Less Is More

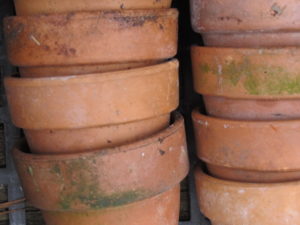
stack of clay pots, transplant houseplantsMove miniature species of plants into something only 1/2″ to 1″ larger, if they need it. I know; that doesn’t seem like it could make much of a difference. But for the plant whose roots, in the wild, might be crammed between layers of sedimentary rock on a blustery cliff, 1/2″ is plenty.

Large-growing plants require new pots up to 2″ wider in diameter. Peace lily (robust varieties of Spathiphyllum), weeping fig (Ficus benjamina), Chinese evergreen (Aglaonema spp.), and larger palm species can be moved from 6″ starter pots into 8″ pots. And, importantly, this assumes that the roots tightly fill the smaller pot.

Many of the tropicals will survive and prosper over the next several months, even while very potbound. If they’re already in 8″ pots, they’ll likely be fine until spring, when they can be potted on if needed. The 6′ tall fiddle-leaf fig in an 8″ nursery pot, though, can go into a 10″ pot, since the heated sunroom has floor-to-ceiling windows. Sunny conditions encourage plants to grow new roots, but carefully monitor soil moisture. Avoid watering houseplants (especially succulents) on cloudy days.

If growing conditions in your home are not ideal, but plants absolutely need to be repotted, transplant them now, before fall, into slightly larger pots. Wait until spring to transplant large houseplants, if it’s needed at all.

Houseplants don’t require repotting every year. Once they have attained a mature size, they no longer need to be moved into progressively larger pots. Instead, regularly fertilizing with products formulated for houseplants will supply all the nutrients they need.


Headings:

Page 1: Should We Transplant Houseplants Now?, Inspect Them First, Do Your Plants Actually Need Bigger Pots? (Fertilizing Houseplants, Fungus Gnats, Save the Spider!), When Should I Transplant Houseplants?, How Big Should the Pots Be? (The Old Weeping Fig, African Violets, Less Is More)

Page 2: Prepare for Transplant (Root Insects, Speaking of Spider Plants, Roots-Air-Water-Light) and Potting Up (Score the Root Ball, Potting Soil, Begin Filling the Pot, Downsizing, Water It In)


Return to the top


What Is Wrong With My Houseplants?


2019: HAPPY NEW YEAR!


Does your list of New Year’s Resolutions include paying more attention to your houseplants? Now that the busy holidays are over, we’re almost back to our routines. The plants look forward to returning to their normal locations. They missed those bright windows!

If you’re dissatisfied with your plants’ appearance, today might be a good day to give all the houseplants a thorough examination and a good cleanup.


 Philodendron selloum, easy houseplants

Philodendron selloum adds a tropical element to the indoor environment.


What Is Wrong With My Houseplants?


Let’s begin with some easily recognized problems:

  • the plant has collapsed into a sad-looking heap of wilted foliage
  • leaf tips are brown
  • leaves are turning yellow
  • many of the leaves are dropping off
  • the flowers are gone

But your houseplants have sentimental value, so they’re not going into the trash…or into the compost pile. And you know they probably will recover with a little attention. After all, the same thing happened last year.

A home without houseplants looks sterile—to me, anyway—so there will always be indoor plants wherever we live. They rid the air of benzene, formaldehyde, and other pollutants. In return, we get a small boost in the humidity and oxygen content of the air we breathe.

And we enjoy living with nature. Many studies point to the psychological benefits of living with plants at home, at the office, in school, and in the community.

With the renewed interest in growing houseplants, a huge number of species and varieties are available. Popular plants, such as Fiddle-leaf fig (Ficus lyrata), are in such high demand at garden centers that supply is often difficult to maintain.

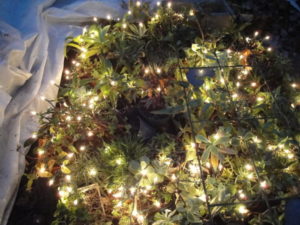
cold frame before covering, with mini lights

Several dozen plants are protected here, and will be covered with plastic for the night.

There are hundreds of plants in my collection, from 1″ tall miniature Haworthias to a 6′ tall 40-year-old ponytail palm (Beaucarnea recurvata).

Many succulents and half-hardy perennials spend the winter in the cold frame outdoors, heated with a few strings of miniature incandescent Christmas lights and covered with 2 or 3 sheets of clear plastic (photo, right). There’s just not enough room inside for everyone!

We often have warm winter days in the Carolinas. This gives some houseplants the opportunity to spend a few afternoon hours on the enclosed deck, basking in the mild sunshine.


My Peace Lily Is Wilting


Spathiphyllum, or peace lily, popular houseplants

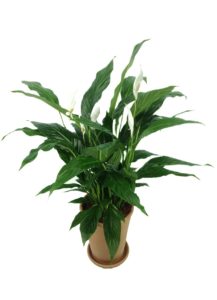
Peace lily, Spathiphyllum.

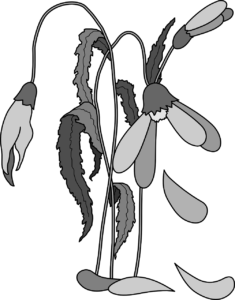
Wilt in peace lilies due to underwatering is a common problem. There are few plants that exemplify wilt more clearly than this one. A dry but still living peace lily, once watered thoroughly, will recover. But a few leaves might turn yellow, and they won’t green up again.

Peace lily (Spathiphyllum spp.) is commonly available and a good choice for beginning gardeners. You see them in malls and offices all over the country, where lush foliage lends a tropical flair to indoor spaces. Garden centers sell cultivars ranging from robust five-foot-tall specimens to table-top varieties less than 10″ tall.

They like soil that stays lightly moist all the time. But roots that stay wet all the time (from overwatering, overpotting, sitting in a wet saucer, or poorly-drained soil) are unable to “breathe”. Air and water are equally important to root health. Tiny root hairs that absorb moisture rot in wet soil, so the plant can’t get water to the leaves, causing the familiar wilt. A plant can wilt from either dry or constantly wet soil.


Keeping the Peace Lily Tidy

Strelitzia

Bird of paradise.

When yellow leaves appear, remove the entire leaf—both the blade (the wide part) and the petiole (the narrow leaf stem). The petiole is connected to the crown, stem, or the main trunk of a plant by a thin layer of cells. That layer of cells, the abscission layer, helps the petiole separate from the main part of the plant if the leaf is no longer useful.

After cutting off most of the yellow leaf, peel off the last bit of the yellow or brown petiole. If it is difficult to remove, as in large cultivars, cut the base of the petiole longitudinally down the center, toward the stem or the crown. Now you can easily peel off each half of the remaining petiole.

This works on other species with strong leaf attachments, such as Bird of paradise (Strelitzia, photo, above), yucca, palm, and dracaena. Removing all those dead fragments greatly improves the plant’s appearance.

Easy to Grow

Peace lilies are not demanding when it comes to light. Provide bright indirect light or morning sun for continuous growth. Disregard the advice that they thrive in “low light”. Sure, they’ll survive for a while, but brighter light toughens the tissues. New growth emerges thicker and stronger.

Plants photosynthesize and grow faster and often bloom in those locations, sometimes emitting a trace of scent soon after the white spathe flowers open. During the shorter days of the year, peace lilies welcome a few hours of direct sun.


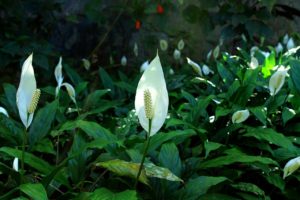
peace lily, flowers. easy houseplants

Peace lilies in bloom.


When the flower turns brown, snip off most of the stalk, wait a few days, and then pull out the remaining part of the shrinking brown stalk. You could remove it earlier, but sometimes a few green leaves are inadvertently removed at the same time. Once again, this keeps the plant tidy, with no lingering dead remnants.


How Often Should I Water My Peace Lily?

The Environmental Variables

diagram, wilted plantTemperature, light, humidity, fullness of the plant (number of leaves), pot size and type (porous or non-porous), soil composition, and air circulation affect moisture in the soil. A furnace cycling on more often during cold weather necessitates frequent watering of thirsty plants. Knowing how these variables work in conjunction with each other, for each species, will determine how often your plant needs water.

A full and potbound (roots tightly filling the pot) peace lily, in morning sun at 72°F, and in potting soil that drains fast (has a lot of bark chips), for example, might need water every 2 or 3 days. On the other hand, one that was recently transplanted into soil with mostly peat moss and kept in a room at 65°, in indirect light, with 15 other plants nearby (higher humidity) might need water every 5 or 10 days. That’s why it’s so difficult to answer the question, “How often should I water it?”

Most varieties of peace lily are potted into 6″ to 10″ diameter pots. Stick your finger into the soil an inch or two down from the surface. If the surface of the soil feels dry, but there’s damp soil below that, the plant does not need water.

Waiting to water your plants until they begin to wilt is not a good idea. Delaying for only one day could cause another leaf to turn yellow. Or the plant will refuse to produce new foliage.

How Can I Tell When To Water?

A better course of action is to feel the moisture in the soil and the weight of the plant and pot. Eventually, you’ll learn to recognize that when it feels “this” dry or light in weight, it’s time to water. Some gardeners rely on inexpensive soil moisture meters, but I don’t consider them to be very accurate.

And water your peace lily thoroughly! Not just a little bit that moistens the top 2″ of soil. Instead, give it enough to moisten the entire root ball. Some water will drain into the saucer, and a dry pocket of soil might soak up that excess. Drain off any excess that remains in the saucer after 15 minutes.

Many of us conserve energy in winter by keeping the thermostat in the mid to high 60’s F during the daytime and in the low 60’s at night. If you’re growing plants from the tropics, they appreciate being given lukewarm water, about 85° or 90°. This includes ficus, philodendron, pothos, African violet, Alocasia, Aglaonema, and spathiphyllum. Dry soil absorbs lukewarm water more readily than it does cold water.


Upon Careful Examination

Place a fully wilted peace lily in a bucket filled with lightly warmed water up to the pot’s rim. You might have to weigh down the pot. Keep it there for an hour or two, then let it drain. If it doesn’t revive after a few hours, remove the plant from its pot and examine the roots.

Certain materials used at the wholesale nursery, once dry, can resist absorbing water. It’s possible that, even though the plant had been transplanted into better quality potting soil, the plant’s original root ball stayed dry and was unable to produce new roots. When transplanting any plant, tease out some of the roots on the surface of the root ball, especially one that is solidly filled with roots. This helps stimulate the formation of new roots that will quickly grow into fresh potting soil.

I’ve worked on plants that seemed to have moist soil, yet remained in a wilted state. One of these conditions was usually the cause:

  • The plant was repotted too deeply, rotting the petioles and the crown of the plant. The crown should remain at soil level, where the green top growth meets the roots. Very few plants survive being planted lower in the soil. Rule of thumb: the original soil surface should be visible after repotting.
  • Over time, the organic matter (peat moss, wood products) in soil breaks down and loses most of its volume. Consequently, the soil surface drops lower in the pot. If roots are visible under the crown and are exposed to the air, add fresh potting soil to cover the roots. You might have to remove the plant from the pot and add soil under the roots to raise the crown to the proper level. Either way, don’t bury the crown.
  • The roots were not teased out from the root ball, and remained within the tight confines of the original root ball. The root ball dried out before new roots could grow into the moist new soil.
  • New potting soil was loosely added around the root ball, and not firmed in next to the roots. Moderate pressure against the roots helps develop a healthy root system, and fills any voids in the pot that could dry out delicate root hairs. It also prevents water from rushing through the pot, following the path of least resistance, and not soaking in.
  • The plant’s soil was wet for too long, and the rotted roots couldn’t regrow. Fungal and bacterial pathogens build up in wet soil and cause more problems.
  • The temperature in the room or of the water was too low. 
  • The plant was overfertilized, burning the roots. Many people think that fertilizing more often or using more than the recommended concentration makes plants grow faster. It doesn’t. Overfertilizing makes plants die faster. High salt concentrations draw water out of the roots, killing them.

Many of the problems we have with houseplants can be avoided if we keep them potbound in the winter. Cooler soil temperatures and shorter days do not favor root growth at this time of the year. It’s better to delay repotting houseplants into larger containers, if they need it, until spring to mid summer.


Headings:

Page 1: What Is Wrong With My Houseplants?, My Peace Lily Is Wilting, How Often Should I Water My Peace Lily? (The Environmental Variables, How Can I Tell When To Water?, Upon Careful Examination)

Page 2: How Often Should I Water Houseplants?, Should I Fertilize My Houseplants?, Brown Tips On Houseplants (Overwatering, Underwatering, Overfertilization, Disease, Guttation, Fluorine), Yellow Leaves, and My Houseplants Are Dropping Leaves

Page 3: Succulents (Porous Pots, Repotting and Refreshing), Ferns (Raise the Humidity), Pothos and Philodendron, Snake Plant (What is CAM?), English Ivy (Spider Mites), Will They Flower Some More?, and Before You Know It


Return to the top


Poinsettias: Merry and Bright!


Poinsettias in December


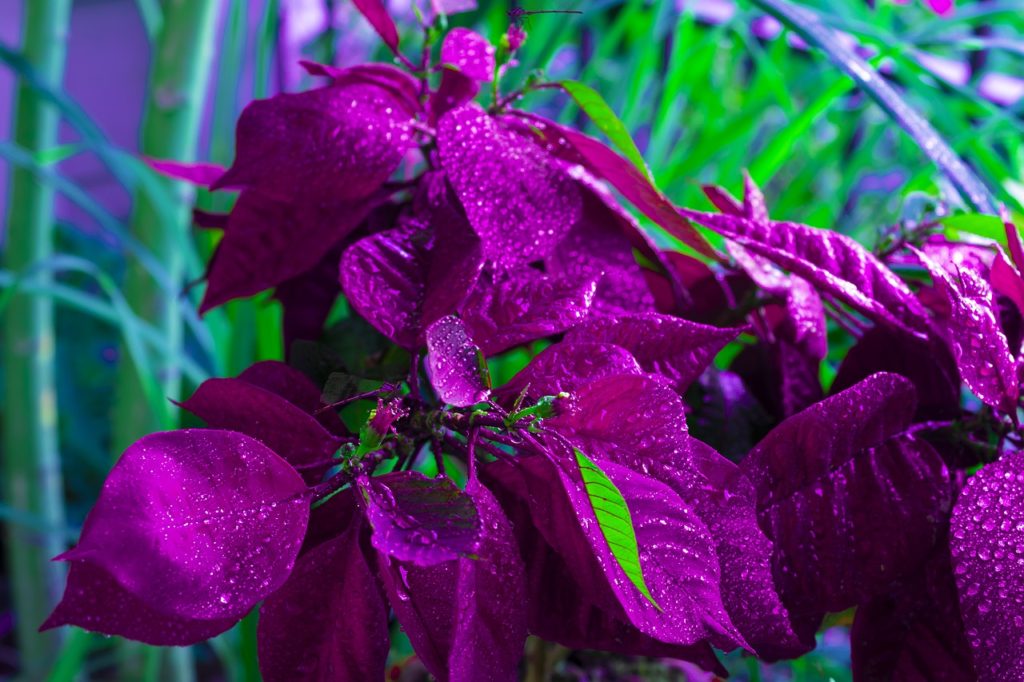
red poinsettia


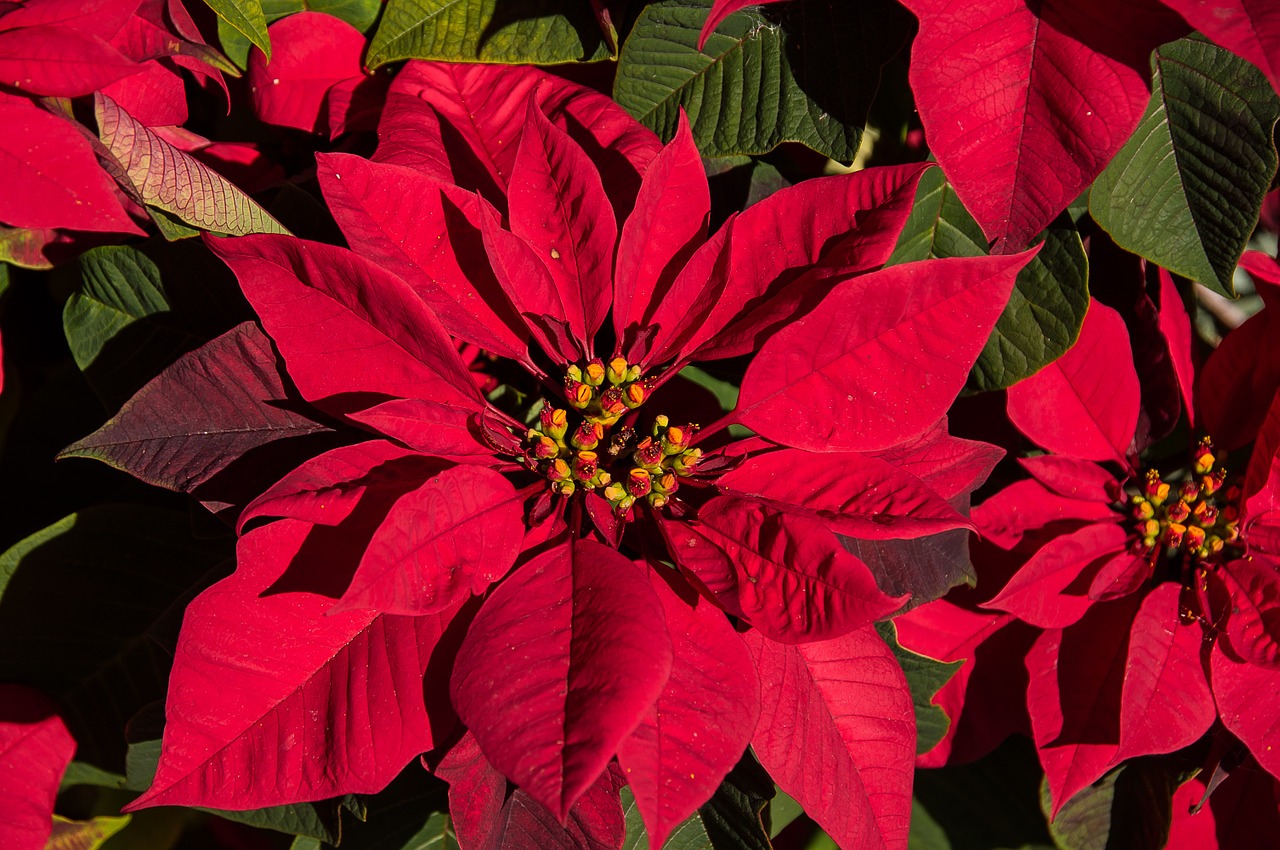
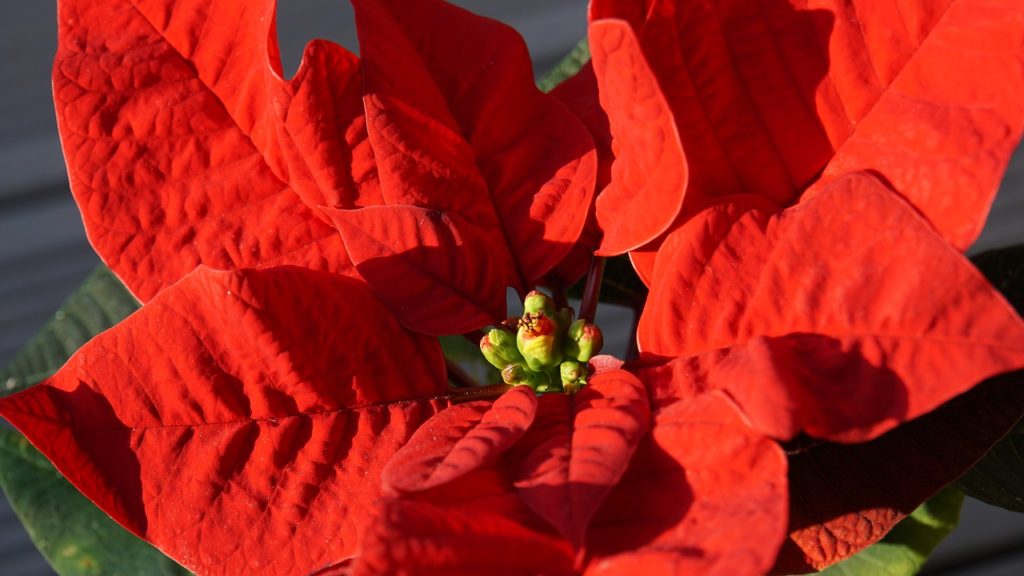
Poinsettias have long been associated with Christmas celebrations and are the most popular indoor flowering plants. They appear as early as mid-November in every garden center, grocery store, florist, Christmas craft show, and hardware store across the country.

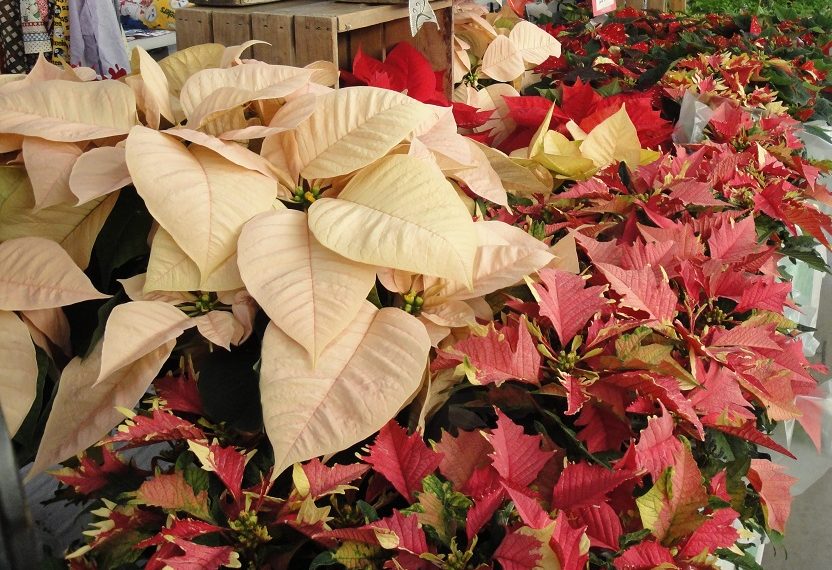
Recently, I bought one called ‘Ruby Frost’ (bred by Syngenta). It’s a short plant that fits perfectly under a table lamp. I prefer some of the novelty colors, such as the very pale, creamy peach Premium ‘Apricot’, but I didn’t see it this year. ‘Visions of Grandeur’ (Ecke) is another favorite, with soft pale pink bracts. It is stunning when grown to a large size.

Over 100 varieties are available, with new ones advertising improved features, such as darker leaves and longer-lasting bracts. The colorful parts, sometimes called flowers, are actually modified leaves called bracts. True flowers are the small yellow and red parts in the center of the youngest bracts. Poinsettias are also being bred for resistance to necrotic leaf margins, a physiological condition where the edges of bracts or leaves turn brown due to calcium deficiency.


History of Poinsettias


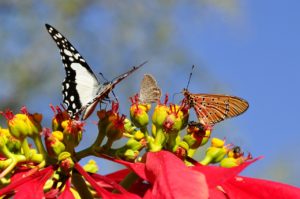
As you can see from the photograph below, wild poinsettias look quite different from the ones we grow today in greenhouses. The plant is native to tropical deciduous forests of Mexico, where they grow from 2′ to 12′ tall.

Seven hundred years ago, the Aztecs called the plant Cuetlaxochitl, and used the red bracts for dye. The white latex had antipyretic properties, and the Aztecs used it for treating fever (but don’t try this at home). King Netzahualcoyotl considered the poinsettia a symbol of purity, as did the Aztec King Montezuma in the 1500’s.


wild poinsettia

Wild poinsettia.


The first U.S. ambassador to Mexico (1825-1829), Joel Roberts Poinsett, introduced the plant to the United States in 1825 after seeing them in the area now known as Taxco. Poinsett, a physician and botanist, shipped specimens to his greenhouse in Greenville (or Charleston, depending on source), South Carolina. He also sent plants to Philadelphia botanist John Bartram, who, in turn, gave plants to Robert Bruist, a nurseryman who named them Euphorbia pulcherrima Willd.

poinsettia cyathia

Poinsettia flowers, the cyathia.

More than 700 species belong to the Euphorbia genus, a member of the Euphorbiaceae, or spurge, family, and have in common the characteristic white sticky latex sap. A Euphorbia flower generally comprises a single female flower, without sepals, surrounded by male flowers in a cyathium (plural: cyathia). The small flowers are located in the center of the colorful bracts, which attract the attention of pollinators.

Poinsettias are not poisonous, as was previously thought. Children and family pets chewing on the leaves or stems find out fast that better things await them on, or under, the dinner table. Those rare individuals who are allergic to the sap and develop a rash should immediately seek medical attention.


The Christmas Connection


poinsettia

The origin of poinsettias as a Christmas tradition began in the 1500’s, in Mexico, with a poor young girl named either Pepita or Maria. Because she was unable to provide a gift to celebrate Jesus’ birthday, she was inspired by an angel to gather weeds into a bouquet and to place them by the church altar. Red blossoms sprouted from the weeds, the story goes, which turned into poinsettias.

By the 1600’s, Franciscan priests in Mexico included them in Christmas celebrations. Around the same time, the writings of a botanist named Juan Balme began to appear, describing the poinsettia.


Modern Culture of Poinsettias


In 1923, Mrs. Enteman of Jersey City, New Jersey, discovered the first oak-leaved seedling and named it, appropriately, ‘Oak Leaf’. This was the first selection suitable for pot culture. Up until the 1960’s, all selections and sports are credited with having ‘Oak Leaf’ heritage.

Poinsettias were first grown as cut flowers (‘True Red’, ‘Early Red’), and were raised in outdoor fields before moving into greenhouses in the 1960’s. Paul Ecke, a California nurseryman, began breeding, in the 1920’s, most of the varieties grown today. His company discovered a way to breed plants that branched freely. So, for decades, this secret method allowed Ecke to remain the dominant grower…until the secret was revealed by a student, this story goes. Good branching structure and shorter stems culminated in their ‘Eckespoint Freedom’, in 1992.

Pennsylvania State University, the University of Maryland, and several commercial breeding programs proliferated in the 1950’s. Dr. Robert N. Stewart, of the Univ. of Maryland’s Agricultural Research Center in Beltsville MD, bred poinsettias with stiff stems, large bracts, and new colors. ‘Paul Mikkelsen’, named in 1963, was the first long-lasting poinsettia crop. ‘Annette Hegga Red’, with multi-bracted stems from pinching, and other sports were imported from Norway in 1964.

Before these new improvements came on the gardening scene, poinsettias grew long stems and were trained to look like a paperclip—“tromboning”, it was called.

Currently, California leads the nation (total: 34 million plants) in the number of poinsettias grown. The USDA reports that, in 2013, California grew 6 million plants. North Carolina came in second, with 4.4 million pots grown. Then Texas with 3.7 million pots, and Florida and Ohio, each with about 3 million pots. Red is the most popular color, claiming ¾ of all U.S. sales, followed by white, and then pink.

Poinsettias accounted for 23% of all U.S. indoor flowering potted plant sales in 2013. They contributed $144 million of the $618 million in this category.


Varieties


Looking for a basic red poinsettia is no longer a simple task. There are cherry reds and scarlet reds, deep velvety reds and burgundies. Some bloom early and some bloom later, and can last in color for months! There are plants with dark green foliage or a lighter shade of green. And there’s ‘Winter Rose’ (Ecke) with bracts that are curled, resembling a rosette. ‘Carousel’ (Ecke) adds a bit of a frill, with its wavy-edged bracts. ‘Mirage’ and ‘Lyra’ (both from Syngenta) were introduced in 2017. Every year or two, new introductions come to the marketplace.

Solid pinks, in shades from very pale to vibrant, and from clear pink to peach to salmon, broaden the palette. And, of course, there’s white, although most white poinsettias are creamy yellow and mature somewhat white, as in ‘Freedom White’ and the recent ‘Merry White’ (Selecta). The newer ‘Princettia’ series does have a pure white variety, and also several pink shades. These colors offer tones that fit better, stylistically, in many homes.


If bright rich orange is your color, there’s a poinsettia for you! ‘Lemon Drop’ and ‘Gold Rush’ bring even more color selections. But the traditional reds, such as the ‘Freedom’, ‘Prestige’, ‘Premier’, and ‘Viking’ series are still the favorites and readily available.

For those who dare, spray paints and glitter can be applied. White poinsettias suddenly, magically, become blue or purple! Very striking, unnatural some would say, and not for the faint of heart!


Variegated Bracts and Foliage


variegated poinsettia

A poinsettia with variegated bracts.


Variegated leaves, with creamy yellow margins, add another dimension, as in ‘Holly Point’. The newer ‘Tapestry’ (Ecke; photo, end of this section) is more vigorous than ‘Holly Point’ and more resistant to necrotic leaf margins. Foliage is gray-green in the center, and bracts are cherry red.

‘Mars Marble’ has cream margins with soft pink in the center of the bracts. ‘Christmas Angel Marbella’ (Selecta) also has creamy margins around salmon-pink centers.

For something a little different, there are series with spotted and splotched bracts. ‘Glitter’ (Ecke), ‘Shimmer Surprise’, ‘Tri-Color’, and ‘Jingle Bells’ look as if they’ve been splattered by white or pink paint. Some cultivars have yellow spots!

‘Ice Punch’ has red bracts with a blaze of pinkish white in the center. ‘Ruby Frost’ offers marbling in shades of pink, white, and red. (Note: the plant I purchased was labeled ‘Ruby Frost’, but it differs in appearance from photos in NC State Poinsettia Trials.)


‘Strawberries and Cream’ (photo, below) is a diminutive variety, often grown in a 4 1/2″ pot. It has oak-leaved bracts that are cream on the margin and deep salmon pink in the center. Because of its size, it fits nicely in a basket with small-leaved English ivy, a Norfolk Island pine, and a young fern. Cover the pots with Spanish moss, add a bow, and you’re all set!

To hide bare stems near the bottom of the plant, simply add sprigs of evergreens and pine cones. Or use them in baskets, lined with plastic to prevent leakage, with other plants surrounding the bare stems. Keep them in the pots and move the plants around until you arrive at a pleasing arrangement.


Headings

Page 1: Poinsettias in December, History of Poinsettias, The Christmas Connection, Modern Culture of Poinsettias, Varieties, and Variegated Bracts and Foliage

Page 2: How To Care For Poinsettias (Growing Conditions), Outdoors For the Summer, And Back Indoors Again, and National Poinsettia Day

Return to the top


Paperwhite Narcissus: Fragrant And Easy To Grow


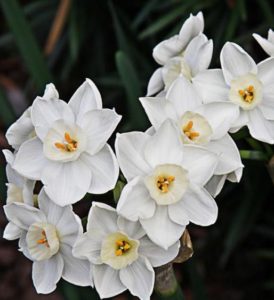
paperwhite narcissus 'Winter Sun', white flowers, yellow cup

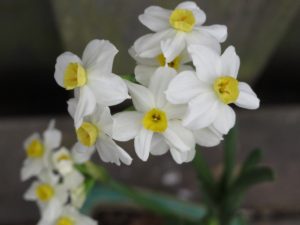
‘Winter Sun’ paperwhite daffodil.


The Paperwhite Narcissus


Among the easiest plants to grow for fragrant blooms in winter is the paperwhite narcissus, Narcissus papyraceus. Success is practically guaranteed, since the flowers are already inside the bulbs when you buy them. All they need to sprout is light and moisture. Yes—it’s that easy!

Bulbs are available in autumn, alongside their hardier daffodil cousins, and sometimes into winter. Narcissus papyraceus is the name used by the Royal Horticultural Society. It lists Narcissus papyraceus subsp. tazetta as a synonym.

Purchase the bulbs by the end of November if you want blooms for Christmas. But, if time is running short, garden centers and florists will have potted paperwhite narcissus already sprouting or in flower right up to Christmas and often into the New Year.

Look for large, healthy bulbs that feel solid when you lightly squeeze them. Bulbs generally will bloom 3 to 4 weeks after planting them; some require a week or two more. Keep them cool—in the 50’s F—until they’re planted.


Narcissus Narcissus Bulb  - Capri23auto / Pixabay


How To Plant Paperwhite Narcissus Indoors


With Roots In Water

Many gardeners prefer the traditional method of growing bulbs on a bed of decorative gravel or pebbles. Simply place a layer of pebbles in a shallow non-draining ceramic bowl or a glass container. Maintain the water level just below the bottom of the bulbs, which will sense the humidity and begin to grow roots. It won’t be long before growth emerges.

If you don’t see roots within a few days, add water until it touches the bottom of the bulbs. Once roots are visible, maintain the water level right below the bulbs. When the bulbs begin absorbing water, remember to refill the container to keep the roots wet. Avoid submerging bulbs in the water, which can cause rot.

Another method of forcing paperwhite narcissus is to rest a bulb in the top of a “bulb-forcing vase”, keeping water just under the bottom of the bulb. These vases come in a few sizes, so look for the small one made for daffodils. Amaryllis bulbs are sometimes grown this way in a larger vase.


With Roots In Soil

forced bulbs, paperwhite narcissus

Paperwhite bulbs on the soil surface.

I prefer forcing bulbs in potting soil. Place paperwhite narcissus bulbs for forcing close together, unlike bulbs planted in the garden. Several bulbs will fit in a 6″ or 7″ pot.

Put some potting soil in the bottom third of the pot and nestle in the bulbs. Then, add some soil between the bulbs, and see if you can layer in a few more. It’s okay if the bulbs’ noses protrude above the soil. Other gardeners might place the bulbs fully exposed on top of the soil. Now water the pot.

The root systems of paperwhite narcissus bulbs grow very vigorously. In fact, strong young roots often push the bulbs higher in the medium. Gently push them back down; eventually the roots will more securely grab the soil.

One or two bulbs in a small decorative pot also makes a lovely presentation. When selling plants at the Christmas shows, I offered sprouted single paperwhites in 3″ aged clay pots. The bulb was planted high with a collar of fluffy green sheet moss tucked in the soil around the inside rim of the pot. I added a twig and holiday ribbon or a few pieces of raffia around the leaves. Add a clay saucer…very cute. Perfect for a windowsill that’s too cold for other houseplants. 

I also planted paperwhites in ceramic bowls, 6″ and 7″ pots, and in squares of burlap, with moss and a bow, surrounding the pots and saucers. Customers enjoyed choosing among the different presentations to fit their needs.


Larger Bulbs

When I sold potted paperwhites in the fall and early winter, I purchased the largest bulbs available from suppliers. This ensured the greatest number of flowers, 2 or 3 multi-flowering stems per bulb. They were worth the additional cost.


Will Paperwhite Narcissus Come Back Next Year?


Forced bulbs have been weakened by the process and require an extra year or two in the garden, gathering strength before they’ll bloom again. Paperwhite narcissus bulbs for forcing are planted close together, but space them about 6″ apart in the garden. 

In colder climates throughout the U.S., most varieties are not winter hardy. Gardeners in Zones 8-11, however, can plant them outdoors, where they usually return every spring. At the end of this article, I include a list of varieties and their USDA hardiness zones

If you plan to set them into the garden after enjoying the forced blooms, keep the plants moist, give them direct sunlight, and do not cut off the foliage. It’s the same for paperwhites as it is for spring-flowering bulbs: leaves photosynthesize, storing nourishment in the bulbs. The more carbohydrates produced, the more flowers you’ll see in the future. For all bulbs, therefore, wait until the foliage has yellowed before removing it.

If your plans include saving the bulbs for the garden, force your paperwhites in potting soil. But don’t expect much of a floral show in the next flowering cycle. Bulbs growing in pots have depleted all the stored energy and require sunshine, moisture, nutrients, and time to gather enough strength to flower again.

As you can see from the list of varieties, several are hardy in colder climates. Left in the garden, they will bloom according to seasonal cues. Like other daffodils, roots grow in autumn, followed by the blooms in late winter to spring.


Temperature


Average indoor temperatures encourage rapid sprouting. Bright green leaves emerge before the tightly budded flowers. Temperature is one factor that determines how quickly the plants grow. Bulbs planted in late November to early December will probably flower for Christmas if they’re given temperatures in the high 60’s to 70°F. Rates of growth can vary, though, depending on the cultivar.

Let’s say you planted your bulbs on Thanksgiving Day, but now prefer to delay the bloom as long as possible. This is where lowering the temperature can help. Plants in full bloom or showing flower buds will slow down their development if they are kept very cool. And I mean “back porch” cool!

cool porch

Don’t let them freeze. Expose plants to temperatures in the 40’s to just about stop them in their tracks. They probably would survive close to freezing temperatures, but the leaves might flop over. Cool temperatures keep the plants shorter overall. If the leaves are falling over, gather them together and secure with ribbon or raffia to a stake.

Watch the weather forecast to see if the plants can be kept outdoors overnight. But don’t forget to water them. Incidentally, deer and rodents won’t eat your paperwhite narcissus. 


Chill!

When you bring the plants in for the night, put them in a very cool location. On the floor near a chilly patio door or in a cold window should suffice. Or in the garage if it’s cool but not freezing. Avoid placing them where they’ll feel the warm dry air from the heater. Kept very cool, the flowers last longer and growth will slow down.

Sure, bring them in for a few hours while your friends are over. (Not everyone likes the fragrance, though, so you might ask your guests.) Some varieties are less fragrant and are noted as such in the list of varieties, below.

Of course, there is the option of just letting them grow without fussing over them. If plants are available at the garden center, simply replace the old with the new. But if you prefer to grow them yourself, potting up a few bulbs every 7 to 10 days will give you a succession of blooms.

Planters Outdoors

If the weather remains chilly but not freezing, you can incorporate pre-started pots of paperwhites into patio planter combinations. Add evergreens, berried boughs, pansies or violas, and seasonal embellishments. I did this a few times, and, given favorable weather conditions, the flowers lasted for weeks.


Light and Water for Paperwhite Narcissus


paperwhite narcissus


Another factor that determines how well the plants grow is light. Direct sunlight will keep them shorter, but along with that come higher temperatures. So, try to find a spot that’s cool and sunny, like a chilly window.

Plants grow weaker in low light levels, and flowers—if they open—will be of lower quality. 

Keep the plants moist at all times, using cool tap water. A vigorous root system dries the pot quickly, so check the plants every day. Dry soil will damage the flower buds.


Please Pass the Vodka


vodkaNo, not for me. It’s for the paperwhites! In 2005, Dr. William Miller and student Erin Finan at the Cornell University Department of Horticulture studied the effects of alcohol on paperwhite narcissus.

First, they gave clear water to the bulbs until they began rooting out. After that, they found that plants were about one-third shorter when bulbs received a 4-6% solution of alcohol. So, a 1:7 to 1:9 solution (alcohol:water) will keep the plants shorter. (Divide “proof” by 2 to get alcohol content. For example, 80 proof is 40% alcohol. 40 ÷ 5% target = 8. Subtract 1. This results in a ratio of 1:7.)

Some online sources recommend a more concentrated alcohol content (1:5), but I wonder if that would interfere with water uptake. 

This works on paperwhites grown in water or in soil.


Fact of Life: Floppy Paperwhite Narcissus


Even with good growing conditions, the leaves of paperwhites grow tall and eventually fall over. Prepare for this ahead of time, and have some bamboo stakes, twigs from the garden, or a short decorative trellis and some twine, raffia, or ribbon to secure the stems. And maybe a little gin…for the bulbs.

Paperwhites offer a powerful fragrance. Maybe there are better places to display them instead of next to the Christmas turkey. For the same reason most cooks prefer unscented candles on the dinner table, paperwhites can find some other place for the occasion. Perhaps they can keep company with the cyclamen in the chilly foyer.


dinner table


Cut Flowers


Many paperwhite cultivars are suitable as cut flowers. But water uptake in other types of flowers can be hindered by compounds in the daffodils’ sap.

This also applies to hardy springtime daffodils that emerge in the garden, so keep cut daffodils by themselves for longer-lasting tulips, hyacinths, and others.


Off With the Old


When the scent loses its appeal, trim off the entire flower stem. Don’t discard the plant; there might be another flower stem that will emerge, even if the bud is not immediately visible. Remember to keep the soil moist.

Place finished pots in the garage or a chilly basement, in the sun, and continue to water. Keep them growing if they’re hardy where you live. Gardeners can plant their bloomed-out paperwhites outdoors after the harsh months of winter have passed.

Even though the varieties I grew were not hardy in Maryland, where I used to live, the plants and their soil were discarded under the shrubs or in the borders instead of at the landfill. The organic matter still had value in the garden.


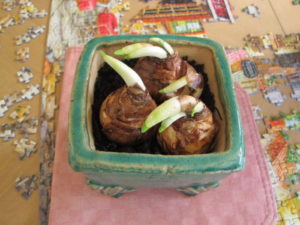
paperwhite narcissus in a decorative pot, planted 1/6/19

‘Winter Sun’ bulbs.


Varieties of Paperwhite Narcissus


Subspecies of N. papyraceus have broad distribution around the world. They’re native to or have naturalized in southeast France, northwest Italy, Sardinia, the Canary Islands, Turkey, Greece, Israel, southeast China, South Korea, Japan, India, and Nepal. They also are found in Australia, New Zealand, Algeria, Morocco, Bermuda, Mexico, South America, and in United States along the south and west coasts.

The term tazetta derives from the Italian word “tazza”, which is a shallow wine cup. These plants used to be called Narcissus tazetta, but recent nomenclature classifies them as Narcissus papyraceus subspecies tazetta. All paperwhites are in the Amaryllidaceae family.

Alphabetically, and all are fragrant:

  • ‘Ariel’: large pure white flowers that face down slightly. Good for forcing, one source says grow only in soil. Zones 8-11.
  • ‘Avalanche’: white with greenish-yellow cup, strong fragrance. Called ‘Seventeen Sisters’ in the 1700’s for its profuse blooms. Heirloom; award winner. Mid-spring, zones 6-9.
  • ‘Canaliculatus’: white with yellow cup, sweetly fragrant, 4 to 7 flowers per stem. Short, to 6″ tall. Heirloom. Mid-spring, zones 6-10.
  • ‘Chinese Sacred Lily’ (N. tazetta chinensis or orientalis): white with golden yellow cup, wonderful fragrance, 5 to 10 small flowers per stem, might be not as free-flowering as others. One source said to give it a little bottom heat (about 70°F) to coax the flowers. Three to five weeks to bloom. To 16″ tall. Brought from China in the 1800’s and used to celebrate Chinese New Year. Zones 8-11. 
  • ‘Cragford’: white with vivid orange cup, 4 to 6 flowers per stem. Excellent cut flower (strong stem). Good forcer, 1′ to 2′ tall. Heirloom, award winner. Zones 5-9.
  • ‘Erlicheer’: double white with yellow mixed in, to 16″ tall. Award winner. Zones 6-9.
  • ‘Falconet’: deep yellow with orange-red cup, 3 to 8 flowers per stem, strong fragrance. Excellent cut flower, 1′ to 2′ tall. Award winner. Mid-spring, zones 5-9.
  • ‘Galilee’: all white, 10 to 15 flowers per stem, musky scent. Good for forcing. Zones 8-11.
  • ‘Geranium’: white with yellow-orange cup, very fragrant. Several stems, each with 3 to 6 flowers. Well-drained soil, good in the South. Up to 15″ tall. Award winner. Zones 4-9.
  • ‘Grand Soleil d’Or’: bright yellow with orange cup, 10 to 20 flowers per stem. Delicate fruity fragrance. Good forcer but takes longer to grow. To 18″ tall. Very early spring, zones 8-11.
  • ‘Inbal’: large clusters of white flowers, flat cup. Good for forcing, milder fragrance. Zones 8-11.
  • ‘Jerusalem’: large white flowers, mild sweet fragrance. To 20″ tall. Zones 8-11.
  • ‘Minnow’: pale yellow with yellow cup, fading with age, 2 to 5 flowers per stem. 8″ to 10″ tall, nice in rock gardens. Award winner. Zones 5-9.
  • ‘Nazareth’ (‘Yael’): creamy white, mildly sweet fragrance. To 14″ tall. Zones 8-11.
  • ‘Scilly White’: white with short pale yellow cup, 3 to 20 flowers per stem. Sweet scent, but not as strong as others. To 20″ tall. Late winter/early spring flowers. Zones 8-11.
  • ‘Winter Sun’ (‘Wintersun’): white with buttery-yellow to clear yellow cup. 4 to 5 weeks to bloom, milder fragrance. Zones 8-10, one source said Zones 9-11. (Photo, below).
  • ‘Ziva’: pure white, large cluster. 3 to 4 stems per bulb. Sweet, spicy scent. Zones 8-11. Also, the favorite for forcing.


Winter Sun paperwhite narcissus

‘Winter Sun’, one month after potting up.


If you prefer a milder fragrance, start with those indicated as such in the list above. Photographs of several cultivars can be found online.

In the meantime, I hope you’ll enjoy potting up a few of these paperwhite narcissus bulbs. Tuck a pot into a large basket with other winter flowers (Amaryllis, Poinsettia), some English ivy, and ‘Frosty’ fern for a festive arrangement. 


Merry Christmas and Happy Holiday Season to all!

Christmas greens


Return to the top

How To Keep Cyclamen In Bloom


It’s Time For Cyclamen!


cyclamen photo

A florist’s cyclamen.


Cyclamen are perfect winter-blooming plants. Miniature varieties don’t take up much space, and they can fit in just about anywhere–a cool windowsill, the kitchen table, or a guest room. The cyclamen found in garden centers in autumn are florist’s cyclamen, which I’ll describe after the section on hardy cyclamen.

Now that we’re well into autumn, temperatures dip below freezing at night. Outdoor gardening activities are less critical, and preparing for the holidays takes priority.

Garden centers are brimful with enticing delights—real trees (fake ones, too) and wreaths and all the trimmings… Strings of miniature Christmas lights (“annuals”, according to some), bird feeders, seed and suet…

And plants, of course. Poinsettias in an ever-widening assortment of cultivars, paperwhite narcissus bulbs in bins or sprouting in pots, stately amaryllis in dozens of colors…and benches of cyclamen in sprightly pinks, reds, bicolors, and pure white.

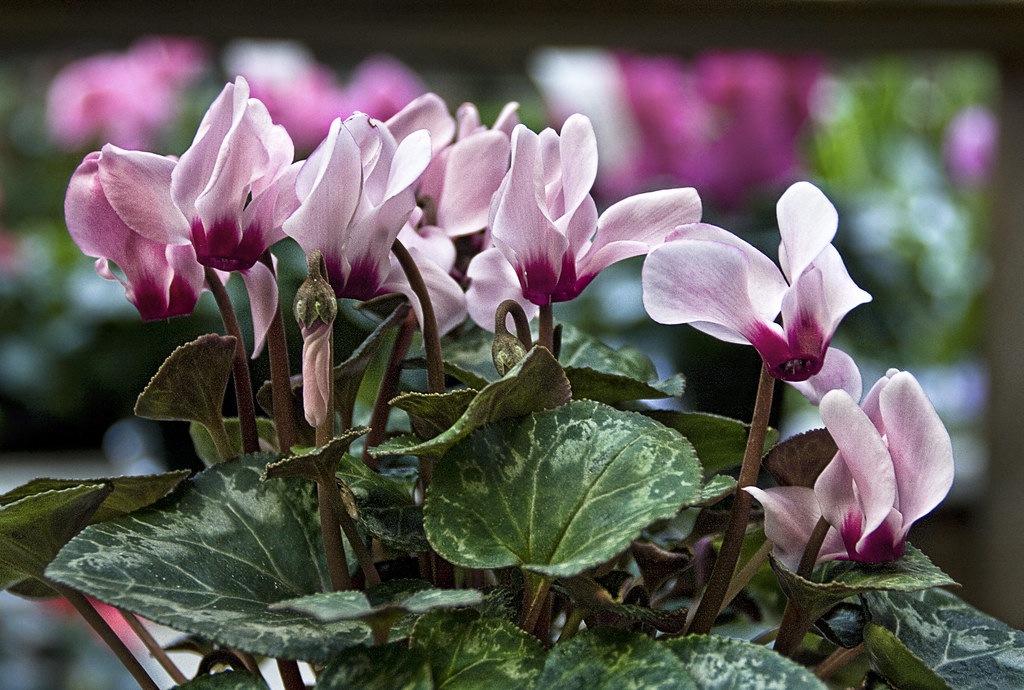
potted cyc.I’ve always loved miniature cyclamen. Sometimes you can find one with an especially delightful scent. The miniatures, to me, are easier to manage and stay in bloom longer than the larger types. A pink miniature from last Christmas just went out of bloom, yet summoned the energy to form 20 new flower buds.

Now, they won’t bloom forever, but with careful maintenance, miniature cyclamen can bloom for many months.

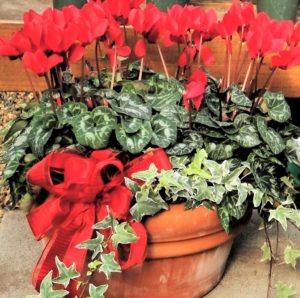
Cyclamen are truly versatile. They easily fit into combination arrangements with Norfolk Island pine, English ivy, small poinsettias, and houseplants seeking company.

Grow them in rustic clay pots, in modern ceramics, in birch logs, and in baskets. Or clustered on the credenza with candles, amaryllis, and fresh greens. And near the front door, in the chilly foyer, under a desk lamp, with some ornaments, and, yes, more greens.

There are two groups of cyclamen: those that are hardy and can tolerate cold temperatures when planted in the garden (“Hardy Cyclamen”) and those that are grown for indoor culture (“Florist’s Cyclamen”).


Hardy Cyclamen—We Can Take the Cold


There are about two dozen species of cyclamen available to gardeners, all belonging to the Primulaceae family. In addition to Cyclamen, other members in the family include Primula, LysimachiaDodecatheon, and about 50 other genera.


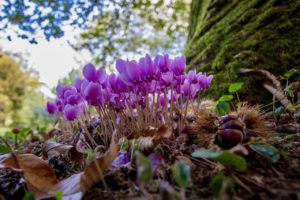
Cyclamen hederifolium photo

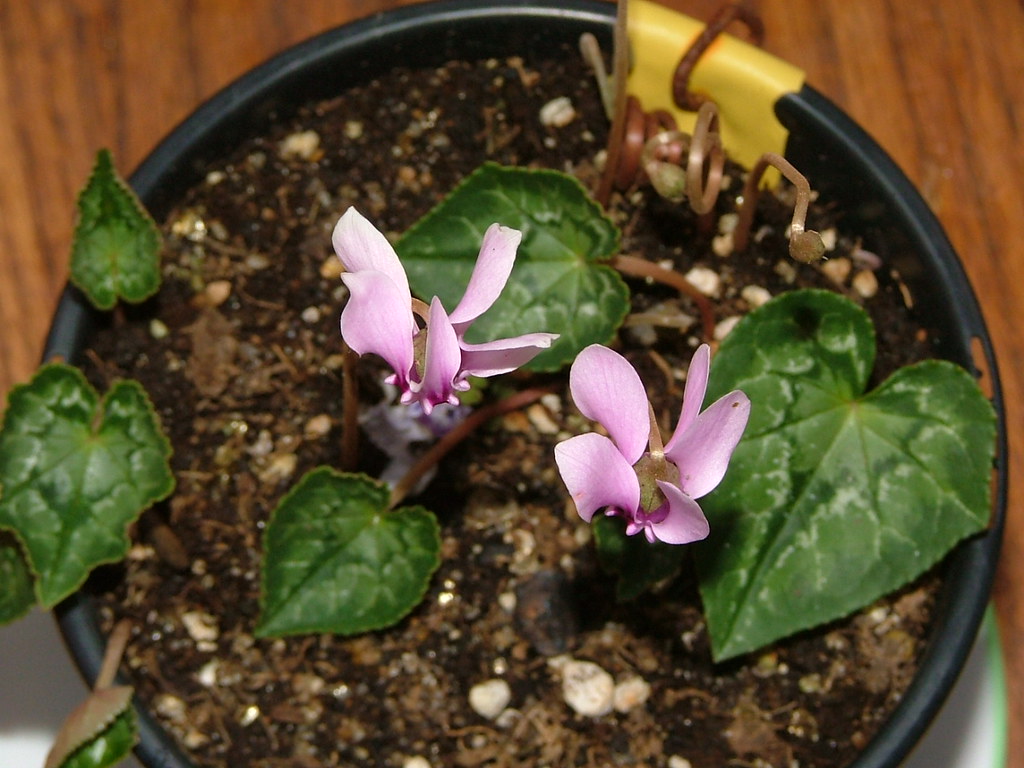
The hardy Cyclamen hederifolium.


Cyclamen Hederifolium

Cyclamen hederifolium is the most commonly found hardy cyclamen. The ivy-leaved cyclamen grows outdoors in USDA Zones 5 to 7, and can take temperatures down to -20°F. Its resemblance to English ivy (Hedera helix) explains the specific epithet, hederifolium.

Although it has naturalized in the Pacific Northwest, it is native to rocky woodlands and scrub in the Mediterranean region, from southern France to Turkey, and to islands in the Mediterranean Sea. This species is adaptable, readily self-seeds, and grows from sea level to about 4,000′ in elevation.

In late summer and autumn, pink flowers with darker eyes emerge among the silver-mottled leaves. Cyclamen needs gritty soil with lots of organic matter to keep it happy. Roots of this species emerge from the sides and the top of the tuber. Be careful not to cultivate the soil above the tuber, which will damage roots and the “floral trunks”, extensions of the tuber that bear flower buds.

Large tubers of the ivy-leaved cyclamen that I grew for sale arrived in mid summer. I potted them into 4½” pots, slightly bigger than the tubers. Half the soil consisted of drainage material. Coarse sand, pine fines, and small gravel (like PermaTill) mixed with potting soil in a 1:1 ratio encouraged roots to grow. But they rooted…very…slowly. Tubers rot in soil that holds too much water, so good soil preparation is important for long-term success.


hardy cyclamen

Hardy cyclamen.


Rooted In and Around

Decades ago, in Maryland, I planted a C. hederifolium tuber in a friend’s front yard, under a young Japanese maple. About 10 or 15 years later, she asked if it could be dug and taken to her new house. After some exploration, I felt a flattened tuber the size of a dinner-plate! But it was pinned in position by the aggressive roots of the maple tree.

It could not be pried loose, so it remains there today. Planted where the soil dries out while the tuber is dormant was probably part of the key to success. The maple absorbed a great deal of the water in spring and summer.


More Hardy Cyclamen Species

Here are some of the hardy cyclamen species, listed from more cold-tolerant first:

  • hederifolium (USDA Zones 5-7): described above.
  • coum (Zones 5 or 6 to 8): 4″ tall, small dark green or variegated leaves with deep red reverse. Pink to purple blooms appear in late winter to early spring. Similar to parviflorum, but coum grows at lower elevations in northern Turkey, and the two don’t hybridize.
  • purpurascens (Zones 6-7): fragrant deep pink flowers in summer. Its silver-mottled foliage is nearly evergreen. Native to northern Italy and central Europe.
  • cilicium (Zones 6-8): white to pale pink flowers in fall to winter, and silver-mottled leaves.
  • mirabile (Zones 6-8): small flowers in autumn.
  • parviflorum (Zones 6-9): a green-leaved species, from 4,000′ to 7900′ elevation (alpine tundra, subalpine meadow) in northern Turkey. Small tuber, only ¾” across.
  • repandum (Zones 7-8): coarsely toothed leaf margins, silver-marbled.
  • graecum (Zones 7-9): Greek cyclamen blooms in autumn with white or pink, often fragrant, flowers. From southern Greece and southern Turkey.

Collectors grow many of the species cyclamen, keeping them year-round in cool greenhouses. Information on websites varies regarding bloom time, flower color, and leaf color. Rare species and forms of species are available from specialty nurseries and garden clubs.

It takes a few years for cold-hardy species to flower from seed. In the wild, seeds are coated with a sweet sticky substance, which attracts ants. They feed on the sweet part, and discard the seeds. This method of seed dispersal, by ants, is called myrmecochory, in case you were wondering.


Because of dwindling native populations, be sure to ask for “nursery-propagated tubers”. This is not synonymous with “nursery-grown tubers”.


*   *   *   *   *   *   *   *


Florist’s Cyclamen


red cyclamen


This is the species that is most widely grown for indoor cultivation.  

Cyclamen persicum comes from rocky hillsides, up to 3900′ elevation, in south-central Turkey, Israel, Jordan, and in parts of northern Africa. It is also found in some of the Greek islands, where monks grew it and introduced it to traders.

Native populations of this species had fragrant pink flowers. Although much of the fragrance has been lost in hybridization, some modern strains, especially the miniature and intermediate varieties, once again have some scent. They don’t throw scent far from their flowers, so smell the flowers before purchasing if fragrance is what you want.

Cyclamen are available in autumn, during the winter holidays, and for Valentine’s Day. In cool regions, some garden centers offer them in early spring.

Flowers come in a wide range of colors, including white, pink shades, salmon, scarlet, deep red, burgundy, lilac, and shades of purple. They can be solid or bicolor, or finely edged in a contrasting color (“picotee”). Breeders have come up with micro miniatures, miniatures, intermediates, and large-growing standard strains.

Foliage differs from one strain to another, some showing little silver mottling, and others showing bold silver variegation. Leaf margins can be smooth, lobed, or somewhat toothed. Flowers, too, can vary in form, from smooth to ruffled to fringed.

Keep cyclamen away from children and animals. Ingestion can cause abdominal distress, seizures, and even death.


Combinations


cyclamen, ivy in clay pot

A few miniature cyclamen and variegated English ivy in a clay pot.


These were fast sellers where I attended winter farmers’ markets in Olney MD, around Washington, D.C., and at the Carroll County Christmas shows in Westminster, MD.

In a Basket

Selaginella frosty fern

‘Frosty’ fern (Selaginella sp.), a fern ally.

In cool conditions, group together cyclamen, kalanchoe, ‘Frosty’ fern, and lemon button fern. Add a small pot of English ivy to trail over the sides. Small grasses, such as mondo grass or Carex, add textural contrast to combinations.

I kept the plants in their pots, and snuggled them together in baskets lined with plastic. Add Spanish or green sheet moss, holiday ribbon or raffia, and maybe some small pine cones for the finishing touches.

Never allow water to collect in the bottom of a pot cover or a decorative container.

In a Pot

They also can be potted together. Use a shallow pot that snugly fits the root systems of the plants; keep them potbound.

The popularFrosty’ fern, a Selaginella, develops white tips in cool conditions, and must be kept moist. More options include Norfolk Island pine, English ivy, and other plants that take the same conditions.

Clay pots allow soil to dry faster than non-porous pots. Potting cyclamen with other plants can be a bit tricky, especially if light levels are not optimal. Their tubers can rot in pots that are too large or if the soil is too wet.


Strains of Florist’s Cyclamen


cyclamen foliage

Marbled cyclamen foliage.


Most customers aren’t concerned with the name of the cyclamen, but some are. A strain called Verrano tolerates higher, but not tropical, temperatures. The new Dreamscape strain performs well over a longer period of time. These are good choices for landscape beds in moderate to cool temperatures during the “shoulder” seasons, when they’re not exposed to frost.

A few of the miniature strains growers sell for indoors are Mini Winter (also good in cool, moist landscapes), Fantasia, and Snowridge Mini. Intermediate strains include Laser, Snowridge Midi, and Allure. For larger pots (5″ to 7″), growers offer Sierra, Mammoth, Fleur en Vogue, and Friller.

Strains with heavy silver variegation are beautiful even without flowers. Picasso (fragrant flowers) and Silverado are two popular miniature cyclamen strains. Rembrandt is an intermediate cyclamen, and Winter Ice is a larger standard with broad silver markings. Halios ‘White Silverleaf’ is a newer white-flowering cultivar with wide silver edging on the leaves. Metalis, an intermediate strain introduced in the 2020 California spring trials, has a broad silver margin, a green central heart, and can be used indoors and in the landscape.

Varieties coming to market are bred for leaf color, flower fragrance, and disease resistance. Breeders also are looking for larger bloom counts and for blooms that bunch in the center. Another variety in the 2020 spring trials is the heat tolerant ‘Leopardo’.


What About the Seedpods?


cyclamen seedpod

Remove seedpods to encourage more blooms.

We normally remove faded flowers and their stems, encouraging more flowers to form. But, sometimes, for fun, I let seedpods develop at the end of the bloom cycle.

The flower stem curls curiously downward, and the pod splits open when the seeds are ripe. A fully developed seedpod resembles a grape.

Florist’s cyclamen grow quite easily from seed; they just take a long time to get to flowering size. Older strains of cyclamen needed 15 to 18 months from seed to flower. Newer varieties take only half that amount of time.

Seeds germinate soon after ripening if planted about ¼” deep. They germinate better in the dark, in high humidity, and with temperatures in the mid 60’s F. Tiny cyclamen leaves emerge after the tuber has begun to grow. I used to grow seedlings in 9-cell market packs until they were ready, months later, for 4″ pots. To save time, however, I purchased pre-finished cyclamen to sell at garden shows after they bulked up and came into flower.


Headings

Page 1: It’s Time For Cyclamen!, Hardy Cyclamen—We Can Take the Cold (Cyclamen Hederifolium, Rooted In and Around, More Hardy Cyclamen Species), Florist’s Cyclamen (Combinations, Strains Of Florist’s Cyclamen), and What About the Seedpods?

Page 2: Starting Out With Cyclamen, Choosing Cyclamen, Water, They Like It Cool (Miniature Cyclamen Might Be Easier), On a Chilly Porch, Dormancy, New Digs (Potting Soil), Fertilizer for Cyclamen, Light, Deadheading Cyclamen, and For Further Research

Return to the top

Trick-or-Treaters Will Like This Halloween Twist


carved pumpkins


Halloween Is Coming Up


I’d like to relate the story of a 29-year tradition that took root in our family. But first, some background.

After leaving Morgantown, West Virginia, we purchased our first home in Monrovia, Maryland. The first order of business was to build a greenhouse for the vegetable transplants, succulents, and other houseplants that I sold to florists and garden centers, and at the occasional plant sale held in the front yard. This was several years before the phenomenal rise in popularity of the farmers’ markets.

Fast-forward a few years to September, 1984, and we were on the move again, this time to a smaller property in Rockville MD, 30 minutes south. All the light fixtures and other horticultural paraphernalia came with us…along with our young daughter, Brynn, and our first Rhodesian ridgeback, Aureus.

The plants…hundreds of them!…found temporary quarters in every window or in the back yard, until the dozen or so 4′ fluorescent light fixtures were set up in the basement. But I didn’t need all the duplicate plants for the business at this time of the year, and they could easily be propagated if I did.


bars of chocolate for trick-or-treaters


Returning home with bags of little Butterfingers, Mars bars, Nestle crunch, and Smarties, I had a lightbulb moment.


What if we offered plants to the trick-or-treaters?


My husband, at the time, said, “That’s un-American.” But I wasn’t going to stop offering candy altogether. I intended to give trick-or-treaters a choice!

Despite doubts, I went ahead with the plan. A folding table under the porch lights held a few flats of small thornless succulents (like those in the photo, below), spider plants, and Moses-in-the-boat (Rhoeo spathacea) in 2″ or 3″ pots. White rope secured to the shrubs guided the trick-or-treaters along the sidewalk to the front door, and prevented shortcuts through the garden.


Assorted succulents


Spooky noises from a tape cassette echoed around the foyer, as glow-in-the-dark spiders crawled all over my t-shirt. And the great plastic pumpkin brimming with treats sat inside, on a bench by the door. Brynn went out trick-or-treating with her Dad; a few years later, her brother, Logan, would join them. Okay, we’re all set.


The First Knock on the Door


porch light

In our neighborhood, trick-or-treating took place during the early evening hours, and participating homes kept their porch lights on. Parents accompanied their young children, or they waited nearby at the curb.

I greeted our first visitors, and followed up with “Would you like a plant or candy?” I think I detected some quizzical remarks under their masks and make-up. After giving a succinct explanation to Snow White, a pair of dice, and a foil-covered cardboard robot, important decisions were about to be made.

“Can we have both?”

“No, you have to choose one or the other. You can have candy, which is gone in a few minutes, or a plant, which can last for years. It’s entirely up to you.”

It often happened that when the first of a group of trick-or-treaters chose a plant, then, like a contagion, the rest of the group followed suit.

trick-or-treaters, basket of candyOnce in a while, the young ones would have a change of heart, and I happily accommodated. It’s never too early to teach kids how to make a decision, but I didn’t want them to go away disappointed…not on Halloween!

The middle-school-aged kids and the few high-schoolers often chose the plants, and were surprisingly fascinated by this new twist on trick-or-treating.

They paused while I gave more detailed instructions for care, and even asked the names of the plants. So, I found small white labels and a Sharpie pen, and wrote common and botanical names for each of the plants.


There’s Always One


Halloween monsterTiny fingers gingerly grasped their bounty. I saved small bags and newspaper for the occasion, but most were content to carry the pots. They excitedly passed them to their parents, who responded with “Thanks! What a great idea!” I was thrilled that they were thrilled.

About 15 years into this tradition, a young boy started coming. His father remained at the curb, chatting with friends and neighbors. When he realized what was going on, the father shouted toward his son, “Take the candy. Take the candy!

The cute little boy handed back the plant he had chosen, and took a couple of chocolate bars instead. In this instance, I was willing to make an exception. He was the only trick-or-treater allowed to take both a plant and candy, and usually traveled alone, so I didn’t have to explain anything to his friends. This happened for a few years, and always played out the same way: “Take the candy!”


A Wider Web


spider web


The morning after the first Halloween, I took my daughter and the dog for a walk around the neighborhood. I noticed a green pot in the gutter, and a plant not far away in the middle of our neighbor’s lawn. That was one of mine!

child watering a plantThen we saw two more down the block in someone’s front yard. After gathering the bits and pieces, I had to decide whether to continue doing this in the future.
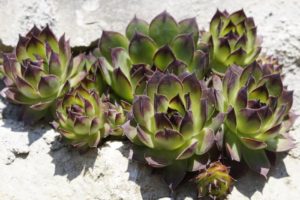
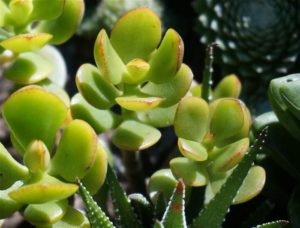
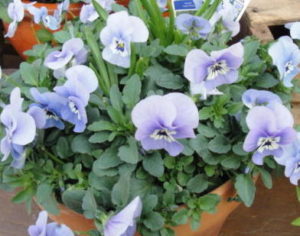
Hmmm… Actually, this was a no-brainer. Only a handful of plants were discarded, but dozens were given away! And to miss out on the opportunity to introduce young people to the world of plants? No way!

As the years went by, hippies, clowns, and Frankenstein monsters said they had given their plants to Grandma or to favorite teachers. Some kept their spider plants and philodendrons for 5, 6, or 7 years, and some told me that their hens-and-chicks (the hardy succulent, Sempervivum) were spreading all over the garden.

Several mentioned that they had used the story of the “Halloween Plant Lady” as a subject for classroom assignments. I had no idea this little tradition would have such an effect, and for 29 years, trick-or-treaters continued to surprise me.


Second Generation of Trick-Or-Treaters

And then I began to hear tales from our Halloween visitors that their Moms or Dads used to come to the Plant Lady’s house! The parents, former trick-or-treaters, parked their cars down the block and sent their kids up to the end of the cul-de-sac for their own plants!

This tradition lasted until 2013, when I moved to North Carolina. But I will do it again, some day. (***Update***: I did move to a rural town in NC, but, alas…no trick-or-treaters. 12/16/21)


Plants for Trick-Or-Treaters


Hens and chicks, often chosen by trick-or-treaters

Hens and chicks.


Houseplants and Houseleeks

As more children were born into the neighborhood, and into the one across Shady Grove Road, more trick-or-treaters showed up. We used to chuckle about something being in the water… Some years we had only 15 or 20 kids coming to the door, but in its heyday, Halloween brought well over 100 visitors for their treats.

The older children, middle- and high-schoolers, were more inclined to take a plant than the youngest visitors. Some told me they chose plants every year. Over the 29-year period of time, between half and two-thirds of the trick-or-treaters chose plants! Incredible!

jade plant

Jade plant.

Since I was in the business of propagating and selling plants, with a little forethought, it was easy to come up with enough material. Plants that propagated quickly:

  • wandering Jew (Tradescantia)
  • spider plant (Chlorophytum)
  • Moses-in-the-boat (Rhoeo)
  • Swedish ivy (Plectranthus)

These took a little longer to root:

  • jade plant (Crassula, photo, right)
  • miniature Kalanchoe
  • Philodendron
  • Pothos (Epipremnum)
  • dwarf snake plant (formerly Sansevieria, renamed Dracaena)
  • Hens-and-chicks, also called houseleeks (hardy perennials and always popular)

When I began selling plants at farmers’ markets in 1988, I added herbs and other edibles to the Halloween table. The mere mention of “pizza!” got them interested in oregano. And dinosaur kalekale!—was chosen by some. Parsley and thyme were more favorites, and young basil plants (indoors in warm sun) were given away only on warm Halloween evenings.


Flowering Plants


trick-or-treaters loved the blue violas

Blue violas grow in pots or in beds, and love cool weather.


I grew violas (smaller cousins of the pansy) in market packs, and cut them into single-plant sections. Our trick-or-treaters loved the idea of using the flowers in a salad. The plants were especially bright and colorful, and grew well in the cool weather. These biennials were planted outdoors in autumn, went dormant or semi-dormant in winter, and re-emerged in spring.

purple crocus

Crocus.

For March and April home and garden shows, I forced hundreds of pots of spring-flowering bulbs. They were potted up in autumn, and rooted during cool to cold weather, blooming in the spring.

So, I bagged up a few bulbs (Crocus, Puschkinia, Muscari, and the more expensive miniature daffodil ‘Tête-à-Tête’) for the more adventurous, or patient, trick-or-treaters. They loved the fact that these perennial bulbs would come back year after year. (Like they did.)

For the last Halloween in Maryland, in an effort to clean up the yard in preparation for selling the house, I gave away potted perennials, such as Hosta, Helleborus (Lenten rose), Sedum, and seedling Japanese maples. I have every reason to believe that some of those plants are still thriving in our trick-or-treaters’ gardens, or maybe in their parent’s gardens.


So, is it time to start a new tradition in your family?


Gardeners out there might give it a go, or maybe you have something else to offer trick-or-treaters in your neighborhood.

Time for me to fire up the old broom and get some flats of violas for the winter garden.


pumpkins and gourds welcome trick-or-treaters


Return to the top

How To Get Amaryllis To Bloom This Winter


updated 1/17/2024


amaryllis

We’ve enjoyed this deep red amaryllis for many years.


While watering the gardens yesterday, I noticed that all the amaryllis pots next to the fence had been overturned by some middle-of-the-night visitors. Most likely raccoons were to blame, because the bird feeder was empty and the bird bath was dirty. Now is a good time to address the question,


“How do I get amaryllis bulbs to bloom again this winter?”


Most amaryllis plants are sold in 6″ or 7″ pots from Thanksgiving through winter. When garden centers and other growers order bulbs, they not only have a huge assortment of colors to choose from, but they also have the option of buying bulbs that are graded by circumference. The larger the bulb, the more flower stalks you can expect from it…and the more it costs. Many customers willingly pay several dollars more for a large bulb, knowing that it could produce 3 or 4 flower stalks instead of 1 or 2. But that’s worth the price, if you ask me.


A Brief History


Carl Linnaeus in 1753 named a flowering bulb probably from South Africa, but maybe from South America, Amaryllis belladonna. This plant was thought to be the South African Cape Belladonna. Elsewhere, the first named Hippeastrum species was dubbed the “Knight’s-star-lily” (origin unknown) by English botanist William Herbert. The confusion begins, although similar characteristics of both genera place them within the family Amaryllidaceae.

Hardy from USDA zones 6 to 8, true Amaryllis species have naturalized along the west coast of the United States, where conditions are similar to their native South Africa. Most of this article refers, however, to the genus Hippeastrum, the popular holiday amaryllis.

Breeding of the now familiar Christmas amaryllis began in 1799, when British watchmaker Arthur Johnson crossed Hippeastrum reginae with H. vittatum, two species collected in South America. By the mid 1800’s, his hybrids started showing up in the United States.

In the early 1800’s, British explorer and botanist Richard Pearce hybridized H. leopoldii and H. pardinum, two species he’d found in the Andes while employed by James Veitch and Sons Nursery. These crosses produced plants with large and mostly symmetrical flowers.

By 1821, Herbert had described 14 species of Hippeastrum and 3 species of Amaryllis in “The Botanical Register”.

Pearce’s Leopoldii hybrids were crossed with the best of Johnson’s Reginae strains into the mid 1800’s, in the Netherlands. These hybrids formed the basis for breeding most of the large-flowered Dutch hybrids available today.

Breeding continued as new species from South America were collected and sent to Europe. Reginae strains hybridized by Jan de Graaff and sons in the mid 1800’s were crossed with several Hippeastrum species and hybrids available in Europe at that time. Meanwhile, the common name “amaryllis” was loosely applied to plants in both the true Amaryllis and the Hippeastrum genera.


You Say Amaryllis, and I Say Hippeastrum


pale yellow amaryllis

A pale yellow amaryllis.


Debate over use of the terms “Amaryllis” and “Hippeastrum” continued for 200 years. It wasn’t until 1987 that the taxonomy finally had been clarified. The 14th International Botanical Congress decided that “Amaryllis” is the correct name for the South African genus, not the South American genus.

Nevertheless, we still call holiday Hippeastrum plants by their common name, amaryllis. There are approximately 90 species of Hippeastrum native to tropical and sub-tropical areas of South America, from Argentina to Mexico and the Caribbean. More than 600 cultivars are available.

In hardiness zones 7b and south, amaryllis (meaning Hippeastrum) bulbs planted below the frost line in well-drained soil probably will perennialize.

Today, bulbs are grown in many countries, including the Netherlands, Israel, Peru, South Africa, India, Australia, and the U.S. New amaryllis cultivars periodically come to the market, adding to the huge variety of colors and forms: white, pink, peach, coral, orange, scarlet red, deep red, yellow, and bicolors. Flowers can be a single row of petals, or double, or triple, and they can be broad-petaled or spidery, rounded or pointed. Both miniatures and full-size plants are available.

Most modern cultivars have ancestry from several species, including H. aulicum, leopoldii, pardinum, puniceum, reginae, and vittatum. We also see hybrids in the species H. papilio and H. cybister.


Pollinating the Flowers


flower parts, stigma, anther

Anthers, and stigma at bottom of photograph.

The photograph shows pollen, in the male anthers, that’s transferred to the female part, the stigma, during pollination. Gardeners not interested in collecting seeds can remove the anthers before they mature and spill their dusty contents on the flowers.

Hobbyists can easily pollinate plants. The pollen and the stigma have to be mature for fertilization to take place. Seeds require many weeks to develop in the pods, and several years to get to flowering size. (***Update***: I’ve had good results when sowing the seeds shallowly as soon as they loosen from the seedpod. 12/2022)

The next generation—seedlings resulting from genetic recombination—will be a mixed bag of pretty, gorgeous, or pretty hum-drum flowers. You could come up with something unique!

Amaryllis plants are propagated not only by seeds but also by tissue culture under laboratory conditions. Tissue culture yields the largest number of plants and they’re identical to the original plant.

Bulblets growing at the base of the bulb can be separated and grown on for a few years before flowering begins. They’re visible when you dig up the bulbs at the end of the growing season. Separate and pot up the large ones, but let the small ones grow attached to the mother bulb for another year or two.

Other methods of propagation, called chipping, notching, and twin-scaling, involve cutting the bulb into smaller pieces. Dusted with fungicide and potted in vermiculite, small bulblets will grow, which later can be separated and grown on.


amaryllis

The first amaryllis to bloom indoors, late winter, 2019.


In the photograph above, notice that this flower has triple the normal number of petals. You might see, also, the absence of anthers and stigmas in the flower. This is common in petal doubling or tripling with many species of flowers. Consequently, these cultivars must be propagated vegetatively since they can’t set seed.


Amaryllis Seedpods


I hand pollinated some of the flowers in winter and harvested seeds about 3 months later.

As the tough, recurving Y-shaped membrane (a light color, in right photo) dries thoroughly, it forces the pod to open, revealing the black seeds. Mother Nature came up with this ingenious process that allows the seeds to dry and to be as separate from each other as possible, aiding dispersal.


What To Do With Your Plants Now


What prompted me to write about amaryllis were the tumbled and torn plants found in the back yard. They can be fixed. Ten pots bloomed from February through May; we enjoyed a succession of flowers for months! New soil will replace tired, old soil, with the neck and shoulders of the bulb remaining above soil level.

potted amaryllis

If your plants have been weakened after wintering indoors, plant them in well-drained composted garden soil for the summer months. Wait for frost-free weather to put them outside. Give them direct sun in the morning up to early afternoon. In hot regions, keep them out of direct sun in the afternoon, although dappled shade at that time is fine.

Don’t plant too deeply; keep the neck of the bulb above ground level. Plants that have been languishing indoors should be moved gradually into more sun, or the tender leaves will suffer sun scald. Even if they do burn, several new stronger leaves will grow. Amaryllis bulbs grown in garden soil usually recover faster than those growing in pots.

If the long strap-like leaves don’t stand upright, you can stake them gently to keep them off the ground. It wouldn’t hurt to sprinkle some Sluggo granules around them because slugs and snails can damage the foliage or the bulb.


Red Blotch

Before planting amaryllis in the ground for the summer, check them for red streaks or splotches. You might have noticed this disease as the flower stems emerged from the bulbs months ago. This condition indicates a fungal disease caused by Stagonophora curtisii. The disease infects bulbs, leaves, and flower stems. Affected cells die, but surrounding tissues continue expanding, causing leaves or the flower stem to bend.

Peel off infected outer bulb scales and leaves. Throw those parts into the trash rather than composting them, as the spores can spread to other bulbous plants. A systemic fungicide might help clear up the disease. Ask your agricultural extension agent for advice.

When summering amaryllis outdoors in the ground, plant with half of the bulb exposed to air. Avoid splashing water near the top of the bulb, where the disease could take hold.

Physical damage also can cause red or reddish-brown areas. Although those areas look diseased, the rest of the plant continues to grow normally. In this case, fungus is not the problem. However, pathogens can gain entry into the host through bruised tissues.


Headings

Page 1: “How do I get the amaryllis bulbs to bloom again this winter?”, A Brief History, You Say Amaryllis, and I Say Hippeastrum, Pollinating the Flowers (Amaryllis Seedpods), and What To Do With Your Plants Now (Red Blotch)

Page 2: As Amaryllis Plants Grow This Summer, The Process (The Growing Cycle Indoors, And Then Outdoors), and Potting Up New Amaryllis Bulbs (Step-By-Step, and Something’s Growing!)

Return to the top


Create a Porch Planter Made for Shade

2018


good spot for a shady porch planter


A Shady Porch Planter


It is hot outside! This week’s temperatures are soaring well above normal. Throw in the (dis)comfort level, and it feels like it’s over 100 degrees out there! I refreshed the bird bath a few minutes ago. Three cardinals and a Carolina wren less than 15 feet away waited for me to leave.

We haven’t had rain for…well, the grass already is brown, and the trees’ leaves are beginning to flag…

We retreat to air-conditioned spaces, emerging in the evening to collect mail, pull some weeds, or feed the birds. A welcoming porch offers shade and a tall pitcher of iced tea shared with a friend. But, for a gardener like me, something is missing from this setting. That something would be plants!

Although a shady porch planter won’t support the blaze of color we see in our flower gardens, there are lots of plants that will grow there. Here in the Carolinas, a 12″ hanging basket filled with a well-tended Boston fern is a classic. It will require daily watering and fertilizing every 2 or 3 weeks. During cooler weather, in spring and fall, it will take some direct sunlight. Sitting on Grandma’s antique fern stand or hanging between posts, the Boston fern is beautiful in its simplicity. There’s something “cool” in that lush greenery, a calm repose…


Boston ferns for porch planter


But If It Goes Too Dry…


If the soil dries, there will be hundreds of little reminders shed from the older fronds. I’m talking about the pinnae, the small leaflets that line the midrib of the fern frond. Pull up the foliage and snip, down to soil level, the older, yellowing fronds. A certain amount of this shedding is expected, due to heavy shade on the lower fronds.

Soil that runs too dry will result in accelerated loss of foliage. And the edges of tender new fronds will turn crispy brown. I’ve seen ferns that looked dead from lack of water. But with a severe trim, down to soil level, and improved watering practices, the plants can recover. In a week or so, you’ll notice new growth emerging from the crown of the plant if the root system hasn’t been entirely killed off.

Plastic hanging baskets often have a 1″ deep reservoir in the bottom of the pot. Water your fern heavily enough to fill the reservoir. The plant will soon soak up that excess, so usually there is no need to empty it. I don’t recommend this for all plants, however–just the thirsty ones.

Under a porch that gets some direct sun, look for a fern variety called ‘Kimberly Queen’. Its habit is more upright, so it looks best sitting on the porch or on a low plant stand. Where conditions are too sunny for a Boston fern, ‘Kimberly Queen’ should do well. 


Following the Path of Least Resistance


One note about all potted plants: if water gushes out the holes immediately after watering, there’s empty space between the outside of the root ball and the inside of the pot. This space will need to be filled with potting soil, using a tool of some sort. Firm the soil all around, filling in the gaps, or the water will find that one air channel that remains unfilled. This will cause some or much of the root system to remain dry.

Why this happens:

  • letting the soil go too dry, causing the soil mass to shrink.
  • bumpy transportation, shifting loose soil around the pot, causing air pockets to form.
  • heavy roots or fern rhizomes (underground stems) growing along the sides of the root ball or coiled around the bottom of the pot (Bear’s-foot fern rhizomes, or the massive root systems of asparagus fern and spider plant). Strong roots can raise the whole plant higher in the pot. Most pots taper (become narrower) toward the bottom of the pot, so a gap will open as the root ball rises up.
  • loosely-packed soil. Firm the soil–not too hard and not too soft. Avoid piling new soil on top of the root ball. You might have to remove the plant in order to add soil under the root ball.


Ferns and Friends—Made for Shade


ferns and a dinosaur


I love ferns. A combination of different species planted together in a rustic planter, an aged clay pot, or a hollowed-out birch log speaks to my appreciation of the Permian aesthetic. Add a piece of driftwood, live moss, and some rocks collected from who-knows-where, and you’ve got a simple prehistoric scene straight out of Jurassic Park. Maybe you could borrow one of the kids’ toy dinosaurs…

bird bath mini garden

Miniature garden in a cracked birdbath.

Another “pot” that makes a cool miniature garden is a leaky birdbath. I turned a cracked granite birdbath into a tiny campsite, complete with shelter, a forest of prostrate rosemary, a firepit, and pebble pathways between clipped thyme plants (photo, right). Irish and Scottish mosses (Sagina subulata) served as the “lawn”, with driftwood logs for seating. (This one grew in direct sun most of the day.)

Look around; there might be something in the basement, at Good Will, or at a Habitat for Humanity Restore that can be transformed into something special.

Keep the fern arrangement in the shade. Two hours of direct sunlight on a hot summer day might prove fatal to these delicate denizens of the underbrush. And even though ferns like moist conditions, planting them in pots without drainage holes can result in a smelly anaerobic bog, suffocating their roots.

Avoid placing your porch planter in a windy location; ferns prefer the humidity and stillness of calm, close quarters.


So Many Choices

There are many ferns to choose from:

  • maidenhair ferns (Adiantum),
  • variegated brake ferns (Pteris),
  • lemon button fern and dwarf Boston ferns (Nephrolepis),
  • rabbit’s-foot fern (Davallia), with its fuzzy rhizomes,
  • the less fern-like bird’s nest fern (Asplenium) and Hart’s tongue fern (Phyllitis, a perennial),
  • fern allies, such as Selaginella, available in several colors and forms.

Among their numerous cultivars are smaller specimens, growing up to 12″ or 14″ tall, easily accommodated indoors when autumn approaches. Indoors, give them cool morning sun or very bright indirect light. I don’t recommend “low light” for anything, not even ferns. Stronger light makes stronger tissues, which will better tolerate indoor conditions.


Small Scale Gardening In a Porch Planter


With the popularity of miniature gardens, or fairy gardens, tiny 2″ pots of young plants are popping up all over the gardening world. You can find young ferns in a wide variety of foliage colors and textures.

Garden centers also sell assortments of succulents, flowering plants, houseplants, and terrarium plants, but not all are suitable for a shady porch planter or indirect light indoors. And get some information on the growth habits of the plants. Different varieties of ferns might grow only 2″ tall or over 4 feet tall! I grew the little 2″ fern 30 years ago; it was called New Zealand something…I’ll have to see if I can find it again. So cute!

miniature garden

For many years, I grew tiny plants under lights, including miniature strawberry begonia (Saxifraga cuscutaeformis), miniature African violets and their 1″ tall cousin Sinningia pusilla. And there was SonerilaPilea species, and dwarf Peperomia, many of which are available from specialty growers. There are miniature philodendrons, and I once had a dwarf Caladium that grew only 5″ or 6″ tall.

These little plants can be tucked in at the base of a hollowed “tree stump”, emerging from a patch of emerald green moss, or planted next to a “boulder”. Go ahead; make a scene! A tiny slice of the natural world…as mesmerizing as a well-appointed aquarium…   …   …


Little Plants for Sun

Some of my customers in Maryland were serious small-scale train enthusiasts. They looked for little plants to spruce up their outdoor displays. I turned twiggy forms of French thyme, Japanese maples, dwarf rosemary ‘Blue Boy’, and Juniper seedlings into bonsai. Their natural forms fit right into the smaller dimensions of their gardens. Miniature purple basil was trained into a tiny topiary, for one season.

And then there are the miniature evergreens, of course. That’s another post. But you get the idea. Check out all the departments in well-stocked garden centers; there are all sorts of small-scale plants that can be used in porch planters.


aerial view miniature garden

Miniature garden with dwarf evergreens.

Return to the top

Headings

Page 1: A Shady Porch Planter, But If It Goes Too Dry…, Following the Path of Least Resistance, Ferns and Friends—Made for Shade (So Many Choices), and Small Scale Gardening In a Porch Planter (Little Plants for Sun)

Page 2: Perennials for Your Shady Porch Planter (Some Possibilities), Color For a Porch Planter, Getting the Whole Picture, Year-Round Gardening In a Porch Planter (Warm Weather, Cool Weather, Evergreens), and Ready-Made or DIY Porch Planter?

The Fiddle-Leaf Fig: Ficus Lyrata


“What’s Wrong With My Fiddle-Leaf Fig?”


There are few houseplants that exemplify architectural presence to the degree that Ficus lyrata does. Turn the pages in any home decor magazine or visit an online furniture showroom and you’ll see a statuesque fiddle-leaf fig in the corner of a perfectly-appointed living room. “That’s what mine used to look like,” you’re thinking, as you lament the pitiable specimen clinging to life in the spare bedroom.

Large plants can cost hundreds of dollars. Even a small bushy fiddle-leaf fig at the garden center can run $40.00 or more. It’s worthwhile to get this one right. The following suggestions might help.


Light


fiddle-leaf fig, Ficus lyrata

A fiddle-leaf fig grown as a standard.


Indoors, the fiddle-leaf fig prefers 2 or 3 hours of direct sunlight in the morning or early afternoon, and bright indirect light the rest of the day. During the summer months, keep the plant away from hot sun; it needs adequate air circulation between the plant and the window. Leaves can burn if they’re too close to the glass.

Skylights, light-colored floors and walls, and large windows that expose the plant to very bright indirect light for most of the day might provide enough light for the fig to remain reasonably healthy. But growth will be stronger in partial sun.

During the cooler months of the year, figs welcome a few more hours of direct sunlight.


Blame It On Hormones

The segment of a young stem (the internode) between leaf attachments (the nodes) will lengthen in response to lower light levels. Hormones cause cells in the shady side of the stem to elongate. That’s why the stem turns toward the light (phototropism).

A fully shaded stem will stretch as the plant searches for a stronger source of light. This stretch will be noticeable in the softer tip growth; woody stems won’t elongate.

If the leaves were stacked closely together at one point, and now they’re spaced farther apart along the stem, the plant is not getting as much light as it was before. Adequate sunlight keeps a plant more compact by preventing internode stretch.

Don’t place the plant in low light or in the corners of a room despite what you see in those magazines or in other media. If the fig tree doesn’t receive adequate light, it will begin to decline. One of the first signs that the plant is in decline is loss of leaves. And fig trees are notorious for signaling distress!


Watering the Fiddle-Leaf Fig


watering can

When the top 2″ or 3″ of soil in a large pot feels dry to the touch, it might be time to water. Don’t just feel the surface of the soil, though. You must feel the soil well below the surface. Although it feels dry on the top of the root ball, the soil could be moist enough 6″ down.

A narrow unfinished wooden dowel inserted most of the way into the soil will indicate the need for water if it comes up dry. Let it sit in place for 15-20 minutes before removing it.

Most moisture meters I’ve tested did not truly measure the moisture in the soil. The expensive models should be more accurate. Or lift the pot. After a while, you get a “feel” for how heavy a pot of moist soil weighs.

A full, leafy plant in a small pot dries faster than an overpotted sparsely-leaved plant. Don’t allow the entire root ball to go completely dry, but don’t keep it wet all the time either. If in doubt, don’t water, especially in cloudy weather. If there’s no sign of wilt, the fiddle-leaf fig can go another day or two without watering.

Never let the plant sit in a saucer of water for more than 20 minutes. Remove any water that is not absorbed through the drainage holes in that period of time. The soil in a tall pot will absorb water by capillarity up to a certain point. At that level, the force of gravity overpowers capillary action, so you will need to apply more water to the dry soil near the top.

A fig tree that is often overwatered or allowed to sit in water too long will suffer root rot and might not recover. Fungal infections from overwatering cause brown patches in older leaves. Eventually, all the leaves could fall off the tree.

Use water that is warmer than room temperature. In winter, lukewarm water for tropical plants keeps them more comfortable. Here, I keep indoor air temperatures between 60° and 68°F in winter. Water, tested with an aquarium thermometer, should read around 85° to 90° for plants such as figs, pothos, philodendron, Chinese evergreen, basil, alocasia, and African violet.
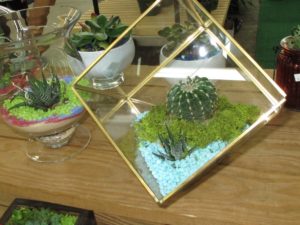
Water well enough to moisten the entire root ball. Not watering thoroughly results in dry soil lower in the pot, and roots there will die off. Applying small amounts of water a couple of times a week is not a good practice. Water thoroughly; then let the soil dry.


A Hasty Exit

Sometimes, water exits the drainage holes immediately after watering. In this case, the soil mass might have shrunk, which happens when soil has thoroughly dried out. Also, during transportation, the root ball might have shifted in the pot.

A gap has opened up between the inside of the pot and the outside of the root ball. Water finds the path of least resistance, following that air space to the holes at the bottom of the pot. But most of the soil stays dry. Fill the space with potting soil, using a dowel to firm in the new soil. Then the water will more slowly percolate through the root ball.


Humidity


sprayer


Fig trees, like many tropical plants, benefit from additional humidity when the air is dry. Simply grouping plants together will raise humidity in their vicinity, and all will benefit.

Using large saucers filled with pebbles and water will help raise humidity. The bottom of the pot should always be above the water level in the saucer. This arrangement is easier to maintain for smaller pots. If your home is especially dry, consider using a humidifier.

The positive effects of misting last only as long as there is a film of water on the leaves. And that’s only a few minutes. When water evaporates, a small amount of white mineral residue from the water persists on the leaf. It will build up over time but can be removed by wiping the leaves with a solution of horticultural oil on a soft cloth. Don’t use vegetable oil or mayonnaise. Look for horticultural oil. It’s a good idea to periodically wash the foliage to remove dust and grime.

Keeping foliage damp for long periods of time can initiate bacterial infections. Both young and older leaves can develop brown spots and yellow patches. These infected leaves will fall off.

Don’t place a fiddle-leaf fig where HVAC registers blow cold or hot dry air toward the foliage. Tender new leaves will turn brown on the edges. Louvered registers usually can be closed or use a deflector to change the direction of the air flow.

By the way, it’s normal for the fig tree to drop an older leaf or two now and then. As long as there is a net gain of healthy foliage, it’s probably not a concern.


Temperature  


Avoid placing fiddle-leaf figs in cold drafts. These plants, members of the mulberry family (Moraceae), originated in warm, humid areas of western Africa. They appreciate temperatures that are at least 63° to 65° at night and 68° to 70° in the daytime. But keep in mind that the higher the temperature, the lower the relative humidity.

If you keep your house in the mid 70’s in the winter, and are not uncomfortable dropping the temperature a few degrees, the higher relative humidity will benefit both you and your plants.


Fertilization


Plants purchased from garden centers are usually fertilized on a schedule, so ask a salesperson if your plant is due for fertilization. For the fiddle-leaf fig, and for all plants, it’s better to underfertilize than to overfertilize.

Too much fertilizer will burn the roots and could kill the plant. It will not make the plant grow faster! If you accidentally gave the plant too much fertilizer, flush a few to several gallons of clear water through the root system to flush out the excess. Use the fertile drained water in the garden rather than letting it go down the drain.

Use balanced fertilizers formulated for houseplants, such as 12-12-12 or 20-20-20, every 5 or 6 weeks during the growing season, usually March through October in the northern hemisphere. Follow dilution rates indicated on the package. Plants growing in less than ideal conditions, though, should be fertilized less often or at more diluted rates.

If the plant is in poor health, fertilize once at one-third the recommended rate, and try to improve the growing conditions. Wait to see how the plant responds before resuming the regular schedule. Fertilizing a plant that doesn’t need it or one that is frail (from something other than lack of nutrients) will exacerbate any problems it already has.

You won’t have to fertilize as often if you use slow-release (or timed-release) products. They simplify our gardening chores and are a great convenience. The prills are used up faster at warm temperatures and in moist conditions, such as when the plant is placed outdoors in the summer. For example, a timed-release product that says “6 months” on the label might need to be reapplied in 3-4 months at 85°.


Repotting  


When the roots are very crowded in the pot, it might be time to repot your plant. Consider doing this task in mid-spring to early summer. This will give your plant enough time to grow a strong root system before winter comes.

Don’t wait until autumn to do this, because shorter daylength and cooler indoor temperatures slow down plant processes. The fig will grow new roots very slowly, if at all, in average indoor conditions. That’s when a plant can suffer root rot. New soil that has no roots growing in it stays wet for a long period of time, which can damage nearby roots.

Choose a nursery (or ordinary plastic) pot that’s only 1-2″ larger in diameter. Score the outside of the root ball in several places with a knife. Or tease out roots from the surface of the root ball. This slight injury to the roots stimulates rapid re-rooting.

Don’t put a small plant into a huge pot thinking this will make it grow faster. It won’t.

All new soil goes below and around the original root ball, never on top of it. Heavily composted potting soil should have coarse sand and pine fines mixed in for better drainage. Firm it in well, filling all gaps between the root ball and the pot. For residential purposes, a large 7′ or 8′ tall plant can stay in a 14″ to 18″ pot indefinitely.

Since nutrition will be provided by fertilizer, there is no need to repot more often than every year or two while the plant is young. Recently repotted plants will not need fertilizer for at least 6 to 8 weeks, or until new soil has filled with roots.

Don’t worry if your fig is getting potbound. It’s easier to manage a fiddle-leaf fig in a somewhat tight pot. And it runs a lower risk of damage from overwatering.


Headings

Page 1: “What’s Wrong With My Fiddle-Leaf Fig?”, Light (Blame It On Hormones), Watering the Fiddle-Leaf Fig (A Hasty Exit), Humidity, Temperature, Fertilization, and Repotting

Page 2: But If You Want a Nicer Pot (Double-Potting), The Finishing Touches, Pruning the Fiddle-Leaf Fig (When To Prune), Outdoor Living (Before Moving Back Indoors), Insects and Mites, and Picture Perfect

Return to the top 

How To Grow Succulents To Perfection!


Speaking Of Succulents


Earlier today, I gave a presentation on succulents at the annual meeting for the Charlotte (NC) Council of Garden Clubs. We spent a few hours at Southern Gourmet in Matthews, and, with their help, and someone else’s laptop, I was able to get through all the pictures. Thank you, CCGC, for the invitation.


succulents

Oscularia deltoides in bloom.


What Is A Succulent?


Succulents, by definition, are plants that store water in their leaves, stems, and roots. They evolved in arid regions (primarily in the Americas, Africa, and Australia), and can endure intense sunlight and prolonged drought and heat. By providing favorable conditions, we can grow colorful succulents in sunny windows. Over the past several years, they have been enjoying a resurgence in popularity.

Decades ago, I purchased young bare-root succulents from a California wholesaler for my horticultural business. Unwrapping each little parcel was like waking up on Christmas morning as a child. These were plants I’d never seen before—Titanopsis, Pleiospilos, Graptopetalum, Lapidaria—and were destined for sale at the Westover Flea Market when I lived in nearby Morgantown, West Virginia.

Although there are many species of hardy succulents in the Sedum and Sempervivum genera, this article addresses primarily the tender succulents, which require temperatures above freezing.


Plenty Of Light For Succulents


Haworthia cooperi, succulent with windowtip leaves.

Haworthia cooperi showing leaftip windows. Light refracts inside the leaf, even if the plant is almost buried in desert sand.

Adequate light is one of those conditions that must be met for these plants to show good color and characteristic form. Some succulents, such as Haworthia, Gasteria, Aloe, Epiphyllum, and Christmas cacti, grow well with at least 4 hours of direct sun, and very bright indirect light the rest of the day.

Crassula, Echeveria, Euphorbia, and Sedum appreciate even more light, at least 5 or 6 hours.

Cacti (succulents with spines or thorns), living stones, and Sempervivum (Hens and Chicks) need abundant sunshine, at least 6, but preferably 8, hours per day.

Direct sunlight keeps the plants colorful and compact. If the plants receive enough sunlight most of the time, they will tolerate the occasional stretch of cloudy weather without deteriorating.

Artificial light helps during the short days of winter or when the sun refuses to shine. When necessary, I use 2-tube 4′ long shop lights with “daylight” LED or fluorescent tubes. Be sure to place the plants within a few inches of the tubes for at least 16 hours per day.


When Light Is Insufficient


How do you know when your succulents are not receiving enough light? Plants that grow in the shape of a rosette start growing faster (photo above, left). The center leaves outgrow the outline of the plant, stretching toward the light. And the new part of the stem grows thinner. That happens when winter sunlight is scarce, as in this Graptopetalum pentandrum ‘Superbum’ (photo above, right).

In poor light, strong colors begin to pale, and purple, red, or orange highlights fade. New leaves become thinner. The internodes (stem segments between the nodes, where leaves are attached) on younger parts of the plant will lengthen (photos, above); this appearance is diagnostic for low light levels.

There’s a huge difference between “direct sunlight” and “bright indirect light”. A few hours of indirect light offers very little benefit to succulents; they need the strong sun. And, without adequate light, succulents are more susceptible to damage from overwatering.


More Sun For Cacti


Cacti also suffer in inadequate sunlight. The spines on new growth grow farther apart.

In upright species, the stem becomes narrower relative to the older part that was growing in good sun. If you see that the top half of a cactus stem is thinner than the bottom half, and the spines are not as closely clustered, the plant is not getting as much sun as it was before. Solution? More sun!

The colorful tops of grafted cacti (photo, above right) lack chlorophyll, and depend on the green stock plant for sustenance. Also, the graft is more sensitive to harsh sun and should be placed in cooler morning sun.


cacti are succulents too

Variability among cacti.


Light And Water


Light and water are inextricably linked in plants. When the sun doesn’t shine, photosynthesis, transpiration, and respiration slow down, and soil moisture sits unused around the root system. Play it safe and water succulents only on sunny mornings and when the forecast calls for sunny weather for the next couple of days.

Under normal conditions, allow the soil to dry completely before watering again. Although the soil feels dry on the surface, there’s usually some moisture in the lower half of the root ball.


glass, cactus

Glass container with two open sides.


These plants never need misting. Water that sits on the foliage can initiate rot, so shake it off or use a towel to dry it. Never let succulents sit in a saucer of water.

Although glass terrariums are very popular, I do not recommend succulents for terrariums. Unless the glass container has large openings for heat to escape (photo, above), succulents in direct sun will fry in terrariums! They also rot in high humidity or if there’s the slightest amount of excess water in the soil.


Pots


shallow bowls for succulents

Succulents and shallow bowls (Pike’s Nurseries, Matthews NC).


Succulents prefer to remain quite potbound, where roots are tightly packed in the pot. Plants in oversized pots are more likely to be damaged by overwatering simply because the greater soil volume holds more water for a longer period of time.

Shallow glazed containers, such as decorative bowls and ceramic bonsai trays, make delightful homes for succulent combinations (photo, below). Include rocks, gravel, and driftwood in these dish gardens to create a natural-looking scene from nature.
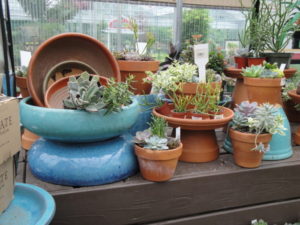
 

succulents in glazed bonsai tray

Small-growing succulents in a bonsai tray.


Tall glazed pots hold a reservoir of water that probably won’t be used by the plant. More appropriate for succulents, terra cotta (Italian for “baked earth”) pots are porous and help the soil dry faster when water vapor passes through the sides.

Repotting, if needed, should be done early in the growing season so a strong root system can develop before the days begin to shorten in autumn. Growth slows during those months. Always use pots that have drainage holes.


Potting Soil


Fenestraria succulents

Fenestraria species showing leaftip windows.

The soil used for succulents should be gritty for quick drainage. If needed, amend regular potting soil with perlite, coarse sand, horticultural grit, pine fines, charcoal, expanded rock, or PermaTill. “Cactus and Succulent” soil is available, although quality varies widely among brands.

When repotting, all new soil goes below and around the sides of the root ball, never on top of it. Planting too low in the soil results in rotten leaves and stems.

In their natural environment, certain succulents, such as Haworthia, Aloe, and Gasteria, have contractile roots. If blowing sand exposes the crown or the top of the root system, the roots are able to “pull” the plant lower into the soil. Amazing!


Living Stones

The ground-hugging living stones, or split-rock, succulents (photos, below) are extremely sensitive to overwatering. Use small clay pots and very gritty, gravelly soil. There should be only a very small percentage of organic matter in the soil.

These plants are well-camouflaged in their native southern Africa, almost indiscernible from the rocks around them. Some of the genera available for purchase include Lithops, Lapidaria, Gibbaeum, and Conophytum.


Fertilizer


Succulents grow slowly, so fertilize only 2 or 3 times during the growing season, from March through October.

Use products formulated for indoor houseplants, with small numbers on the package, such as 8-8-8 or 10-10-10. Those three numbers represent the amounts of nitrogen, phosphorus (phosphate), and potassium (potash) in the product. All products list these three primary macronutrients on the label in that order: N-P-K.

It’s better to underfertilize than to overfertilize, so use a more diluted rate than the recommendation on the label. For succulents, dilute it to half-strength.

Lithops and other living stones are extremely slow-growing, so they’re hardly ever fertilized. Use a very dilute higher phosphorus fertilizer only when the plant shows new growth.


Sempervivum (hens and chicks) can be tucked between rocks, and they’re hardy perennials.


Outdoors For The Summer


succulents in my sunny window

Light blue Echeveria in bloom.

Succulents summering outdoors benefit from higher light levels and often take on vibrant coloration. Jade plants (Crassula) develop red margins on their leaves in brighter sun, and Echeveria becomes even more colorful.

Monitor closely during periods of high heat. Above 85° F, provide light shade during the hot afternoon hours. Potted plants are more susceptible to stress from extreme conditions than those planted in the ground.

Transition your plants to outdoor conditions gradually. Give them just a couple of hours of early morning sun or dappled shade for the first few days. A plant that was growing indoors all winter will probably suffer sun scald if immediately placed outdoors in full sun. This hardening off process gives plant tissues time to toughen up so they can withstand more intense summer sun. Sunlight causes the cuticle, a protective waxy layer on the leaf surface, to thicken.

This beautiful variegated succulent, called Kalanchoe ‘Fantastic’, has a variably feathered band of cream between the pink edge and the greenish-gray base of the leaf (photo, below). I’ve had this plant for over a decade, and protect it from dropping temperatures in autumn by moving it indoors well before frost. Stronger sun and more stressful conditions might cause it to turn redder in color. It recovers, though, in less extreme conditions.


kalanchoe thyrsiflora, a succulent called "flap jack"

Kalanchoe thyrsiflora ‘Fantastic’, growing outdoors for the summer.


Protect your plants from excessive moisture. After receiving some rain, place the dampened succulents under cover. Check to make sure the drainage hole allows water to drain freely.
 

And Back Inside In Autumn

As autumn temperatures fall into the high 40’s at night, it’s time to bring your plants indoors for the winter. The more sensitive types, including Echeveria and Graptopetalum, come indoors before the thermometer drops below 55°. Prolonged exposure to cold, wet conditions will cause succulents to deteriorate, so check the forecast!


Pruning Succulents


joyce chen scissors

Joyce Chen scissors.

If your plants are growing too large and cannot be accommodated in the space available, consider cutting them back. Stretched-out plants benefit from selective pruning in early summer. New growth will soon emerge.
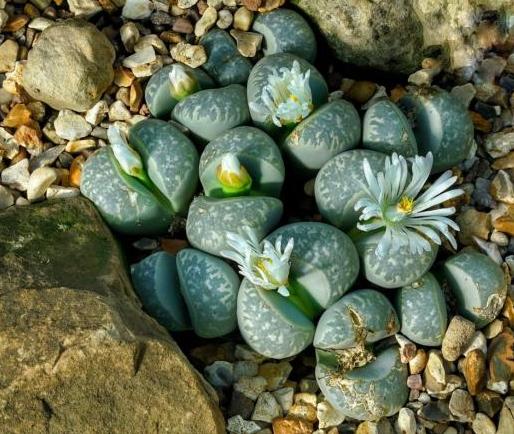
Cacti can be temperamental, so be careful if you choose to lop off the tops. For cacti, this is best done in late spring/early summer for a full season of recuperation.  Stronger light available in the summer causes the plant to respond with more compact growth. They might grow a few new stems below the cut.
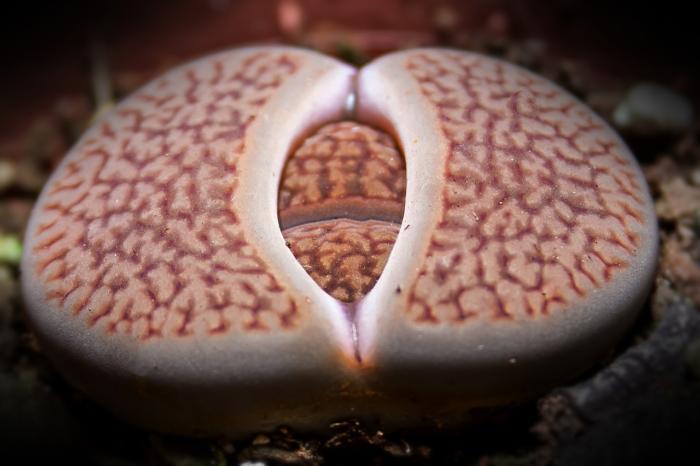
During transpiration, water is “pulled” through the plant’s vascular system from the roots, to the stems, and then through the leaves and out to the atmosphere. This process is the primary manner in which moisture is removed from the soil. Therefore, avoid extensive pruning if any plant was recently watered. Because there’s less foliage on the plant after pruning, the soil stays moist for a longer period of time. Wait a few days, or until the soil is almost dry, before pruning.


Headings

Page 1: Speaking Of Succulents, What Is A Succulent?, Plenty Of Light For Succulents (When Light Is Insufficient), More Sun For Cacti, Light And Water, Pots, Potting Soil (Living Stones), Fertilizer, Outdoors For The Summer (And Back Inside In Autumn), Pruning Succulents

Page 2: Propagation Of Succulents (Rooting Cuttings, Stem Cuttings, Leaf Cuttings, Division, Seed), Root Rot And Insects (Root Or Stem Rot, Insects and Mites), Flowers, Time To Grow That Collection!

Return to the top