Tag Archive | watering plants

Rocks For Drainage In Pots: Do They Really Help?


Should We Add Rocks For Drainage?


Rocks for drainage?


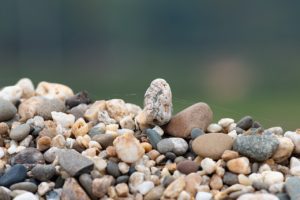
This issue of adding rocks or gravel to a pot for better drainage has been debated for generations by amateur as well as professional gardeners. Gardening programs from decades ago recommended adding a few inches of gravel or broken clay pottery to the bottom of a pot before filling with potting soil.

That method has been put to the test and soundly debunked. It doesn’t work. In fact, it can retain even more water close to the plant’s roots!

Many gardeners are eager to start filling their patio pots with flowers and herbs. Or perhaps vegetable gardening in containers is on the agenda. For some, it has been a long, cold winter, and this activity signals the beginning of a new growing season. But, before buying that big bag of gravel for your pots, look over this information and see if you might consider doing things differently.


Ingredients In Potting Soil


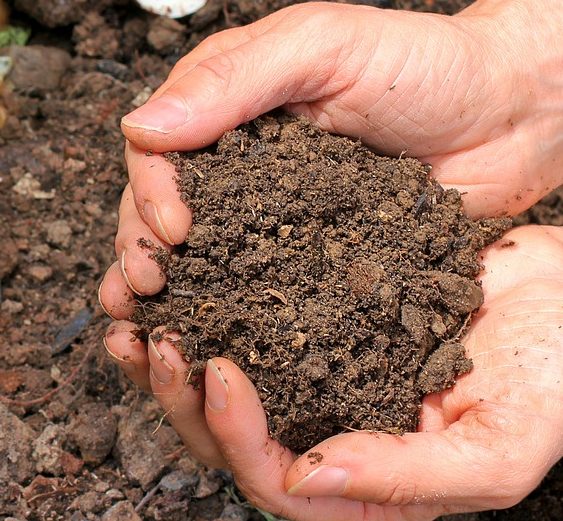
Potting soils are composed of a few or several ingredients in various proportions. Certain components absorb and retain moisture around plant roots while others help the soil drain faster. Some materials do both, depending on how finely they were milled.

This article describes how components behave in potting soil, and how gravity and other forces exert their influence on drainage and water retention. I’ll also suggest why it’s better to exclude rocks for drainage in pots.

Here are some of the ingredients commonly found in potting soils, in addition to water and air:


Organic materials, which help retain water:

  • peat moss, which holds water between its fibers
  • coconut coir, chopped into fine particles (for water retention) or left in longer fibers (more aeration)
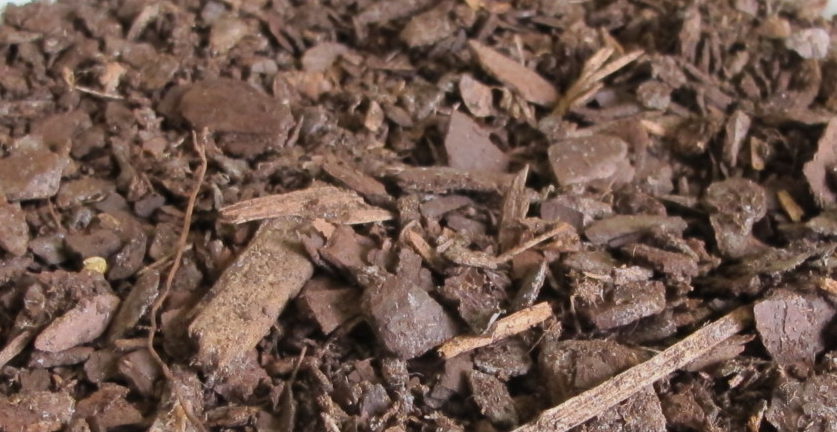
  • pine fines, which decompose quite slowly; most often used to facilitate drainage in potting soil and in gardens, but finely milled pine fines hold water
  • compost, a nutrient-rich material
  • aged manure, composted to kill pathogens


Potting soils might contain other types of materials, including ground shellfish, kelp, alfalfa meal, rice hulls, sawdust, charcoal, blood meal, bone meal, earthworm castings, and bat guano. Some manufacturers add various species of beneficial microbes.

Although not organic matter, fine clay holds water between its particles. Most potting soils contain no soil and are, in fact, soilless. A few include loam in the mix.

“Sinking Soil Syndrome”

You might have noticed the surface of the soil dropping lower in an old potted houseplant. The soil probably isn’t eroding through the drainage hole in the bottom of the pot, so where is it going?

Organic matter in the soil decomposes. As it oxidizes, and gets “used up”, its volume reduces considerably. Over time, you’ve seen the soil level dropping an inch or two, maybe more. On the contrary, sand and other gritty materials hold their volume.

The remedy for this sinking soil syndrome is to take the plant out of the pot and to refresh the potting soil. Pack new soil firmly around the roots to prevent settling. Don’t cover the stems or the crown of the plant with soil—just the roots. After that, the plant should be fine for another few years.
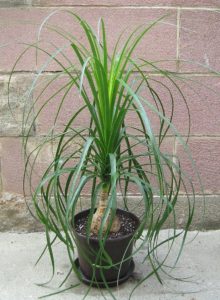
 

Elefantenfuß (Beaucarnea recurvata)

Beaucarnea recurvata, ponytail palm.


Several years ago, I was about to transplant a severely potbound ponytail palm (like the one in photo, above) into a larger clay pot. That plant came with me from Maryland and had been in its 4½” pot for close to a decade. It’s a very durable plant!

After removing it from the plastic pot, all that remained under the trunk were the roots, perlite, and sand clinging to the roots. It looked like a wire sculpture—a tracery of root and grit and mostly air taking the shape of the pot, but no peat moss or other organic matter. It transplanted successfully, and now sits on the back deck in mild weather.

Reusing Potting Soil

Many customers have asked about potting new plants into potting soil that has been used before. If there is still a substantial organic component and the soil has good tilth, then it can be used again. But, first, fluff up the soil and supplement with compost, potting soil, or some of the other amendments.

Rather than risk infecting new plants, toss old soil that held diseased plants into an active compost pile or the woods. Plants known to be vulnerable to soil-borne diseases (basil, in particular) are best planted in fresh potting soil and a thoroughly cleaned pot. When I lost an heirloom tomato to a fungal disease a few years ago, I removed the plant and the top layer of soil. After adding fresh potting soil, I planted a disease-resistant tomato, which grew fine for the rest of the season.


Inorganic materials, which increase drainage:

  • perlite, a heat-expanded mineral, those little white particles
  • expanded rock, such as PermaTill, another heat-expanded mineral
  • horticultural grit
  • vermiculite, not used as often today because it can compress and lose its drainage capacity
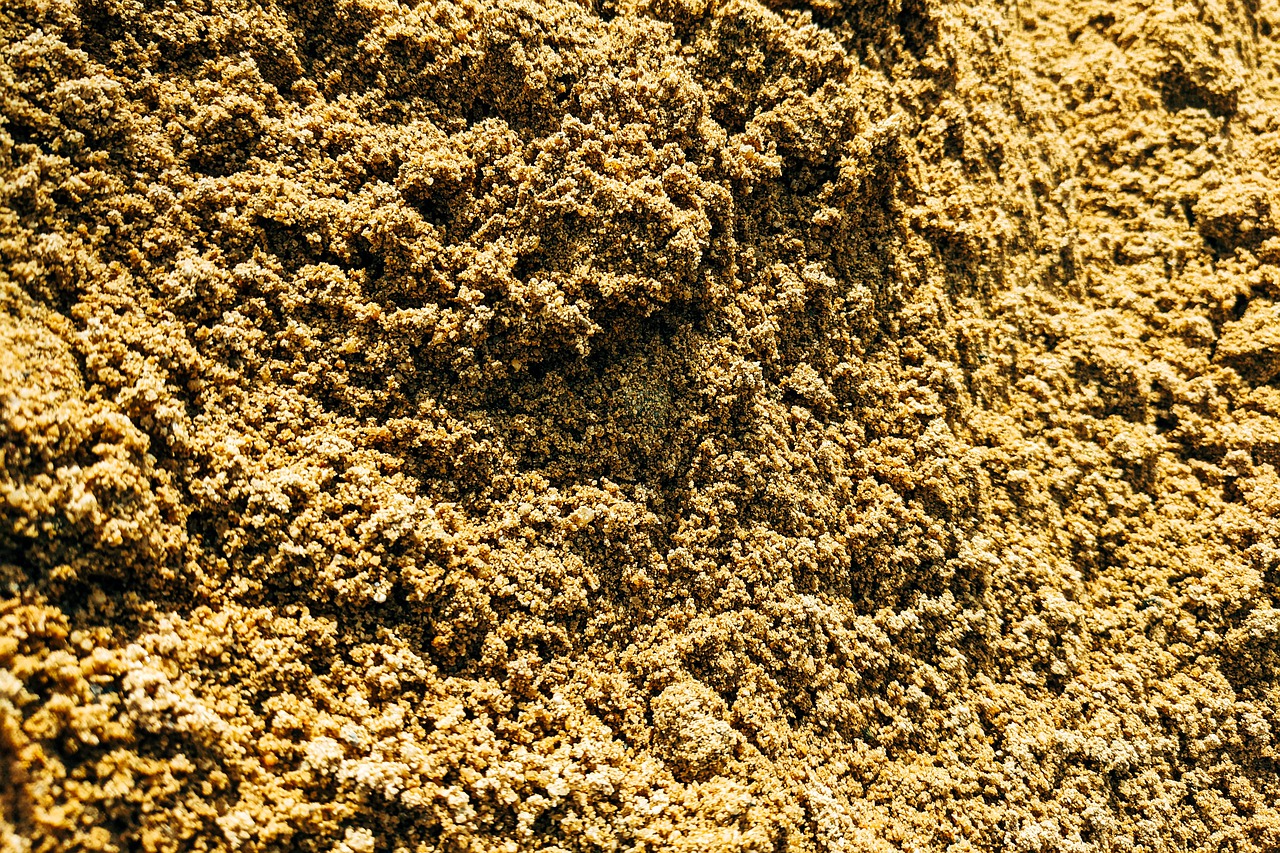
  • coarse or sharp sand and gravel—angular-edged particles, as opposed to rounded particles, can help drainage if they aren’t too small


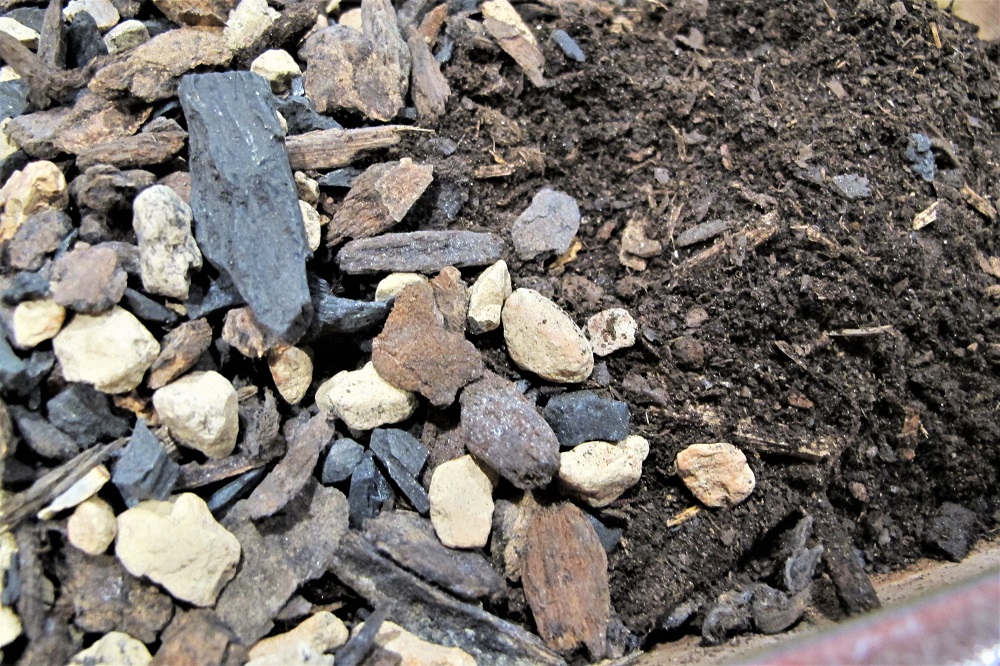
Chunky expanded clay and rock, often found in succulent and orchid mixes (photo, above), provide fast drainage and excellent air circulation around the roots.

Qualities such as tilth, water retention, nutrient capacity, and aeration of the soil are determined by the particular combination of materials and the sizes of their particles. Larger particles tend to facilitate aeration and drainage, while tiny particles (especially clay soil) retain water in the tight spaces between them.


Air Pore Space and Gravity


Air pore spaces occupy the voids between soil particles when they’re not taken up by water. Water flows through the soil profile, following the force of gravity. As water drains away and as the roots absorb it, air infiltrates the medium, providing oxygen for the roots. Plant cells use oxygen in respiration, as they oxidize the products of photosynthesis (glucose) and expel carbon dioxide as a waste product.

“Wait, what?” Yes, plants give off carbon dioxide during respiration. The net effect in each 24-hour period, however, is more oxygen given off during photosynthesis than is consumed during respiration. This process creates energy needed by plants to make new cells and to carry out hundreds of cellular activities.
wilt, marjoram 'Compactum'

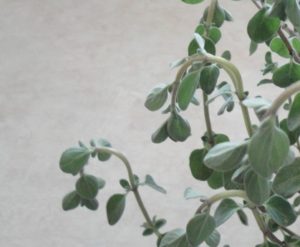
Wilted marjoram ‘Compactum’.

Plants continually grow tiny new root hairs right behind the expanding root tips. Oxygen is critical to respiration and, therefore, to new root growth. These short-lived root hairs do most or all of the water absorption and interact with beneficial fungal mycorrhizae in almost all species of plants.

Brassicas (broccoli, cabbage, kale, etc.) do not participate in this mycorrhizal/root relationship. A few other groups of plants (Ericaceous plants, orchids, sedges, spinach, and beets) have rare forms of mycorrhizae colonizing in or around their roots.

Saturated soil kills root hairs. If this condition persists, the roots themselves will die and not regrow. If roots and root hairs can’t supply water to the leaves, the foliage wilts. The plant’s wilted appearance looks the same as when the plant has been deprived of water. Either overwatering or underwatering prevents water from reaching the leaves once the roots have been suffocated or dehydrated.


Feel the Soil

An extended period of wilt and wet soil is a common reason for plant failure. Even if the soil surface feels dry, there’s usually adequate moisture deeper into the pot. That’s why we recommend feeling the soil an inch or two into the pot.

Soil texture, pot size, sunlight, temperature, the plant’s leaf surface area, and, of course, frequency of watering influence how quickly potting soil drains and dries.


Capillarity

The force that works in opposition to gravity is capillary action. Water drains between soil particles, thanks to gravity, allowing most of the excess to pass through the holes in the bottom of the pot. But water also can move upward or sideways in the pot due to capillary action.

Capillarity is part cohesion and part adhesion, two kinds of forces between molecules. Cohesion is the attraction of water molecules to each other. Adhesion is the attraction of water molecules to other substances, such as particles of potting soil or the xylem tubes in a plant’s vascular system. In capillary attraction, adhesion is a stronger force than cohesion, so water molecules will stick to and be drawn between particles or along the inside surfaces of xylem.

As water molecules on the soil surface evaporate, they’re replaced by water molecules below them because of capillarity.

So, there’s a constant battle waged between gravity and capillarity. Water moves toward the bottom of the pot, but is limited by capillarity, which pulls it upward. What does this have to do with using rocks for drainage in a pot? I’ll explain in a moment. But first…

A Simple Experiment

Here’s an experiment that illustrates these points. Because organic soils often don’t contain wetting agents, which help the soil absorb water more readily, look for fresh potting soil that is not certified organic. Fill a short pot and a tall pot with dry or barely damp potting soil, using no rocks. Pack it in evenly and moderately firmly.

Now, place each pot in a shallow bowl of warm water. Why warm? Because soil absorbs warm water faster than it absorbs cold water. If the water disappears into the soil, add more to the bowl.

Wait an hour or so. In the short pot, you’ll see moisture on the surface. It might take longer for the larger pot to absorb water. If water remains in the bowl without moving all the way to the surface in the tall pot, the force of gravity has exceeded the ability for capillarity to pull the water farther upward. Moisture can wick into the soil by capillarity only up to a certain point.

If the tall pot is moist on the surface, the soil might have more water-retentive components than drainage materials. Tiny clay particles also can absorb water and hold it tightly. Try using a taller pot. Watering a plant in a very tall pot from the saucer usually necessitates additional water applied to the surface when capillarity fails to moisten the soil all the way to the top.

Movement of moisture within the medium depends on the dimensions of the container and the texture of the soil. Soil with larger air pore spaces will have more difficulty absorbing water all the way to the surface of the pot.


Water Tables and Rocks For Drainage 


The Perched Water Table

It seems logical that soil would drain better when rocks are added to the bottom of the pot. But, to the contrary, rocks can slow down water trying to exit through the drainage holes. And it all has to do with those air pore spaces.

Gravel by itself has large air pore spaces between the pieces. So, water will pass through them after some of it adheres to the surface of the gravel. You’d think that potting soil on top of the gravel should drain freely. While water does drain freely close to the surface of the soil, percolation slows as the water approaches the layer of gravel.

Gravity removes much of the excess water. At some point, though, water does not move readily from soil (with small air pore spaces) to the rocks (with large air pore spaces). The water sits at the bottom of the soil volume and hesitates moving into the rocks. This creates a “perched water table”, a layer of soggy soil above the rocks.

How Soil Drains In the Garden


drainage to a stream


Soil in the garden behaves differently. Gravity continuously pulls water down through the soil profile. Water percolates toward an aquifer, or it hits a layer of extremely compacted clay soil, called hardpan. When it hits the hardpan, water either pools there or slowly drains down the slope of the hardpan a foot or a few feet underground.

Much of the water, of course, will be used by plants, drain downslope, or evaporate to the atmosphere. The rest of the surface runoff drains toward roads, storm basins, or ditches, ultimately ending up in streams and other bodies of water.

Remember the Wet Sponge Experiment?

Soak a rectangular sponge in water until it’s saturated. Held horizontally, it contains the maximum amount of water the sponge can hold. Now, turn it upright, with the bottom edge horizontal. More water drips from the bottom of the sponge, right? The longer vertical axis of the sponge allows more water to drain as water passes from one part of the sponge to a lower part.

The air pore space is consistent throughout the sponge, so water is pulled through. You’ll notice that the bottom of the sponge is the wettest part. But eventually it will stop dripping. Now, hold the sponge on an angle, and the sponge will drip a bit more water from the corner to the air below.

At one point, the sponge will feel wet, but it won’t drip. As long as there’s material for water to drain to, you might be able to coax more water from the sponge. For example, if you hold a paper towel—even a wet one—to the bottom of the sponge, the paper towel will draw more water from the sponge because of gravity.

Air under the sponge—or gravel in the bottom of a pot—has large air pore spaces. Consequently, water won’t move from the sponge—or from the potting soil—into the gravel. Gravity can do only so much; after that, some kind of material with similar air pore space is needed to draw water through the soil. Then, when no more water can drain by gravity, capillarity will hold water in the sponge or in the perched water table.


The Water Table

We see that the flow of water is impeded at the interface between the soil and the rocks. A pot filled with only potting soil (no rocks for drainage) also holds water above the bottom of the pot. After excess water drains through the holes, that lowest region of soil will feel wet compared to the upper layer.

The difference between a pot with rocks for drainage and one without rocks is the soil volume occupied by the roots. A plant grows a more extensive root system in a pot without rocks, allowing larger and more vigorous top growth. A plant with a compromised root system, from soil that drains poorly, ordinarily will not grow as vigorously. In fact, it might get off to a difficult start due to the presence of constant moisture in the perched water table.

Conformation of nursery pots I’ve bought over the years consider these aspects of soil drainage. Here’s one where the bottom of the pot is molded higher in the center. This dome directs water toward and out the drainage holes. Bi-level drainage holes encourage air to circulate in the bottom of the pot (photo, below).
 

rocks for drainage, not needed in pot with domed bottom

A 6″ pot with a domed bottom for better drainage.


In Saturated Soil

Capillarity helps hold water among the soil particles until roots can absorb it. But, if the roots can’t use that water, they can rot if the excess can’t drain away. This water fills the air pore spaces, cutting off air circulation around the roots. Soon, anaerobic decomposition begins and contributes to root failure.
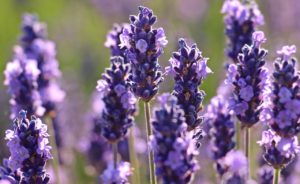
lavender

Lavender must have good drainage.

A full pot of thirsty annuals in hot sun or a large leafy tomato might be able to absorb all that water, but plants that need less moisture will suffer. Lavender, rosemary, succulents, orchids, and other plants requiring perfect drainage can be damaged in saturated soil. For these kinds of plants, keeping them potbound (not overpotting), using terra cotta pots, watering less often, and placing them under cover during rainy weather will help.

In addition to those suggestions, add more plants to the container you want to use. More foliage dries the soil faster. Remove the mulch, at least until the young plants have grown. Before potting up, incorporate extra drainage material into the soil. This is especially important when using large pots.


Rocks For Drainage and Weight

I have used rocks for drainage on very few occasions. Businesses and schools hired me to fill concrete or ceramic planters. The extra weight of rocks prevented the pots from “walking away”. Amending the potting soil to facilitate drainage through the entire soil profile is the preferred method.

First, I covered the drainage holes with synthetic landscape fabric or a handful of polyester fiberfill. Then heavy rocks and gravel went into the bottom third of the large container. Instead of piling soil directly on top of the gravel, I added a layer of landscape fabric over the sloped surface of gravel and up the inside of the pot. Then I filled the space with soil.

Landscape fabric prevented soil from eroding into the gravel. Sloping the fabric, so water concentrated at a low point, helped remove more water from the soil, into the rocks, and out the drainage hole.

Sometimes I added rocks and/or charcoal for drainage when planting houseplants in decorative containers without drainage holes. Still, we should check for accumulating water and tip the planter on its side to let stagnant water drain out. Or use a dry wooden dowel to periodically test for moisture.

Otherwise, I never add rocks for drainage in a pot.
 

What Is Wrong With My Houseplants?


2019: HAPPY NEW YEAR!


Does your list of New Year’s Resolutions include paying more attention to your houseplants? Now that the busy holidays are over, we’re almost back to our routines. The plants look forward to returning to their normal locations. They missed those bright windows!

If you’re dissatisfied with your plants’ appearance, today might be a good day to give all the houseplants a thorough examination and a good cleanup.


 Philodendron selloum, easy houseplants

Philodendron selloum adds a tropical element to the indoor environment.


What Is Wrong With My Houseplants?


Let’s begin with some easily recognized problems:

  • the plant has collapsed into a sad-looking heap of wilted foliage
  • leaf tips are brown
  • leaves are turning yellow
  • many of the leaves are dropping off
  • the flowers are gone

But your houseplants have sentimental value, so they’re not going into the trash…or into the compost pile. And you know they probably will recover with a little attention. After all, the same thing happened last year.

A home without houseplants looks sterile—to me, anyway—so there will always be indoor plants wherever we live. They rid the air of benzene, formaldehyde, and other pollutants. In return, we get a small boost in the humidity and oxygen content of the air we breathe.

And we enjoy living with nature. Many studies point to the psychological benefits of living with plants at home, at the office, in school, and in the community.

With the renewed interest in growing houseplants, a huge number of species and varieties are available. Popular plants, such as Fiddle-leaf fig (Ficus lyrata), are in such high demand at garden centers that supply is often difficult to maintain.

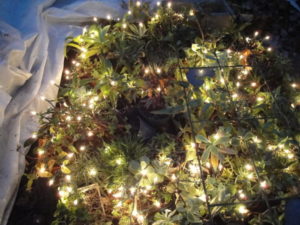
cold frame before covering, with mini lights

Several dozen plants are protected here, and will be covered with plastic for the night.

There are hundreds of plants in my collection, from 1″ tall miniature Haworthias to a 6′ tall 40-year-old ponytail palm (Beaucarnea recurvata).

Many succulents and half-hardy perennials spend the winter in the cold frame outdoors, heated with a few strings of miniature incandescent Christmas lights and covered with 2 or 3 sheets of clear plastic (photo, right). There’s just not enough room inside for everyone!

We often have warm winter days in the Carolinas. This gives some houseplants the opportunity to spend a few afternoon hours on the enclosed deck, basking in the mild sunshine.


My Peace Lily Is Wilting


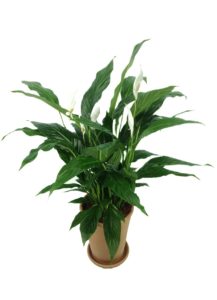
Spathiphyllum, or peace lily, popular houseplants

Peace lily, Spathiphyllum.

Wilt in peace lilies due to underwatering is a common problem. There are few plants that exemplify wilt more clearly than this one. A dry but still living peace lily, once watered thoroughly, will recover. But a few leaves might turn yellow, and they won’t green up again.

Peace lily (Spathiphyllum spp.) is commonly available and a good choice for beginning gardeners. You see them in malls and offices all over the country, where lush foliage lends a tropical flair to indoor spaces. Garden centers sell cultivars ranging from robust five-foot-tall specimens to table-top varieties less than 10″ tall.

They like soil that stays lightly moist all the time. But roots that stay wet all the time (from overwatering, overpotting, sitting in a wet saucer, or poorly-drained soil) are unable to “breathe”. Air and water are equally important to root health. Tiny root hairs that absorb moisture rot in wet soil, so the plant can’t get water to the leaves, causing the familiar wilt. A plant can wilt from either dry or constantly wet soil.


Keeping the Peace Lily Tidy

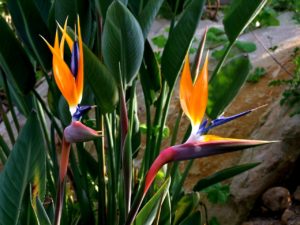
Strelitzia

Bird of paradise.

When yellow leaves appear, remove the entire leaf—both the blade (the wide part) and the petiole (the narrow leaf stem). The petiole is connected to the crown, stem, or the main trunk of a plant by a thin layer of cells. That layer of cells, the abscission layer, helps the petiole separate from the main part of the plant if the leaf is no longer useful.

After cutting off most of the yellow leaf, peel off the last bit of the yellow or brown petiole. If it is difficult to remove, as in large cultivars, cut the base of the petiole longitudinally down the center, toward the stem or the crown. Now you can easily peel off each half of the remaining petiole.

This works on other species with strong leaf attachments, such as Bird of paradise (Strelitzia, photo, above), yucca, palm, and dracaena. Removing all those dead fragments greatly improves the plant’s appearance.

Easy to Grow

Peace lilies are not demanding when it comes to light. Provide bright indirect light or morning sun for continuous growth. Disregard the advice that they thrive in “low light”. Sure, they’ll survive for a while, but brighter light toughens the tissues. New growth emerges thicker and stronger.

Plants photosynthesize and grow faster and often bloom in those locations, sometimes emitting a trace of scent soon after the white spathe flowers open. During the shorter days of the year, peace lilies welcome a few hours of direct sun.


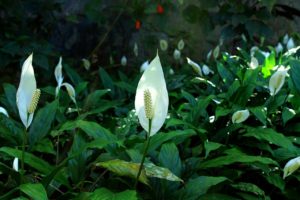
peace lily, flowers. easy houseplants

Peace lilies in bloom.


When the flower turns brown, snip off most of the stalk, wait a few days, and then pull out the remaining part of the shrinking brown stalk. You could remove it earlier, but sometimes a few green leaves are inadvertently removed at the same time. Once again, this keeps the plant tidy, with no lingering dead remnants.


How Often Should I Water My Peace Lily?

The Environmental Variables

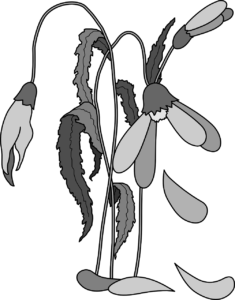
diagram, wilted plantTemperature, light, humidity, fullness of the plant (number of leaves), pot size and type (porous or non-porous), soil composition, and air circulation affect moisture in the soil. A furnace cycling on more often during cold weather necessitates frequent watering of thirsty plants. Knowing how these variables work in conjunction with each other, for each species, will determine how often your plant needs water.

A full and potbound (roots tightly filling the pot) peace lily, in morning sun at 72°F, and in potting soil that drains fast (has a lot of bark chips), for example, might need water every 2 or 3 days. On the other hand, one that was recently transplanted into soil with mostly peat moss and kept in a room at 65°, in indirect light, with 15 other plants nearby (higher humidity) might need water every 5 or 10 days. That’s why it’s so difficult to answer the question, “How often should I water it?”

Most varieties of peace lily are potted into 6″ to 10″ diameter pots. Stick your finger into the soil an inch or two down from the surface. If the surface of the soil feels dry, but there’s damp soil below that, the plant does not need water.

Waiting to water your plants until they begin to wilt is not a good idea. Delaying for only one day could cause another leaf to turn yellow. Or the plant will refuse to produce new foliage.

How Can I Tell When To Water?

A better course of action is to feel the moisture in the soil and the weight of the plant and pot. Eventually, you’ll learn to recognize that when it feels “this” dry or light in weight, it’s time to water. Some gardeners rely on inexpensive soil moisture meters, but I don’t consider them to be very accurate.

And water your peace lily thoroughly! Not just a little bit that moistens the top 2″ of soil. Instead, give it enough to moisten the entire root ball. Some water will drain into the saucer, and a dry pocket of soil might soak up that excess. Drain off any excess that remains in the saucer after 15 minutes.

Many of us conserve energy in winter by keeping the thermostat in the mid to high 60’s F during the daytime and in the low 60’s at night. If you’re growing plants from the tropics, they appreciate being given lukewarm water, about 85° or 90°. This includes ficus, philodendron, pothos, African violet, Alocasia, Aglaonema, and spathiphyllum. Dry soil absorbs lukewarm water more readily than it does cold water.


Upon Careful Examination

Place a fully wilted peace lily in a bucket filled with lightly warmed water up to the pot’s rim. You might have to weigh down the pot. Keep it there for an hour or two, then let it drain. If it doesn’t revive after a few hours, remove the plant from its pot and examine the roots.

Certain materials used at the wholesale nursery, once dry, can resist absorbing water. It’s possible that, even though the plant had been transplanted into better quality potting soil, the plant’s original root ball stayed dry and was unable to produce new roots. When transplanting any plant, tease out some of the roots on the surface of the root ball, especially one that is solidly filled with roots. This helps stimulate the formation of new roots that will quickly grow into fresh potting soil.

I’ve worked on plants that seemed to have moist soil, yet remained in a wilted state. One of these conditions was usually the cause:

  • The plant was repotted too deeply, rotting the petioles and the crown of the plant. The crown should remain at soil level, where the green top growth meets the roots. Very few plants survive being planted lower in the soil. Rule of thumb: the original soil surface should be visible after repotting.
  • Over time, the organic matter (peat moss, wood products) in soil breaks down and loses most of its volume. Consequently, the soil surface drops lower in the pot. If roots are visible under the crown and are exposed to the air, add fresh potting soil to cover the roots. You might have to remove the plant from the pot and add soil under the roots to raise the crown to the proper level. Either way, don’t bury the crown.
  • The roots were not teased out from the root ball, and remained within the tight confines of the original root ball. The root ball dried out before new roots could grow into the moist new soil.
  • New potting soil was loosely added around the root ball, and not firmed in next to the roots. Moderate pressure against the roots helps develop a healthy root system, and fills any voids in the pot that could dry out delicate root hairs. It also prevents water from rushing through the pot, following the path of least resistance, and not soaking in.
  • The plant’s soil was wet for too long, and the rotted roots couldn’t regrow. Fungal and bacterial pathogens build up in wet soil and cause more problems.
  • The temperature in the room or of the water was too low. 
  • The plant was overfertilized, burning the roots. Many people think that fertilizing more often or using more than the recommended concentration makes plants grow faster. It doesn’t. Overfertilizing makes plants die faster. High salt concentrations draw water out of the roots, killing them.

Many of the problems we have with houseplants can be avoided if we keep them potbound in the winter. Cooler soil temperatures and shorter days do not favor root growth at this time of the year. It’s better to delay repotting houseplants into larger containers, if they need it, until spring to mid summer.


Headings:

Page 1: What Is Wrong With My Houseplants?, My Peace Lily Is Wilting, How Often Should I Water My Peace Lily? (The Environmental Variables, How Can I Tell When To Water?, Upon Careful Examination)

Page 2: How Often Should I Water Houseplants?, Should I Fertilize My Houseplants?, Brown Tips On Houseplants (Overwatering, Underwatering, Overfertilization, Disease, Guttation, Fluorine), Yellow Leaves, and My Houseplants Are Dropping Leaves

Page 3: Succulents (Porous Pots, Repotting and Refreshing), Ferns (Raise the Humidity), Pothos and Philodendron, Snake Plant (What is CAM?), English Ivy (Spider Mites), Will They Flower Some More?, and Before You Know It


Return to the top


How To Grow Succulents To Perfection!


Speaking Of Succulents


Earlier today, I gave a presentation on succulents at the annual meeting for the Charlotte (NC) Council of Garden Clubs. We spent a few hours at Southern Gourmet in Matthews, and, with their help, and someone else’s laptop, I was able to get through all the pictures. Thank you, CCGC, for the invitation.


succulents

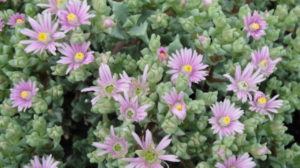
Oscularia deltoides in bloom.


What Is A Succulent?


Succulents, by definition, are plants that store water in their leaves, stems, and roots. They evolved in arid regions (primarily in the Americas, Africa, and Australia), and can endure intense sunlight and prolonged drought and heat. By providing favorable conditions, we can grow colorful succulents in sunny windows. Over the past several years, they have been enjoying a resurgence in popularity.

Decades ago, I purchased young bare-root succulents from a California wholesaler for my horticultural business. Unwrapping each little parcel was like waking up on Christmas morning as a child. These were plants I’d never seen before—Titanopsis, Pleiospilos, Graptopetalum, Lapidaria—and were destined for sale at the Westover Flea Market when I lived in nearby Morgantown, West Virginia.

Although there are many species of hardy succulents in the Sedum and Sempervivum genera, this article addresses primarily the tender succulents, which require temperatures above freezing.


Plenty Of Light For Succulents


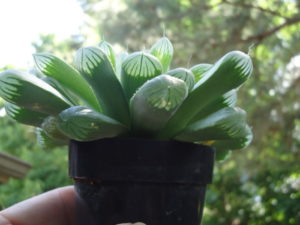
Haworthia cooperi, succulent with windowtip leaves.

Haworthia cooperi showing leaftip windows. Light refracts inside the leaf, even if the plant is almost buried in desert sand.

Adequate light is one of those conditions that must be met for these plants to show good color and characteristic form. Some succulents, such as Haworthia, Gasteria, Aloe, Epiphyllum, and Christmas cacti, grow well with at least 4 hours of direct sun, and very bright indirect light the rest of the day.

Crassula, Echeveria, Euphorbia, and Sedum appreciate even more light, at least 5 or 6 hours.

Cacti (succulents with spines or thorns), living stones, and Sempervivum (Hens and Chicks) need abundant sunshine, at least 6, but preferably 8, hours per day.

Direct sunlight keeps the plants colorful and compact. If the plants receive enough sunlight most of the time, they will tolerate the occasional stretch of cloudy weather without deteriorating.

Artificial light helps during the short days of winter or when the sun refuses to shine. When necessary, I use 2-tube 4′ long shop lights with “daylight” LED or fluorescent tubes. Be sure to place the plants within a few inches of the tubes for at least 16 hours per day.


When Light Is Insufficient


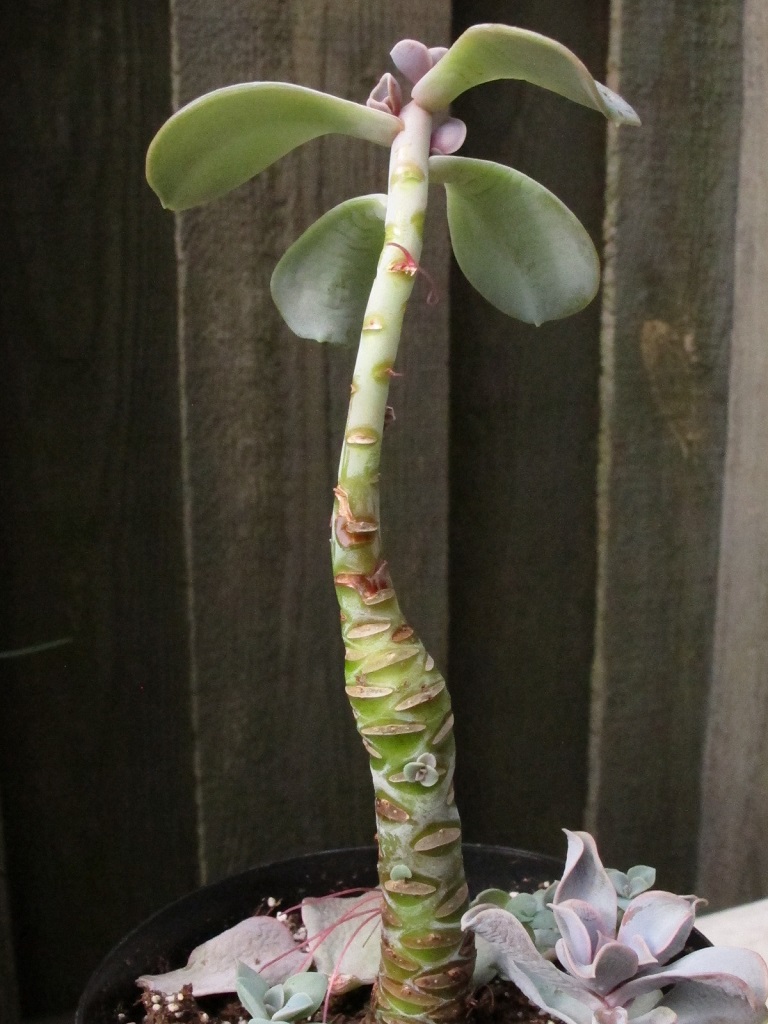
How do you know when your succulents are not receiving enough light? Plants that grow in the shape of a rosette start growing faster (photo above, left). The center leaves outgrow the outline of the plant, stretching toward the light. And the new part of the stem grows thinner. That happens when winter sunlight is scarce, as in this Graptopetalum pentandrum ‘Superbum’ (photo above, right).

In poor light, strong colors begin to pale, and purple, red, or orange highlights fade. New leaves become thinner. The internodes (stem segments between the nodes, where leaves are attached) on younger parts of the plant will lengthen (photos, above); this appearance is diagnostic for low light levels.

There’s a huge difference between “direct sunlight” and “bright indirect light”. A few hours of indirect light offers very little benefit to succulents; they need the strong sun. And, without adequate light, succulents are more susceptible to damage from overwatering.


More Sun For Cacti


Cacti also suffer in inadequate sunlight. The spines on new growth grow farther apart.

In upright species, the stem becomes narrower relative to the older part that was growing in good sun. If you see that the top half of a cactus stem is thinner than the bottom half, and the spines are not as closely clustered, the plant is not getting as much sun as it was before. Solution? More sun!

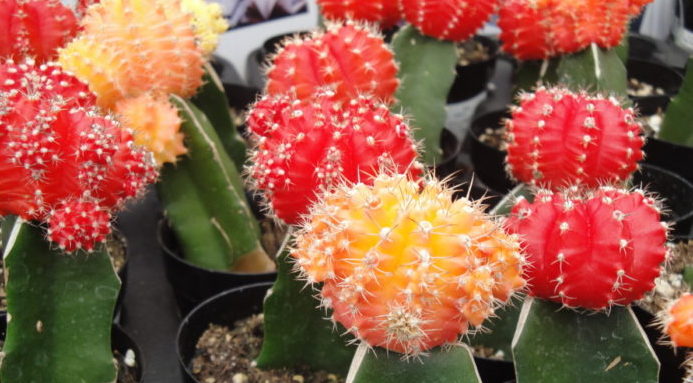
The colorful tops of grafted cacti (photo, above right) lack chlorophyll, and depend on the green stock plant for sustenance. Also, the graft is more sensitive to harsh sun and should be placed in cooler morning sun.


cacti are succulents too

Variability among cacti.


Light And Water


Light and water are inextricably linked in plants. When the sun doesn’t shine, photosynthesis, transpiration, and respiration slow down, and soil moisture sits unused around the root system. Play it safe and water succulents only on sunny mornings and when the forecast calls for sunny weather for the next couple of days.

Under normal conditions, allow the soil to dry completely before watering again. Although the soil feels dry on the surface, there’s usually some moisture in the lower half of the root ball.


glass, cactus

Glass container with two open sides.


These plants never need misting. Water that sits on the foliage can initiate rot, so shake it off or use a towel to dry it. Never let succulents sit in a saucer of water.

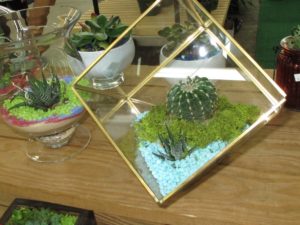
Although glass terrariums are very popular, I do not recommend succulents for terrariums. Unless the glass container has large openings for heat to escape (photo, above), succulents in direct sun will fry in terrariums! They also rot in high humidity or if there’s the slightest amount of excess water in the soil.


Pots


shallow bowls for succulents

Succulents and shallow bowls (Pike’s Nurseries, Matthews NC).


Succulents prefer to remain quite potbound, where roots are tightly packed in the pot. Plants in oversized pots are more likely to be damaged by overwatering simply because the greater soil volume holds more water for a longer period of time.

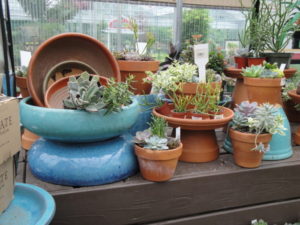
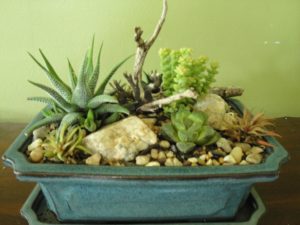
Shallow glazed containers, such as decorative bowls and ceramic bonsai trays, make delightful homes for succulent combinations (photo, below). Include rocks, gravel, and driftwood in these dish gardens to create a natural-looking scene from nature.


succulents in glazed bonsai tray

Small-growing succulents in a bonsai tray.


Tall glazed pots hold a reservoir of water that probably won’t be used by the plant. More appropriate for succulents, terra cotta (Italian for “baked earth”) pots are porous and help the soil dry faster when water vapor passes through the sides.

Repotting, if needed, should be done early in the growing season so a strong root system can develop before the days begin to shorten in autumn. Growth slows during those months. Always use pots that have drainage holes.


Potting Soil


Fenestraria succulents

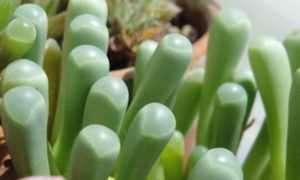
Fenestraria species showing leaftip windows.

The soil used for succulents should be gritty for quick drainage. If needed, amend regular potting soil with perlite, coarse sand, horticultural grit, pine fines, charcoal, expanded rock, or PermaTill. “Cactus and Succulent” soil is available, although quality varies widely among brands.

When repotting, all new soil goes below and around the sides of the root ball, never on top of it. Planting too low in the soil results in rotten leaves and stems.

In their natural environment, certain succulents, such as Haworthia, Aloe, and Gasteria, have contractile roots. If blowing sand exposes the crown or the top of the root system, the roots are able to “pull” the plant lower into the soil. Amazing!


Living Stones

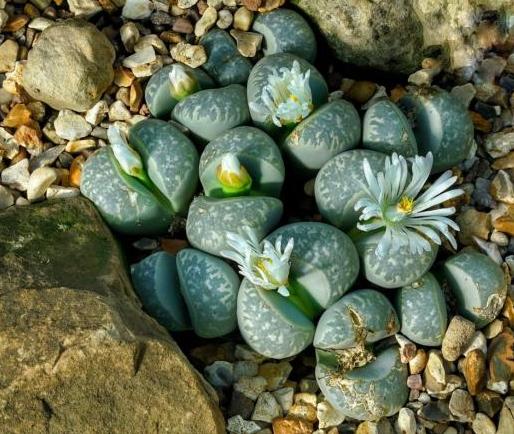
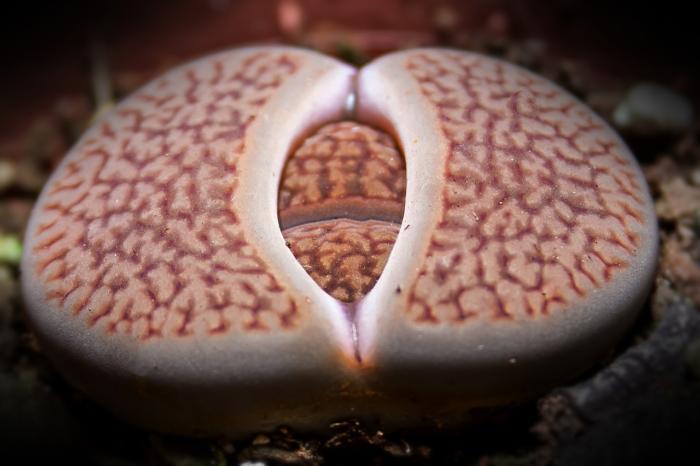
The ground-hugging living stones, or split-rock, succulents (photos, below) are extremely sensitive to overwatering. Use small clay pots and very gritty, gravelly soil. There should be only a very small percentage of organic matter in the soil.

These plants are well-camouflaged in their native southern Africa, almost indiscernible from the rocks around them. Some of the genera available for purchase include Lithops, Lapidaria, Gibbaeum, and Conophytum.


Fertilizer


Succulents grow slowly, so fertilize only 2 or 3 times during the growing season, from March through October.

Use products formulated for indoor houseplants, with small numbers on the package, such as 8-8-8 or 10-10-10. Those three numbers represent the amounts of nitrogen, phosphorus (phosphate), and potassium (potash) in the product. All products list these three primary macronutrients on the label in that order: N-P-K.

It’s better to underfertilize than to overfertilize, so use a more diluted rate than the recommendation on the label. For succulents, dilute it to half-strength.

Lithops and other living stones are extremely slow-growing, so they’re hardly ever fertilized. Use a very dilute higher phosphorus fertilizer only when the plant shows new growth.


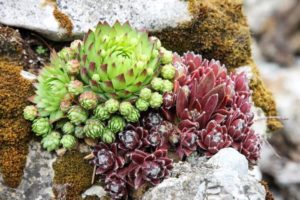
Sempervivum (hens and chicks) can be tucked between rocks, and they’re hardy perennials.


Outdoors For The Summer


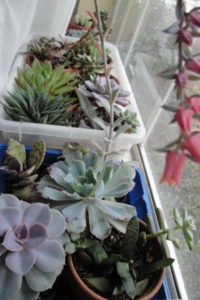
succulents in my sunny window

Light blue Echeveria in bloom.

Succulents summering outdoors benefit from higher light levels and often take on vibrant coloration. Jade plants (Crassula) develop red margins on their leaves in brighter sun, and Echeveria becomes even more colorful.

Monitor closely during periods of high heat. Above 85° F, provide light shade during the hot afternoon hours. Potted plants are more susceptible to stress from extreme conditions than those planted in the ground.

Transition your plants to outdoor conditions gradually. Give them just a couple of hours of early morning sun or dappled shade for the first few days. A plant that was growing indoors all winter will probably suffer sun scald if immediately placed outdoors in full sun. This hardening off process gives plant tissues time to toughen up so they can withstand more intense summer sun. Sunlight causes the cuticle, a protective waxy layer on the leaf surface, to thicken.

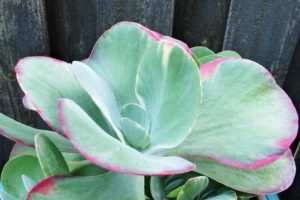
This beautiful variegated succulent, called Kalanchoe ‘Fantastic’, has a variably feathered band of cream between the pink edge and the greenish-gray base of the leaf (photo, below). I’ve had this plant for over a decade, and protect it from dropping temperatures in autumn by moving it indoors well before frost. Stronger sun and more stressful conditions might cause it to turn redder in color. It recovers, though, in less extreme conditions.


kalanchoe thyrsiflora, a succulent called "flap jack"

Kalanchoe thyrsiflora ‘Fantastic’, growing outdoors for the summer.


Protect your plants from excessive moisture. After receiving some rain, place the dampened succulents under cover. Check to make sure the drainage hole allows water to drain freely.


And Back Inside In Autumn

As autumn temperatures fall into the high 40’s at night, it’s time to bring your plants indoors for the winter. The more sensitive types, including Echeveria and Graptopetalum, come indoors before the thermometer drops below 55°. Prolonged exposure to cold, wet conditions will cause succulents to deteriorate, so check the forecast!


Pruning Succulents


joyce chen scissors

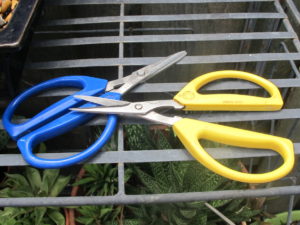
Joyce Chen scissors.

If your plants are growing too large and cannot be accommodated in the space available, consider cutting them back. Stretched-out plants benefit from selective pruning in early summer. New growth will soon emerge.

Cacti can be temperamental, so be careful if you choose to lop off the tops. For cacti, this is best done in late spring/early summer for a full season of recuperation.  Stronger light available in the summer causes the plant to respond with more compact growth. They might grow a few new stems below the cut.

During transpiration, water is “pulled” through the plant’s vascular system from the roots, to the stems, and then through the leaves and out to the atmosphere. This process is the primary manner in which moisture is removed from the soil. Therefore, avoid extensive pruning if any plant was recently watered. Because there’s less foliage on the plant after pruning, the soil stays moist for a longer period of time. Wait a few days, or until the soil is almost dry, before pruning.


Headings

Page 1: Speaking Of Succulents, What Is A Succulent?, Plenty Of Light For Succulents (When Light Is Insufficient), More Sun For Cacti, Light And Water, Pots, Potting Soil (Living Stones), Fertilizer, Outdoors For The Summer (And Back Inside In Autumn), Pruning Succulents

Page 2: Propagation Of Succulents (Rooting Cuttings, Stem Cuttings, Leaf Cuttings, Division, Seed), Root Rot And Insects (Root Or Stem Rot, Insects and Mites), Flowers, Time To Grow That Collection!

Return to the top