Tag Archive | drainage

Rocks For Drainage In Pots: Do They Really Help?


Should We Add Rocks For Drainage?


Rocks for drainage?


This issue of adding rocks or gravel to a pot for better drainage has been debated for generations by amateur as well as professional gardeners. Gardening programs from decades ago recommended adding a few inches of gravel or broken clay pottery to the bottom of a pot before filling with potting soil.

That method has been put to the test and soundly debunked. It doesn’t work. In fact, it can retain even more water close to the plant’s roots!

Many gardeners are eager to start filling their patio pots with flowers and herbs. Or perhaps vegetable gardening in containers is on the agenda. For some, it has been a long, cold winter, and this activity signals the beginning of a new growing season. But, before buying that big bag of gravel for your pots, look over this information and see if you might consider doing things differently.


Ingredients In Potting Soil


Potting soils are composed of a few or several ingredients in various proportions. Certain components absorb and retain moisture around plant roots while others help the soil drain faster. Some materials do both, depending on how finely they were milled.

This article describes how components behave in potting soil, and how gravity and other forces exert their influence on drainage and water retention. I’ll also suggest why it’s better to exclude rocks for drainage in pots.

Here are some of the ingredients commonly found in potting soils, in addition to water and air:


Organic materials, which help retain water:

  • peat moss, which holds water between its fibers
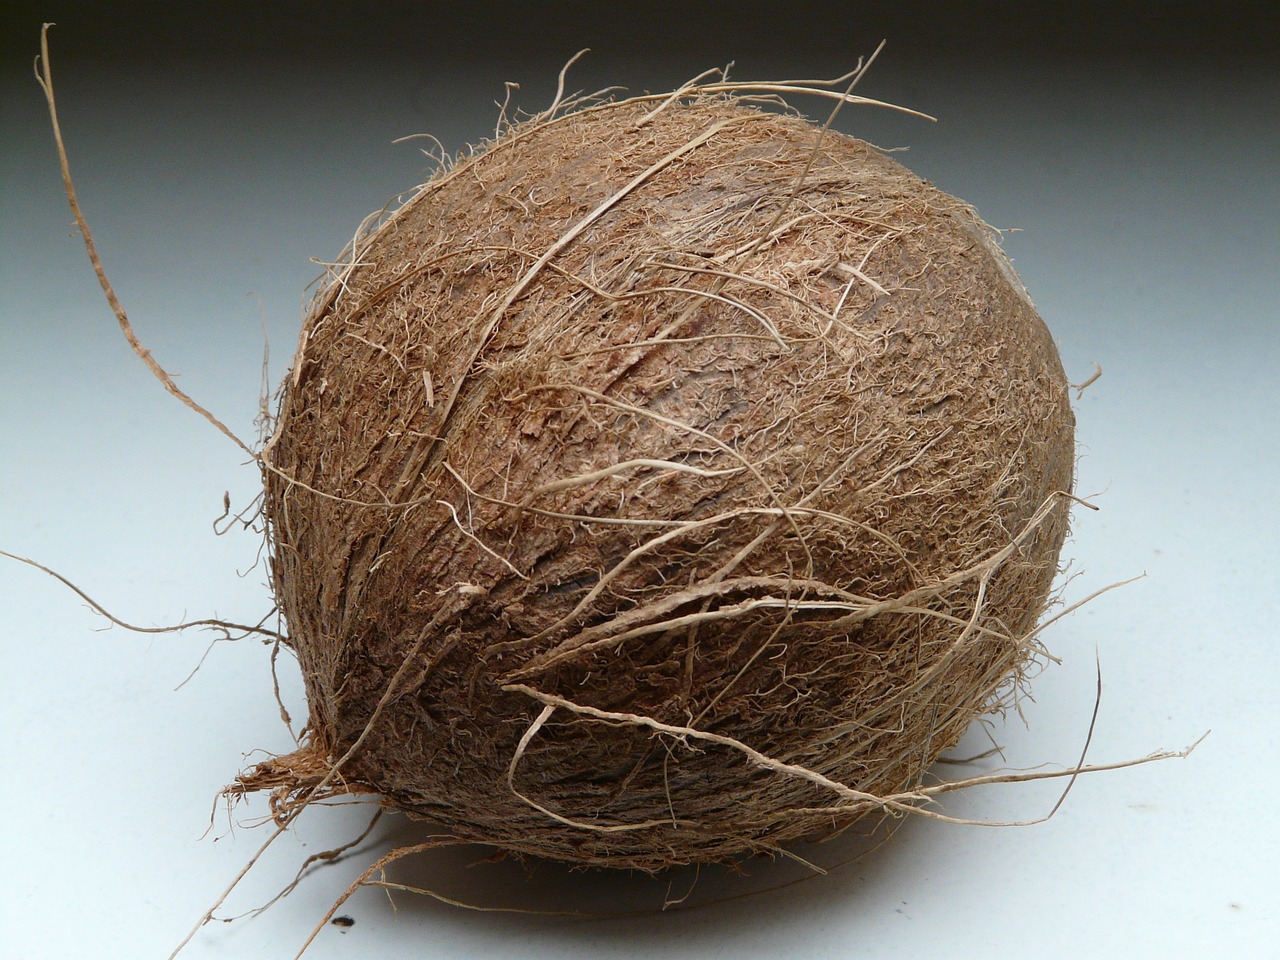
  • coconut coir, chopped into fine particles (for water retention) or left in longer fibers (more aeration)
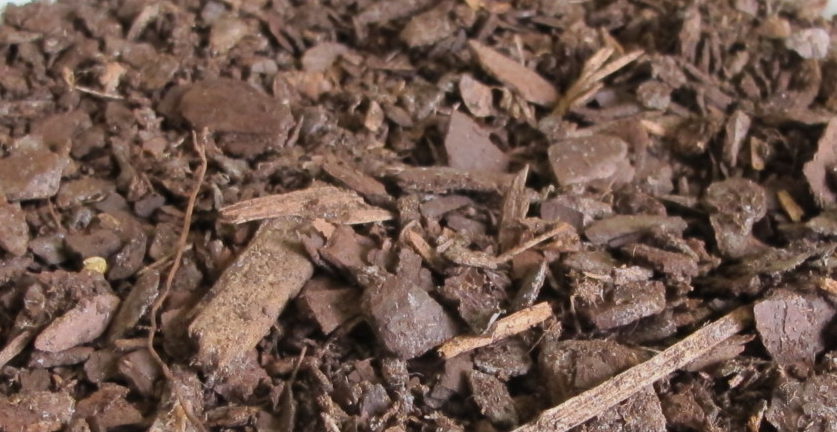
  • pine fines, which decompose quite slowly; most often used to facilitate drainage in potting soil and in gardens, but finely milled pine fines hold water
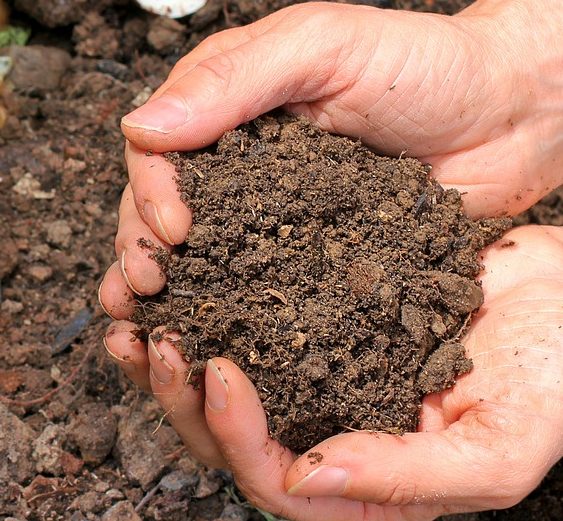
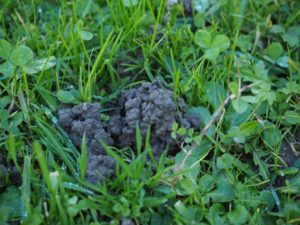
  • compost, a nutrient-rich material
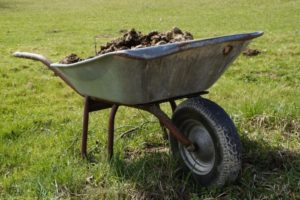
  • aged manure, composted to kill pathogens


Potting soils might contain other types of materials, including ground shellfish, kelp, alfalfa meal, rice hulls, sawdust, charcoal, blood meal, bone meal, earthworm castings, and bat guano. Some manufacturers add various species of beneficial microbes.

Although not organic matter, fine clay holds water between its particles. Most potting soils contain no soil and are, in fact, soilless. A few include loam in the mix.

“Sinking Soil Syndrome”

You might have noticed the surface of the soil dropping lower in an old potted houseplant. The soil probably isn’t eroding through the drainage hole in the bottom of the pot, so where is it going?

Organic matter in the soil decomposes. As it oxidizes, and gets “used up”, its volume reduces considerably. Over time, you’ve seen the soil level dropping an inch or two, maybe more. On the contrary, sand and other gritty materials hold their volume.

The remedy for this sinking soil syndrome is to take the plant out of the pot and to refresh the potting soil. Pack new soil firmly around the roots to prevent settling. Don’t cover the stems or the crown of the plant with soil—just the roots. After that, the plant should be fine for another few years.


Elefantenfuß (Beaucarnea recurvata)

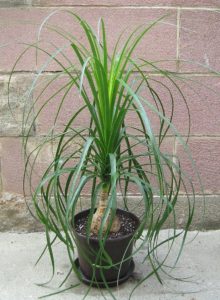
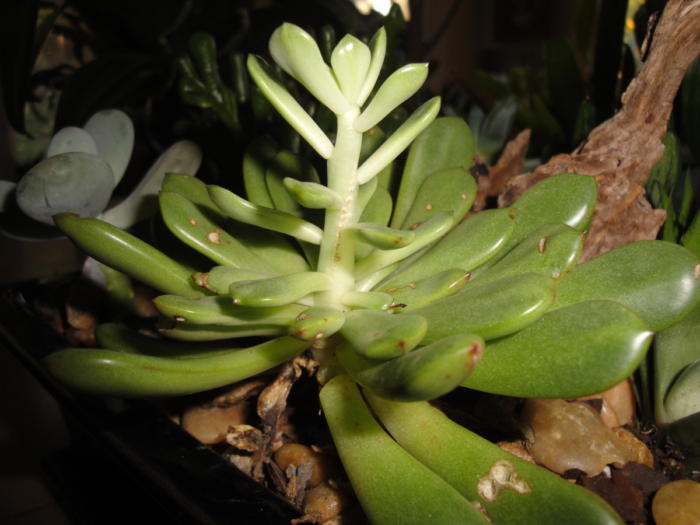
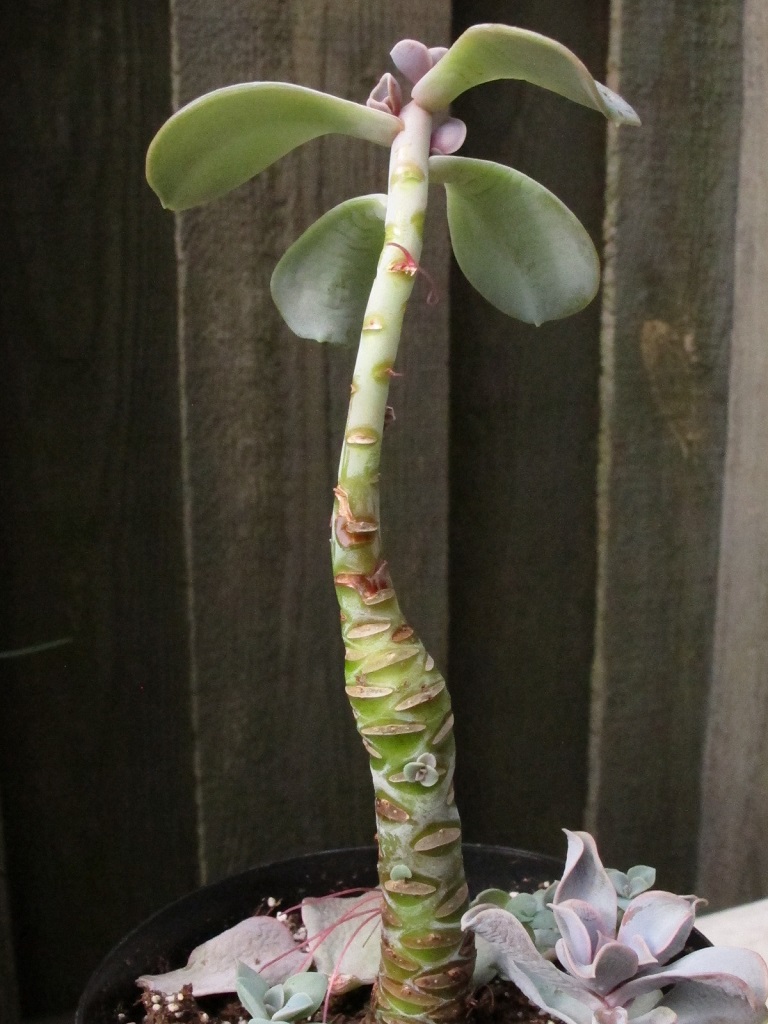
Beaucarnea recurvata, ponytail palm.


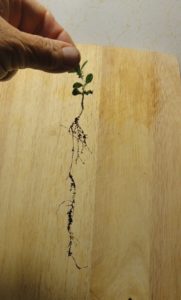
Several years ago, I was about to transplant a severely potbound ponytail palm (like the one in photo, above) into a larger clay pot. That plant came with me from Maryland and had been in its 4½” pot for close to a decade. It’s a very durable plant!

After removing it from the plastic pot, all that remained under the trunk were the roots, perlite, and sand clinging to the roots. It looked like a wire sculpture—a tracery of root and grit and mostly air taking the shape of the pot, but no peat moss or other organic matter. It transplanted successfully, and now sits on the back deck in mild weather.

Reusing Potting Soil

Many customers have asked about potting new plants into potting soil that has been used before. If there is still a substantial organic component and the soil has good tilth, then it can be used again. But, first, fluff up the soil and supplement with compost, potting soil, or some of the other amendments.

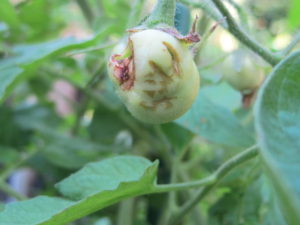
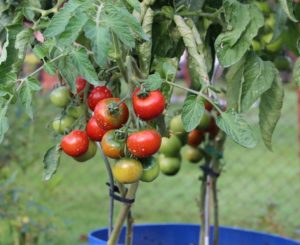
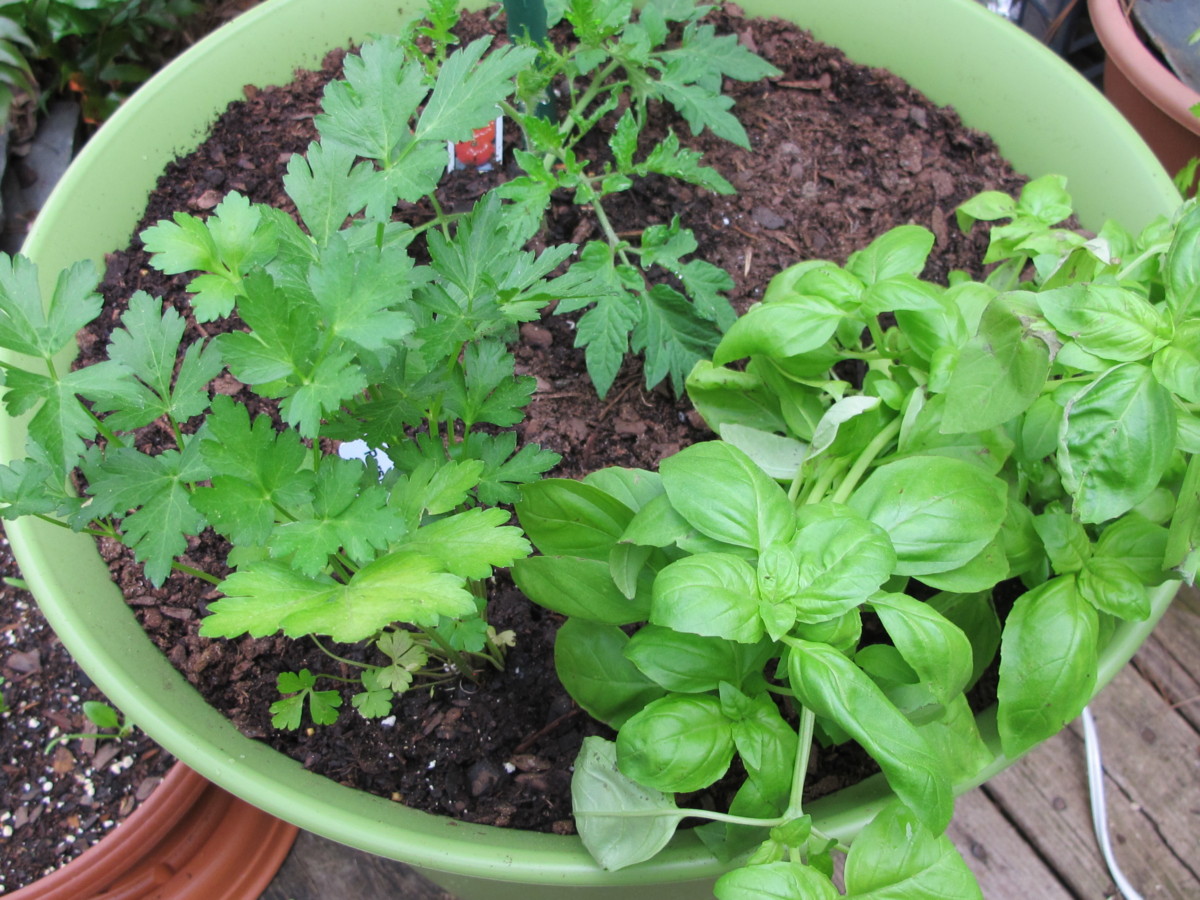
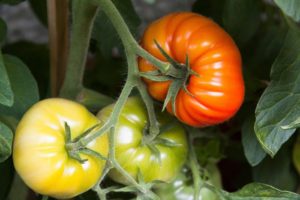
Rather than risk infecting new plants, toss old soil that held diseased plants into an active compost pile or the woods. Plants known to be vulnerable to soil-borne diseases (basil, in particular) are best planted in fresh potting soil and a thoroughly cleaned pot. When I lost an heirloom tomato to a fungal disease a few years ago, I removed the plant and the top layer of soil. After adding fresh potting soil, I planted a disease-resistant tomato, which grew fine for the rest of the season.


Inorganic materials, which increase drainage:

  • perlite, a heat-expanded mineral, those little white particles
  • expanded rock, such as PermaTill, another heat-expanded mineral
  • horticultural grit
  • vermiculite, not used as often today because it can compress and lose its drainage capacity
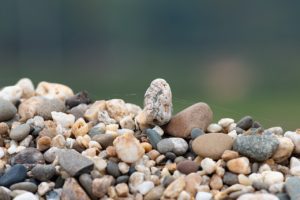
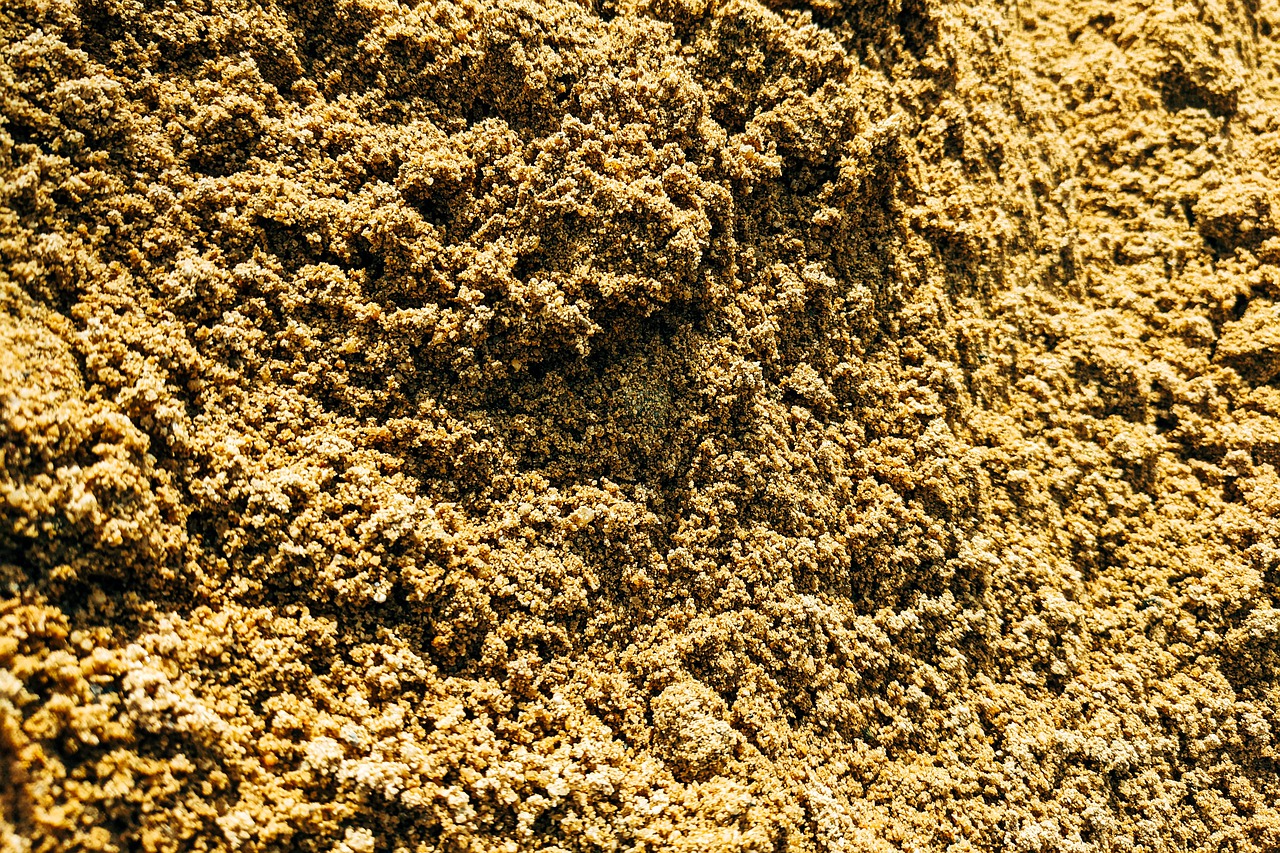
  • coarse or sharp sand and gravel—angular-edged particles, as opposed to rounded particles, can help drainage if they aren’t too small


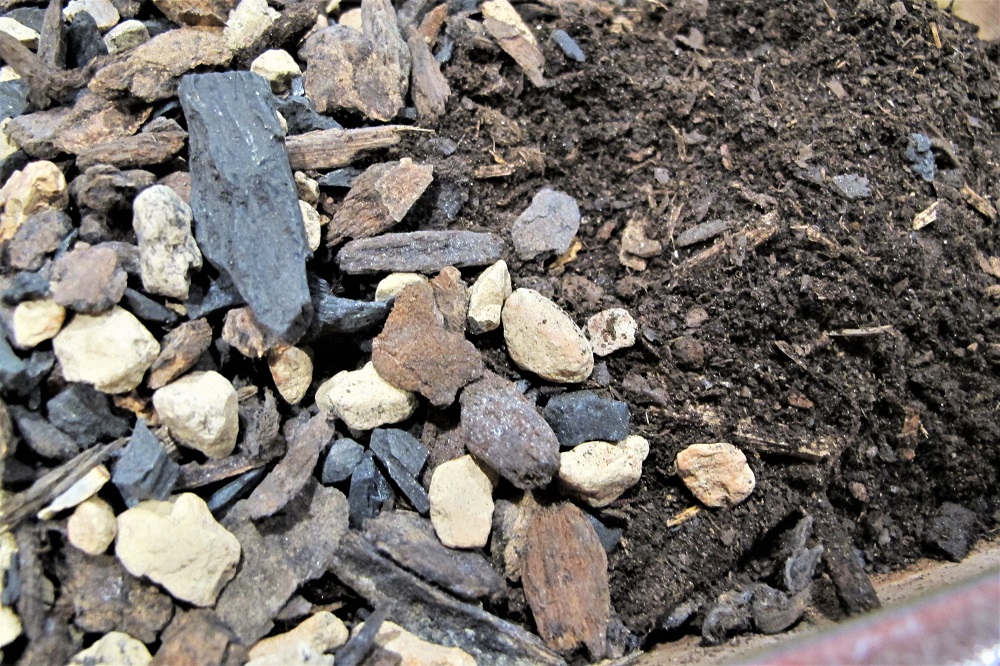
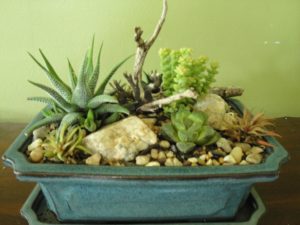
Chunky expanded clay and rock, often found in succulent and orchid mixes (photo, above), provide fast drainage and excellent air circulation around the roots.

Qualities such as tilth, water retention, nutrient capacity, and aeration of the soil are determined by the particular combination of materials and the sizes of their particles. Larger particles tend to facilitate aeration and drainage, while tiny particles (especially clay soil) retain water in the tight spaces between them.


Air Pore Space and Gravity


Air pore spaces occupy the voids between soil particles when they’re not taken up by water. Water flows through the soil profile, following the force of gravity. As water drains away and as the roots absorb it, air infiltrates the medium, providing oxygen for the roots. Plant cells use oxygen in respiration, as they oxidize the products of photosynthesis (glucose) and expel carbon dioxide as a waste product.

“Wait, what?” Yes, plants give off carbon dioxide during respiration. The net effect in each 24-hour period, however, is more oxygen given off during photosynthesis than is consumed during respiration. This process creates energy needed by plants to make new cells and to carry out hundreds of cellular activities.

wilt, marjoram 'Compactum'

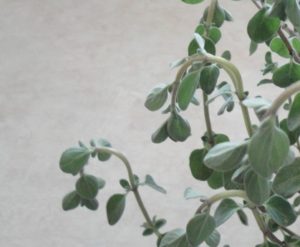
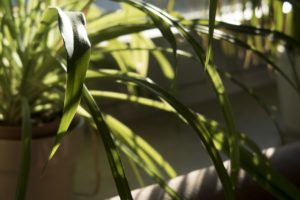
Wilted marjoram ‘Compactum’.

Plants continually grow tiny new root hairs right behind the expanding root tips. Oxygen is critical to respiration and, therefore, to new root growth. These short-lived root hairs do most or all of the water absorption and interact with beneficial fungal mycorrhizae in almost all species of plants.

Brassicas (broccoli, cabbage, kale, etc.) do not participate in this mycorrhizal/root relationship. A few other groups of plants (Ericaceous plants, orchids, sedges, spinach, and beets) have rare forms of mycorrhizae colonizing in or around their roots.

Saturated soil kills root hairs. If this condition persists, the roots themselves will die and not regrow. If roots and root hairs can’t supply water to the leaves, the foliage wilts. The plant’s wilted appearance looks the same as when the plant has been deprived of water. Either overwatering or underwatering prevents water from reaching the leaves once the roots have been suffocated or dehydrated.


Feel the Soil

An extended period of wilt and wet soil is a common reason for plant failure. Even if the soil surface feels dry, there’s usually adequate moisture deeper into the pot. That’s why we recommend feeling the soil an inch or two into the pot.

Soil texture, pot size, sunlight, temperature, the plant’s leaf surface area, and, of course, frequency of watering influence how quickly potting soil drains and dries.


Capillarity

The force that works in opposition to gravity is capillary action. Water drains between soil particles, thanks to gravity, allowing most of the excess to pass through the holes in the bottom of the pot. But water also can move upward or sideways in the pot due to capillary action.

Capillarity is part cohesion and part adhesion, two kinds of forces between molecules. Cohesion is the attraction of water molecules to each other. Adhesion is the attraction of water molecules to other substances, such as particles of potting soil or the xylem tubes in a plant’s vascular system. In capillary attraction, adhesion is a stronger force than cohesion, so water molecules will stick to and be drawn between particles or along the inside surfaces of xylem.

As water molecules on the soil surface evaporate, they’re replaced by water molecules below them because of capillarity.

So, there’s a constant battle waged between gravity and capillarity. Water moves toward the bottom of the pot, but is limited by capillarity, which pulls it upward. What does this have to do with using rocks for drainage in a pot? I’ll explain in a moment. But first…

A Simple Experiment

Here’s an experiment that illustrates these points. Because organic soils often don’t contain wetting agents, which help the soil absorb water more readily, look for fresh potting soil that is not certified organic. Fill a short pot and a tall pot with dry or barely damp potting soil, using no rocks. Pack it in evenly and moderately firmly.

Now, place each pot in a shallow bowl of warm water. Why warm? Because soil absorbs warm water faster than it absorbs cold water. If the water disappears into the soil, add more to the bowl.

Wait an hour or so. In the short pot, you’ll see moisture on the surface. It might take longer for the larger pot to absorb water. If water remains in the bowl without moving all the way to the surface in the tall pot, the force of gravity has exceeded the ability for capillarity to pull the water farther upward. Moisture can wick into the soil by capillarity only up to a certain point.

If the tall pot is moist on the surface, the soil might have more water-retentive components than drainage materials. Tiny clay particles also can absorb water and hold it tightly. Try using a taller pot. Watering a plant in a very tall pot from the saucer usually necessitates additional water applied to the surface when capillarity fails to moisten the soil all the way to the top.

Movement of moisture within the medium depends on the dimensions of the container and the texture of the soil. Soil with larger air pore spaces will have more difficulty absorbing water all the way to the surface of the pot.


Water Tables and Rocks For Drainage 


The Perched Water Table

It seems logical that soil would drain better when rocks are added to the bottom of the pot. But, to the contrary, rocks can slow down water trying to exit through the drainage holes. And it all has to do with those air pore spaces.

Gravel by itself has large air pore spaces between the pieces. So, water will pass through them after some of it adheres to the surface of the gravel. You’d think that potting soil on top of the gravel should drain freely. While water does drain freely close to the surface of the soil, percolation slows as the water approaches the layer of gravel.

Gravity removes much of the excess water. At some point, though, water does not move readily from soil (with small air pore spaces) to the rocks (with large air pore spaces). The water sits at the bottom of the soil volume and hesitates moving into the rocks. This creates a “perched water table”, a layer of soggy soil above the rocks.

How Soil Drains In the Garden


drainage to a stream


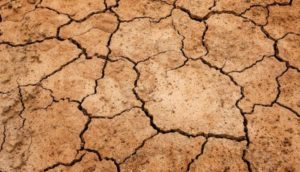
Soil in the garden behaves differently. Gravity continuously pulls water down through the soil profile. Water percolates toward an aquifer, or it hits a layer of extremely compacted clay soil, called hardpan. When it hits the hardpan, water either pools there or slowly drains down the slope of the hardpan a foot or a few feet underground.

Much of the water, of course, will be used by plants, drain downslope, or evaporate to the atmosphere. The rest of the surface runoff drains toward roads, storm basins, or ditches, ultimately ending up in streams and other bodies of water.

Remember the Wet Sponge Experiment?

Soak a rectangular sponge in water until it’s saturated. Held horizontally, it contains the maximum amount of water the sponge can hold. Now, turn it upright, with the bottom edge horizontal. More water drips from the bottom of the sponge, right? The longer vertical axis of the sponge allows more water to drain as water passes from one part of the sponge to a lower part.

The air pore space is consistent throughout the sponge, so water is pulled through. You’ll notice that the bottom of the sponge is the wettest part. But eventually it will stop dripping. Now, hold the sponge on an angle, and the sponge will drip a bit more water from the corner to the air below.

At one point, the sponge will feel wet, but it won’t drip. As long as there’s material for water to drain to, you might be able to coax more water from the sponge. For example, if you hold a paper towel—even a wet one—to the bottom of the sponge, the paper towel will draw more water from the sponge because of gravity.

Air under the sponge—or gravel in the bottom of a pot—has large air pore spaces. Consequently, water won’t move from the sponge—or from the potting soil—into the gravel. Gravity can do only so much; after that, some kind of material with similar air pore space is needed to draw water through the soil. Then, when no more water can drain by gravity, capillarity will hold water in the sponge or in the perched water table.


The Water Table

We see that the flow of water is impeded at the interface between the soil and the rocks. A pot filled with only potting soil (no rocks for drainage) also holds water above the bottom of the pot. After excess water drains through the holes, that lowest region of soil will feel wet compared to the upper layer.

The difference between a pot with rocks for drainage and one without rocks is the soil volume occupied by the roots. A plant grows a more extensive root system in a pot without rocks, allowing larger and more vigorous top growth. A plant with a compromised root system, from soil that drains poorly, ordinarily will not grow as vigorously. In fact, it might get off to a difficult start due to the presence of constant moisture in the perched water table.

Conformation of nursery pots I’ve bought over the years consider these aspects of soil drainage. Here’s one where the bottom of the pot is molded higher in the center. This dome directs water toward and out the drainage holes. Bi-level drainage holes encourage air to circulate in the bottom of the pot (photo, below).


rocks for drainage, not needed in pot with domed bottom

A 6″ pot with a domed bottom for better drainage.


In Saturated Soil

Capillarity helps hold water among the soil particles until roots can absorb it. But, if the roots can’t use that water, they can rot if the excess can’t drain away. This water fills the air pore spaces, cutting off air circulation around the roots. Soon, anaerobic decomposition begins and contributes to root failure.

lavender

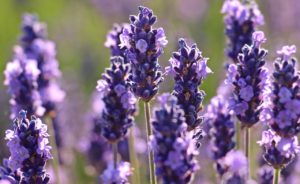
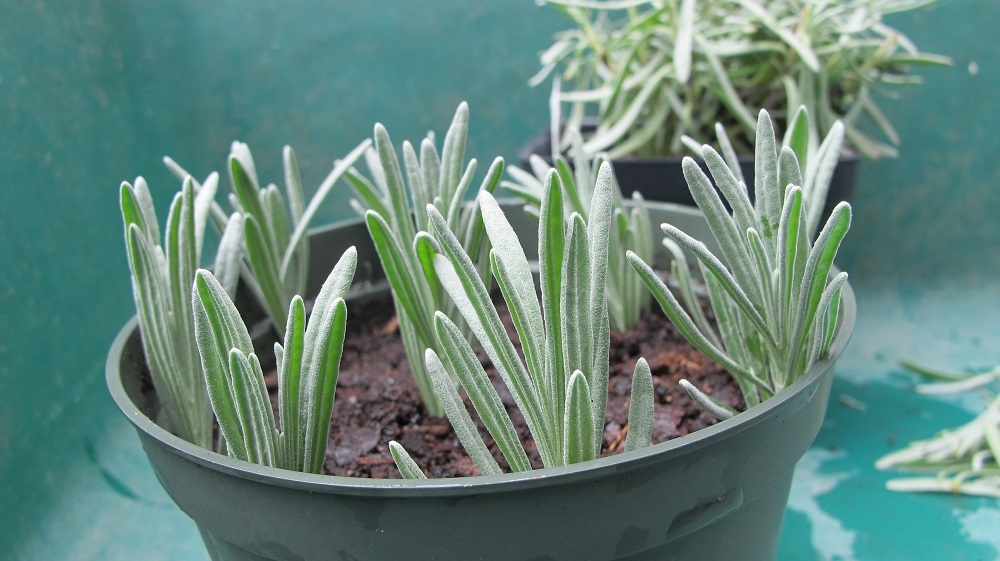
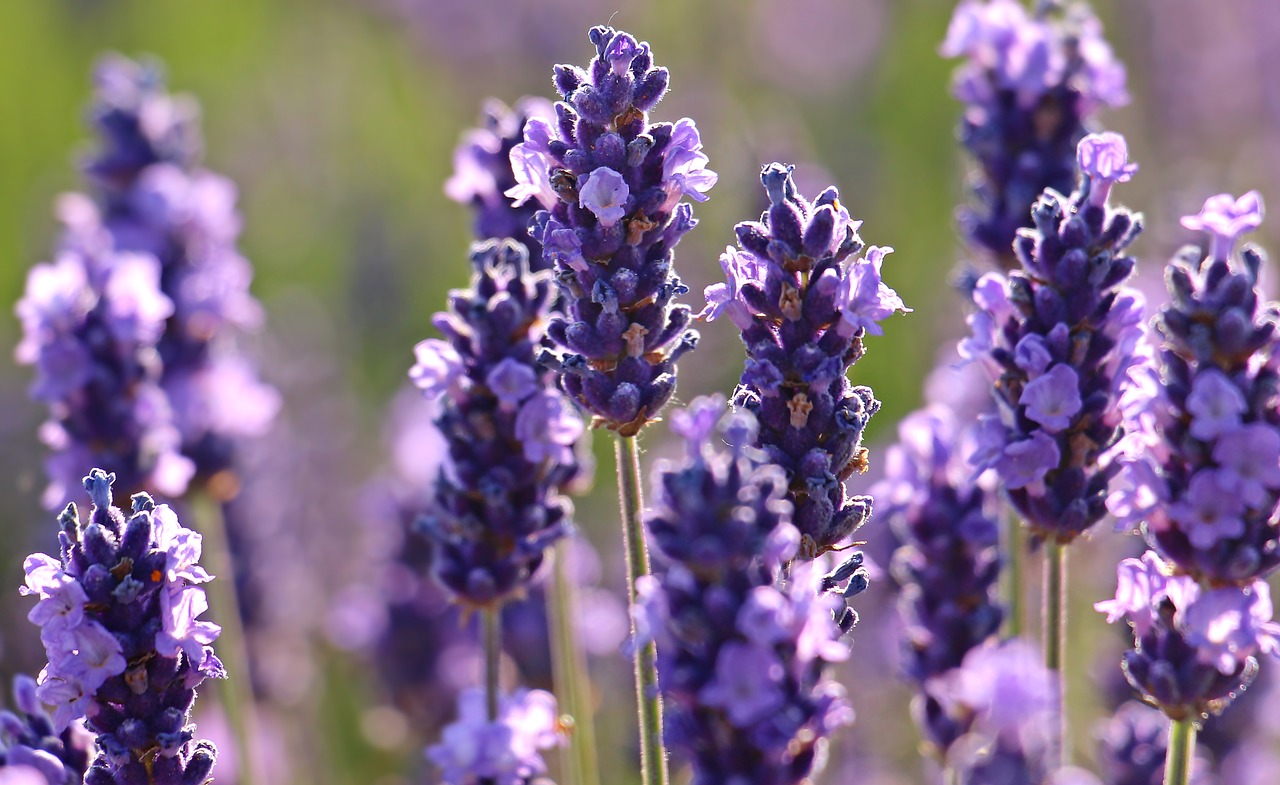
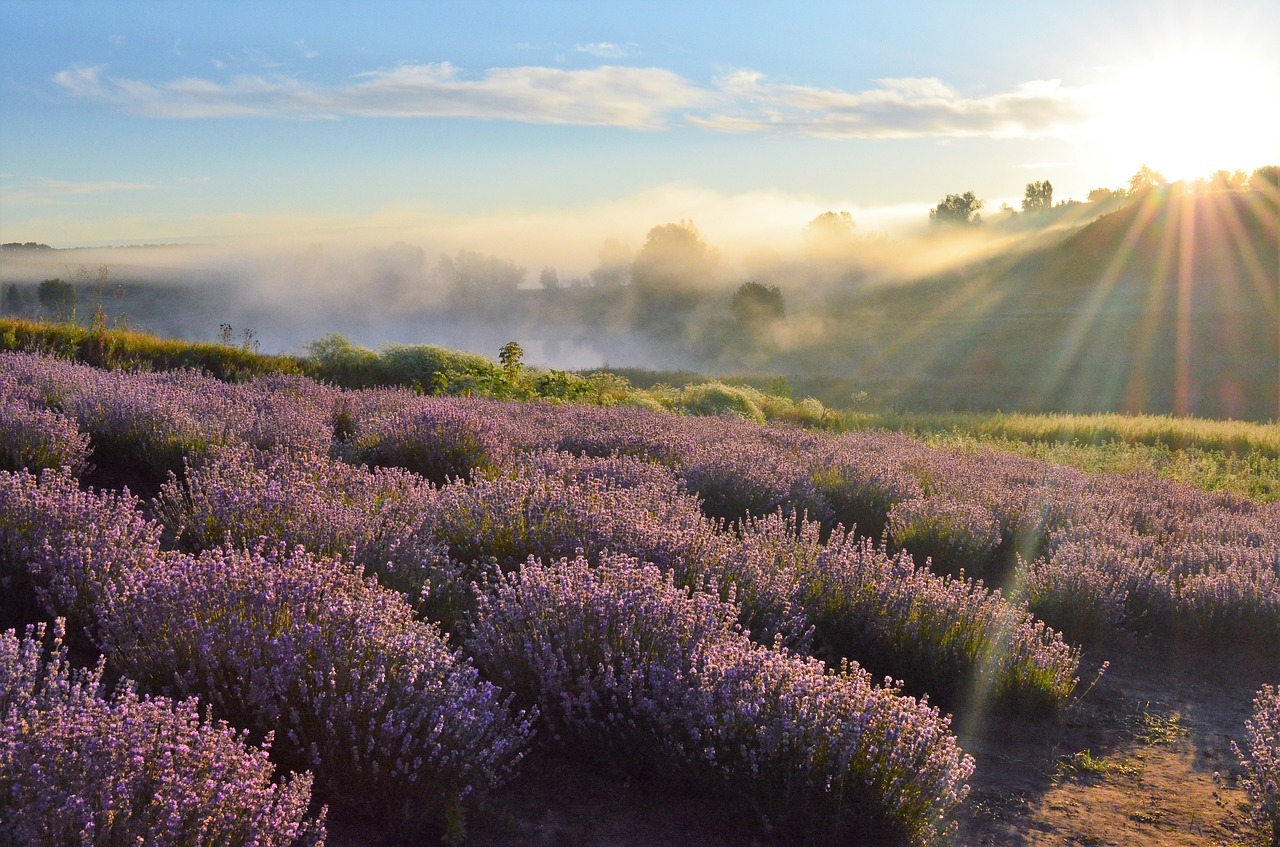
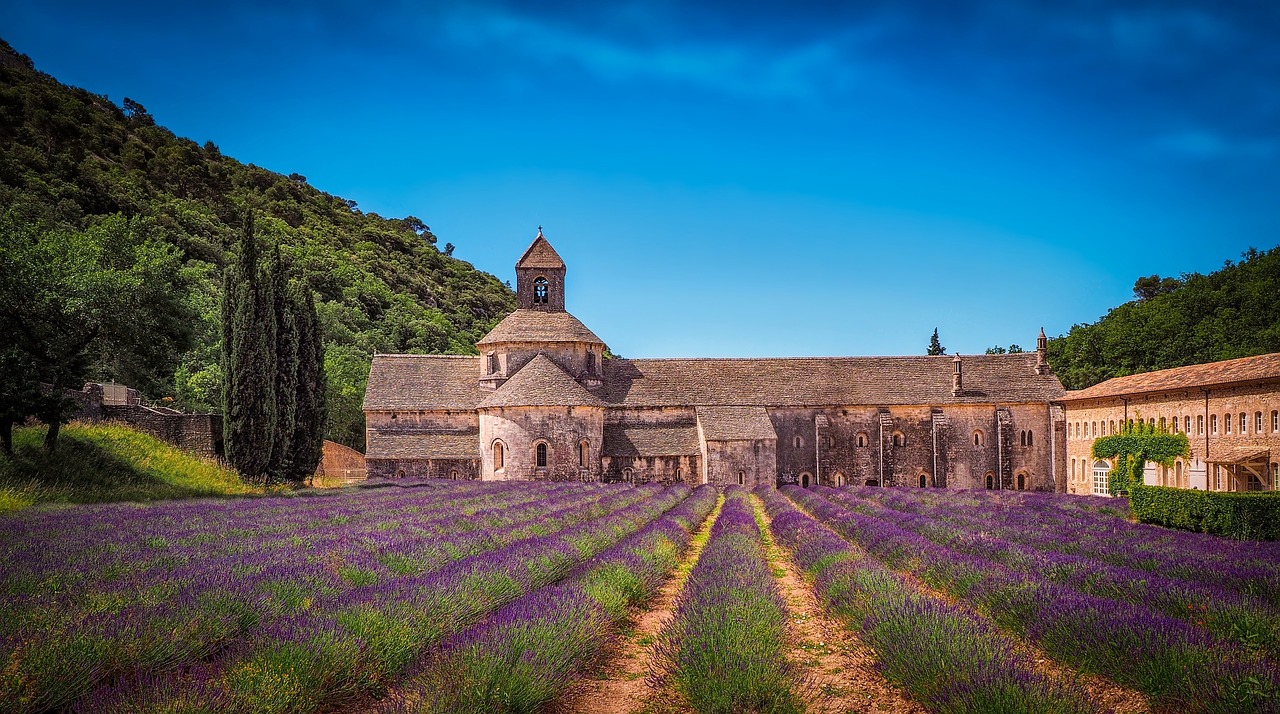
Lavender must have good drainage.

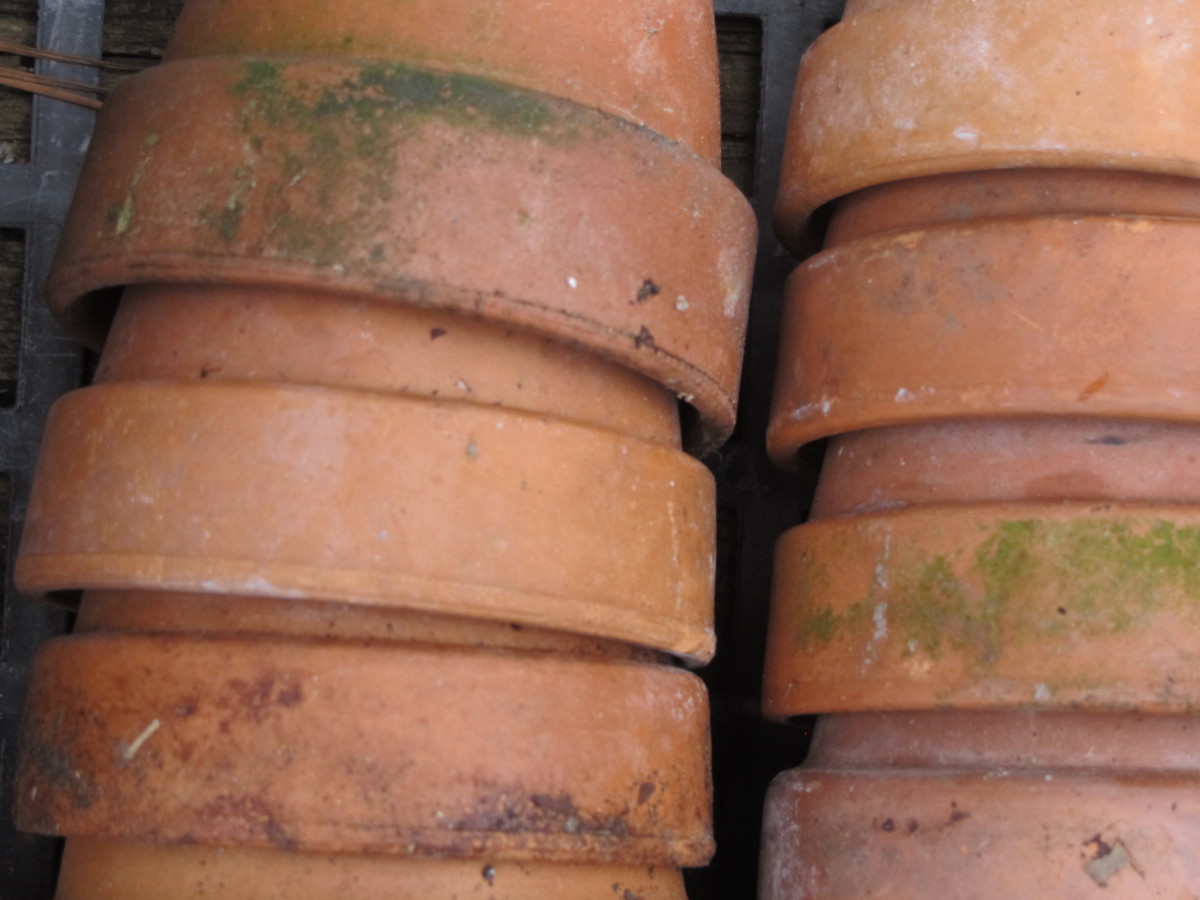
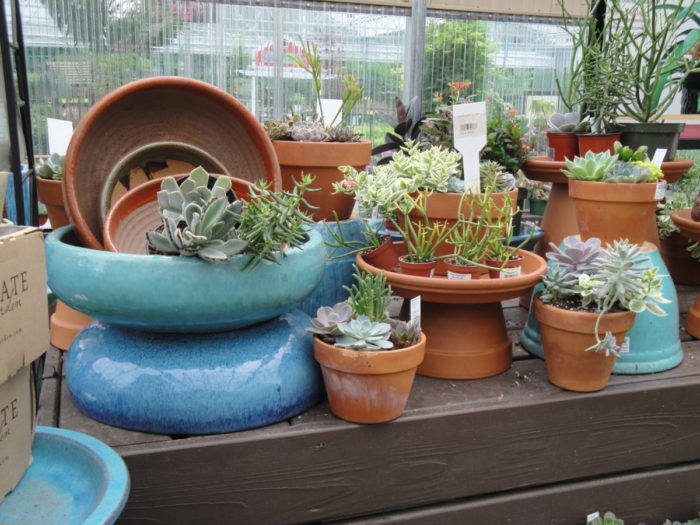
A full pot of thirsty annuals in hot sun or a large leafy tomato might be able to absorb all that water, but plants that need less moisture will suffer. Lavender, rosemary, succulents, orchids, and other plants requiring perfect drainage can be damaged in saturated soil. For these kinds of plants, keeping them potbound (not overpotting), using terra cotta pots, watering less often, and placing them under cover during rainy weather will help.

In addition to those suggestions, add more plants to the container you want to use. More foliage dries the soil faster. Remove the mulch, at least until the young plants have grown. Before potting up, incorporate extra drainage material into the soil. This is especially important when using large pots.


Rocks For Drainage and Weight

I have used rocks for drainage on very few occasions. Businesses and schools hired me to fill concrete or ceramic planters. The extra weight of rocks prevented the pots from “walking away”. Amending the potting soil to facilitate drainage through the entire soil profile is the preferred method.

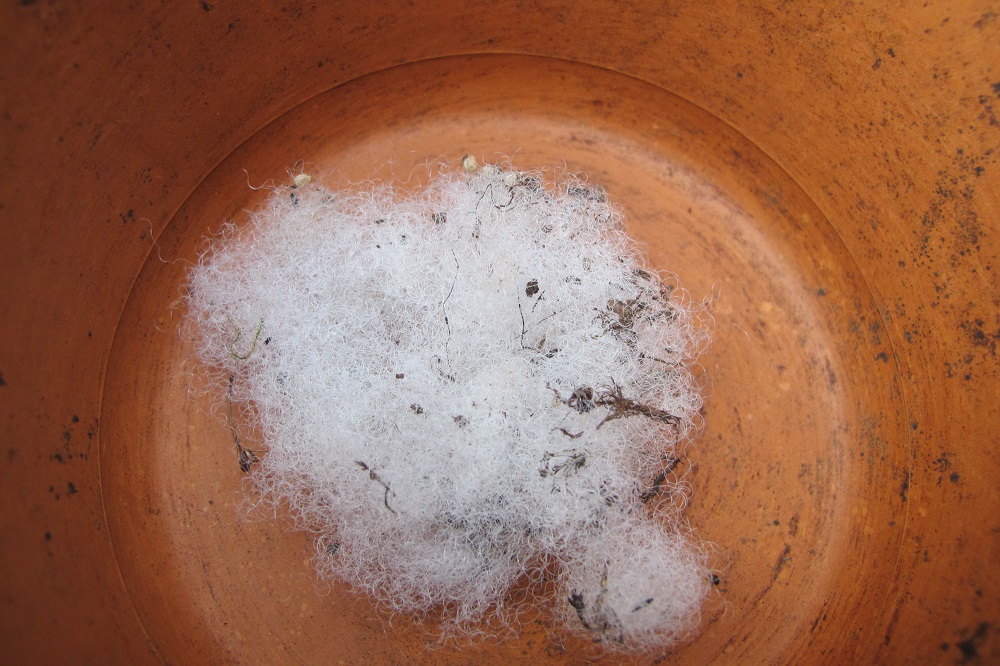
First, I covered the drainage holes with synthetic landscape fabric or a handful of polyester fiberfill. Then heavy rocks and gravel went into the bottom third of the large container. Instead of piling soil directly on top of the gravel, I added a layer of landscape fabric over the sloped surface of gravel and up the inside of the pot. Then I filled the space with soil.

Landscape fabric prevented soil from eroding into the gravel. Sloping the fabric, so water concentrated at a low point, helped remove more water from the soil, into the rocks, and out the drainage hole.

Sometimes I added rocks and/or charcoal for drainage when planting houseplants in decorative containers without drainage holes. Still, we should check for accumulating water and tip the planter on its side to let stagnant water drain out. Or use a dry wooden dowel to periodically test for moisture.

Otherwise, I never add rocks for drainage in a pot.


New Gardens For a New Property: What To Do First


2021

A New Home and New Gardens!


new gardens

View from the front porch.


As you might know from reading The Farm In My Yard, I moved from Rockville, Maryland to Charlotte, North Carolina in 2013. I worked for a few years, while watching over my elderly mother. After she passed away in 2020, the search was on for a larger property in a smaller town. Must-haves included reasonably quiet surroundings, lots of nature, room to play in new gardens, and no HOA. This article includes information from a landscaper’s perspective that might be new to first-time property owners.

Success! In late October, I moved to a new home in northern North Carolina. A few obstacles didn’t stop my tireless realtor, Erika, from finding this (almost) perfect little house. There was Covid, for one, and the reluctance on the part of homeowners to list their homes for sale. Very few livable offerings in my price range came to the market. As soon as they did, they immediately went under contract.

As many buyers have done in this tight market, I made an offer on the property sight unseen. Well, truthfully, I did drive by the house before submitting an offer, and liked what I saw. Trees, woods, space, and sunlight—perfect for a gardener! The previous owners made some major improvements, saving me the trouble and the expense. But I had no idea what the interior looked like.


Inspections

When buying a house, have all the inspections done before closing, as recommended by your realtor or for your own peace of mind. Estimate the cost of necessary upgrades and repairs.

Particularly for older homes, check the roof and electrical, plumbing, and HVAC systems. Look for water damage and mold, pests and wood rot, foundation issues, adequate insulation, storage space, and evidence of ongoing maintenance.

Negative findings could nullify a contract or provide a basis for negotiation between your realtor and the listing agent.


The Lay Of the Land


Small towns, farms, and independent businesses dot the landscape in this part of Wilkes County. Several vineyards and state parks attract visitors to these lovely rolling hills. Drive along any of the scenic roads, and new vistas open at every turn; the Blue Ridge Parkway is only half an hour away. Beautiful countryside!

looking east

The big oaks frame a sunrise.

My new home, a one-story house built in the 1940’s, sits on 1¼ acres of mostly level land. The view from the front porch looks over a field, a few houses, and downslope toward a small stream. Stunning sunrises greet me from that direction almost daily.

Most of the trees’ leaves have fallen from the massive limbs of the native white and willow oaks (Quercus alba and Q. phellos). A few of these trees tower over the eastern border of the property. In the summer, those toward the west will shade the house from hot afternoon sun.

The mighty oaks came first, judging by their size, and then the house. If I were to name the property, “Quercus Magnus” would seem fitting.


Preliminary Plans For New Gardens

There’s plenty of space for the berries and the vegetables to bask in the sun. Plenty of space to raise shade-loving perennials in the fenced enclosure north of the great oaks. And plenty of space for gardens that will support birds, bugs, bees, and butterflies.

Also, importantly, there’s room to grow plants to sell at the local farmers’ market, as I did in Maryland for 25 years.


After Moving In


Deciding what to do first depends on the season, your climate, and the condition of the house and gardens. Priorities often reflect our occupations or interests, so artists might first set up a studio while contractors organize tools in the outbuildings. Growing families might rank bicycle storage, a big kitchen, and an extra bathroom at the top of the list.

And gardeners? Well, we look at soil quality, existing gardens, and sunlight. This gardener prefers a large, mostly blank slate. Others call it a lawn.

In April, I’d be concerned about starting seeds for the market, getting the summer vegetables and flowers planted, and cutting grass. But it’s December now. The yard needs tidying, houseplants need to find their homes, and, of course, we must bake Christmas cookies. Not to mention, those boxes won’t unpack themselves!

Moving into a house that doesn’t need major repairs eases the stress. To be sure, there are some improvements that can and will be made, but nothing that needs immediate attention. Wouldn’t mind a new kitchen with a dishwasher, Santa. (Chocolate chip or almond crescents?)


Trees and Shrubs


Poor Pruning Practices

Walking around the property will highlight issues that need attention. Check the trees and shrubs for dead or broken branches, or call a licensed arborist for a professional assessment. There are some dead twigs way up in these oaks. A brisk wind shakes them loose, so the truck stays parked under the carport. Fortunately, that debris falls short of the house.


I’ll hire an arborist to clean up the trees and remove branches that have been headed back. Heading back, or bluntly cutting off the end of a branch, causes many epicormic shoots to form. Those are new growing tips emerging from buds concentrated close to the cut. The shoots also can cover the length of the branch. Epicormic shoots have weak connections to the branch and, over time, most will fail and fall from the plant (photos, above).

Similarly, topping trees is, in my opinion, not recommended. Yes, it reduces the height, temporarily, but topped trees in winter are hardly natural-looking and not attractive (photo, below). They, too, drop twigs over an extended period of time.

An expert arborist might be able to undo the damage from heading back or topping. However, removing the tree might be the most economical solution. Research appropriate tree species for your property and where to plant them. Keep in mind that plants almost always achieve dimensions larger than those indicated on the label. Your local agricultural extension office can help. Check with botanical gardens and sources such as your state’s native plant societies.


topped tree, sky

A topped tree.


The Root Of the Problem

Trees planted close to the foundation can threaten its structural integrity. Consider having them removed.

The same ruthlessness applies to the wrong tree in any space. Keeping silver maples or weeping willows close to the house, septic system, or underground utilities begs for trouble. This is where an arborist or a well-informed landscaper can recommend more fitting species and a pleasing design for better curb appeal. Call 8-1-1 to have underground utility lines marked.


Constricted

Look for old stakes and wires still looped around trunks or branches. Wooden posts rot, but wire and synthetic rope from clotheslines, fences, and hammocks persist.

As trunks and branches grow in girth, they attempt to grow around the obstruction, cutting off the vascular system inside the bark. This results in the death of those parts of the tree that cannot receive water from the roots. Early fall color on isolated branches might indicate trouble, such as pests or physical constriction.

In the Maryland garden, a dogwood tree died for no apparent reason. After cutting it down and opening the bark in several places, I found plastic rope deeply embedded in the trunk a few feet from the ground. Although the damage appeared several years after I had moved there, it eventually killed a beautiful dogwood.


Flares and Girdling Roots


Most trees flare out where the trunk descends into the ground. If this flare is missing, see if soil has been piled up against the trunk, and remove it.

Construction around unprotected trees can deposit soil that cuts off the oxygen supply to the roots, resulting in the plant’s decline. As little as an additional 1-2″ can damage trees. Also, parking vehicles over the root system compacts the soil, impeding air and water penetration. Keep in mind that tree roots extend well beyond the dripline, or the edge of the canopy.

Check for a girdling root crossing over the trunk at the soil line or below it. As it grows, the root will hinder growth of that section of the trunk, making the trunk look straight-sided where it enters the ground. Cut it out before the tree tries to grow around it. Maples and other surface-rooting trees are notorious for this.

There’s no flare at the base of this maple tree (photo, above) and at least one large girding root is constricting the flow of water and nutrients from the soil. I noticed large dead limbs in the canopy, so the tree might be removed.


English Ivy


english ivy growing up a white oak

English ivy growing up an oak tree.


Vining English ivy (Hedera helix) is growing up a white oak’s trunk, using rootlets to cling to the bark. All the vines will be removed for 4 main reasons.

red-shouldered hawk dec 2021
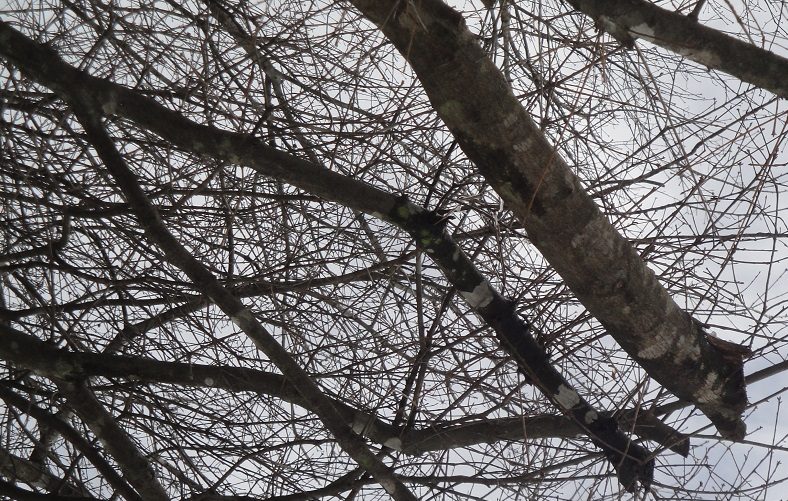
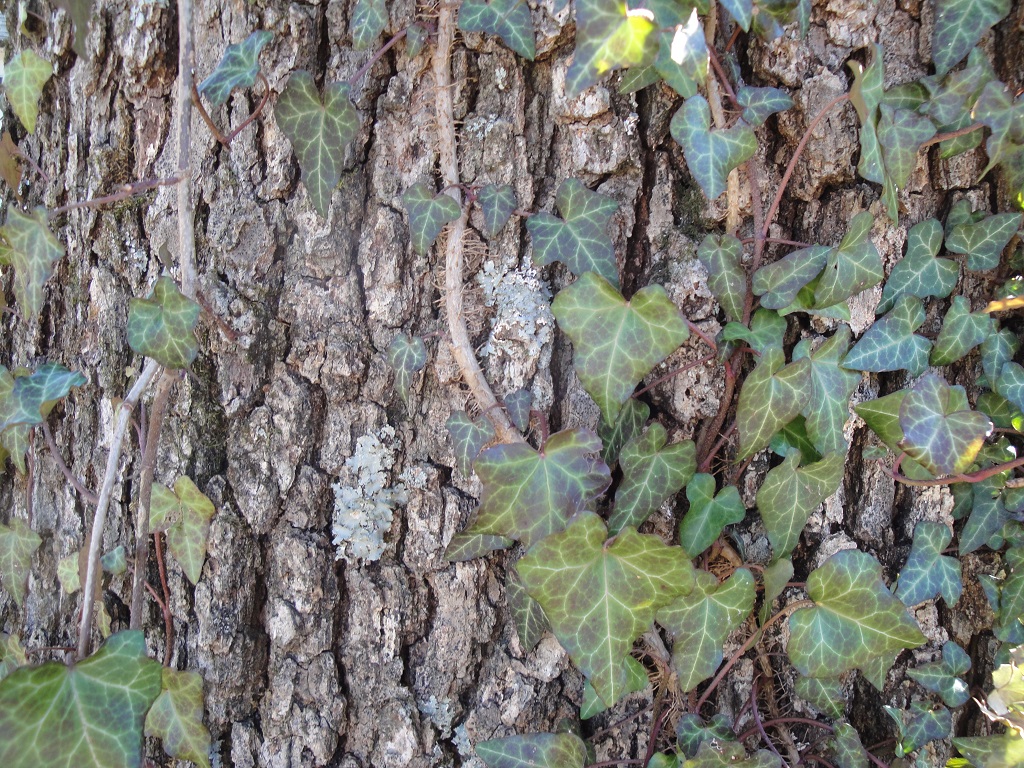
First, English ivy is a woody vine, so its stems will grow in girth just as a tree branch does. As they wrap around the tree trunk or the limbs and thicken over the years, the ivy stems will constrict tree growth, killing limbs and possibly the tree.

Second, the evergreen ivy holds moisture and debris close to the bark, and could encourage insects and diseases.

Third, as ivy scampers over the ground and up the trees, it provides safe haven for rodents. Birds of prey and other predators cannot see them. Here’s a red-shouldered hawk perched in a dogwood tree, looking for dinner.

Fourth, ivy competes with small native plants, crowding them out.

So the ivy must go.


Headings

Page 1: A New Home and New Gardens! (Inspections), The Lay Of the Land (Preliminary Plans For New Gardens), After Moving In, Trees and Shrubs (Poor Pruning Practices, The Root Of the Problem, Constricted, Flares and Girdling Roots, English Ivy)

Page 2: The Lawn (Safety First, Less Grass To Mow, Grass Clippings, Spontaneous Combustion), Drainage (Hold the Water), New Gardens for Old Plants (Virginia Sweetspire), More New Gardens and Less Lawn (The Black Walnut, The Ravine and the Woodland, Passionflower and Phlox ‘Minnie Pearl’)

Page 3: Planting a Few Trees (The Rule Of Thirds, Too Cold To Plant New Gardens?, Viola, Different Players—Same Script, All Those Leaves), A Welcome Surprise (A Firm Foundation, Heeling In, Iris, Chores Indoors), Christmas Already?, and Concluding

Return to the top of Page 1

Lavender Cuttings: Tips for Propagating Lavender


2020


Kim’s Tips for Rooting Your Own Lavender Cuttings


taking lavender cuttings

Cutting a lavender stem at a node.


How wonderful—the fragrance of lavender wafting through the back yard. You’re pleased beyond measure with these silver-leaved subshrubs in the pollinator garden, and perhaps you’d like more of them. The bees and butterflies are all over them! And the deer never touch them!! Garden centers stock several cultivars of lavender, but they are not inexpensive. Problem solved: “I’ll root my own lavender cuttings!”

The plants have performed well, and the garden is buzzing with activity. Now, you’d like to expand the garden to provide even more sustenance for all the bees and other insects. Admittedly, there is some work involved. Properly preparing the heavy clay soil takes effort and materials, but you know it will be worthwhile.

We need pollinators for farms and orchards, for our own vegetable gardens, and to regenerate natural stands of greenery. They pollinate every third bite of food we eat.

Because it takes several weeks to root cuttings and to grow them on to the proper size for transplanting, time is on your side. So, let’s begin by taking cuttings from the plants in the garden. While they’re rooting, you’ll have plenty of time to get the soil just right for the new plants.


Patent Rights

Because it’s illegal to propagate trademarked plants for resale, I bought the newer lavender cultivars in trays of 60 to 200 tiny rooted plants, called plugs. Labels of branded varieties carry the caution, “Unauthorized propagation prohibited”. Many varieties were not under patent protection, however, so those were the ones I propagated.


Lavender from Seed

Another option is sowing seeds—‘Ellagance Purple’ and ‘Lady’ are two that you might try growing. ‘Munstead’ is a strain that has been around for a long time. Seeds take a few weeks to germinate, so this project is best started in spring. Plants grown from seed (sexual propagation) can vary in certain characteristics, including plant size, foliage color, flower color and size, and time to first bloom.

Plants vegetatively propagated, on the other hand, will have consistently similar characteristics. Cloned plants, from cuttings, have the same genetics as the stock plant, so the rooted cuttings will look identical to the parent.


Lavandula and butterfly


Prepare the Pots and Soil for Lavender Cuttings


First, assemble 4″ or 4 1/2″ plastic pots. Bigger pots hold a much larger volume of soil and dry too slowly.

Lavender is susceptible to several fungal diseases, so starting with clean materials is essential. At the very least, wash the pots with soap and hot water. Better yet, clean the pots with a bleach solution, let them sit for a few minutes, then rinse thoroughly.

Another option is to use new cell packs, with 4 to 9 cells per pack. Soil in small cells dries faster, so you’ll need to closely monitor these containers.

Don’t use soil left over from last year’s plants; it could be harboring disease spores. Never throw “used” soil into the trash. Instead, add it to the flower gardens or the shrub border, where it will contribute organic matter as it decomposes.


Options for Potting Soil:

  • Always begin with pasteurized potting soil. Mix this with clean coarse sand or perlite. The medium should drain well, allowing both water and air to percolate through the soil.
  • Use products formulated for succulents, and add houseplant potting soil to make a gritty medium, but one which will hold some water.
  • Or, simply, use a fresh bag of pasteurized potting soil, which includes perlite, and be very careful about watering.

Avoid using soil containing a large percentage of peat moss, which is acidic and stays too wet for lavender. This herb, like many others, needs close to a neutral pH.

Incidentally, most potting soils sold in garden centers contain no soil at all, and are sometimes called “soilless potting mixtures”. For our purposes, the term “potting soil” will do.

If the medium is dusty dry, mix in a small amount of water. Avoid breathing in the dust. The soil should be slightly damp. Fill the pots with potting soil, and firm lightly. Leave about 1/2″ to 1″ of space between the soil surface and the pot’s rim.


Making the Cut


joyce chen scissors for cutting lavender

Joyce Chen scissors.


When To Cut

Cuttings taken in early to mid summer should root adequately before autumn. These are considered “semi hardwood” cuttings. The stems aren’t fully matured, but they aren’t too tender, either. Tough old woody stems will not root.

Collect lavender cuttings in the morning, when they’re fully plumped with water. Don’t use material from the bottom or from the shady side of the plant. Use healthy foliage, without any spots. Cuttings from plants that have not been overfertilized with nitrogen often root more successfully.


How To Take Lavender Cuttings

With clean sharp scissors, take cuttings from non-blooming, non-budded stems. Lavender cuttings from the tips of the stems, rather than from middle sections, make better propagating material. If your early blooming lavender plants were deadheaded (old flower stems cut back) early in the season, the remaining stems might already have branched out, providing fresh cutting material.


lavender cuttings

Cuttings, before removing bottom leaves.


Lavender cuttings should be only 2″ to 3 1/2″ long, depending on variety. Large cuttings have greater leaf surface area, and the cuttings are more likely to wither before roots form. When taking cuttings from any plant, consider the number of leaves, light, water, humidity, and time to root. Each variety has its own combination of variables that result in prompt, successful rooting. Long cuttings, low humidity, lack of light, and wet or dry soil will not yield rooted plants.

Make the cut where two leaves join the stem (photo at top). This part of the stem is called the “node”, and the first roots often emerge there.

Now, remove leaves on the bottom inch or so of the stem. Gently peel them off. Otherwise, leaves will rot in the soil, which could rot the stem.


lavender cuttings

Cuttings, ready for sticking.


Rooting Lavender Cuttings In Water

Coleus cuttings start rooting in water in a few days; lavender requires weeks in soil. When possible, I always root plants in potting soil rather than in water. The roots’ cell structures differ between the two methods, and those growing in water often die when re-adapting to soil.

If you have plenty of cuttings, perhaps rooting some in water will work for you. Cuttings should still be about 3 1/2″ long. Use only an inch of water in a glass, don’t crowd the cuttings, and remove leaves in the water. Place the glass in part sun, and change the water every few days.


Sticking the Lavender Cuttings


After decades of rooting plants under lights for my business, I’ve had the most success with cuttings that were stuck right next to the inside of the pot. Particles of soil touching the wall of the pot tend to permit more air to circulate around the stems. That’s precisely what lavender needs.

The stems aren’t sitting in wet soil, although there is some contact. At night, as the temperature drops, water vapor precipitates on the inside of the pot. And the humid air in that space helps the cuttings root.


lavender cuttings in a pot

Lavender cuttings.


This 4 1/2″ pot accepted 9 cuttings, with 1 in the center. Avoid crowding the cuttings; space them so their leaves don’t touch each other. Lightly water in the cuttings to make better contact between the stems and the soil.

I propagate other herbs, including thyme, rosemary, oregano, sage, and bay laurel, in the same way.


Actinovate

When propagating thousands of herbs and perennials each season, I used an organic biological fungicide called Actinovate. This product, a bacterium called Streptomyces lydicus strain WYEC 108, prevented vulnerable plants from succumbing to most diseases. Water the solution into the soil after sticking or lightly mist the cuttings, occasionally, in the morning. I also used it when germinating seeds.

This fungicide is quite expensive, but it made plant propagation much easier for me. It carries the OMRI label and is safe to use on edibles.

Always exercise caution when using materials for treating plants. Don’t breathe the dust, avoid getting it on your skin (rinse thoroughly), and don’t improperly dispose of leftover product or the container. Read the label.


Rooting Hormone

Rooting hormone powder coats the base of the cutting with a chemical fungicide and plant hormones. While it accelerates the rooting process for many plants, this product carries the Environmental Protection Agency’s Caution rating, as does Actinovate.

I haven’t used it for many years, but, if you’ve had good results using rooting powder, then try it on your lavender cuttings. Always read the label, and never discard leftover powder where it can pollute streams.


Raise the Humidity


lavender cuttings in clear plastic bag

Pot of cuttings in open plastic bag.


In order to raise the humidity around the cuttings without causing rot, place the pot of cuttings into a clear plastic bag. Pull up the bag so it surrounds the cuttings, but don’t secure it. Fuzzy-leaved plants, such as lavender, rot (not “root”) easily in high humidity. A closed plastic bag or some other closed system raises the relative humidity to 100%. It also causes the “greenhouse effect”, raising the temperature too high.

So, keep the top of the bag open. Enough humidity will remain around the lavender cuttings. In very dry environments, the bag can be partially closed, but don’t let heat build up. Empty any water that collects at the bottom. If the soil is moist and there’s significant condensation inside the bag, open the top more widely, and let excess moisture dissipate. Wet soil will rot the cuttings.


Light For Lavender Cuttings


sunshine through trees


Lavender loves to bask in the sunshine. The sooner the cuttings get back to the sun, the sooner they can resume strong growth. But harsh sun will desiccate the unrooted cuttings. This is a race against time.


Indoors

Indoors, place the cuttings where they will get gentle direct sunlight. Sunlight helps cuttings root faster, but strong sun will dry them and overheat the air inside the bag. Bright filtered sun most of the day, as through a sheer curtain, works well. Average indoor temperatures (mid 60’s F to low 70’s) will help them root.

Don’t put the cuttings too close to a window, in the hot sun. Check to make sure excess heat can escape. Lavender cuttings will not root in low light, so it might require a bit of experimentation to find the perfect light level to root the cuttings without desiccating them.

New growth emerging from the tip of the stem indicates a cutting that is beginning to root. Congratulations!


Artificial Light

A 4′ long fixture with 2 daylight LED or fluorescent tubes makes a perfect nursery. Here, the plants never see a cloudy day, and you can keep a close eye on progress.

Place the lavender cuttings close to the tubes, within 2″ or 3″. They should be as close as possible to the lights, but not feel heat from the fixture. Keep the lights on for 14-16 hours each day.

Smaller tubes and grow bulbs emit less light, which might not be enough for lavender. But if that’s what you have, try it. Make sure the cuttings are close to the tubes and that the lights are kept on for perhaps 18 hours each day.


Outdoors

Many of us don’t have indoor space suitable for rooting lavender cuttings. In that case, place the pots outdoors in dappled shade, where the plants will get more bright shade than harsh sun. Don’t expose them to hot afternoon sun. Find a location out of the wind.

In a pinch, take a few cuttings and simply stick them at the edge of a planter, in light shade cast by a plant. I’ve been able to root many kinds of plants this way. Watch out for slugs, by the way, and use organic Sluggo to bait them. Scoop out rooted plants, and pot up for a few additional weeks of growing and getting used to full sun before planting them in the garden.

The cuttings in the photographs go outdoors on the deck in the morning. I take them back inside at noon or in early afternoon. It’s been way too hot and humid outside this summer—mid 90’s F, over 100° heat index for days at a time. When it cools down, they’ll spend more time outdoors.

(***Update***: The pot of cuttings in the photographs has only one survivor. Prolonged heat, frequent downpours, and mischievous chipmunks digging in the soil killed the rest. But that one well-rooted plant looks great, and will stay in its 4″ pot over the winter. 1/1/2021)


Ready for Transplant?


Okay…it’s been about 5 or 6 weeks and most of the cuttings show new leaves growing at the tips of the stems. That’s great!

If you see roots at the drainage holes in the bottom of the pot, the cuttings might be ready to divide. Remove the cuttings from the pot by gently tipping the pot upside-down. See if there are enough roots to move them to the next stage. Each cutting should have a few 1″ to 2″ long roots. Handle with care, since the roots detach easily from the stems and dry quickly when exposed to air.


Cuttings Rooted in Pots

Before settling them into their permanent homes, the rooted cuttings in pots will need to grow a more extensive root system. Transplant them individually into their own small pot or into 4-cell market packs. Be sure to maintain the same soil level against the stem; never bury the stems. Use the same kind of soil you used to root them.

If they’re rooted, give them full sun for a few weeks before planting in the garden. Rooted cuttings don’t require high humidity, so remove the plastic bag.


Cuttings Rooted in Cell Packs

If you planted the cuttings in market packs to begin with, simply push up the bottom of a cell to check root growth. Don’t pull the cutting itself. Well-rooted plants can be planted directly into the garden if you monitor them very closely. If needed, cover temporarily with a “caterpillar” tunnel fitted with bird netting. This protection admits air and sunlight, and will prevent damage from digging animals while the lavender becomes established.

If cold weather is approaching, use a clear plastic cover over the tunnel, and vent it in the daytime. This will buffer severe conditions, and could save the plants.


Harden Off the Lavender Cuttings

Harden off the cuttings by gradually introducing them to outdoor conditions over a period of a week or so. Place the pots of lavender outdoors, in morning sun for a few days, then in more hours of sun. It’s easy to forget them, when they’re out of sight, so remember to water! Plants receiving abundant sunshine make more food for themselves, through photosynthesis, so their roots will grow faster. By the end of the hardening off process, the plants should be able to tolerate direct sun all day.

Remove flower buds appearing on young cuttings. For now, all energy should be directed toward growing a robust root system.

Any cuttings that haven’t rooted and have foliage that feels limp can be discarded. If they look like this after a month, it’s not likely they will root. Figure out how to improve the growing conditions, and try again.


The Garden is Ready


garden rake, prepared soil


And so are the plants. Water them first. Then remove the rooted plant from its pot and gently loosen the outer roots if they form a tight root ball.

Plant the little lavenders, maintaining the same soil level next to the stem. Firm the soil around the roots to eliminate air pockets. For almost all plants, you should be able to see the top of the original root ball after transplanting.

Be sure to space them properly, according to the variety. Some mature at 16″ tall and wide, while others can grow as large as 3′ or 4′ across. Lightly shade the plants if the leaves wilt in moist soil. Sticking a leafy twig in the ground on the sunny side works well enough.

During hot weather, check the soil moisture every day, although you might not have to water every day. Feel the soil a few inches down and next to the root ball. If you detect moisture, don’t water. If it wilts or the soil feels dry, water around the root ball.

When you do water, keep the foliage dry. This helps prevent disease.


To Mulch Or Not To Mulch

If you use mulch in the garden, avoid placing it under the canopy of the plant. Where it rains regularly, mulch can hold too much moisture in the soil, so use only a thin layer or, preferably, none at all right under the plant. Keep mulch off the stems.

Avoid finely shredded hardwood mulches, and choose pine fines or small nuggets instead. They permit better air circulation around the lavender.

Planting lavender on raised ground helps the soil drain faster, and plants display better when elevated above surrounding lawn or paving.


Is Your Lavender Winter Hardy?


lavender


Each plant variety has a hardiness zone rating, usually between zone 5 and zone 9 for lavender. If you live at the colder end of that variety’s hardiness zone, the rooted plants might need the protection of a cool greenhouse or a cold frame until next spring. It depends on expected weather patterns—temperature and precipitation—over the next several months for the cultivars you’ve selected.

At this point, in late summer, waiting to propagate lavender until next year might be more feasible, especially for gardeners in colder climates.

Lavender is drought resistant once established in the garden, but often dies when overwatered. Improving soil drainage is especially important for cultivars planted in the colder regions of their hardiness zones. “Winter wet” is a frequent cause of lavender failure.

Plant lavender with other perennials and shrubs that share its preferred growing conditions. Although it isn’t native to the U.S., it is non-invasive.

You might enjoy reading about the history of lavender and its uses through the centuries. This article at The Farm In My Yard includes more detailed information for growing lavender successfully.

Better for the Environment

Traditional property management calls for removing winter shelter and sources of food for insects and animals, so this is how we can begin to compensate, right in our own gardens.

Propagating plants is an economical means of providing new material for your gardens. Planting species that offer sustenance to pollinators is not only ecologically preferable to maintaining lawn grass, but it’s also prettier!


lavender


Return to the top

Daffodil Bulbs: Divide, and Multiply the Flowers


How Do Your Daffodils Look This Year? 


daffodil bulbs, yellow, cane creek park

Daffodils in February at Cane Creek Park, Waxhaw NC.


For years, your daffodil bulbs bloomed to great satisfaction. From late winter to mid-spring, there was never a shortage of cut flowers to bring indoors. And plenty remained in the garden to admire from indoors or for neighbors to enjoy.

But this year, they were so disappointing! Masses of slim green leaves look healthy enough, but there were only a few flowers! Come to think of it, there weren’t many last year, either. They should be in their prime right now.


daffodil leaves, no flowers comp

Clumps of daffodils with all leaves, very few flowers.


Why does this happen? You’ve been using the bulb fertilizer recommended by the garden center, and, heaven knows, they never went dry! They looked great a few years ago. Clearly, there’s a problem with the daffodils.

This is called daffodil “blindness”, or lack of flowers. A number of factors contribute to this condition.


“Should I Remove Them?”


Not yet. Just let them soak up the sun’s energy, undisturbed, for as long as the leaves remain green. Don’t cut, knot, braid, or mulch over the leaves. Keep them exposed to direct sunlight. Remove any seedpods, if you see them, to conserve energy and resources. All energy should be directed toward plumping up the bulbs.

In this article, you’ll find tips for restoring your daffodil gardens back to their spectacular spring show. I’m including information on conditions for growing daffodil bulbs successfully for many years into the future. But it’s too early to dig them up right now. Once the leaves have turned yellow or brown, we can begin to dig, divide, and re-set the bulbs.

Bulbs that have been forced in a pot should be planted into the garden after the foliage yellows. While the leaves are green and photosynthesizing, continue watering and provide sunlight. Lasagna pots, crowded with layers of bulbs, rarely bloom well, if at all, a second time. These bulbs might need a year or two in the garden gathering strength for more blooms in the future.


Hardiness 

There are 13 divisions of Narcissus, grouped according to their flower structure. Thanks to the efforts of daffodil hybridizers, consumers can choose from among 32,000 registered daffodil varieties! Also, according to the American Daffodil Society, there are between 40 and 200 daffodil species.

In general, daffodils grow in USDA plant hardiness zones 3 to 11, although some prefer the cooler end, and others, the warmer zones. Before purchasing your bulbs, find out which zone you live in and which varieties will grow there.

‘Camelot’ and ‘Flower Record’, for example, are better suited to zones 3 to 7, struggling in a warm zone 7 season and failing south of it. The paperwhites Narcissus tazetta (N. papyraceus) ‘Avalanche’ and ‘Minnow’, on the other hand, do better in the warmer zones 5 or 6 to 9.


For Now, Fertilize the Daffodil Bulbs


Apply a complete bulb fertilizer to your daffodils and other spring-flowering bulbs. It should have low levels of nitrogen (N), but more phosphorus (P) and potassium (K) content. Use a low analysis product, such as 5-10-10 (N-P-K). 10-10-10 also is acceptable.

As plants photosynthesize, they make their own food and store it in the bulbs. This nourishes the embryo, which is dormant in summer, and prepares the plant for next year’s growth. The more carbohydrates stored in the bulbs, the more flowers for next spring, as long as other conditions are favorable.

Fertilizer applied as the bulbs begin to emerge from the ground could cause the robust foliage and heavy flower heads to flop over. I normally fertilize the bulbs later, around the time of peak bloom, if they need it. Non-flowering bulbs can benefit from a light fertilizing before dividing the clumps. Because the foliage will stay green for several more weeks, the bulbs will have time to utilize the fertilizer.

A soil test conducted by your local agricultural extension service will indicate whether any nutrients should be added.


Bone Meal

For years, many gardeners have relied on bone meal to fertilize their bulbs. Bone meal contains a small amount of nitrogen (3-4%), more phosphorus (12-14%), no potassium, and some micronutrients (Ca, Fe). Mixed products available for bulbs might include bone meal, but also have additional nutrients to make a complete formulation.

The problem with exclusively using bone meal is that it takes longer than other products to break down and become available to the roots. Furthermore, phosphorus, the primary ingredient, moves very slowly through the soil profile. For that reason, bone meal added to the root zone—before planting the bulbs—might be more useful than applying it to the surface of the ground. Avoid direct contact, though, between the bulbs and the fertilizer. Still, it’s not likely to provide nutrients until months or a full season later, after microbes have begun decomposing it.

Bone meal is a slaughterhouse by-product, after sterilizing and grinding cow bones. Some animals are attracted to the scent, so burying it might prevent it from being consumed.

Because daffodils and other bulbs aren’t very demanding, giving them anything should result in good growth. Soil pH should be somewhere between 6.0 and just below 7.0 for nutrient availability. If a soil test indicates adequate phosphorus, I wouldn’t use bone meal. An excess of P will interfere with the uptake of other nutrients.


Food or Fertilizer?

Notice the distinction between the terms “fertilizer” and “food”. Fertilizer is the product we apply to plants. There are many kinds of fertilizers, including soluble and granular types, and compost. They provide various amounts of nutrients to help plants function at an optimum level.

Food is a product of photosynthesis; plants make their own food inside the foliage. This substance is stored as carbohydrates in bulbs, stems, and roots, depending on the species.


Easy Does It!

Daffodils and other bulbs we plant in our gardens don’t need much in the way of nutrients, so never overfertilize. Perhaps you’ve seen clusters of yellow or white daffodils randomly appearing along roadsides or in the middle of a field. Heirloom varieties of Narcissus bulbs are sometimes the only surviving clues that an old homestead once stood nearby. Daffodil bulbs can live for decades!


***Update***: At the south edge of the woods at the new property, daffodils emerged under snow and after a tangle of growth had been cleared away (photos, above). Once the honeysuckle vines, brambles, and tree saplings had been removed, the daffodils grew thick and healthy, although there were few flowers. The soil there is rich with decomposed leaf litter. After the foliage begins to yellow, I’ll divide and transplant most of the bulbs. 3/20/2022


daffodil bulbs


***Update***: Well, I never got around to dividing these bulbs. Starting in January 2023, abundant flowers grew on stronger plants (photo, above). And the flowers lasted 2 months! I don’t know the variety, but it’s an older one with fragrant double flowers. Because the flowers last such a long time, I’ll transplant several divisions to the garden on the far side of the driveway, visible from my office. 4/13/2023

“Then, why do those old abandoned daffodils look better than mine?”

Over time, year after year, fallen leaves and other organic debris have collected at the soil surface above the daffodil bulbs. Microorganisms decompose this material from spring through fall, while the soil is warmer. Nutrients from decomposition slowly filter down to the roots, and are absorbed as the roots emerge in late summer and autumn.

Those abandoned daffodil bulbs don’t need fertilizer from us, nor do they need a layer of mulch. Mother Nature is looking after them! Sometimes, less is more.

Growing our bulbs leaner could help. Pushing them to “grow better” is one reason for overabundance of foliage and lack of flowers. High nitrogen is particularly problematic. For spring-flowering bulbs in decent garden soil, the application rate recommended on the package of bulb fertilizer can be halved. Unless your garden soil is absolutely wretched, keep the fertilizer levels somewhat low.

If the garden soil is good enough to sustain annuals and perennials, it is more than adequate for daffodil bulbs. With occasional applications of fertilizer to garden plants through the growing season, the bulbs lying dormant in the soil below them will have plenty of nutrients when they begin to root out.

I fertilize lightly, sometimes, in autumn, as the bulbs root into cooling soil, and again when they’re in full leaf in spring. It just depends on how the garden has been managed. In many years, I don’t fertilize at all.

Bulbs planted in gardens under irrigation might be getting too much water, which can rot the bulbs. Daffodils don’t appreciate dry soil, but wet soil will kill the bulbs, and then nothing will sprout.


mount hood daffodil bulbs

‘Mount Hood’ daffodils. As they age, they turn ivory white. Soil in the mulched garden was good, so I rarely fertilized them.


“Can I use compost?”

A moderate amount of compost top-dressed on the surface and watered into the soil makes a fine addition. Or scratch the compost into the surface of the ground. Covering the compost preserves the beneficial microbes, which will be destroyed by the sun. Because the bulbs are deeper, they won’t be damaged by light cultivation.

Nutrients in decomposing mulch also contribute to the health of the soil. Soil under slowly decaying shredded hardwood mulch is probably sufficient for daffodils and other spring-flowering bulbs. Earthworms consume partially decayed material, enriching it in their own special way. They then distribute the castings (earthworm excrement) throughout the garden soil, and aerate it as well.

Shredded hardwood mulch breaks down faster than pine products, but don’t pile on large amounts. That could cause manganese toxicity and raise the pH too high. It’s a good idea to use shredded hardwood for a few years, and then switch to pine for a few years.


Headings

Page 1: How Do Your Daffodils Look This Year?, “Should I Remove Them?” (Hardiness), and For Now, Fertilize the Bulbs (Bone Meal, Food or Fertilizer?, Easy Does It, “Then, why do those old abandoned daffodils look better than mine?”, “Can I use compost?”)

Page 2: Sunlight For Daffodil Bulbs, Daffodil Bulbs Under the Trees, Soil and Drainage (Soil Preparation, Dig In!), Divide and Multiply Daffodil Bulbs (The Process, “And How Deep Is That?”), Time To Plant Daffodil Bulbs (Planting in Autumn, Planting in Early Summer), Summary

Return to the top

How To Transplant Houseplants

2019


Time To Transplant Houseplants?


potting soil, how to transplant houseplants


As the end of the growing season approaches, we need to prioritize all the chores that need attention. Do the houseplants require transplanting? The plants that summered outdoors must come back inside soon, before frost damages the foliage or kills the plants.

They’ve been luxuriating on the porch, in higher humidity and brighter light than they usually receive inside. It’s no wonder they look fabulous! So, reintroduce them to indoor conditions while the days are still somewhat long and before the furnace kicks on and dries the air.

Perennials that looked picture perfect in May now look a little stressed after those record high temperatures. And the tired vegetable garden needs fresh compost or aged manure before setting the fall crops.

In a few weeks, flowering bulbs will arrive at garden centers…with pansies, violas, snapdragons, dusty miller, and Heuchera, trailing ivy, and hardy grasses. You’ve been dreaming of those beautiful combination planters, like the ones you saw last autumn at the garden center. But first things first.


Should We Transplant Houseplants Now?


Let’s start with the houseplants. Exposing tropicals to cooling temperatures outdoors, as autumn takes hold, could stress your houseplants. And some of those plants are pleading for attention right now.

While certain plants can tolerate cooler temperatures (cyclamen, ferns, English ivy, succulents, ponytail palm), others can’t. The aroids (peace lily, Dieffenbachia, Anthurium, Philodendron, Alocasia, Chinese evergreen, pothos), prayer plants (Calathea, Maranta), and some of the begonias, for example, should come indoors before temperatures dip below 60°F.

Although they won’t be killed by a few nights in the 50’s, or even the 40’s, you don’t want to prolong their discomfort. Chilling stresses many of our tropical houseplants, and can rot roots and disfigure foliage.


Inspect Them First


Scale on Ficus neriifolia (leaves are 7/16″ wide).

You probably won’t need to transplant houseplants, summering on the porch, that were repotted in the spring. All you need to do now is to inspect them for insects and spider mites before bringing them indoors. Check the bottom of the pot for slugs and sowbugs hiding around the drainage hole.

Clean up the leaves, too, and remove any that are discolored, insect-eaten, or damaged. Peel away the entire leaf, so none of the leaf stems (petioles) remain that later will turn yellow or brown.

After the inspection, clean the pots, wash the saucers, and place the plants in front of the windows where they seemed to thrive last winter.


Horticultural Oil

The dwarf Ficus neriifolia contracted a scale infestation, so I sprayed it with a horticultural oil solution. For insects and mites, horticultural oil works very well. It smothers the pests and is safe to use on most plants, including edibles.

Wiping the horticultural oil solution on smooth leaves (fiddle-leaf fig, pothos, peace lily) with a soft sponge removes dust, grime, and residue from water and fertilizers. It gives them a nice luster without appearing artificial. Read the label; I prefer to use less oil than is recommended on the label—to start with, anyway. Horticultural oil makes surfaces slippery, so be careful.


fiddle-leaf fig

The fiddle-leaf fig, Ficus lyrata.


Do Your Houseplants Actually Need Bigger Pots?


potted plant bonsai

Evergreen bonsai.

Knowing if the plant needs repotting, when to repot, and how large a pot to use is half the battle.

Does it wilt often? Perhaps instead of repotting, the plant needs to be deeply watered. Or maybe the roots have rotted in waterlogged soil, or the water rushes right through without moistening the soil.

I’ve seen a lot of dead plants over the years, and many simply were in pots that were too large. “Aren’t we supposed to transplant houseplants every year, just like our children outgrow their shoes every year?” No; once they have matured, plants can stay potbound for quite some time.

“If I transplant houseplants into bigger pots, won’t that make them grow faster and bigger?” No, another myth! If you transplant houseplants into pots twice the size they need, they more likely will die faster.

Large pots hold large quantities of soil and water. When the moisture is not used by the plant, the sodden mass just sits there, cutting off the oxygen supply and rotting the roots. So, if the entire volume is not tightly filled with roots, the plant doesn’t need to be repotted.

Many houseplants like being potbound. English ivy (Hedera helix), pothos (Epipremnum aureum), Philodendron, palm trees, Ficus trees, African violets, succulents, snake plants (formerly Sansevieria, now Dracaena), and bonsai prefer somewhat cramped quarters. Many potted herbs (rosemary, lavender, chives, sage, thyme) also fare better when potbound. But, in order to ensure good health, gardeners must provide nutrients according to the needs of the particular plant, and according to the time of year.

It’s helpful to know the habits and preferences for each kind of plant. For example, although the 4′ tall variegated snake plant (Dracaena trifasciata ‘Laurentii’) eventually will need a 10″ or 12″ pot, its cousin, the dwarf bird’s nest species (D. hahnii), can stay in a 4″ or 5″ pot for many years!


Fertilizing Houseplants

Most tropical plants spending the winter indoors won’t need fertilizer until late winter or early spring. If they continue to grow and look healthy, and they’re receiving good light, though, diluted solutions (1/4 to 1/2 strength) can be added every 4 to 6 weeks. Err on the side of using less fertilizer in winter.

As long as they’re properly watered and fertilized, your plants can remain perfectly happy while potbound. In fact, they’re easier to manage this way, since there’s less likelihood of overwatering. But you’ll have to water more frequently.

Look for products formulated for foliage houseplants or for flowering plants. They’re available in several forms: timed-release prills (use a low dose from fall through winter), liquids, granules, and soluble crystals. Read the label.


Fungus Gnats

Plants in smaller pots are less susceptible to diseases, root rot from overwatering, and fungus gnats. Ever have those annoying little “fruit flies” around your houseplants? The simplest remedy is to allow the soil surface to dry out.

Female fungus gnats lay eggs on moist soil. When the tiny larval worms emerge, they eat small roots, sap on cuttings, fungus, and organic matter in the top inch or two of the soil. Let the surface of the soil dry before watering again, and you’ll have fewer fungus gnats. See if adding a 1/2-1″ layer of pine fines as a mulch might prevent gnats from laying eggs.

Yellow sticky cards are good for catching flying insects. A card placed horizontally near the plants, on the pot’s rim, or in a sunny window attracts the most gnats.


Save the Spider!

spider plant

A green spider plant.

The spider plant in the 4″ pot that your girlfriend gave you two months ago is literally crawling out of the pot. She propagated it from one of her own plants, so it has sentimental value.

Spider plants, related to other strong-rooted Asparagaceae (formerly Liliaceae) family members, develop roots that circle around the inside of the pot. The vigorously growing roots raise the entire plant higher in the pot, opening up air spaces around the root ball. This dries out the finer roots, and water gushes immediately through the drainage holes without moistening the soil. Clearly, it’s time to work on this one.


When Should I Transplant Houseplants?


A good time to transplant houseplants is in spring to mid- or late summer. Plants that recover slowly (for example, succulents) should be repotted, if needed, by mid-summer. In autumn and winter, plants receive fewer hours of daylight, photosynthesizing at a reduced level. Our slower growing tropicals don’t grow much foliage in autumn and in winter. And roots also are reluctant to grow.

Cooler temperatures, compared to the balmy summer days spent on the porch, cause systems to slow down. So, trying to force plants to grow at a time when they’re entering semi-dormancy often does more harm than good. Plopping a plant’s almost dormant root system into wet soil and expecting it to grow is asking the plant to do something against its nature. It would rather stay semi-dormant.

greenhouse
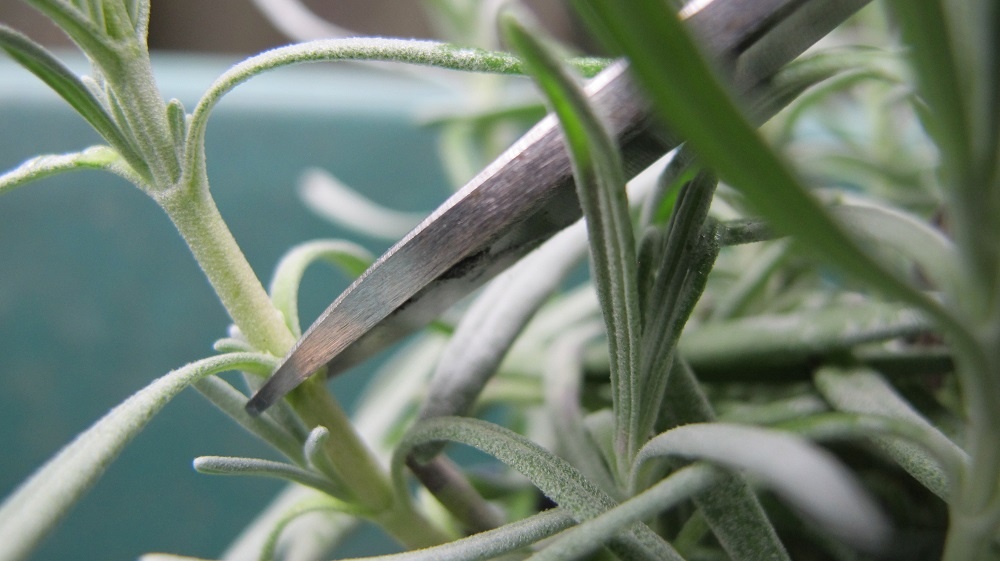
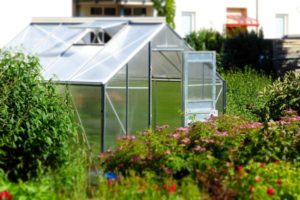
Providing a greenhouse atmosphere—warm, humid, and sunny—keeps your houseplants in much better condition, even through the shortest days of winter. Optimal light levels increase rates of photosynthesis, respiration, and transpiration. As a result, they might grow almost as fast as they did in June.

But most of us deal with dryer air, energy-saving chilly nights, and dim lighting (in the plants’ eyes) until the hyacinths bloom outside.

Plants, both indoors and out, take on renewed vigor once the days lengthen closer to springtime. Some of us humans do, too.


How Big Should the Pots Be?


succulent dish garden

Succulent dish garden in ceramic bonsai tray.

I’ve grown dwarf peperomias and miniature succulents, such as Echeveria minima and Haworthia truncata, in 2″ pots for many years. Since the succulents are prone to rot in wet soil, keeping them very potbound decreases the chances. There simply isn’t that much soil in the little clay pot, and it dries fast in direct sunlight.

Most of the succulents I enjoy growing are on the small side, anyway. Almost all are in 1½” to 4″ pots, and others have been planted in larger, but shallow, bonsai trays (photo, right).

I brought with me from Maryland a 4½” pot of Drimiopsis kirkii, one of the leopard lilies, and it has yet to be repotted into a larger pot, 6 years later. Its cousin, Drimiopsis maculata, however, grows from bulbs which multiply faster than those of D. kirkii. So D. maculata gets divided more often, but they’re still in 4½” pots.

Dracaena hahnii, the dwarf snake plant, lived happily for years in a 4½” pot. The small, glossy-leaved Spathiphyllum wallissii would have complained if it had been bumped up into anything larger than its 6½” plastic pot.


pink cyc.

We’ve had this miniature cyclamen for years.


A pink flowering miniature cyclamen stays in its 4½” pot (photo, above), year after year. It is now coming out of dormancy and beginning to grow new foliage, contrary to what most other plants are doing. That’s because its growth cycle calls for cool to cold, but not freezing, temperatures in order to set flower buds. It will be fertilized accordingly, for a full canopy of marbled leaves.

The plant’s habit and its root structure help determine the required pot size. In general, transplant houseplants into pots that are only 1″ to 2″ wider, and only if they need it.


The Old Weeping Fig

weeping fig

Variegated weeping fig.

A weeping fig (Ficus benjamina), given time, will grow to the ceiling. Instead of raising the roof, its height can be managed by “aesthetically” cutting stems back in the spring, when it will respond faster.

I grew a variegated weeping fig in a 14″ pot for about 15 years, in front of a big window that received a few hours of morning sun. When the tree grew to almost 8′ tall, above the top of the window, I pruned it back a few feet. Then, when it regrew, all the foliage was once again in the sun and at eye level.


African Violets


African violet

A healthy African violet.


African violets (Saintpaulia ionantha) are happy to stay in 4″ pots for years. Miniature African violets need smaller pots than that.

A rule of thumb for pot size and an African violet is to plant it in a pot that is 1/3 the spread of the foliage. So, a 4″ pot will accommodate a plant that is 12″ wide. Plants in top condition might take a slightly larger pot, but you have to pay very close attention to moisture and soil drainage.

“What should I do with an African violet that has a long trunk?”

As these plants grow new leaves from the top of the rosette, older leaves lower on the stem die off. That’s part of their natural growth pattern. When the plant develops a trunk, it’s time to make an adjustment. But don’t do this if the plant is slowing its growth. Spring to mid-summer is a better time for this procedure.

Remove the plant from its pot and slice off the bottom third of the root ball. Shave off a small amount from the sides as well. Wash the pot, check the plant for insects (mealybugs, especially), and treat with horticultural oil if necessary.

Place a small amount of African violet potting soil in the bottom of the pot. These plants like peat moss in their mix. Set the plant in the pot, and fill in the sides with more soil, using a chop stick to firm soil in the gap.

Part of the trunk will now be loosely covered with soil, and it will grow new roots. The top of the root ball should be lower in the pot than it grew previously. (Yes, this is exactly what we don’t ordinarily recommend.) Water it in, using lukewarm (about 85°F) water. Keeping the soil too wet will rot the trunk and the roots.

Use the kitchen sink sprayer to wash soil off the leaves, using lukewarm water. Towel off the water drops, and let the plant dry in a warm location.

It’s less stressful for these plants if this is done every year or two, before the trunk grows a few inches tall. But I have seen perfectly happy violets with long stems curling over the edge of their pots.

“What are those marks on the leaves?”

Water the soil—always lukewarm for African violets—and avoid wetting the leaves. If water splashes on the leaves, absorb it with a towel, and let the plant dry in a warm place. As drops of water chill on this plant’s leaves, unsightly tan or brown rings and lines will be left behind.

Grow African violets at 70 to 74°, and fertilize regularly with a product formulated for this genus.


Less Is More

stack of clay pots, transplant houseplantsMove miniature species of plants into something only 1/2″ to 1″ larger, if they need it. I know; that doesn’t seem like it could make much of a difference. But for the plant whose roots, in the wild, might be crammed between layers of sedimentary rock on a blustery cliff, 1/2″ is plenty.

Large-growing plants require new pots up to 2″ wider in diameter. Peace lily (robust varieties of Spathiphyllum), weeping fig (Ficus benjamina), Chinese evergreen (Aglaonema spp.), and larger palm species can be moved from 6″ starter pots into 8″ pots. And, importantly, this assumes that the roots tightly fill the smaller pot.

Many of the tropicals will survive and prosper over the next several months, even while very potbound. If they’re already in 8″ pots, they’ll likely be fine until spring, when they can be potted on if needed. The 6′ tall fiddle-leaf fig in an 8″ nursery pot, though, can go into a 10″ pot, since the heated sunroom has floor-to-ceiling windows. Sunny conditions encourage plants to grow new roots, but carefully monitor soil moisture. Avoid watering houseplants (especially succulents) on cloudy days.

If growing conditions in your home are not ideal, but plants absolutely need to be repotted, transplant them now, before fall, into slightly larger pots. Wait until spring to transplant large houseplants, if it’s needed at all.

Houseplants don’t require repotting every year. Once they have attained a mature size, they no longer need to be moved into progressively larger pots. Instead, regularly fertilizing with products formulated for houseplants will supply all the nutrients they need.


Headings:

Page 1: Should We Transplant Houseplants Now?, Inspect Them First, Do Your Plants Actually Need Bigger Pots? (Fertilizing Houseplants, Fungus Gnats, Save the Spider!), When Should I Transplant Houseplants?, How Big Should the Pots Be? (The Old Weeping Fig, African Violets, Less Is More)

Page 2: Prepare for Transplant (Root Insects, Speaking of Spider Plants, Roots-Air-Water-Light) and Potting Up (Score the Root Ball, Potting Soil, Begin Filling the Pot, Downsizing, Water It In)


Return to the top


Lavender: History and How To Grow It

2019


Lavender’s Long History


old lavender


B.C.


For many centuries, lavender has enjoyed popularity for its alluring fragrance and for its medicinal qualities. Lavandula dentata was first cultivated on the Arabian peninsula, and other species spread from Greece across Europe. Lavender species might also have originated in the Cape Verde Islands and the Canary Islands off the west coast of Africa.

Thousands of years ago, Egyptians and Phoenicians used the herb in perfumes and during mummification. When Egyptian King Tutankhamen’s (1341-1323 B.C.) tomb was opened by Howard Carter in 1922, claims were made that the scent of lavender could be detected.


Greek islands


Greek traders introduced lavender around 600 B.C. to the Hyères Islands, off the southern coast of France, and to Europe from there. Ancient Greeks used it for insomnia and backache, and in public baths.

Cleopatra
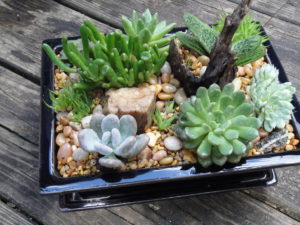
Other healing qualities of lavender were recorded in the 3rd century B.C., when Greek physician/philosopher Theophrastus (c. 372-287 B.C.) wrote of them in Concerning Odours.

Cleopatra (69-30 B.C.), Queen of Egypt from 47-30 B.C., was able to temporarily preserve her kingdom from Roman rule. As the story goes, she used lavender to win the love of Roman generals Julius Caesar (100-44 B.C.) and Mark Antony (83-30 B.C.).

Upon defeat by Augustus Caesar (63 B.C.-14 A.D., first Roman emperor from 27 B.C.-14 A.D., and heir of Julius Caesar) and Cleopatra’s death by suicide, Egypt then became a Roman province.


Early A.D.


Mary is said to have used lavender when Jesus (4 B.C.-30 or 33 A.D.) was an infant and again when he was crucified. Both the Bible and, later, William Shakespeare’s (1564-1616) work The Winter’s Tale, refer to the herb as “spikenard”. Ancient Greeks called lavender “nard” or “nardus”, apparently after Naarda, a city in Syria where it was sold.

Pliny the Elder (23-79), Roman naturalist and encyclopedist, described relief from “women’s problems” attributed to lavender. His great work, Naturalis Historiae, is composed of 37 volumes, describing natural sciences from agriculture to mineralogy to zoology. Dioscorides, the Greek physician under Nero (37-68), collected herbs and, in 77, wrote about their uses in De Materia Medica.

When the Romans invaded England in 43, they used the lavender they brought with them for bathing, cooking, and giving scent to the air. The Romans and the early French believed in its antiseptic properties, and used it to treat infections and to heal wounds.

It is no surprise, then, that lavender derives from the Latin root lavare, meaning “to wash”. And when the Romans departed England around 410, this plant was left behind, growing in gardens around monasteries.


It’s Debatable

Much information online refers to the introduction of lavender to England as late as the 16th century. But as important as this herb was in Roman culture, and because other references claim that they did indeed bring it with them when they invaded England, I will leave it there…unless I find information that clarifies the debate.


From the Middle Ages Forward


old stone castle


During the Dark Ages, from the late 400’s to 1100, lavender wasn’t used much outside the monasteries. An edict issued by the Holy Roman Empire in 812 ordered monks to grow vegetables, medicinal herbs, trees, and flowers. Lavender was grown at Merton Abbey, near the center of production in Mitcham, in Surrey, England. According to records from 1301, Merton Priory sold lavender to raise money for King Edward I (1239-1307).

Medieval and Renaissance women who worked by taking in laundry used the herb to scent it when washing and also when drying the laundry on top of lavender shrubs. In 12th century England, washerwomen using the herb in this manner were called “lavenders”. Incidentally, the word “laundry” derives from the same root, the Latin lavare.

Monks cultivated it in monasteries as a medicinal herb during the Middle Ages (in European history, approximately 500-1350). A German nun named Hildegard of Bingen (1098-1179) used lavender water with vodka and gin for relief from migraine. And French King Charles VI (1368-1422) slept with lavender-filled pillows.


From the Renaissance


Fit For a Queen Or a King


King Henry VIII

King Henry VIII.


English King Henry VIII (1491-1547) destroyed the stone monasteries and their medicinal herb gardens in the 1500’s during the religious purges. Because this plant is not native to the area, remaining specimens of lavender were found primarily in private gardens.

King Henry’s daughter (with Anne Boleyn), Queen Elizabeth I (1533-1603), enjoyed lavender conserve, a type of jam, and fresh flowers every day. She sought relief from migraines by drinking an herbal tisanne containing lavender.

King Louis XIV (1638-1715) of France bathed in scented water. Around this time, lavender was used to treat headaches, nervous conditions, insect bites, mad dogs, and snake bites. And if people needed their passions stirred, they just tied some stems to the bed post!


And For the Rest Of Us

Merchants traveling along the Silk Road, from central Asia to Europe, inadvertently carried the Black Death with them. Bubonic plague spread across Europe from 1346 to the early 1350’s, killing one-third to possibly 60% of the entire population.

Infected fleas on rats transmitted the Yersinia pestis bacterium to people initially through flea bites. But modern researchers now think transmission was airborne, particularly among crowded populations. Outbreaks of the plague were treated with lavender as an antiseptic, but its efficacy is questionable, especially against such a virulent microbe.

Lavender Makes Good Business Scents

Sixteenth century glove makers in Grasse, France, used lavender to scent their wares. I can’t judge the accuracy of the claim, but it was said that those who made or wore the gloves were spared the agony of plague and cholera.


lavender soap


The Shaker community was the first to commercially cultivate lavender in the area now known as the United States and Canada, in the 1600’s. They used it to treat hyperactivity, flatulence, insomnia, and to fight bacterial and fungal infections. Their products that sold in distant markets included candles, cleaning products, soaps, and treatments for bee stings, migraines, burns, restless sleep, and skittish horses.

In another European epidemic in 1664-5, many died from the Great Plague. Lavender sold for high prices and was in demand for its supposed ability to ward off infection and to repel insects. People wore bundles of the herb on their wrists. Burglars of the ill took precautions by washing in Four Thieves Vinegar, containing lavender, garlic, and vinegar, to prevent infection. And those criminals who were caught and sentenced to digging graves also washed in the vinegar.

Seventeenth century herbalists John Gerard and Nicholas Culpeper wrote about the benefits of lavender. Gerard prescribed it for palsy. A few decades later, in 1652, Culpeper recommended it, in The English Physician, “for all the grief and pains of the head”.

Ornamental Use

In 17th century Ireland, lavender was planted as a low clipped lawn. Later, in the mid 1860’s in County Down, Sir Arthur Rawdon’s Moira Castle maintained an acre of lavender lawn. John Reid, in 1766, recommended lavender as an ornamental walkway edging in The Scots Gardener.


The Victorian Era


Queen Victoria

Queen Victoria.


Both Queen Victoria and Queen Elizabeth I, hundreds of years before her, used herbal products supplied by Yardley and Company of London.

Britain’s Queen Victoria (1819-1901) popularized lavender from its use as a deodorant, and floor and furniture cleaners. The Queen appointed Miss Sarah Sprules “Purvey of Lavender Essence to the Queen”, and used it everywhere and as a cure-all.

lavender productsAs a strewing herb on floors, it gave out a fresh scent when walked upon. Women sold bundles of lavender, called Tussie mussies, on the city streets. The scent became synonymous with purity and cleanliness.

In 19th century Provence, France, lavender treated dizziness, nerves, convulsions, stomach ailments, infections, palsy, and repelled fleas and other insects.

Lavender is still used in dried flower arrangements, pot pourri (flowers and buds), and sachets (for fragrance and to deter moths). Bath products, candles, and perfumes sold today attest to lavender’s enduring qualities.


Too Much Lavender?


Lavender’s overuse contributed, consequently, to loss of its popularity in the early 1900’s. It also became associated with “old ladies”, although during World War I, medics dressed soldiers’ wounds with it.

And then, in the 1920’s, French perfumer Rene Gattefosse severely burned his arm. He immediately plunged it into a vat of lavender oil, the story goes, and experienced immediate pain relief and, according to some, rapid healing. His book, Aromatherapie, describes applications for wounds and other uses derived from essential oils, and gave rise to…you guessed it…aromatherapy!


In the Medical Establishment


Whatever your beliefs—whether lavender’s popularity is due to its use as a panacea or as a wonderfully fragrant plant—it is beautiful in a sunny garden and it attracts bees, butterflies, and other pollinators.

There are only a few scents that come close to lavender on my list of favorites. But, on one of the “favorite smells” lists online, this scent rated #49! And “petrol” rated…#1! Bacon, freshly-baked bread, rain, cookies in the oven, and mowed grass made the top 10 in some of those lists. But…49th?!


Caution!

test tubes, lab

The U.S. National Institutes of Health recommends that pregnant or lactating women not use lavender on their skin or take it internally, because the side effects are unknown. For sensitive people, it can cause skin irritations, and can be toxic if consumed.

In prepubertal boys, gynecomastia, an enlargement of the breasts due to hormonal imbalances, can be caused by topical lavender products.

One research study claimed that attaching a pad dipped in lavender oil to the neckline of clothing reduced the risk of falling by 43% among nursing home residents.

Testing for its use in treating cankersores and insomnia resulted in insufficient evidence for its efficacy…

…But let me tell you a little story 

One spring day at the garden center, I was working on lavender topiaries and large specimens—reshaping, cutting back, repotting, and removing all the dead leaves. The scent was just wonderful. It took a couple of hours to clean up all the plants, and then it was lunch time.

As always, I spent the time in my truck, reading and listening to the news while enjoying my lunch. Well…that day was the closest I had ever come, in the past 4 decades, to falling asleep while at work. I had to fight to stay awake!

Normally skeptical of proclaimed powers of plants, I believe this one—that the scent of lavender can induce sleep! No wonder it has been found in bath products for thousands of years.


Edible Lavender


Lavender has been used fairly extensively over the centuries, in conserves, teas, vinegars, and pastries. One of my herb books describes lavender as “an acquired taste”. I made lavender tea, once. Only once.

Apparently, L. a. ‘Munstead’ is the most popular variety for cooking and baking, for its sweeter fragrance and “citrusy notes”. Those seeking new culinary experiences might find lavender in salads, dressings, pasta, sauces, and desserts. If I remember correctly, it was at the Olney Farmers’ and Artists’ Market, in Maryland, where, years ago, I purchased a lavender bud and lemon poundcake that was delicious.


lavender

Lavender flowers.


The Lavender Genus


Lavender is a member of the mint family, Lamiaceae, and is related to basil, thyme, rosemary, Swedish ivy (Plectranthus), ajuga, Phlomis, and all the salvias, including sage. Their lipped flowers appear in whorls, on spikes carried above the foliage. Flower colors range from white and pink, to blue, lilac, violet and blackish purple. Some species in the family have yellow flowers.

The stems of plants in this family are usually, but not always, square in cross-section. Lavender’s resemblance to rosemary has confused many gardeners, but the scent distinguishes one from the other.

There are 47 known species in the genus Lavandula. Leaves are generally simple (with a smooth, or “entire” margin) or dentate (with a toothed margin), although some species have pinnate leaves (L. buchii, from the Canary Islands). Leaves and other parts are covered in trichomes, the fine hairs (the indumentum) from which essential oils are harvested. L. lanata (from Latin lanaius), the woolly lavender, is covered in woolly hairs.

Most gardeners associate this genus with silver or gray foliage, but it includes some green-leaved species as well. Also available are variegated cultivars, such as ‘Platinum Blonde’, whose leaves are edged in creamy white.


Lavender From Seed

transplanting lavender seedling

‘Ellagance Purple’ seedling.

Lavenders are small and shrubby in their growth habit, and qualify as woody perennials or as sub-shrubs.

Some will bloom in the first season when grown from seed, and, where they don’t survive the winter, would be considered annuals. I used to grow a variety called ‘Lady’, which had a powerful scent.

A new English lavender called ‘Blue Spear’ will sprout in 2 to 3 weeks from seed, after first being chilled for a week in the freezer. It will perennialize in zone 5 or 6, but can be grown as an annual flowering plant in colder regions. Seeds have to be started very early, though, or the previous fall, for blooms from late spring through summer. ‘Blue Spear’ is an upright plant, growing 11″ to 14″ tall and a bit narrower than that.

***Update***: This summer, I’m growing a variety of lavender from seed that blooms the first year if the seeds are started early in the season. ‘Ellagance Purple’ has dense spikes of deep purple flowers. So far, they look healthy in their 2½” pots, but I’m not sure they’ll have enough time to bloom this year. Photo shows how long the roots are compared to the stem. 7/20/2022


moth on lavender


Perennial Species


Cross-pollination among the species and varieties gives rise to more variation. Cuttings taken from desirable plants (asexual or vegetative propagation), however, assure the grower that all the young cloned plants will look the same. Many newer cultivars are under plant patent protection, and may not be propagated without authorization from the patent holder.

Their common names also vary widely. The English types are well-defined, but when it comes to French or fringed, Greek, Italian, or Spanish, there doesn’t seem to be universally accepted agreement concerning the species they’re assigned to. When shopping for plants, refer to the name of the cultivar (‘Hidcote’, ‘Provence’, etc.) to avoid confusion.


Lavandula angustifolia

lavenderZones 5-8. Formerly L. officinalis. Commonly called English lavender, this species grows well there but is native to France, Spain, and Italy. It is used more often in cooking than other lavenders, due to its lower camphor content. This species’ essential oils are considered superior to those of other species. Earlier blooming than lavandins, generally.

Varieties include:

  • ‘Blue Spear’: zones 5 or 6 to 8 or 9. 11″-14″ tall, upright growth; deep blue substantial flowers, will flower first year from seed.
  • ‘Ellagance Ice’: compact; large silver-white-light bluish flowers all summer.
  • ‘Ellagance Purple’: zones 5-7;  deep purple flowers on full spikes, blooming first year from seed.
  • ‘Hidcote’: 12″-18″ tall; tightly budded stems; flowers deep purple.
  • ‘Jean Davis’: 18″ tall; light pink flowers.
  • ‘Melissa’: 24″ tall; pale pink to white flowers late spring to early summer.
  • ‘Muntsead’: heat, sun, and humidity tolerant; 12″-18″ tall; late spring to early summer flowers from pale blue to shades of purple.
  • ‘Platinum Blonde’ (‘Momparler’): zone 5b. To 18″ tall, culinary. Creamy white leaf margins.
  • ‘Royal Velvet’: 2′ to 2 1/2′ stems; velvety purple/navy blue flowers that retain color when dried.
  • ‘Sweet Romance’: 12″-18″ tall; purple flowers early summer to fall; a Proven Winners cultivar.


Lavandula x intermedia

provence lavender

Zones 5-8. Often called Lavandin or Dutch lavender, this species is a cross between English lavender (L. angustifolia) and spike lavender (L. latifolia). Flowers have abundant nectar, and contribute to the sought after monofloral honey. These interspecific hybrids, denoted by the lower case “x” in the species name, are sterile and cannot set viable seed.

Varieties include:

  • ‘Fred Boutin’: to 3 1/2′ tall. Late summer light blue blooms.
  • ‘Grosso’, also called ‘Fat Spike’: about 3′ tall and wide; very fragrant; medium violet blue flowers. Grower Pierre Grosso (1905-1989) discovered this variety in the Vaucluse district of France. It has a very high oil content, and is disease resistant.
  • ‘Hidcote Giant’: to 3 1/2′ tall. Dense, dark purple flowers, dries well.
  • ‘Phenomenal’: zones 5-9; grows 2′ to 4′ tall and wide. ‘Phenomenal’ is more heat, humidity, and drought resistant than others. Introduced by Peace Tree Farms, 2012.
  • ‘Provence’: from southwest France; foliage grows 2′ tall with very tall spikes of pale purple flowers in early summer to early fall; culinary, and commercially grown for the perfume industry. One of my favorites for scent and for tall, see-through flower spikes.
  • ‘Seal’: 4′ to 5′ tall! Strong fragrance, late summer blooms.
  • ‘Thumbelina Leigh’: zones 5 or 6 to 9. A dwarf English lavender, growing only 6″ to 12″ tall, medium blue flowers. This selection comes from New Zealand.
  • ‘White Spike’: to 3 1/2′ tall. Nicely contrasting white flowers, mid summer. Culinary.


Lavandula dentata

Zones 8-9. French or fringed lavender grows about 3′ tall; toothed edges (dentata, from Latin for tooth), light woolly texture; narrow spikes of long-lasting purple flowers beginning in late spring; from the Mediterranean region, Atlantic islands, Arabian peninsula.


Lavandula stoechas

lavender stoechasZones 8-9. (Pronounced stee′-kiss; [“oe” has long “e” sound, as in “amoeba”, and Greek “ch” has a hard “k” sound.] Derived from the Greek stoichas for “in rows”.) French, Italian, or Spanish lavender is a compact grower; feathery petals at tip of inflorescence, sometimes called “Butterfly lavenders”.

From France, Spain, Portugal, Italy, Greece; considered invasive in Victoria, Australia since 1920. Can self-seed. This was probably the species commonly grown in ancient Rome and Greece. Eucalyptus fragrance.

Varieties include:

  • ‘Dark Eyes’: 2′ tall. Purple-red flowers May to autumn if deadheaded.
  • ‘Kew Red’: zones 8 to 11. Red-violet blooms with deep pink bracts at tip. From southern Spain. Introduced by Kew Gardens, 1999.
  • ‘Otto Quast’: 2′, prune for fullness. Reddish-purple flowers with deep pink bracts at tip.
  • ‘Silver Frost’ (L. angustifolia x lanata): 2′ to 3′ tall, lax stems. Heavily felted silver foliage.


Lavandula pedunculata

Zones 9-10. Also known as Lavandula stoechas subspecies pedunculata. Spanish or French lavender has flowers high above the foliage, and long narrow petals on tip of flower; from Iberia, western Turkey, Morocco.


lavender field


Photograph above: field of lavender at Notre-Dame de Sénanque Abbey, southeast France, in the Vaucluse district of Provence near the village of Gordes. Established by Cistercian monks in 1148.


Return to the top

Headings

Page 1: Lavender’s Long History, B.C., Early A.D., From the Middle Ages Forward, From the Renaissance (Fit For a Queen or a King, And For the Rest of Us, Lavender Makes Good Business Scents), The Victorian Era, Too Much Lavender?, In the Medical Establishment (Caution!, …But let me tell you a little story), Edible Lavender, The Lavender Genus (Lavender From Seed), and Perennial Species (L. angustifolia, L. x intermedia, L. dentata, L. stoechas, L. pedunculata)

Page 2: How To Grow Lavender (On Location, Light, Soil, How To Improve Drainage, Lime and Gypsum, Shopping for Lavender, How To Plant, Watering, To Mulch Or Not To Mulch, Fertilizer, Pruning, Growing Lavender In Pots, Azalea and Standard Pots, Freezing Temperatures, Heeling In, Growing Lavender Indoors)

Vegetables in Containers: How To Grow Them

2018

No Garden Space? No Problem!


Growing Vegetables in Containers


peppers and green onions in a pot

Peppers and onions.


Before I started this blog, I managed the Edibles Department for a few years at an independent garden center in Charlotte, North Carolina. As some of our customers downsized to apartment living or to a condo with a balcony, they didn’t want to give up growing their own herbs and vegetables. So, they were glad to hear that they could grow vegetables in containers…as long as the balcony was on the right side of the building. And the right side for vegetables is the sunny side of the building.

Lack of direct sunlight and adequate growing space are limiting factors. Look around, though, and you might come up with some ideas. For example, some of our customers were given permission from their condo associations to garden in common areas. Running for open association board positions yourselves is one way to garner support. I encourage you to attend board meetings, bringing your neighbors, a plan, and a promise to maintain the site.

Neighborhood community gardens are another possibility, although there often is a waiting list. With so much emphasis on eating healthy foods, little pocket parks and community gardens are popping up all over the country.


For Your Convenience

damaged tomato, squirrel

A young tomato damaged by a squirrel.

Another reason to grow vegetables in containers is simply to have them close at hand when they’re needed. A few steps out the kitchen door to a handful of cherry tomatoes and a ripe ‘Flavorburst’ sweet pepper for today’s salad has its charms.

Keeping the pots elevated on the deck prevents some animals, such as deer and rabbits, from making off with the fruits of your labor. Won’t stop the raccoons, though. (***Update***: Or the squirrels; one thought this little green tomato had something to offer. Discard any fruits that have been chewed on by animals. If needed, I’ll wrap the potted tomato plants, growing on the deck, in bird netting. June, 2019.)


Sun? Not So Much


The choices for edibles in a shady spot are limited. The ones that might succeed in bright shade are arugula, cilantro, parsley, lemon balm (interesting research with Alzheimer’s), French sorrel, and seasonal leafy greens. With just a bit more sun, basil, rosemary, oregano, and maybe a cucumber plant could grow for you.

Reflected light counts, to a degree, including light bouncing off light-colored walls. And a white surface under the pots reflects more light onto the vegetables in containers.

Remember to monitor the sun’s path throughout the seasons. Once trees drop their leaves in the fall, your balcony or patio might receive more direct sunlight than it did in the summer. This opens up all kinds of possibilities for potted cool-season greens and vegetables. Pay close attention to expected temperature changes for the duration of your crops.

Fruiting plants, such as tomatoes, peppers, eggplants, and squash need at least 6, and preferably 7 or 8 hours of direct sun. These vegetables also need warm summery weather.


Approaching Summer Solstice

Our vegetable garden is now receiving the maximum amount of light, with the sun directly overhead. In the springtime of the last two years, heavy rains caused the tree canopy up on the berm, to the south, to swell with heavy, overhanging branches. Trees now cast considerable shade early and late in the day for most of the growing season. So, I planted fewer tomato plants and more greens.

Two large ‘Big Beef’ tomatoes are beginning to ripen, and a whole lot of ‘Sun Gold’ and ‘Mexico Midget’ cherry tomatoes. So, even with less than ideal conditions, there will be something to harvest.


At Julia’s Request

Several family members from New Jersey and California recently visited us in North Carolina. I promised Julia this article about growing summer vegetables in containers.


Vegetables In Containers: Which Ones?


Sweet and hot peppers, tomatoes, and eggplants can be grown in containers, as well as zucchini, yellow summer and Patty Pan squashes, cucumbers, and green beans. Also, it’s easy to grow most herbs in pots. Green onions, carrots, potatoes, and peas can grow in pots!

It’s just a matter of the details. One of those details is to look for dwarf or bush varieties of the crops you want to grow. There’s even a variety of corn (‘On Deck’) that grows in large pots.

One of the popular combinations I used to sell included a sweet or a hot pepper planted with two herbs. Theme combinations (‘Jalapeno’ pepper-cilantro-Greek oregano; ‘Carmen’ frying pepper-Italian oregano-dwarf parsley ‘Titan’) grew in 14″ pots. Customers found them irresistible if they were bearing fruit.

Growing more varieties of leafy greens in containers has become a priority as our garden becomes more shaded. In addition, greens can grow all year in regions with moderate winters.


Starting With Tomatoes


Much of the information in “Starting With Tomatoes” also applies to other vegetables in containers.


'Blueberry' tomato

Potted ‘Blueberry’ cherry tomato.


Beginning with America’s favorite, tomatoes grow well in pots. Will it be a beefsteak or a cherry? An heirloom or a modern hybrid? A slicer or a sauce-type? Determinate? Indeterminate (it keeps growing until frost, bearing fruit all summer)? Black, red, yellow, or orange? Striped or solid? There are many thousands of varieties of tomatoes to choose from!

potted 'Terenzo' tomato, with red fruits

‘Terenzo’ tomato.

A dwarf tomato called ‘Terenzo’ (photo, right) can grow in a 10″ hanging basket, but a ‘Cherokee Purple’ heirloom or a ‘Big Beef’ needs something considerably larger. For the large varieties, I use pots at least 20″ in diameter.

The long-vining indeterminate cherry types (‘Sun Gold’, ‘Black Cherry’, ‘Mexico Midget’) can grow in a pot as small as 14″ in diameter, but they’d be happier in bigger pots. You’ll need to pay closer attention to water and fertility when using smaller pots.


Vegetables In Containers: Types Of Pots

Each kind of pot has both advantages and disadvantages.

Summer vegetables generally fare better in larger pots rather than smaller pots. Although the pot looks enormous compared to the transplant’s diminutive size, don’t be tempted to plant more than one tomato per pot. You’ll be amazed how quickly that one tomato plant fills a 20″ pot. A new transplant in a large pot runs a greater risk of root rot during rainy weather. But, placing it under an overhang will prevent this loss. It’ll be different once more roots and foliage have grown.

An indeterminate tomato, such as ‘Cherokee Purple’, ‘Sun Gold’, or ‘Black Krim’, can share a 20″ diameter pot (photo, below) with a couple of herbs, such as parsley and oregano. Plant the tomato toward the back of the pot, on the north side (northern hemisphere), and plant the herbs near the southern rim.

Terra Cotta

Terra cotta looks good and has some weight. But clay is porous, so water vapor passes through the pot to the air outside, quickly drying the soil. If you want to use your large clay pots, you could line them with food-grade plastic and punch some holes in the bottom for drainage. This will slow down the evaporation process.

Certainly, use clay pots if you prefer, but prepare to water more often.

Ceramic Pots

Ceramics are beautiful and heavy, and can be expensive. Soil temperature rises uncomfortably on the sunny side unless the pot is shaded. Try using light colored pots in the summer, which will reflect most of the heat.

If you’re unsure of the safety of the glaze, line the inside of the pot with food-grade plastic bags, poking several holes in the bottom for drainage. But, I would choose a different pot if a sticker on the bottom warns “Not for direct contact with food”.

You could also plant the tomato in a large nursery pot, and then insert it into the decorative glazed container. Make sure both pots have drainage holes. This “double-potting” allows air circulation around the interior pot and eliminates concerns about questionable glazes.


vegetables in containers, green pot

Tomato ‘Rutgers’, sweet basil, and Italian parsley in a 20″ wide pot, April, 2019.


Plastic and Vinyl

These pots are inexpensive, readily available, and easily moved. They’re also the most likely to blow over in windy weather. But this is the first choice for most gardeners. Most of these pots last a few to several years in the sun, but, eventually, sunlight will degrade the material.

Wood Containers

Untreated cedar or redwood and half whiskey barrels are suitable for growing vegetables in containers. Check to make sure the pots drain freely.


Reservoirs and Other Considerations

Earth boxes and plastic pots often have built-in reservoirs or detachable saucers. And you can purchase caster kits and trellises for increased functionality. Some gardeners have the option to move their plants from the morning sun on one side of the deck to the afternoon sun on the other side; wheels make this so much easier.

Caution: some of the reservoirs are too deep before the water begins to exit the overflow hole, and can cause young plants to rot if the soil stays sodden all the time. You could drill a hole in the side, below the overflow hole, reducing the capacity of the reservoir. Or simply tilt the pot to allow excess water to drain. Older plants, full of foliage, will absorb water in the bottom of the planter, as long as it isn’t raining for several days straight.

Mosquitoes and Tree Roots

Add a piece of Mosquito Dunks to prevent mosquitoes from maturing in the secluded reservoir. They need only a few days in warm weather to complete their life cycle. Or tip the container to drain all excess water.

A pot sitting directly on soil anywhere near trees or shrubs will invite their roots to invade. Believe me, they will try to grow in that beautiful composted soil. Elevate the pot off the ground. This also facilitates drainage from the pot.

A few pieces of broken flagstone or “pot feet” raise the pots above the surface of the deck, helping to preserve the deck’s finish.

Saucers

Use saucers under the pots, but don’t let water remain in them for more than an hour. Plant roots need oxygen as much as they need water. Water in the saucer prevents air from entering the bottom of the pot.

Saucers aren’t absolutely necessary, but help if the soil has gone too dry. Just keep filling them until no more water is absorbed by the soil. In tall pots, though, the force of gravity will prevail over capillary action, preventing water from reaching the top of the root ball. So, you’ll also need to water the top portion of soil.

During long periods of rainy weather, I remove the saucers, or turn them upside down and keep them under the containers. This is impractical, however, if the pot weighs 50 pounds. Consider removing the saucer and using a few pieces of broken flagstone or brick to elevate the pots, if necessary.


Potting Soil

pot for new chives division

Reused polyester fiberfill covers the drainage hole.

Before filling the pot, place a small handful of polyester fiberfill (from a hobby store) over the drainage hole. This prevents soil from eroding through the hole, and prevents earthworms and other critters from entering. If you pull some of it through the hole to a point at the bottom, excess water will continue to drain. This is helpful for potted plants that rot easily during long stretches of rainy weather (succulents, lavender, thyme, sage). This synthetic material doesn’t rot, so it’s reusable.

Use a good quality potting soil that drains well, but has peat moss to hold moisture. In addition to the peat moss, the mixture will have perlite (white particles that help drainage), pine bark chips (drainage), lime (to adjust the pH), compost or a starter charge of fertilizer, and often a wetting agent (to help the soil absorb water).

Amending the Potting Soil

Feel free to experiment with mixtures of different materials. Soils with a lot of bark (pine fines) in the mix tend to dry out faster. You can mix in smaller-particle loamy topsoil, spongy peat moss, aged manure, or compost to help slow water loss. Water-absorbing crystals might help, too. But moisten them before you add them to the soil. If you don’t, you’ll understand why I italicized the word “before”.

Adding a layer of undyed mulch on top of the soil helps conserve water and keep the soil a bit cooler.

While some gardeners add rocks to the bottom of the pot, I never do. It was thought the rocks increased drainage, but the opposite is true; they create a perched water table in the layer of soil right above the rocks. Water percolating through the soil profile is held in this layer by capillarity, and often rots roots trying to grow there, limiting the useful volume of soil.


Headings

Page 1: Growing Vegetables In Containers, Sun? Not So Much, Vegetables In Containers: Which Ones?, and Starting With Tomatoes (Vegetables In Containers: Types Of Pots, Reservoirs and Other Considerations, Mosquitoes and Tree Roots, Saucers, Potting Soil (Amending the Potting Soil)…

Page 2: Transplanting the Tomato, Water, Going Away?, Staking, Fertilizing Vegetables In Containers, Blossom End Rot, On PH, Pollination), Peppers and Eggplants, Cucumbers, Squash (Squash Vine Borers), Green Onions (Bunching Onions from Seed), Leafy Greens, and Picking Vegetables In Containers

Return to the top

How To Grow Succulents To Perfection!


Speaking Of Succulents


Earlier today, I gave a presentation on succulents at the annual meeting for the Charlotte (NC) Council of Garden Clubs. We spent a few hours at Southern Gourmet in Matthews, and, with their help, and someone else’s laptop, I was able to get through all the pictures. Thank you, CCGC, for the invitation.


succulents

Oscularia deltoides in bloom.


What Is A Succulent?


Succulents, by definition, are plants that store water in their leaves, stems, and roots. They evolved in arid regions (primarily in the Americas, Africa, and Australia), and can endure intense sunlight and prolonged drought and heat. By providing favorable conditions, we can grow colorful succulents in sunny windows. Over the past several years, they have been enjoying a resurgence in popularity.

Decades ago, I purchased young bare-root succulents from a California wholesaler for my horticultural business. Unwrapping each little parcel was like waking up on Christmas morning as a child. These were plants I’d never seen before—Titanopsis, Pleiospilos, Graptopetalum, Lapidaria—and were destined for sale at the Westover Flea Market when I lived in nearby Morgantown, West Virginia.

Although there are many species of hardy succulents in the Sedum and Sempervivum genera, this article addresses primarily the tender succulents, which require temperatures above freezing.


Plenty Of Light For Succulents


Haworthia cooperi, succulent with windowtip leaves.

Haworthia cooperi showing leaftip windows. Light refracts inside the leaf, even if the plant is almost buried in desert sand.

Adequate light is one of those conditions that must be met for these plants to show good color and characteristic form. Some succulents, such as Haworthia, Gasteria, Aloe, Epiphyllum, and Christmas cacti, grow well with at least 4 hours of direct sun, and very bright indirect light the rest of the day.

Crassula, Echeveria, Euphorbia, and Sedum appreciate even more light, at least 5 or 6 hours.

Cacti (succulents with spines or thorns), living stones, and Sempervivum (Hens and Chicks) need abundant sunshine, at least 6, but preferably 8, hours per day.

Direct sunlight keeps the plants colorful and compact. If the plants receive enough sunlight most of the time, they will tolerate the occasional stretch of cloudy weather without deteriorating.

Artificial light helps during the short days of winter or when the sun refuses to shine. When necessary, I use 2-tube 4′ long shop lights with “daylight” LED or fluorescent tubes. Be sure to place the plants within a few inches of the tubes for at least 16 hours per day.


When Light Is Insufficient


How do you know when your succulents are not receiving enough light? Plants that grow in the shape of a rosette start growing faster (photo above, left). The center leaves outgrow the outline of the plant, stretching toward the light. And the new part of the stem grows thinner. That happens when winter sunlight is scarce, as in this Graptopetalum pentandrum ‘Superbum’ (photo above, right).

In poor light, strong colors begin to pale, and purple, red, or orange highlights fade. New leaves become thinner. The internodes (stem segments between the nodes, where leaves are attached) on younger parts of the plant will lengthen (photos, above); this appearance is diagnostic for low light levels.

There’s a huge difference between “direct sunlight” and “bright indirect light”. A few hours of indirect light offers very little benefit to succulents; they need the strong sun. And, without adequate light, succulents are more susceptible to damage from overwatering.


More Sun For Cacti


Cacti also suffer in inadequate sunlight. The spines on new growth grow farther apart.

In upright species, the stem becomes narrower relative to the older part that was growing in good sun. If you see that the top half of a cactus stem is thinner than the bottom half, and the spines are not as closely clustered, the plant is not getting as much sun as it was before. Solution? More sun!

The colorful tops of grafted cacti (photo, above right) lack chlorophyll, and depend on the green stock plant for sustenance. Also, the graft is more sensitive to harsh sun and should be placed in cooler morning sun.


cacti are succulents too

Variability among cacti.


Light And Water


Light and water are inextricably linked in plants. When the sun doesn’t shine, photosynthesis, transpiration, and respiration slow down, and soil moisture sits unused around the root system. Play it safe and water succulents only on sunny mornings and when the forecast calls for sunny weather for the next couple of days.

Under normal conditions, allow the soil to dry completely before watering again. Although the soil feels dry on the surface, there’s usually some moisture in the lower half of the root ball.


glass, cactus

Glass container with two open sides.


These plants never need misting. Water that sits on the foliage can initiate rot, so shake it off or use a towel to dry it. Never let succulents sit in a saucer of water.

Although glass terrariums are very popular, I do not recommend succulents for terrariums. Unless the glass container has large openings for heat to escape (photo, above), succulents in direct sun will fry in terrariums! They also rot in high humidity or if there’s the slightest amount of excess water in the soil.


Pots


shallow bowls for succulents

Succulents and shallow bowls (Pike’s Nurseries, Matthews NC).


Succulents prefer to remain quite potbound, where roots are tightly packed in the pot. Plants in oversized pots are more likely to be damaged by overwatering simply because the greater soil volume holds more water for a longer period of time.

Shallow glazed containers, such as decorative bowls and ceramic bonsai trays, make delightful homes for succulent combinations (photo, below). Include rocks, gravel, and driftwood in these dish gardens to create a natural-looking scene from nature.


succulents in glazed bonsai tray

Small-growing succulents in a bonsai tray.


Tall glazed pots hold a reservoir of water that probably won’t be used by the plant. More appropriate for succulents, terra cotta (Italian for “baked earth”) pots are porous and help the soil dry faster when water vapor passes through the sides.

Repotting, if needed, should be done early in the growing season so a strong root system can develop before the days begin to shorten in autumn. Growth slows during those months. Always use pots that have drainage holes.


Potting Soil


Fenestraria succulents

Fenestraria species showing leaftip windows.

The soil used for succulents should be gritty for quick drainage. If needed, amend regular potting soil with perlite, coarse sand, horticultural grit, pine fines, charcoal, expanded rock, or PermaTill. “Cactus and Succulent” soil is available, although quality varies widely among brands.

When repotting, all new soil goes below and around the sides of the root ball, never on top of it. Planting too low in the soil results in rotten leaves and stems.

In their natural environment, certain succulents, such as Haworthia, Aloe, and Gasteria, have contractile roots. If blowing sand exposes the crown or the top of the root system, the roots are able to “pull” the plant lower into the soil. Amazing!


Living Stones

The ground-hugging living stones, or split-rock, succulents (photos, below) are extremely sensitive to overwatering. Use small clay pots and very gritty, gravelly soil. There should be only a very small percentage of organic matter in the soil.

These plants are well-camouflaged in their native southern Africa, almost indiscernible from the rocks around them. Some of the genera available for purchase include Lithops, Lapidaria, Gibbaeum, and Conophytum.


Fertilizer


Succulents grow slowly, so fertilize only 2 or 3 times during the growing season, from March through October.

Use products formulated for indoor houseplants, with small numbers on the package, such as 8-8-8 or 10-10-10. Those three numbers represent the amounts of nitrogen, phosphorus (phosphate), and potassium (potash) in the product. All products list these three primary macronutrients on the label in that order: N-P-K.

It’s better to underfertilize than to overfertilize, so use a more diluted rate than the recommendation on the label. For succulents, dilute it to half-strength.

Lithops and other living stones are extremely slow-growing, so they’re hardly ever fertilized. Use a very dilute higher phosphorus fertilizer only when the plant shows new growth.


Sempervivum (hens and chicks) can be tucked between rocks, and they’re hardy perennials.


Outdoors For The Summer


succulents in my sunny window

Light blue Echeveria in bloom.

Succulents summering outdoors benefit from higher light levels and often take on vibrant coloration. Jade plants (Crassula) develop red margins on their leaves in brighter sun, and Echeveria becomes even more colorful.

Monitor closely during periods of high heat. Above 85° F, provide light shade during the hot afternoon hours. Potted plants are more susceptible to stress from extreme conditions than those planted in the ground.

Transition your plants to outdoor conditions gradually. Give them just a couple of hours of early morning sun or dappled shade for the first few days. A plant that was growing indoors all winter will probably suffer sun scald if immediately placed outdoors in full sun. This hardening off process gives plant tissues time to toughen up so they can withstand more intense summer sun. Sunlight causes the cuticle, a protective waxy layer on the leaf surface, to thicken.

This beautiful variegated succulent, called Kalanchoe ‘Fantastic’, has a variably feathered band of cream between the pink edge and the greenish-gray base of the leaf (photo, below). I’ve had this plant for over a decade, and protect it from dropping temperatures in autumn by moving it indoors well before frost. Stronger sun and more stressful conditions might cause it to turn redder in color. It recovers, though, in less extreme conditions.


kalanchoe thyrsiflora, a succulent called "flap jack"

Kalanchoe thyrsiflora ‘Fantastic’, growing outdoors for the summer.


Protect your plants from excessive moisture. After receiving some rain, place the dampened succulents under cover. Check to make sure the drainage hole allows water to drain freely.


And Back Inside In Autumn

As autumn temperatures fall into the high 40’s at night, it’s time to bring your plants indoors for the winter. The more sensitive types, including Echeveria and Graptopetalum, come indoors before the thermometer drops below 55°. Prolonged exposure to cold, wet conditions will cause succulents to deteriorate, so check the forecast!


Pruning Succulents


joyce chen scissors

Joyce Chen scissors.

If your plants are growing too large and cannot be accommodated in the space available, consider cutting them back. Stretched-out plants benefit from selective pruning in early summer. New growth will soon emerge.

Cacti can be temperamental, so be careful if you choose to lop off the tops. For cacti, this is best done in late spring/early summer for a full season of recuperation.  Stronger light available in the summer causes the plant to respond with more compact growth. They might grow a few new stems below the cut.

During transpiration, water is “pulled” through the plant’s vascular system from the roots, to the stems, and then through the leaves and out to the atmosphere. This process is the primary manner in which moisture is removed from the soil. Therefore, avoid extensive pruning if any plant was recently watered. Because there’s less foliage on the plant after pruning, the soil stays moist for a longer period of time. Wait a few days, or until the soil is almost dry, before pruning.


Headings

Page 1: Speaking Of Succulents, What Is A Succulent?, Plenty Of Light For Succulents (When Light Is Insufficient), More Sun For Cacti, Light And Water, Pots, Potting Soil (Living Stones), Fertilizer, Outdoors For The Summer (And Back Inside In Autumn), Pruning Succulents

Page 2: Propagation Of Succulents (Rooting Cuttings, Stem Cuttings, Leaf Cuttings, Division, Seed), Root Rot And Insects (Root Or Stem Rot, Insects and Mites), Flowers, Time To Grow That Collection!

Return to the top

Soil Prep 101 For Your Vegetable Garden


cool season vegetables

Cool season vegetables and greens.


Finding the Perfect Spot for Your Vegetable Garden


For the purpose of this post, I’ll assume that your vegetable garden will be flush with the surrounding lawn, rather than in a raised bed. However, sound horticultural principles apply to either method. Locate the garden where it gets lots of direct sunlight, and avoid low areas that collect water after heavy rain. Place it close to a source of water.

Now that you’ve found the perfect spot for your vegetable garden, you’re ready for Soil Prep 101. The types of crops you plant in any season are weather-dependent, so make sure weather patterns in your location suit the peppers, basil, kale, or cauliflower.

Although this article concentrates on preparing beds for vegetable gardens, the principles apply to other plants as well, including new shrub borders and flower gardens for pollinators. Page 2 of this article has tips for improving the soil’s tilth, or workability, for most garden projects.

Prerequisites for this class: “How to Prepare the Soil: An Introduction” and “Yes, But Is It Sunny In the Winter?”


Swiss chard in a raised vegetable garden

Swiss chard in a raised bed.


Depending on your level of affinity for precise measurement, you can use either a measuring tape or simple paces to mark the dimensions of your garden. Gardeners who want to indulge in culinary experimentation by growing a wide variety of crops might regret not having made the vegetable garden large enough from the outset. Consider the possibility of expansion in the future.


How Much Sun Does the Vegetable Garden Need?


There is no substitute for sunlight. Without at least 6 hours of direct sun, the results will be disappointing. Anything less than that will reduce and delay the harvest.

Indirect, dappled, and filtered light don’t really count. In fact, during most of the growing season, fruiting plants perform so much better with 7 or 8 hours of sun, minimum! There are other types of crops that can be grown in less than full sun, including leafy greens (lettuce, arugula) and a few herbs (cilantro, parsley).


Layout


Tomato.

Someone out there is asking, “Do I run the rows (the long axes) east-to-west or south-to-north?” Good question! If your plans include growing several tomato plants and maybe some pole beans on a trellis, and you prefer one long plot that is accessible from both sides, I recommend east-to-west.

Long-term plants (tomatoes, peppers, etc.) will continue to get good sunlight all season. Spaced properly, they won’t cast as much shade on each other, especially as fall approaches and the sun sinks lower in the sky. But, if your garden receives sun all day, it won’t make much difference to main season crops.

Cool season crops, grown from fall through early spring, however, will get more sun when planted east-to-west. They’ll face the sun all day even though the days are short.

Taller plants should be planted on the north side of any plot (northern hemisphere), so they don’t shade smaller plants nearby. Some varieties of staked indeterminate tomatoes can grow 8′ tall!


lettuce basket, a portable vegetable garden

Lettuce growing in a basket.


On properties where spatial considerations are limited, do what you can to provide enough direct sun to those crops you can’t live without. Your crops might not be lined up in neat rows, but rather planted individually in a sunny corner over here and another by the back gate. Doesn’t matter. Do what works for you!

Container-grown crops, such as this lettuce basket (photo, above), can be moved around as conditions change.


Multiple Vegetable Garden Beds


With ample space, a series of garden beds can be laid out in a grid. When deciding where the plants will go, always keep in mind that you want to prevent tall plants from shading short plants, with few exceptions. Using straight pathways makes maneuvering the wheelbarrow and equipment easier.

Crops that prefer cooler, part-shade conditions as the weather warms can be planted between the taller plants or in the partial shade they cast. Those include late spring lettuces, arugula, cilantro, and spinach.

savoy cabbage

Savoy cabbage.

Having several plots allows for crop rotation, planting one family of plants in Plot A this year, in Plot B next year, and so on. This helps prevent the soil from being severely depleted of certain micronutrients and from allowing populations of insects and diseases to build up.

The nightshade family (Solanaceae: tomato, pepper, eggplant, potato), the cucurbits (Cucurbitaceae: cucumber, summer squash, zucchini, melon, pumpkin), and the brassicas (Brassicaceae: broccoli, cabbage, cauliflower, kale, Brussels sprouts) are groups of plants that benefit from being rotated every 4 or more years.

To clarify, one member of a family (tomato, for example) should not be planted where any member of that family (tomato, pepper, eggplant, potato) has grown in the past few years.

This is a good reason to keep a record describing where you plant each crop every year, as well as documenting successes and losses. Knowing the family names that crops belong to also helps with crop rotation.


Seed Or Transplant?


antique seed packet

Don’t go overboard if this is your first attempt. You’re not obligated to germinate every pack of seeds you bought. There’s always next season. Most seeds will remain viable for a few years if kept dry and cool.

Starting out with young tomato, pepper, or slow-growing parsley transplants might be more practical than growing them from seed, even though it is more expensive. You’ll find them at garden centers, farmers’ markets, and local hardware stores, and the growers often have good suggestions for cultivation.

If you’re late getting the vegetable garden going, transplants will save you several weeks of growing time. You can always supplement with fast sprouting varieties of seeds, such as those mentioned in the next section.

Starting plants from seed is a welcome challenge to many and is a source of fascination for children—and for adults, too. Don’t laugh, but, for me, it’s a thrill when the catalogs start showing up in the mailbox. I would never discourage you from exploring this facet of gardening. And, of course, there are so many excellent varieties available from seed that never show up in retail stores as transplants.


Seedlings For Vegetable Gardens Need Sun

Seedlings of fruiting crops need at least 6-8 hours of direct sunlight for strong growth. Use clean pots, pasteurized seed starting mix, and a waterproof tray. Provide the proper temperature for germination.

If you don’t have very sunny windows or a greenhouse, consider starting seeds under shop lights with daylight tubes. I use 4′ long fixtures that hold 2 tubes each. Seedlings growing very close to the tubes—only a few inches away—grow strong stems and roots.

Lettuces, arugula, and other leafy greens tolerate fewer hours of sun, although they appreciate full sun during the cooler months.

Avoid starting seeds too early in the season. This could result in leggy, weak plants that might not perform up to par in the garden.


seedlings

Broccoli ‘Happy Rich’ and Arugula ‘Astro’ seeded into cell packs (late winter, 2022).


Seeding Directly Into the Garden

Some crops grow easily from seed sown directly into the vegetable garden. Peas and beans, for example, and radishes, beets, and carrots are just a few species that can be planted right into prepared ground. Dinosaur kale, mustard spinach, mesclun, leaf lettuce mixes, zucchini, spinach, and cucumbers are more crops that can be directly seeded.

Read all the information on the packet, paying special attention to when to start and how deeply to sow the seeds. Although these crops germinate readily, gardeners must still watch out for pests, both above and below ground, and turns in the weather.


Spacing the Plants


It’s important to calculate how much square footage each of your plants requires, or at least to get a rough idea. On graph paper, map the proposed garden to scale. Use the plants’ spacing recommendations found on the label or the seed packet for the amount of space needed.

With a 1/4″ grid, each square can represent 6″ or 12″ of garden space. The diagram is optional, but it can help in future years when considering crop rotation.

It’s better to have more than enough room rather than not enough; plants don’t respond well to crowding. The seemingly large gaps between the major crops can be interplanted with “ephemerals”—those plants that grow quickly and are harvested before the majors achieve full size. Examples include radishes and lettuce between tomato plants, or green onions and beets between autumn-grown Brussels sprouts.


If It Looks Like This…


dry cracked soil

Clay soil shrinks as it dries, creating surface cracking.

Soil that dries as hard as a brick is impossible to work with. You can thoroughly water the area the day before or start digging a day or two after a good rain. Avoid digging or walking in the garden when the soil is wet. This compresses the soil, squeezing out tiny channels of air space that are critical for healthy root growth.

Sandy soil that drains too fast should be amended with copious amounts of organic matter. Bagged topsoil is also available, but quality varies widely. The tiny clay particles in clay loam help hold water and nutrients in the soil.

In a large vegetable garden, plan for pathways every 4′ or 5′, and restrict foot traffic to those areas. Use pavers, flagstones, pine bark, or even that old pile of bricks for the pathways. You can get very creative with stonework, and your garden can be the neighborhood show-stopper, but don’t lay out the stones until the end of the soil prep process.

Let’s begin! Please turn the page…


Return to the top

Headings

Page 1: Finding the Perfect Spot for Your Vegetable Garden, How Much Sun Does the Vegetable Garden Need?, Layout, Multiple Vegetable Garden Beds, Seed Or Transplant? (Seedlings For Vegetable Gardens Need Sun, Seeding Directly Into the Garden), Spacing the Plants, and If It Looks Like This…

Page 2: Remove Sod, Tilth, Soil Prep (The First Dig: Loosen the Clay, The Second Dig: Add Drainage Materials, Organic Matter vs. “Organic”, The Third Dig: Add Organic Matter), Fertilizers, Rake Smooth and Pave, Agricultural Extension and Soil Tests (To Lime Or Not to Lime, and What is pH?)

How to Prepare the Soil: An Introduction


trowel in soil


Along with the early daffodils comes really beautiful weather. It’s been sunny, the birds are singing…not too hot, not too cold. It’s time to prepare the soil. But first, we need to understand it.


Prepare the Soil


Herbs, vegetables, and flowers are going to be living—hopefully, thriving—in your garden for several months. For trees and shrubs, providing a good home will see them through the next decade, or the next century! It pays to give them the best conditions you can provide, and it all starts below the surface of the ground.


Axiom of the day: soil preparation is 90% of your effort.


If that sounds like work to you, you are correct! But you’re reading this presumably because past results have fallen short of expectations, and you want to improve your gardening skills. I’ve played in the “dirt” professionally for 50 years and can honestly assert: successful gardening depends on the health of the soil.

And here’s the good news. Thorough soil preparation will have benefits for many years to come. You won’t have to prepare the soil to this extent again.


The Soil Is Alive


Microbes


prepare the soil for seedlings

Seedlings in prepared soil.


Soil is more complex than meets the eye. There is a dynamic interplay among minerals, organic matter, air, and moisture. Earthworms, insects, nematodes, and tiny microbes also contribute. Healthy soil is teeming with life! These organisms play an important role in how soil functions. Without them, organic matter would not break down into those vital nutrients needed by all plants.

Vast mycelial mats of beneficial fungi, or mycorrhizae, live in close association with roots. Millions—or perhaps a billion—species of these beneficial microbes inhabit soils around the globe, many of which live within or around a particular species’ roots. Researchers estimate that there could be a trillion species of microbes living in air, soil, water, and living organisms.

Soil-borne mycorrhizae have enzymes that can unlock, or chelate, micronutrients tightly bound to soil particles, making them available to plants. These organisms can gather water and provide it to plants even though the plants’ roots don’t have direct access to moisture. And these microbes act as barriers to certain soil pathogens.

Bacillus, Streptomyces, and Pseudomonas are common bacterial microbes. Fungal mycorrhizae, such as Trichoderma, Hebeloma, and Glomus help roots absorb water and phosphorus. Other microbes, such as viruses and archaea, also inhabit the rhizosphere, the area surrounding the roots. Gardeners are familiar with the nitrogen-fixing bacteria (Rhizobium) that increase yields in legumes.

Scientists have only recently begun deciphering the enormous number of microbes and what they do for or to plants. Only a few plant families, including Brassicaeae, do not have associations with fungal mycorrhizae. Blueberries and other plants in the Ericaceae family (azalea, rhododendron) have very limited associations with mycorrhizae.

Microbes benefit from the symbiotic relationship with roots by getting carbohydrates in return. The numbers of microbes inhabiting just a tablespoonful of soil are staggering. Believe it or not, that’s greater than the number of people living on the planet! Of course, not all of these microbes are beneficial; many cause diseases in plants and animals.


Tilth

earthworm castings

Nutrient-rich earthworm castings.

Consider yourself lucky if your soil has good tilth, or friability, to begin with. Perhaps all you’ll need to do to prepare it is to add compost, aged manure, or some fertilizer periodically.

Soil stays more biologically active over a long period of time if it is not disturbed by frequent tilling. Beneficial fungi and nematodes are especially sensitive to major disturbances. Simply scratching products into the soil surface and watering them in preserves existing microbial populations in the soil.

There are several soil types distributed throughout the United States. They’re determined primarily by the kind of bedrock beneath the surface, the kinds of vegetation growing there, climate, and management practices employed through the centuries. Minerals from rock, eroded by water and wind, will be deposited downstream or downwind.


Soil Composition

Soil is composed of:

  • mineral matter (rocks, sand, silt, clay)
  • organic matter (carbon-containing [once-living] compounds such as compost, aged manure, dead roots, dead organisms). Never use fresh manure; the ammonia content can harm plants, and it might harbor pathogens.
  • living organisms (such as earthworms, nematodes, microbes, insects)
  • air
  • water

Tilth and fertility are determined by relative proportions of these materials. All kinds of soils benefit from the addition of compost and other organic materials. I confess to going a little overboard on these amendments when I prepare the soil. But the plants look great!

You might be fortunate to start with soil that has good tilth. It already has physical characteristics which promote plant growth. Or experience indicates that the roots will need some encouragement to grow beyond the original root ball.

Soil that is a rocky clay, for example, dries to the consistency of brick, and will need lots of amendments to improve drainage and to encourage roots to grow vigorously. On the other hand, sandy soils need materials that will improve water and nutrient retention. Instead of repeatedly failing with plants that can’t adapt to your soil, try starting out with those that can. Working the garden over the years will condition the soil sufficiently so you’ll be able to grow more species.


foxglove

Biennial foxglove (Digitalis purpurea).


Simply digging a hole in the ground, adding a cupful of compost, and plopping the plant in place won’t do the trick in heavy clay or rocky soils. Depth of topsoil, drainage patterns, ratio of clay to organic matter, air pore space (the space between particles), and, of course, fertility and pH, all enter into the equation.

The rich, black ground in our West Virginia garden needed no amendments at all; the foxgloves grew 7 feet tall! Still, I added organic matter every time new plants went into the ground.


From Awful to Awesome


First, the Awful Bit

Our first house in Maryland sat on the crest of a hill. Sunrises and sunsets were spectacular, but the soil was just awful. It was all clay and shale. Any organic matter that did exist blew away or washed down the slope. That “dirt” refused to yield even to the most enthusiastic shovel.

I created a vegetable garden farther down the slope, next to the greenhouse, that gave us fabulous crops of tomatoes and peppers. Digging in autumn leaves, vegetable scraps from the kitchen, and discarded material from my horticultural business greatly improved the soil. It didn’t take long for decomposition to begin and for the earthworms to show up.


wheelbarrow with compost to prepare the soil


Almost Awesome

A few years later, we moved farther south to a community that had been carved out of an old oak and hickory forest. Although the soil quality was better here than at the previous property, I continued to prepare the soil with every new project for the next 3 decades.

Before planting rhododendrons (like the one in the photo, below) in the afternoon shade, I added peat moss and pine fines to the soil. These materials were not merely thrown on top of the ground. Instead, generous quantities of amendments were incorporated (not layered) into the top 12″ to 18″ of existing soil. Then, I mixed nutrient-rich LeafGro (locally sourced compost) into the top 8″ of loosened soil.

This effort created a well-balanced mixture, composed of existing clay and loam, and the added peat moss, composted pine bark, and compost. After that, the soil remained undisturbed except for top dressings of fertilizer, compost, or mulch.


rhododendron

Rhododendron catawbiense.


I left the ditch behind the shrub border undisturbed, allowing rainwater to travel down the slope. Water that did not drain away would have meant death for the shallowly rooted rhododendrons.

Blueberries must have very acidic conditions, in a range from about 4.3 to 5.3 pH. Rhododendrons, azaleas, and hollies like their pH a bit higher than that, but still on the acidic side. Peat moss and pine fines incorporated into the soil helped provide the acidity and aeration.


calibrachoa with chlorosis

This calibrachoa has chlorosis from high pH.


Petunia, calibrachoa, pansy, and viola also benefit from a lower (acidic) pH. Plants growing in soil with closer to neutral pH will have sickly yellowish leaves with green veins (photo, above).


A Shady Oasis

Gradually, most of the back yard grew into a private woodland. Japanese snowbell (Styrax japonica), paperbark maple (Acer griseum), Pieris, Abelia, Viburnum, Kolkwitzia, and a group of monarch birches (Betula maximowicziana) were the main players. And the rhododendrons and existing vegetation, of course.

Mulched pathways meandered under the cool canopy, and all sorts of shrubs and perennials luxuriated in that rich soil. There was a small pond, a greenhouse, and no grass to mow in the back yard. Awesome. (***Update***: As it often happens, subsequent owners of the house altered the property to suit their needs and removed almost all of those plants.)


Monitor Soil Health Over Time


Preparing the soil for vegetables is not difficult, and the results will last for years. Most varieties prosper in improved soil 10 to 14 inches deep. Lettuce and radishes need only 5 or 6 inches.

Using the space efficiently and intensively calls for carefully managing the soil. Vegetables grow quickly, fruit heavily, and, therefore, require frequent additions of nutrients. 

Thoroughly preparing the existing soil will pay dividends, spelling the difference between getting a few vegetables from the garden (“Why bother?”) and having a truly abundant harvest (“Take some veggies, please!”). And, if you properly prepare the soil at the start, you’ll never have to repeat the effort to that degree.

Keep in mind, though, that, as organic matter breaks down and is absorbed by plants and other living things, you’ll need to add more compost. For top performance, plants need balanced fertilizers that are appropriate for specific uses, such as for vegetables, flowers, spring flowering bulbs, or the shrub border. That’s in addition to the compost or aged manure you originally used to prepare the soil. Lack of nutrients and compacted soils are among the top reasons for low crop yields.


Soil Testing

Contact your local Master Gardeners program, or the agricultural extension office, for information on soil testing. The results will indicate which amendments to add, and whether the pH is appropriate for the plants you want to grow. The report also includes a breakdown of the soil components: clay, silt, sand, and organic matter. Normally, I add more organic matter than soil tests recommended.

Soil pH is a measure of acidity or alkalinity. Neutral is 7.0, with acidic values below that and alkaline values above 7.0. A simple soil test will indicate pH and nutrient levels. Soil pH affects the availability of nutrients to plant roots, with most vegetables preferring pH levels between 6.0 and 7.3.

Years ago, a landscape client wanted to prepare the soil for a vegetable garden on the property she and her young family had just bought. She expressed concern for “bad things” in the ground, so I suggested that she ask for a lead test in addition to the basic tests. The cost of the basic test is very reasonable, but extra requests will raise the fee. No matter; it’s worth the cost.

The report showed a surprisingly high lead content in the soil, unusual for a newer home. So, you don’t want vegetables growing there! She submitted tests from different areas, and felt confident that the original spot was unique. Something probably had been dumped there before the house was built. Later, the family was going to have the contaminated soil professionally removed.

Lead Paint

trowel in soilIn 1977, the Consumer Product Safety Commission banned the use of lead paint in residential properties. If you live near an industrial region, a busy highway, or where lead paint might be a concern, I strongly advise testing for lead before you prepare the soil. Local zoning authorities should have records on past property use. For more information, contact the National Lead Information Center at 800 424-5323.

Lead poses a serious health risk, especially to young children. There is no level of lead that is considered “safe enough”. And most of us grow our own vegetables for the health benefits, after all.

For now, gather your tools and your help, and pace yourselves. This is not something to be accomplished in the hour before your daughter’s softball game. So, you might as well turn it into a party—arrange for pizza delivery at the end of the day! You certainly will have deserved it.


pizza


Return to the top