2020
Kim’s Tips for Rooting Your Own Lavender Cuttings
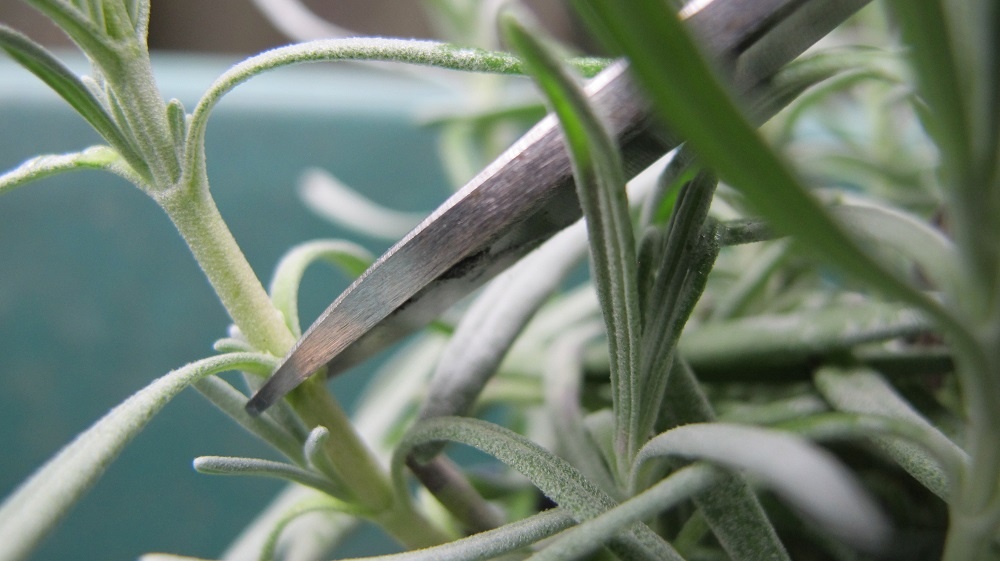
Cutting a lavender stem at a node.
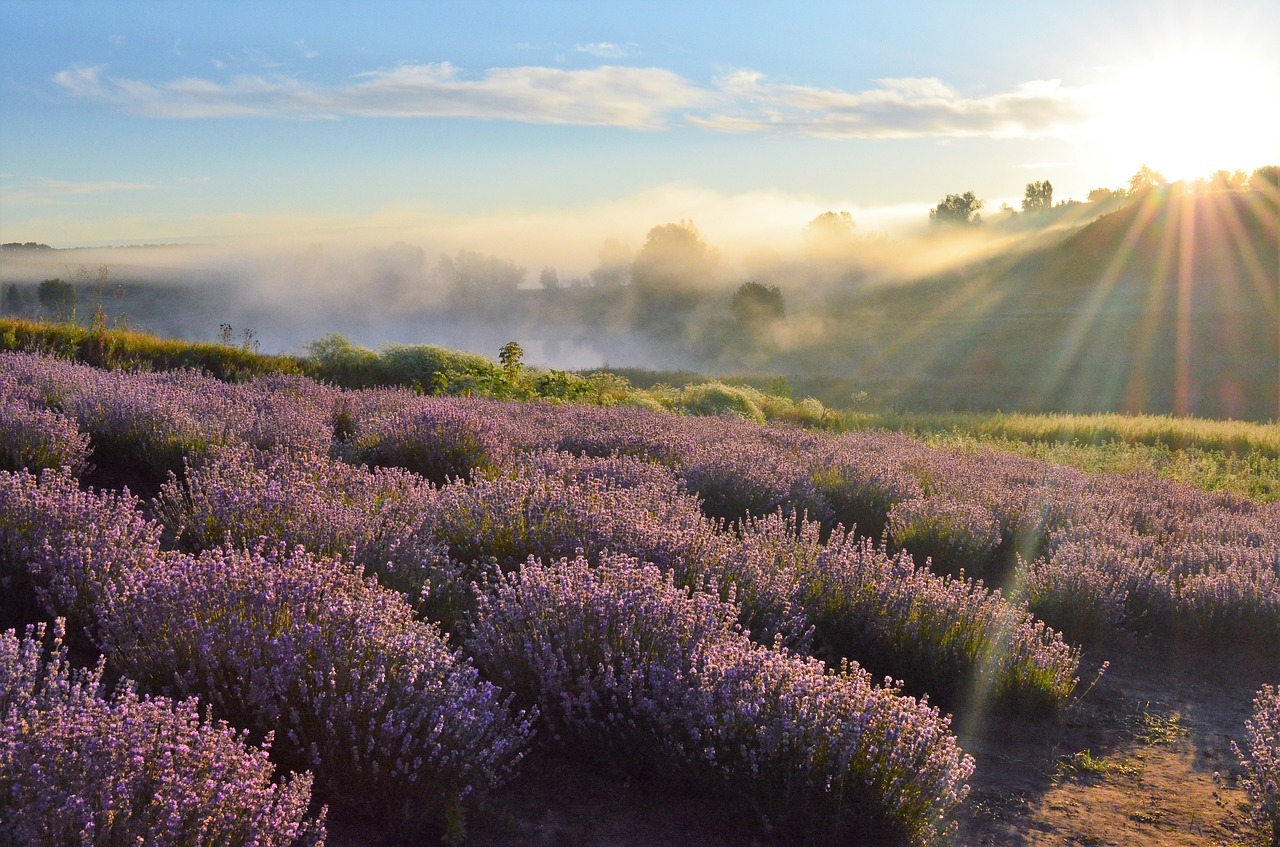
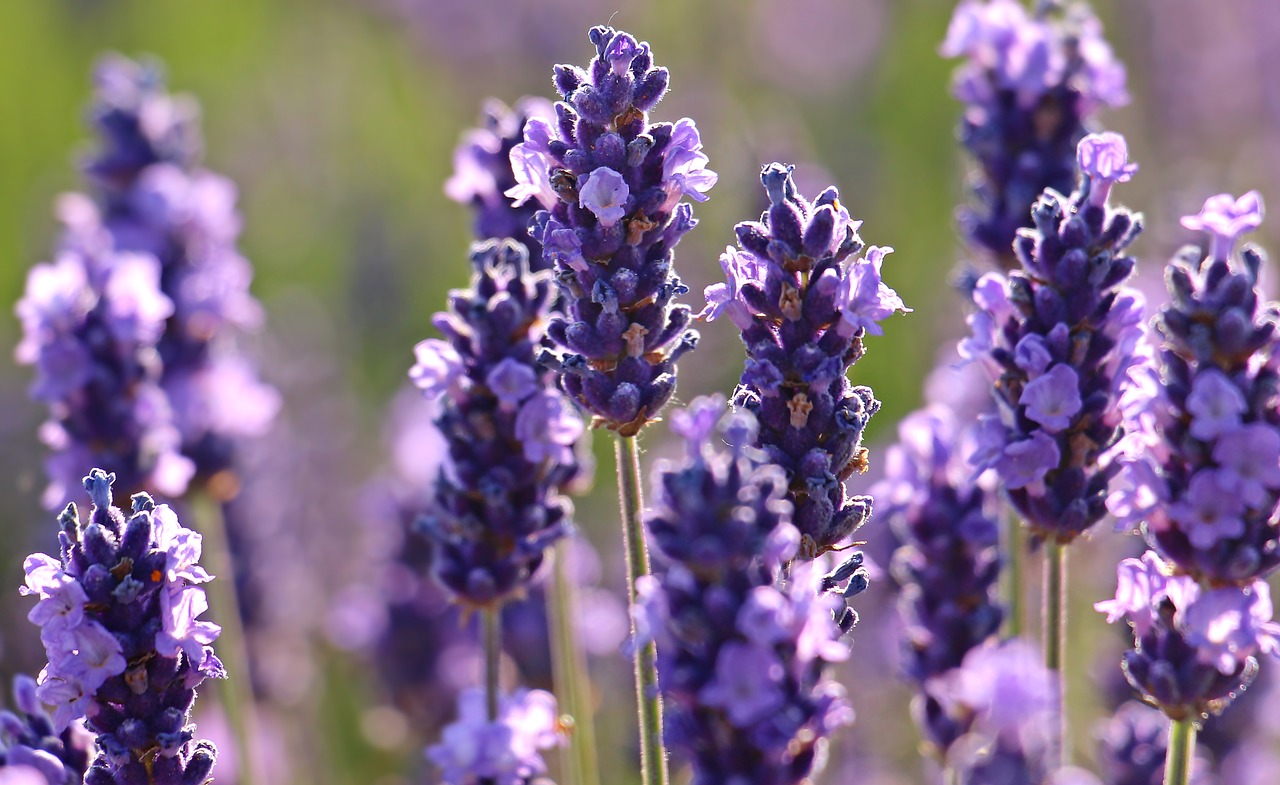
How wonderful—the fragrance of lavender wafting through the back yard. You’re pleased beyond measure with these silver-leaved subshrubs in the pollinator garden, and perhaps you’d like more of them. The bees and butterflies are all over them! And the deer never touch them!! Garden centers stock several cultivars of lavender, but they are not inexpensive. Problem solved: “I’ll root my own lavender cuttings!”
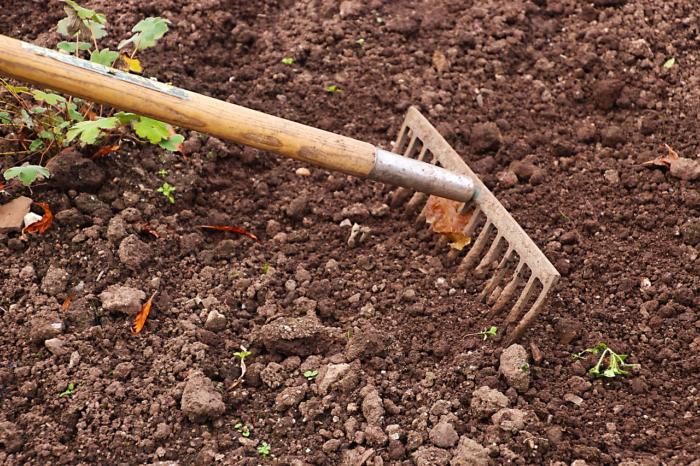
The plants have performed well, and the garden is buzzing with activity. Now, you’d like to expand the garden to provide even more sustenance for all the bees and other insects. Admittedly, there is some work involved. Properly preparing the heavy clay soil takes effort and materials, but you know it will be worthwhile.
We need pollinators for farms and orchards, for our own vegetable gardens, and to regenerate natural stands of greenery. They pollinate every third bite of food we eat.
Because it takes several weeks to root cuttings and to grow them on to the proper size for transplanting, time is on your side. So, let’s begin by taking cuttings from the plants in the garden. While they’re rooting, you’ll have plenty of time to get the soil just right for the new plants.
Patent Rights
Because it’s illegal to propagate trademarked plants for resale, I bought the newer lavender cultivars in trays of 60 to 200 tiny rooted plants, called plugs. Labels of branded varieties carry the caution, “Unauthorized propagation prohibited”. Many varieties were not under patent protection, however, so those were the ones I propagated.
Lavender from Seed
Another option is sowing seeds—‘Ellagance Purple’ and ‘Lady’ are two that you might try growing. ‘Munstead’ is a strain that has been around for a long time. Seeds take a few weeks to germinate, so this project is best started in spring. Plants grown from seed (sexual propagation) can vary in certain characteristics, including plant size, foliage color, flower color and size, and time to first bloom.
Plants vegetatively propagated, on the other hand, will have consistently similar characteristics. Cloned plants, from cuttings, have the same genetics as the stock plant, so the rooted cuttings will look identical to the parent.
Prepare the Pots and Soil for Lavender Cuttings
First, assemble 4″ or 4 1/2″ plastic pots. Bigger pots hold a much larger volume of soil and dry too slowly.
Lavender is susceptible to several fungal diseases, so starting with clean materials is essential. At the very least, wash the pots with soap and hot water. Better yet, clean the pots with a bleach solution, let them sit for a few minutes, then rinse thoroughly.
Another option is to use new cell packs, with 4 to 9 cells per pack. Soil in small cells dries faster, so you’ll need to closely monitor these containers.
Don’t use soil left over from last year’s plants; it could be harboring disease spores. Never throw “used” soil into the trash. Instead, add it to the flower gardens or the shrub border, where it will contribute organic matter as it decomposes.
Options for Potting Soil:
- Always begin with pasteurized potting soil. Mix this with clean coarse sand or perlite. The medium should drain well, allowing both water and air to percolate through the soil.
- Use products formulated for succulents, and add houseplant potting soil to make a gritty medium, but one which will hold some water.
- Or, simply, use a fresh bag of pasteurized potting soil, which includes perlite, and be very careful about watering.
Avoid using soil containing a large percentage of peat moss, which is acidic and stays too wet for lavender. This herb, like many others, needs close to a neutral pH.
Incidentally, most potting soils sold in garden centers contain no soil at all, and are sometimes called “soilless potting mixtures”. For our purposes, the term “potting soil” will do.
If the medium is dusty dry, mix in a small amount of water. Avoid breathing in the dust. The soil should be slightly damp. Fill the pots with potting soil, and firm lightly. Leave about 1/2″ to 1″ of space between the soil surface and the pot’s rim.
Making the Cut
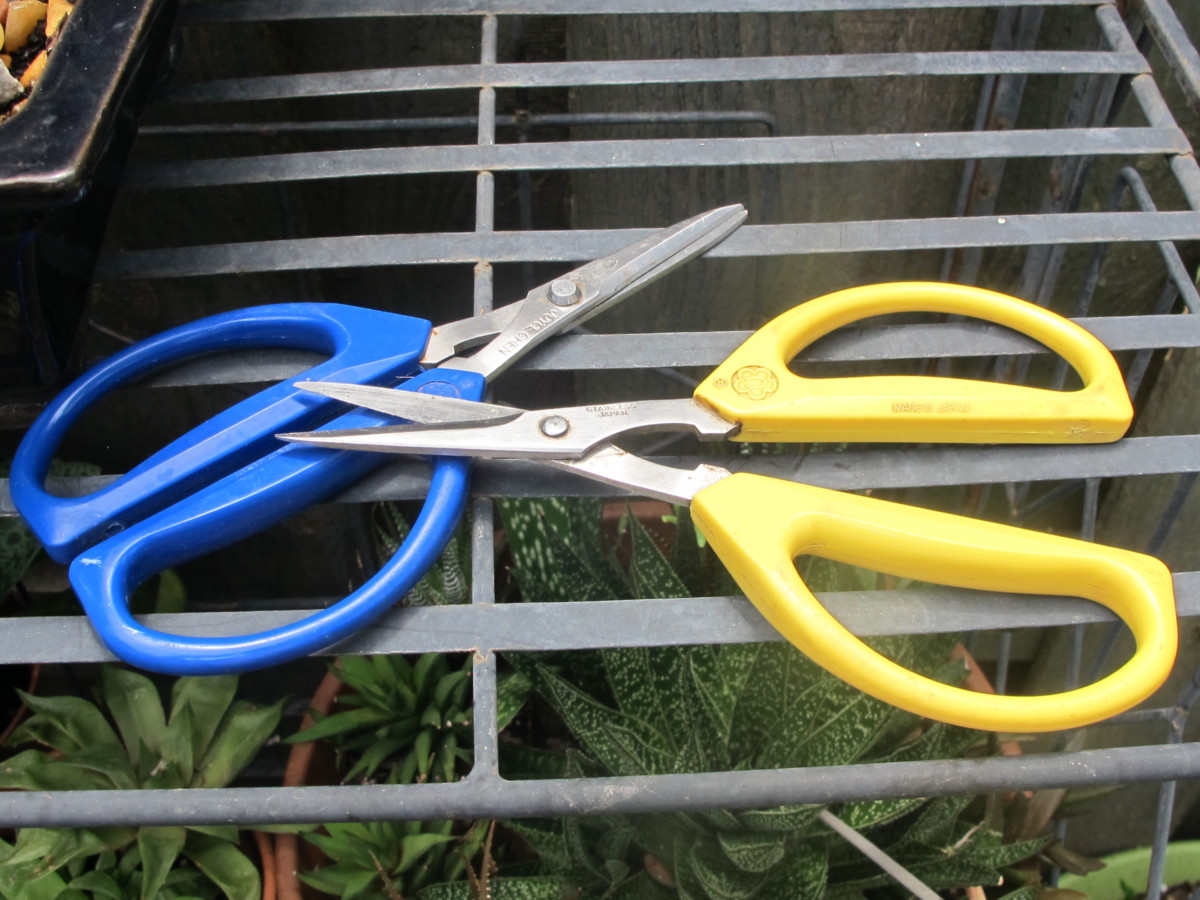
Joyce Chen scissors.
When To Cut
Cuttings taken in early to mid summer should root adequately before autumn. These are considered “semi hardwood” cuttings. The stems aren’t fully matured, but they aren’t too tender, either. Tough old woody stems will not root.
Collect lavender cuttings in the morning, when they’re fully plumped with water. Don’t use material from the bottom or from the shady side of the plant. Use healthy foliage, without any spots. Cuttings from plants that have not been overfertilized with nitrogen often root more successfully.
How To Take Lavender Cuttings
With clean sharp scissors, take cuttings from non-blooming, non-budded stems. Lavender cuttings from the tips of the stems, rather than from middle sections, make better propagating material. If your early blooming lavender plants were deadheaded (old flower stems cut back) early in the season, the remaining stems might already have branched out, providing fresh cutting material.
Cuttings, before removing bottom leaves.
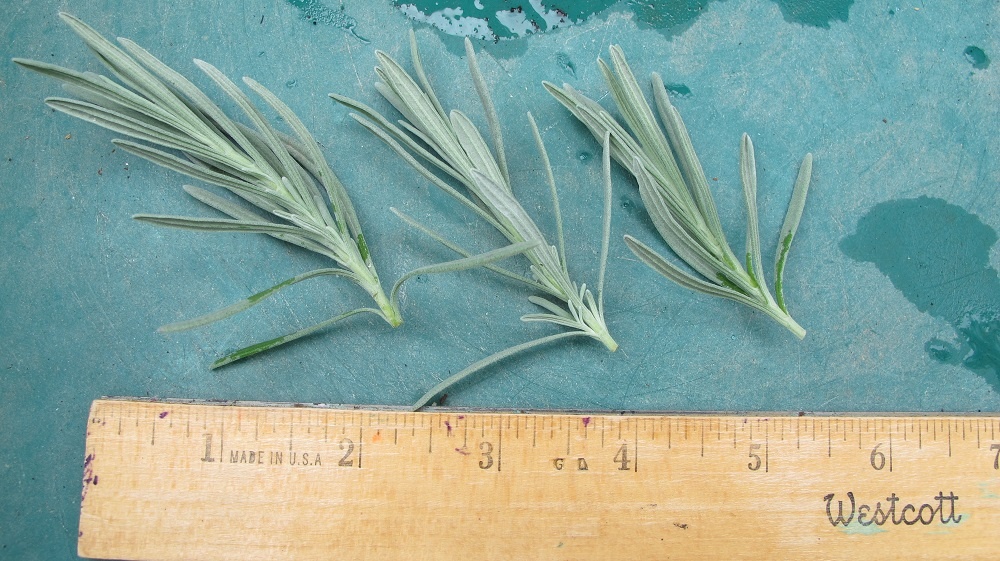
Lavender cuttings should be only 2″ to 3 1/2″ long, depending on variety. Large cuttings have greater leaf surface area, and the cuttings are more likely to wither before roots form. When taking cuttings from any plant, consider the number of leaves, light, water, humidity, and time to root. Each variety has its own combination of variables that result in prompt, successful rooting. Long cuttings, low humidity, lack of light, and wet or dry soil will not yield rooted plants.
Make the cut where two leaves join the stem (photo at top). This part of the stem is called the “node”, and the first roots often emerge there.
Now, remove leaves on the bottom inch or so of the stem. Gently peel them off. Otherwise, leaves will rot in the soil, which could rot the stem.
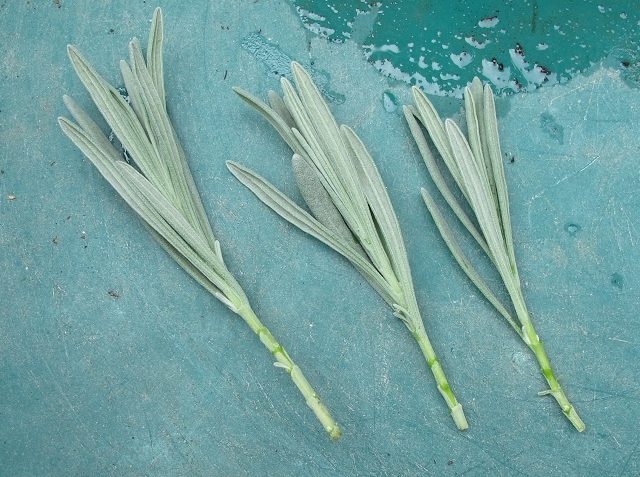
Cuttings, ready for sticking.
Rooting Lavender Cuttings In Water
Coleus cuttings start rooting in water in a few days; lavender requires weeks in soil. When possible, I always root plants in potting soil rather than in water. The roots’ cell structures differ between the two methods, and those growing in water often die when re-adapting to soil.
If you have plenty of cuttings, perhaps rooting some in water will work for you. Cuttings should still be about 3 1/2″ long. Use only an inch of water in a glass, don’t crowd the cuttings, and remove leaves in the water. Place the glass in part sun, and change the water every few days.
Sticking the Lavender Cuttings
After decades of rooting plants under lights for my business, I’ve had the most success with cuttings that were stuck right next to the inside of the pot. Particles of soil touching the wall of the pot tend to permit more air to circulate around the stems. That’s precisely what lavender needs.
The stems aren’t sitting in wet soil, although there is some contact. At night, as the temperature drops, water vapor precipitates on the inside of the pot. And the humid air in that space helps the cuttings root.
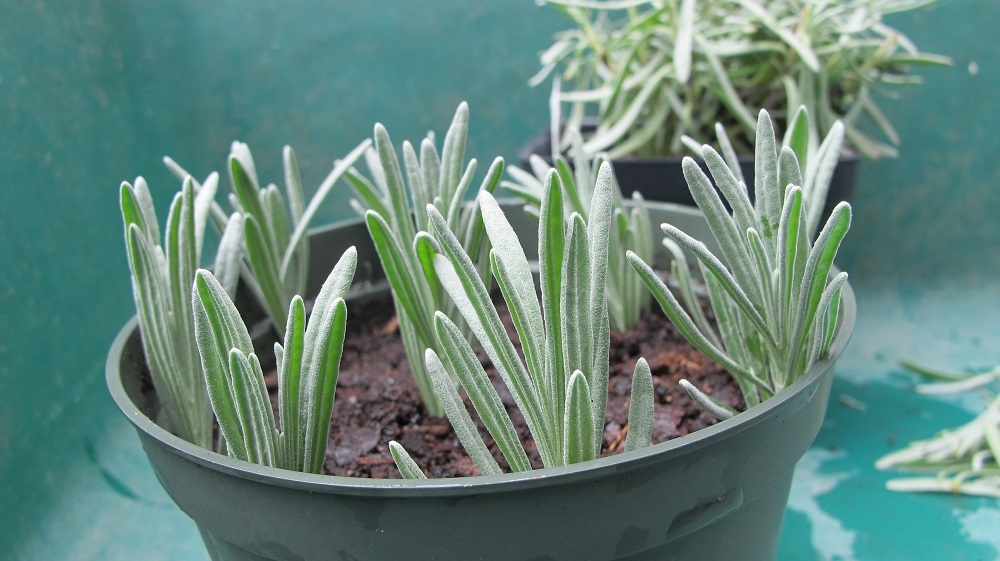
Lavender cuttings.
This 4 1/2″ pot accepted 9 cuttings, with 1 in the center. Avoid crowding the cuttings; space them so their leaves don’t touch each other. Lightly water in the cuttings to make better contact between the stems and the soil.
I propagate other herbs, including thyme, rosemary, oregano, sage, and bay laurel, in the same way.
Actinovate
When propagating thousands of herbs and perennials each season, I used an organic biological fungicide called Actinovate. This product, a bacterium called Streptomyces lydicus strain WYEC 108, prevented vulnerable plants from succumbing to most diseases. Water the solution into the soil after sticking or lightly mist the cuttings, occasionally, in the morning. I also used it when germinating seeds.
This fungicide is quite expensive, but it made plant propagation much easier for me. It carries the OMRI label and is safe to use on edibles.
Always exercise caution when using materials for treating plants. Don’t breathe the dust, avoid getting it on your skin (rinse thoroughly), and don’t improperly dispose of leftover product or the container. Read the label.
Rooting Hormone
Rooting hormone powder coats the base of the cutting with a chemical fungicide and plant hormones. While it accelerates the rooting process for many plants, this product carries the Environmental Protection Agency’s Caution rating, as does Actinovate.
I haven’t used it for many years, but, if you’ve had good results using rooting powder, then try it on your lavender cuttings. Always read the label, and never discard leftover powder where it can pollute streams.
Raise the Humidity
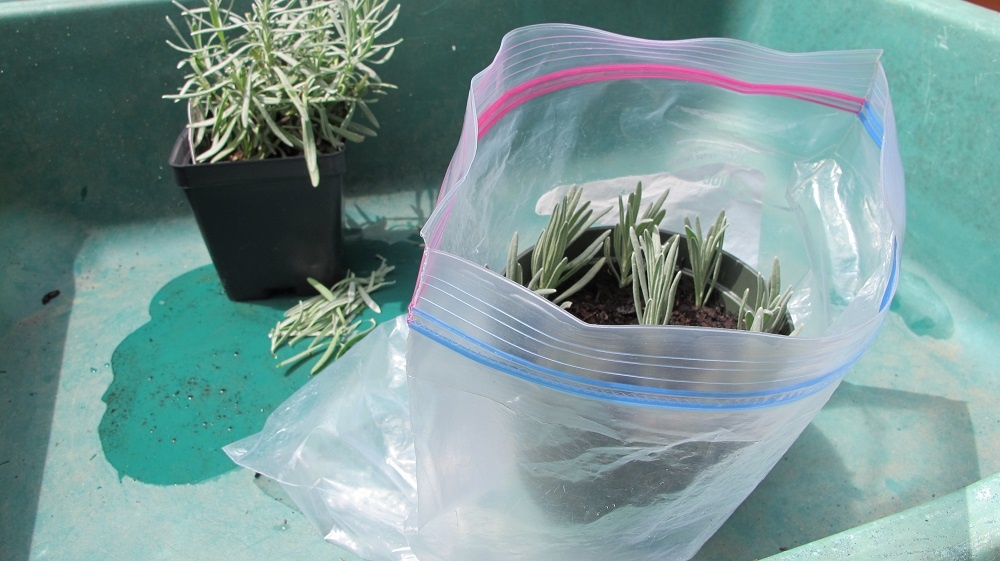
Pot of cuttings in open plastic bag.
In order to raise the humidity around the cuttings without causing rot, place the pot of cuttings into a clear plastic bag. Pull up the bag so it surrounds the cuttings, but don’t secure it. Fuzzy-leaved plants, such as lavender, rot (not “root”) easily in high humidity. A closed plastic bag or some other closed system raises the relative humidity to 100%. It also causes the “greenhouse effect”, raising the temperature too high.
So, keep the top of the bag open. Enough humidity will remain around the lavender cuttings. In very dry environments, the bag can be partially closed, but don’t let heat build up. Empty any water that collects at the bottom. If the soil is moist and there’s significant condensation inside the bag, open the top more widely, and let excess moisture dissipate. Wet soil will rot the cuttings.
Light For Lavender Cuttings

Lavender loves to bask in the sunshine. The sooner the cuttings get back to the sun, the sooner they can resume strong growth. But harsh sun will desiccate the unrooted cuttings. This is a race against time.
Indoors
Indoors, place the cuttings where they will get gentle direct sunlight. Sunlight helps cuttings root faster, but strong sun will dry them and overheat the air inside the bag. Bright filtered sun most of the day, as through a sheer curtain, works well. Average indoor temperatures (mid 60’s F to low 70’s) will help them root.
Don’t put the cuttings too close to a window, in the hot sun. Check to make sure excess heat can escape. Lavender cuttings will not root in low light, so it might require a bit of experimentation to find the perfect light level to root the cuttings without desiccating them.
New growth emerging from the tip of the stem indicates a cutting that is beginning to root. Congratulations!
Artificial Light
A 4′ long fixture with 2 daylight LED or fluorescent tubes makes a perfect nursery. Here, the plants never see a cloudy day, and you can keep a close eye on progress.
Place the lavender cuttings close to the tubes, within 2″ or 3″. They should be as close as possible to the lights, but not feel heat from the fixture. Keep the lights on for 14-16 hours each day.
Smaller tubes and grow bulbs emit less light, which might not be enough for lavender. But if that’s what you have, try it. Make sure the cuttings are close to the tubes and that the lights are kept on for perhaps 18 hours each day.
Outdoors
Many of us don’t have indoor space suitable for rooting lavender cuttings. In that case, place the pots outdoors in dappled shade, where the plants will get more bright shade than harsh sun. Don’t expose them to hot afternoon sun. Find a location out of the wind.
In a pinch, take a few cuttings and simply stick them at the edge of a planter, in light shade cast by a plant. I’ve been able to root many kinds of plants this way. Watch out for slugs, by the way, and use organic Sluggo to bait them. Scoop out rooted plants, and pot up for a few additional weeks of growing and getting used to full sun before planting them in the garden.
The cuttings in the photographs go outdoors on the deck in the morning. I take them back inside at noon or in early afternoon. It’s been way too hot and humid outside this summer—mid 90’s F, over 100° heat index for days at a time. When it cools down, they’ll spend more time outdoors.
(***Update***: The pot of cuttings in the photographs has only one survivor. Prolonged heat, frequent downpours, and mischievous chipmunks digging in the soil killed the rest. But that one well-rooted plant looks great, and will stay in its 4″ pot over the winter. 1/1/2021)
Ready for Transplant?
Okay…it’s been about 5 or 6 weeks and most of the cuttings show new leaves growing at the tips of the stems. That’s great!
If you see roots at the drainage holes in the bottom of the pot, the cuttings might be ready to divide. Remove the cuttings from the pot by gently tipping the pot upside-down. See if there are enough roots to move them to the next stage. Each cutting should have a few 1″ to 2″ long roots. Handle with care, since the roots detach easily from the stems and dry quickly when exposed to air.
Cuttings Rooted in Pots
Before settling them into their permanent homes, the rooted cuttings in pots will need to grow a more extensive root system. Transplant them individually into their own small pot or into 4-cell market packs. Be sure to maintain the same soil level against the stem; never bury the stems. Use the same kind of soil you used to root them.
If they’re rooted, give them full sun for a few weeks before planting in the garden. Rooted cuttings don’t require high humidity, so remove the plastic bag.
Cuttings Rooted in Cell Packs
If you planted the cuttings in market packs to begin with, simply push up the bottom of a cell to check root growth. Don’t pull the cutting itself. Well-rooted plants can be planted directly into the garden if you monitor them very closely. If needed, cover temporarily with a “caterpillar” tunnel fitted with bird netting. This protection admits air and sunlight, and will prevent damage from digging animals while the lavender becomes established.
If cold weather is approaching, use a clear plastic cover over the tunnel, and vent it in the daytime. This will buffer severe conditions, and could save the plants.
Harden Off the Lavender Cuttings
Harden off the cuttings by gradually introducing them to outdoor conditions over a period of a week or so. Place the pots of lavender outdoors, in morning sun for a few days, then in more hours of sun. It’s easy to forget them, when they’re out of sight, so remember to water! Plants receiving abundant sunshine make more food for themselves, through photosynthesis, so their roots will grow faster. By the end of the hardening off process, the plants should be able to tolerate direct sun all day.
Remove flower buds appearing on young cuttings. For now, all energy should be directed toward growing a robust root system.
Any cuttings that haven’t rooted and have foliage that feels limp can be discarded. If they look like this after a month, it’s not likely they will root. Figure out how to improve the growing conditions, and try again.
The Garden is Ready
And so are the plants. Water them first. Then remove the rooted plant from its pot and gently loosen the outer roots if they form a tight root ball.
Plant the little lavenders, maintaining the same soil level next to the stem. Firm the soil around the roots to eliminate air pockets. For almost all plants, you should be able to see the top of the original root ball after transplanting.
Be sure to space them properly, according to the variety. Some mature at 16″ tall and wide, while others can grow as large as 3′ or 4′ across. Lightly shade the plants if the leaves wilt in moist soil. Sticking a leafy twig in the ground on the sunny side works well enough.
During hot weather, check the soil moisture every day, although you might not have to water every day. Feel the soil a few inches down and next to the root ball. If you detect moisture, don’t water. If it wilts or the soil feels dry, water around the root ball.
When you do water, keep the foliage dry. This helps prevent disease.
To Mulch Or Not To Mulch
If you use mulch in the garden, avoid placing it under the canopy of the plant. Where it rains regularly, mulch can hold too much moisture in the soil, so use only a thin layer or, preferably, none at all right under the plant. Keep mulch off the stems.
Avoid finely shredded hardwood mulches, and choose pine fines or small nuggets instead. They permit better air circulation around the lavender.
Planting lavender on raised ground helps the soil drain faster, and plants display better when elevated above surrounding lawn or paving.
Is Your Lavender Winter Hardy?
Each plant variety has a hardiness zone rating, usually between zone 5 and zone 9 for lavender. If you live at the colder end of that variety’s hardiness zone, the rooted plants might need the protection of a cool greenhouse or a cold frame until next spring. It depends on expected weather patterns—temperature and precipitation—over the next several months for the cultivars you’ve selected.
At this point, in late summer, waiting to propagate lavender until next year might be more feasible, especially for gardeners in colder climates.
Lavender is drought resistant once established in the garden, but often dies when overwatered. Improving soil drainage is especially important for cultivars planted in the colder regions of their hardiness zones. “Winter wet” is a frequent cause of lavender failure.
Plant lavender with other perennials and shrubs that share its preferred growing conditions. Although it isn’t native to the U.S., it is non-invasive.
You might enjoy reading about the history of lavender and its uses through the centuries. This article at The Farm In My Yard includes more detailed information for growing lavender successfully.
Better for the Environment
Traditional property management calls for removing winter shelter and sources of food for insects and animals, so this is how we can begin to compensate, right in our own gardens.
Propagating plants is an economical means of providing new material for your gardens. Planting species that offer sustenance to pollinators is not only ecologically preferable to maintaining lawn grass, but it’s also prettier!