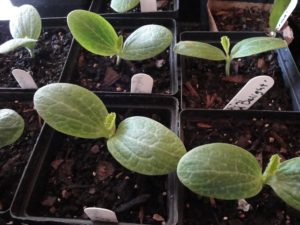
Tag Archive | basil

Seedlings For Your Garden: 12 Tips


2022


seedlings, zucchini


Starting Seedlings For Your Garden


Busy spring! This lengthy article focuses on starting and caring for seedlings and getting them established in the garden. If I’m not working on the seedlings, I’m working in the gardens, creating new beds and expanding those started last fall and winter. Winter weather was delightfully mild to allow planting right through the cold season. The weeds and I have come to an understanding, and in the next article, I’ll tell you how in “Patches for Pollinators”.

Foremost on the agenda has been starting plants to sell at our local Elkin Farmers’ Market. It’s been a challenge this year, keeping plants in good condition with high heat, heavy humidity, and frequent rainstorms. If I had a climate-controlled greenhouse, there might have been fewer losses. But, for the most part, my company, Wellspring Gardens, is producing more seedlings than I can sell at the market.

Some of that overproduction is destined for the vegetable gardens. It will yield small harvests of produce to sell at the market in addition to what’s needed in the kitchen. This is new territory for me, adding produce to the plants offered at the farmers’ market.

I might even consider canning, which I’ve never done…but let’s not get ahead of ourselves. That would be helpful, though, considering the rapidly rising prices at the grocery store. For that reason alone—the impact of rampant inflation on our wallets—it’s wise to learn how to grow at least a few vegetables.
 

sun's path

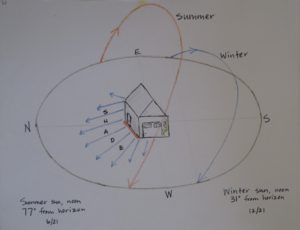
The sun’s path across the sky, Charlotte NC.


Watching how the sun tracks across the sky from month to month reveals good spots for the sun worshipers and areas where leafy greens should thrive in partial sun. This is my first summer in this house. The massive oak trees create shifting shade patterns that cause me to periodically rethink the plans.

So, let’s begin!


12 Tips For Starting Seeds


1. Start with clean materials for seedlings.
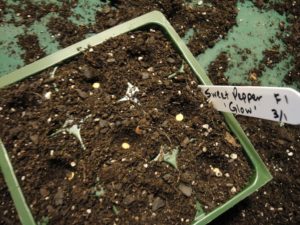
 

pepper 'Glow' seeds and cell pack

Sweet pepper ‘Glow’, started in 9-cell packs.


This calls for packaged seedling mix or fine-grained potting soil. Don’t use “dirt” from the garden, with its pathogens, insects, weed seeds, and worms that disrupt soil structure around tiny roots. In addition to the unknowns lurking in garden soil, its high clay content causes drainage issues in containers.

Soil used previously for potted plants is not a good medium for your seedlings. It’s often depleted of nutrients, might contain pathogens, and the organic matter has partially decomposed. If it’s only one season old, it’s probably safe for potted annuals, when mixed with fresh potting soil, or incorporated into the backfill for that new sourwood tree. Or simply throw it under the shrubs or into the compost pile.

Because seedlings are susceptible to soil-borne diseases, play it safe and start with pasteurized bagged seedling mix or potting soil. This, however, doesn’t guarantee a successful outcome, as many disease spores are air-borne. But we can increase the odds of success by using clean materials.

When reusing cell packs, pots, and flats for seeding, wash them in a 10% bleach solution, and rinse well before proceeding. Don’t smoke around plants, and wash hands thoroughly before working with them. Tobacco and other plants in the nightshade family (Solanaceae, including tomato, pepper, eggplant, and potato) can fall prey to the same disease organisms. Spores can transfer from tobacco products to your hands to the plants.


Pasteurizing Potting Soil

For bagged soil that’s questionable, you can pasteurize it in the oven. Don’t heat soil that contains timed release fertilizers. Use an oven-safe covered pot or baking dish, wet the soil, and heat the oven to 200°F. When the soil registers 140° on a meat thermometer, lower the oven temperature and maintain soil at that temperature for 30 minutes. This kills most pathogens. Wait for it to dry somewhat and to cool thoroughly before using. Various websites recommend different temperature levels from 140° to 300°. At the high end, beneficial microbes are killed off as well.

Let it cool down outdoors. Considering the pervasive “earthy” odor coming from hot soil, you might prefer buying a new bag of seedling mix or accept a small risk with the open bag in the garage.

Another method of pasteurizing (not sterilizing) soil is to place a heat-resistant container of soil in a black plastic bag. Place the bag in a sunny place outdoors on a warm day, and let the sun do the work for you. This is called solarization, and can raise the temperature inside the bag to 140-160°F. To prevent damage to the beneficial microbes, take the temperature, and maintain it at 140° for 30 minutes, opening the bag a bit to prevent overheating.

Most bagged potting soils and seedling mixes already have been heat-treated to eliminate pests. Close the bag securely and store in a cool dark place. The last and only time I pasteurized soil was nearly 50 years ago because that’s what the experts recommended.


2. Grow disease resistant varieties…


While fungicide and bactericide formulations—both organic and conventional—are available, I’d rather grow disease resistant varieties and not rely on spraying. Keep in mind that resistance is not 100% effective, particularly when plants are exposed to stressful weather or cultural conditions.

Certain varieties are more flavorful than others, but all well-grown fruits and vegetables from your own garden taste better than those purchased from grocery stores. Picked when vine-ripened perfect, anything coming from the garden will be superior to what’s found elsewhere except, perhaps, at farmers’ markets and farm stands. Freshly picked produce also has the highest nutrient content.

Digging in the garden is great exercise; proceed slowly at first. Working outside in nature feels good, and self-sufficiency is never amiss. A few steps from the back door gathering a green onion, spinach, dinosaur kale, and a little ripe sweet pepper for the veggie omelet is more rewarding than I can describe. You’ll see!

Those are just a few of the many benefits of growing our own vegetables. Using disease resistant varieties, if available, makes the job so much easier. Many new gardeners gave up after having suffered the disappointment of losing an entire crop to early blight or bacterial leaf spot. And we also have to deal with deer, rabbits, and insects!

Although this article concentrates primarily on edibles, flowering plants also have their own set of disease organisms. Again, look for resistant varieties, grow them in conditions that don’t favor infection, and look for remedies at the garden center.


…Especially Tomato Seedlings
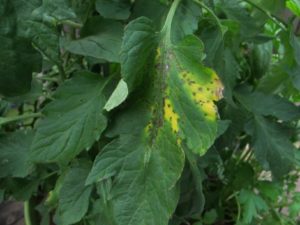
tomato disease septoria?

Disease beginning on ‘Rutgers’ tomato.

Tomatoes and peppers, two of the most popular crops for home vegetable gardens, are vulnerable to many diseases. They’re caused by fungal, bacterial, or viral pathogens. In some areas, nematodes also can be a problem. Usually, we can harvest some fruits before disease claims them, but resistant plants last longer in the garden. Plants infected with viruses should be removed and destroyed. For fungal and bacterial pathogens, products at garden centers will help. Always read the labels.

Tomato diseases include Alternaria stem canker, early blight, late blight (Phytophthora; very few varieties are resistant to this one), Fusarium wilt, grey leaf spot, leaf mold, tobacco mosaic virus, tomato mosaic virus, tomato spotted wilt virus, and Verticillium wilt. Catalog listings use initials to indicate disease resistance. For tomatoes, AS, EB, LB, F, GLS, LM, TMV, ToMV, TSWV, and V, respectively, represent those diseases.

Tomatoes are weedy plants and normally produce good crops, despite many organisms that target them. Peppers are susceptible to several races of bacterial leaf spot, and basil to basil downy mildew. Some zinnias are plagued by powdery mildew. Weather conditions, such as high humidity and frequent rain, exacerbate these disease problems.

Most hybrid (or “F1”) tomatoes have some resistance to one or more pathogens, but not to all of them. ‘Big Beef Plus’ is resistant to a wide variety of diseases. ‘Damsel’ and ‘Defiant PhR’ are resistant to late blight. Hybrid seeds carry a higher price than open pollinated varieties due to the cost of research that developed them and the extra steps needed to produce hybrid seeds each year.

It’s so hot out there!
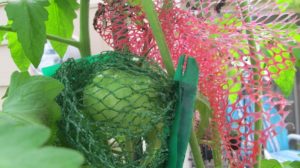
 

shading tomato flowers


If you live in a hot climate, look for tomato varieties that have been bred to produce better at high temperatures. The pollen in tomatoes and peppers, and others, can die at high temperatures. While these plants are comfortable at 65-80°F, pollen dies above 88°, 90°, or 92°, depending on the cultivar. No pollination = no fruits! A reference to “heat” or to the “south” in the plant’s variety name indicates its higher tolerance for heat.

Researchers are investigating thermo-tolerant genetics in wild tomato species (Solanum pimpinellifolium) and incorporating them in tomato breeding programs.

One trick to preserve viable pollen is lightly shading the plant in the hot afternoon hours. Attach shade fabric—a black woven mesh—to a support over and on the west side of the tomato or pepper plants. This provides a decrease of up to several degrees in hot climates or temporarily during a heat wave. In the photo, above, mesh bags from the grocery store protect fruits from squirrels and sun scald, and lightly shade new flowers and their pollen from high heat.

The young ‘Estiva’ tomato plants (“estiva” refers to summer), a hybrid bred for heat tolerance and great taste, lost most of their diseased bottom leaves in heavy rains, but those little fruits are still growing! I’ll plant them out this weekend, after the temperatures drop well below the 108° heat index value we have now. Recent weather has been in the record-breaking mid- to high 90’s F, with high humidity. Not my favorite conditions to dig in the garden…so I don’t.  I was not bred for heat tolerance!

***Update***: ‘Estiva’ tomatoes endured this hot summer and produced fruits past the first fall frosts. I covered them on chilly nights to ripen the last of the fruits. These were among the last tomatoes to succumb to the cold, in mid-November. Autumn 2022

A Few More Tomato Tips

Your best defense against tomato disease, in addition to growing disease resistant varieties, includes these tips:

  • Stake them. Tall indeterminate types need a 6-8′ tall stake, taller for some.
  • Space them farther apart, at least 3½-4′.
  • Thin the vines to 3 or 4 main stems by removing excess suckers.
  • Remove leaves on the bottom 12″ of the plants after they’ve become established.
  • Locate them where a breeze blows through the garden. These first 5 tips address increasing air circulation around and through the tomato plants.
  • Give them lots of direct sun—a minimum of 7 or 8 hours. The more sun they receive, the shorter the window of opportunity for pathogens to germinate on damp leaf surfaces.
  • Mulch the soil under the plants to prevent disease spores lying dormant in the soil from splashing onto and infecting the foliage. More on Page 4.
  • Water in the morning to early afternoon so all foliage is dry going into the night. Try to keep the foliage dry at all times and avoid handling wet foliage.
  • Water established plants heavily (1½”/week) when needed, but avoid giving little sips every day. Young seedlings need more frequent watering until their root systems expand.
  • Clip off leaves that show early symptoms (yellowing, spotting), and dip your pruners in alcohol when moving from plant to plant.
  • Don’t smoke near the garden, and wash hands thoroughly before working with plants.
  • Rotate your crops. Don’t plant a member of the Solanaceae family where any members have grown in the past 3-4 years. There’s more about crop rotation on Page 4.

All plants grown with good soil preparation, good air circulation, proper watering techniques, adequate sun, and appropriate fertilization are less stressed. Less stress equates to lower infection rates.

Growing Heirloom Seedlings


Heirloom tomatoes are always in demand because of their exceptionally good flavor. Heirlooms are open pollinated, which means gardeners can save seeds from fully ripened fruits each year for the next season’s garden. Because they’re not F1 hybrids but have been breeding true, for the most part, for many decades, heirlooms retain their traits from one generation to the next.

These varieties, however, don’t have much built-in disease resistance. Nevertheless, I’m growing a few heirlooms, and spacing them 4′ apart for improved air circulation. We’ll see what happens.

Commercially grown tomatoes must be able to survive long distance transportation and handling without damage. They’re picked early, when green or first showing color. Varieties of these tomatoes have skins that normally are tougher.

Heirloom tomatoes have more desirable thinner skins and, therefore, travel poorly. So, you won’t see them in grocery stores unless those stores buy from local farms. Heirloom tomatoes from the grocery store might cost $5.00/lb. or more! So, yes, it is worth growing a couple of heirloom tomato plants in our gardens.

A few prolonged and heavy rainy periods this spring almost wiped out certain tomato varieties, namely ‘Carmello’, ‘Brandywine’, and ‘German Johnson’. I still have a few that show less damage than others. ‘Black Krim’ and ‘Cherokee Purple’ are doing fairly well, although they are heirlooms. Most of the remaining plants will be set in the garden. There’s usually a breeze blowing through the property, and by spacing them appropriately, I should get plenty of fruits.


Basil Downy Mildew
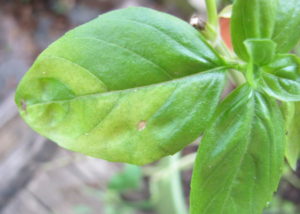
 

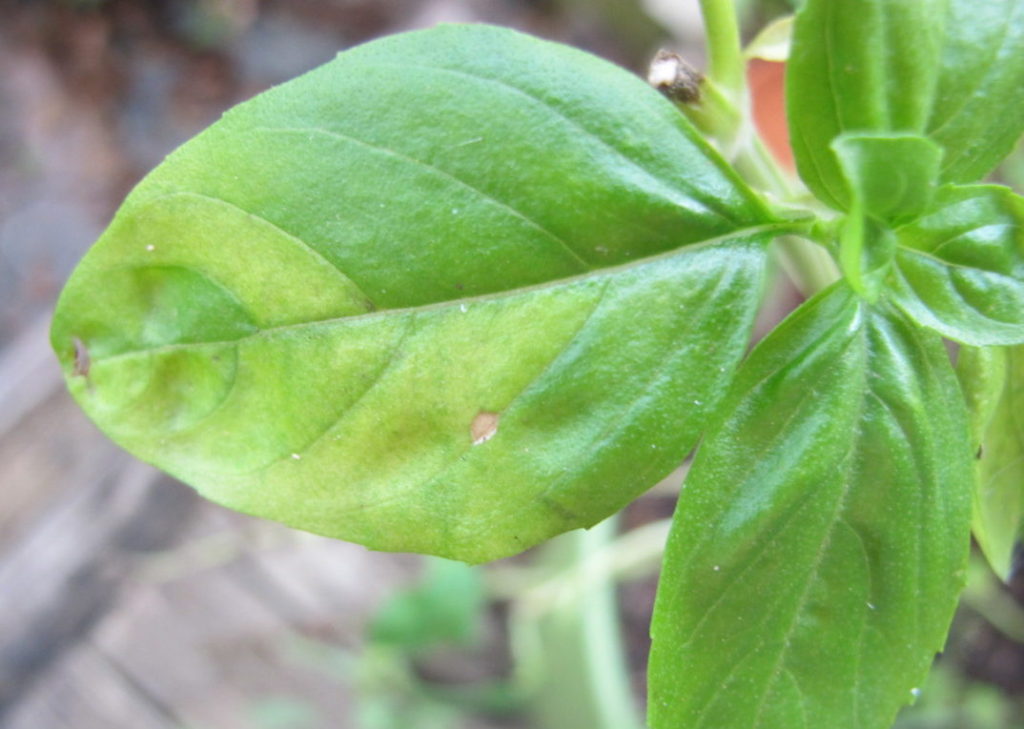
basil downy mildew

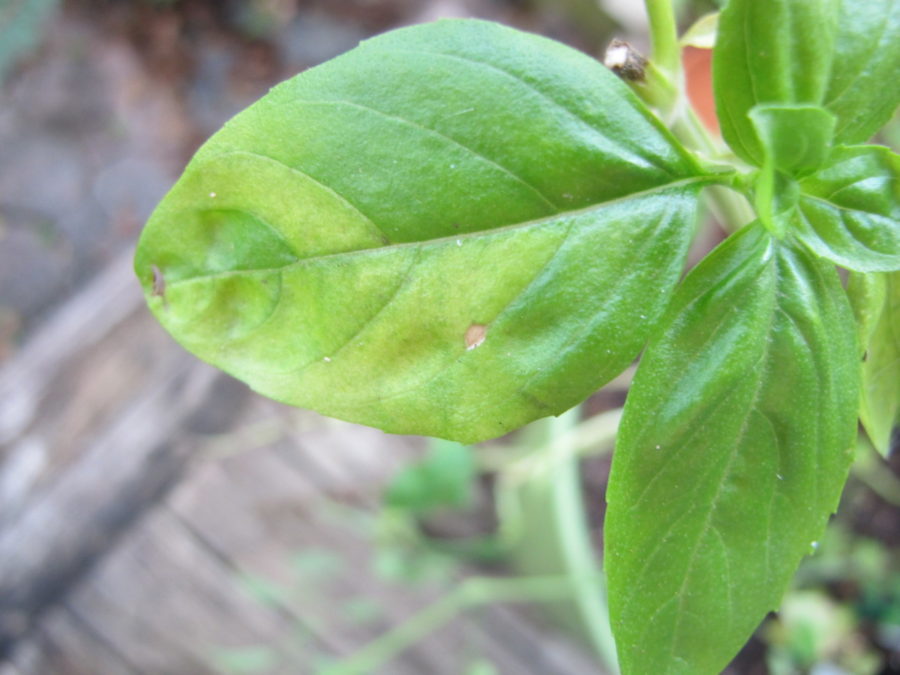
First symptom of BDM: yellow blotches between the main veins.


Although this dreaded disease targets only basil, it hasn’t appeared yet this year. But I’m prepared.

Last year, I grew ‘Rutgers Obsession DMR’ (DMR = Downy Mildew Resistant), an acceptable substitute for our beloved ‘Genovese’ and other susceptible sweet basils. Last year’s ‘Obsession’ did not develop any basil downy mildew (BDM)—not one speck—although wet and humid weather presented a worthy challenge. Other basil varieties in the ground or in pots succumbed to the disease within a week of infection…even young seedlings.

This year, I’m growing ‘Rutgers Obsession DMR’ and also ‘Rutgers Devotion DMR’ outside all summer. In addition, I’m seeding the old favorites, including ‘Genovese’, ‘Italian Large Leaf’, Thai basil ‘Siam Queen’, ‘Marseillais Dwarf’, and ‘Tuscany’, a lettuce-leaf basil. A few non-resistant basil plants will come indoors at night when warranted, as described below. But I’ll stop seeding susceptible varieties, except for a few pots, and concentrate on the resistant ones for the farmers’ market if the disease appears in the neighborhood.

Several other BDM resistant varieties can be purchased as seeds or as started plants.

Avoid High Humidity
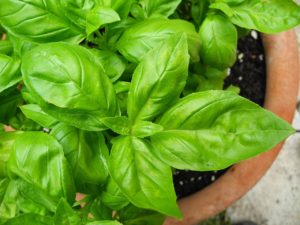
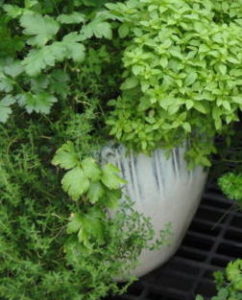
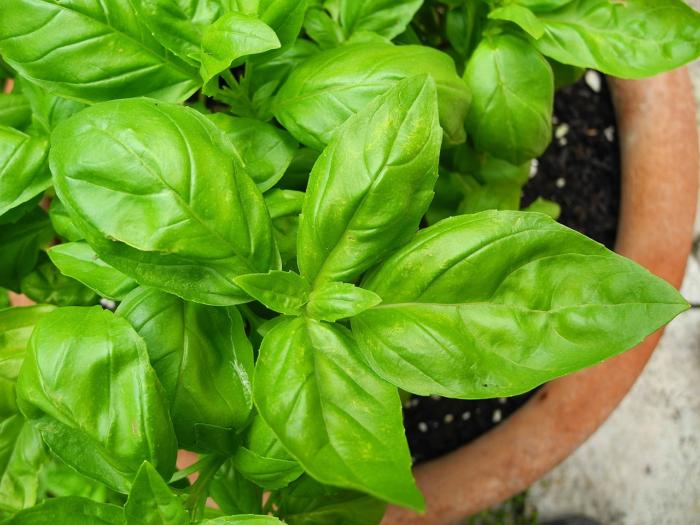
basil seedlings in clay pot

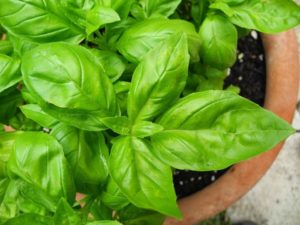
Healthy sweet basil, in a pot.

If you want to grow your favorite basil varieties that are not resistant to BDM, there is a way to prevent a total loss.

BDM spores move up from the south on the breeze or on infected plants shipped into the area. The spores don’t overwinter in cold climates. If spores land on a susceptible variety, they need a relative humidity above 80-85% for a couple of hours in order to germinate.

Even during pleasant weather, the relative humidity can reach 90% or higher in the 2-3 hours around dawn. That’s when the temperature is usually the coolest and, therefore, the relative humidity is the highest.

When plants show early symptoms of BDM, remove the affected leaves. Take potted basil plants indoors for the night, every night. Indoor conditions never reach those high humidity levels, so you can still grow your preferred basil varieties successfully with a little effort. Remember to place the plants back outdoors after the sun has been up for a couple of hours.

Follow this regimen during rainy weather, although the plants might need to spend a day or two inside. Find the brightest spot to keep them during their temporary stay indoors. If possible, provide some artificial light. Unless it’s wilting, avoid watering basil indoors. Less sunlight means the plant won’t be photosynthesizing optimally or using much water, and wet soil can initiate root rot.


Headings

Page 1: 1. Start with clean materials for seedlings. (Pasteurizing Potting Soil), 2. Grow disease resistant varieties… (…Especially Tomato Seedlings, It’s so hot out there!, A Few More Tomato Tips, Growing Heirloom Seedlings, Basil Downy Mildew, Avoid High Humidity)

Page 2: 3. Timing is important for seedlings. (The Fall Growing Season, Keeping Records, The Cooperative Extension Service, Starting Seedlings Outdoors, Don’t Start Seedlings Too Early, Cool Season Crops, Extending the Growing Season, Seedlings Transplanted Into Bigger Pots, Bunching Onions, The Brassicas, Brassicas In My Garden, Lettuce), 4. Is the temperature suitable for seedlings? (Miniature Incandescent Lights For Warmth, Water Temperature)

Page 3: 5. Start seedlings in small batches. (My Simple Infrastructure), 6. Seedlings need strong light. (Growing Seedlings Under Shop Lights), 7. Cull the weaklings and anomalies. 8. Prevent damping-off disease from killing your seedlings. (Actinovate), 9. Seedlings and plants need fertilizer. (The Elements, Read the Label)

Page 4: 10. Prepare the soil for your transplants. (Start With Good Drainage, Air Pore Space, Gypsum and Lime, Add Nutrient-Rich Amendments, Bury It), 11. Try succession planting for maximum yield. (Crop Rotation, Mulch), 12. Stop the pests before they ruin your garden. (Slugs and Snails, Larvae of Moths and Butterflies, Spider Mites and Thrips, Deer and Rabbits), Concluding
Return to the top of Page 1

Herb Gardens: How To Grow Herbs In Pots


2021

updated 3/14/2024


Herb Gardens: The Scents and Flavors of Summer


herb gardens


Fresh ‘Genovese’ basil for the garden salad…savory French thyme on grilled fish…chives and flat parsley to enliven the egg salad and browned potatoes. Yummy! This lengthy article describes how you can plant and enjoy growing herb gardens in containers. Growing potted herbs on the balcony or the sunny patio is the perfect solution if you have no garden space.

Potted herb gardens can be moved around to get just the right amount of sunlight the plants need. They can enjoy the morning sun on one side of the deck, and a few additional hours of afternoon sun on the other. As the sun’s arc changes from one season to the next, you can reposition the plants to capture the most light.

Several years ago, a gentleman asked me to pot herbs into a large strawberry jar. He traveled frequently between his residence and a summer home at the beach. Because he was a keen cook, he planned to take this herb garden with him to the next kitchen, wherever it was. So, if not prohibited where you’ll be traveling, consider taking your herb garden with you on your next road trip!


The Gift That Keeps On Giving

Place herb gardens on the picnic table for family and guests to sample as they enjoy the day’s barbecue. And then, in autumn, you can continue the harvest by growing them in sunny windows indoors.

Using herbs to flavor foods might help you kick the salt habit, or at least decrease its consumption. In addition to their wonderful flavors, herbs have high concentrations of beneficial antioxidants, which contribute to our well-being. In decreasing order, oregano, rosemary, parsley, basil, and thyme contain the most antioxidants among the common herbs.

I’ve sold herb gardens as wedding or birthday presents, for Mother’s Day, Father’s Day, Christmas, and as housewarming gifts. Families purchased herb gardens for retiring parents, who planned to devote more time to gardening. Over decades of selling potted plants, I estimate that about half of these delightful combinations were given as gifts.


Choosing the Right Containers for Herb Gardens


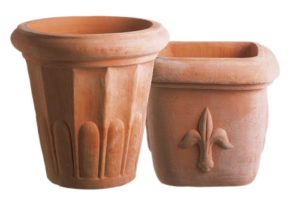
clay pots


Style and Size

Visit any well-stocked garden center and you’ll see an extensive selection of terra cotta (clay), stoneware, ceramic, wood, and inexpensive plastic pots. Containers are available in all sizes and shapes. Plain or ornate finishes reflect modern, rustic, or classic styles. You’ll also find containers specially fitted for deck railings or for hanging on a wall. Plant a half whiskey barrel with one or more mint varieties, and let them take over…in the pot, that is.

Some ceramics are glazed with materials that should not be used with edible plants. There might be a sticker on the bottom indicating this.

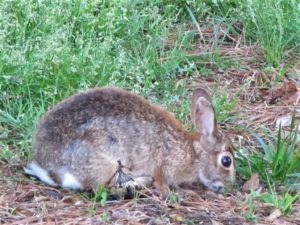
rabbit

Rabbits are cute, but…

Small clay pots dry out faster than large non-porous pots. Just one day too many in direct sun without water could kill the plants. Lining a clay pot with food-grade plastic and poking a few holes in the bottom will slow the evaporation to a degree. To be sure, your herb gardens—especially small ones—will need daily checking.

Potting herbs in hanging baskets is a great solution if you live where deer and rabbits are waiting for the instant you turn your back. They’re particularly attracted to parsley, cilantro, and dill.

Herbs need excellent drainage, so always choose pots that have holes in the bottom. Other than that requirement, just select the pots that appeal to you. Many gardeners look for a consistent style, favoring pots that harmonize with each other and with the setting.


Window Boxes


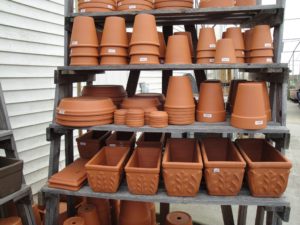
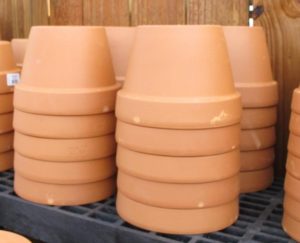
clay pots for herb gardens

Clay pots for herb gardens.


A popular container for herb gardens is the window box. Window boxes come in many styles, from quite simple to highly ornate. They’re available in terra cotta (lower shelf in photo, above), plastic, and lined or unlined wood. Plastic containers often have plugs in the drainage holes; remove them to ensure proper drainage.

You can hang them outside windows in securely anchored frames; lighter weight containers are a safer bet. Or simply place them on a brick wall, along a sidewalk, or at the edge of a sunny patio. Several herbs in clay pots look charming clustered together on a table. Where wind is a concern, use heavier pots, but don’t place them where they could blow off the balcony to the sidewalk and harm someone.

Cracking

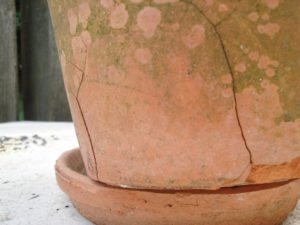
Handle clay pots carefully so they won’t crack. Clay pots might tolerate one or a few seasons of freezing weather; eventually most will begin to spall or crack. When clay absorbs water, and the water expands as it freezes, the clay degrades. Denser terra cotta (Italian for “baked earth”) survives more winters than softer clay.

This clay pot (photo, right) spent almost a decade outside, and it cracked this past winter. Until it crumbles, it will serve some purpose in the garden. I usually used Italian clay pots for my plant business and acknowledge that even better-quality pottery has limits.

Switching herbs into frost-resistant pots where winters are cold is one option. Other options include growing them indoors, in a cold frame, or in a conservatory—in other words, where the pots won’t freeze.

Tuscan Style

Years ago, I planted two herb gardens for a customer in Potomac, Maryland. They sat on a low stone wall surrounding a sunny Mediterranean-style garden. The Italian clay window boxes were over 4′ long and weighed more than 50 pounds empty. They were beautiful when finished—all those shades of green, purple, gray, variegated white and yellow—and the fragrances!

Even without flowers, potted herb gardens have their own unmistakable charm. Green algae and that white coating (efflorescence, from mineral salts) building up on clay pots won’t harm the plants but will amplify the rustic factor. And, yes, you can clean it off if you prefer.


Long Toms

Long toms, also called rose pots, are taller than they are wide (top shelf and part of next one, in photo under “Window Boxes”). Variegated lemon thyme or prostrate rosemary cascading over the side are perfect choices.

These pots are available in tiny sizes only 2″ wide, but 4″, 5″, and 6″ pots are more useful. Offer small herb containers as party favors for special occasions or use them to assign seating around the table.

While in Maryland, I potted herbs into 3″ stainless steel long toms for the tables at a popular seafood restaurant. I switched them out every couple of weeks.

I used to purchase clay long toms from a wholesale supplier in Baltimore. They normally came without drainage holes, so I added them, using a reversible drill and a masonry bit. Easy.


Plain Pots

azalea pots for herb gardens

“Azalea” pots are 3/4 as tall as they are wide.

Reusing what you have sitting around the garage is most economical.

Clean out those 12″ hanging baskets that held annuals last year, and repurpose them for herb gardens, with or without the wires. Green plastic pots last longer than white ones, which degrade faster in direct sun.

Empty the tired old soil into the shrub gardens and purchase new potting soil for your project. Some plants, particularly basil, are susceptible to several soil borne diseases. Starting with clean materials, therefore, is critical for their success. Wipe down used pots with a 10% bleach solution, rinse, and air-dry…for basil, at least.

Azalea pots are a bit shorter than they are wide and lend a more anchored look to potted plants. I prefer azalea pots over standard pots (height = width). It’s a personal choice, of course. You can pot them up with one plant or use a larger pot for a few plants.

Topiary

Rosemary and lavender topiary standards (the lollipop shape) look great in clay azalea pots, with some moss growing on the soil surface. Grow them indoors, in full sun, where they’re protected from hard winter freezes. But keeping them outdoors—even in chilly weather—ensures they get enough direct sunlight.

Try training the woody herbs “quasi-bonsai” style, with knobby stems, a few little weeds, and a fallen “log” embedded in the moss. Allowing the clay to mellow with algae and efflorescence, and those pots aren’t so plain after all.


Strawberry Pots


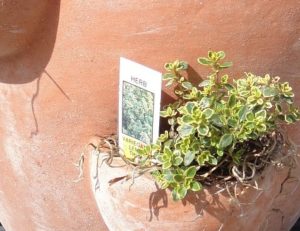
herbs in a strawberry jar

Lemon thyme in a clay strawberry jar.


Planting a strawberry jar is a bit more complicated, so it deserves a post of its own. If your attempts at planting a strawberry pot have been less than successful, refer to this article for solutions.


Pot Color

A fine point often overlooked in container gardening is the color of the pot. In summer, with scorching sun bearing down on a dark pot, that heat transfers to the soil. Consequently, the root system will be sparse on the hot side of the pot. Plants are happier without this stress.

You can alleviate their discomfort by shading the root system in summer with smaller pots of heat tolerant plants, such as dwarf zinnias or vinca. Or use white pots in hot weather to lower the temperature.

In autumn, I plant cool season greens and herbs in black nursery pots. Dark colors absorb more energy from the sun. Warming the soil a moderate amount helps limit the deep freeze in winter. The longer the roots can function, the more foliage I’ll be able to pick.

Curiously, clay pots with moist soil can feel cooler to the touch. This is due to evaporative cooling, where the temperature decreases as water evaporates from the surface. So, even in hot weather, a clay pot won’t feel as hot as most other pots. Your skin performs the same function.

Choosing pot colors might not be an option. Alternatively, plant herbs that dislike heat (such as cilantro) on the cooler north (northern hemisphere) or east side of the pot.


Choosing the Right Plants for Herb Gardens


A Proper Fit

First, decide which herbs you want to grow. Look for smaller varieties of the herbs you use in cooking, choosing young but well-rooted transplants. These will adapt better to containers than full size varieties. Sometimes there’s not much choice; maybe only ‘Italian Large Leaf’ basil is available. Okay, I’d rather have it than no basil at all, so there are 4 options when using large-growing herbs:

  1. use fewer herbs in the herb garden to make room for the big basil
  2. keep the basil in the combination pot, but cut it back more frequently
  3. find a larger pot for the herb garden
  4. grow this large basil by itself

We need to find a balance between plant size and available space relative to what other plants need. You can fit a few plants together, but they suffer when cramming all the herbs you like into too small a container. Plants growing in pots, however, don’t grow as large as those in the ground.


Seeds and Transplants

Seeds can be sown directly in the pots, but thin them once they sprout. Remember that some species are very slow to germinate, and you most likely will have better success with transplants. For new gardeners, I suggest buying young plants for now, and perhaps experimenting with seeds during the summer. But if the herbs you need are available only as seed, go for it.

Garden centers and farmers’ markets offer a wide variety of herbs grown as transplants. Some growers start them from seed, cuttings, or plugs (very young plants) several times a year. In one growing season, you might find dozens of varieties of basil alone! So, shop around for the local herb lady, and request certain plants she might grow for you.

I included a section on Propagating Herbs, which you’ll find on Page 5.


What’s the Difference Between Herbs and Spices?


Although we use the two terms interchangeably, there is a difference between them. Herbs are leaves of edible plants, and the focus of this article. Spices comprise all other parts of edible plants—bark, seeds, roots, fruits, and flower parts.

Cilantro leaves and coriander seeds come from the same plant, but those interested in this minor technicality differentiate between the herb and the spice.

Turmeric, ginger, vanilla extract, nutmeg, cinnamon, and black pepper are spices that we keep in the pantry. Saffron, the world’s most expensive spice, comes from the 3 threadlike female parts in a fall-blooming Crocus sativus flower.


Return to the top of Page 1

Headings:

Page 1: The Gift That Keeps On Giving, Choosing the Right Containers for Herb Gardens (Style and Size, Window Boxes, Long Toms, Plain Pots, Pot Color), Choosing the Right Plants for Herb Gardens (A Proper Fit, Seeds and Transplants, What’s the Difference Between Herbs and Spices?)

Page 2: Which Herbs Are Annuals? Biennials? Perennials?

Page 3: Herb Gardens Close To the Kitchen, Combination Pots, Potting Up Herb Gardens, How To Maintain Herb Gardens (Light, Natural Sunlight, Artificial Light)

Page 4: Tips For Watering Herb Gardens (Transpiration, Why Plants Wilt, Testing for Moisture, From Season To Season, Water Temperature), Fertilizing Herb Gardens (Organic or Synthetic?, Macronutrients and Micronutrients, How Often To Fertilize Herbs, When We Don’t Fertilize, The Taste Test), Temperature (As Temperatures Change)

Page 5: Common Pests (Better Options To Eradicate Pests, Bacillus Thuringiensis, Horticultural Oil, Organic Sluggo, Plain Water), Girth Control (It’s Thyme For Drying, Which Herbs Dry Well?), Renovating Herb Gardens (Propagating Herbs)


Basil Downy Mildew: You Can Prevent It!


Yes, You Can Prevent Basil Downy Mildew!


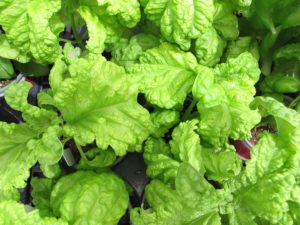
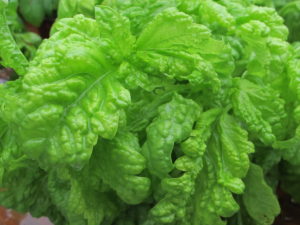
lettuce-leaf basil

Pots of young lettuce-leaf basil.


What could be more refreshing than a garden salad harvested from your own back yard? We love our tomatoes, cucumbers, green onions, ripe sweet peppers, and the ‘Tango’ celery added to mixed greens. And don’t forget the basil!

But you’ve noticed how basil has struggled the past few years despite all the suggestions offered by the garden center. It just doesn’t look quite right, which prompts the question,


“What Is Wrong With My Basil?”


Gardeners throughout the world are having issues with basil. From Anchorage to Adelaide, readers at The Farm In My Yard clearly have problems with this herb. And it used to be so easy to grow! Now their leaves develop black spots every summer, and they’re yellow between the veins. This is not appetizing at all.

Does that sound familiar?

Well, join the club! For over a decade, we’ve been dealing with spotty ugly basil, infected by that awful disease known as basil downy mildew. This water mold has been seen in more than 44 of these United States, and in just about every country where this herb is grown. Once the disease has reached your plants, you might think it’s all over.

But it isn’t! By managing it differently than you normally do, you can have beautiful basil once again. I’ve successfully grown it in pots every year since the disease was first identified in the United States. The plants grown in the garden, however, almost always have succumbed to BDM. But there’s more to it than just growing them in pots, as you’ll read later.

You need not worry that Peronospora belbahrii will infect other plants in your garden. BDM targets only basil.


basil downy mildew

Yellow areas between the veins.


How To Recognize Basil Downy Mildew


As you can see in the photo, above, formerly healthy green leaves developed yellow patches bordered by the main veins. After a stretch of high humidity or rain, the symptoms became readily apparent. The plant looked fine one day, and the next morning it looked like this!

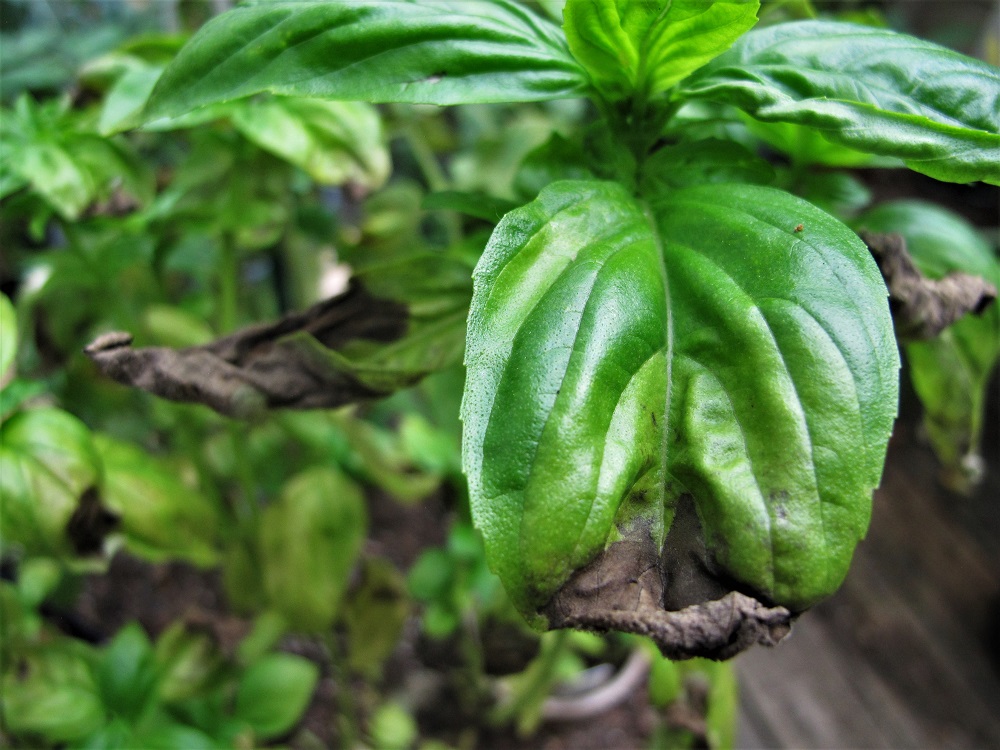
The condition worsened, as it infected more leaves and more stems. The leaves became yellow overall, and black spots showed up. Within a week, the plant was worthless. It had been growing in a large pot with a tomato, so I cut the basil at soil level and threw it in the trash.

We’ve had a very rainy spring and summer so far (2020), and this plant started showing signs of distress by mid June. I picked the good green tips, and kept them indoors in a glass of water until they went into tomato-basil salads.

The local grocery store had full sweet basil in small pots, so I bought one. The first thing to do is to discard the clear plastic wrap around the plant. Why? Because humidity causes the problem in the first place!


potted bsil

This is a pot of healthy sweet basil.


How BDM Starts


Microscopic BDM spores on the leaves need relative humidity above 80% or 85% for only a few hours in order to germinate. Local weather reports will indicate the relative humidity, and you might be surprised by how high that number is at dawn, even during “nice” weather.

Although you might not have had rain or high humidity during the daytime, your basil can still become infected. Here’s how:

As the temperature decreases through the night, the relative humidity rises. It’s usually around dawn, the coolest hours, that the relative humidity reaches its highest reading. With BDM spores on a susceptible variety, 2 or 3 hours of high humidity will get the disease growing. So, even during comfortable daytime weather, the infection gets its start quietly, hours before the alarm clock goes off.

Most years, we can grow basil successfully for a few months before the humidity increases. But over the past few years, BDM has struck earlier in the growing season.

If the summer is hot—in the mid 90’s and above—and the nights don’t cool off very much, the relative humidity won’t rise to the critical 80-85% level required for germination. Unless there’s rain.

Gardeners living where the humidity is always low probably won’t have problems with BDM. But one brief rainstorm could be enough to initiate the disease, if spores are present, even in a normally dry region. If the weather dries sufficiently, though, the disease will subside. Pick off and discard infected leaves, and normal growth should resume.

Wind carries the spores from infected southern-grown plants to northern zones (northern hemisphere) each year. Plants that are shipped to garden centers around the country, infected seeds, and overwintered infected plants are potential sources of basil downy mildew. But the spores do not survive cold winters, and the disease needs a living host.


At Dawn, The First Day


basil downy mildew

Early symptom–fuzzy gray layer on reverse.


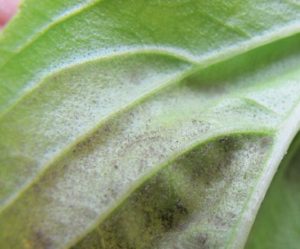
Once the spores germinate, they grow into a gray fuzzy film on the leaf’s reverse. You have to be an early riser to catch this stage of the disease. You’ll notice a change in the leaf’s appearance, showing light green to yellow areas between the main veins.


Later, Or The Next Day


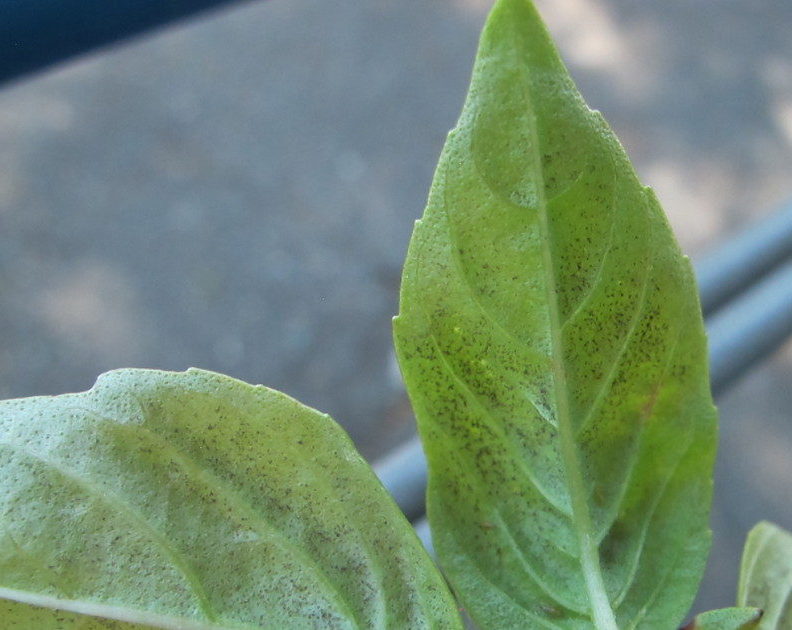
The mold progresses to the next stage, when tiny black dots become visible on the back of the leaf. Those dots are the sporangia that have burst open, releasing spores to infect the next basil that comes along. The leaf becomes more discolored, wrinkled, and spotted. The sporangia can be so thick that most of the leaf reverse is covered in black.


basil downy mildew

Black sporangia on reverse.


And Then


Yellowing between the veins continues, and leaves develop black edges or spots. Although the infected leaves won’t harm you if eaten (unless there’s a true allergy to the mold), they will not have that rich summer basil flavor and aroma you longed for. It’s time to look for new, healthy young plants. Or start some seeds!

Any basil without good color, either light or dark green, or purple, tastes awful. Whether it’s caused by disease, poor growing conditions, or lack of nitrogen, pale leaves will disappoint your taste buds. Some varieties, notably the lettuce-leaf basils, normally have light green leaves (photo at top).


Three Suggestions To Prevent Basil Downy Mildew


At the end of this post, I’ll include links to other articles at The Farm In My Yard with information on basil downy mildew. They have all the details you’ll need to grow beautiful basil. And there are methods for growing this herb outdoors in the garden in ways which might decrease the likelihood of BDM.

For disease-free basil, consider these 3 tips:


1. Grow Basil Under Artificial Lights

The Structure

Many gardeners don’t have sunny windows or any garden space to grow basil. You can grow a decent crop, however, under artificial lights, such as fluorescent tubes or LED’s. The more expensive LED’s last longer and consume less energy.

You can buy light cart kits to assemble at home, but they will cost you dearly. Instead, gather a few materials from the hardware store, including the light fixtures, and construct your own light table. Another option would make use of an empty bookshelf. Perhaps the basement or a spare bedroom could become indoor growing space for houseplants and edibles. I recommend a small fan to circulate the air.

A 4′ long plug-in fixture with 2 tubes and a reflector on top will suffice. Smaller units emit much less light and might not provide enough light for herbs. So, for plants that normally require lots of sunlight, try to find space for the larger fixture.

Two or three fixtures lined up about 2′ apart significantly increase the light levels, so you can grow other edibles or houseplants with the basil. Maybe you’d like to add parsley and cilantro to your indoor garden. Lots of possibilities!

For 35 years, I used plant tables originally built by our contractor friend, Wally. I broke them down and reassembled them each time we moved. Constructed from 2″ x 4″ framing, carriage bolts, screws, hooks, small chains, 4′ light fixtures, and 4′ x 8′ sheets of exterior grade plywood, each table was a marvel of functional simplicity. Matte white surfaces reflect light back to the plants, so consider painting the structure, including the plywood, and the room white or off-white.

Be careful using electricity and water in close proximity. If you have any doubts, ask a licensed electrical contractor for advice. But it’s not difficult to set up a simple table with lights. Double the fun and add fixtures under the table, where it’s a bit cooler. Lettuce and mesclun should do well there.

Growing Basil

Keep the plants very close to the tubes—within a couple of inches—and leave the lights on for 14 to 16 hours each day. Yes, this is more hours of light than they’d receive outdoors, but with lower photosynthetic photon flux density (“weaker” light) indoors, plants use this light more efficiently over a longer period of time, resulting in increased growth. Your indoor basil probably will look better than outdoor basil.

Basil likes temperatures from the high 60’s and into the 80’s F, but prefers to be above 70°. You might be able to grow it indoors all year. Keep the soil slightly moist, but not wet.

Pinch back the stems so the basil won’t grow too tall. This prevents lower leaves from being shaded, which will cause yellowing. Cutting back the plants also forces branching, supplying more tender growth for the kitchen. Remember to fertilize every 2 to 3 weeks to keep the foliage a rich green color; pale foliage tastes terrible.

Start seeds or buy young transplants every few months. Basil is an annual, and once in flower mode, it often starts deteriorating. Cutting off the flower buds and a few nodes (pairs of leaves) under them, however, will delay its demise. Place potted basil plants on inverted pots, if needed, to raise young plants closer to the lights.


microgreens in a tray

Microgreens, primarily broccoli.


Growing microgreens in shallow trays is another worthwhile project for your light table. Tender basil seedlings, among many other edible plants grown for microgreens (photo, above), can be harvested 2 to 4 weeks after germination.

Advantages:

  • Basil is within reach of your kitchen.
  • You can grow it all year long.
  • No insects, with careful monitoring. No pesticides.
  • Pick only what you need, without any of it deteriorating in one of those plastic clamshell containers.
  • Basil growing in conditioned air (heat or AC) indoors has low relative humidity, so downy mildew will never be a concern. Don’t mist the plants.
  • Growing plants indoors keeps you connected to nature, which has proven psychological benefits.


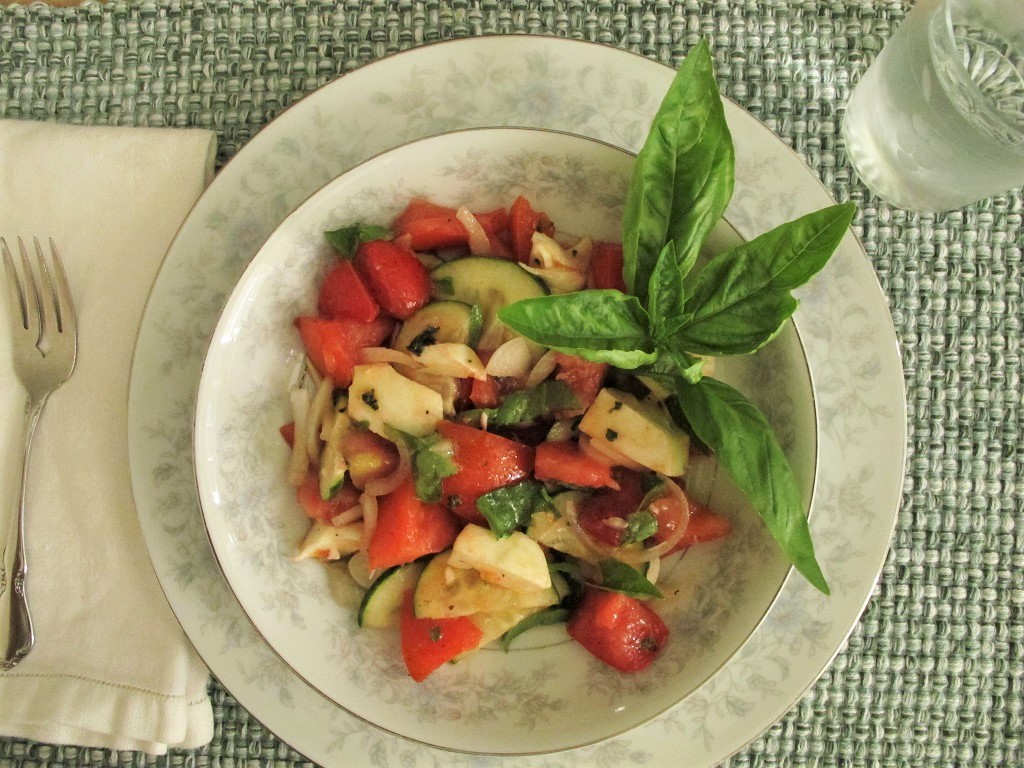
tomato-basil salad

Tomato-basil salad.


2. Move Potted Basil Indoors In the Evening

Now that you know how BDM becomes established in your plants, keeping basil in pots is a good solution. Sure, you can also grow it in the summer garden. But having at least one potted basil is a safety net if BDM ravages your garden.

Once rainy weather settles into your neighborhood, or if you’ve noticed BDM in gardens around town, it’s time to pull the pots indoors for the night. Humidity indoors will never reach the levels that exist in the garden outside. Basil I’ve kept indoors has never gotten BDM.

Don’t forget to place the pots back outside in the morning, if it’s warm enough. Basil should receive at least 6 hours of direct sun outdoors. If rainy weather is in the forecast, keep potted basil plants in a bright spot or under lights indoors for the day. Avoid watering them indoors unless it’s absolutely necessary. Plants in 7″ or 8″ pots are easier to move around than basil in huge, heavy ceramic pots. So, consider ahead of time which pots you’re going to use.

A collection of several pots will be easier to wheel back and forth on a cart. How convenient is that?! Treat yourself to one of those carts with a recessed surface, which doubles as a saucer. But don’t let water collect beneath the pots. This will cut off air circulation in the root ball, and could rot the roots. Out to the deck for sunshine, indoors at night for disease-free basil!


3. Use Varieties That Are Resistant to Basil Downy Mildew 

Recent breakthroughs in basil breeding show promise for disease-free and pesticide-free growing. Rutgers University developed several new BDM resistant varieties of sweet basil. Look for ‘Rutgers Obsession’, ‘Rutgers Devotion’, ‘Rutgers Thunderstruck’, and ‘Rutgers Passion’. When I ordered seeds this spring, my regular supplier had already sold out.

In Israel, Genesis Seeds and Bar-Ilan University bred the variety called ‘Prospera’. It is available through the commercial arm of the partnership, BIRAD Research and Development Company, Ltd. Your favorite seed house might stock it.

Proven Winners is offering ‘Amazel’. This is a vegetatively propagated variety, and is sterile. It will be sold only as plants since it doesn’t set seed.

In a Maryland trial testing all of these BDM resistant varieties, ‘Prospera’ and ‘Amazel’ did not show any symptoms. Some of the Rutgers plants showed very mild symptoms in autumn, probably because other stressors made them more vulnerable at that time.

I look forward to trying some of these new varieties next year. Check with these suppliers: Johnny’s Seeds, High Mowing Seeds, Harris Seeds, and Proven Winners. As far as I know, only sweet basil is available as disease resistant varieties. I’m not aware of disease resistant lemon and Thai basils, two more of my favorites.

No, none of these new varieties are genetically modified organisms (GMO’s).

(***Update***: I’m pleased to report that the ‘Rutgers Obsession’ basil growing in front of a tomato plant in a 20″ pot outdoors has not shown one speck of basil downy mildew. We’ve had the weather to put it to the test, though, with high humidity and long periods of rainy weather. 9/2/2021)


Concluding

 

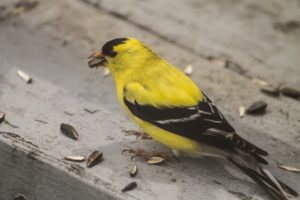
American goldfinch, male

Male American goldfinch.


At the end of the season, as any surviving basil goes to seed, consider leaving it in the garden. The cheery little American goldfinches will appreciate this windfall.

I hope you’re encouraged by these options for growing BDM-free sweet basil. It takes a little effort, yes, but I can’t imagine a season without this fresh herb. I strongly recommend growing the new BDM-resistant varieties.

Good luck, and happy gardening!


Here are two other posts about basil (Ocimum basilicum), with detailed growing instructions:

Growing Basil In Pots: How and Why

Basil Downy Mildew: Symptoms and Solutions


basil downy mildew

Symptoms of basil downy mildew.


Return to the top

Bees and Butterflies: At Home In Your Garden


National Pollinator Week: June 22-28, 2020


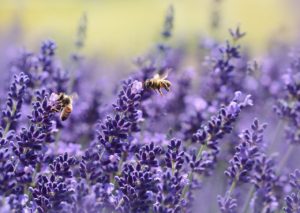
lavender, for bees and butterflies

Lavender and honey bees.


In 2007, the U.S. Senate passed a bill designating one week in June as National Pollinator Week. This legislation recognizes the importance of pollinators, including bees and butterflies, in our food supply and in the health of all ecosystems.

Every third bite of food we consume is directly attributable to pollinators. The global economic value is worth between $300 billion and $600 billion per year. Around 85% of all flowering plants are pollinated by insects, ensuring the regeneration of forests and fields as well as high yielding edible crops.

Our morning coffee beans are primarily self-pollinated, depending on crop species. Introducing bees, however, can increase the yields and lower costs of production.

In tropical regions of South America, Africa, Indonesia, and, more recently Australia, a tiny midge is responsible for pollinating cacao trees, bringing us chocolate. Chocolate contributes, incredibly, $100 billion annually to the global economy.

In the southern hemisphere, pollinator awareness programs take place in November. The Australian Government’s Department of the Environment recognizes November 8-15 as their pollinator week for 2020. Many countries throughout the world observe this initiative, and local organizations sponsor programs to raise awareness.

An outdoor project can be an enjoyable and healthy way to use our time. Having the children participate will teach them valuable skills they will carry with them wherever they live.


And, if there’s one thing we could use more of, it’s nature.


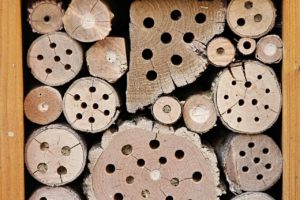
bee box

A bee house.


What Bees and Butterflies Need


All living creatures need food and water, shelter, and a place to raise their young. By adapting the way we maintain the property around our homes, we can achieve both an attractive landscape and one that fosters populations of wild creatures. Currently, 40% of the insect pollinator species are at risk of extinction. A few of us can make a small difference in our neighborhood; millions of us can really shake it up!

Houses—entire communities—generally have been built after felling all the native trees, bulldozing the rest, and covering the ground with a high maintenance lawn. Streams were diverted to concrete pipes underground, taking habitat from frogs, salamanders, and turtles. Where this tradition is changing, developers are roping off and protecting native stands of trees and understory species.

Maybe the builder spotted in a fast growing silver maple, a row of clipped hollies along the foundation, and a couple of forsythias in the back. Well, that won’t do much for all the bees and butterflies, or for the hummingbirds, bats, moths, and beetles that pollinate our crops and wild plants. And right there, in this yard and in that yard, lie the broken links in the food chain. Our monocultured and unnaturally manicured properties are sold as low maintenance, but there’s little life there.


The Missing Elements


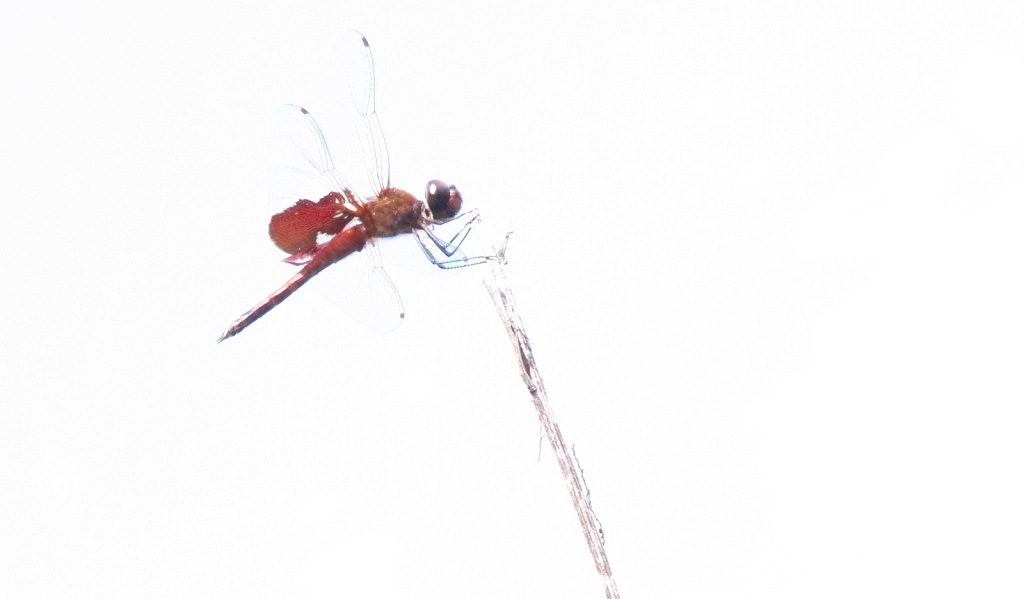
dragonfly


We concentrate instead on creating an “indoor oasis”, untroubled that the quiet stillness outside the door is not what Mother Nature had intended. No birds chirping or warbling…no cicadas or katydids…no lizards leaping for their dinner…nowhere for the dragonfly to land.

Yes, we need more nature in our lives. By cultivating a relationship with the natural world, there’s more than just a pretty sight beyond the living room windows. There’s life. Birds will continue to follow million-year-old migration paths. Mason bees and swallowtail butterflies will secure homes for their young. And there will be less talk of scarcity.

Need to feel better? Try gardening!


1. A Garden of Annuals for Bees and Butterflies


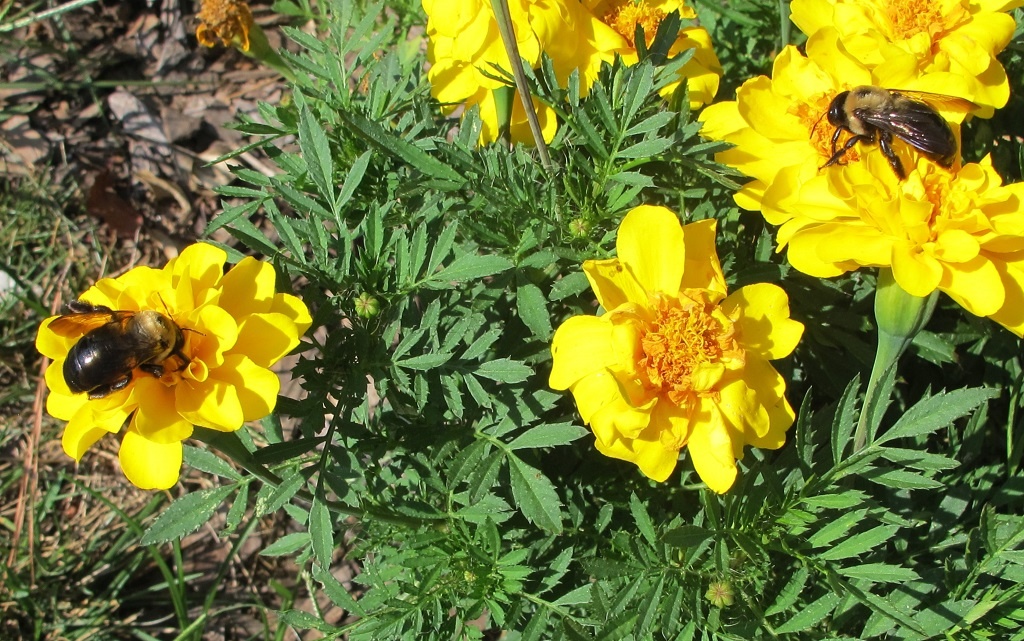
marigolds for bees and butterflies

Bumble bees in the marigolds.


Maybe this week’s goal is to carve out a section of the big lawn in the sunny back yard, and plant a flower garden. Mid summer isn’t too late for annuals, either from seeds or from transplants. Or, for now, consider how your family can use the property in the future. It’s always a good time to decrease the amount of lawn space we have to mow, fertilize, and treat for insects and diseases.

Be sure to plant significant drifts of flowers instead of a dot of zinnias here and a couple of marigolds over there. Large blocks of similar colors are more likely to get attention from pollinators. If your space is limited, though, there are some options. Sunny windowbox gardens and pots filled with bright colorful flowers will generate interest from the pollinators. Or perhaps there’s room for hanging baskets.

Each pollinator has its own preferences. Hummingbirds are attracted to the color red, but bees can’t see it. Bees are initially attracted to blue, yellow, and white, and then will visit a red flower nearby. Hummingbirds can feed from long tubular flowers, but hover flies need short little flowers.

At night, moths can detect white or pale colored sweet-smelling flowers that are open at that time. Almond flowers are pollinated primarily by honey bees, and tomatoes by bumble bees. Butterflies are especially interested in landing platforms, such as those found on plants with wide, flat flowers.


What Is An Annual?

An annual grows from a seed that germinates, generally, in spring or summer. It grows for several weeks to a few months, matures, and then begins to flower. Many species of annuals bloom all summer, until frost ends their lives in autumn, roots and all. But, by then, the plant will have set seed, with help from the local pollinators. An annual completes its life cycle within one growing season.

Those seeds will remain dormant over the winter, protected by their seed coats. With favorable weather conditions next spring, some of the seeds will germinate. Many, however, will be consumed by small mammals, birds, and insects.


What Do Pollinators Do?


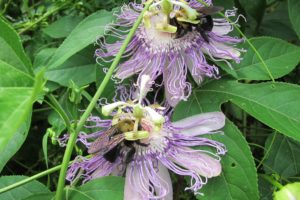
bumble bee on passiflora

Bumble bees on passion flower vine. Arrangement of flower parts facilitates pollination.


Bees and butterflies, and other pollinators, transfer pollen grains from the male anthers of a flower to the stigma, the female part of a flower. Sometimes male and female flowers grow in separate flowers on the same plant (that’s a monoecious plant). And other plants have either all male or all female flowers (dioecious plants). Some have both male and female reproductive elements within each flower (perfect flowers).

Pollinators don’t do this intentionally. Instead, their goal is to collect the flowers’ pollen and nectar. They inadvertently pick up the pollen on their hairs or wings, after being lured in by the flowers and the sweet nectar. Then the pollinators transfer pollen from flower to flower, from plant to plant, as they forage. Thus, they enable fertilization of the ovules, germ cells in the ovary of the female flower.

The male and the female parents must be the same species in order for their chromosomes to be compatible. However, interspecific and intergeneric hybrids sometimes do occur among closely related individuals.

The end result is a ripe fruit with viable seeds. That could be a zinnia’s seedpod, for example, or a blueberry, a peach, or a tulip poplar’s samara.

Cross Pollination

Ah, the genius of nature. Pollen grains and stigmas in many species mature at different times, preventing self-pollination.

Moving pollen among different plants of the same species permits cross-pollination, resulting in stronger genetics and, potentially, a better future for the species. Apple trees and blueberries are two crops that benefit from cross-pollination.


Single? Double? Triple?


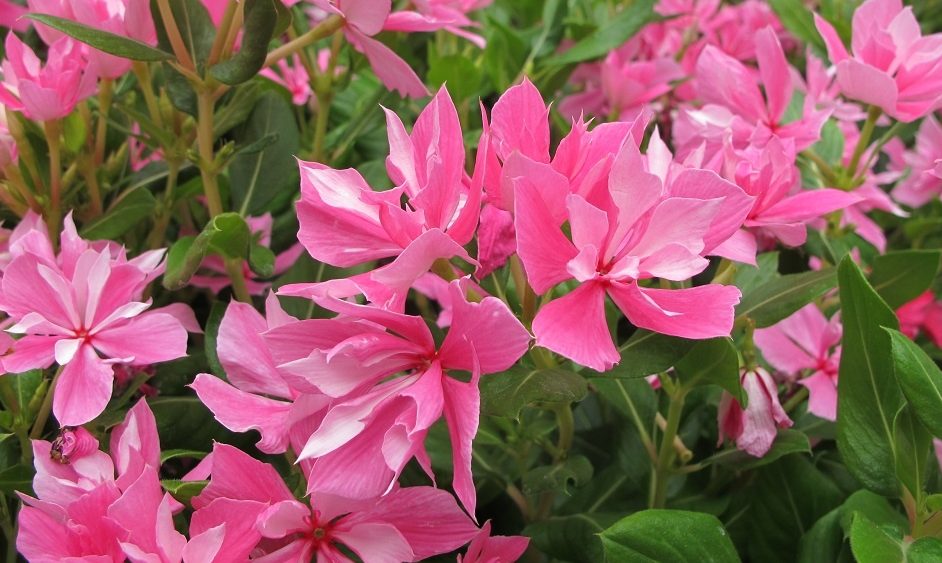
double pink vinca--less nectar for bees and butterflies

Catharanthus ‘Soiree Double Pink’, an annual vinca. Extra petals replace reproductive parts.


Flowers with single rows of petals usually have more pollen and nectaries than those with a more complicated petal structure. Plant breeders all over the world have brought to market thousands of these kinds of fluffy triple-flowered hybrids, and they are beautiful. That’s fine, for aesthetics.

But, for bees and butterflies, there’s less treasure for them in flowers filled with petals. Reproductive structures that produce nectar and pollen are often reduced and replaced with additional petals (photo, above). Collecting pollen or nectar from these packed doubles is less efficient, and requires extra visits to gather sufficient quantities. So, pollinators will look for more desirable plants elsewhere, to conserve energy, and avoid such anomalies of nature.

When choosing the varieties for your annual garden, keep these details in mind. Gardens loaded with heavy producers of nectar and pollen (in other words, single flowers) will better serve the pollinators that visit them.

Sunflowers

sunflower seeds for birds, bees and butterfliesMany varieties of recent sunflower introductions have been hybridized to grow flowers with very little or no viable pollen at all. When looking through catalogs, make note of the ones called “pollenless”. These varieties will make less of a mess on the credenza and won’t cause you to sneeze. But they have little to offer bees and butterflies.

Pollenless sunflowers won’t develop mature seeds filled with sustenance for birds and other animals. If pollinators and full seedpods are what you want, ask the seed supplier for varieties that make edible seeds, not just edible flowers.

These varieties of sunflowers will attract pollinators and make edible seeds: ‘Big Smile’, ‘Black Peredovik’, ‘Chocolate’, ‘Giganteus’, ‘Hopi Black Dye’, and ‘Kong Hybrid’. Also, ‘Mammoth Grey Stripe’, ‘Mammoth Russian’, ‘Paul Bunyan’, ‘Royal’, ‘Royal Hybrid 1121’, ‘Sunzilla’, ‘Super Snack’, and ‘Titan’.

Sunflowers have a row of showy ray florets surrounding the disc florets. Disc florets open slowly over time, from the outer edge to the center, ensuring many visits from different pollinators.

The Asteraceae family is perhaps the largest, with 1900 genera and over 32,000 species. (The orchid family is its main rival, but no one knows exactly how many species are in either family.) Members of this extended family include sunflowers, dianthus, lettuce, coreopsis, marigold, zinnia, coneflower, gerbera daisy, chrysanthemum, and shasta daisy.


Where to Plant?


squash flowers

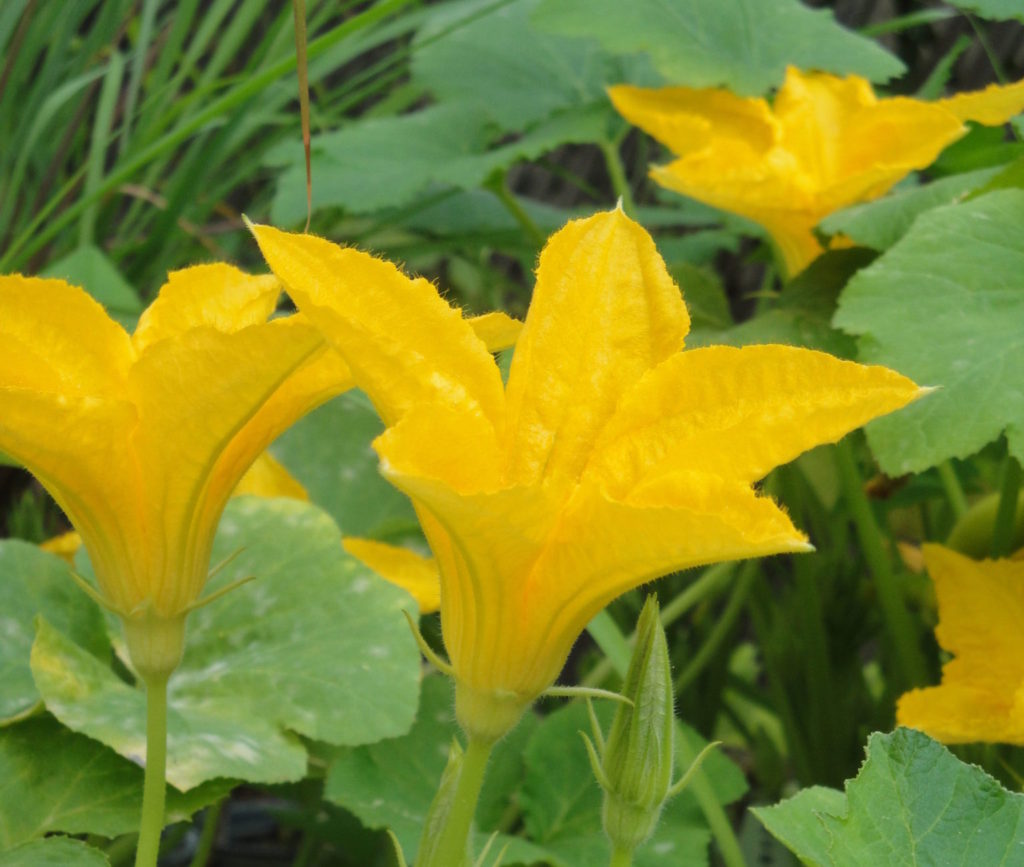
Thin peduncle (flower stalk) under summer squash flower indicates a male flower. A female flower has a rounded peduncle.


A large bed of color around the patio or the mailbox, a free-standing raised bed, and a border close to the vegetable garden are just some of the possibilities. Farmers often include wide bands of wildflowers alongside their fields of crops for better pollination and heavier yields.

One plant that attracts all sorts of pollinators is ‘African blue’ basil. This is a sterile herb—unable to set seed—so it flowers constantly. Other varieties of sweet or flavored basils customarily are used in the kitchen. Plant an ‘African blue’ basil in early summer, close to tomatoes, peppers, and squash to encourage bees to visit the veggies. And let it flower.

Check with local garden centers to see what they have available. Ask for help choosing annuals—seeds or transplants—that attract pollinators.

Before you do any digging, ask your municipality (call 8-1-1) to mark underground utilities. Whether you’ll be tilling the area or digging it by hand, you’ll certainly want to avoid damaging any of those lines.

Locate the garden where a source of water is easily accessible. New transplants and young seedlings will need consistent moisture until they’re established. During summer drought, water the bed thoroughly every week or so.

Sun or Shade?


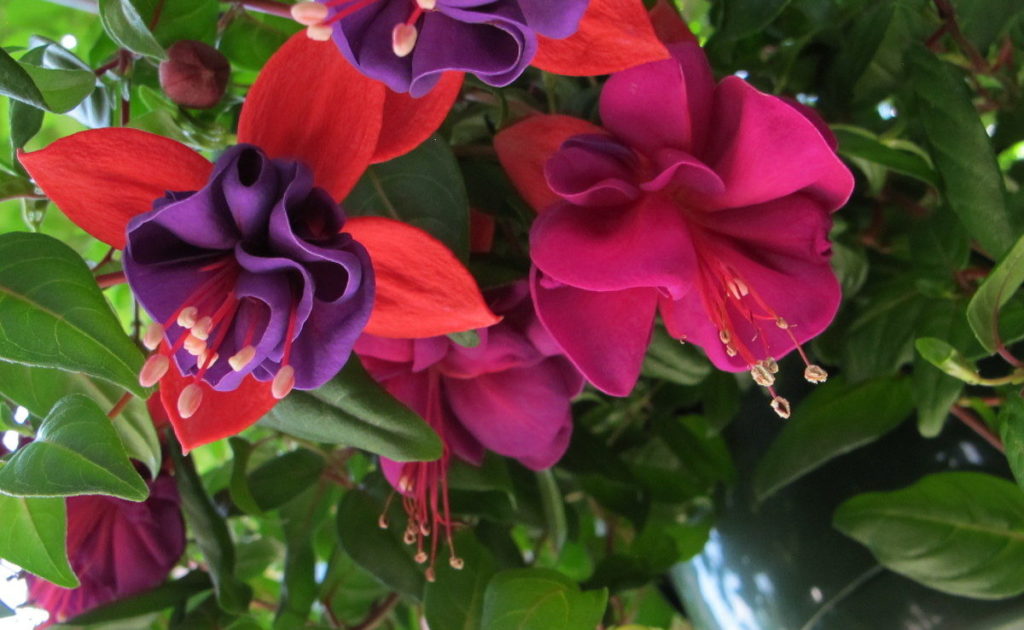
fuchsia flowers

Fuchsia flowers.


Find an area that gets full sun if you want lots of flowers. Full sun is at least 6 hours, but annuals will positively thrive in more sun than that. Summer annuals blooming heavily in sun will attract the most pollinators.

But several species prefer shade, such as impatiens. The ‘Imara’ impatiens, resistant to impatiens downy mildew, provides a carpet of color under the trees and shrubs. This plant attracts bees and butterflies, and also hummingbirds.

Where summers aren’t too hot, the fuchsia baskets (photo, above) will entice the hummingbirds to visit every day, like clockwork. This plant does well in dappled shade or early morning sun. And it likes moist soil. As the temperatures climb and fuchsia fails, hummingbirds will flock to the single petunias and salvias, which need lots of sun. They also visit herbs in bloom, including basil and lavender.


How Big Is Big?

hummingbird at feeder

Hummingbird.

With proper soil preparation and regular maintenance, a plot that measures 10′ x 6′ can become a magnet for pollinating insects. The flowers will buzz with activity from perhaps dozens of species of bees and butterflies, and moths and hummingbirds, too.

This country is home to over 4,000 species of bees alone! More than 20,000 species live around the globe. Some live in colonies, and many are solitary creatures. Interestingly, the honey bee is not native to the United States. It was brought by European settlers hundreds of years ago and proliferated throughout the country.

To increase the activity and the number of pollinating species lured in, make the bed even larger. And include more variety in the plants selected. Use masses of the same plant, and repeat elsewhere in the garden, if you want. Planting larger blocks of a particular color or flower type will attract more pollinators than scattering them about.

If this is your first gardening effort, keep the garden a manageable size so you’re not overwhelmed. There will be maintenance involved! Weeds, no doubt, will have to be pulled. And your garden will need fertilizer a few times through the growing season for the best results. An inch or two of mulch will help cool the soil, retain moisture, and restrain weeds. You can always expand the area as you gain confidence in your skills.

Container Gardens

Even in a very limited space, some of the local bees and butterflies will find the lovely combination pots on your balcony or the patio. Use bright colors, and have your camera ready—for the flowers and their visitors. Once they find their preferred flowers, pollinators will come back day after day.

Remove seedpods to encourage more flowers to develop, although finches and other birds will feed on seeds remaining on stalks late in the season. Fertilize regularly to keep the plants in prime condition. Plants in containers might need daily watering.


Added Benefits

  • Vegetables and Fruits


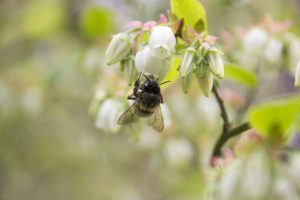
bee and blueberry flower

Blueberry flowers.


Insects are on a constant lookout for sources of pollen and nectar. You might discover your fruit trees, blueberries, and vegetable crops yielding heavier harvests since installing a flower garden.

Edible crops and plants growing naturally in or around your property will benefit from complete pollination because of the larger populations of pollinators. Include plants whose flowers attract pollinators early and late in the growing season, as well as during the summer months.


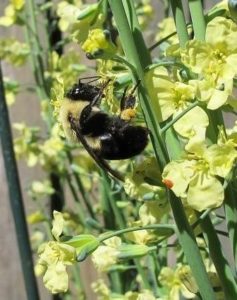
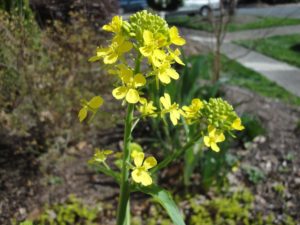
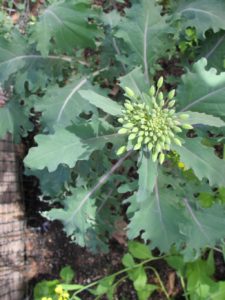
I grow many kinds of greens (photos, above) in the cool seasons. Before they’re replaced with summer crops, I allow them to go to flower in late winter to early spring. Most are biennials in the Brassicaceae family, including kale, collards, broccoli, arugula, and mustard greens. Although they don’t require pollination for a harvest, the cruciferous flowers provide pollen and nectar for bees, braconid wasps, hover flies, and other pollinators at the time of year when little else is available.

Pansies and violas provide sustenance for bees that emerge on pleasant winter days. These colorful cold-tolerant biennials grow in garden beds and in containers.

  • Braconid Wasps

braconid wasp, aphids

Braconid wasp.

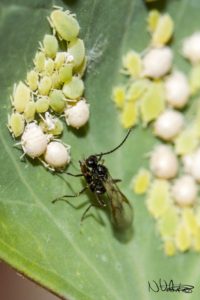
The tiny non-stinging braconid wasps are hardly noticeable, but they help keep populations of live-bearing aphids in check. A female braconid wasp deposits an egg in or on an aphid. After hatching, the wasp larva consumes the tissues, killing the aphid. One braconid wasp can parasitize 200 aphids in her brief lifetime. Adults emerge to mate, and a new generation of females will begin hunting aphids.

Pollen is an important food source for the braconid wasps, which will feed on some aphids as well. So, even these tiny insects help pollinate plants.

Photo at right shows a wasp about to deposit some eggs. White aphids have been parasitized, and the others are alive. I’ve often seen leaves with a hundred aphid mummies (the aphid’s empty exoskeleton) attached, with no living aphids.

Planting a wide variety of flowers helps these beneficial insects. Self sustaining populations of beneficials contribute to the overall health of your garden, reducing or eliminating the need for pesticides.

  • For the Birds

Let’s not forget about the birds! Although most species, other than hummingbirds, don’t play a major role in pollinating plants, songbirds certainly have a place in any natural ecosystem. We can play an important part, in our own yards, by maintaining an environment that fosters healthy populations of native animals.

ruby crowned kinglet

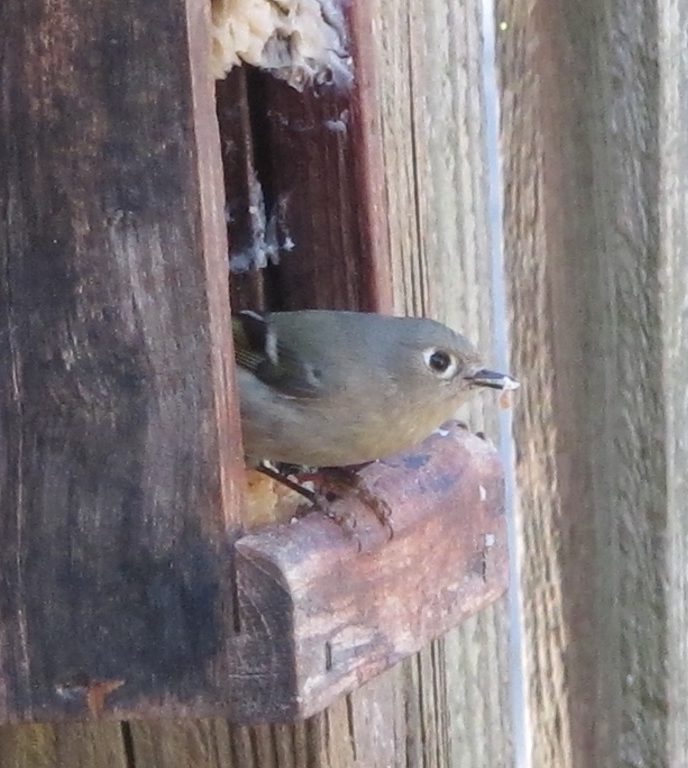
The tiny ruby-crowned kinglet at a winter feeder.

The numbers of many species of birds are declining, due primarily to human interference. We’ve removed their habitat in favor of expansive lawns and non-native trees and shrubs. And we’ve killed off their food sources by spraying pesticides every time a “bug” shows up. Can we please adopt a new attitude?

After all, birds help by consuming huge numbers of insect pests that otherwise could destroy crops or damage potted plants. Birds and bats keep mosquitoes and moths in check. More insects in the garden will support more avian activity.

Restoring healthy populations of all native animals and insects will return balance to the ecosystem. Sometimes, though, the songbirds fall prey to foxes, snakes, or hawks. Predator and prey: yes, folks, that’s how it works.

There are many benefits to living in modern society, but loss of habitat for wild creatures is not one of them. Letting nature be is a crucial step in re-establishing native populations and preventing extinctions.

Let ‘Em Seed About

Finches, sparrows, and chickadees feast on seeds that develop after the flowers fade. So, don’t be too hasty to deadhead the last round of flowers. Allow them to remain in place through the fall and winter, so the birds have another food source available when they need it. Birds will soon recognize your property as a wellspring of year-round sustenance.

Bright yellow and black American goldfinches are fond of zinnias, cosmos, salvias, and asters that have gone to seed. In late summer and autumn, the finches, northern cardinals, thrashers, blue jays, and other animals eagerly consume seeds atop the black-eyed Susans and tall sunflowers. And you might notice plants germinating next spring from seeds the birds overlooked.

Water


butterfly on lily pad


Include a source of clean water for the birds. A birdbath in the garden is fine, or you could keep a large plant saucer on the deck. Change the water frequently to prevent mosquito wrigglers from reaching adulthood.

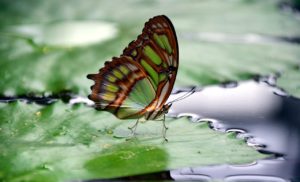
The bees and butterflies also will appreciate a small saucer of water on a hot summer day. Place a flat rock island in the water for safe sipping. A mud puddle, just a bare patch of wet sandy clay, provides moisture and minerals for butterflies.

  • Cut Flowers

Another benefit of growing a garden of annuals is the almost endless supply of cut flowers for indoor arrangements. Include plans to expand the garden next year, to keep the pollinators happy, too. Check with your agricultural extension service to see which flowers last longest in a vase.

Try Some Of These For the Bees and Butterflies

Ageratum, alyssum, bachelor’s button, cleome, cosmos, fuchsia (hummingbirds), herbs, impatiens, lantana, marigold, and pentas. Rudbeckia (annual and perennial varieties of black-eyed Susan), salvia (annual and perennial types, a hummingbird favorite), some of the sunflowers, tithonia, verbena, and zinnia.


Headings

Page 1: National Pollinator Week, June 22-28, 2020, What Pollinators Need (The Missing Elements), and A Garden of Annuals for Bees and Butterflies (What Is An Annual?, What Do Pollinators Do?, Cross Pollination, Single-Double-Triple?, Sunflowers, Where To Plant?, Sun or Shade?, How Big Is Big?, Added Benefits, Vegetables and Fruits, Braconid Wasps, For the Birds, Cut Flowers)

Page 2: Perennial Favorites For Bees and Butterflies, Lavender, Herbs, Brush Piles, Go Native, A Comprehensive Garden Plan (Dream, Plan, and Implement, On the Right Path, Stone, Diversify, Some Native Woody Plants, Asking for Help, Dig In!, Small Is Beautiful), and Links

Return to the top

Growing Basil In Pots: How and Why

2019

updated 3/5/2024


Why Should We Grow Basil in Pots?


Valentino basil.

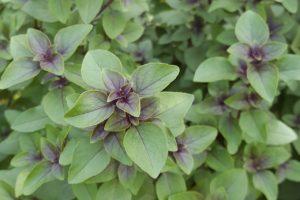
‘Valentino’, a lettuce leaf basil, normally is light green in color.


This year, I’ll grow basil in pots. It’s too early to grow basil outdoors, but I am starting seeds now for early sales (transplants and cut herbs) at the farmers’ markets.

Although summer thunderstorms are most welcome after a dry patch, that’s when Basil Downy Mildew becomes a real problem. In this article, I’ll describe the disease and offer tips for growing perfect basil once again.

Basil Downy Mildew was first described in Uganda in the 1930’s. It has been a serious problem in the United States since 2007, when it first appeared in Florida. The disease now has appeared in most of the U.S. and elsewhere around the globe. I lived in Maryland at the time of the first outbreak and was selling plants at farmers’ markets and garden shows.


How To Recognize Basil Downy Mildew


The leaves of affected plants become speckled in pale green or yellowish blotches, mostly bordered by the main veins. Eventually, entire leaves turn pale green.


A coating of grayish felt, visible at dawn, covers the bottom of the leaf. Soon afterward, small black dots appear. Those black dots (sporangia) released their spores, which will infect other basil plants. The plant looks sickly, as if it needs fertilizer…or something…and never again has that healthy basil look.


Do you recognize some of these symptoms? These characteristics are diagnostic for Basil Downy Mildew. (***Update***: Photograph above, left, was taken at a Charlotte garden center on May 20, 2019. BDM arrived early that year.)

Spores float on air currents, usually migrating north from infected southern-grown plants. They also can be carried on seeds or spread from overwintering local greenhouse plants.

Humidity that rises higher than 85% for a few hours is sufficient to initiate this infection on susceptible varieties. Other water molds affect coleus and seed-grown impatiens, but only basil (Ocimum basilicum) can catch this one. And its name is Peronospora belbahrii.

Can we do something for our beloved basil?…


Easy Solution: Basil In Pots


weather station…Yes we can! Growing basil in pots is the answer! Take the pots indoors in rainy weather to prevent spores from germinating.
But that’s not the only time basil is susceptible to this disease. Nighttime humidity levels can rise quite high even on a day that was perfectly clear and comfortable. When the temperature drops through the night, the lowest temperature usually occurs right around dawn. When the temperature drops to its lowest measurement, the relative humidity increases to the highest level.

Check your local weather report early in the morning. Look for the relative humidity measurement, which can be 85% or 95% at dawn. Rain doesn’t even have to be in the forecast. With spores in the air and basil exposed to high relative humidity, it will become infected. The spores need a few hours of these conditions to germinate. Fortunately, normal indoor conditions never come close to those levels of humidity.

Every year that I moved them indoors at night, the potted basil plants remained BDM free. And almost every year I grew basil outside, BDM was inevitable.

None of the relatively non-toxic sprays I tested worked well enough. But I prefer to not spray herbs at all. Some cultivars introduced over the past several years are recommended as having “some tolerance to Basil Downy Mildew”…but they still can develop the disease in humid areas.


New Varieties

Fortunately, new varieties promise “high tolerance to BDM”. Rutgers University and Van Drunen Farms developed resistant varieties that are available to growers, and, more recently, to retail customers. A huge demand for production of basil downy mildew resistant varieties is driving the research.

(***Update***: Basil ‘Obsession’, from Rutgers, has grown extremely well this summer, and with no BDM. I’ll take some cuttings for winter pots. Several seed suppliers stock these new resistant varieties, but demand might exceed supply, so order early. 9/2/2021)


Long-Time Favorite Herb


Since it was my customers’ favorite herb, I had to figure out a way to grow basil without using chemicals. I couldn’t afford to lose my best-seller. At that time, I started many varieties of basil from seed under fluorescent lights in the basement. They grew larger outside, after transplanting (2½”, 3½”, 4½” pots, and some that were larger), until they were sold at the markets.

tomato basil salad

Tomato-basil salad.

Knowing that high humidity provided the right conditions for this infection, I moved all the basil flats into the garage at night. Every day! Two small table fans kept the air moving around the plants, so the basil never caught BDM when handled this way.

My business infrastructure was very simple and did not include greenhouse space at that time. During the height of the market season, I grew several dozen flats of basil in various stages of growth at any one time.

These tips were passed along to my customers, who were glad to know how to stay ahead of the problem.

So, I always grow basil in pots, and take them indoors when the humidity is expected to rise high enough to cause trouble. It is a commitment, but the reward is freshly picked luscious basil for summer salads and lasagna. The disease often appears by mid- to late summer, but it can show up earlier.


mini purple basil

‘Miniature Purple’ basil for salads or trained as a tiny topiary standard.


Varieties Included:

  • sweet basil: ‘Genovese’, ‘Genovese Compact’, ‘Fino Verde’, ‘Italian Large Leaf’, ‘Aroma 2’, ‘Nufar’, ‘Marseillais Dwarf’, ‘Amethyst’, ‘Miniature Purple’, and others
  • lettuce-leaf sweet basil: ‘Napoletano’, ‘Tuscany’, ‘Valentino’
  • Greek basil: ‘Yevani’, ‘Minette’, and 2 ‘Columnar’ varieties
  • lemon basil: ‘Mrs. Burns Lemon’
  • Thai basil: ‘Siam Queen’, ‘Sweet Thai’
  • ‘Magical Michael’
  • lime (good with cucumbers)
  • holy: ‘Kapoor tulsi’ (O. americanum v. pilosum)
  • ‘Mexican Spice’
  • ‘African Blue’ (an ornamental basil and an excellent pollinator magnet)
  • ‘Cardinal’ (a cinnamon type; this one and the previous 3 basils have some or good resistance to BDM)

The few that showed any resistance to the disease, however, were not the varieties we prefer in the kitchen.

It wasn’t long before basil started disappearing from other growers’ booths at the markets. So, it was worth the effort to keep basil alive and growing.


Basil In Pots: Potting Up


Start with clean materials. If you’re reusing a 12″ wide pot, clean it out very well, including all the old soil. Don’t discard it, though; throw it under the shrubs or dig it into the flower garden. Even used potting soil has value in the garden. A pot this size will accommodate several stems of basil for the entire growing season.

Wipe down the inside and the outside of the pot with a 10% bleach solution. Allow it to sit for a few minutes before rinsing thoroughly.

Basil is susceptible to several air-, water-, and soil-borne pathogens. That’s why it’s important to begin with clean materials.


Shopping For Basil Transplants

Look for rich green uniform coloring in the foliage. Familiarize yourself with the normal coloring for the varieties you’re interested in growing. For example, ‘Siam Queen’ Thai basil has dark green foliage, while lettuce-leaf basils (top of page) have light green puckered leaves.

Avoid wilted plants and those with brown edges, yellow lower leaves, pale green foliage, splotchy surfaces of leaves, and black spotting on the stems or leaves. Turn the leaves over and look for the tiny black dots of BDM. Inspect purple-leaved varieties carefully. Avoid buying basil that has started flowering.

Underpotted (tightly potbound) and underfertilized basil is stressed and will not last all season. Leaves that are off-color taste awful!

Look for small pots (2½-4½”) with 2 or 3 seedlings in the pot. The plants should have foliage down to the soil or close to it.


Growing Basil From Seed

If you can’t find the varieties you’d like to grow, consider starting them from seed. This gives you an opportunity to try new flavors—maybe lemon or lime, or anise-flavored Thai basil.

Seeds that are kept cool and dry remain viable for a few years, so you won’t have to germinate the entire packet…unless you want to.


lemon basil seedlings in pots

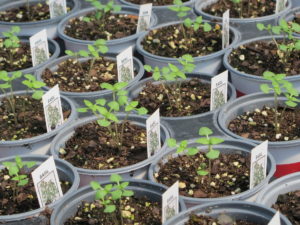
Lemon basil sown in 4″ pots.


Pots and Seedling Mix

Have market packs or 4″ pots cleaned and ready. Use the same bleach solution recommended for larger pots, described above.

New peat pots are an option, and can be planted pot and all, without disturbance. Always pinch the bottom open in a few places before transplanting peat pots. This allows roots to quickly grow into the potting soil. Peel off the rim of the pot protruding above the soil level to prevent water from wicking away to the atmosphere. Roots will soon grow through the peat pot in moist soil.

Use pasteurized seedling mix. Most pathogens have been destroyed and its finer particles make better contact with the seeds. Fill containers with the seedling mix to within 1/2″ of the rim, tamping lightly. Fresh, fine-grained, high quality potting soil also works well.

Water gently, using lukewarm (around 85° F) water. Label the pots with the varieties of basil you’re growing and the date—for example, “Sweet basil ‘Genovese Compact’, 4/20/19”. Labels are easily fashioned from a clean, repurposed plastic milk jug.

Now, make a small depression in the center of the pot, about 1/4″ deep. Drop in a few seeds. Or make a few separate small depressions in the pot and drop a seed in each one. The latter is my preferred method; the separation gives each stem a little breathing room.

Cover with 1/4″ of soil. An exception is Thai Basil, which prefers to be sown on the surface of the soil and not covered.

Water

When moistened, basil seeds develop a grayish-white mucilaginous coating. This is normal. The gel holds water next to the seeds and it might attract insects, which help distribute seeds in the wild. And the stickiness helps seeds adhere to the soil.

Place the pots in a flat or a tray and give them warm sun indoors. Basil germinates within a week in damp soil at temperatures in the 70’s and 80’s F. If it’s too chilly, you can place the pots of basil on a heat mat. Seeds won’t germinate and young seedlings will fail in cold soil.

Keep the soil damp to moist but not wet. Never let water collect in the tray. Use lukewarm water, and water gently so the seeds won’t become dislodged. You could water from the bottom but pour off the excess once the soil surface has moistened.

Now That They’re Germinating

As soon as the seeds germinate, give them at least 6 hours of direct sunlight. This ensures shorter sturdy stems that are less susceptible to damping off disease. Use artificial light (see “Maintenance”, page 2) if you don’t have sunny windows.

stretching seedlings

Seedlings (not basil) stretching due to insufficient light.

With favorable outdoor conditions, young seedlings can be placed outside for at least part of the day. Don’t expose them to temperatures below 70°, or to wind or full hot sun if they have been indoors for a while. Check the weather forecast.

Basil needs warmer temperatures than most herbs and vegetables. Even if it’s frost-free and the garden is ready, don’t be tempted to plant basil until the soil has warmed up. Basil will either sit still or deteriorate in cool or wet soil.

Damping off is a fungal disease that appears as a narrowed, light brown section of the stem that causes the stem to bend over, killing the seedling. Avoid overly wet and humid conditions, stagnant air, low light, and cold temperatures. Young seedlings are more susceptible to damping off than older plants.


Return to the top

Headings

Page 1: Why Should We Grow Basil In Pots?, How To Recognize Basil Downy Mildew, Easy Solution: Basil In Pots (New Varieties), Long-Time Favorite Herb (Varieties Included), and Basil In Pots: Potting Up (Shopping for Basil Transplants, Growing Basil from Seed)

Page 2: Repotting Basil In Pots (The Soil, Score the Root Ball, Add Plants, A Small Pot of Dwarf Basil), Maintenance For Basil In Pots (Light For Basil In Pots, Temperature, Watering Basil In Pots, Dealing With Slugs and Snails (Caterpillars), Fertilizer For Basil In Pots, Harvesting and Hormones), and About That Basil Downy Mildew (Growing Basil Outdoors)

Basil Downy Mildew: Symptoms and Solutions

2018


healthy green basil

Healthy basil.


Basil Downy Mildew In the U.S.


Basil downy mildew is a devastating disease caused by the pathogen Peronospora belbahrii. This disease has been active in the United States since 2007, and for several years before that in Europe. BDM is thought to have originated nearly 90 years ago in Africa.

This water mold targets a very specific host—basil. Just basil. There are related species that attack other members of the Lamiaceae family, such as coleus, but it’s basil I’ll concentrate on today.

I’m writing about it now because some of you might have given up growing basil. If you’ve struggled with it the last few years, I’m going to offer some tips so you can once again enjoy your home-grown basil. And then I’ll share my favorite Tomato-Basil Salad recipe, a summertime staple around here.


Symptoms Of Basil Downy Mildew


basil downy mildew

Yellowing between main veins.


Let me begin by describing the symptoms of BDM. The plants might start the season looking great, all green or purple and… oh, that fragrance!… You probably harvested several clippings, using them in salads, on pizza, in tomato sauce. What’s summer without fresh basil?!

And suddenly it went downhill from there. The leaves developed blotchy yellow or pale green sections between the main veins. The discoloration then spread over most of the leaf surface. The leaf reverse (the lower surface) was covered in a fuzzy gray film early the next morning, followed by little black dots.

Those tiny black specks are the fruiting structures (sporangia) of basil downy mildew. They puffed out microscopic spores that were carried on the breeze to infect other basils. The plants became spotty overall, and never regained their strength.

In only a few days, the affected leaves turned yellow. Some of the tips of the stems remained green, but, eventually, they, too, showed symptoms. And most of the leaves dropped off.

You fertilized, you spoke kind, encouraging words. And you commiserated with friends. Yet nothing helped. How disappointing!


Spores and Relative Humidity


All is not lost. With some insight into how this disease works, you might be able to stop the progression of BDM and get more mileage out of your plants. Another option is to start with healthy new transplants and take precautions so it doesn’t happen again.

You might have noticed that basil downy mildew started showing up and spreading quickly during wet or humid weather. Good observation! In fact, spores require around 85% relative humidity for a few hours in order to germinate.

Even if the weather is quite dry or only slightly humid, the basil still can become infected. How? As the nighttime temperature drops, the relative humidity climbs. After a period of high humidity, the spores begin to germinate on susceptible varieties of basil.

Let’s say the daytime temperatures are in the 80’s F, with comfortably low humidity around 40%. With no rain in the forecast, you might think you’re in the clear. The problem is that the period of time just before dawn is when the relative humidity is at its highest reading of the day. It could easily reach 90%! The lower the temperature drops during the night, the higher the relative humidity rises.

So…limiting humidity around basil can keep the plant just outside the reach of the disease. If you live in an area that gets extremely hot and dry in the summer, your basil might survive unscathed. That’s happened only 2 or 3 times in my gardens since BDM started showing up in the mid-Atlantic and southern states.


Reducing Humidity


no basil downy mildew on potted plants brought indoors at night

Potted sweet basil.

How do you limit the humidity? Simple! That’s why I’m writing this now, before everyone gets their basil plants into the garden. Here are some suggestions for you:

Basil grown in the garden should be situated in an area with excellent air circulation. Don’t plant it in the middle of a bed, with neighboring plants all around, or next to a fence.

Planting basil near a paved surface, or surrounded by paved surfaces, has the benefit of having less square footage that’s able to absorb moisture. The goal is to reduce as many sources of moisture as possible. And that includes overhead watering! If you’ve read the posts about tomatoes, you’ve learned the importance of keeping foliage dry.

BDM can show up in one neighborhood while entirely missing the next one. It might not appear at all if the summer is very hot and dry and if the nights don’t cool down very much. Or it might not show up until rain returns after a long, dry summer.

Certain weather conditions, such as frequent rainstorms and persistently high humidity, foster the widespread and enduring presence of basil downy mildew. Once the spores are in the air, growing basil is a lost cause… Or is it?


The Ultimate Solution: Potted Basil


herb garden, toad

This pot will come inside at night, after releasing the toad.

Basil grows well in containers. An airy exposure up on the deck could be a good spot for it. Or sitting on a brick patio, or under the umbrella when it’s especially hot. Check your plants every day for those tell-tale light-colored blotches, and remove those leaves immediately.

If it looks like a losing battle, move the pot indoors for the night. That’s right! Get used to it if you want to—no, must—have fresh basil.

As long as you’re not living in the middle of a bog, the humidity indoors will never reach the levels required to grow BDM. And then place the basil back outside the next morning. On rainy days, keep the potted basil indoors, in a bright spot. Yes, it’s work, but worth the effort.

A few varieties of basil don’t get the disease, and plant breeders are working feverishly to bring more to market. Naturally, all of my favorites, including ‘Genovese’, ‘Yevani’, ‘Mrs. Burns’ Lemon’, ‘Tuscany’, and ‘Siam Queen’ DO get basil downy mildew. And, yes, I DO bring in the potted plants at night once the disease has reached the area or before rainy weather comes near.

Those that, in my experience, seem to be resistant are ‘Cardinal’, ‘Kapoor tulsi’ (holy basil), and ‘African Blue’ basil, but they’re not my favorites in the kitchen. ‘Eleonora’ is another that has been advertised as having “intermediate” resistance, but I have seen advanced cases of BDM on this variety.

(***Update***: New cultivars developed by Rutgers University will be worth trying. Look for ‘Rutgers Devotion DMR’, ‘Rutgers Obsession DMR’, ‘Rutgers Passion DMR’, and ‘Rutgers Thunderstruck DMR’. I grew ‘Rutgers’ Obsession DMR’ outdoors all summer, in 2021, and still have a cutting growing in the kitchen window. This variety did not develop any symptoms of BDM. Success! 1/22/2022)

Always remember: when you think about basil, think about how relative humidity can affect its health.


tomato basil salad

Tomato-basil salad.


Tomato-Basil Salad


Here’s a recipe for Tomato-Basil Salad, like Caprese salad, but with extra bits:

  • Ripe tomatoes, cut into chunks, juice included
  • Yellow or white onion, thinly sliced
  • Cucumber, alternately-peeled (no need to peel the thin-skinned ‘Diva’), halved and sliced
  • Mozzarella cheese, medium chunks
  • Sweet basil, usually ‘Genovese’ for us
  • Extra virgin olive oil
  • Red wine vinegar, or white wine vinegar if you prefer
  • Fresh Italian oregano, chopped; dried will work
  • Salt and pepper to taste

Measurements aren’t that important. Tomatoes are the main ingredient, and you can use all reds or mix the colors. Not too much onion. Certainly enough basil, and don’t use so much oregano that it overpowers the rest. Mother likes hers more vinegary. Oh, and get a nice loaf of bread for dunking. Enjoy!


Return to the top