2021
Updated 3/14/2024
Herb Gardens: The Scents and Flavors of Summer
Fresh ‘Genovese’ basil for the garden salad…savory French thyme on grilled fish…chives and flat parsley to enliven the egg salad and browned potatoes. Yummy! This lengthy article describes how you can plant and enjoy growing herb gardens in containers. Growing potted herbs on the balcony or the sunny patio is the perfect solution if you have no garden space.
Potted herb gardens can be moved around to get just the right amount of sunlight the plants need. They can enjoy the morning sun on one side of the deck, and a few additional hours of afternoon sun on the other. As the sun’s arc changes from one season to the next, you can reposition the plants to capture the most light.
Several years ago, a gentleman asked me to pot herbs into a large strawberry jar. He traveled frequently between his residence and a summer home at the beach. Because he was a keen cook, he planned to take this herb garden with him to the next kitchen, wherever it was. So, if not prohibited where you’ll be traveling, consider taking your herb garden with you on your next road trip!
The Gift That Keeps On Giving
Place herb gardens on the picnic table for family and guests to sample as they enjoy the day’s barbecue. And then, in autumn, you can continue the harvest by growing them in sunny windows indoors.
Using herbs to flavor foods might help you kick the salt habit, or at least decrease its consumption. In addition to their wonderful flavors, herbs have high concentrations of beneficial antioxidants, which contribute to our well-being. In decreasing order, oregano, rosemary, parsley, basil, and thyme contain the most antioxidants among the common herbs.
I’ve sold herb gardens as wedding or birthday presents, for Mother’s Day, Father’s Day, Christmas, and as housewarming gifts. Families purchased herb gardens for retiring parents, who planned to devote more time to gardening. Over decades of selling potted plants, I estimate that about half of these delightful combinations were given as gifts.
Choosing the Right Containers for Herb Gardens
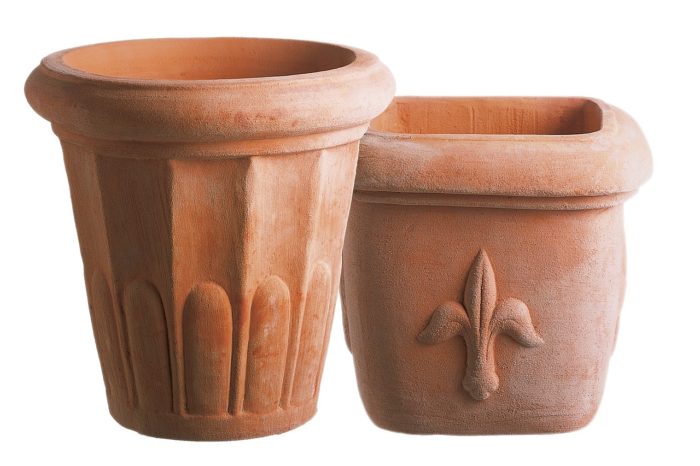
Style and Size
Visit any well-stocked garden center and you’ll see an extensive selection of terra cotta (clay), stoneware, ceramic, wood, and inexpensive plastic pots. Containers are available in all sizes and shapes. Plain or ornate finishes reflect modern, rustic, or classic styles. You’ll also find containers specially fitted for deck railings or for hanging on a wall. Plant a half whiskey barrel with one or more mint varieties, and let them take over…in the pot, that is.
Some ceramics are glazed with materials that should not be used with edible plants. There might be a sticker on the bottom indicating this.
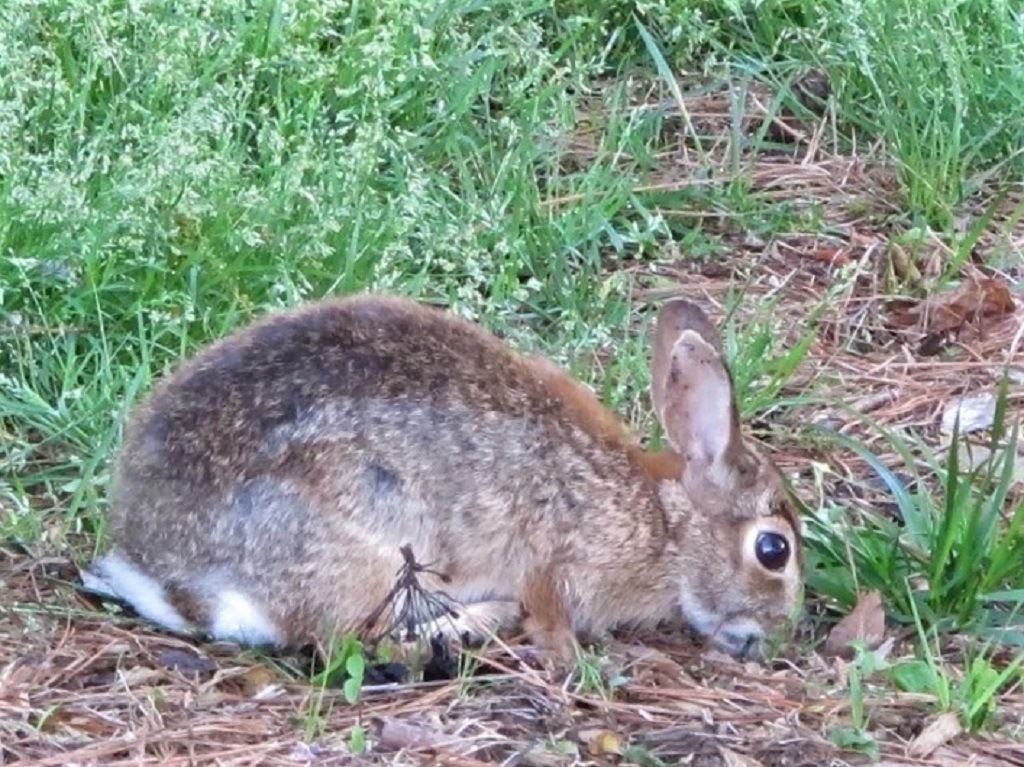
Rabbits are cute, but…
Small clay pots dry out faster than large non-porous pots. Just one day too many in direct sun without water could kill the plants. Lining a clay pot with food-grade plastic and poking a few holes in the bottom will slow the evaporation to a degree. To be sure, your herb gardens—especially small ones—will need daily checking.
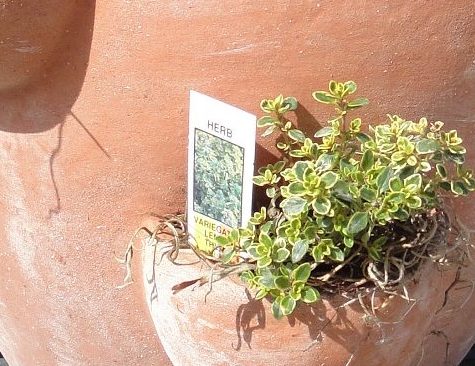
Potting herbs in hanging baskets is a great solution if you live where deer and rabbits are waiting for the instant you turn your back. They’re particularly attracted to parsley, cilantro, and dill.
Herbs need excellent drainage, so always choose pots that have holes in the bottom. Other than that requirement, just select the pots that appeal to you. Many gardeners look for a consistent style, favoring pots that harmonize with each other and with the setting.
Window Boxes
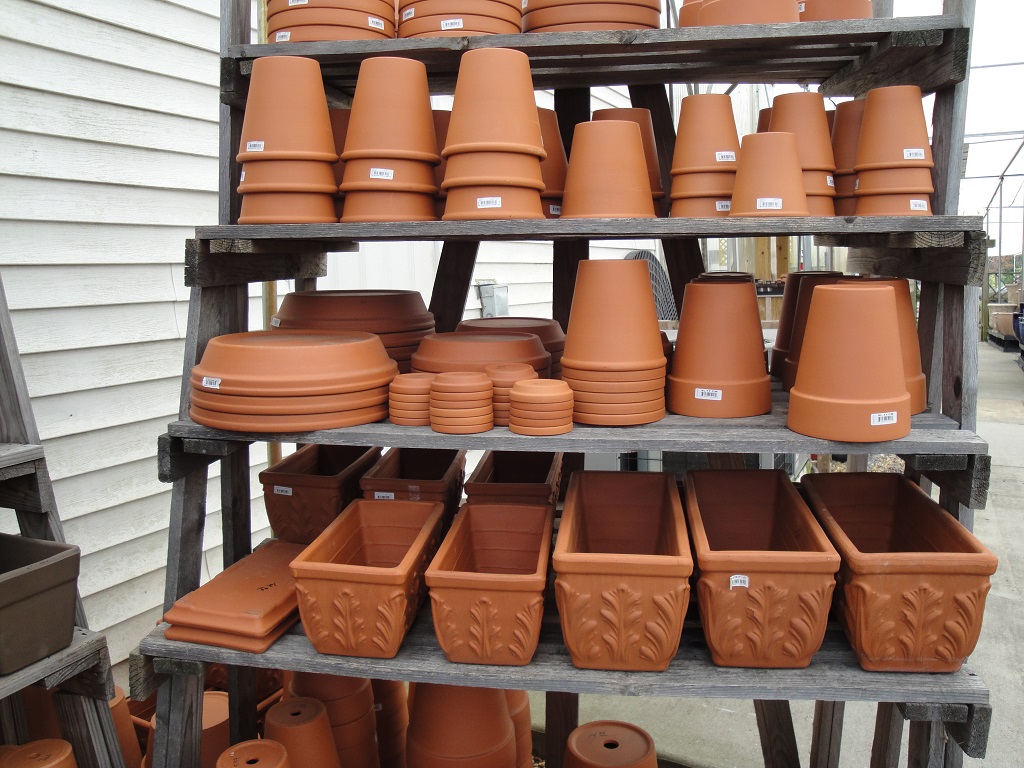
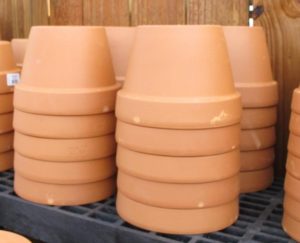
Clay pots for herb gardens.
A popular container for herb gardens is the window box. Window boxes come in many styles, from quite simple to highly ornate. They’re available in terra cotta (lower shelf in photo, above), plastic, and lined or unlined wood. Plastic containers often have plugs in the drainage holes; remove them to ensure proper drainage.
You can hang them outside windows in securely anchored frames; lighter weight containers are a safer bet. Or simply place them on a brick wall, along a sidewalk, or at the edge of a sunny patio. Several herbs in clay pots look charming clustered together on a table. Where wind is a concern, use heavier pots, but don’t place them where they could blow off the balcony to the sidewalk and harm someone.
Cracking
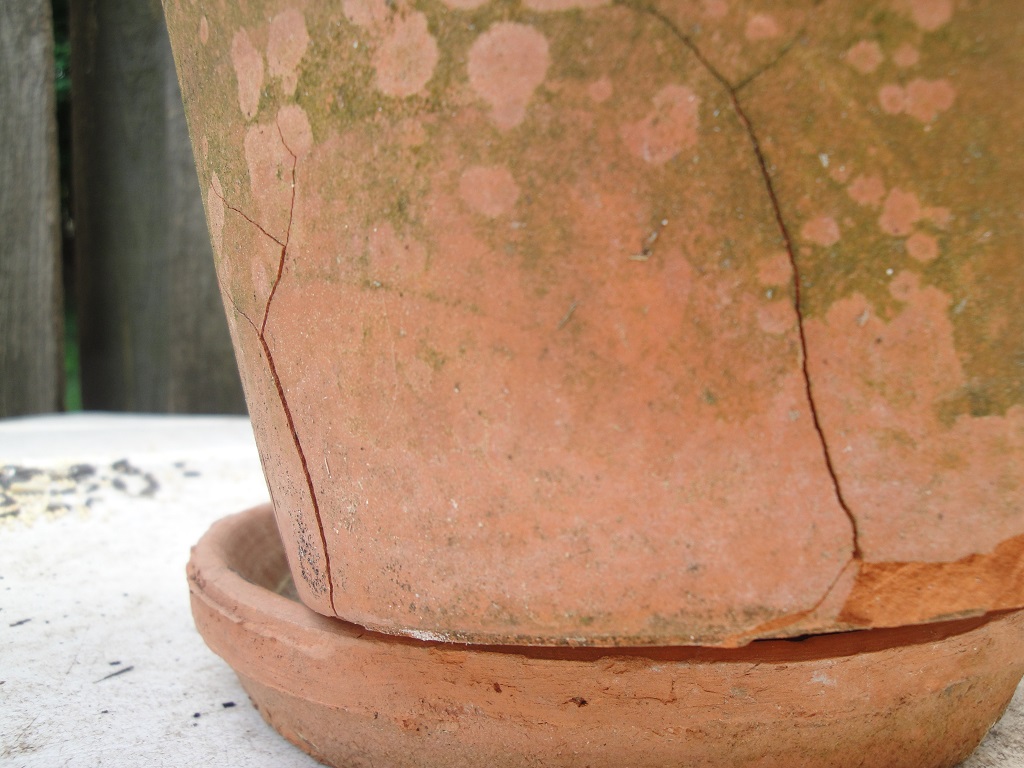 Handle clay pots carefully so they won’t crack. Clay pots might tolerate one or a few seasons of freezing weather; eventually most will begin to spall or crack. When clay absorbs water, and the water expands as it freezes, the clay degrades. Denser terra cotta (Italian for “baked earth”) survives more winters than softer clay.
This clay pot (photo, right) spent almost a decade outside, and it cracked this past winter. Until it crumbles, it will serve some purpose in the garden. I usually used Italian clay pots for my plant business and acknowledge that even better-quality pottery has limits.
Switching herbs into frost-resistant pots where winters are cold is one option. Other options include growing them indoors, in a cold frame, or in a conservatory—in other words, where the pots won’t freeze.
Tuscan Style
Years ago, I planted two herb gardens for a customer in Potomac, Maryland. They sat on a low stone wall surrounding a sunny Mediterranean-style garden. The Italian clay window boxes were over 4′ long and weighed more than 50 pounds empty. They were beautiful when finished—all those shades of green, purple, gray, variegated white and yellow—and the fragrances!
Even without flowers, potted herb gardens have their own unmistakable charm. Green algae and that white coating (efflorescence, from mineral salts) building up on clay pots won’t harm the plants but will amplify the rustic factor. And, yes, you can clean it off if you prefer.
Long Toms
Long toms, also called rose pots, are taller than they are wide (top shelf and part of next one, in photo under “Window Boxes”). Variegated lemon thyme or prostrate rosemary cascading over the side are perfect choices.
These pots are available in tiny sizes only 2″ wide, but 4″, 5″, and 6″ pots are more useful. Offer small herb containers as party favors for special occasions or use them to assign seating around the table.
While in Maryland, I potted herbs into 3″ stainless steel long toms for the tables at a popular seafood restaurant. I switched them out every couple of weeks.
I used to purchase clay long toms from a wholesale supplier in Baltimore. They normally came without drainage holes, so I added them, using a reversible drill and a masonry bit. Easy.
Plain Pots
“Azalea” pots are 3/4 as tall as they are wide.
Reusing what you have sitting around the garage is most economical.
Clean out those 12″ hanging baskets that held annuals last year, and repurpose them for herb gardens, with or without the wires. Green plastic pots last longer than white ones, which degrade faster in direct sun.
Empty the tired old soil into the shrub gardens and purchase new potting soil for your project. Some plants, particularly basil, are susceptible to several soil borne diseases. Starting with clean materials, therefore, is critical for their success. Wipe down used pots with a 10% bleach solution, rinse, and air-dry…for basil, at least.
Azalea pots are a bit shorter than they are wide and lend a more anchored look to potted plants. I prefer azalea pots over standard pots (height = width). It’s a personal choice, of course. You can pot them up with one plant or use a larger pot for a few plants.
Topiary
Rosemary and lavender topiary standards (the lollipop shape) look great in clay azalea pots, with some moss growing on the soil surface. Grow them indoors, in full sun, where they’re protected from hard winter freezes. But keeping them outdoors—even in chilly weather—ensures they get enough direct sunlight.
Try training the woody herbs “quasi-bonsai” style, with knobby stems, a few little weeds, and a fallen “log” embedded in the moss. Allowing the clay to mellow with algae and efflorescence, and those pots aren’t so plain after all.
Strawberry Pots
Lemon thyme in a clay strawberry jar.
Planting a strawberry jar is a bit more complicated, so it deserves a post of its own. If your attempts at planting a strawberry pot have been less than successful, refer to this article for solutions.
Pot Color
A fine point often overlooked in container gardening is the color of the pot. In summer, with scorching sun bearing down on a dark pot, that heat transfers to the soil. Consequently, the root system will be sparse on the hot side of the pot. Plants are happier without this stress.
You can alleviate their discomfort by shading the root system in summer with smaller pots of heat tolerant plants, such as dwarf zinnias or vinca. Or use white pots in hot weather to lower the temperature.
In autumn, I plant cool season greens and herbs in black nursery pots. Dark colors absorb more energy from the sun. Warming the soil a moderate amount helps limit the deep freeze in winter. The longer the roots can function, the more foliage I’ll be able to pick.
Curiously, clay pots with moist soil can feel cooler to the touch. This is due to evaporative cooling, where the temperature decreases as water evaporates from the surface. So, even in hot weather, a clay pot won’t feel as hot as most other pots. Your skin performs the same function.
Choosing pot colors might not be an option. Alternatively, plant herbs that dislike heat (such as cilantro) on the cooler north (northern hemisphere) or east side of the pot.
Choosing the Right Plants for Herb Gardens
A Proper Fit
First, decide which herbs you want to grow. Look for smaller varieties of the herbs you use in cooking, choosing young but well-rooted transplants. These will adapt better to containers than full size varieties. Sometimes there’s not much choice; maybe only ‘Italian Large Leaf’ basil is available. Okay, I’d rather have it than no basil at all, so there are 4 options when using large-growing herbs:
- use fewer herbs in the herb garden to make room for the big basil
- keep the basil in the combination pot, but cut it back more frequently
- find a larger pot for the herb garden
- grow this large basil by itself
We need to find a balance between plant size and available space relative to what other plants need. You can fit a few plants together, but they suffer when cramming all the herbs you like into too small a container. Plants growing in pots, however, don’t grow as large as those in the ground.
Seeds and Transplants
Seeds can be sown directly in the pots, but thin them once they sprout. Remember that some species are very slow to germinate, and you most likely will have better success with transplants. For new gardeners, I suggest buying young plants for now, and perhaps experimenting with seeds during the summer. But if the herbs you need are available only as seed, go for it.
Garden centers and farmers’ markets offer a wide variety of herbs grown as transplants. Some growers start them from seed, cuttings, or plugs (very young plants) several times a year. In one growing season, you might find dozens of varieties of basil alone! So, shop around for the local herb lady, and request certain plants she might grow for you.
I included a section on Propagating Herbs, which you’ll find on Page 5.
What’s the Difference Between Herbs and Spices?
-
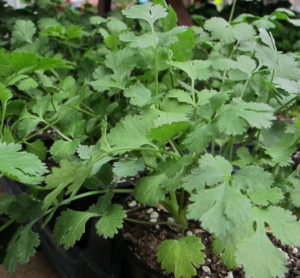
- cilantro, the herb,
-
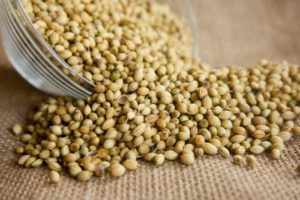
- Coriander, the spice.
Although we use the two terms interchangeably, there is a difference between them. Herbs are leaves of edible plants, and the focus of this article. Spices comprise all other parts of edible plants—bark, seeds, roots, fruits, and flower parts.
Cilantro leaves and coriander seeds come from the same plant, but those interested in this minor technicality differentiate between the herb and the spice.
Turmeric, ginger, vanilla extract, nutmeg, cinnamon, and black pepper are spices that we keep in the pantry. Saffron, the world’s most expensive spice, comes from the 3 threadlike female parts in a fall-blooming Crocus sativus flower.
Headings:
Page 1: The Gift That Keeps On Giving, Choosing the Right Containers for Herb Gardens (Style and Size, Window Boxes, Long Toms, Plain Pots, Pot Color), Choosing the Right Plants for Herb Gardens (A Proper Fit, Seeds and Transplants, What’s the Difference Between Herbs and Spices?)
Page 2: Which Herbs Are Annuals? Biennials? Perennials?
Page 3: Herb Gardens Close To the Kitchen, Combination Pots, Potting Up Herb Gardens, How To Maintain Herb Gardens (Light, Natural Sunlight, Artificial Light)
Page 4: Tips For Watering Herb Gardens (Transpiration, Why Plants Wilt, Testing for Moisture, From Season To Season, Water Temperature), Fertilizing Herb Gardens (Organic or Synthetic?, Macronutrients and Micronutrients, How Often To Fertilize Herbs, When We Don’t Fertilize, The Taste Test), Temperature (As Temperatures Change)
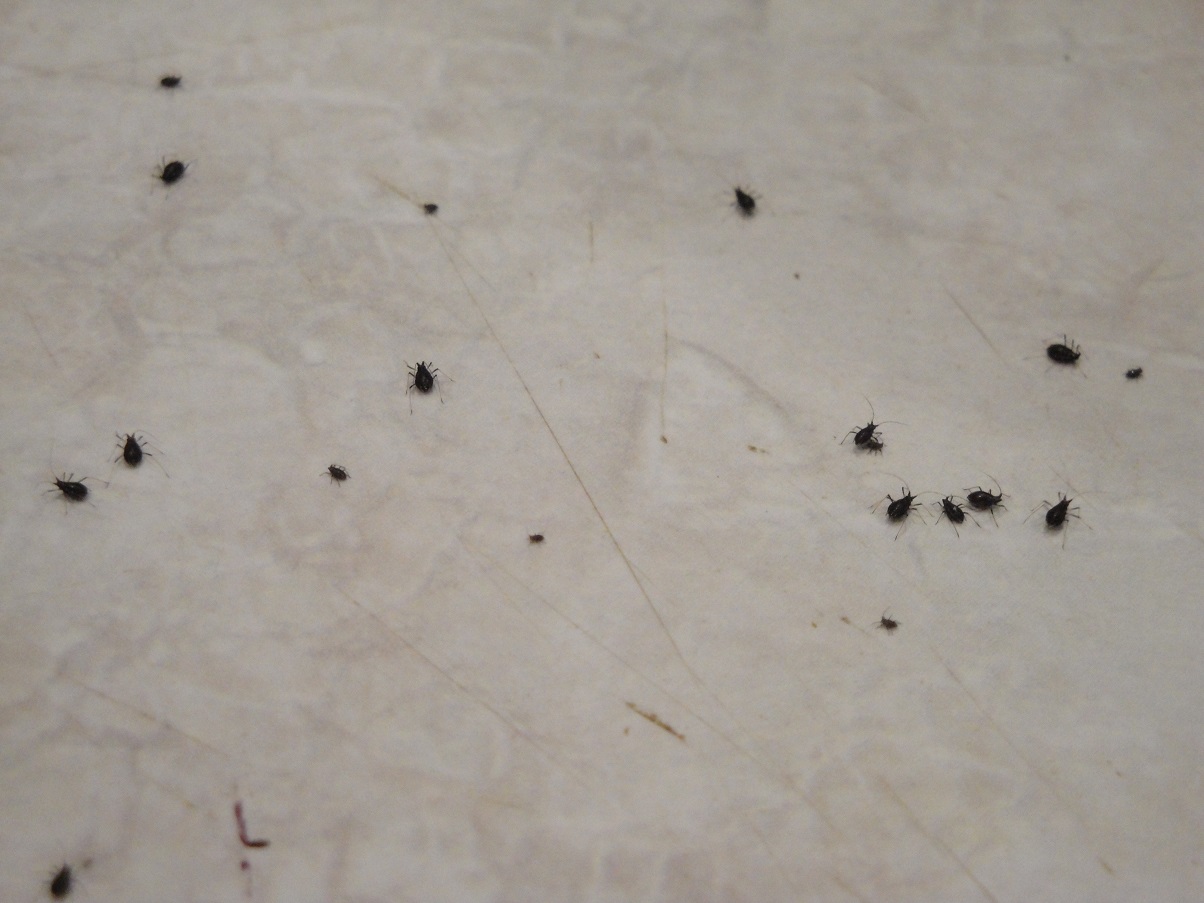
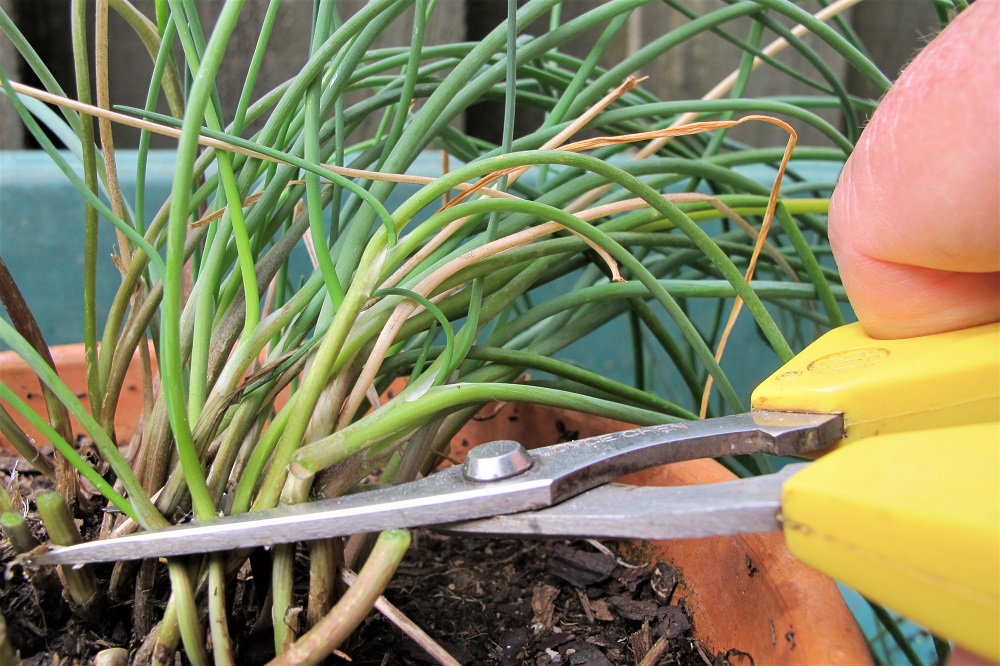
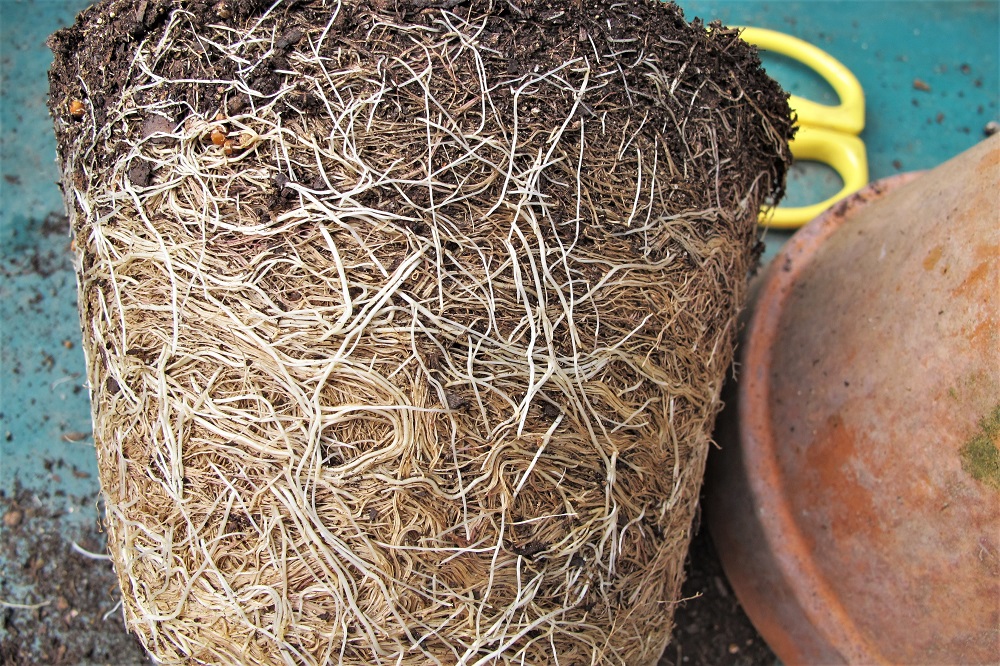
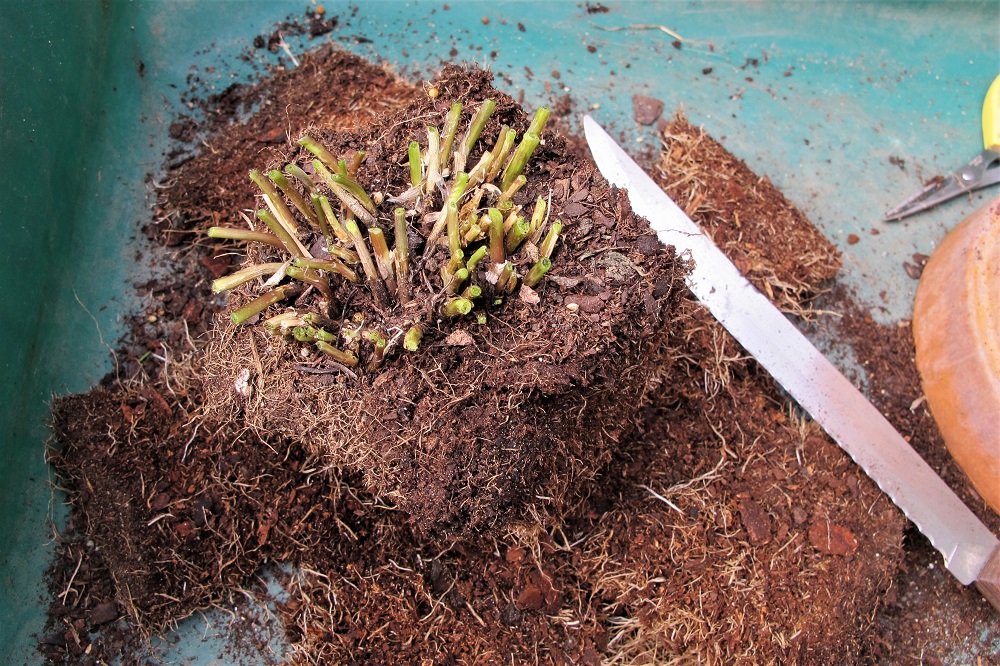
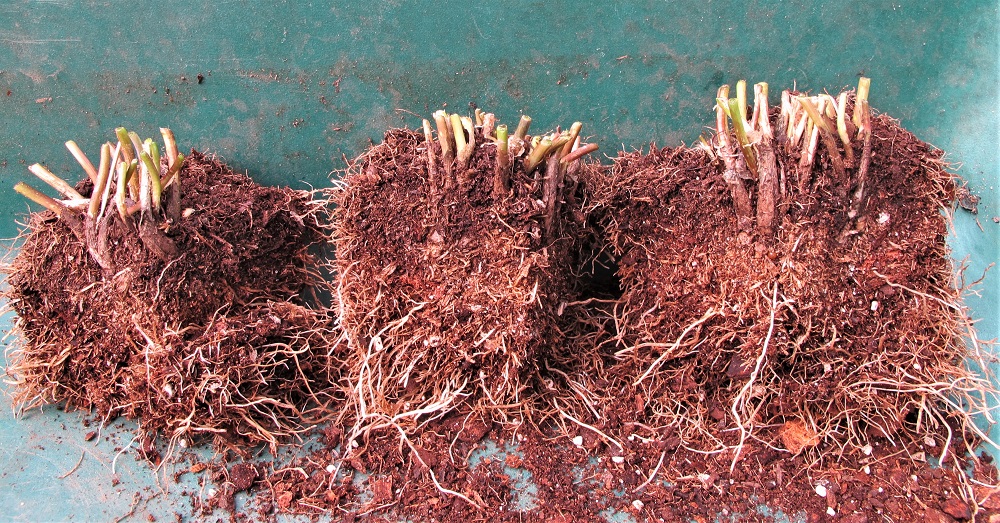
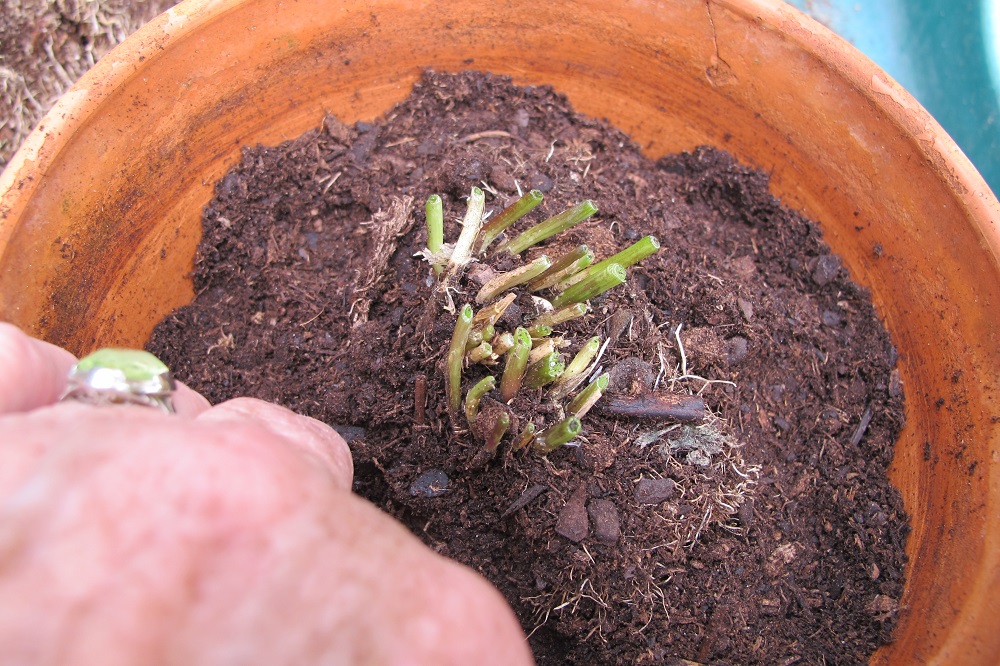
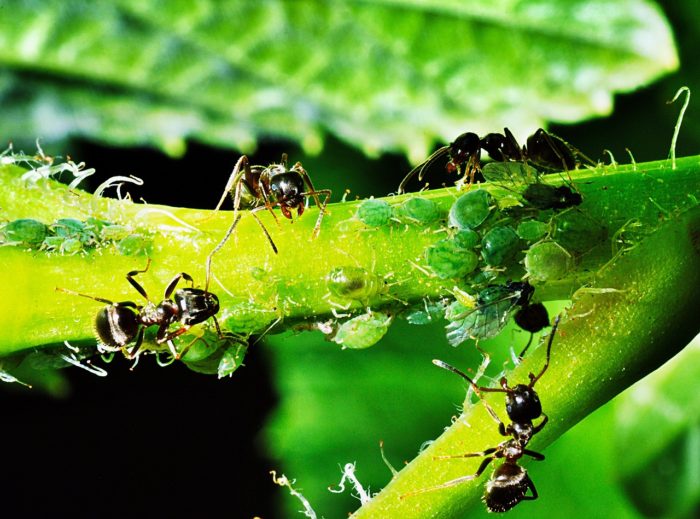
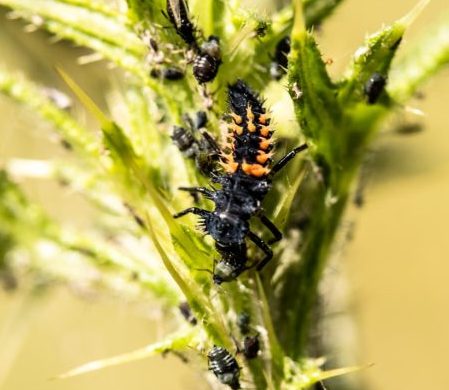
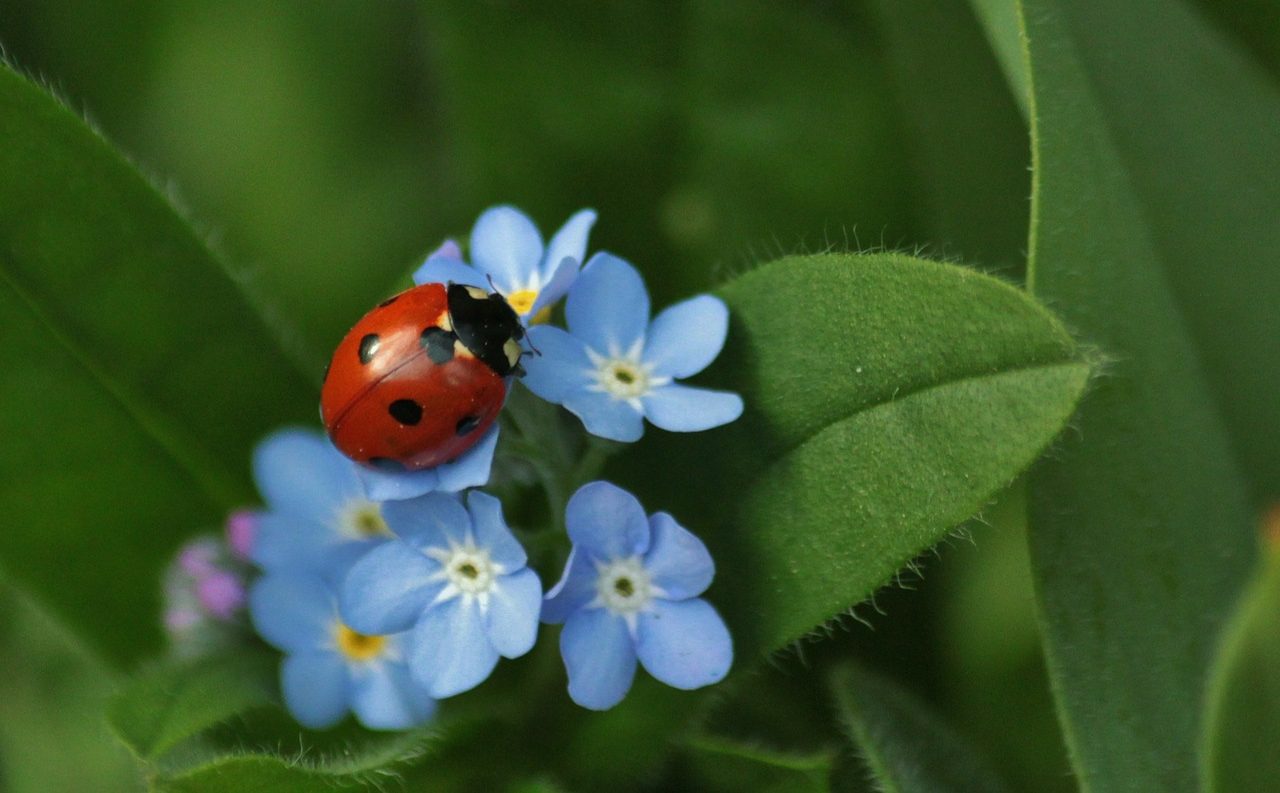
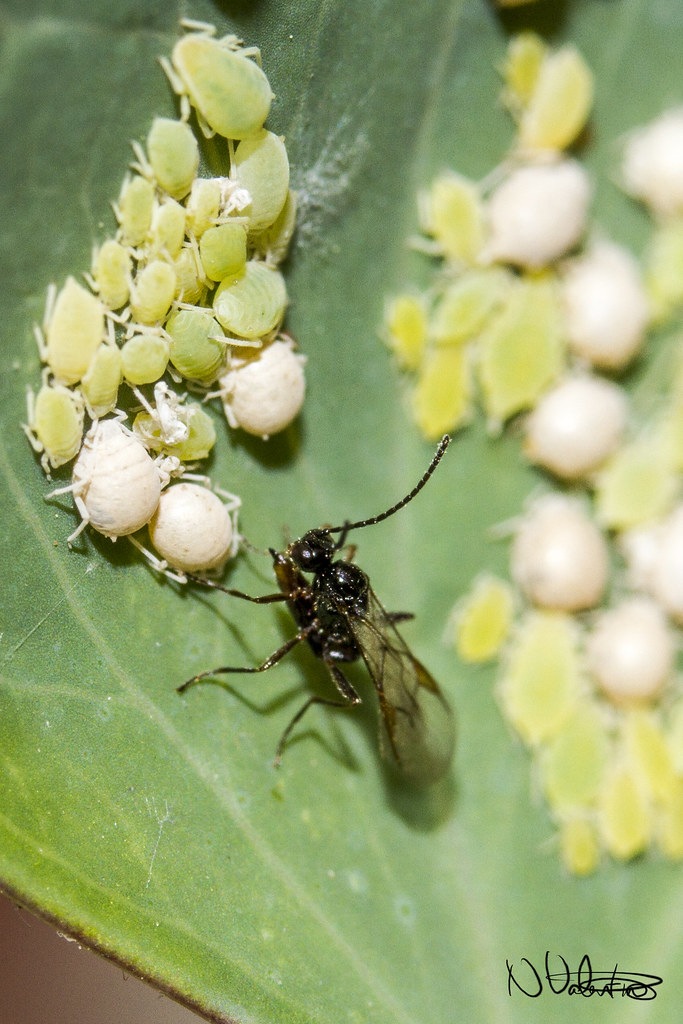
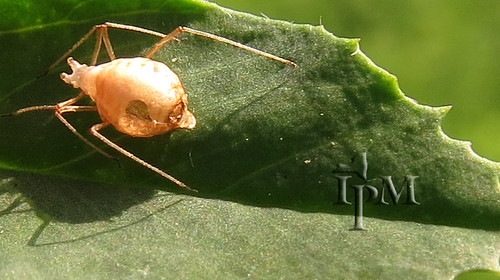
Page 5: Common Pests (Better Options To Eradicate Pests, Bacillus Thuringiensis, Horticultural Oil, Organic Sluggo, Plain Water), Girth Control (It’s Thyme For Drying, Which Herbs Dry Well?), Renovating Herb Gardens (Propagating Herbs)