updated 1/28/2024
Here’s How To Divide and Rejuvenate Chives
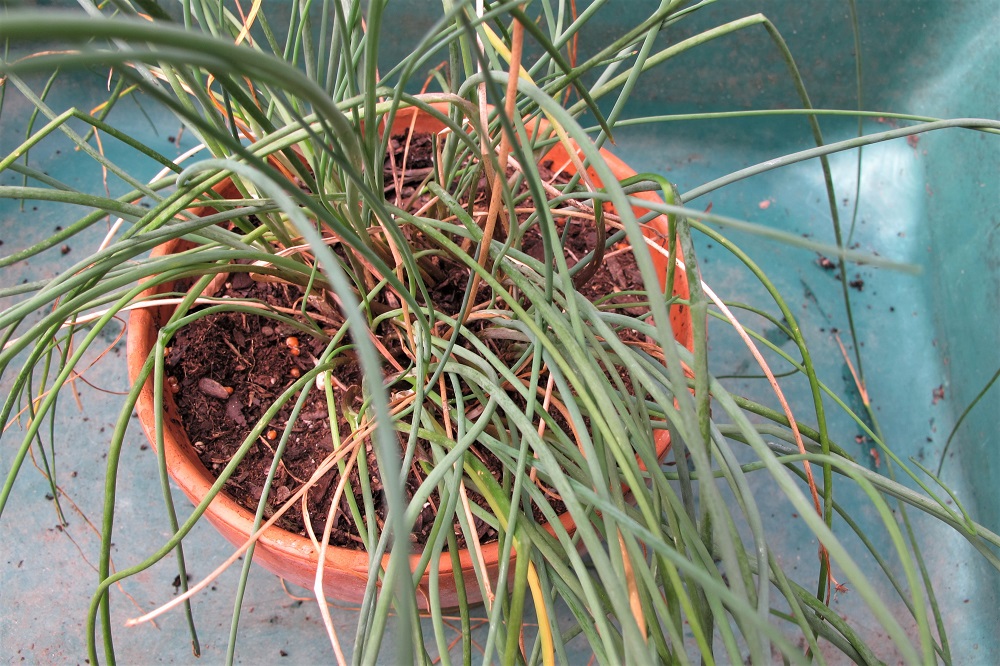
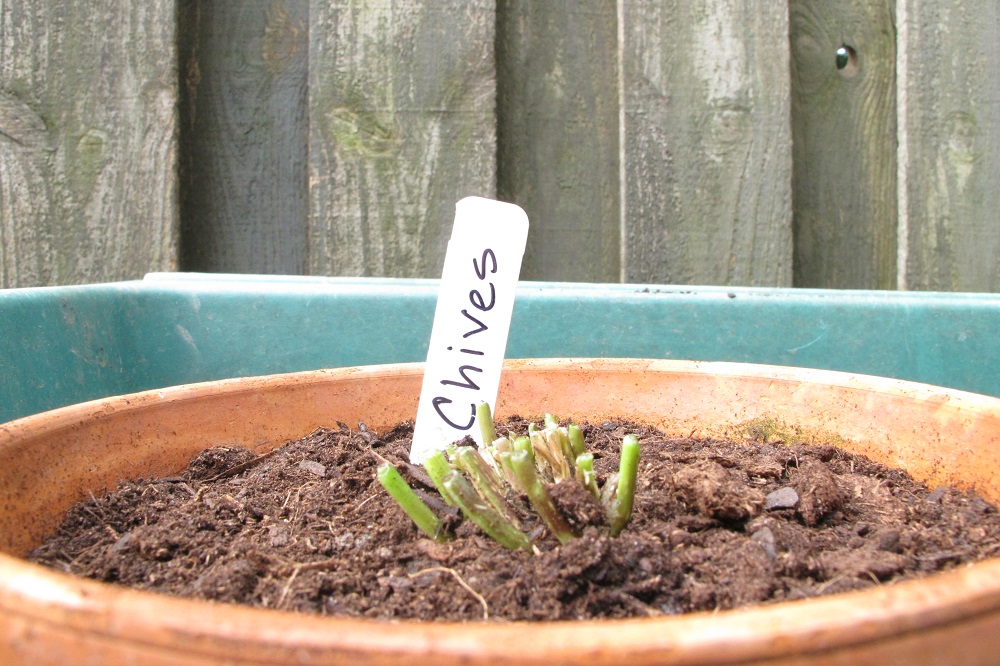
Potted chives, about to be divided.
There are few plants that are easier to manage than chives. This herb, in the onion family (Amaryllidaceae), benefits from an occasional division. And as autumn approaches, a rejuvenated plant will reward you with a fresh crop of flavorful leaves until the snow flies.
Chives (Allium schoenoprasum) is super hardy, growing as a perennial in USDA plant hardiness zones 3 to 9. In the colder zones, it behaves as a herbaceous perennial, dying back to the soil after some hard freezes. A few months later, new leaves emerge from dormant bulbs in the ground when the soil begins warming up. Wherever I’ve lived, it has always been the first herb to sprout new foliage in late winter or early spring.
Here in zone 7 North Carolina, pot-grown chives has some usable foliage through most of the winter. If grown in a protected area or next to a south-facing wall (northern hemisphere), it will retain some foliage in cold weather. Potted chives is less winter hardy, by one or two zones, than those grown in the ground because the roots are fully exposed to cold air temperatures.
The term, “chives”, is from the French word cive, which derives from the Latin word for onion, cepa.
Some gardeners use the singular form of the word, “chive”, and others prefer using “chives” for both singular and plural applications. Your choice. Similar to the terms “species” and “impatiens”, I add the “s” at the end.
Why Divide Chives?
After a few years of growth, the small bulbs in the soil become very crowded. One year, the chives will look fine, and the next year it might fail to emerge at all. By dividing the clump every 2-3 years, the younger and more vigorous bulbs will have a chance to grow. Those old bulbs might already have decomposed, so you won’t see them in the soil.
Wet soil exacerbates any problems it might have, so plant it where the drainage is good, in a raised bed, or in a clay pot. In fact, chives can tolerate quite dry soil, and it doesn’t mind being potbound. But for the best growth, keep potted chives damp to lightly moist. It needs full sun—6 hours or more each day—to grow well.
Another reason to divide chives is to provide more plants for the garden, to give away, or to sell at the neighborhood yard sale. Perhaps you’d like to add a division to the strawberry jar you’re filling with herbs. Chives responds very quickly after division.
If onion aphids have weakened your chives early in the season, removing all the foliage is an option. That would be another good time to divide the plant, perhaps waiting until after the blooms fade. I’ve never had a problem with onion aphids after spring.
***Update***: These tiny young onion aphids (photo, below) hitched a ride on the potted chives brought indoors last month. So, I cut back the plant and moved it outside, after feeding a few aphids to the betta. The other chives on the deck already are beginning to show new leaves. 2/5/2021
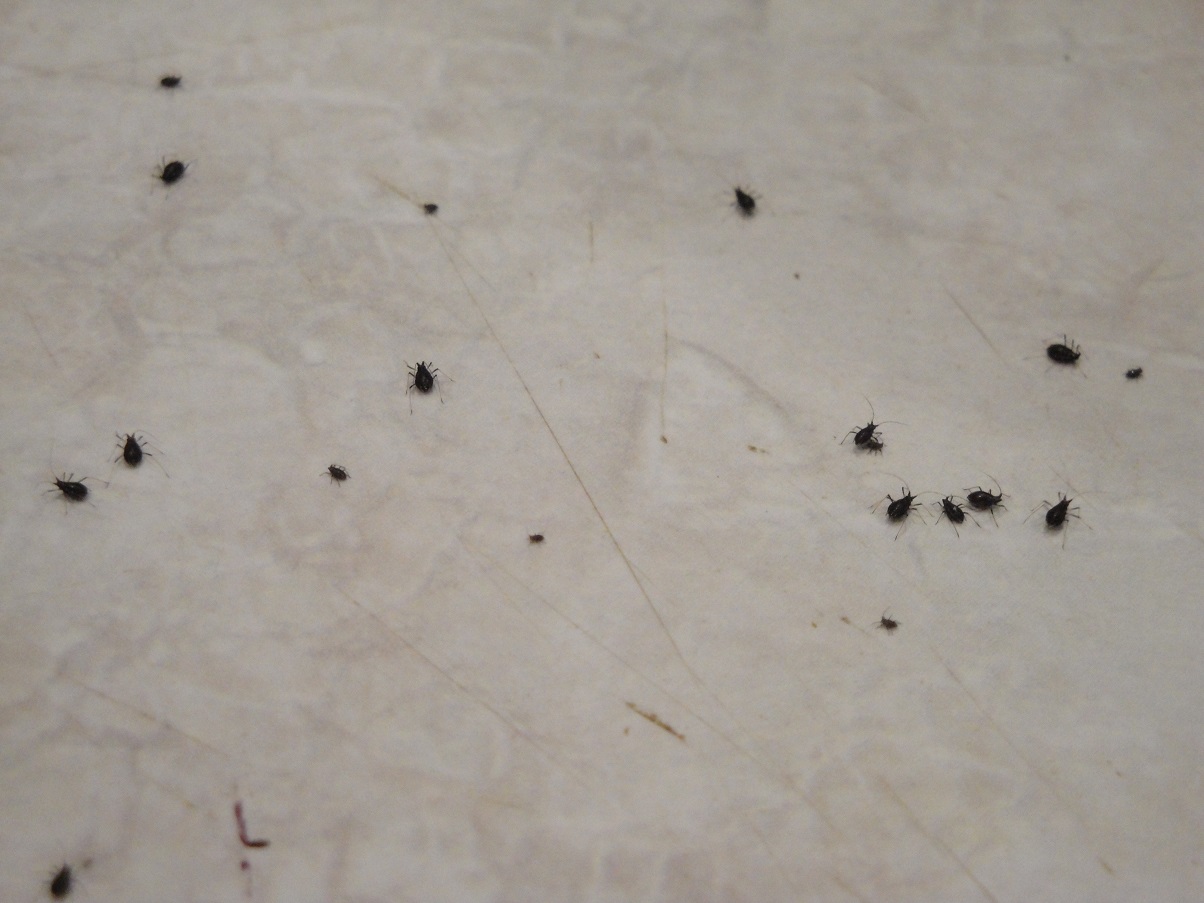
Onion aphids from chives.
How To Divide Chives
The Pot
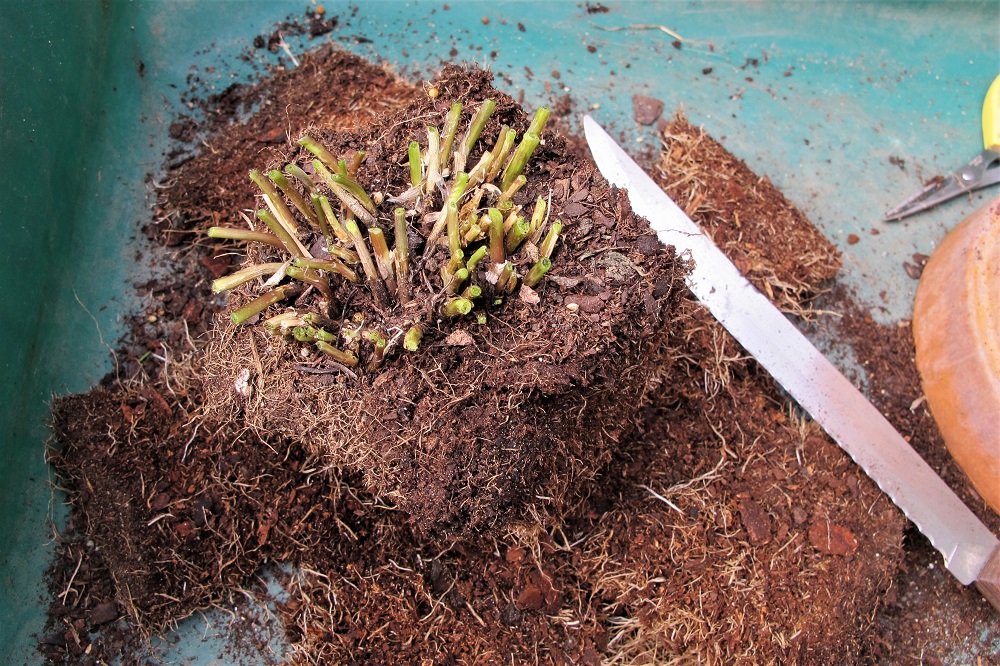
This process begins with digging up the clump or unpotting the potted chives. The plant in the photos has been growing in a 6½” clay azalea pot (shorter than wide—about 5″ tall). I will replant the same pot with one of the divisions, after cleaning it. Replanting in a dirty pot will make the next plant more difficult to remove. The new root ball will get stuck on the debris tightly clinging to the walls.
Another issue to consider is the shape of the pot. If the top curves inward, the root ball won’t slip beyond the narrow section, and you’ll have to cut straight or tapering sides to get the root ball out of the pot.
If you want to use Grandma’s ceramic pot, simply grow the chives in a plastic pot, with holes, that fits inside the prettier one. While double-potting lets you use a decorative pot without a drainage hole, remember to empty water collecting in the bottom.
Plastic or frost resistant ceramic pots are fine, but use one that is small to medium in size. A big pot holds a large volume of soil that stays wet in a rainy period or in the cold. The excess moisture could kill your chives unless you’ve added extra drainage material. Chives grows nicely with a few other herbs in a window box.
Cut It Back
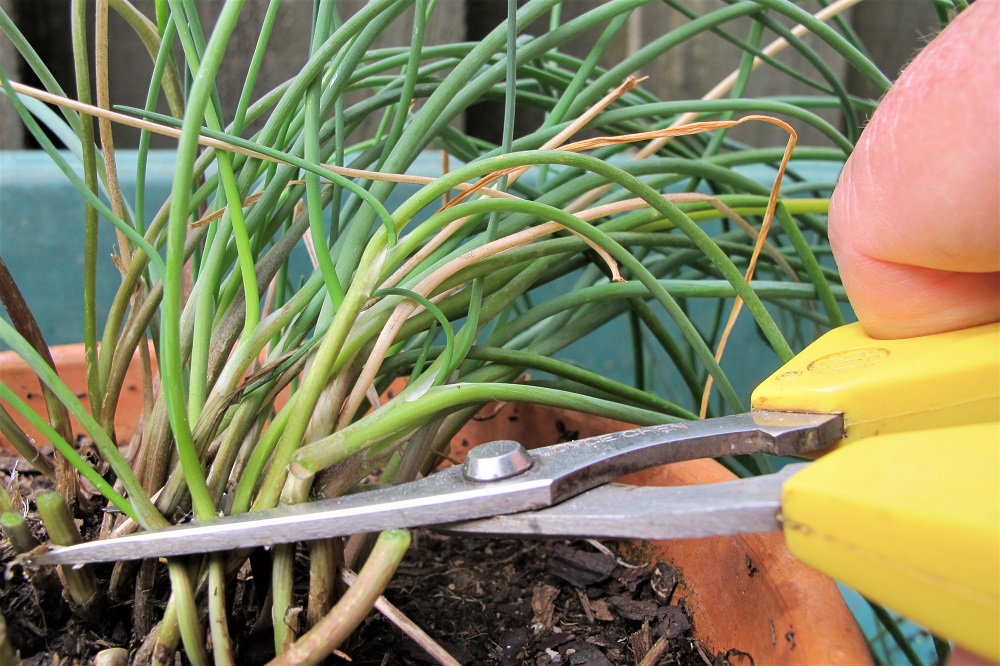
Cutting leaves right above soil level.
Cut off all the foliage, down to about 1/2″ from the soil surface. While it might appear extreme, this plant won’t skip a beat. Already, a day after cutting back this plant, it has grown 1/3″ (photo at the end).
Removing the foliage makes the process easier and neater. Also, there’s less stress on the roots because they won’t have to supply water to the foliage. Take the good leaves to the kitchen, and add them to baked potatoes for dinner, or to eggs, a salad, or soup. You’ll have long leaves to snip from rejuvenated plants within a couple of weeks, depending on weather.
Look for leek moth larvae, immature insects that sometimes bore into the hollow leaves or burrow inside and destroy the bulbs. This insect is native to Europe and Asia, but also is found in North America, where it can become invasive.
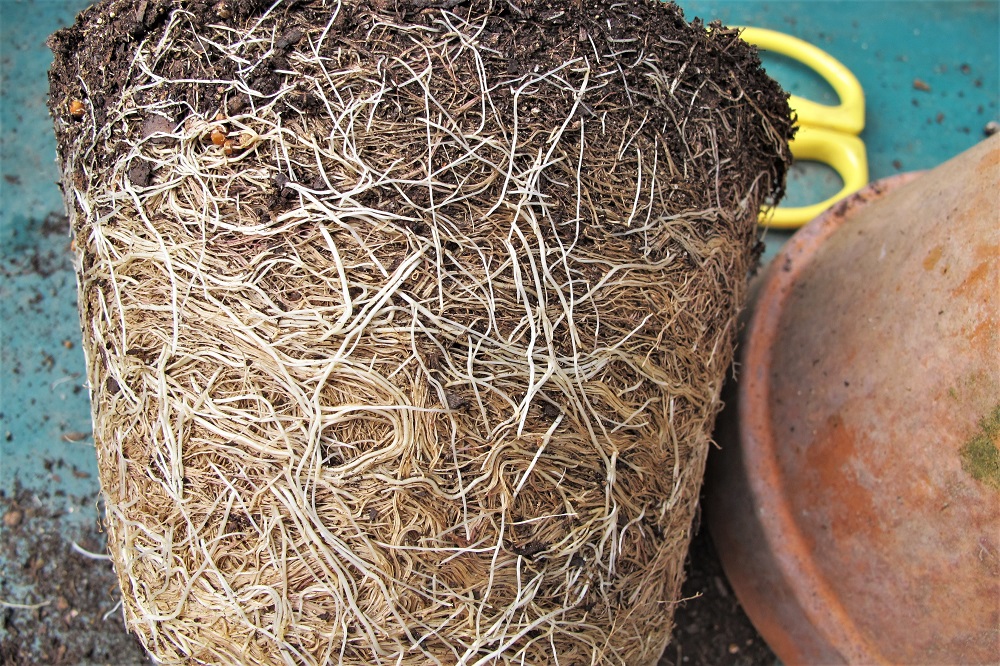
Divide and Multiply
If you’re removing your chives from the ground, dig a few inches from the base of the clump, and about 8″ deep. Tease off loose soil and put the earthworms back in the garden. Don’t worry about some lost roots; chives’ roots regrow very fast.
-

- Chives’ root ball.
-
- Slicing off outer roots.
-
- Three divisions.
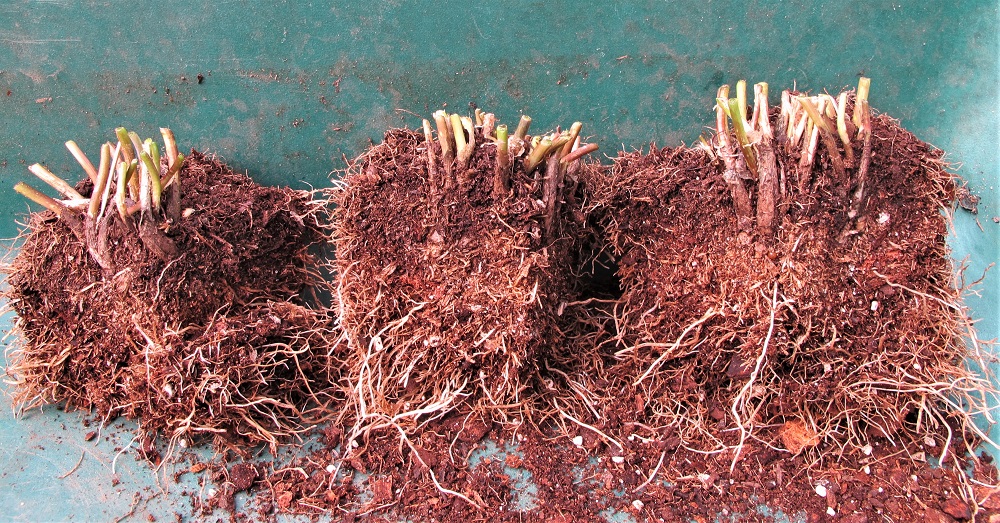
The root ball in a potted plant will become very congested with tightly packed roots, both dead and alive. Use an old serrated knife to slice off the outer edges of the root system. And remove that center part if there are no bulbs there. Compost this tired soil or toss it under the shrubs.
An old clump of chives often grows outward, while the center dies out. Identify the places where natural divisions can be separated. Now divide the plant. Use the knife to make a few or several divisions. I kept 12 to 20 shoots in each division. If you want, you could cut smaller divisions for more plants.
Potting Up
-
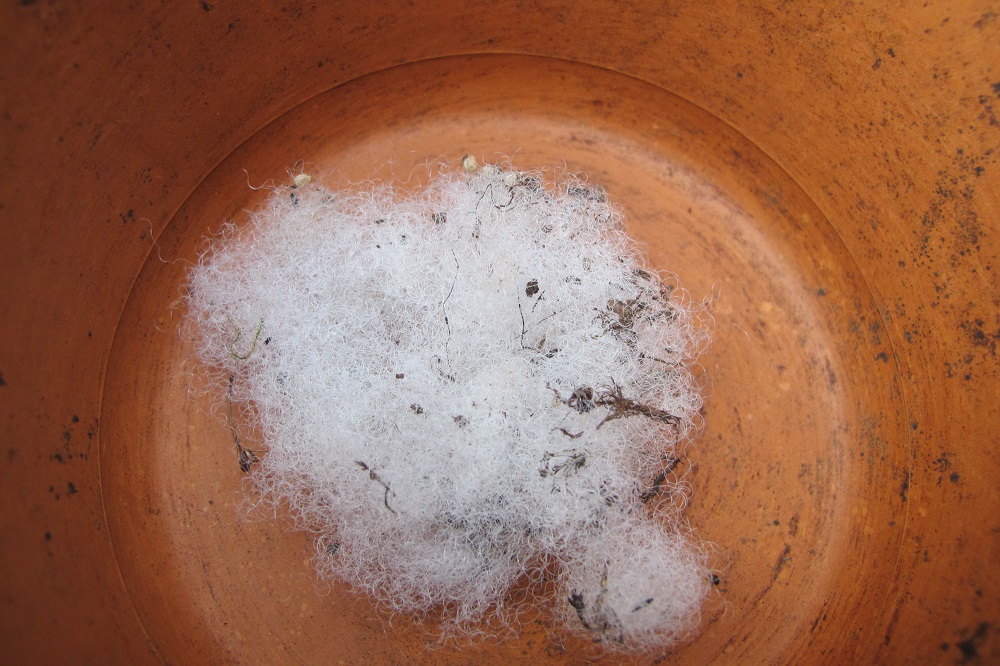
- Clay pot with polyester fiberfill covering drainage hole.
-
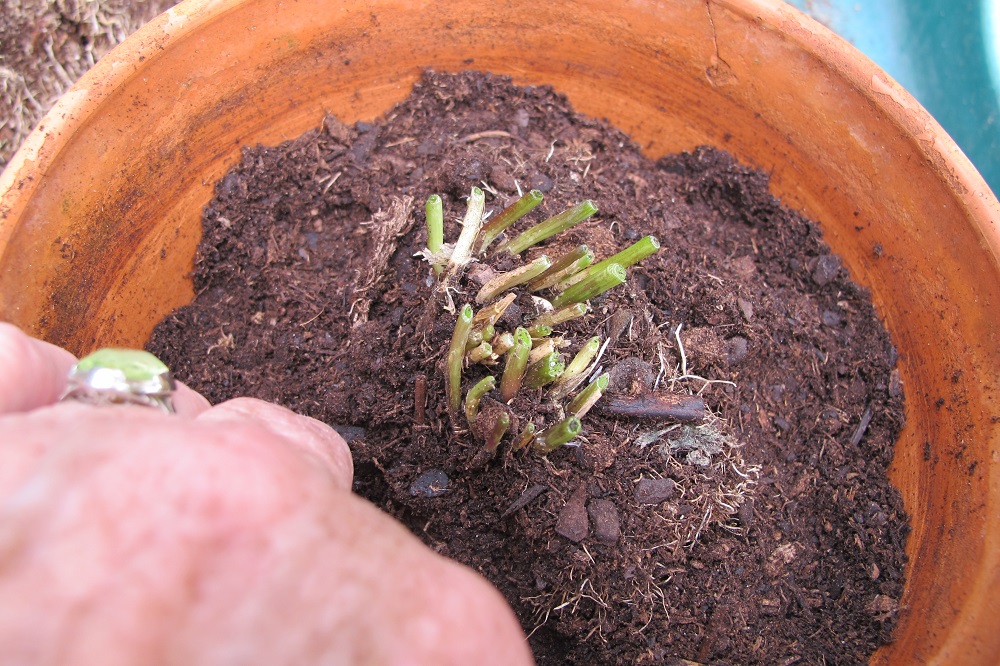
- Firm soil around the roots.
-
- Finished pot of chives.
Place a wad of polyester fiberfill over the pot’s drainage hole. A small bag can be purchased for a few dollars at hobby shops. Because it’s synthetic, it doesn’t break down and can be reused. The PF prevents soil erosion, leaving all the soil in the pot. Also, sowbugs, earthworms, and other critters will not be able to gain entrance to the soil through the drainage hole. But water will drain freely.
Add some potting soil to the pot and hollow out a depression for the fresh division. The soil line should be about 1/2″ to 1″ below the rim of the pot. Firm the soil around the roots to prevent settling or air channels through the soil. Add more soil if needed. But don’t bury the crown of the plant any deeper than it was growing before the division.
Water the plant and place the pot in the sun. Done! Wasn’t that easy?
Growing Chives Indoors
Light
Chives grows easily in a sunny window, where it gets at least 6 hours of direct sun. Abundant sunshine allows optimal photosynthesis and keeps the plant growing strong. Lack of adequate sun causes thin, weak growth that falls over.
Artificial light can help on cloudy days. Place the plant close to a light source to supplement the natural light it gets, but not so close that it can feel the heat.
Temperature
Even if the windowsill is chilly on winter nights, the plant should thrive there. Chives growing indoors should stay in leaf all season, even though those growing outdoors will go dormant. Cooler winter temperatures (45° to 65°F) indoors keep the plant shorter and in better condition. It will bloom in spring only if it has received enough cold, so don’t expect flowers.
If you must keep chives indoors in the summer, set the pot back several inches from the glass so it doesn’t overheat.
Water
Keep the soil damp. Water thoroughly, and then let it dry a bit. After 10 or 15 minutes, empty excess water that remains in a saucer. Chives can grow in a pot as small as 4″ across and doesn’t mind being potbound for some time. A full plant in a small pot requires water more often.
Fertilizer
Every 6 weeks, from mid-fall through winter, apply a dilute (1/4 to 1/2 strength) solution of fertilizer if the plant continues growing.
From spring through early fall, fertilize every 3 or 4 weeks at about half the strength recommended on the package. Chives just isn’t that fussy. Wait 5 or 6 weeks after dividing before starting to fertilize. Chives planted in the garden might need fertilizer only once or twice during the growing season.
Tips for Harvesting Chives
When cutting the leaves, cut the entire leaf, almost down to the soil. The bulbs will soon generate new growth. If you cut the tips off a bunch of leaves, all the ends of those leaves will turn yellow.
Intercalary meristematic tissues right above the bulbs permit regrowth of the leaf from the ground up.
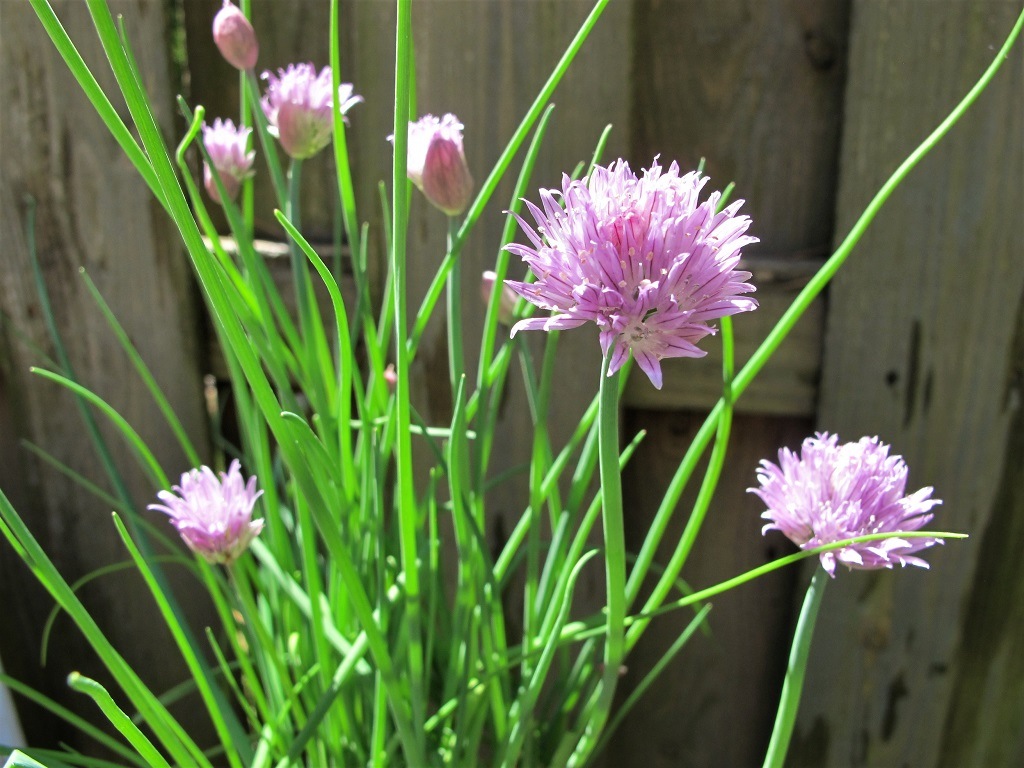
Chives in flower.
Chives flowers in spring (or early summer in northern zones) after being exposed to several weeks of a cold winter. It’s very pretty in bloom, with pinkish purple flowers on sturdy stalks. It looks like their cousins, the ornamental Alliums, grown from bulbs planted in autumn.
This herb’s flowers produce generous amounts of nectar, attracting beneficial insects. Chives’ flowers are edible. Simply pull some of the little florets off the head and use as a garnish. Young flowers have a milder flavor than those that have been open for a few days.
The stalk, or peduncle, that the flower is attached to is quite tough, and not edible for most purposes. Hold the base of the plant and pull out the entire flower stem.
Chives from Seed
As a monocot, chives produces flower parts in multiples of threes. So, each floret has 6 petals and the seed capsule is 3-lobed.
Different varieties of chives have similar flavor, but some have finer foliage than others. ‘Dolores’ has thin foliage, while ‘Purly’ and ‘Staro’ have wider leaves.
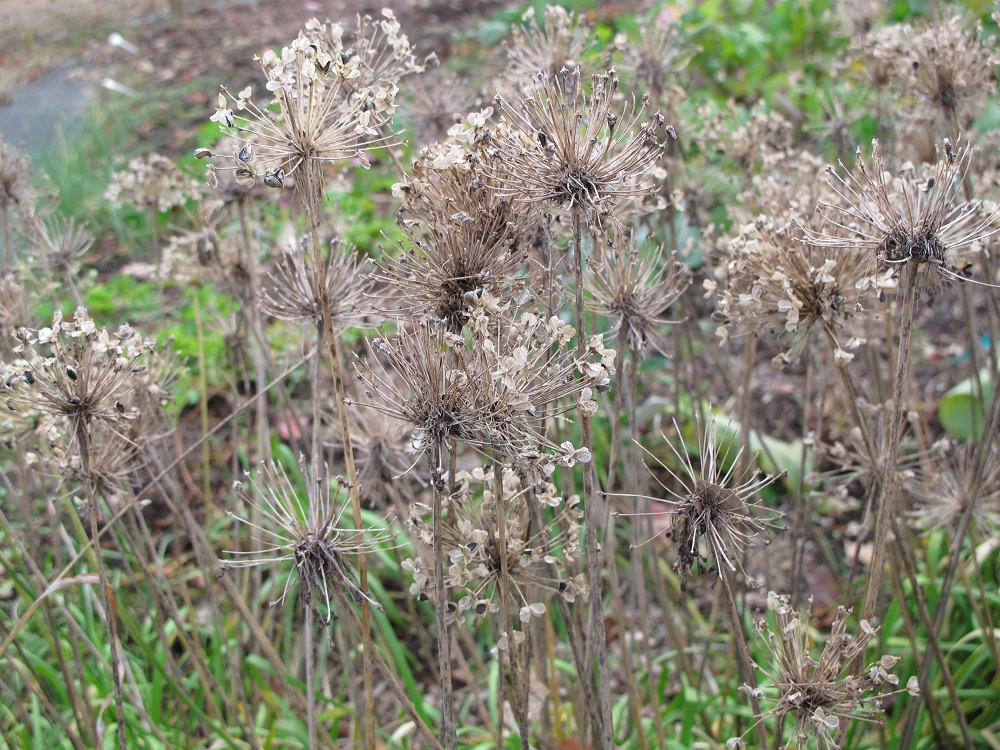
Garlic chives going to seed.
And there’s garlic chives, Allium tuberosum, with a distinct mild garlic flavor. Very nice in salads, but it will spread all over the place if the seedheads are not removed (photo, above). It also spreads underground more vigorously than onion chives.
Garlic chives grows in zones 4 through 9. Its pretty white flowers appear later than onion chives. Enjoy the flowers for a few days but remove them before seeds develop. Most wild animals do not feed on chives.
Garlic chives has leaves that are flattened, while onion chives has leaves that are cylindrical in cross-section.
Growing chives from seed is quite easy. Sow chives about 1/4″ deep in moist potting soil. You can use market packs or individual 3½-4″ pots, with 10 or so seeds sown together. Some growers sow dozens of seeds in one pot for a faster sale.
As soon as the seeds germinate, give them full direct sun for strong plants. They can be planted out after hardening off the seedlings, and they’ll tolerate light frost at a young age.
* * * * * * * *
Chives has been used for 5,000 years by civilizations in both the Old World and the New World. The foliage is high in Vitamin C, carotenoids, and manganese. It’s very high in Vitamin K. Because we normally don’t consume chives in large quantities, it’s not considered a major source of nutrients.
Dividing chives is an easy project for a cool end-of-summer day. Clipped fresh chives is very nice on a chilly day with a baked potato, melted cheese, crumbled bacon, topped with barely cooked broccoli…and butter… Enjoy!
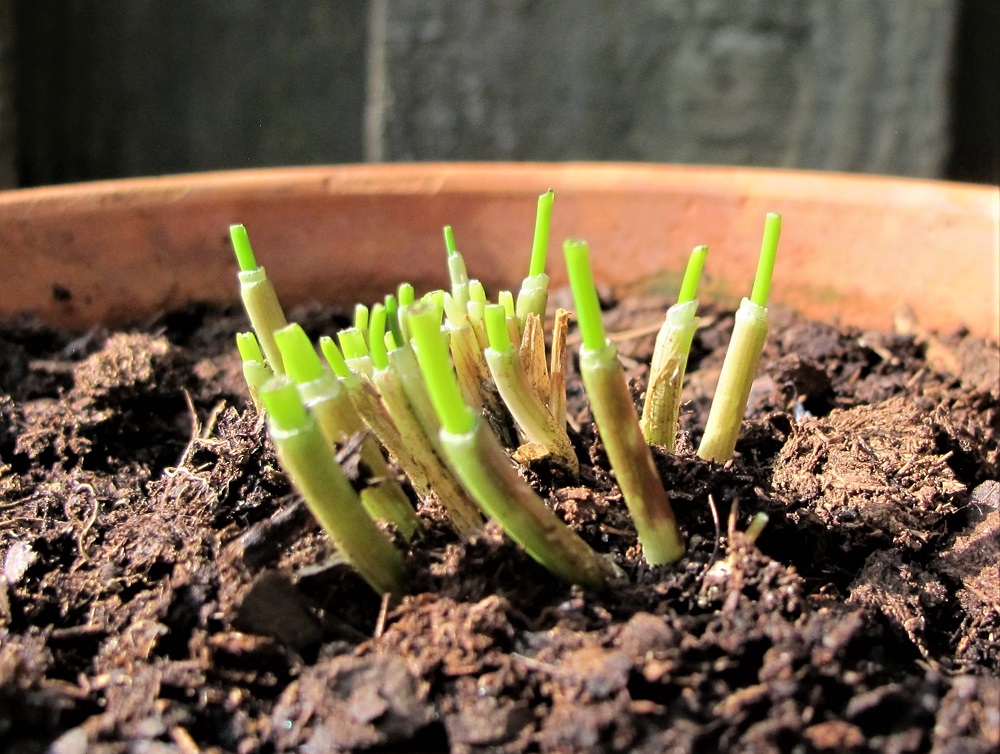
Chives, a day after dividing the original plant.