Tag Archive | tradition

An Evergreen Swag In 7 Simple Steps


How To Make a Festive Evergreen Swag 
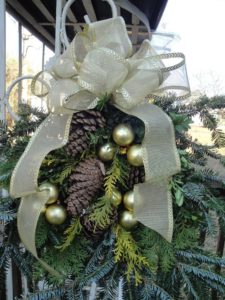
 

evergreen swag, gold bow


As the holidays approach and the to-do list grows ever longer, quickly pulling together a swag or two before guests arrive is so easy. Would you like to try this? In this article, I’ll describe making an evergreen swag in 7 simple steps.


What is a swag, exactly?


An evergreen swag is a hanging cluster of ornamental greens—with or without embellishments—used primarily during the holiday seasons. It can have one point of attachment, or it could span between two or more supports. Personalize it with ribbon, ornaments, and other items that reflect your family’s style.

Hang swags on walls, porch posts, doors, fences, and gates. Attach one to the mailbox or the lamppost. Although the greens last longer in cold conditions outdoors, you can hang them indoors. Certain evergreens, particularly freshly cut Fraser and balsam firs and some of the cedars, smell absolutely wonderful for a while.


Step #1: Gather Materials For the Evergreen Swag


Using Evergreens From Your Gardens


When searching for a new home in northern North Carolina, I noticed the southern magnolias (Magnolia grandiflora) and boxwoods (Buxus sempervirens) on this property. (“Great! Materials for swags and wreaths!”) Look for evergreens, twigs and buds with character, pine cones, and seedpods around your property. Perhaps you and your friends and neighbors can get together and trade materials…over hot chocolate and Christmas cookies, of course.
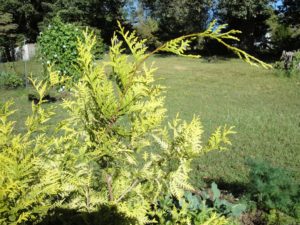
 

Chamaecyparis 'Vintage Gold' for an evergreen swag

Chamaecyparis ‘Vintage Gold’.


A small Chamaecyparis pisifera ‘Vintage Gold’ (USDA zones 5-8) planted last winter provides threadlike sprays of golden-yellow foliage. Bright yellow adds a great spark of color and shows up brilliantly against darker greens. Chamaecyparis—the false cypresses—are among my favorite evergreens for the landscape. Hinoki cypresses add soft texture and deep green swirled foliage for swags, wreaths, and table centerpieces.
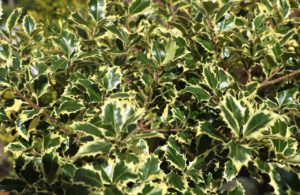
Variegated English holly for evergreen swag

Variegated English Holly has yellow or white margins.

In the future, I’ll plant shrubs and conifers not only to enhance my surroundings, but also for the birds and as cut greens. The long, soft needles of white pine (Pinus strobus) add textural contrast to arrangements. The native species grows to huge proportions, so I’ll look for smaller cultivars.

When choosing varieties to add to your landscape, consider your plant hardiness zone. Some love the cold and will fail in hot summers.

Other evergreens, such as juniper, spruce, cedar, and cypress, can supply clippings for seasonal projects. Variegated English holly (Ilex Aquifolium) and some of the dwarf hollies are on that growing wish list. Although traditional at Christmastime, holly leaves and berries don’t cling for a long time. I sometimes use small artificial berries when those little details would add to the design.

Buy a Taller Christmas Tree For More Greens

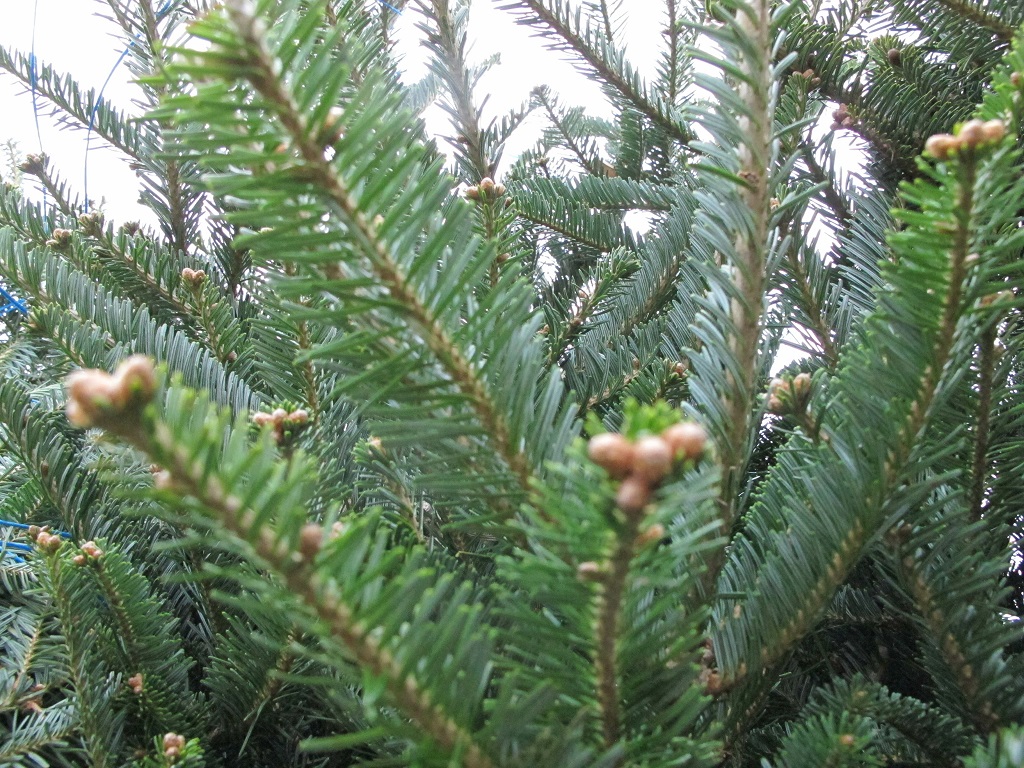
Fraser fir branches are one of the best greens to begin the project. Since there aren’t any growing here, I used bottom branches from a freshly cut Christmas tree purchased at Hawk’s Market in Elkin. Fraser fir lasts a fairly long period of time without much shedding. Trees are pruned while they’re growing, causing very dense growth. To make ornaments hang freely, you can thin out some of the branches and use them in your evergreen swags.

Garden centers, farmers’ markets, florists, and craft shops stock various cut greens and supplies for creating swags, start to finish.

Experiment with unconventional sources of material, such as eucalyptus, bay leaves, and red- or yellow-twig dogwood stems. I’ve used a few leaves of variegated liriope or acorus tied in bunches and wired into arrangements.

You might prefer artificial materials, including the greens. Fresh poinsettias or magnolia blooms wouldn’t last on a swag, of course, but craft shops have “picks” in a wide range of styles and colors. They might or might not hold up to outdoor conditions, depending on what they’re made of. Handled carefully, silks and flocked picks can last for a few seasons.


Berries and Seedpods
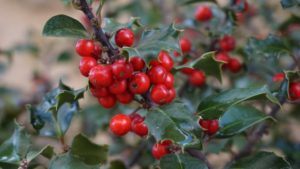
 

holly with red berries

One of many hollies.


Use rosehips, holly berries, nandina berriesacorns from oak trees, nuts, and small fruits for ornamentation. Birds might help themselves to the berries.

Seedpods offer another dimension in decorating your evergreen swag. Siberian iris grows woody seedpods on strong stems. Use them in their natural state or spray paint them in the color of your choice.

Grow everlastings (several species of flowers whose dry seedpods hold up in winter arrangements) in the garden during the summer season. Scabiosa stellata and strawflower are flowering annuals with stiff papery seedheads.

Although rather delicate, seedpods of biennial money plant, also called honesty (Lunaria annua), can be used in protected locations or with indoor arrangements. Clean the seedpods by gently rubbing between your fingers, removing the outer coverings and revealing the shimmering membrane inside.


Cones

Gather pine cones from your property, or perhaps you have some tucked away in your craft corner. They last for years if kept dry. This year, I used the ones that had been in storage for a decade.

Various evergreen species grow cones in different sizes, shapes, and shades of brown. Some have cute little cones ½-2″ long (hemlock, cypress) for smaller projects. Many pine species are 3-8″ long, and one—Coulter pine—has gigantic pine cones around 14″ long. Some have needle-sharp tips or sticky sap, so handle carefully.

Pine cones are the female reproductive parts of pine trees; the males generally are smaller and shed all that wind-blown pollen many months before pine cones mature. Seeds provide food for wildlife, and delicious pine nuts (“pignoli”) are harvested from about 20 species growing around the world.

When pine cones get wet, their scales close tightly. As they dry out, they begin opening up once again (photo, above).


Other Materials For the Evergreen Swag

In addition to the plant materials, you’ll need:

  • a protected work surface
  • pruners
  • scissors
  • pliers
  • old scissors or wire cutters
  • Wilt-Pruf, a biodegradable antidesiccant (optional, but recommended)
  • a sprayer bottle
  • a bucket for preparing a large quantity of greens
  • a large plastic trash bag or an old towel
  • florist’s paddle wire—I use 26 gauge and the thicker 22 gauge (wire will break down in the environment). Use pipe cleaners or zip ties for the loop and the bow, if you prefer.
  • ribbon with wired edges. Outdoor ribbon holds up to the weather.
  • sap/adhesive remover (Goo Gone or Goof Off). Read the label.
  • ornaments, bells, or other embellishments



Step #2: Prepare the Greens


For the swags I made to sell at the farmers’ market, the longest stems from the Fraser fir Christmas tree measured about 30″. Use short stems for smaller swags and centerpieces. Trim off any unusable parts.

During mild weather, set up an area outdoors, if possible, to cut the greens and when using Wilt-Pruf. Prepare a sprayer bottle by adding Wilt-Pruf to the water (read the label.) The dilution rate for Wilt-Pruf to water is 1:10. Although the solution looks like diluted milk, it will dry clear. When it dries, it coats foliage with a waxy film which holds water in the plant tissues. This helps the greens last longer, especially when used indoors. (I’ve used it in a colder climate for evergreens planted in autumn to protect them from drying winds.)

Place the greens in a single layer on the plastic, and spray thoroughly. Turn them over and spray again. Agitate the solution periodically. The goal is to cover all surfaces with the solution. Let the greens dry outside on the plastic or the towel (or the lawn), and shade them from warm sun.

If you’re making a few arrangements, fill the bucket partway with the Wilt-Pruf solution. Dip the greens a few times into the solution. Let them drip, then lay them out to dry.

I’ll spray leftover solution on the tree itself, letting it dry before bringing it indoors and adding lights and ornaments. Wilt-Pruf kept in the sprayer will gum up the works, so rinse thoroughly with soap and hot water. Wash soapy water and then clear water through the sprayer.

If you don’t use Wilt-Pruf, soak the greens in cool water for a few minutes before working with them. It’s a good idea to mist the greens now and then, even after completing the project.


Step #3: Layer the Greens


Reserve the fullest, longest fir stem for the base of the evergreen swag. Then layer on 2-4 more stems, each one a little shorter than the previous one. This gives the appearance of depth rather than looking two dimensional.

Adjust the stems so the swag doesn’t show large gaps when you look through it. Leave some of the smaller twigs near the base of the stem out of the loop (next paragraph), so the swag doesn’t look so constricted. Look for a balance of foliage on the left side and the right side. If needed, add another stem or two, or cut off a wayward twig.

Cut a piece of the 22-gauge (thicker) wire about 12-14″ long. Wrap it very tightly 1 or 2 times around the base of the stems, 2-3″ from the ends. Twist the wire ends tightly together 5-6 times to secure it. Use the ends to create a loop and twist the ends again several times to hold it together. Give the loop a tug to test it.

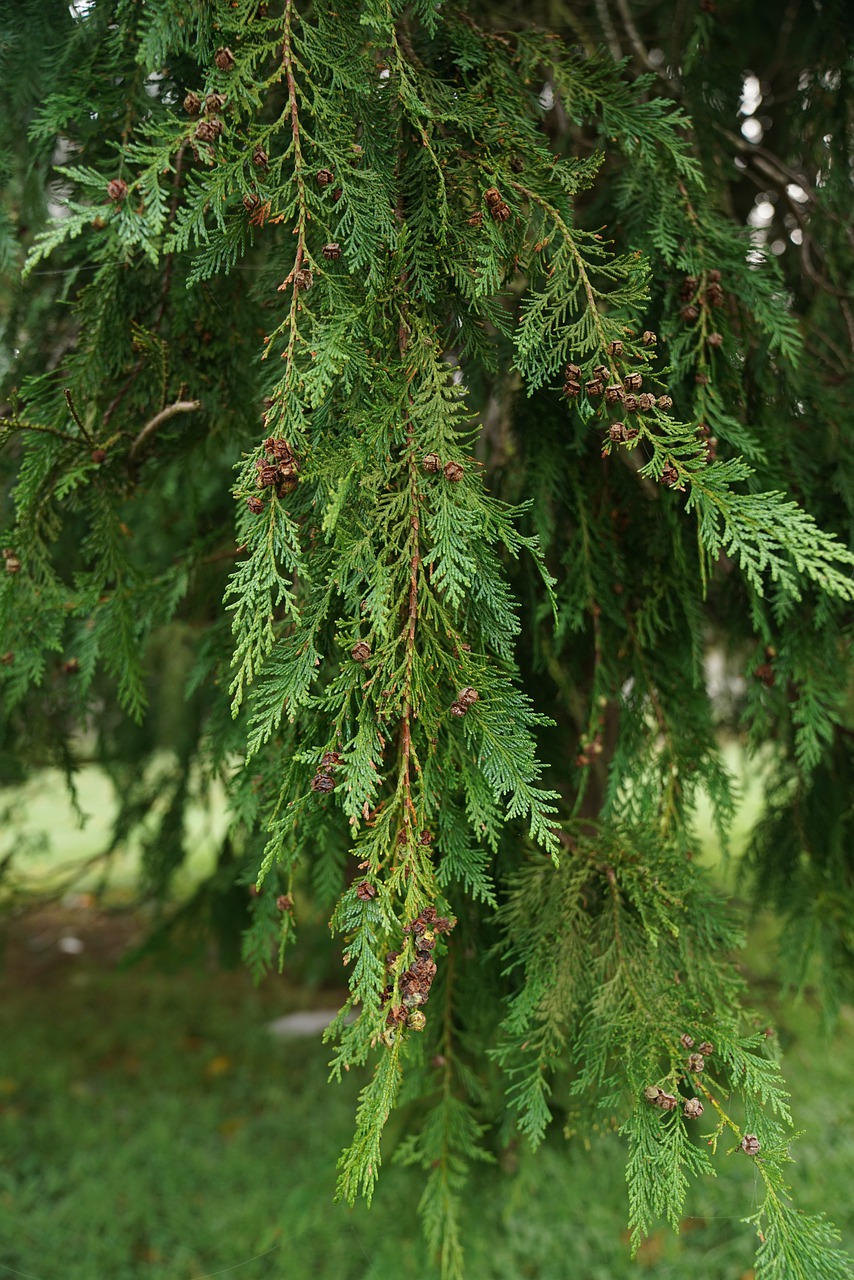
An alternative to using fir is to substitute long, softly flowing branches of cedar. Port Orford cedar (Chamaecyparis lawsoniana), and incense cedar (Calocedrus decurrens) with its tiny yellowish cones, are elegant, fragrant greens. Add a bow with long tails for a simple arrangement.


Step #4: Add More Layers Of Greens On the Swag
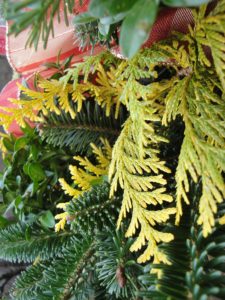
 

evergreen swag featuring golden chamaecyparis

Colorful foliage of Chamaecyparis ‘Vintage Gold’ with boxwood and Fraser fir.


Adding greens with different textures or colors brings complexity to your design. Add one or a few sprigs of white pine, cypress, or cedar, and bushy boxwood stems near the top. Use the 26-gauge wire to secure the new greens near the top of the fir stems.

Consider color echoes when designing your swag. For example, a piece of yellow conifer can pick up the gold in the ribbon or the ornaments you plan to use. Red berries echo the red in the bow.

Once all the greens have been secured, trim the cut ends to the same length, if desired.


Step #5: A Beautiful Bow For Your Evergreen Swag


Do you like the Victorian style, an organic woodsy design, or modern glitz? You can find ribbon to reflect any style for this year’s decorations. Look for a ready-made bow at the florist shop or garden center if your skills are not so advanced. Maybe someone can offer suggestions and make one for you while you wait.

Use either gauge wire to tie the bow tightly together and onto the evergreen swag near the top. After the rest of the elements have been added, you can fluff open the loops of the bow. Wired edges in the ribbon help everything stay in place, and sturdy ribbon (more substantial wire) is required in the breezy outdoors. Save your favorite bows by stuffing the loops with tissue paper (optional) and carefully placing them in a plastic bin during the off-season.

There are plenty of YouTube videos showing how to make bows. With a little practice, you can master this part of the project, too. Here are 2 of them, from Welcome to the Woods and Maymay Made It Crafts:


Step #6: Pine Cones 


Choose 3 similar pine cones, and place them on the swag below the big bow at different levels.  It’s okay if they’re not exactly the same size. I prefer an uneven number of elements, but that’s a personal choice. You might prefer 2 pine cones or none at all.

If you like the placement, cut a 12-16″ piece of the thinner wire for each pine cone. It might be easier to poke the wire through from the back of the swag, around a sturdy stem. Then, pull the ends together around the pine cone, between the scales, about 1/3 of the way from the top of the cone. Pull the wire tightly and twist the ends together to secure it. Cut off the excess wire or tuck it into the greens. The other option involves wrapping the wire around the pine cone and then wiring it onto the swag.

Does it all feel pretty stable? If it doesn’t, it might not hold together in the wind and rain. See if you can pull the wires tighter, twisting the excess at the back of the swag. Using pliers to tightly twist the wire might help.

If the swag swings around in the wind, shorten the loop or wire the lower part of the swag to the support. If necessary, screw 2 thin pieces of wood together (like a “T”), and build the swag on that.

Evergreens have sticky sap. Some gardeners use gloves when working with greens. Although it’s not recommended to use on the skin, I use sap remover to clean my hands and tools. Wash with soap and water immediately afterward.


Step #7: Finishing Touches For the Evergreen Swag

 

centerpiece with tiny gift box garland

Little gift boxes on a table centerpiece. So cute.


This is the time for adding those finishing touches that individualize your project. Whether it’s a small brass horn, inexpensive Christmas balls or bells, small red “faux” apples or berries—or real ones. Get creative! In the photo above, I used a garland of tiny light blue gift boxes on the neck of this blue ceramic pot for an indoor centerpiece. These are made of paper and would not last long in the rain.

Deep, rich colors are best observed up close. From a distance, though, deep green evergreens and a burgundy bow look very dark. If you want to keep it there, you can lighten up the swag with bright red bow or a colorful plaid. Add frosted pine cones (painted white on the tips of the scales) or shiny ornaments. Some variegated English holly could do the trick or shine a spotlight on the area.

Maybe you’d like to remember your trip to Mardi Gras and drape some colorful beads on the swag. A string of battery-operated tiny fairy lights. Laminated bits of photographs or Christmas cards. Sea shells, painted acorns, a cool piece of driftwood… See what’s offered in craft shops and stores specializing in Christmas decorations. There are so many fabulous materials available for your evergreen swag! Get the family or friends involved and have fun with this easy project.


Celebrate the Winter Solstice, Merry Christmas, Happy Holidays!


Return to the top

Mabry Mill On The Blue Ridge Parkway


Mabry Mill


Mabry Mill

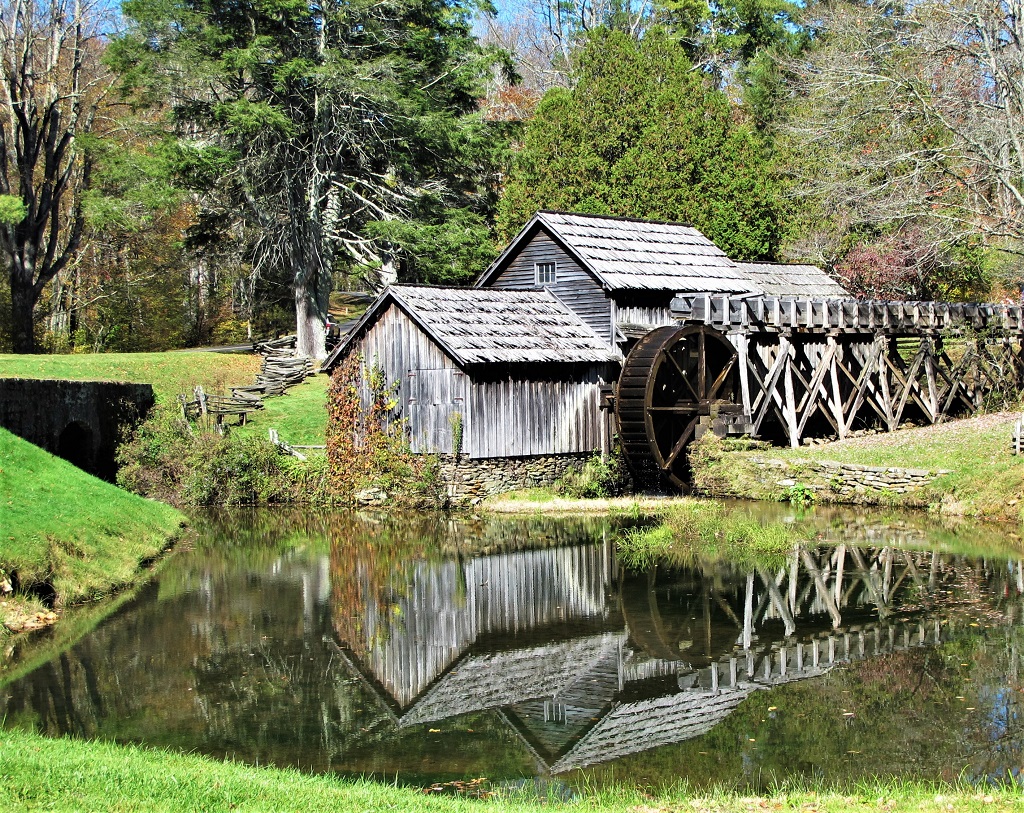
Mabry Mill is among the most photogenic stops on the Blue Ridge Parkway.


Last month, a leisurely drive took me to Mabry Mill in Meadows of Dan, Virginia. It was an easy detour from a few of those towns in northern North Carolina I had been exploring. During this pandemic, with social distancing in mind, day trips are pleasant diversions. My mother and I called them “mental health drives”.

I’ve spent the past few months looking for property with more sun, more space, and no homeowners’ association. The goal: large gardens for pollinators, butterflies, and birds. Raise greens and vegetables, and maybe a dog. Fix it up while working part-time? Open a little plant shop? The possibilities are exciting! With the vaccine apparently a likelihood, maybe more properties will soon come to the market.

For years, the western part of North Carolina was the location of choice. But, for the past month or so, I’ve widened the search to include counties in the northern part of the state. Lovely area, beautiful terrain, home to several vineyards. This is where people waved from their riding mowers as I drove by.


Getting to Mabry Mill


driving the Blue Ridge Parkway

Driving along the Blue Ridge Parkway.


The mill is located at milepost 176.1 (watch for signs) on the Blue Ridge Parkway and is administered by the National Park Service. This is a truly memorable drive and part of the National Scenic Byways system. The Blue Ridge Parkway winds 469 miles through the southern Appalachian Mountains. Elevations range from 649′ near the James River, Virginia, up to 6053′ on the slope of Richland Balsam Mountain (milepost 431) in North Carolina.

The Parkway connects the eastern side of Great Smoky Mountains National Park, which straddles the border between Tennessee and North Carolina, and Shenandoah National Park in Virginia. It continues northward as Skyline Drive, from where it intersects with U.S. Interstate 64 near Afton VA, to Front Royal VA. The Blue Ridge Mountains are part of the larger Appalachian Mountain chain.

But don’t expect to whiz by at interstate speeds; this is a slower road, with over 380 stopping points. There are many intersections along the faster U.S. or state highways where you can pick up a local stretch of the Blue Ridge Parkway. And gas up the car before reaching the Parkway because there are no filling stations on this road.


Caution

Keep in mind that people live and work here, so there might be farm vehicles on or crossing the Parkway. And check with the National Park Service to see if hazardous conditions or inclement weather might have closed parts of the Parkway.


Camera’s Ready


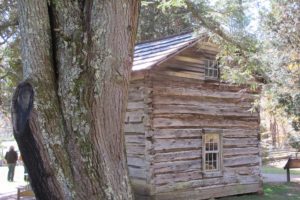
Trails cabin

Trail’s cabin.


Very picturesque. The entire area presents scenes of astonishing beauty, with views of pastoral landscapes, deep valleys, and mountain vistas. If you need to get away from it all, come to the Blue Ridge Parkway.

The “blue” in Blue Ridge derives from the Cherokee Indian description for the mountains, an area they and their ancestors have inhabited for over 10,000 years. Their term translates to “land of blue mist”. Isoprene compounds (hydrocarbons) are released from and protect the trees in hot sun, cloaking the distant hills in a bluish haze. The Mohawk, Iroquois, and Shawnee also inhabited this mountain chain, with the Cherokee centered around the Great Smoky Mountains at the southern terminus of the Blue Ridge Parkway.

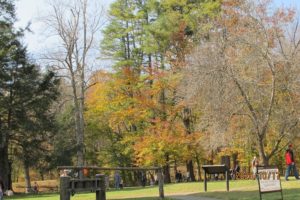
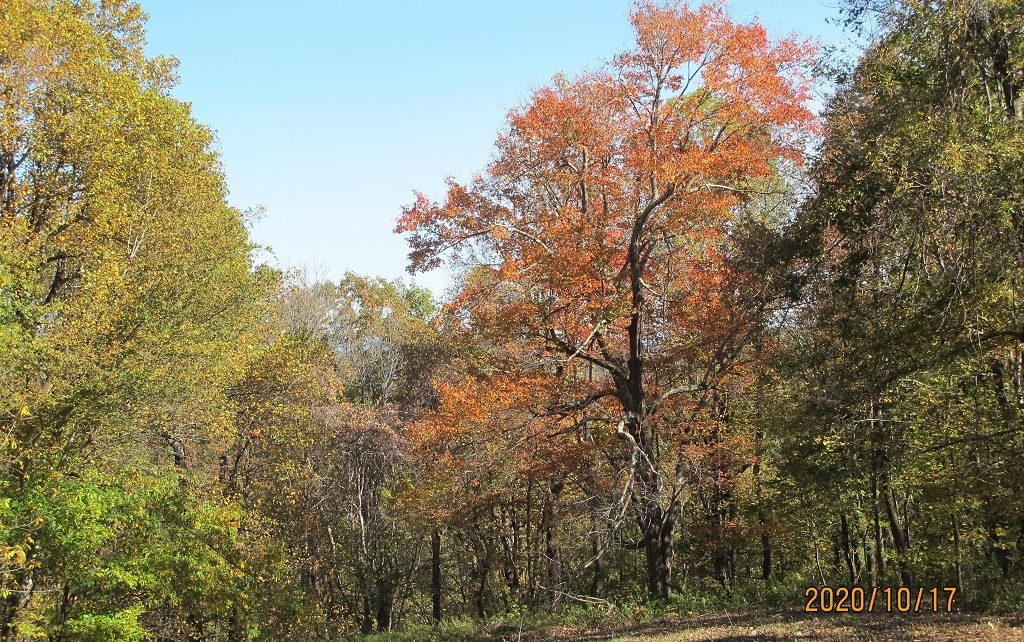
This was my second visit to Mabry Mill, and I had a particular goal in mind: pictures of fall foliage! Although there was some color in the trees and shrubs, the bright reds and oranges of sourwood and maple, and the glowing gold of hickory, had already passed. A gentleman in the restaurant informed me that, just a few days prior to my visit, a wicked wind had stripped much of the fall color from the trees.

Photographers after the perfect shot of the mill and its reflection waited for the pond water to stop rippling after a young boy had stirred it up. But no one complained. He was having a great time! A few of us exchanged “Oh well” glances, and made sure we were positioned to capture the moment.


Mabry Mill grounds

Entering the grounds of Mabry Mill.


Building Mabry Mill


Edwin B. Mabry and his wife, Mintoria Elizabeth (“Lizzie”), had acquired the property and water rights around 1905, and finished construction of the gristmill three years later. By 1914, the gristmill, the sawmill, and blacksmith and woodworking shops were providing services for residents living in the area. A sorghum evaporator and the remains of the whiskey still also can be seen.

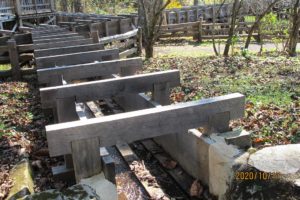
Mabry Mill flume

A flume channeling water toward the mill.

Mabry built a system of concrete tributaries, which collected water from streams above the mill, and directed it toward the wooden flumes (photo, right). Those flumes, in turn, channeled water toward the race, which fed water to the overshot waterwheel.

Because the water flowed slowly, the gristmill (called a “slow grinder”) ground corn with less friction, preventing the grain from overheating and burning. This earned the Mabrys a reputation in the region for producing products of excellent quality.

A few years after the mill and the shops were operating, around 1918, the Mabrys built their new home. It has since been replaced with a wooden structure once owned by the Marshall family (photo, below). The house on the site was built in 1869 near Galax, and donated to the National Park Service in 1956.


appalachian house

The old Marshall house.


The National Park Service

The Parkway’s construction began in 1935 at Cumberland Knob, milepost 218, just south of the border between North Carolina and Virginia. In 1938, two years after Ed Mabry died, the National Park Service purchased Mabry Mill.

Restoration of the historically significant mill and other buildings was completed in 1942. By then, gristmills had been rendered obsolete by more efficient large-scale milling operations and transportation networks that shipped products throughout the country.

The site is home to the restored mill, the wooden residence, and the workshops. This property includes short walking trails, a restaurant, and a gift shop, where you can pick up publications and maps. The restaurant closes for the season in early November, so check first if you’re hungering for their famous pancakes.

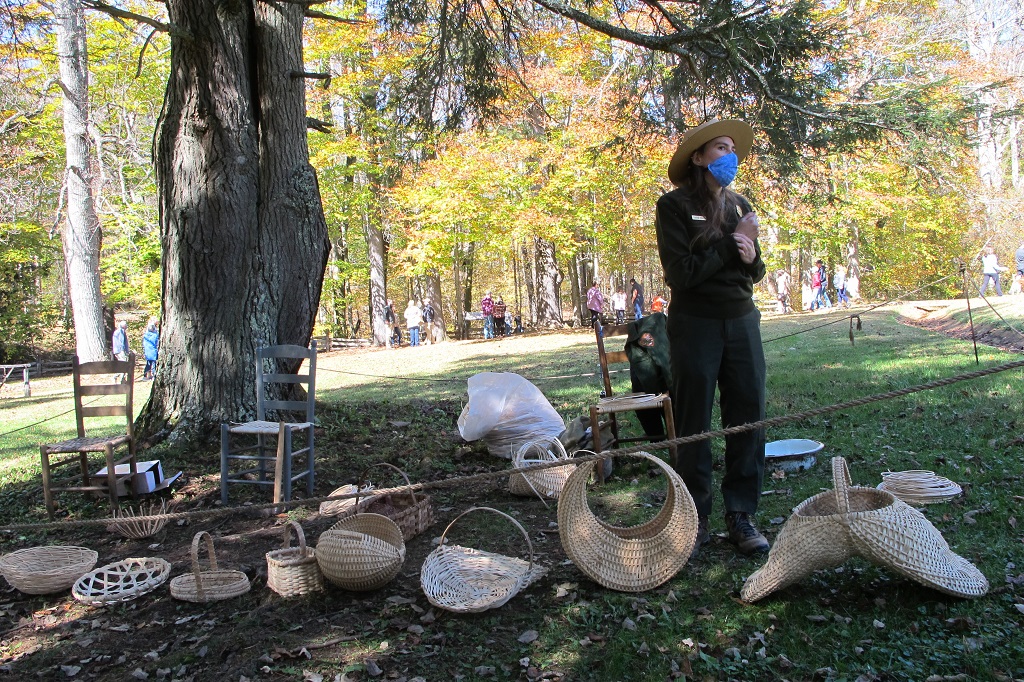
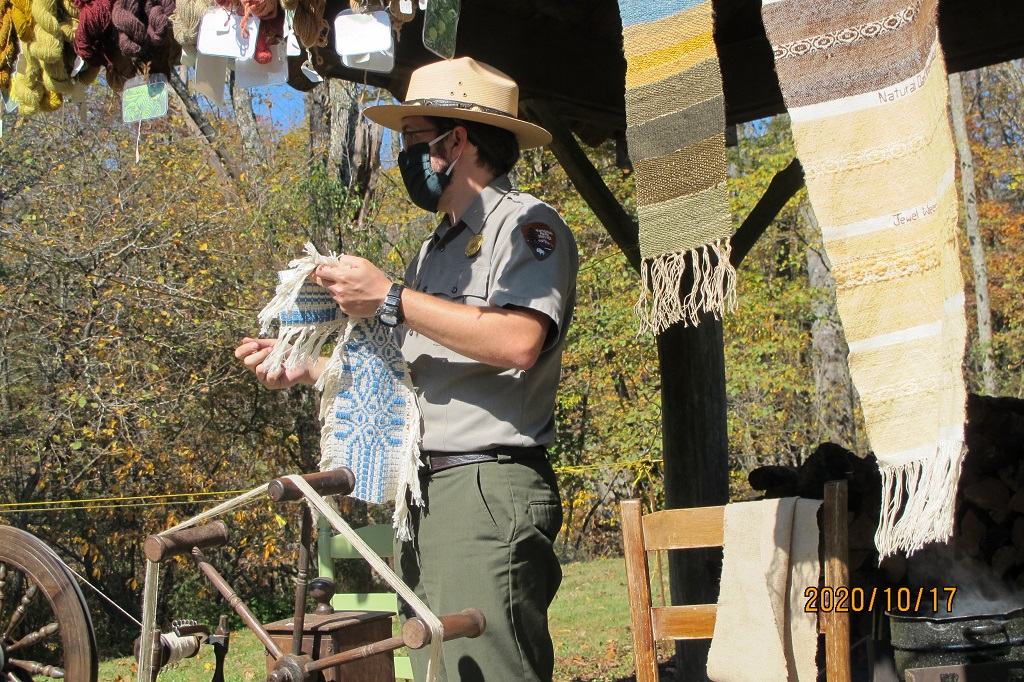
On certain days through the year, the National Park Service conducts craft demonstrations recounting ways of the past. They also bring in live musical performances to entertain visitors. The day I was there, Park Rangers Chris and Tabitha welcomed questions and shared information about how residents met the many challenges presented to them at that time. Each year, hundreds of thousands of travelers from around the world stop at the mill.


Seeing how others lived just 100 years ago gives me renewed appreciation for our more modern conveniences. Now that my mother has passed, I enthusiastically look forward to life in a more rural location…one with those modern conveniences.


Farther Up the Road


yellow flowers of witch hazel at Mabry Mill

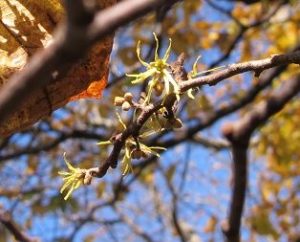
Native witch hazel, Hamamelis virginiana, in bloom at the mill.

In no rush to get home, I drove for another two hours or so, northward on the Blue Ridge Parkway. There was so much to see; each stop had its own unique view or plant life or structure to learn about. Trail’s Cabin, Shortt’s Knob Overlook, Rocky Knob, Rakes’ Mill Pond…and that’s only one small segment. Informative signs provide more details at the various sites.

“There’s something for everyone” along the Blue Ridge Parkway. If you’re curious about the history of a region or its natural wonders, if you enjoy photography or painting, bicycling or walking the trails, it’s all here. Check before you go to see when campgrounds, visitor centers, and picnic locations will be open.

Within a few miles of the Parkway are hundreds of attractions, including museums, folk art centers, performance theaters, lodging, restaurants, water sports, caverns, and fishing opportunities. Enjoy the friendly vibe or the local craftwork in any of the quaint shopping districts not far from the Parkway.


Biodiversity


pink thistle flowerThe Parkway accommodates tremendous biodiversity. According to one pamphlet, 159 kinds of birds nest along the Blue Ridge Parkway, and dozens more migrate through it. 130 species of trees, 1600 kinds of plants, and 74 kinds of mammals (including bears) live here. Near one of the gorges, a sign indicates that 25 species of native ferns inhabit that area.

More than 50 species of threatened or endangered plants occupy terrain around the Parkway, so tread respectfully.

Among the oldest land formations on earth, the Appalachians got their start 1.1 billion years ago. From that time up to around 250 million years ago, European and North American tectonic plates collided, pushing up this mountain range that stretches from Pennsylvania to Georgia.

The Appalachians once were as high as the Rocky Mountains, but erosion slowly reduced their elevation. Now, the tallest mountain east of the Mississippi River is Mount Mitchell, reaching 6684′, near milepost 350, west of Old Fort NC. These cooler mountain tops support evergreen spruce-fir ecosystems, also found in the northern United States and Canada, while mixed hardwood forests occupy the lower elevations.

As rivers and streams shaped the surface of the land, pockets of territory became isolated from each other. Smaller “niche” ecosystems evolved, each with its own assortment of organisms. Geographic isolation and a great deal of time are the primary drivers behind speciation. One kind of salamander might inhabit a particular streamside location, but not occur anywhere else in the world, not even over the next ridge.


From the first superintendent of the Blue Ridge Parkway, Stanley Abbott:

“A parkway like Blue Ridge has but one reason for existence, which is to please by revealing the charm and interest of the native American countryside.”

Modern living continues to extract more land for housing, transportation, and commerce. But, with conservation of natural habitats, the National Park Service has protected vulnerable ecosystems for wildlife and preserved the history and character of the region for all to see.


If you’d like to read another article about gristmills, this one at The Farm In My Yard describes one that is still working in North Carolina, and dates from pre-Revolutionary War days: The Old Mill of Guilford. (Try their gingerbread mix!)


2020: The Year That Wasn’t?


pumpkin pie

Kim’s pumpkin pie.

Well, it’s almost over. We have the holidays to look forward to, right? Oh wait; here, we can’t gather indoors in groups numbering more than 10… Some areas are discouraging any kind of indoor celebration. I wonder what most American families will do.

There will be turkey roasting in the oven while freshly baked pumpkin pies cool on the counter. We’ll celebrate Thanksgiving (400th year since the Mayflower) and Christmas, although new traditions—new ways of gathering—might be born. (With respect due the native Indian cultures, I acknowledge that not everyone celebrates this day.)

How will your holidays look different this year?

Such misery this pandemic has caused many millions of us: jobs lost, loved ones lost, businesses closed, weddings postponed, school children missing out. The good news on the radio this morning announced another pharmaceutical company that has developed a vaccine for the virus. If it’s safe and effective, sign me up.

If all we can do is gather outdoors, then so it shall be. No problem; I’ll gather the camera and some snacks, and be off to some not-too-distant location…somewhere in nature, which, for me, never fails to rejuvenate.

This has been a difficult year for all of us, all around the globe. Good days are on the horizon, though, and I wish you happiness and good health. There’s still so much to be grateful for. Let’s celebrate that.


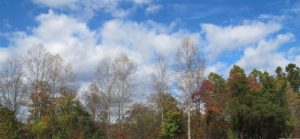
trees and sky, North Carolina

Northern North Carolina.


Return to the top

Toffee Cookies: You Must Try These!


Time for Toffee Cookies!


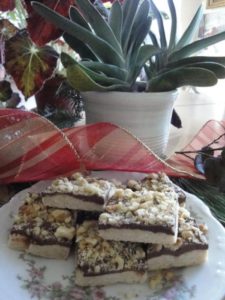
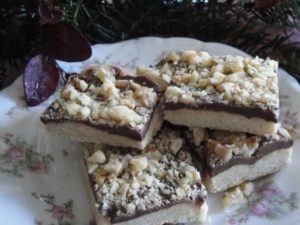
The cookie from Kim’s Kitchen that is most frequently requested: Toffee Cookies! These delicious cookies were a Christmas tradition in our family.

My father worked with a photographer in Englewood, New Jersey, after returning home from serving in the U.S. Navy during World War II. His employer’s wife gave the recipe to my mother, sometime in the 1940’s.


toffee cookies

A Christmas favorite: Toffee Cookies.


Ingredients For Toffee Cookies


  • 1 cup light brown sugar, lightly packed
  • 1/2 pound cold butter
  • 1 egg yolk
  • 1 teaspoon real vanilla extract
  • 2 cups all-purpose unbleached flour


Added After Baking the Toffee Cookies

  • 10 (+ or -) ounces milk chocolate. I use 7 ounces Hershey’s milk chocolate plus 3 or 4 ounces Symphony milk chocolate. Use any kind of chocolate you prefer.
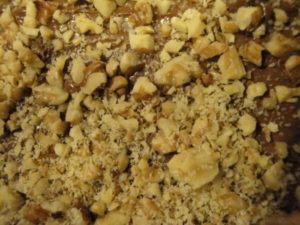
  • 1 to 1 1/4 cups chopped walnuts


The Process


  • Preheat oven to 350°F.
  • Cream butter and sugar in a stand mixer until well-mixed but not overdone.
  • Add egg yolk and vanilla. Mix, and scrape bowl.
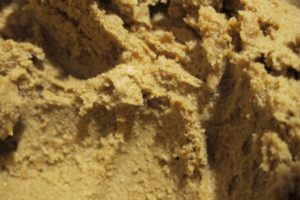
  • Add flour in batches. Mix well, scraping bowl. Dough will be thick.
  • Spread on parchment-paper-lined cookie sheet that has a raised edge. I use an approximately 10″ x 15″ jelly roll pan, which is thicker than cookie sheets and has been in our family for decades. Use a butter knife and your fingers to spread the dough; this is the hardest part. The palms of your hands can flatten it somewhat; it will flatten more in the oven.
  • Bake 20 to 25 minutes, or until the top and edges begin to show a light golden brown color. Watch it carefully. One minute too long will result in a crispy cookie, and everyone in my family, except Mother, likes it chewy. Remove from oven.


Now, the Toppings

  • Break up the chocolate into pieces. Before the toffee cools, place chocolate on top. It will melt on the hot toffee. If the chocolate doesn’t melt, place cookie sheet back into the warm oven, turned off, but monitor it closely. Various brands of chocolate have different melting points. Use a butter knife to smooth the chocolate over the toffee.
  • Sprinkle with chopped walnuts.
  • Allow the toffee to cool before cutting into squares. This could take a few hours at room temperature. If the chocolate is still soft, your toffee cookies will not cut neatly!
  • Cut with a long-bladed knife into 1 1/2″ squares. Place in a cookie tin or plastic container, lined—and layers separated—with wax paper.


More dessert recipes from Kim’s kitchen:

Almond Crescents

Cream Cheese Pound Cake

Gingersnaps


Return to the top

Kim’s Gingersnaps: Adding Spice To Your Life


Kim’s Gingersnaps


Here’s another cookie recipe that’s a family tradition during the holidays, but we enjoy them at any time of the year. A tiny few in our family prefer them baked until crispy. Most of us, however, like them soft inside. Gingersnap or gingersoft—your choice. This recipe has been adjusted a bit from my mother’s original recipe.


gingerbread tiny houses

Gingerbread tiny houses.


Ingredients For Making Gingersnaps


  • 1½ sticks butter
  • 1 cup white granulated sugar
  • 1/4 cup unsulphured molasses
  • 1 large egg
  • 2¼ cups all-purpose unbleached flour
  • 2 teaspoons baking soda
  • 1/2 teaspoon salt
  • 1 teaspoon ground ginger
  • 1/2 teaspoon ground cloves
  • 1 teaspoon ground cinnamon—I use just a bit more of the ginger, cloves, and cinnamon for extra “warmth”. Mix these 6 dry ingredients together in a bowl.
  • Very fine sugar in a separate bowl, for coating formed cookie dough


Santa, taking a cookie

One of Santa’s favorites.


The Process


gingersnaps dough

Finished cookie dough.

  • Mix butter and white sugar in the large bowl of a stand mixer. Don’t over-mix it.
  • Add the molasses. Mix well, scraping with spatula.
  • Add egg, and mix.
  • Gradually add and mix in the flour-spice mixture. Scrape with spatula.
  • After it’s all mixed together, refrigerate the covered dough for at least a couple of hours.
  • Preheat oven to 375°F or a little lower.
  • Line 1 or 2 cookie sheets with parchment paper.
  • Now that the dough is cool, spoon out enough dough to make a 1″ diameter ball. Roll it between the palms of your hands to form a sphere. Place balls, in batches, in the very fine sugar to coat. Roll them around and/or spoon the fine sugar over the dough.
  • Place on cookie sheets, about 3″ on center, and bake for about 8 minutes. They might need less time or a minute more, depending on your oven. In this electric oven, I put a pyrex dish of water over the “hot spot”, and bake one large and one small cookie sheet at a time. To avoid hot spots, perhaps baking one sheet at a time will work better.
  • Lay the gingersnaps out on the wax-paper-covered counter to cool somewhat. If they’re placed in cookie tins before they have fully cooled, they will stay a little softer. It takes almost no time to go from soft and luscious to crispy, so watch them carefully while baking and while cooling.
  • Wrap cooled cookies in foil and a plastic bag to freeze the excess.


*   *   *   *   *   *   *   *   *


When Brynn and Logan were little, I shaped some of the dough into gingerbread men, just for them. A little ginger, by the way, can settle an upset stomach and makes me feel just a bit warmer. How do you like them—crispy or soft? Either way, enjoy!


gingersnaps, cookies

Soft gingersnaps fresh from Kim’s kitchen.


Here are links to more of Kim’s dessert recipes:

Toffee Cookies

Almond Crescents

Cream Cheese Pound Cake


Return to the top

Our Favorite: Pumpkin Pie!


If It’s Thanksgiving, There Will Be Pumpkin Pie


pumpkin pie

Kim’s pumpkin pie.


Here’s a recipe for homemade Pumpkin Pie. Those few Thanksgiving guests who say “No thanks” might start asking for seconds once they’ve tried it. We’ve been making this pumpkin pie for generations. And, yes, it does call for home-made crust.


The Crust For Pumpkin Pie


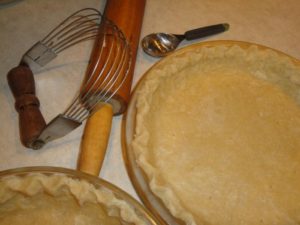
You’ll need wax paper, a pastry cutter, a rolling pin, and counter space. This recipes makes 2 pies, and the crust and filling bake at the same time. I use clear Pyrex pie plates. Preheat oven to 375°F.


Ingredients

  • 2 cups all-purpose unbleached flour, plus a bit more for decoration on top of filling
  • 1 teaspoon salt
  • 1/2 cup Crisco all-vegetable shortening. You can substitute 1 or 2 tablespoons butter for some of the shortening, but any more than that and the crust will be less flaky. Use the very scientific “water displacement method” (remember Home Ec?) to measure the shortening. (Fill a 2-cup measuring cup with 1 1/2 cups cold water. Using a butter knife, add the shortening to the water, and submerge it until the water comes up to the 2-cup level. Drain water.)
  • 5 tablespoons cold water


The Process

  • Add flour to a medium size bowl.
  • Stir in the salt.
  • Add shortening.
  • Add water evenly over the flour.
  • Use a pastry cutter to work the dough, cutting into and distributing the ingredients evenly, but do this as quickly as possible. For a really good crust, work fast, work cool, and don’t overwork the dough. Dough will stick inside the pastry cutter; use the knife to clear it several times as you cut the dough. If it feels too dry (“floury”) and you’ve been cutting the dough for a while, add a little more water or shortening. Too much water and overworking will make the crust hard; shortening makes it flaky. It’s okay if you see tiny blobs of fat mixed in the dough.
  • Gather a handful of dough and squeeze it. If it stays in a clump, it’s ready to be rolled. If it’s very sticky, add more flour.
  • Divide the dough in half.
  • Cut 4 pieces of wax paper. Lay 1 piece on the counter.
  • Move half of the dough to the wax paper. Ball it up in the center. Cover with another piece of wax paper.

Roll It Out

  • Use the rolling pin to flatten the dough all the way to the edge of the wax paper. Invert a pie plate over the dough to see if it’s wide enough. Dough should extend about 1 1/2″ around the pie plate.
  • Now, carefully remove one sheet of wax paper. The knife will help loosen an edge.
  • Lift the bottom paper and lay the dough into the pie plate. Remove the paper.
  • Press the dough into the pie plate, in the angle and up the side.
  • Roll down the edge of the dough to the top of the plate.
  • Form the zigzag top edge of the dough using the index finger and thumb of one hand, and the other index finger.
  • Use a fork to pierce the dough in several places on the bottom and sides.
  • Repeat for the second pie.


pie crust

Pie crusts.


The Filling For Pumpkin Pie


Ingredients

  • 4 tablespoons butter
  • 1½ cups sugar
  • 2 large eggs
  • 29 ounce can Libby’s 100% pure pumpkin (no spices added)
  • 1 teaspoon ground ginger
  • 1 teaspoon ground nutmeg
  • 1½ teaspoons ground cinnamon. (For the spices—ginger, nutmeg, cinnamon—I like to add a bit more than the recommended amount.)
  • 1 teaspoon salt
  • 2¼ cups milk. We use 2%.


The Process

  • Preheat oven to 375°F.
  • Mix sugar and butter in the large bowl of mixer until evenly mixed; we like our Kitchen-Aid stand mixer.
  • Add eggs, pumpkin, spices, and salt.
  • Add milk last. Scrape bowl and attachment with spatula a few times while mixing.
  • Add filling to the 2 uncooked crusts.
  • Leftover dough, if there is any, can be shaped into a turkey or a pumpkin and placed on the filling.
  • Bake for 1 hour. Check the pies about 10 minutes before they’re done. If your oven has hot spots, turn the pies halfway through cooking so the crusts bake evenly.
  • Let them cool.
  • Enjoy, and Happy Thanksgiving!


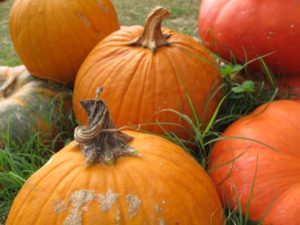
orange pumpkins union market


Return to the top

Trick-or-Treaters Will Like This Halloween Twist


carved pumpkins


Halloween Is Coming Up


I’d like to relate the story of a 29-year tradition that took root in our family. But first, some background.

After leaving Morgantown, West Virginia, we purchased our first home in Monrovia, Maryland. The first order of business was to build a greenhouse for the vegetable transplants, succulents, and other houseplants that I sold to florists and garden centers, and at the occasional plant sale held in the front yard. This was several years before the phenomenal rise in popularity of the farmers’ markets.

Fast-forward a few years to September, 1984, and we were on the move again, this time to a smaller property in Rockville MD, 30 minutes south. All the light fixtures and other horticultural paraphernalia came with us…along with our young daughter, Brynn, and our first Rhodesian ridgeback, Aureus.

The plants…hundreds of them!…found temporary quarters in every window or in the back yard, until the dozen or so 4′ fluorescent light fixtures were set up in the basement. But I didn’t need all the duplicate plants for the business at this time of the year, and they could easily be propagated if I did.


bars of chocolate for trick-or-treaters


Returning home with bags of little Butterfingers, Mars bars, Nestle crunch, and Smarties, I had a lightbulb moment.


What if we offered plants to the trick-or-treaters?


My husband, at the time, said, “That’s un-American.” But I wasn’t going to stop offering candy altogether. I intended to give trick-or-treaters a choice!

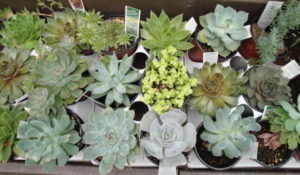
Despite doubts, I went ahead with the plan. A folding table under the porch lights held a few flats of small thornless succulents (like those in the photo, below), spider plants, and Moses-in-the-boat (Rhoeo spathacea) in 2″ or 3″ pots. White rope secured to the shrubs guided the trick-or-treaters along the sidewalk to the front door, and prevented shortcuts through the garden.


Assorted succulents


Spooky noises from a tape cassette echoed around the foyer, as glow-in-the-dark spiders crawled all over my t-shirt. And the great plastic pumpkin brimming with treats sat inside, on a bench by the door. Brynn went out trick-or-treating with her Dad; a few years later, her brother, Logan, would join them. Okay, we’re all set.


The First Knock on the Door


porch light

In our neighborhood, trick-or-treating took place during the early evening hours, and participating homes kept their porch lights on. Parents accompanied their young children, or they waited nearby at the curb.

I greeted our first visitors, and followed up with “Would you like a plant or candy?” I think I detected some quizzical remarks under their masks and make-up. After giving a succinct explanation to Snow White, a pair of dice, and a foil-covered cardboard robot, important decisions were about to be made.

“Can we have both?”

“No, you have to choose one or the other. You can have candy, which is gone in a few minutes, or a plant, which can last for years. It’s entirely up to you.”

It often happened that when the first of a group of trick-or-treaters chose a plant, then, like a contagion, the rest of the group followed suit.

trick-or-treaters, basket of candyOnce in a while, the young ones would have a change of heart, and I happily accommodated. It’s never too early to teach kids how to make a decision, but I didn’t want them to go away disappointed…not on Halloween!

The middle-school-aged kids and the few high-schoolers often chose the plants, and were surprisingly fascinated by this new twist on trick-or-treating.

They paused while I gave more detailed instructions for care, and even asked the names of the plants. So, I found small white labels and a Sharpie pen, and wrote common and botanical names for each of the plants.


There’s Always One


Halloween monsterTiny fingers gingerly grasped their bounty. I saved small bags and newspaper for the occasion, but most were content to carry the pots. They excitedly passed them to their parents, who responded with “Thanks! What a great idea!” I was thrilled that they were thrilled.
About 15 years into this tradition, a young boy started coming. His father remained at the curb, chatting with friends and neighbors. When he realized what was going on, the father shouted toward his son, “Take the candy. Take the candy!

The cute little boy handed back the plant he had chosen, and took a couple of chocolate bars instead. In this instance, I was willing to make an exception. He was the only trick-or-treater allowed to take both a plant and candy, and usually traveled alone, so I didn’t have to explain anything to his friends. This happened for a few years, and always played out the same way: “Take the candy!”


A Wider Web


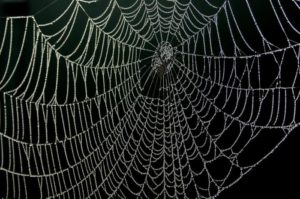
spider web


The morning after the first Halloween, I took my daughter and the dog for a walk around the neighborhood. I noticed a green pot in the gutter, and a plant not far away in the middle of our neighbor’s lawn. That was one of mine!

child watering a plantThen we saw two more down the block in someone’s front yard. After gathering the bits and pieces, I had to decide whether to continue doing this in the future.
Hmmm… Actually, this was a no-brainer. Only a handful of plants were discarded, but dozens were given away! And to miss out on the opportunity to introduce young people to the world of plants? No way!

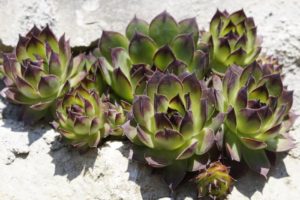
As the years went by, hippies, clowns, and Frankenstein monsters said they had given their plants to Grandma or to favorite teachers. Some kept their spider plants and philodendrons for 5, 6, or 7 years, and some told me that their hens-and-chicks (the hardy succulent, Sempervivum) were spreading all over the garden.

Several mentioned that they had used the story of the “Halloween Plant Lady” as a subject for classroom assignments. I had no idea this little tradition would have such an effect, and for 29 years, trick-or-treaters continued to surprise me.


Second Generation of Trick-Or-Treaters

And then I began to hear tales from our Halloween visitors that their Moms or Dads used to come to the Plant Lady’s house! The parents, former trick-or-treaters, parked their cars down the block and sent their kids up to the end of the cul-de-sac for their own plants!

This tradition lasted until 2013, when I moved to North Carolina. But I will do it again, some day. (***Update***: I did move to a rural town in NC, but, alas…no trick-or-treaters. 12/16/21)


Plants for Trick-Or-Treaters


Hens and chicks, often chosen by trick-or-treaters

Hens and chicks.


Houseplants and Houseleeks

As more children were born into the neighborhood, and into the one across Shady Grove Road, more trick-or-treaters showed up. We used to chuckle about something being in the water… Some years we had only 15 or 20 kids coming to the door, but in its heyday, Halloween brought well over 100 visitors for their treats.

The older children, middle- and high-schoolers, were more inclined to take a plant than the youngest visitors. Some told me they chose plants every year. Over the 29-year period of time, between half and two-thirds of the trick-or-treaters chose plants! Incredible!

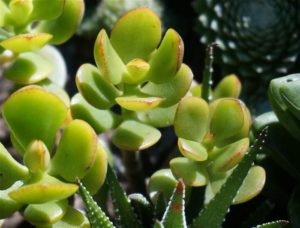
jade plant

Jade plant.

Since I was in the business of propagating and selling plants, with a little forethought, it was easy to come up with enough material. Plants that propagated quickly:

  • wandering Jew (Tradescantia)
  • spider plant (Chlorophytum)
  • Moses-in-the-boat (Rhoeo)
  • Swedish ivy (Plectranthus)

These took a little longer to root:

  • jade plant (Crassula, photo, right)
  • miniature Kalanchoe
  • Philodendron
  • Pothos (Epipremnum)
  • dwarf snake plant (formerly Sansevieria, renamed Dracaena)
  • Hens-and-chicks, also called houseleeks (hardy perennials and always popular)

When I began selling plants at farmers’ markets in 1988, I added herbs and other edibles to the Halloween table. The mere mention of “pizza!” got them interested in oregano. And dinosaur kalekale!—was chosen by some. Parsley and thyme were more favorites, and young basil plants (indoors in warm sun) were given away only on warm Halloween evenings.


Flowering Plants


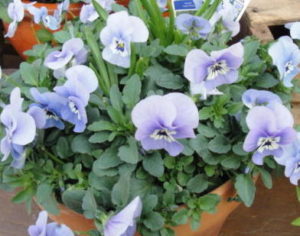
trick-or-treaters loved the blue violas

Blue violas grow in pots or in beds, and love cool weather.


I grew violas (smaller cousins of the pansy) in market packs, and cut them into single-plant sections. Our trick-or-treaters loved the idea of using the flowers in a salad. The plants were especially bright and colorful, and grew well in the cool weather. These biennials were planted outdoors in autumn, went dormant or semi-dormant in winter, and re-emerged in spring.

purple crocus

Crocus.

For March and April home and garden shows, I forced hundreds of pots of spring-flowering bulbs. They were potted up in autumn, and rooted during cool to cold weather, blooming in the spring.

So, I bagged up a few bulbs (Crocus, Puschkinia, Muscari, and the more expensive miniature daffodil ‘Tête-à-Tête’) for the more adventurous, or patient, trick-or-treaters. They loved the fact that these perennial bulbs would come back year after year. (Like they did.)

For the last Halloween in Maryland, in an effort to clean up the yard in preparation for selling the house, I gave away potted perennials, such as Hosta, Helleborus (Lenten rose), Sedum, and seedling Japanese maples. I have every reason to believe that some of those plants are still thriving in our trick-or-treaters’ gardens, or maybe in their parent’s gardens.


So, is it time to start a new tradition in your family?


Gardeners out there might give it a go, or maybe you have something else to offer trick-or-treaters in your neighborhood.

Time for me to fire up the old broom and get some flats of violas for the winter garden.


pumpkins and gourds welcome trick-or-treaters


Return to the top