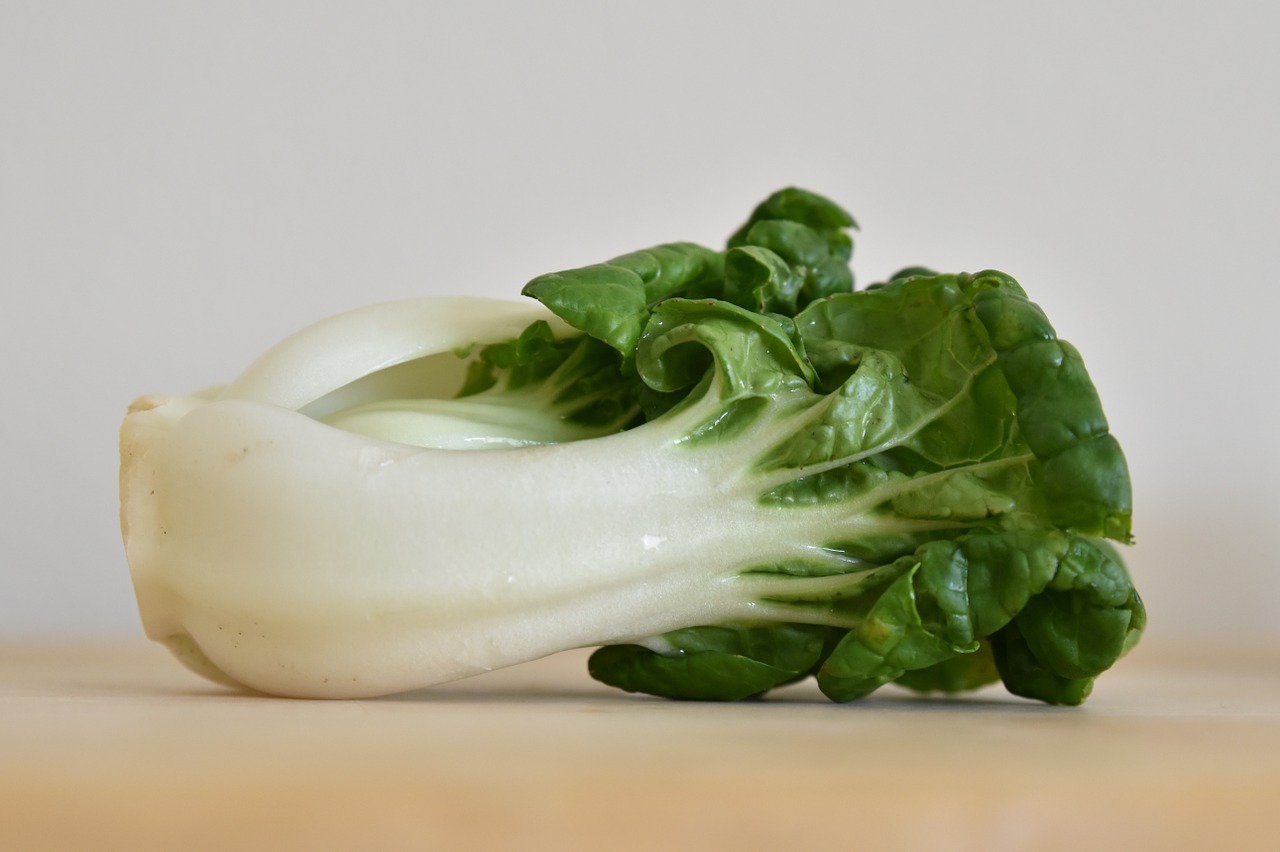
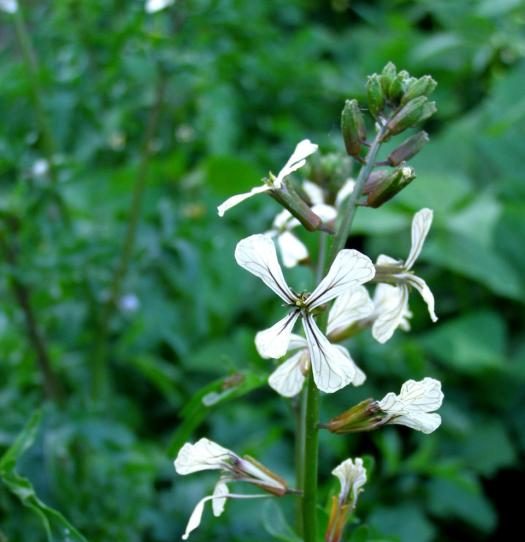
One of the most popular tomatoes offered at farmers’ markets is an heirloom called ‘Cherokee Purple’. We rarely see them in grocery stores because they don’t travel well over long distances. At the markets where I sell several heirloom tomato transplants, customers request this one most often.
In 1990, Craig LeHoullier, chemist and grower of hundreds of heirloom tomatoes near Raleigh NC, received unnamed tomato seeds and a note in the mail. John D. Green, of Sevierville TN, sent the material. Green received seeds that had been saved and passed among a few generations of local gardeners. His note said the Cherokee Indians in the area had been growing this lobed variety since the late 1800’s.
LeHoullier planted the seeds in 1991. Confident in this tomato’s marketable qualities—and naming it—he distributed seeds saved from the trial to Jeff McCormack of Southern Exposure Seed Exchange and to Rob Johnston of Johnny’s Selected Seeds. Beginning in 1993, these seed suppliers included the ‘Cherokee Purple’ tomato in their catalogs.
LeHoullier continued selecting variants of this variety, coming up with ‘Cherokee Green’ in 1997. This tomato is striped green and yellow, and has some orange tints at the blossom end of fully ripe fruits. After trialing a batch of seeds sent from another grower, Lehoullier named this one ‘Cherokee Chocolate’ in 1995. This variety is mahogany brown.
Attributes of the ‘Cherokee Purple’ Tomato
Often called “ugly” by some (not me), their flavor, nevertheless, is outstanding! The 8–12-ounce tomatoes might appear lumpy due to asymmetrical ribbing, but they’re often shaped like regular tomatoes.
The skin color is uniquely brick red to maroon, perhaps brownish, and often with green shoulders. The interior is also variably red to purple, sometimes with green.
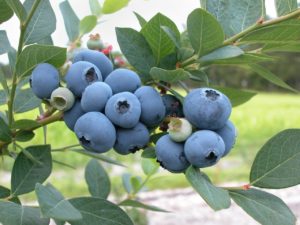
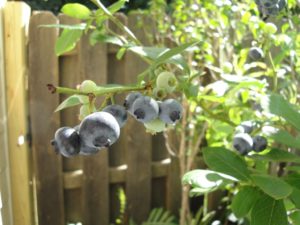
When exposed to dappled sunlight, the fruits darken. The deeper “black” color indicates higher levels of beneficial antioxidants called anthocyanins. I prefer these super-nutrient fruits and vegetables, from red lettuces to blueberries to black tomatoes. A diet rich in antioxidants can help protect us from many kinds of cancer, inflammatory, and cardiovascular illnesses.
‘Cherokee Purple’ is shorter than most indeterminate tomatoes, staying around 5′ in height when staked. For tomato lovers without gardens, try growing it in a large container. It doesn’t bear as many fruits as some, such as ‘Black Prince’, but yields—and flavor— are sufficient to merit including it in your garden.
Because this variety developed in a naturally humid region of eastern United States, it probably has some disease resistance built into its genetics. In my experience, it’s less susceptible to disease than many other heirlooms.
As an heirloom tomato and not a hybrid, ‘Cherokee Purple’ is open-pollinated. So, you can save seeds from ripe fruits for next year’s garden. The offspring will be identical—or nearly so—to the parent plant.
“Mmmm… BLT”
There is no sandwich, burger, or salad that isn’t enhanced by adding this richly flavored tomato. Some call it smoky, while others consider it sweet, complex, or balanced. Try a “sloppy BLT” on lightly toasted rye with a fair amount of Duke’s mayonnaise (on both slices), bacon, lettuce, and this tomato, of course, but also with cheese and ripe avocado.
It is juicier than many other tomatoes and, therefore, is not recommended for sauce. But, if I have some ripe fruits, I’ll add them to the stock pot when making sauce, which simmers on low for 2 hours or longer.
Regardless how it’s described, the ‘Cherokee Purple’ tomato always has a place in my garden. In fact, when cool weather arrives in autumn, I place large pieces of clear plastic raised over the plants to protect them from frost. For a little extra warmth, add a hot water bottle or a string of miniature incandescent Christmas lights to extend the season for a few more ripe fruits.
When a freeze threatens, pick all remaining full-size or nearly full-size tomatoes and let them ripen on the kitchen counter. Be careful not to bruise them.
A few other varieties also get covered in the garden to give the fruits additional time to ripen, but it’s these last ‘Cherokee Purple’ tomatoes that wrap up the season.
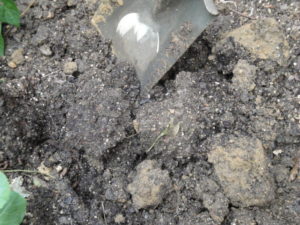
So… those potatoes left in the pantry or the bottom of the refrigerator decided to sprout. Instead of throwing them into the trash or the compost bin, try growing them! You can grow potatoes in the home garden or in large pots, following a few simple guidelines.
Too withered for consumption, but fine for the garden.
We don’t recommend planting potatoes recently purchased from the grocery store because they’ve likely been treated with a sprout inhibitor. After the effect wears off, you’ll see the eyes begin growing. That, though, could take months.
Organic potatoes, if treated with sprout suppressors approved by the National Organic Program, sprout earlier than non-organic potatoes. Inhibitors, such as spearmint, peppermint, and clove oils, must be applied more frequently than chemicals used on traditionally treated potatoes.
Spouting potatoes (like the ‘Yukon Gold’ in photo, top) are still edible, after removing the eyes. Discard moldy and rotting potatoes. But save for the garden the ones with well-developed sprouts and those that have withered beyond the point of palatability.
Carbohydrates stored in the tuber provide energy for the developing shoots. When green leaves begin growing, photosynthesis will sustain the plant.
When can we grow potatoes outside?
Potatoes can tolerate cool soil, but not cold, wet soil or freezing temperatures. I live in USDA plant hardiness zone 7, where we plant early maturing varieties 4-6 weeks before the last spring frost. Gardeners plant mid-season and late varieties after that.
Wait for the soil to warm up to at least 45°F before planting tubers. Long-range weather forecasts might indicate whether it’s safe to plant or prudent to delay.
A garden exposed to full direct sunlight warms up earlier in spring than one in partial sun. Grow potatoes in full sun, but avoid exposing them to searing summer heat. Gardeners living in higher elevations or in cooler summer regions can grow potatoes through the season.
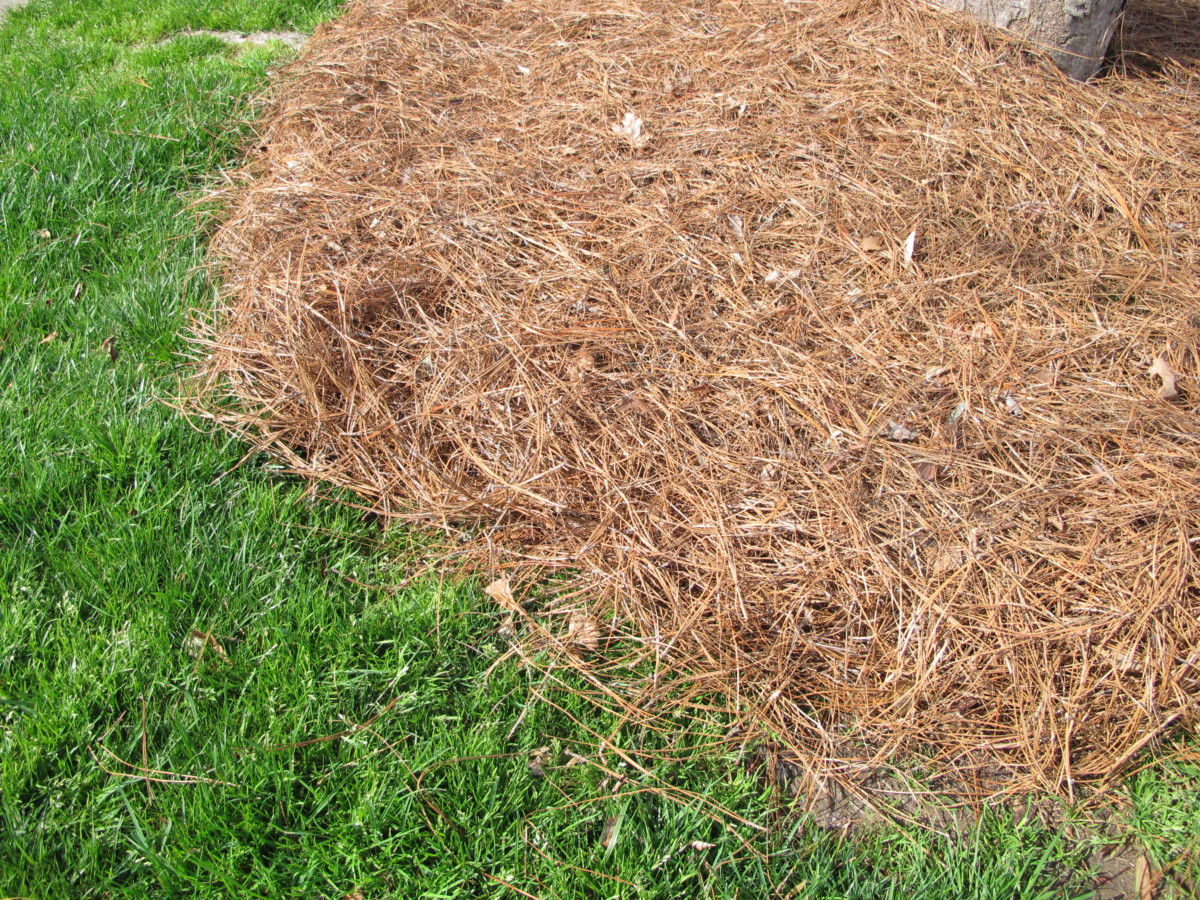
If the weather forecast predicts temperatures below freezing, I’ll mulch the soil with several inches of oak leaves, never in short supply around here. A thick, airy mulch insulates the ground from a sudden drop in temperature. Plants benefit from mulch kept in place all season. Not only does it moderate temperature, suppress weeds, and keep moisture in the ground, but it also prevents disease spores from splashing onto the potato’s leaves. This is easier to do in small garden plots than in larger farming operations.
Emerging foliage can tolerate light frost. It could take a few weeks for growth to show above ground.
Seed Potatoes
For a wider selection of varieties offered to farmers and home gardeners, look for “seed potatoes”. Some garden centers and many seed suppliers stock seed potatoes. They’re not actually seeds, but certified young potatoes almost ready for planting. Although they’re certified disease-free when purchased, plants are susceptible to a few pathogens as they grow.
Favorable conditions and good management practices decrease the likelihood of problems. If you’ve had diseases in your potato crops, don’t save potatoes year to year, but purchase certified potatoes instead. Don’t grow potatoes where they’ve been planted any time in the past 4 years.
Botanically speaking, potatoes are classified as Solanumtuberosum. They belong to the Solanaceae family and call tomatoes, peppers, and eggplants their cousins. Tobacco, petunias, and deadly nightshade, a poisonous weed, also belong to the nightshade family.
Potatoes are native to the cool mountainous regions of South America. In the 1530’s, European explorers gathered them and introduced potatoes to their homeland. Irish immigrants brought them to North America in the early 1700’s. Approximately 4,000 varieties of potatoes have been bred. True seeds, as opposed to seed potatoes, are poisonous when eaten and are used only for breeding purposes.
You can find potatoes with white, yellow, tan, red, blue, and purple skins and flesh. Thin-skinned potatoes, such as ‘Yukon Gold’, ‘Kennebec’, and ‘Red Pontiac’, grow well in the eastern parts of the U.S. The western states suit the thicker-skinned ‘Russet’ and other baking potatoes.
Crop Rotation
One of those good management practices involves rotating our crops. Related plants tend to be susceptible to the same pathogens and insect pests. When growing one crop in the same plot of land year after year, disease spores and insects can build up in that location. That’s why it’s recommended to move all members of a particular plant family to different plots over the next several growing seasons.
For example, if you grew potatoes, tomatoes, peppers, or eggplants in Plot A in any of the last 4 years, move your potatoes and other members of the Solanaceae family to Plot B this year, Plot C next year, and then Plot D the year after that.
Rotate among the various plant families, such as:
brassicas—arugula, broccoli, Brussels sprouts, cabbage, cauliflower, kale, etc., in the Brassicaceae family
cucurbits—cucumber, squash, zucchini, melons, in the Cucurbitaceae family
legumes—peas, beans, in the Fabaceae family
lettuces, in the Asteraceae family
onions, leeks, garlic, in the Amaryllidaceae family
Swiss chard, spinach, beets, in the Amaranthaceae family
Several varieties of potatoes.
How To Grow Potatoes In the Garden
Step 1: The First Cut
Before planting potatoes in the ground, cut them into pieces about 1½” long. Each piece should have 2-3 eyes. Let them sit in the open air for 1-2 days to seal the cut surface. This helps prevent rot in moist soil.
Small potatoes can be planted whole.
Step 2: Prepare the Soil If You Want To Grow Potatoes
Thorough soil preparation serves the immediate purpose as well as plantings in years to come. After improving the soil with generous amounts of drainage materials, you’ll need to add nutrient-rich amendments a few times each year after that.
Not repeatedly disturbing the soil profile retains healthy populations of beneficial microbes. Farmers are increasingly using no-till methods and cover crops to preserve soil structure and prevent erosion of valuable topsoil. Frequent tilling also introduces high levels of oxygen between the particles of soil, so organic matter is broken down too quickly.
Vegetable plants need good drainage, and potatoes are no exception. Loosen the soil at least 12″ deep, breaking up the clods. Potatoes struggle in compacted clay and stony soils; tubers that do form are often misshapen. Potatoes grow very well in raised beds.
Incorporate a few inches of pine fines, soil conditioner, peat moss, and/or coarse sand to improve the tilth (or workability) of the soil. Avoid layering materials in the soil profile. Layers of coarse and fine materials, with differing air pore spaces from one material to another, obstruct water percolating through the soil. This could cause soggy layers that can rot roots. For that reason, I never place a layer of gravel under plantings.
In the top 5″ of loosened soil, mix in compost, leaf mold, or planting mixes. These materials contain a variety of nutrients required by vegetables, and they encourage rapid rooting.
Aged manure and mushroom compost are not recommended for root vegetables.
Soil PH
Potatoes love heavily composted soil. They also require acidic soil, with a pH between 5.0 and 6.0. (Various websites recommend a pH anywhere between 4.8 and 7.0.)
Low pH helps prevent scab, a disfiguring disease of potato skins. Soil pH outside the preferred range for potatoes limits nutrient absorption and might cause nutrient toxicities.
Contact your local agricultural extension agents for information on taking a soil test. They can recommend preferred fertilizers, methods to lower soil pH, and varieties appropriate for your area.
Step 3: Place the Seed Potatoes
In rich, organic soil, simply lay the potato pieces on top of moist, loosened soil or nestle them into the surface. The eyes should face upward. Then mulch over the seed potatoes.
They’ll also grow when planted 2″ deep. Space potatoes 6-12″ apart, depending on variety. Because potato plants grow 2-3′ tall and might sprawl a bit, allow 30-36″ between rows.
Mulch the bed with a few inches of leaf litter, shredded leaves, and pine needles to cover the planted potatoes. It’s important to adequately shade the surface of the ground from sunlight to protect growing tubers from greening…
“Greening”?
Potatoes with green skin needed deeper mulch.
Greening is caused by exposure to light, which, in itself, is not harmful. But the green pigment (chlorophyll) in potatoes is associated with the formation of a toxic glycoalkaloid called solanine.
Never eat green potatoes; if only the skin is green, cut off and discard that part before cooking. Never eat leaves, stems, or the berries that develop on potato plants.
Solanine in potatoes is more concentrated when growing potatoes in high nitrogen soils and in soil that’s compacted or very sandy. Bruised potatoes, those held a long time in storage, and potatoes with large eyes are higher in this toxin. The greener the potato, the higher the level of solanine. This bitter substance is a natural repellent to insects and browsing animals.
Solanine can’t be boiled or cooked away. The level is somewhat lower in foods fried at very high temperatures, but that brings its own problems, described later in this article. I’m not intent on discouraging you from growing or eating potatoes, but moderate consumption of this popular vegetable and proper preparation make it a healthier indulgence.
Symptoms of solanine toxicity include vomiting, diarrhea, slow pulse or breathing, low blood pressure, and abdominal pain. It can cause coma and death in rare instances, so be very careful with green potatoes. If any of the flesh is green after removing the skin, I would discard the potato.
Step 4: Maintenance
Water
Water the garden thoroughly after planting and mulching. If rain is unreliable, water the garden every week, never letting the soil become dry. Provide 1-1½” of water each week if it doesn’t rain.
Avoid wetting the foliage, and water in the morning so the foliage is dry going into the night. This helps cut down on the incidence of disease. Some varieties are resistant to blight, scab, Rhizoctonia, and Verticillium wilt. Those that have not been bred with disease resistance often produce great yields when using good gardening practices.
Hollow Heart and Brown Center
Some large varieties, particularly ‘Atlantic’ (for potato chips) and ‘Yukon Gold’ (a personal favorite), might show hollow heart and/or brown center. These are physiological disorders characterized by a star-shaped cavity and a central area with dead brown tissue, respectively, in the center of the potato or near the ends.
These stress-related conditions often result from inconsistent soil moisture—for example, wet soil after a period of dry soil. In addition, a period of prolonged cold weather during tuber formation can cause brown center. Spacing seed potatoes too far apart and using small seed potatoes (with too few eyes) can be the cause. Low potassium and other nutrient deficiencies can initiate the disorders.
The potato’s skin shows no indication of a problem. Affected potatoes aren’t perfect but are still edible.
Hilling Up
As the plants grow, hill up soil against the stems of the plants. Take soil from another part of the garden, adding a few inches up the stem and about 12″ out from it. This is an option—not necessary—but it should increase the yield.
Like tomatoes, potatoes root along buried stems. As they root, they’ll develop another layer of young potatoes at the ends of the stolons. Hill up around the stems 2 or 3 times during the growing season to maximize the harvest.
An alternative is to start potatoes in a moderately deep trench, reserving excavated soil on the side of the bed. Periodically fill in the trench with amended soil, a few inches at a time.
Fertilizer
Every few weeks, apply a complete fertilizer. The 3 numbers on the package representing nitrogen, phosphorus, and potassium (N-P-K) should be in a ratio of 1:1:1 or 1:2:2. Avoid fertilizers high in nitrogen. An analysis close to 10-10-10 or 5-10-10 is adequate.
Although you could use chemical fertilizers, they tend to damage populations of beneficial microbes. But, until the soil warms up, microbes aren’t sufficiently active to break down the organic components into molecules the plants can absorb. That’s when I use chemical fertilizers, and then switch to organic products when the soil warms.
To help prevent disorders in developing potatoes, it’s recommended to apply smaller concentrations of fertilizer more frequently.
Insect Pests
Colorado potato beetles can be especially bothersome as they consume significant amounts of foliage. Inspect the undersides of the leaves for yellow-orange egg masses and remove them. The beetles have 10 black stripes on their tan wings. Immature larvae are orangish-red with 2 rows of black dots down each side. Bacillusthuringiensis var. tenebrionis, a biological insecticide, kills this beetle.
Aphids might congregate in large numbers on the plants. A brisk spray of cool water from the hose takes care of most of them. Encourage ladybugs, braconid wasps, and green lacewings to populate your garden. For severe infestations, prepare a solution of horticultural oil and spray early in the morning. Apply the solution to the bottoms of the leaves as well. Read the label.
Cutworms feed on sprouts emerging from the ground. Since these C-shaped larvae become moths, treating the potatoes with Bacillus thuringiensis var. kurstaki effectively kills them. Keep in mind that they’ll have to eat some of the foliage in order to ingest the Bt.
Slugs and Deer
A slug.
Slugs reproduce rapidly in moist conditions and where they can hide in crevices during the daytime.
Lay a board on moist ground, and slugs and snails will gather there after feeding through the night. You might notice those silvery slime trails on tender foliage. Early in the morning, take an old knife to the garden and… dispatch them forthwith! Or use organic Sluggo or similar product, which does not contain toxic chemicals. Except to slugs and snails. Read the label.
Although potato foliage is not the favorite choice of warm-blooded animals, deer and others will feed on it when not much else is available.
Other members of the nightshade family also host these pests. Row cover secured over the planting excludes most insects and browsing animals.
Potatoes that sprouted in storage are now growing new plants in 6″ pots. They’ll need protection from hard frost if planted, but I didn’t want to delay planting the deteriorating tubers.
Headings
Page 1: Can we grow new potatoes from old potatoes? (When can we grow potatoes outside?, Seed Potatoes, Crop Rotation), How To Grow Potatoes In the Garden, Step 1: The First Cut, Step 2: Prepare the Soil If You Want To Grow Potatoes (Soil PH), Step 3: Place the Seed Potatoes (“Greening”?), Step 4: Maintenance (Water, Hollow Heart and Brown Center, Hilling Up, Fertilizer, Insect Pests, Slugs and Deer)
Page 2: Step 5: Harvesting!, How To Grow Potatoes In Containers, Grow Potatoes For Their Nutrients (The Power Of the Purples, Potato Skins, Resistant Starch), The Problem With High Heat
Do you have an empty plot in the garden where you’ve wanted to plant something but aren’t sure what to plant? It’s too small for blueberries or raspberries. Tall plants will shade vegetables in the other raised beds, so you need something that stays rather short on this south side of the garden.
Here’s an option: strawberries!
Now that spring is in the air—and in your local garden centers—this is the perfect time to plant young strawberry plants. Nurseries are filling up with all sorts of temptations—hardy annuals, trees and shrubs, early greens and vegetables, and budded spring-flowering bulbs in pots. You might find young, well-rooted strawberries already leafing out.
Strawberry plants can be purchased from neighborhood nurseries and from specialty mail order companies. Some varieties are available as seeds, but most are bare-root plants sold in bundles or rooted plants in pots. Bare-root crowns are less expensive than potted plants but need to be planted right away. I don’t have room for 25 plants, so a few potted strawberries are good enough for now.
Strawberries, by the way, are not berries at all, but aggregate accessory fruits. Those little brown spots on the outside of the strawberry are the achenes, or ovaries of the flower, each containing a seed. The achenes are the true berries. The colorful part is an enlarged receptacle, the flower part that normally holds the ovary. But I’m quite sure no one will warm up to the term “strawreceptacle”.
U.S. per capita consumption of strawberries was a bit over 7 pounds in 2018, and that number is growing. North Carolina is third in the nation for strawberry production, after California and Florida. Among nations, top producers include the United States, China, Mexico, Turkey, and Egypt.
Types of Strawberries
Strawberry species are native to the Americas, Europe, and Asia. In the 1700’s, French botanists crossed the strawberry native to the eastern U.S. (Fragaria virginiana) with a Chilean species (F. chiloensis), yielding, eventually, most of today’s cultivars. That explains the “x”, representing an interspecific cross, in the name Fragaria x ananassa. Breeding efforts using genetics from several species have resulted in hundreds of varieties available today.
Strawberries grow within USDA zones 3 to 9. Some varieties prefer the cooler end of that range, and others need somewhat warmer climates. Most require at least 200 to 300 chill hours, when plants are exposed to cool temperatures between 32° and 45° F. Most strawberry plants stop fruiting above 75° or 80°.
Planting varieties that mature at different times prolongs the harvest, but place them in separate beds for ease of maintenance. Keep track of the varieties you’ll be growing in your garden.
There are 4 main groups of strawberries, with many varieties within each category. Look for disease resistance, and consider other characteristics, such as color, size of fruit, and time of harvest.
1. June-Bearing
These large-fruiting varieties bear heavily over a period of two weeks to a month in mid to late spring. They respond to a short daylength, having formed flower buds the previous autumn. The buds, though, stay dormant through winter, safely tucked inside the mulched plants.
For gardeners living in areas with a limited growing season, June-bearing strawberries are a good choice. Those who wish to preserve the fruits often select varieties from this group.
June-bearers develop many runners, or stolons, which root at the tips and grow new plants from there. The “matted row system” is commonly used on farms and in home gardens for this group of berries. Runners are permitted to roam about and root in at will, within the confines of the bed. Each year, the beds are thinned or renovated immediately following the harvest.
Because flowers will be snipped off over the first 4 to 6 weeks after a new planting, as recommended, June-bearers will have no fruits the first year. You can avoid this task by planting crowns of June-bearers later in the season, after they flower. They will bear fruits in the next spring season.
Although strawberries are short-lived herbaceous perennials, some commercial operations renew their stock every year, establishing young plants in a new location.
2. Everbearing
Everbearing strawberries have a large first crop, a smaller late crop (especially in areas with warm summers), and sometimes a few berries in between. They are not affected by daylength.
Berries in this group are smaller and not as abundant as June-bearing types. The total harvest is about the same as for June-bearing types, although it is spread out over time.
Remove flowers and runners the first 4 to 6 weeks after the initial planting. This will sacrifice the early harvest, but they will flower again and yield berries later in the season.
3. Day-Neutral
Day-neutral varieties produce strawberries through the growing season, and will flower regardless of daylength. Fruits are smaller and the plants don’t yield as heavily as the June-bearers.
As with the everbearers, remove flowers and runners that develop during the first 4 to 6 weeks after planting. They will flower again later and set fruits in the current season. Cooler temperatures might yield heavier crops in late summer.
4. Alpine
Alpine strawberry.
These are the smaller, oval-shaped berries carpeting the ground in their native northern hemisphere habitats. Sometimes called “fraises des bois“, French for “strawberries of the woods”, these strawberries often belong in the species Fragaria vesca, although several species of alpine strawberries are found around the world. They grow over a wide range of climates, in USDA zones 3 to 9.
Alpine strawberries tolerate some shade, and should be planted 24″ apart. They don’t grow a vigorous system of runners, but will propagate from seeds.
Some strawberry enthusiasts swear by these tiny morsels, and grow no others.
Preparing the Bed for Strawberries
Find garden space that gets full sun for the best yields. Strawberries start growing before the end of winter, when the sun is still low in the sky. Take this into consideration when locating your garden. In partial sun, foliage and fruits might be plagued by diseases that will ruin the crop.
Avoid low spots. Locate the beds on higher ground where cold air won’t collect and freeze the flowers. Try growing strawberries in containers if you don’t have garden space.
Don’t plant them where tomatoes, peppers, potatoes, or eggplants have grown in the past 5 years. Verticillium wilt disease from infected plants in the nightshade family (Solanaceae) can also infect strawberries (family Rosaceae).
Strawberries prefer sandy loam and must have well-drained soil. This is one reason you often see them growing in raised beds. Another benefit of raised beds is increased air circulation, which helps prevent diseases from spreading among the plants.
How To Configure the Beds
The Matted Row System
In the matted row system, strawberries are spaced 18″ apart down the middle of a 4′ wide bed. Spacing between the beds depends on the method of harvest and whether large tools (tiller, mower, wheelbarrow) will be required. For most home gardeners, 2′ or 3′ between beds serves that purpose.
June-bearing strawberries grow in matted rows, allowing their numerous runners to spread. Over the growing season, let plants fill in to a density of 4 or 5 plants per square foot. Heavy leaf canopy discourages weeds from growing in the bed, but overly congested growth encourages diseases.
The Hill or Mounded System
In this technique, crowns will be spaced in a zigzag manner 12″ apart, in mounds 8″ high. These hill systems are narrower than matted row systems, at about 24″ wide. This permits better air circulation and drainage around the plants. Disease prevention is of prime importance.
This method suits everbearing and day-neutral strawberries, which have fewer runners. In fact, websites recommend removing all runners in hills, forcing plants to grow lateral crowns next to the original plants.
Dig In!
Pine fines.
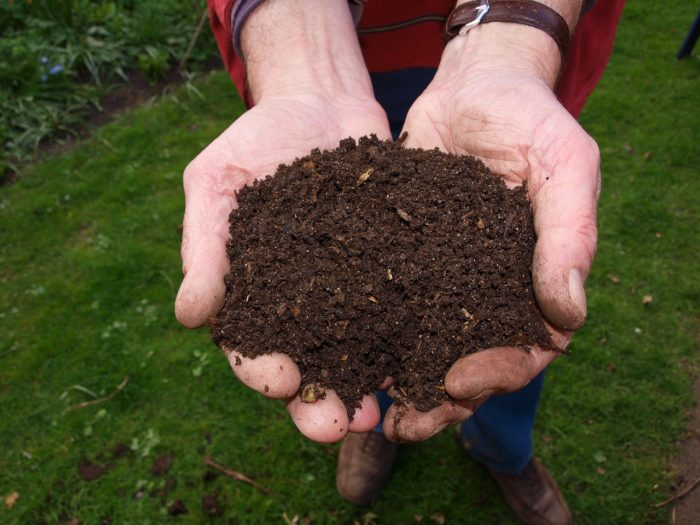
Compost.
Loosen the Clay
First, remove all vegetation where the strawberries will be planted. They don’t compete well with weeds.
Loosen the existing soil, breaking up the clay to a depth of about 12″. This is easier to do if the soil is damp. Don’t work the soil if it’s wet, though; that will collapse the air spaces between soil particles.
Add Drainage Material
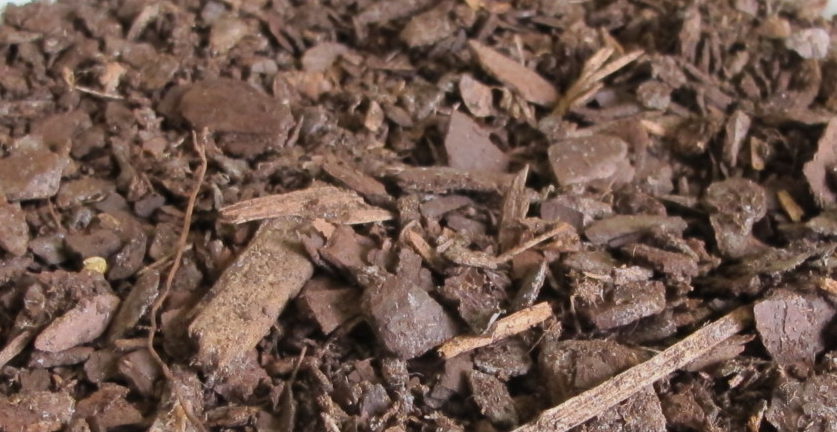
Now, incorporate (don’t layer) 2″ to 4″ of pine fines, sometimes called soil conditioner, into the loosened soil. Pine fines (photo, above) are partially composted small bits of pine bark. Because they decompose very slowly, they help keep the soil open, improving drainage. Pine fines might not be available everywhere. See if you can find bags of “soil conditioners” that include pine fines.
Strawberries also like large-grained coarse sand (not play sand) added at this time.
Adjust PH, Peat Moss
Strawberries need acidic soil, with a pH range between 5.5 and 6.5. One or two inches of pre-moistened peat moss incorporated 8″ into the bed will help lower the pH in alkaline soil.
Your local agricultural extension office can analyze a soil test and make recommendations about pH and fertilizers. Some gardeners apply 10-10-10 fertilizer with the initial soil preparation.
Compost
Next comes the nutrient-rich compost. Incorporate 2″ or 3″ of compost into the top 4″ of soil. Placing it deeper in the soil will put it out of reach of the strawberry’s shallow roots.
Compost provides nutrients for the strawberries as well as for the microbes living in the soil. Microbes, active during the growing season, break down organic matter, making nutrients available to plant roots in a usable form. These microorganisms derive the benefit of carbohydrates from this relationship. Microorganisms also help plants fend off soil pathogens and contribute in other ways that scientists are now researching. In healthy gardens, billions of microorganisms occupy a small handful of soil!
For sandy soil, add more water-holding amendments, such as peat moss, pasteurized loam, and compost.
Rake the soil, filling in low spots.
Planting the Strawberries
Strawberry ‘Ozark Beauty’.
If you received bare-root plants, trim long roots to about 6″. Place the roots in a bowl of water for an hour, in the shade.
Although a raised bed is an efficient method of growing strawberries, they can be planted in level gardens. Pay special attention, though, to slope, drainage, and air circulation.
After preparing the soil, dig a hole for each plant, spreading out the roots and firming soil around them. The crown of the plant, where the leaves meet the roots, should be just above soil level.
Mulch
Once all the plants are in place, apply 2″ or 3″ of an airy mulch, such as pine straw or weed-free straw (photo, right). The traditional use of straw as a mulch might be where the term “strawberry” came from.
Don’t cover the crowns; give them space to emerge freely. This kind of material, rather than a heavier mulch, permits air circulation and lowers humidity around fruiting stems, helping prevent rot.
Mulch cools the soil, conserves moisture, and keeps the fruits clean as they grow. As it rots, it adds organic matter to the soil and will need to be replenished.
Using mulch in the growing season is optional, of course. In beds of June-bearing strawberries, a thick layer of mulch could hinder runners trying to root into the soil.
Another option used by many commercial growers and home gardeners is black plastic or fabric over the soil. This warms the soil rapidly in late winter and early spring. Commercial growers using “plasticulture” renovate the beds every year. If you’d rather not use plastic, you could use biodegradable black mulch. Using a soil cover might extend strawberry production. And weeds won’t stand a chance. Still, this is optional.
Water the bed, making sure the entire planting depth has been moistened.
In Their First Year
Most experts recommend removing all flowers during the first 4 to 6 weeks after planting. This concentrates energy in the roots and runners. For plants in the June-bearing group, however, there will be no harvest the first year if you planted them in early spring. But they should yield a bountiful harvest the next year.
Other groups of strawberries will develop more flowers in the months ahead. They will bear fruit later in their first season. For everbearing and day-neutral varieties, apply fertilizer after their first crop.
Water the beds every week if there isn’t substantial rainfall. Strawberries need 1″ to 2″ of water per week, most importantly after planting and during fruit set. Most of their roots are found in the top few inches of soil, so they are very susceptible to damage from drought.
Pollination
These early flowering plants attract bees and other pollinators. Strawberry flowers contain both male and female reproductive parts. Although they can self-pollinate or be pollinated by wind, strawberry flowers achieve more complete pollination from the activity of pollinating insects. This results in fruits that are plump and well-formed.
Headings
Page 1: Types of Strawberries (June-Bearing, Everbearing, Day-Neutral, Alpine), Preparing the Bed for Strawberries (How To Configure the Beds, The Matted Row System, The Hill or Mounded System, Dig In!), Planting the Strawberries, Mulch, and In Their First Year (Pollination)
Page 2: The Harvest, Renovating the Strawberry Bed, Varieties, Winter Protection, Potted Strawberries (The Pots and Potting Soil, Watering the Containers), Problems? (Insects and Mites, Slugs and Snails, Diseases), and Celebrate!
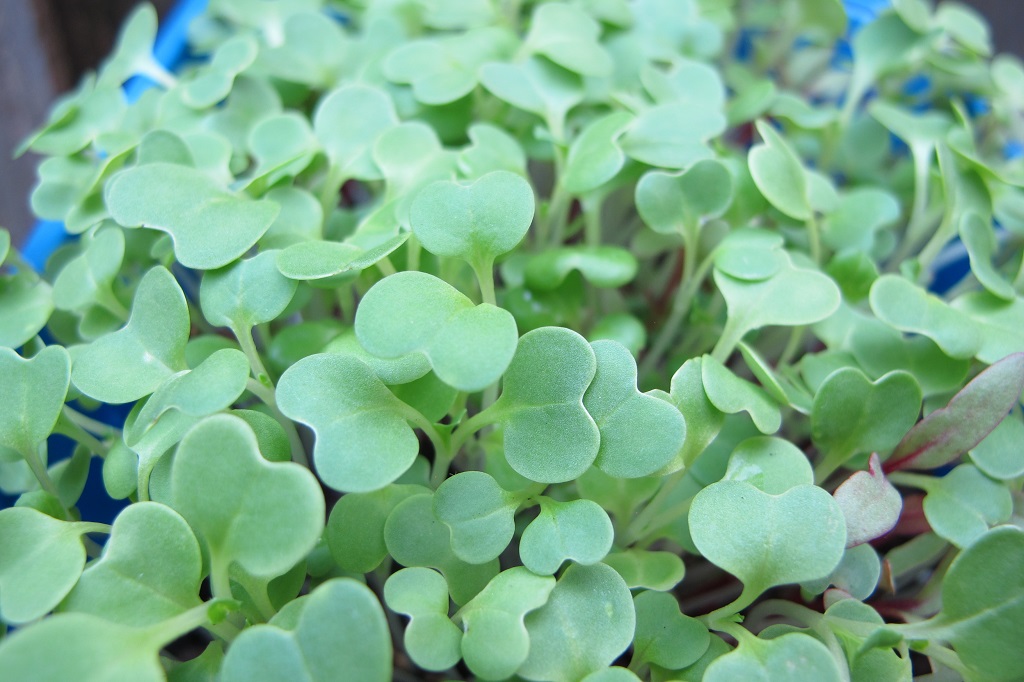
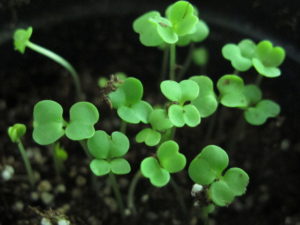
A mixture of microgreens, primarily brassicas, and a few beets.
Here’s an easy way to grow nutrient-dense plants in a tiny space without lifting a trowel. Have you ever tried growing microgreens? This is such a simple method of incorporating the most concentrated sources of antioxidants and other nutrients into your diet.
Maybe you’re not sure about all those supplements in the health food store, and you want to go the more natural route. Besides, the experts tell us, vitamins and minerals are best obtained from a wide variety of foods, including fresh fruits and vegetables.
Eating from several of the plant families ensures that we get a diverse assortment of nutrients. Greens provide a hefty helping of antioxidants, vitamins, and minerals, but missing from the plant world is Vitamin B-12. This is of particular concern among vegetarians.
Vitamin B-12 is found in seafood, meats, dairy, and fortified cereals. Because I don’t eat red meat at all, and other animal proteins only a few times per week, I take Vitamin B complex, among a few other supplements.
If you have any questions, ask your health care professional.
Why Are Microgreens So Good For Us?
Certain nutrients have gained prominence over the past decades, as research suggests their efficacy in maintaining good health. Although not among the basic food categories needed for survival (carbohydrates, fats, protein, vitamins, and minerals), these substances help us fight or prevent many serious illnesses, including cancer. Phytonutrients, polyphenols, prebiotics, and antioxidants—oh, my! Sure, it can be confusing.
Research indicates that microgreens have between 4 and 40 times more nutrients than a similar amount of the full grown crops. That’s all it took to convince me!
Seed suppliers sell individual varieties as well as mixtures. Accordingly, they’ll vary in color and flavor. The mixtures I use are primarily composed of the brassicas, and here’s why…
The Brassicaceae Family
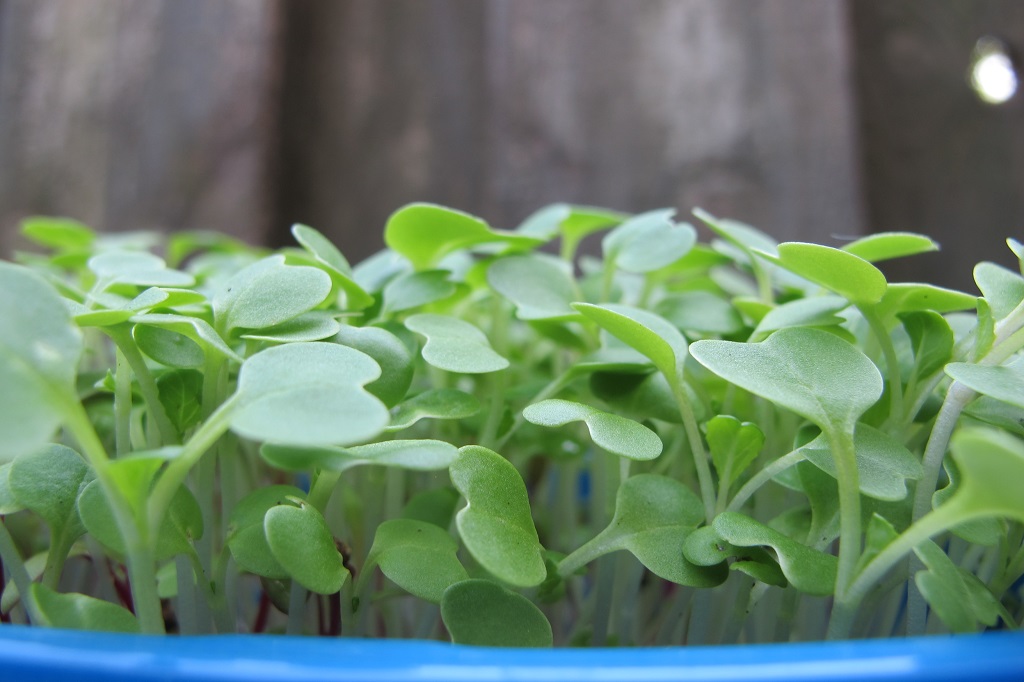
Arugula ‘Astro’ seedlings.
Let’s start with the First Family of Plant Nutrition, the cabbage and broccoli relatives. Plant taxonomists changed the name of this family from Cruciferae to Brassicaceae (“brass·i·kay’·see·ee”), but the terms cruciferous vegetable, brassica, and cole crops refer to the same group of plants. These brassicas have uniquely beneficial properties that set them apart from other plant families.
I’ve written many times in The Farm In My Yard about the health benefits of these plants. If you do just one thing to improve your diet, start with the brassicas. It helps that these microgreens are really easy to grow.
This family comprises many types of super-healthy plants. I include at least one in my diet every day: arugula, broccoli, Brussels sprouts, cabbage, cauliflower, collards, kale, mizuna, mustard greens, pac choi, tatsoi, turnip greens, and others.
You can harvest brassicas grown as microgreens within 3-4 weeks of sowing. Give them at least 6 hours of direct sunlight for optimal growth. With less than ideal conditions, you’ll still be able to harvest greens, but they’ll take longer to grow and they might lack some color. For the full complement of phytonutrients, though, give them sun.
Health Benefits of the Brassicas
Adopting a healthy lifestyle presupposes dropping some bad habits, and incorporating those that contribute to greater longevity. Adding half a cup of microgreens might not negate the harm done by smoking or your daily dose of mac and cheese, but it’s a start. Consuming foods from the brassica group helps:
reduce inflammation
slow the aging process (skin, eyes, joints, brain, vascular system)
reduce the chances of getting age-related macular degeneration and cataracts
reduce the risk of cancer, heart disease, type 2 diabetes, dementia
These greens and vegetables contain varying amounts of Vitamins A, B complex, C, E, and K. They contain calcium, fats (Omega-3), fiber, folate, iron, magnesium, manganese, potassium, protein, zinc, and more. Some of these nutrients are among the dozens of types of antioxidants, which neutralize potentially harmful free radicals.
What Are Free Radicals?
Remember learning about atoms, electrons, and protons? Well, here’s a summary:
The atom contains protons and neutrons in the positively-charged nucleus. The nucleus accounts for more than 99.9% of the atom’s mass. Surrounding the nucleus are the orbits, or shells, which hold the negatively-charged electrons. Up to two electrons fill the inner shell (“1 shell”), up to eight electrons fill the next shell (“2 shell”) and other shells contain up to 2 times the square of the shell number.
The number of protons (equal to the atomic number in the periodic table) distinguishes oxygen from carbon or sulfur or any other element. A stable atom, one that is inert, has an equal number of protons and electrons. Atoms of different elements bond together to form molecules, such as sugar, proteins, and water.
In order to become stable, atoms must complete their outer shells. They do that by stealing one or more electrons from, or giving them to, another atom. The outer shell is where chemical reactions with other atoms take place. Chemical bonds hold the atoms together. When weak bonds split between atoms or molecules, free radicals are formed.
These unstable free radicals seek to steal electrons from nearby molecules. This sets up a chain reaction of instability—one molecule stealing from another molecule—causing oxidative stress.This cascade of interactions is what can damage our cells. Cancer and other inflammatory diseases can begin if the disruption occurs near cell nuclei or membranes.
Those free radicals form in response to stresses in our bodies, including pollutants and toxins in our cells and bloodstream, and enzymes present in the normal process of digestion. We are healthier if there are more antioxidants than free radicals in our systems.
What Are Antioxidants?
Antioxidants are substances that prevent oxidative stress and reduce inflammation. They can be vitamins, minerals, or any of the many thousands of phytonutrients. Deep green, red, orange, and other colorful plant pigments are loaded with antioxidants.
Vitamin E is the most abundant fat-soluble antioxidant, and might protect us from heart disease by limiting LDL (low-density lipoprotein) oxidation and plaque formation.
Vitamin C is the most abundant water-soluble antioxidant. It, too, donates electrons to free radicals, ending the damaging cascade of instability. Vitamin C shows promise in the fight against cancer, especially types that affect the mouth, larynx, and esophagus. (Discuss diagnoses and treatments with your doctor.)
In recent studies, researchers used isotopes to track the uptake of these nutrients. They associate antioxidants, such as beta-carotene, lutein, and lycopene, with possible avenues of cancer treatment.
Glucosinolates
Phytonutrients are a major category of nutrients found in the brassicas. Of particular interest among this group are the glucosinolates, which include sulforaphanes. These substances are not found in significant amounts—or at all—in any other family of plants. These compounds, numbering more than 100 kinds, are key players in lowering the risk of cancer and inflammatory diseases. Different phytonutrients are found in brassicas eaten raw and in those which are cooked.
That’s why this is my go-to vegetable family. Every day. While preparing these greens for cooking, I also eat a few raw pieces. When possible, I’ll cut or chop the broccoli or kale (or any brassica) and let it “rest” on the kitchen counter for 30-60 minutes, so the enzyme, myrosinase, can start transforming precursors of sulforaphanes into the sulforaphanes themselves in the damaged plant cells. Heat destroys this essential enzyme, so we would miss out on those powerful sulforaphanes if we cooked the greens right away. Eating raw brassicas also delivers the benefit of sulforaphanes. Broccoli sprouts contain the highest amounts of these beneficial nutrients.
Before you think you’re protected because of the three little broccoli florets you just had with your steak dinner, think again. Consider making brassicas and other vegetables the main attraction, and using chicken, beef, or pork as condiments. If this is too big a leap, try adding more vegetables and decreasing the amount of meat consumed over time. Baby steps are better than not moving at all.
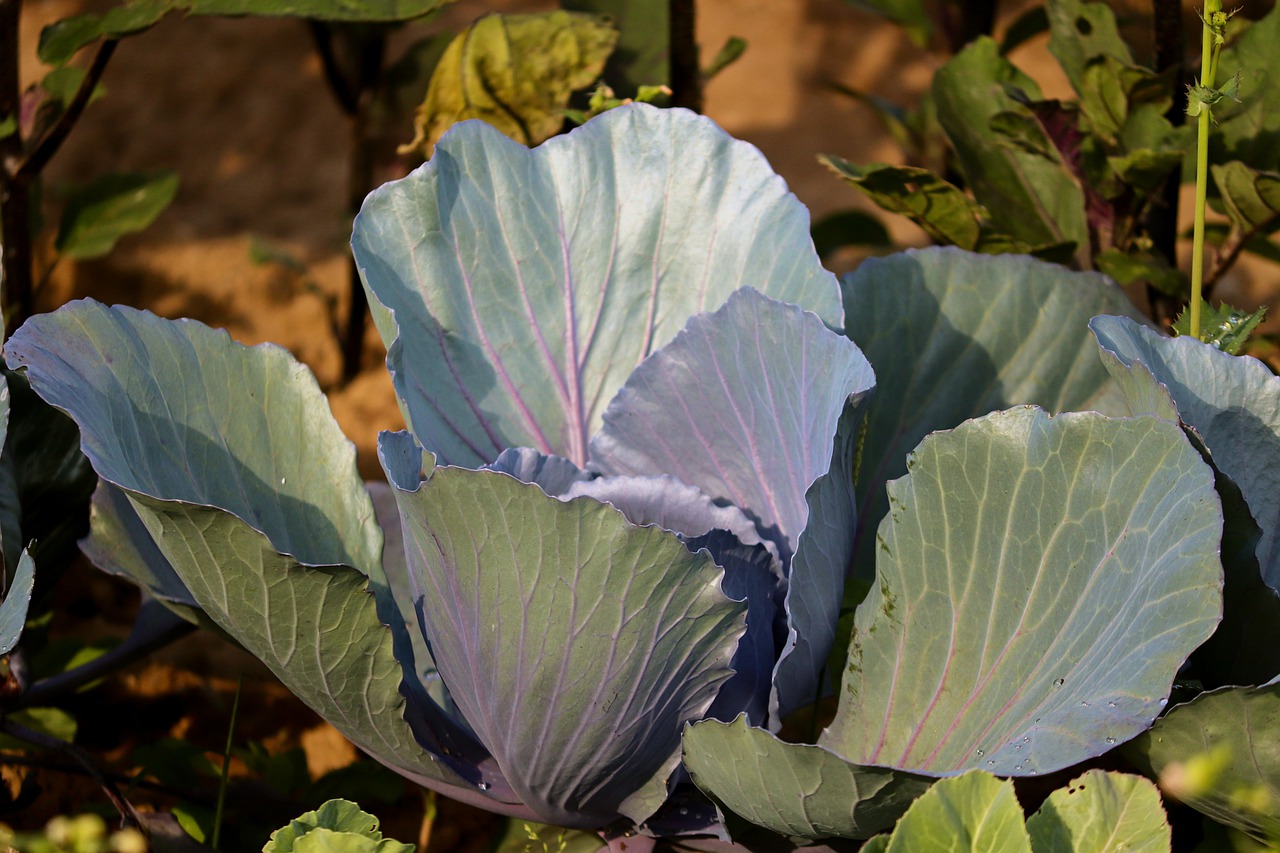
Mature red cabbage, one of the brassicas.
Other Plant Families for Microgreens, Sprouts, or Shoots
The Amaranthaceae Family
Amaranth, beets, quinoa, spinach, and Swiss chard are members of this family. Because of the higher oxalate content in this group, check with your doctor if you’re prone to kidney stones. Lots of pigments are found in amaranth, beet greens, and ‘Bright Lights’ Swiss chard, adding color to your clippings.
The Amaryllidaceae Family
This is the onion group, which also includes garlic, green onion, leeks, and shallots. Seedlings are very finely textured and take longer to grow.
The Apiaceae Family
Many useful herbs and vegetables belong to this family: carrot, chervil, cilantro, cutting celery, dill, fennel, parsley. All can be grown as microgreens.
The Asteraceae Family
This group includes endive, the lettuces, single marigold, radicchio, and sunflowers. Look for varieties that have red pigments, which have more anthocyanins. Anthocyanins are powerful antioxidants.
The Cucurbitaceae Family
Cucumber, melons, and squash plants have large seed leaves, so the seeds are sown father apart.
Grains and Legumes
Alfalfa, barley, oats, rice, winter wheat; chickpeas, lentils, mung beans, pea and pea tendrils.
Microgreens on caprese salad.
Headings
Page 1: Mmm…Microgreens!, Why Are Microgreens So Good For Us? (The Brassicaceae Family, Health Benefits of the Brassicas, What Are Free Radicals?, What Are Antioxidants?, Glucosinolates), and Other Plant Families For Microgreens, Sprouts, or Shoots
Page 2: What Are Microgreens?, What Are Shoots?, What Are Sprouts?, and How To Grow Microgreens, (How To Use Microgreens, The Container, The Soil, The Seeds, Maintenance, Yellow Leaves?)
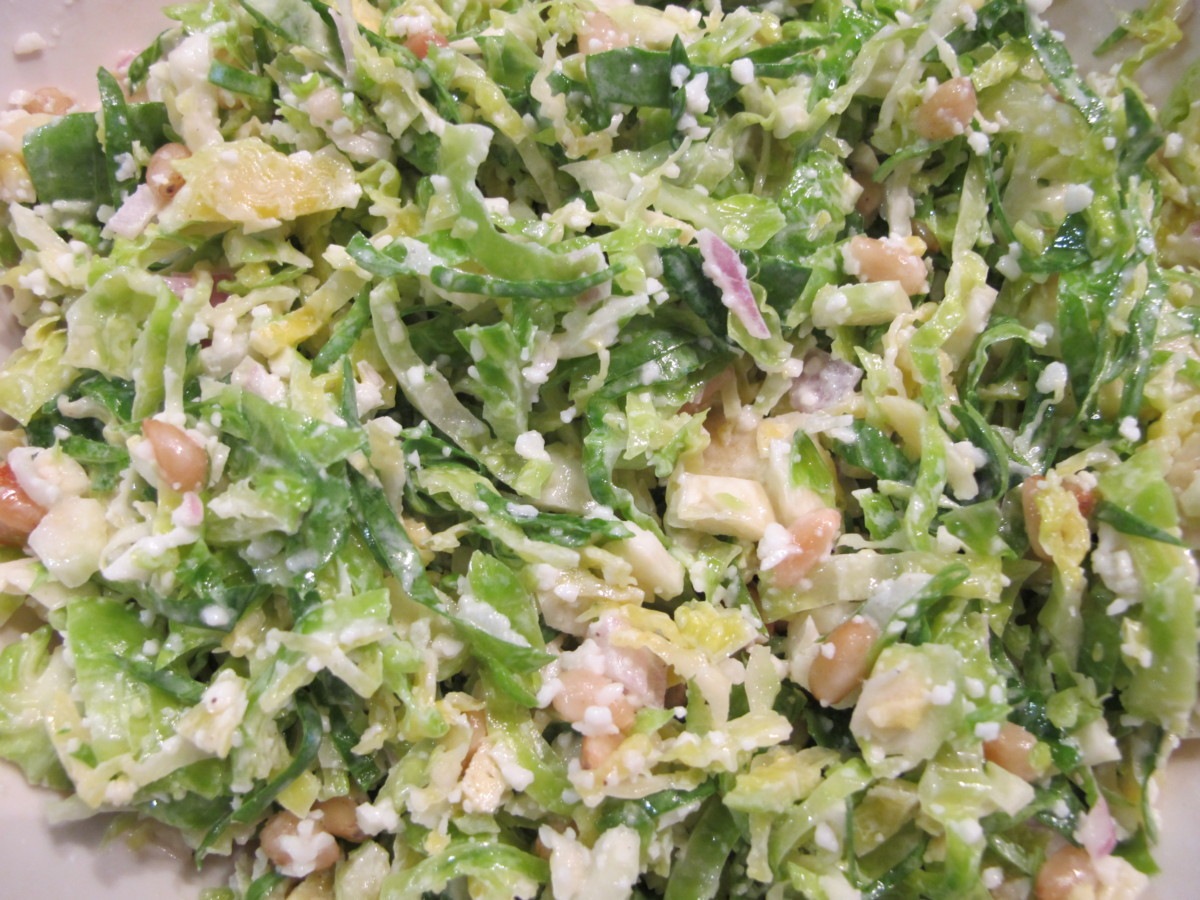
Here’s a recipe for Brussels Sprouts Slaw—absolutely delicious and nutritious! If you like garlic and cheese and pine nuts, you’ll love this dish. And if you like this recipe, you might want to try growing your own Brussels sprouts for super-fresh flavor.
Ingredients
1 pound raw Brussels sprouts, rinsed, hard core removed, and finely shredded or sliced. Place in medium size bowl.
1/4 to 1/2 cup pine nuts, lightly toasted in dry pan, turning often. Set aside.
1/3 to 1/2 cup grated Romano cheese
Dressing, below
Brussels sprouts grow on the plant’s stem.
Ingredients For The Dressing
1 1/2 Tbsp. lemon juice
1 small shallot, minced
2 tsp. Dijon mustard
1 small to medium clove garlic, minced
1 to 2 Tbsp. mayonnaise
1/4 tsp. salt
Dash black pepper
3 to 4 Tbsp. extra virgin olive oil
Mix together all the dressing ingredients, except the olive oil, in a bowl. Now slowly whisk in the olive oil. Adjust measurements of ingredients, if desired. Some like less mustard; some like more garlic.
And Combine
Add dressing to Brussels sprouts, mix well, and refrigerate 30 minutes or more.
Then add the toasted pine nuts.
Add Romano cheese.
Adjust salt and pepper, if necessary.
Mix well and serve. This side dish can turn Brussels sprouts haters into Brussels sprouts lovers. Take it on your next picnic or try it as a light dinner. Enjoy!
Brussels Sprouts Slaw—it’s ready!
* * * * * * * * * *
Quickly Cooked Brussels Sprouts
Here’s another simple way to serve Brussels sprouts:
Rinse the sprouts and cut them in half.
Add to a pot of boiling water, or steam them in a smaller amount of water to preserve nutrients.
Let them cook on medium heat for a few minutes, then drain. Cooking longer makes them softer, but be careful not to overcook.
Either in the empty pot or in a serving bowl, add butter, a bit of salt, and chopped fresh basil to the sprouts.
Toss and serve.
Brussels sprouts is a member of the Brassicaceae (formerly Cruciferae) family, sometimes called the cruciferous vegetables. This large group of plants also includes arugula, broccoli, cabbage, cauliflower, collards, kale, mustard greens, pac choi, turnip greens, and others.
“Mmm…Sulforaphanes!”
Miniature broccoli ‘Happy Rich’ my favorite vegetable.
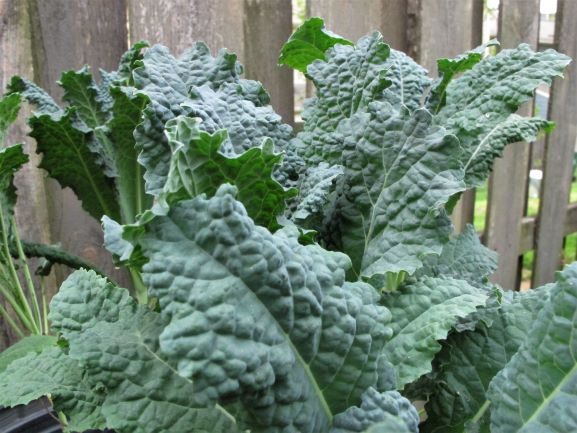
Dinosaur (‘Lacinato’ or ‘Toscano’) kale.
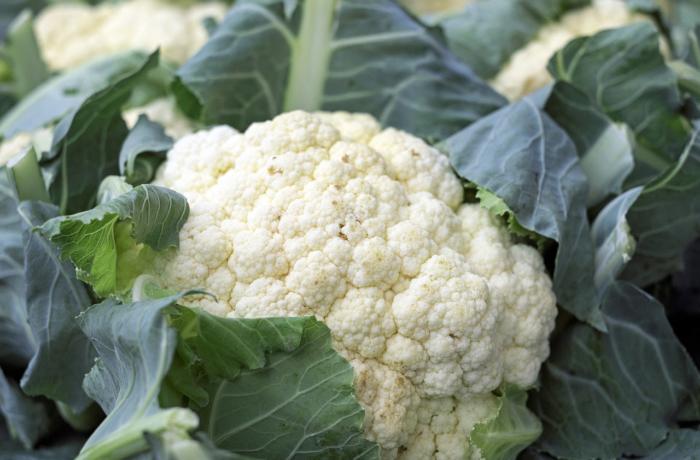
Cauliflower.
Pac choi, or bok choy.
The brassicas are famous not only for their generous vitamins, minerals, and fiber, but also, significantly, for their phytonutrients. And that’s not all—the anti-inflammatory brassicas also contain some protein and Omega-3 fatty acids.
Raw brassicas contain a group of nutrients called sulforaphanes, phytonutrients that help prevent many illnesses, including cancer. They also contribute to cardiovascular health and help preserve eyesight and brain function. No other group of edible plants has nearly the level of antioxidant glucosinolates that this one can boast; I’m not sure they have any!
Cutting up and immediately cooking the brassicas, however, will not produce the beneficial sulforaphanes. But there are 2 ways to get these powerful antioxidants. One is to eat them raw, as in the recipe for Brussels Sprouts Slaw.
The second way is to chop them up and let them sit on the counter for 40 minutes. There’s an enzyme in brassica tissues, called myrosinase, that is needed to produce the sulforaphanes. This enzyme, once activated by damaging the plant cells, needs time to convert sulforaphane precursors into the sulforaphane itself. But myrosinase is destroyed by heat; that’s why we need to wait before cooking them if we want those benefits.
So, if you’re preparing cooked Broccoli One or Two, Collards Soup, or simply adding any of the brassicas to store-bought pizza, steamed greens, or Eggplant Parmigiana, consider this “chop and hold” method of bringing out the best in the brassicas.
Because of the numerous health-giving attributes of the brassicas, I include at least one in my diet every day.
It’s hard to believe it’s already time to start seeds for fall greens and vegetables. I’ve been putting it off because of the hot weather we’ve been having. But, unless I want to buy transplants, seeds will have to be started soon. You folks up north probably have sown seeds for the broccoli and cauliflower by now, and certainly the Brussels Sprouts.
Here in North Carolina, fall seems a long time away, but in order for us to harvest those fall greens, we need to start sowing seeds now. Remember to locate your fall/winter garden where it will receive adequate sunlight. And, of course, I’ll sow successive crops through the rest of summer and early fall, as space permits.
Because we have a long growing season in the Carolinas, we can squeeze in another crop of summer vegetables. Zucchini, summer squash, cucumber, and beans can be sown again. But with the encroaching canopy of the trees on the berm, south of the garden, I’ll be planting only cool-season vegetables. The ‘Diva’ cucumber is loaded with fruits. And I will wait patiently for every last fruit to ripen on the tomatoes and peppers.
(***Update***: A few days ago, a large and dangerously crooked pine tree was taken down, and now there’s more afternoon sun for the tomatoes and peppers. More sun also gives us opportunities to grow containerized vegetables and fall greens inside the fence, protected from deer.)
If They Can’t Take the Heat
Spinach.
Temperatures are still too hot to sow lettuce and spinach outdoors, so I’ll wait another week or two. It’s still in the 90’s! They can be started indoors, in air-conditioned space, if needed.
Check the temperature of the soil before sowing seeds in the garden. Direct sun beating down on the dark soil surface can raise the temperature too high and dry it out very quickly. Look for one of those “Easy Tunnels”, or fabricate something yourself, to partially shade the soil and the tender young seedlings. You can purchase knitted shade fabric, made from black polyethylene, from mail order suppliers. In the southern states, 30-50% shading should work during the late summer months. This could lower the temperature by 10° or 15°F. Keep the soil surface moist to ensure good germination and to cool it down.
The best germination occurs between 60° and 75°F for lettuce and spinach. I usually put transplants into the garden instead of sowing seeds directly because hungry slugs, snails, and cutworms find tiny seedlings very tender and delicious.
Organic Sluggo will bait the mollusks (slugs and snails) to their deaths, and Bacillus thuringiensis (Bt), sprayed on the seedlings, will kill cutworms. Slug baits made with iron phosphate, such as organic Sluggo, are far less harmful to pets and to people than products containing metaldehyde, so be sure to read the labels.
One way to gather up a whole lot of slugs is to place a board, maybe 1′ x 2′, over damp soil. Go out and check the underside early the next morning, old knife in hand, and cut them quickly in half or squish them any way you choose…but, don’tuse saltin the garden!
Choosing Varieties of Fall Greens
Sowing seeds for fall greens and vegetables, which prefer cool weather, can be tricky in July’s heat. Look online or through seed catalogs for lettuce, spinach, broccoli, and other crops that are described as being heat tolerant varieties. Yes, all lettuce and broccoli varieties prefer cool temperatures, but some will take warmer or colder weather than others as they form heads. If you’re buying transplants, ask the grower.
Either way, plan to provide some sort of device that will lower the temperature during these last hot weeks of summer. For later harvests, I’ll sow seeds that grow cool and mature in cold weather, and they will not need the shade fabric. Plants grow better with more hours of direct sun as the temperatures cool down.
Check with your local agricultural extension office for recommendations or for a planting calendar.
Planting Young Transplants
Soil
Rich, dark soil with lighter brown clumps of clay, before incorporating.
Starting a vegetable garden with soil that has not been conditioned could result in a mediocre or poor harvest. Fall greens grow faster and larger in well-prepared soil.
Garden soil for these crops needs additional organic matter (compost, composted cow manure), drainage material (pine fines, coarse sand), and sometimes lime. A soil test will indicate the need for lime.
Our fall greens are being planted in soil that has been worked for 6 years, so it’s in very good condition. I will, however, continue to add compost, fertilizer, or manure to the garden.
When digging soil, bring some of the lower-level clay up to the surface, and turn under the richer topsoil 4″ to 6″ deep (a few inches deeper for tomatoes, in spring). Over time, the clay soil on the surface will improve as mulch decomposes or when compost is added as a top dressing. Here you can see clumps of light brown clay that were brought to the surface of the soil (photo, above) before they were broken up.
Roots
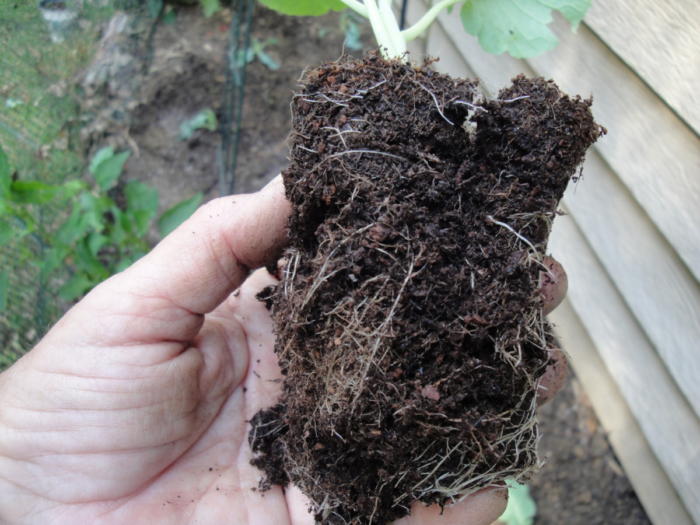
Growers use pots and market packs of various sizes, including small 9-cell packs, 4-cell packs, 2″ peat pots and 4″ plastic pots. The smaller the root ball, the more carefully you will have to monitor the care.
Broccoli roots before…
…and after.
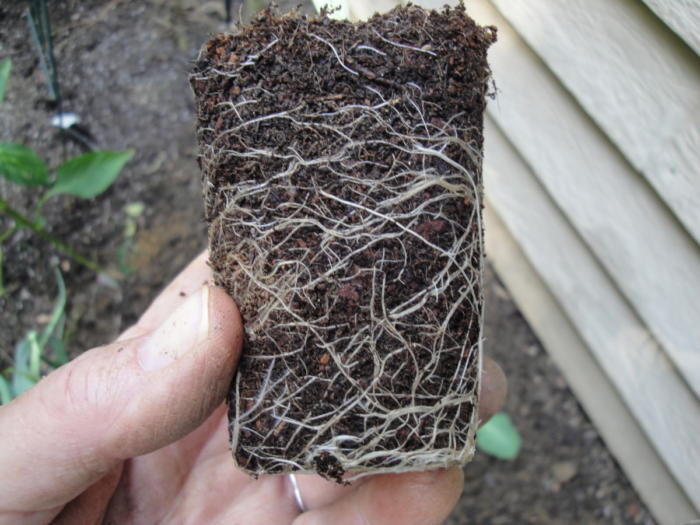
An important step before planting is to rough up the outside of the root ball (photos, above). This slightly injures the inner root layer called the pericycle, stimulating the plant to quickly send out new lateral roots into the soil. Be careful not to so severely damage the root system that the plant can’t supply water to the leaves on a hot, sunny day. Do this for every plant that is about to be repotted or planted into the garden.
A root ball that’s tightly packed with roots can be shallowly scored down the sides in a few places. Use a knife, a rock, or even a twig. Or use a cultivator to pry out some of the roots.
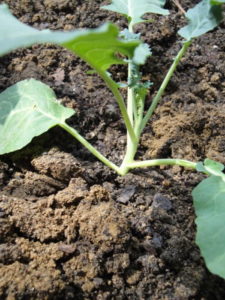
To Bury or Not To Bury?
Broccoli ‘Arcadia’ from 4-cell-pack.
Most youngvegetable transplants can be placed an inch deeper into the soil, or up to the bottom leaves. If the plant is more mature and has developed a somewhat woody or tough stem, plant it at the same level it was growing in the pot. But always, if possible, choose younger transplants.
Older plants can be stressed by being potbound or underfertilized, and might go to flower or head up prematurely, yielding undersized harvests. Young plants will require more time to grow, but they will give you the largest heads of lettuce, broccoli, cauliflower, and cabbage. If in doubt, plant the top of the root ball level with the soil surface.
Firm the soil around the roots and stem using medium pressure. Humidity in the soil between the soil particles will encourage the stem to grow fine roots without interference from tightly packed soil. Watering the plant will help the soil settle in around the root system and provide much-needed moisture.
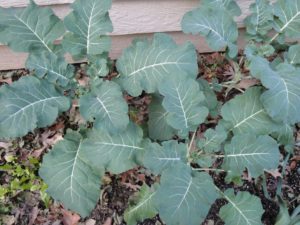
Broccoli ‘Arcadia’ in winter.
These are same broccoli ‘Arcadia’ plants photographed in late December (photo, above). Trees on the berm cast too much shade until leaves dropped off, delaying harvest. When the garden gets more sun, heads should form in mid to late winter.
Fertilizer
Planting fall greens and vegetables into late September, I mix a handful of granular organic vegetable fertilizer into the planting area. These crops grow beautifully with adequate nitrogen, so I will soon use higher nitrogen fish emulsion. Another application of fish emulsion will be made every 2-3 weeks through November, or every 2 weeks for potted greens.
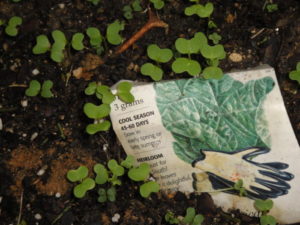
Mustard seedlings in the garden.
Microbes in the soil break down organic compounds and make nutrients available to the roots.But, as the weather cools significantly, microbial activity slows down. I’ll use synthetic soluble fertilizers a few times in winter to keep the plants growing.
Greens and vegetables will grow all winter here, with some protection during very cold weather. This is worth the effort, since I can pick beautifully fresh kale and spinach for the Sunday omelet, or a big bunch of collards for collards soup.
Mustard ‘Florida Broadleaf’ was sown in late September, and germinated a few days later. The thinned seedlings will be used in soup, salad, or an omelet. Spinach sprouted about a week later.
Arugula
Arugula flowers.
Arugula ‘Astro’ seedlings.
Love, love arugula! A forkful of salad greens that has a piece of arugula in it…mmm… The variety I prefer is ‘Astro’. It’s not as hot as the wild types, and it tolerates warmer temperatures. Arugula will self-sow if it likes where it’s growing. Just let it flower and set seed. The papery seed capsules release the seeds, which germinate within 2 weeks, during favorable weather, near the mother plant.
It grows well in morning sun, during warm weather, and in moist, rich soil. Those who are more adventurous than I might enjoy growing the hotter ‘Wasabi’. Arugula doesn’t look like a member of the family Brassicaceae, but it, too, is in that famous family.
You might have seen the term “cruciferous” being used when describing members of the family Brassicaceae. It refers to the flowers of these plants, which have 4 petals arranged in the shape of a crucifix. The terms brassica, cole crops, and crucifer (or cruciferous) refer to the same plants.
Broccoli
One of the most nutrient-rich foods, broccoli is a must in my garden. Nutrients include protein, Vitamins A, several B’s, C, K, minerals, fiber, and their famous phytonutrients. To say that we eat broccoli in one form or another every 2 or 3 days is not an exaggeration. Just ask Mother.
Broccoli crowns.
Heat and cold tolerance ranges from poor to excellent, depending on the cultivar. In this zone 7b area, ‘Imperial’ can be sown in July or planted as transplants from July through August; Johnny’s Selected Seeds’ catalog rates it “excellent” in heat tolerance for broccoli. Normally, broccoli grows best in cool weather, but you can extend the harvest by choosing 2 or 3 varieties that are suited to the weather at different times of the year.
The variety that will see us through the winter is cold-hardy ‘Arcadia’, which grows a large number of side shoots once the main head has been harvested. For that reason, don’t cut off too many leaves when you do harvest broccoli, because each of those leaves could be topped by another side shoot.
By the way, tender broccoli leaves are edible as well. Add them to soup, a smoothie, pasta, or a stir-fry. After the harvest is done, I keep the plants in the garden to flower. Bumble bees and other early risers are fond of this bounty, and the flowers are quite pretty!
Bumble bee visiting broccoli flowers in early spring.
Miniature Broccoli ‘Happy Rich’
Broccoli ‘Happy Rich’.
I’ve grown ‘Happy Rich’ for many years. This plant grows a small head at the end of a stem, harvested ideally before the white flowers open. Each of those little green beads is a flower bud, and even if the buds start opening when the stems are picked, they’re still going to the kitchen.
The head will never get to the same size as regular broccoli, but the flavor is superb. Once the little heads have been cut off with 5″ to 8″ of the stem, the plant will branch out and grow more little heads. The stem, the leaves, and the head are edible—steamed, stir-fried, or added to soup or a pasta dish.
Two plants have been growing in the garden since the spring, and they don’t look very happy. It’s been a hot summer, so I didn’t expect them to survive this long.
Bt
Cabbage worms on broccoli.
The white cabbage moths visit frequently—more frequently, alas, than I do with the bottle of Bt.
Bt is an abbreviation for Bacillus thuringiensis, a naturally-occurring bacterium that kills caterpillars of moths and butterflies (but not sawflies). Before you groan “no chemicals”, Bt is used by organic growers and it’s been around for decades. Perfectly safe, even for pollinators, and not a chemical.
All brassica crops are targeted by a few kinds of moths, which lay eggs on the leaves. They soon hatch into voraciously hungry and well-camouflaged caterpillars. After consuming some of the Bt, they stop feeding and die shortly thereafter. Young caterpillars are more easily controlled than older caterpillars. Thuricide and Dipel are two brand-name products with Bt as the active ingredient.
Page 1: Ready To Sow Fall Greens and Vegetables?, If They Can’t Take the Heat (Choosing Varieties of Fall Greens), Planting Young Transplants (Soil, Roots, To Bury Or Not To Bury?, Fertilizer), Arugula, Broccoli, and Miniature Broccoli ‘Happy Rich’ (Bt)
Page 2: Brussels Sprouts, Cabbage, Cauliflower, Collards, Kale, Lettuce, Nutritional Considerations of Fall Greens (Where’s the Beef?), and Only the Beginning
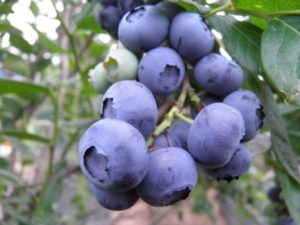
July is National Blueberry Month, but it’s a rare day when I don’t consume blueberries. For many years, breakfast 5 or 6 days per week consisted of plain Cheerios, a handful of English walnuts, a handful of fresh strawberries, and a handful of fresh blueberries. Throw in half a nectarine or peach in season, or part of a banana, and I’m “doin’ the body good”. More fruit and nut than anything else.
Today is Day One
Until today. This morning, when I was researching nutritional information on the luscious little berry, I read the caution about eating blueberries and dairy, especially high-fat dairy, at the same time. The super-healthy antioxidants found in blueberries (strawberries, too) lose their desired effect when dairy and berries are eaten together.
Eating a lotmore blueberries will increase the level of antioxidant activity, even in the presence of dairy. Apparently, this goes for strawberries as well. But this can get expensive, especially when berries are out of season.
So, all of you smoothie drinkers out there who use yogurt as a base might consider saving the blueberries until a few hours later. Or skip the yogurt. And today, the blueberry partnership comes to an end in my kitchen. At breakfast, anyway.
Blueberry Nutrients
A few berries in the bowl won’t hurt, and they certainly have other healthful reasons for including them. A ½-cup serving contains:
40 calories
1 g. protein
<1 g. fat
11 g. carbohydrate
7 g. sugars (blueberries have a low glycemic index of 53)
2 g. fiber
high amounts of vitamins A, C, K (blood clotting, bone health, heart health), and the mineral, manganese
But it’s the antioxidant benefit I’m after more than anything else. Blueberries contain huge numbers of antioxidants, including the flavonols, quercetin (linked to lower blood pressure and reduced heart disease) and myricetin (cancer, diabetes).
Anthocyanins include malvidin and delphinidin, found predominantly in the blueberry skins.
What Antioxidants Do
Blueberries have the highest antioxidant levels among commonly found fruits and vegetables—when they’re not eaten with dairy products. Anthocyanins are one group of antioxidants, the pigments that give red, blue, and purple fruits and vegetables their colors.
Antioxidants are health-promoting flavonoids belonging to a huge group of polyphenols. They circulate through our vascular system and help protect us from the damaging effects of free radicals. Those free radicals are produced as normal products of metabolism. They also help prevent free radical cell damage due to exposure to alcohol, cigarette smoke, and other pollutants.
A free radical, lacking an electron or two in the molecule’s outer orbit, is unstable as it tries to steal an electron from a nearby molecule, replicating the instability. This can lead to the development of cancerous cells if it happens in DNA. Antioxidants neutralize the unstable molecules.
More Benefits
In addition to helping prevent oxidative DNA damage, potentially leading to cancer, and slowing down the aging process by 2½ years, antioxidants in blueberries are also linked to lower LDL cholesterol, the “bad” cholesterol that can lead to heart disease. But there are many other factors that contribute to this illness. One of those factors is inflammation, and blueberries—you guessed it—are also anti-inflammatory.
Many studies point to the positive effects blueberries have on blood pressure, type 2 diabetes, urinary tract infections, brain function, and muscle damage after strenuous workouts. Antioxidants help our bodies produce more nitric oxide and can relax blood vessels, helping to lower blood pressure.
This little fruit also slows the progression of age-related macular degeneration and glaucoma. There are plenty of reasons to include blueberries and other colorful plant pigments in the diet.
One clue to their growing popularity is the fact that per capita blueberry consumption tripled between 2000 and 2015, to just over 3 pounds per person per year. When I move to a place with more land, planting a blueberry patch is high on the list of garden projects.
Prepare for Planting Your Blueberry
Sun
First, locate your blueberries where they’ll receive at least 6 or 7 hours of direct sunlight. In areas with hot summers, dappled shade in mid-afternoon helps prevent stress. Consider the tree canopy and how soon it might begin to cast too much shade on your blueberry garden.
For all permanent plantings, I like to give plants an excellent base to root into. The section in Soil Prep 101 for Your Vegetable Garden headed “Prepare for Soil Prep” offers details on getting started, with a few exceptions for blueberries. Blueberries, in particular, require very acidic soil.
A soil test is recommended to get an accurate reading of the soil’s fertility, pH, and tilth. Proper planting and management will reward you with perhaps 20-30 years of blueberry harvests.
Drainage
Planting mix composed primarily of pine fines.
Very dry soil is difficult to dig, so watering the area a few hours or the day before starting the process will make it easier. I usually use a sturdy garden fork for the initial dig.
Loosen the soil 15-20″ deep, and 3 or 4 times the width of the root ball. Add a cubic foot or more, depending on how bad the soil is, of partially composted pine bark chips, also called soil conditioner or pine fines (photo, above) to facilitate drainage. Don’t layer the pine fines; instead, incorporate them into the full depth of excavated soil.
If you have sandy loam to begin with, you might not need as much soil conditioner. Here in the piedmont of North Carolina, however, we have heavy, sticky clay. Clay soil holds moisture and fertility, but it requires amendments to improve the drainage.
Coarse sand (not play sand, which is too fine) is another material that can improve drainage, but it should be used in conjunction with organic matter.
Loosening the soil and adding amendments and plants raises the finished level of the bed. Take this into consideration as you sculpt the land. Blueberries need good drainage, and you want to make sure you didn’t create a berm where the water has nowhere to drain. Hire a professional gardener, if you prefer, to till and prepare the soil according to how you want it done.
If you’re planting the shrubs in a row or in a group, the plants will thank you if you dig the entire bed instead of just the area around each plant. Remember to place the tallest-growing varieties on the north side of the garden (northern hemisphere). Concentrate the peat moss and compost near the plants, but add some peat and pine fines between them as well.
Gypsum
Gypsum (calcium sulfate) can be added annually for several years to soils that are especially intractable. It works by “flocculating”, or gathering, tiny particles of clay soil into larger particles, opening up minute channels through the soil profile. The larger air pore space allows water, air, and roots to more easily penetrate the soil.
Unlike lime (no lime for blueberries!), gypsum doesn’t raise the pH of the soil. Pelleted gypsum can be incorporated into the soil at the beginning of the process and applied as a top dressing in subsequent years. Water will carry it lower into the soil.
Soil PH
Because blueberries are sensitive to high salt content, do not add mushroom compost or composted manure to the garden. Manure also can raise the pH of the soil.
Our soils in the eastern U.S. tend to be acidic, but not acidic enough for blueberries. Blueberry plants need a pH below 5.5, even as low as 4.3. Peat moss is very acidic, and blueberries love it. In addition to the pine fines, add at least one cubic foot of pre-moistened peat moss per plant. Again, thoroughly incorporate the peat with the top 12″ to 15″ of soil, breaking up the clods as much as possible.
Pockets of dry peat moss buried in soil will remain dry for a long period of time because it resists absorbing water. Clay readily absorbs water; you need to thoroughly mix the clay particles into the peat moss. Pre-moistened peat moss is easier to work with.
A moderate amount of aged compost can be incorporated into the top 6-8″ of soil. The amended soil should be at least 3 times the width of the root ball. Sure, that sounds like work, and the plants probably would survive with a lesser effort, but greater effort equals greater rewards!
Rake the area smooth.
Time to Plant Your Blueberry
Before removing the blueberry plant from its pot, water it. This will help the root ball slide out of the pot. Don’t pull the plant by the stem; this could damage the delicate root system. Avoid heavily damaging the roots of blueberries because they lack root hairs. Keep the label for each plant with the plant.
Let gravity help you. Tilt the pot almost upside-down and see if the plant comes out without too much coaxing. Be ready to catch it before it lands on the ground; stems are brittle and easily broken. If the roots still won’t let go of the pot, cut away the plastic pot with a utility knife or sharp pruners. Or use an old bread knife along the inside of the pot, separating the pot from the outside of the root ball.
Know how large the plants will grow when they reach maturity in order to gauge how far apart they should be planted. Plants often grow larger than the size indicated on labels. And to maintain the health of the foliage, spacing them farther apart assures good air circulation.
Grab Your Shovel
Hollow out a hole in the prepared garden. The depth should be almost the height of the root ball. Allowing ½” to 1″ of the root ball to protrude above the finished grade is advised.
Never cover the original root ball with new soil; doing so would suffocate the roots and damage the stem. Blueberries prosper when planted in a raised bed, ensuring good drainage and high oxygen content at the crown of the plant.
Use a cultivator to loosen some of the roots on the outside of the root ball, or score it several times with a knife, slicing shallowly from top to bottom. This light damage will stimulate the root system to quickly send out new roots.
You want to encourage the plant to grow roots away from the plant and into the amended soil instead of circling around the original root ball. Whenever you add anything into the landscape, do not dig a bowl with a smooth surface. Use a shovel to create jagged edges, which will direct growing roots into new territory.
Now plant the blueberry, backfilling with amended soil. Guide the loosened roots out into the prepared ground. Using medium pressure, firm the soil. Loosely packed soil will settle, possibly dragging the plant too deep into the ground.
First Pruning
With young plants, remove very thin twigs, crossing or damaged stems, and cut back long stems to remove most flowers. Mature plants at the nursery, grown in large pots—okay, experts still recommend pruning them, but I’ve had no problems letting them set some fruit the first year when the plants are well cared for.
Label the Blueberry Plant
For new plants, bury the label on thenorth side of the stem. This way, you’ll know where to find the label if you need to know the cultivar’s name. Plastic labels that are shaded will last a long time. It’s not a bad idea to take pictures or to record this information in a journal. Keep track of the plants’ names in case one or two should perish, because…
…blueberries are particular about their pollinizers—the plants that provide the pollen. So, you’ll want to know the names of plants that need to be replaced. All blueberries bear fruit, but you don’t want to create a gap in bloom cycles by guessing which varieties to buy. Ensuring an uninterrupted succession of flowers and mature pollen throughout the bloom season yields an abundant harvest of beautiful berries.
Mulch
Once all the blueberries have been planted and the soil raked smooth, apply the mulch. I prefer to use pine products, such as 4″ of pine straw or 2″ to 3″ of pine bark nuggets for blueberries. An inch of pine fines also works. Don’t apply mulch against the stems.
Avoid walking over the newly prepared garden to prevent compressing the soil.
Pine straw.
Mulch helps cool the soil and hold in moisture. It also helps prevent most weeds from growing, which compete with blueberries for moisture and nutrients. More mulch will be needed as it decomposes, but pine bark chunks can last a few years.
Shredded hardwood mulch is attractive and readily available. And it holds well on a slope, except during heavy rains. A thin layer, an inch or so, is acceptable. But too much hardwood will raise the pH of the soil. As long as you can maintain the pH that blueberries require, using a thin layer of shredded hardwood is okay. But pine straw and pine nuggets are preferred.
If the soil pH is too high, switch from shredded hardwood to pine bark nuggets. In fact, specialists recommend alternating between pine products and hardwood every several years. Changing the pH with mulch is a very slow process. So, you’ll need soil acidifier, which is available at garden centers, to lower the pH if it drifted too high.
Water
Blueberry ‘Patriot’, in a pot for several years.
If you can’t plant the blueberries right away, they might require water every day.
Water the new garden well. For the next 2 weeks, or until the plants root in, the only water available to them is the moisture held by the original root ball. Naturally, if ample rain falls while they’re rooting in, you might not need to water. Dry clay soil in the bed will steal moisture from the plant’s root ball.
If the plant was being watered daily at the nursery, it might require daily watering after planting. Large leafy plants dry fast in warm, breezy conditions. New growth on the tips of the stems visibly wilts if the roots have been damaged or if the soil is dry. Having no root hairs subjects blueberries to early wilting if moisture levels drop too low. Water immediately, or those tender new leaves will turn brown.
Direct water from the hose over the original root ball. Feel the water first, to make sure it’s not hot. Give each plant at least 3 gallons of water, more for larger specimens. Water the soil a few inches beyond the root system to encourage new roots to grow toward the moisture. Monitor soil moisture levels for the first growing season.
Tap water has a high pH, so regularly irrigated soil will require acidifying.
How Are They Looking?
Do they wilt every day although you water every day or two? Water deeply so that the entire root system is moistened. Shallow watering might satisfy roots near the surface, while those deep in the soil remain dry. As new roots grow into the soil, water more widely around the plants. The original root ball often resists absorbing moisture if it has gone too dry. That’s why we recommend pre-moistening peat moss and watering the potted plant before planting.
Overwatering also can cause wilt. Don’t overdo it. Too much water in clay soil prevents air from reaching the roots. Essentially, they drown. An overwatered plant is less likely to recover. I can’t over-emphasize the importance of good drainage… and that means amending clay soil.
Excessive root injury sustained when planting will cause the plants to wilt. You might need to lightly shade them for a few days to ease the stress. After a week or two, prune off branches that didn’t recover, or leave them for a while longer to see if dormant buds sprout from live wood.
Check to see if the root ball has settled too deeply into the soil. Raise it up if that’s the case. The crown of the plant should be flush with the surrounding soil level, or, preferably, raised a little above it. And make sure all air pockets around the roots have been filled with soil.
If your new blueberries are looking good and starting to grow, congratulations! Blue star!
Settled In
Once the plants begin to root in, after a couple of weeks, you can decrease the frequency of watering. It’s tempting to assume that the recent gentle rain is enough for the next few days. But it might have been only ¼”, which dampens the mulch but not the soil.
If in doubt, dig several inches into the soil near the edge of the original root ball to see whether the soil is running dry or is sopping wet. You don’t want either of those conditions.
One inch of water throughout the garden will moisten the top 4-6″ of soil. Every week during the growing season, the entire garden should receive 1½” of water, and more than that in sandy soil. After the plants have become established, water less often, if you need to at all, but water deeply when you do.
Family Likeness
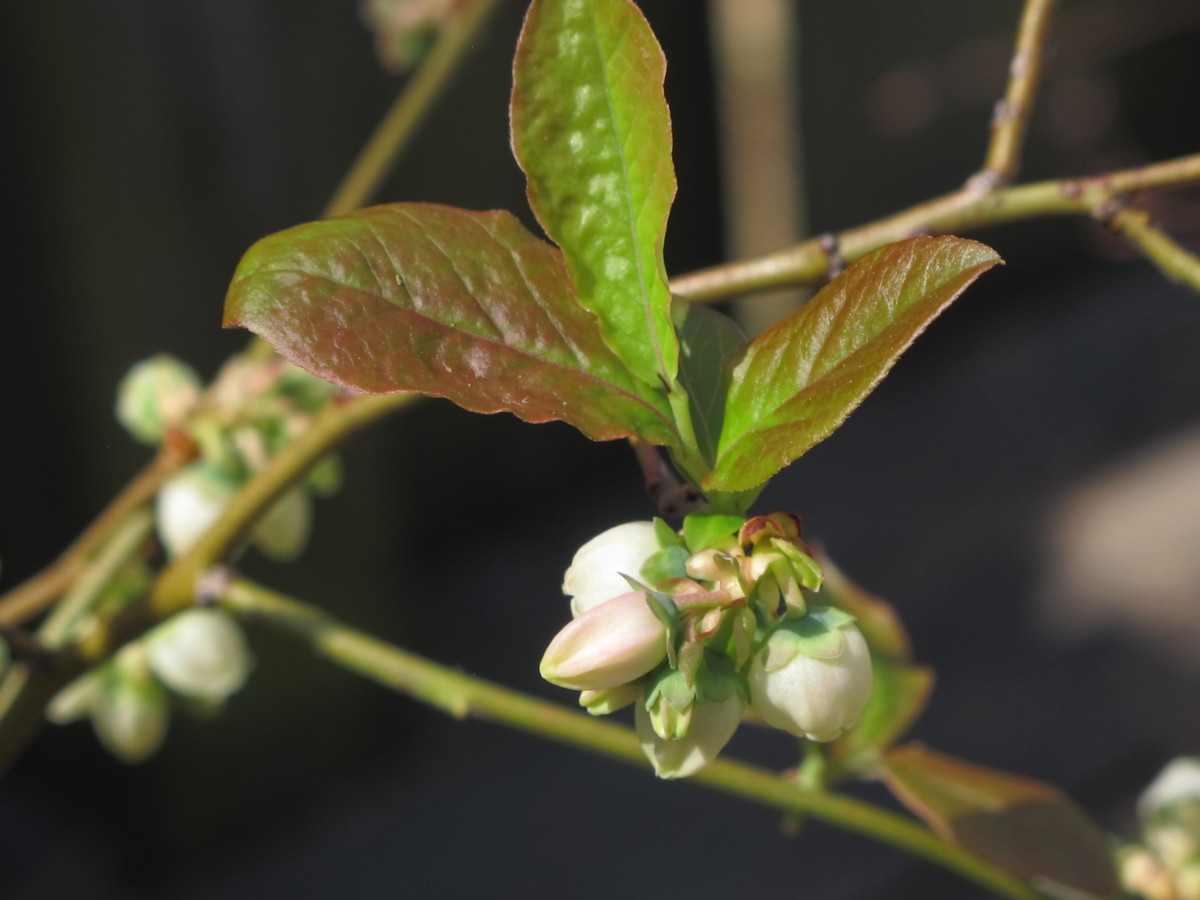
Early season flowers and leaves on our potted ‘Patriot’ blueberry.
Looking at the flowers in late winter to late spring, you might have noticed the similarity between blueberry (Vacciniumspp.) flowers and the flowers of Pieris japonica, and those of the sourwood tree, Oxydendrum arboreum. Their flowers resemble little bells.
All of them belong to the family Ericaceae, which includes heaths, heathers, azaleas, and rhododendrons, although these shrubs’ flowers bear less similarity to those of blueberries. Cranberry, bilberry, and huckleberry also belong to the Vaccinium genus.
Gardeners cultivate 50 or 60 species of blueberries around the world. Several species native to the United States and Canada formed the basis for almost all of the many blueberry varieties available today.
New dwarf cultivars of blueberries feel right at home in foundation plantings. Edible landscaping highlights both the ornamental and the edible aspects of growing blueberries.
Headings
Page 1: Planting a Blueberry Patch?, Today Is Day One, What Antioxidants Do (Blueberry Nutrients, More Benefits), Prepare for Planting Your Blueberry (Sun, Drainage, Gypsum, Soil PH), Time To Plant Your Blueberry (Grab Your Shovel, First Pruning, Label the Blueberry Plant, Mulch, Water, How Are They Looking?, Settled In), Family Likeness
Page 2: The 5 Major Groups of Blueberries (Lowbush Blueberry, Northern Highbush Blueberry, Southern Highbush Blueberry, Rabbiteye Blueberry, Half-High Blueberry), Blueberry Maintenance (Water, Mulch, Fertilizer, Pruning, Blueberry Pollination, Disease, Picking), Woodchucks and Friends, Plant Protection, Cage Your Blueberries
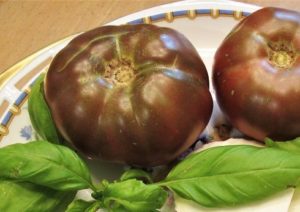
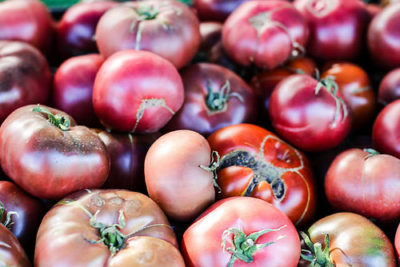
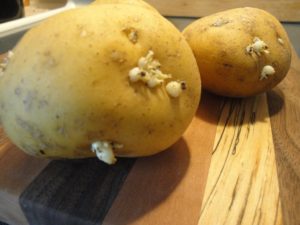
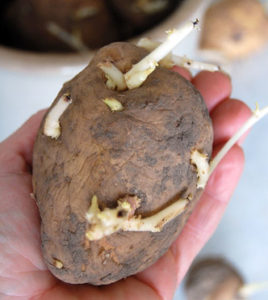
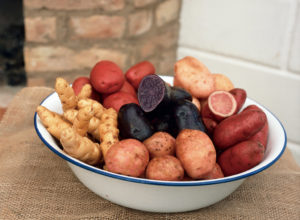
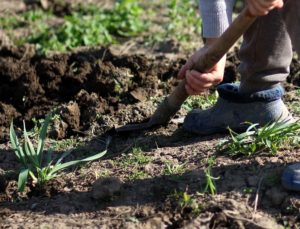
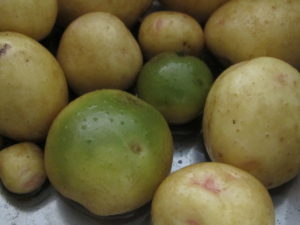

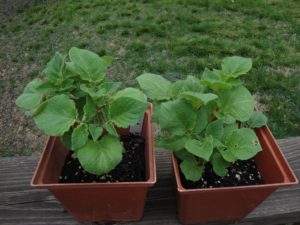
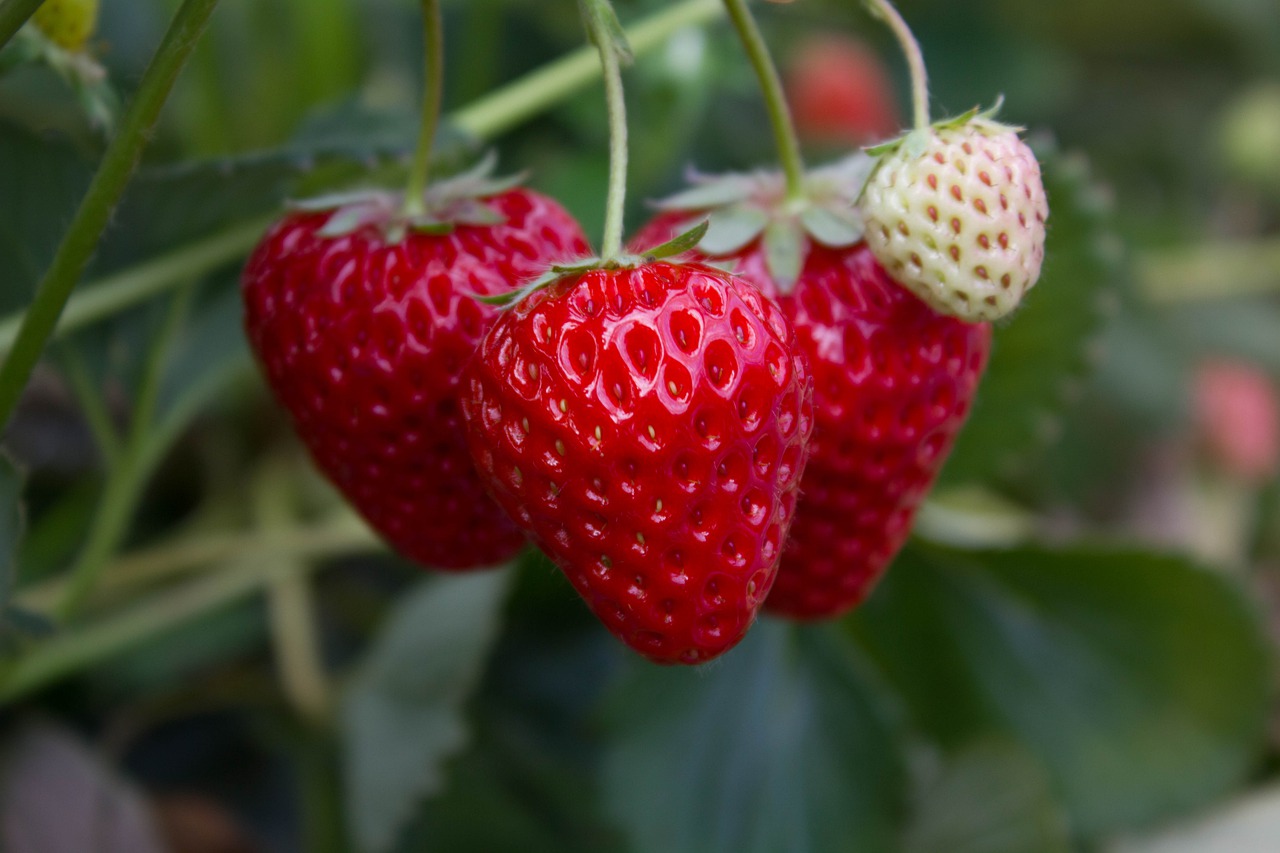

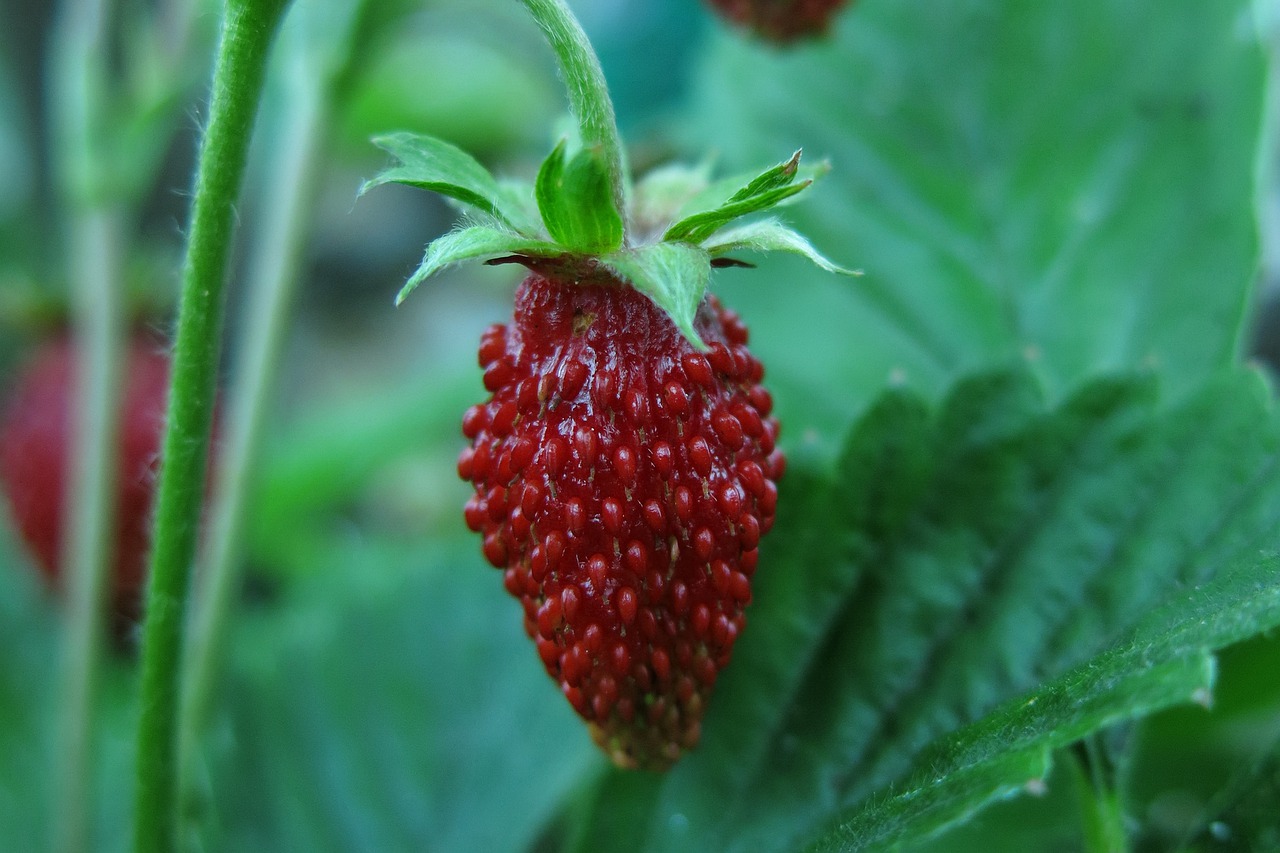
 Find garden space that gets full sun for the best yields. Strawberries start growing before the end of winter, when the sun is still low in the sky. Take this into consideration when locating your garden. In partial sun, foliage and fruits might be plagued by diseases that will ruin the crop.