Page 2
What Are Microgreens?
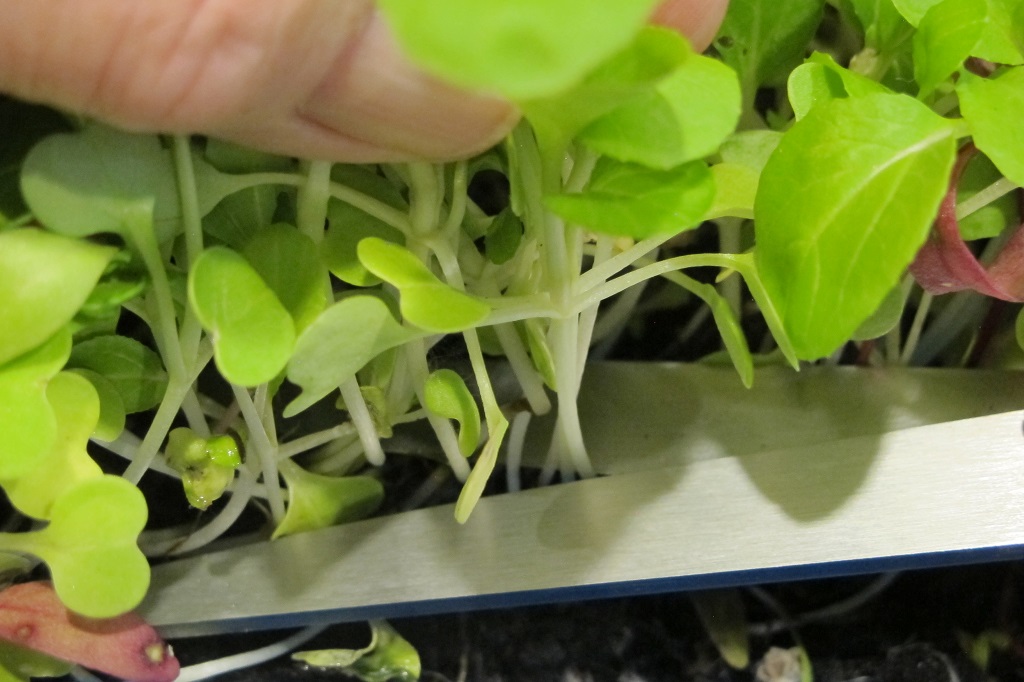
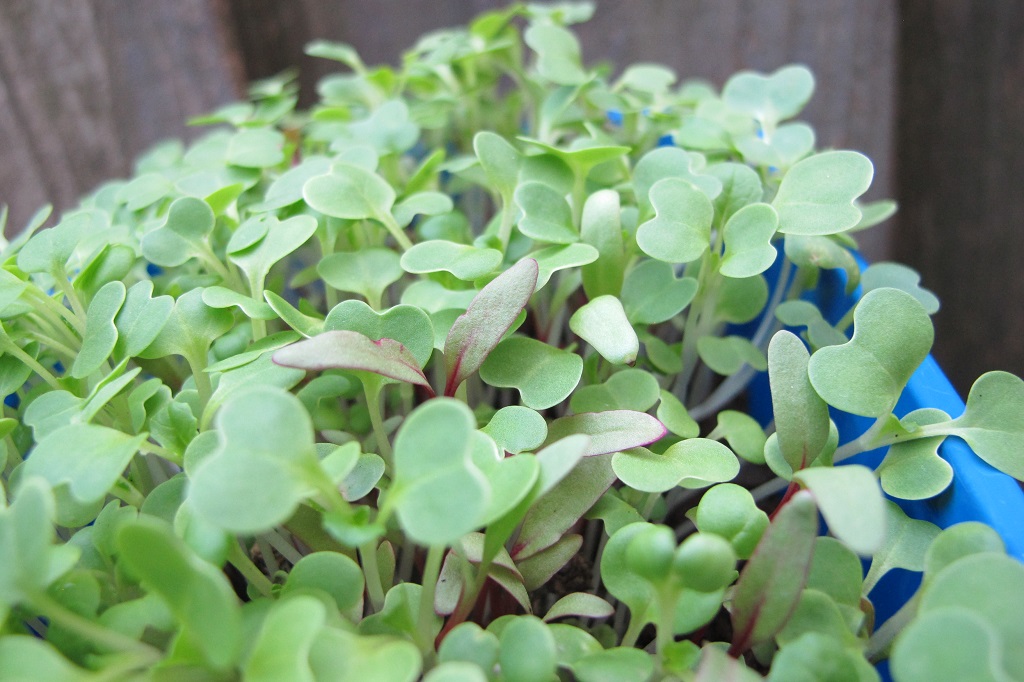
Harvesting microgreens.
Microgreens are seedlings of certain vegetables and greens that are ready to harvest about two to four weeks after sowing. Most are between 1″ and 2″ tall. By then, they will have grown cotyledons (seed leaves) and the first true leaves. I use sharp scissors to harvest a handful at a time, right above soil level.
This time, though, I’m letting one tray grow a bit larger. I’m curious to see if I can get a second cutting from the container if I don’t cut the seedlings too low. Plants won’t sprout again if they’ve been cut below the seed leaves. If leaves begin to turn yellow, I’ll compost the lot. (***Update***: Mixed results; less than half of the seedlings regrew nicely.)
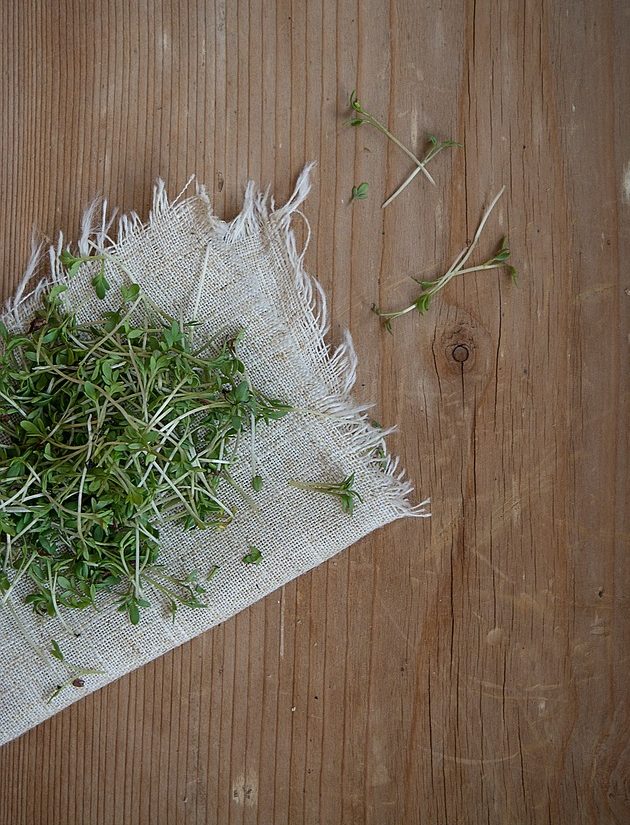
Always rinse microgreens before using them in the kitchen.
Herbs and annuals grown as microgreens are harvested within two weeks to a month. Plants include basil, borage, celosia, chervil, cilantro, cutting celery, dill, fennel, lemon balm, marigold ‘Gem’, parsley, salad burnet, and sorrel.
Seedlings will taste like the herbs themselves, of course, and range from sweet to spicy or peppery, and citrusy to earthy.
They’re cut when immature, so they will not have flowers. Many plants, however, do have edible flowers, but they require months to grow before harvesting.
What Are Shoots?
Some species of fast-growing edibles are cut 2 to 4 weeks after sowing on 1″ or 2″ of soil. These shoots include mung beans, sunflower, buckwheat, field peas and pea tendrils, winter wheat, and nasturtium.
Shoots have seed leaves and a few sets of true leaves. Cut the stems just above the soil, and, again, rinse before using.
These green shoots are excellent for garnishes, in salads, soups, and sandwiches, and are usually cut between 3″ and 5″ in height.
What Are Sprouts?
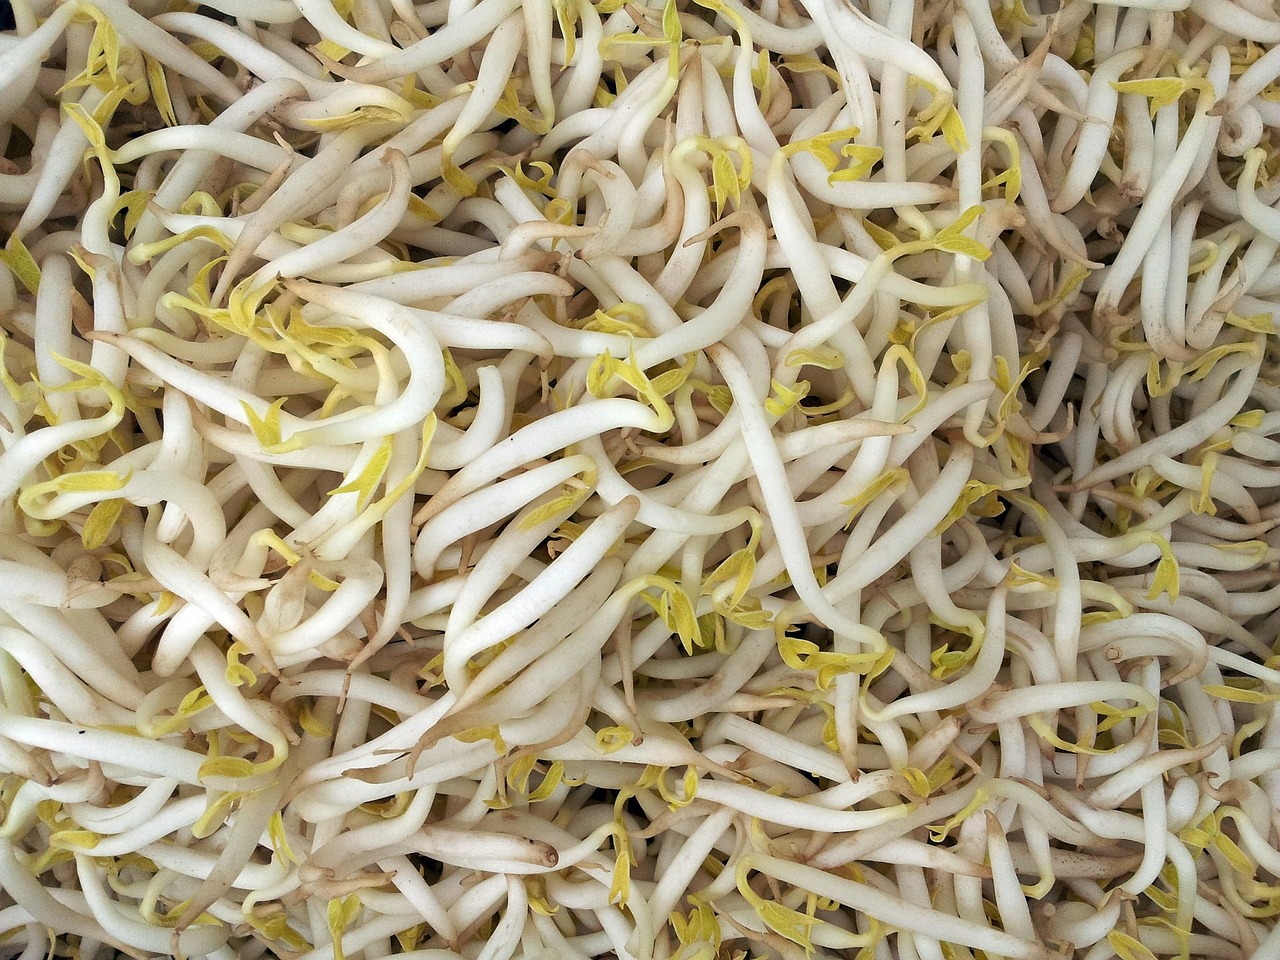
Mung bean sprouts.
The fastest crop comes from harvesting young sprouts. Because the seeds can harbor bacterial spores, look for sources that test their seeds for Salmonella, E. coli, and other pathogens.
Sprouts grow without soil, and they don’t require any more light than you have in the kitchen. I used to grow mung beans (bean sprouts, photo, above) and broccoli sprouts in jars covered with a cloth, rinsed and drained a few times each day. Harvest sprouts soon after the root or stem emerges from the seed, with seed leaves beginning to unfold—literally, within a week.
Unlike microgreens and shoots, harvested sprouts often contain some of the seed coats as well. They can be rinsed away with some effort.
Plants grown as sprouts include alfalfa, broccoli, fenugreek, kale, lentil, mung and other beans, onion, radish, and winter wheat. (Alfalfa is particularly tricky concerning diseases, so I don’t grow it.) Seed suppliers sell special germinators for growing sprouts without soil.
Always rinse well before serving.
* * * * * * * * *
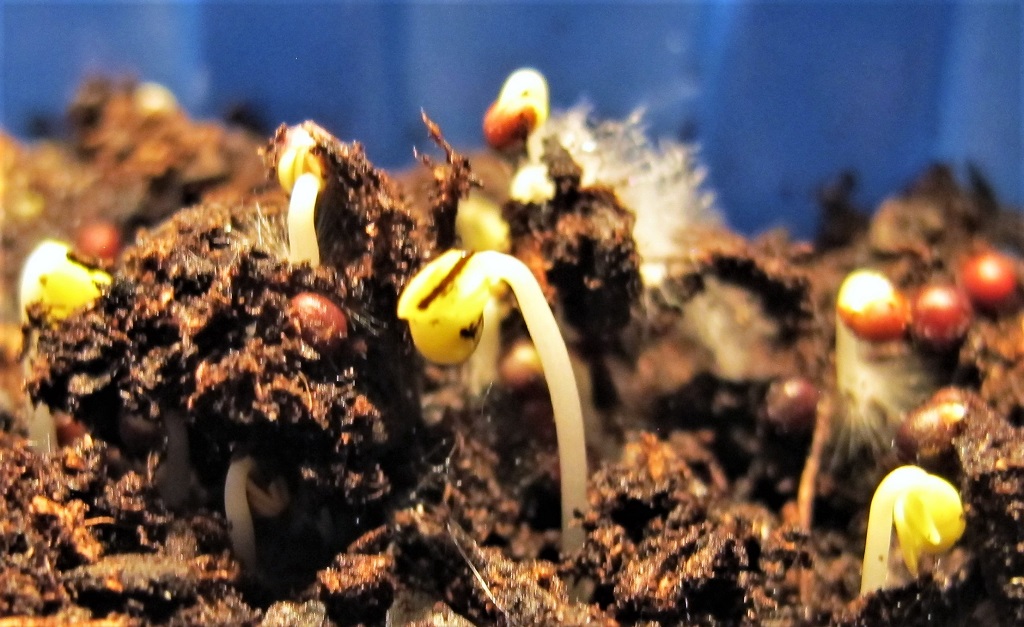
These microgreens germinated at night, a few days after sowing.
How To Grow Microgreens
Look through any comprehensive seed catalog, and you’ll find an assortment of seed mixtures formulated to grow as microgreens. Mesclun mixes also can be grown as microgreens or shoots. Some are spicy, and some are mild. Others are grown for bright colors.
Not all crops’ leaves are edible, so be sure they qualify for this project. None of my seed catalogs list tomato, pepper, eggplant, or potato seeds (the nightshades, family Solanaceae) for microgreens. Only tomato, pepper, and eggplant fruits and potato tubers are edible. Their foliage and other parts are not edible and, in fact, contain poisons.
You can also choose from among dozens of unmixed species and varieties. If you combine varieties, choose those that germinate and grow at approximately the same rate. Otherwise, some plants will be ready for cutting while others will have barely germinated. If you have partial seed packs hanging around, this is one way to use them up (“note to self…”).
How To Use Microgreens

Veggie omelet with microgreens.
Experiment with color, texture, and flavor, and soon you’ll have your own signature blend. Microgreens topping your cooked fresh fish will rival the dishes served at your favorite restaurant. Or pair them with a soft cheese for elegant crostini.
Use these versatile greens in smoothies, soups, mixed salads, and caprese salad. I sometimes add a handful of microgreens at the last minute before folding the omelet. Garnish a pasta dish or a stir-fry with these colorful greens. Include them in your favorite wraps or sandwiches for a burst of flavor, color, and texture.
Although some species won’t Wow! you with flavor, knowing they contain all those beneficial nutrients is good enough for me. Brassicas come to mind, with their earthy goodness.
The Container
These crops grow for a short period of time, so use a shallow pot. Any of the various types of plastic containers in the grocery store’s produce section will work. Lately, I’ve been using shallow mushroom trays that measure about 6″ x 8″. As one tray supplies a few harvests, others are in the line-up.
Even if they don’t have drainage holes, it’s not hard to tell how moist the soil is. Poke some holes through the bottom and let the water drain if that’s easier for you.
For a greater quantity, use a clean garden flat. Microgreens, shoots, and sprouts also adapt to growing hydroponically.
Here’s an idea for gatherings with friends and family: spot some potted microgreens around the dinner table. Let your guests snip them or take them home. Now, there’s a good way to reuse small containers…or hollowed out miniature gourds. And they might get the conversation going.
The Soil
For microgreens, fill a clean container with 1″ to 1 1/2″ of potting soil or seedling mix. Organic soils lack wetting agents, and are, therefore, a bit more difficult to moisten. Give it several spritzes of lukewarm water from a mister, and mix it in.
Or, use pasteurized seedling mix or potting soil which is not certified organic. That’s easier for me.
The Seeds
Inexpensive options for seeds are available. You can find them in bulk at reasonable prices. There’s no need to grow the more expensive hybrids, since the greens will be picked very young. Seeds can maintain viability for up to a few years if stored in a cool, dark, dry place.
Give the seed packet a shake (for mixtures), and sprinkle the seeds on the surface, about 1/16″ to 1/4″ apart, depending on species. For a succession of harvests, sow them every 7 to 14 days.
Cover the seeds with 1/8″ to 1/4″ of potting soil. Mist the surface gently, so all the soil is damp. After 15 or 20 minutes, tilt the pot and see if water pools in the corner. In a container without drainage holes, that excess water must be drained off. Or simply poke a hole through the soil and the bottom of the pot using a sharp knife. After a while, you’ll learn what a pot of moist soil weighs when lifted.
Cover the container with plastic film or slip it into a clear plastic bag; high humidity helps the seeds germinate. Place the container where the temperature is around 65° to 75°F. As soon as you see growth, remove the plastic covering and provide direct sunlight.
The brassicas begin germinating within a few days, and are easily spotted by the notched seed leaves, or cotyledons. Because all the brassicas belong to only a few species, their true leaves also look very similar. In the photo below, most of the seedlings are brassicas, although a few red-tinged beets have also started growing.
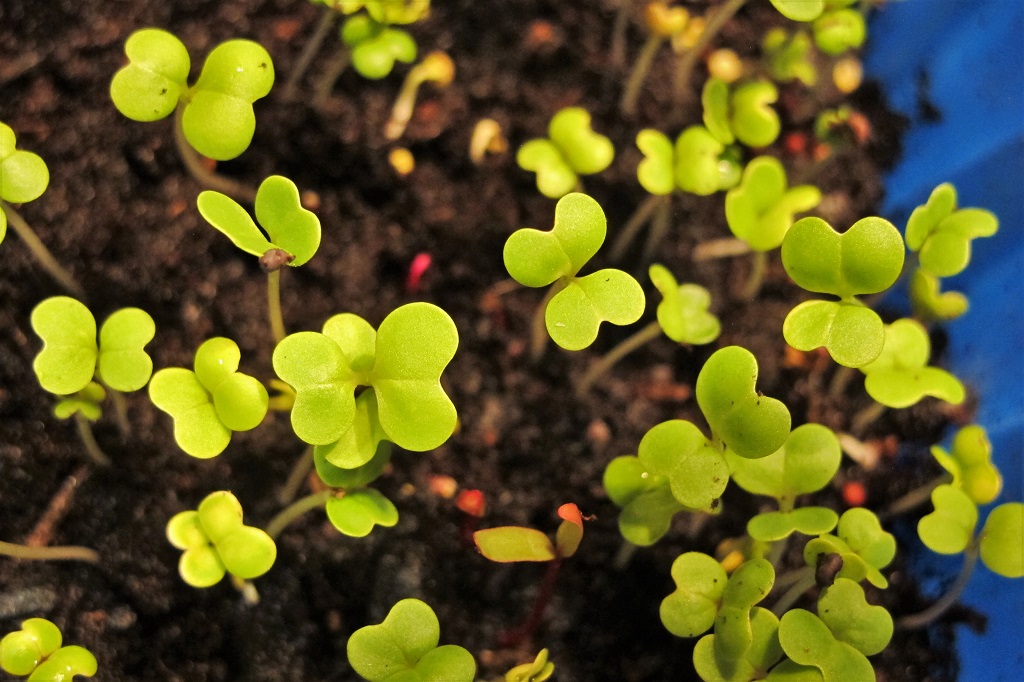
These microgreens are 2 days old.
Maintenance
To prevent leggy growth, expose the seedlings to direct sunlight on the first day. Here in USDA zone 7, I germinate the trays indoors, and move them outside in the daytime during the summer season. They come back inside at night to prevent damage from slugs, grasshoppers, and rainstorms.
Cool season greens (brassicas, lettuce, Swiss chard, beet, onion, pea, fennel, sorrel) grow well from 50-65°. Warm-season greens (basil, purslane, marigold), though, should be kept indoors, at temperatures around 65-75°.
During cold weather, of course, they grow indoors. The plants can stay on a sunny windowsill until harvest, but monitor the temperature. When daytime temperatures reach 50°, I often move the brassicas outside to the sun for a few hours, even in winter. Direct sunlight outdoors is much stronger than sunlight indoors.
This mixture contains several brassicas, beets, and Swiss chard.
Three ways to water:
- Water gently, so the soil doesn’t splash onto the leaves.
- Mist the trays to keep the leaves clean. Gently tap the container on the table so water drips to the soil.
- For containers with holes in the bottom, place them in a tray of water until the soil has moistened.
Snip the amount of microgreens you need at the moment. They retain more of their nutrients if they’re not stored. Hold a handful of the tops and cut with scissors to include most of the stem length. Rinse well before eating.
Yellow Leaves?
Yellow leaves are less palatable and have diminished nutrients, so harvest your greens before they deteriorate.
The seedlings won’t need fertilizer unless you intend to harvest taller greens, but nutrients in larger plants are less concentrated. The soil will run out of fertilizer, especially nitrogen, in 2-4 weeks, depending on soil composition and density of growth. Products with compost might last the full month without additional fertilizing.
Lack of light in tightly packed plants causes yellowing foliage. Dry or wet soil, poor soil, and temperature extremes also compromise the quality of your microgreens.
If you decide to make growing microgreens a regular activity in your home, consider growing them under a 4′ long LED or fluorescent fixture. Keep the lights on for 14 to 18 hours each day, and place the pots within a few inches of the tubes. The plants will never see a cloudy day.
Bon Appetit!
This is great project during these Covid times when most of us are staying close to home. There aren’t too many edibles you can grow and harvest in such a short period of time, and none are this densely packed with nutrients. Stay safe and enjoy!
Headings
Page 1: Mmm…Microgreens!, Why Are Microgreens So Good For Us? (The Brassicaceae Family, Health Benefits of the Brassicas, What Are Free Radicals?, What Are Antioxidants?, Glucosinolates), and Other Plant Families For Microgreens, Sprouts, or Shoots
Page 2: What Are Microgreens?, What Are Shoots?, What Are Sprouts?, and How To Grow Microgreens, (How To Use Microgreens, The Container, The Soil, The Seeds, Maintenance, Yellow Leaves?)