Tag Archive | using Christmas lights to keep plants warm

The ‘Cherokee Purple’ Tomato

updated 2/18/2024


cherokee purple tomato

‘Cherokee Purple’ tomatoes from my garden.


The Last of the ‘Cherokee Purple’ 


One of the most popular tomatoes offered at farmers’ markets is an heirloom called ‘Cherokee Purple’. We rarely see them in grocery stores because they don’t travel well over long distances. At the markets where I sell several heirloom tomato transplants, customers request this one most often.

In 1990, Craig LeHoullier, chemist and grower of hundreds of heirloom tomatoes near Raleigh NC, received unnamed tomato seeds and a note in the mail. John D. Green, of Sevierville TN, sent the material. Green received seeds that had been saved and passed among a few generations of local gardeners. His note said the Cherokee Indians in the area had been growing this lobed variety since the late 1800’s.

LeHoullier planted the seeds in 1991. Confident in this tomato’s marketable qualities—and naming it—he distributed seeds saved from the trial to Jeff McCormack of Southern Exposure Seed Exchange and to Rob Johnston of Johnny’s Selected Seeds. Beginning in 1993, these seed suppliers included the ‘Cherokee Purple’ tomato in their catalogs.

LeHoullier continued selecting variants of this variety, coming up with ‘Cherokee Green’ in 1997. This tomato is striped green and yellow, and has some orange tints at the blossom end of fully ripe fruits. After trialing a batch of seeds sent from another grower, Lehoullier named this one ‘Cherokee Chocolate’ in 1995. This variety is mahogany brown.


Attributes of the ‘Cherokee Purple’ Tomato


Often called “ugly” by some (not me), their flavor, nevertheless, is outstanding! The 8–12-ounce tomatoes might appear lumpy due to asymmetrical ribbing, but they’re often shaped like regular tomatoes.

The skin color is uniquely brick red to maroon, perhaps brownish, and often with green shoulders. The interior is also variably red to purple, sometimes with green.

When exposed to dappled sunlight, the fruits darken. The deeper “black” color indicates higher levels of beneficial antioxidants called anthocyanins. I prefer these super-nutrient fruits and vegetables, from red lettuces to blueberries to black tomatoes. A diet rich in antioxidants can help protect us from many kinds of cancer, inflammatory, and cardiovascular illnesses.

‘Cherokee Purple’ is shorter than most indeterminate tomatoes, staying around 5′ in height when staked. For tomato lovers without gardens, try growing it in a large container. It doesn’t bear as many fruits as some, such as ‘Black Prince’, but yields—and flavor— are sufficient to merit including it in your garden.

Because this variety developed in a naturally humid region of eastern United States, it probably has some disease resistance built into its genetics. In my experience, it’s less susceptible to disease than many other heirlooms.

As an heirloom tomato and not a hybrid, ‘Cherokee Purple’ is open-pollinated. So, you can save seeds from ripe fruits for next year’s garden. The offspring will be identical—or nearly so—to the parent plant.


Foodlander: Cherokee Purple Heirloom Tomatoes


“Mmmm… BLT”

There is no sandwich, burger, or salad that isn’t enhanced by adding this richly flavored tomato. Some call it smoky, while others consider it sweet, complex, or balanced. Try a “sloppy BLT” on lightly toasted rye with a fair amount of Duke’s mayonnaise (on both slices), bacon, lettuce, and this tomato, of course, but also with cheese and ripe avocado.

It is juicier than many other tomatoes and, therefore, is not recommended for sauce. But, if I have some ripe fruits, I’ll add them to the stock pot when making sauce, which simmers on low for 2 hours or longer.

Regardless how it’s described, the ‘Cherokee Purple’ tomato always has a place in my garden. In fact, when cool weather arrives in autumn, I place large pieces of clear plastic raised over the plants to protect them from frost. For a little extra warmth, add a hot water bottle or a string of miniature incandescent Christmas lights to extend the season for a few more ripe fruits.

When a freeze threatens, pick all remaining full-size or nearly full-size tomatoes and let them ripen on the kitchen counter. Be careful not to bruise them.

A few other varieties also get covered in the garden to give the fruits additional time to ripen, but it’s these last ‘Cherokee Purple’ tomatoes that wrap up the season.


Return to the top

The Resilience of Plants


resilience of plants

Drimiopsis maculata.


It happens to everyone. We’re busy with the kids’ activities, our jobs, or the weather isn’t convenient. Sometimes we just can’t get to all those chores on the list. These cool drizzly days before the gardening season kicks into gear provide the opportunity to tend some of those plants I’ve neglected for months or, admittedly, for years. The fact that they survived attests to the resilience of plants.

It’s rare when any of them actually die; that’s not a good look for someone who’s in her 50th year of professional horticulture! But, after growing these plants for decades, I know how far they can go before reaching the point of no return. Not the best way to garden, but that’s reality for many of us.

This article describes a few examples of the adaptability of plants.


The Resilience of Plants: Confined Spaces


Drimiopsis Maculata

Drimiopsis maculata is one of the leopard lilies native to Africa. This species (photo, above) and 2 other leopard lilies that I grow (Ledebouria socialis and Drimiopsis kirkii) are perennials where winters don’t approach the freezing point. The specific epithet, maculata, refers to the deep green, sometimes purplish, spots on new spring growth. Foliage grows from bulbs on or just below the soil surface. These 3 species are classified in the Asparagaceae family.

They prefer average to cool temperatures indoors from fall to spring, and often shed some of the previous year’s foliage. Leopard lilies tolerate temperatures down into the 40’s F, so they’re spending the winter on the enclosed porch with only the sun, an additional plastic bubble, and miniature incandescent Christmas lights for warmth. Although it might drop below 20° outside the porch, nighttime temperatures won’t get below 45° under the bubble.

I simply don’t have enough direct sunlight inside (or a greenhouse) for hundreds of small plants. Anticipating that Arctic Blast (down to 0°) on December 24, 2022, I moved all the tender plants indoors the night before. Good thing, because the power went out for a few hours at the coldest time of day, around dawn. No power, no lights, no plants! It’s only when outdoor temperatures drop below the low teens that I move the tropicals indoors.

This clump and a few others stayed in 4½” pots for over a decade, since I last potted them up in Maryland. (I moved to North Carolina in 2013 and to this house in 2021.) They grew in only an inch of soil before I divided them in late summer, 2022. Because most of the organic matter had decomposed over that period of time, the level of the soil surface dropped a few inches lower in the pot.

In late winter or spring, the bulbs sprout shortly after repotting (photo, below). Normally, I repot plants in spring to mid-summer, but this species is amenable to transplanting at other times, given good growing conditions.


resilience of plants, drimiopsis after dividing

New growth and flowers on Drimiopsis.


Classification Confusion

The lily family and related families include many species that demonstrate the resilience of plants. These are some of the toughest plants for problem spots in the garden. I also brought from Maryland several hostas (Asparagaceae family) that had stayed in 4½” pots for over a decade. They leafed out nicely every spring, but never attained a good size until after I’d planted them at this rural North Carolina property in the autumn of 2021.

Cousins of drimiopsis that tolerate some neglect include ponytail palm (Beaucarnea recurvata), daylilies (Hemerocallis spp.), liriope, grape hyacinth (Muscari spp.), agave, and asparagus fern.

The huge lily family (Liliaceae) has undergone adjustments over recent decades. Genera of the original Liliaceae family have been redistributed among 10 families, all of which remain members of the same order, Liliales. The new taxonomy is based on modern studies of molecular biology (genetics) rather than on the number of tepals and the placement of the ovary in the flowers (physical characteristics). Liliaceae hasn’t been entirely disbanded, according to the APG, the Angiosperm Phylogeny Group; fifteen genera are still classified in the Liliaceae family.

Binomial Nomenclature

Swedish botanist, physician, and taxonomist Carl Linnaeus (1707-1778), later Carl von Linné, categorized thousands of plant species in his 2-volume 1753 work, Species Plantarum. Incorporating some of the discoveries of Georg Eberhard Rumphius (German-born botanist) from the 1600’s, Species Plantarum is considered the first attempt at organizing plant species according to a hierarchical system of binomial nomenclature.

Briefly, binomial nomenclature is a system of identifying organisms by assigning them 2 names: a genus and a specific epithet. Together, the 2 terms represent a species. For example, Liriope muscari ‘Royal Purple’ is the scientific or botanical name for a certain variety of the species. Lilyturf is the common name that also can refer to other species of liriope and Ophiopogon. The genus is always capitalized, while the specific epithet almost always begins with a lower-case letter. The species is italicized, but the variety (‘Royal Purple’) is not.

Everywhere around the world, gardeners and scientists use the same Latinized scientific name to identify a particular plant, whereas its common name might refer to several different unrelated species. The genus name is often used as a common name, as in liriope, hosta, and drimiopsis, as long as the reference is clear.

The taxonomical hierarchy after species proceeds to family, order, class, phylum, and kingdom. Genetic similarities and differences determine whether 2 plants are related closely enough to group them in the same genus or separately. The closer 2 species appear on the phylogenetic tree, the more likely they’re able to interbreed.

With modern genetic research, taxonomists have reworked several other plant families, including Lamiaceae (many of the herbs we use daily) and Asteraceae (the composites, perhaps the largest family of plants).


Swiss Chard


resilience of plants, Swiss chard in 2" pot

Swiss chard ‘Bright Lights’.


Here’s a little cutie that sits on the kitchen windowsill, right behind the sink. This Swiss chard ‘Bright Lights’ gets several hours of direct sunlight in the morning and early afternoon, and bright indirect light the rest of the day. Chilly nighttime temperatures don’t bother it. It found a temporary home in the nearest empty pot when I thinned it from a cluster of vegetable seedlings. And there it stayed.

What makes this plant special is the fact that I potted it up in March of 2022! And it has been in its 2¼” clay pot all this time! The other seedlings planted last spring grew to their normal 18″ height. This one stands a diminutive 3″ tall.

I’m not keeping it for the purpose of harvesting leaves; there’s not much to pick, after all. It looks perfectly healthy, as long as it gets watered every 1-3 days, depending on temperature. Every 3 weeks, I add a tablespoon of dilute fertilizer, such as Sea-Plus or fish emulsion—just enough to keep it in good color, but no more than that.

I’m curious to see how long this orange-stemmed miniaturized plant will last. Short-season (spinach, lettuce) or fast-growing (tomato) plants would not last long in such tiny quarters. Swiss chard is a foliage plant for close to a year before it flowers, so it has tolerated these conditions. Now and then, a leaf turns yellow and is pinched off, but new foliage continues to grow. (***Update***: still going strong in late June 2023.)


Agave


resilience in plants, agave


Another cousin of the lily family and a desert dweller, agave (in the Agavaceae family) is a very forgiving plant. I brought 2 varieties from Maryland. They slowly grew new leaves and strong stems with adventitious roots. Although confined in deteriorating 9-cell market packs for a long, long time (~15 years), they rooted into anything near them that stayed still for a year. In the photo, above, the last of the agaves rooted into a nearby clay pot and unoccupied cells of the (removed) market pack. The resilience of plants once again has been demonstrated by this plant’s will to survive.

I buried most of the long stem into a clay pot with barely damp potting soil and no additional water. I’ll water this one very sparingly until it shows signs of new growth.

Succulents and other plants native to dry, harsh climates are masters of survival. They store water in stems, roots, and swollen leaves protected by a thick, waxy epidermis. Species needing constant moisture would not have endured this neglect.


The Old Orchid


resilience of plants, mini orchid in 3" pot for 45 years

Dendrobium kingianum.


When I lived in Morgantown, West Virginia in the 1970’s, a friend and I drove out to The Glasshouse Works, over the border in Ohio. This nursery carried a dazzling assortment of plant species and varieties.

One of my purchases was a small orchid called Dendrobium kingianum. After returning home, I planted it in a 3″ clay pot. Every few years, I refresh the medium, using pine fines, long-fibered sphagnum moss, perlite, and a bit of potting soil.

It rarely blooms, and I propagate it when rooted plantlets form on the stems. An aerial plantlet is called a keiki, Hawaiian for “the little one”. It has been over 45 years now, and the orchid still resides in that 3″ pot.


Bonsai


Bonsai Plant Pot Tree Leaves - 20706085 / Pixabay


Bonsai are the ultimate in meticulous care, incredible beauty, and sometimes astonishing age. Many large botanical gardens have collections that truly are worth visiting. Specimens can be several hundred years old and grow in pots only a couple of inches deep. Or they might be trained on a carefully chosen slab of rock.

Plants trained as bonsai usually are woody perennials, either deciduous or evergreen shrubs and trees. Successful bonsai require very specific care in trimming, root pruning, watering, and fertilizing according to seasonal cycles. Most important is the degree of artistry that contributes to a credible bonsai, one that expresses the appearance of an exquisitely aged specimen.

Bonsai exemplify the resilience of plants, considering the means by which they’re maintained over decades or centuries. Each specimen requires a tailored set of precise horticultural skills to keep it healthy.

(No, that’s not my plant in the photo, but this style of gardening deserves a mention.)


Headings

Page 1: The Resilience of Plants: Confined Spaces (Drimiopsis Maculata, Classification Confusion, Binomial Nomenclature, Swiss Chard, Agave, The Old Orchid, Bonsai)

Page 2: The Resilience of Plants: Opportunity (A Plant In a Strange Place, Young Lavender, Another Surprise Seedling), The Resilience of Plants: Recovery (Cryptanthus, Propagating Bromeliads, The Petunia, Giant Redwoods Define the Resilience of Plants, Wildfires)

Return to the top

Enclosing the Porch For Winter Growing

 2022

updated 3/13/2024


Enclosing the Porch for Growing Plants In Winter


Average Temperatures

Winter weather is in a rush to make its presence known here in northern North Carolina. Average nighttime low temperatures in October are in the 50’s F falling to the 40’s by the end of the month. In 2022, though, many nights were frosty. In this article, I’ll describe how enclosing the porch can add more growing space for sun-loving tender plants—those killed by freezing temperatures.

I moved to this beautiful acre outside Elkin, in USDA plant hardiness zone 7b, in October, 2021. The average lowest extreme temperatures in winter are 5-10° F, with January the coldest month. That won’t stop most gardeners from finding ways to extend the growing season, and, in fact, encourages us to do so.

Abnormally cold weather prompted me to gather all plants that would have been damaged or killed by frost. Both daytime and nighttime temperatures have fallen 10-20° below average on many days in October and November. On the other hand, we’ve also enjoyed a few shorts-and-tee-shirt days hovering well above average.


Priority: Plants


succulent dish garden

Succulents in this dish garden can begin stretching toward the light after less than a week in insufficient sunlight.


Priority went to succulents and tropical plants intolerant of cooling temperatures. Some I’ve had for decades and don’t want to lose. A collection that started in spring as 12 flats of tender plants blossomed to 40 by autumn.

Miniature succulents, succulent gardens in bonsai trays (photo, above), bromeliads, aroids (Alocasia, pothos, philodendron), amaryllis, leopard lilies (Drimiopsis, Ledebouria), tradescantias, ferns, ficus, begonias… I propagated all these houseplants for the farmers’ market, where I’ve been a vendor (“Wellspring Gardens”) since April, 2022.

Plants requiring warm temperatures fill every sunny window indoors. In the basement, more plants snuggle close to the 4′ fluorescent shop lights.

From autumn to spring, I carried many flats of houseplants outdoors to the sunny porch when it was warm enough, above 50° or 60°F. And later in the day, I brought them back indoors again. Almost every day. Winter ’21-’22 was quite mild.

That’s in addition to the dozens of flats of herbs and cool season greens (lettuce, spinach, arugula, broccoli, kale, etc.) started for the farmers’ markets and my own gardens. After 3-4 weeks of growth, they could safely be hardened off outdoors, exposed to colder temperatures—even frost—before planting or selling them.

The Best Option

I need an easier way to accommodate all these plants. A greenhouse is prohibitively expensive for now. Another option is to keep them outside, after enclosing the porch. In winter, this south-southwest-facing porch receives full sun from morning until sunset. Perfect!

How hard could it be to tack a big sheet of clear plastic to the structure? That will work in the daytime, when the sun’s out. But during cold overcast weather and at night, supplemental heat will be needed. Later in this article, you’ll see what I did to keep the tender plants comfortable.


Preliminary Plans


The goal was to create an inexpensive makeshift greenhouse environment from readily available materials, employing rudimentary carpentry skills. Winter winds, primarily from the west, can be fierce at times. This necessitated strong bracing for the structure to prevent the plastic from breaking loose.

At the hardware store, I bought a 12 x 100′ roll of clear 4-mil plastic for enclosing the porch and creating low tunnels in the garden for winter greens. You can find sheets and rolls of clear plastic in the paint department. Although it won’t last as long as greenhouse film, it is less expensive. A more attractive alternative is clear acrylic film, but I’m looking for the most economical solution for now.

Plastic degrades in sunlight, and faster in hot sunlight. So, if used on the porch only during the cold months, it should last 3-4 years. That’s based on many years’ experience using plastic to protect plants from cold winter weather.

(***Update***: Plastic used in the garden lasts longer than the plastic used to enclose the porch. After 2 full seasons, the porch plastic is showing signs of weakening in the hottest spot because the enclosed space heats up significantly, shortening the life of the plastic. If I don’t vent the plastic or open the front door and use a fan to blow the heat into the house, the porch heats up to 90-105° F on a sunny winter day. The air under plastic in the garden doesn’t get that hot because the plastic is removed or vented to prevent overheating the greens. January 14, 2024)

The plan is to leave the wooden support grid in place all year. After weather warms up in spring, I’ll remove the plastic panels, still stapled to their 1 x 2 x 8′ posts, clean them, and store them in the basement. In the future, enclosing the porch in permanent materials (floor-to-ceiling operable windows) is a strong possibility.


Enclosing the Porch: First, the Support System


Before cutting the plastic, I had to figure out how to put this whole thing together, preferably without piercing the aluminum siding. Where to start? How to seal it from drafts? What about a door?

The front porch measures approximately 20′ x 8′, so the 1 x 2″ x 8′ wood posts from the hardware store fit well. I used a hand saw for a few cuts. Posts with large knots, not visible when purchased in bundles, were returned to the store. Those are weak spots that could break in high winds. These posts have a smoother side—the side in contact with the plastic.

enclosing the porch

6 x 6″ timbers with 1 x 2″ x 8′ posts across the front of the porch.

Four 6 x 6″ timbers support the roof along the front edge of the porch, and the attic above is insulated. The timbers are secured 3″ inside the outer edge of the decking. Because the 1 x 2’s are attached at the top of the timbers and extend 8′ down, past the edge of the decking, the posts are slightly off vertical when viewed from the side.

I didn’t attach plastic directly to the bottom of the timbers because I wanted it to fall all the way to the ground on the 3 sides. That would help warm up the concrete block foundation and the ground underneath the decking. The goal was to retain the maximum amount of heat in the enclosed porch.

The porch is elevated 2 steps up from the ground. That made my time on the ladder somewhat less daunting. I took my time and was very careful. Safety first.


Brace Yourselves

Hardware included:

  • Hillman Red Exterior 8 x 1 5/8″ deck screws, with a special drill bit in the package
  • 3″ galvanized corner braces with smaller screws
  • a few nails

Although the deck screws are supposed to require “no pre-drilling”, a few of the 1 x 2’s split. I used a couple of nails to hold them together.


corner brace screwed to decking and post

Brace was placed with the edge of the post flush with the front edge of the floor.


Holding a 1 x 2 post firmly against the house and the edge of the floor, I positioned a brace, then marked where the first screw would go. The west and east sides would have five 1 x 2’s each.

I used a reversible drill to screw braces to the floor. For each of the east and west sides, one brace went next to the house, one on the outside corner, and one in the middle. The other 2 posts on each side were screwed to the edge of the decking without braces.

I used 2 longer deck screws—instead of the smaller screws in the package—for the horizontal half of the brace attached to the floor. This made a stronger attachment. Because the long screws would have gone through the 1 x 2’s and pierced the plastic, I used shorter screws on the vertical part of the brace (photo, above).


Next Up: The Vertical Posts

Once the braces had been secured on the west and east sides, the vertical 1 x 2″ posts were next. I attached five 1 x 2″ posts to the decking—about every 2′—on the west side and 5 more on the east side. Each post was screwed on at the bottom securely enough for it to stand straight. A carpenter’s level established true vertical and horizontal before I tightened the screws.

Then I fastened the middle horizontal post, and the top horizontal post as close to the ceiling (overhang) as possible. I can add more supports at any time, if necessary.

Where the ground level was higher near the house, I cut the posts so they stopped right above the soil. In other areas, the 8′ length doesn’t extend that close to the soil, but that’s okay. The excess plastic made a flange over the ground, on which I placed heavy pots and cinder blocks to block air infiltration. I haven’t trimmed any of the 12′ wide plastic, but I can play with that later. Incidentally, the flange helped keep the basement drier during a recent rainstorm. For now, it stays.


enclosing the porch, west side wood supports

The west side with 5 vertical and 2 horizontal 1 x 2″ x 8′ posts.


The braces and posts were sturdy, but there was too much play in the sides. So, I drilled another 3″ brace inside each of the upper 2 corners adjacent to the house, through the siding in the ceiling and into the vertical 1 x 2 (photo, below). A wooden beam hides under the siding. First, I hammered a nail through the aluminum, then replaced it with a deck screw, stabilizing the sides.


brace between ceiling and 1 x 2" post

Brace secures vertical post to the ceiling, near house. Clear tape, barely visible on the right, seals plastic to siding.


On the South Face


enclosing the porch, south side

Posts:                1        2        3        4            door            5        6        7        8


Here’s the 20′ south face of the porch. Imagine the vertical posts are numbered, from #1 at the left (west) corner to #8 at the right corner, with a larger gap in the middle for the “door”. The numbers don’t exactly correlate with the posts, but you get the idea. The door has not been finalized. Posts #1 and 8 were added previously to the corner timbers, when I worked on the east and west sides.

Across the front, I fastened braces to the floor and then added 2 middle posts on each side of the door (#2, 3, 6, 7). The other 2 new posts were fastened to the top of the inner 6 x 6″ timbers (#4, 5), and screwed directly to the edge of the decking. All 1 x 2″ x 8′ posts angled out slightly, below the edge of the floor.

Then the horizontal members went up: top and middle. Later, I had to remember to leave some extra plastic at the top of the outside corners to accommodate the slightly angled vertical posts (and longer dimension at the floor). Some of the posts were a bit bowed, so I’ll tape the gaps at the top from inside the porch.

At this point, all braces and support posts are in place. Progress!


Headings

Page 1: Enclosing the Porch for the Winter (Average Temperatures, Priority: Plants, The Best Option), Preliminary Plans, Enclosing the Porch: First, The Support System (Brace Yourselves, Next Up: The Vertical Posts, On the South Face)

Page 2: Enclosing the Porch: Second, Wrapping It Up (The West Side, The East and South Sides, How?), Warming Up to This, Enclosing the Porch: A Winter Retreat for Succulents (An Arctic Blast, and I Don’t Mean Fun Times with Santa, Blown Away Or Not?, Why Not LED’s?, Enclosing the Porch for Edible Plants, Potted Herbs and Tender Plants, Enclosing the Porch for Me, Too!)

Return to the top

Seedlings For Your Garden: 12 Tips


2022


seedlings, zucchini


Starting Seedlings For Your Garden


Busy spring! This lengthy article focuses on starting and caring for seedlings and getting them established in the garden. If I’m not working on the seedlings, I’m working in the gardens, creating new beds and expanding those started last fall and winter. Winter weather was delightfully mild to allow planting right through the cold season. The weeds and I have come to an understanding, and in the next article, I’ll tell you how in “Patches for Pollinators”.

Foremost on the agenda has been starting plants to sell at our local Elkin Farmers’ Market. It’s been a challenge this year, keeping plants in good condition with high heat, heavy humidity, and frequent rainstorms. If I had a climate-controlled greenhouse, there might have been fewer losses. But, for the most part, my company, Wellspring Gardens, is producing more seedlings than I can sell at the market.

Some of that overproduction is destined for the vegetable gardens. It will yield small harvests of produce to sell at the market in addition to what’s needed in the kitchen. This is new territory for me, adding produce to the plants offered at the farmers’ market.

I might even consider canning, which I’ve never done…but let’s not get ahead of ourselves. That would be helpful, though, considering the rapidly rising prices at the grocery store. For that reason alone—the impact of rampant inflation on our wallets—it’s wise to learn how to grow at least a few vegetables.


sun's path

The sun’s path across the sky, Charlotte NC.


Watching how the sun tracks across the sky from month to month reveals good spots for the sun worshipers and areas where leafy greens should thrive in partial sun. This is my first summer in this house. The massive oak trees create shifting shade patterns that cause me to periodically rethink the plans.

So, let’s begin!


12 Tips For Starting Seeds


1. Start with clean materials for seedlings.


pepper 'Glow' seeds and cell pack

Sweet pepper ‘Glow’, started in 9-cell packs.


This calls for packaged seedling mix or fine-grained potting soil. Don’t use “dirt” from the garden, with its pathogens, insects, weed seeds, and worms that disrupt soil structure around tiny roots. In addition to the unknowns lurking in garden soil, its high clay content causes drainage issues in containers.

Soil used previously for potted plants is not a good medium for your seedlings. It’s often depleted of nutrients, might contain pathogens, and the organic matter has partially decomposed. If it’s only one season old, it’s probably safe for potted annuals, when mixed with fresh potting soil, or incorporated into the backfill for that new sourwood tree. Or simply throw it under the shrubs or into the compost pile.

Because seedlings are susceptible to soil-borne diseases, play it safe and start with pasteurized bagged seedling mix or potting soil. This, however, doesn’t guarantee a successful outcome, as many disease spores are air-borne. But we can increase the odds of success by using clean materials.

When reusing cell packs, pots, and flats for seeding, wash them in a 10% bleach solution, and rinse well before proceeding. Don’t smoke around plants, and wash hands thoroughly before working with them. Tobacco and other plants in the nightshade family (Solanaceae, including tomato, pepper, eggplant, and potato) can fall prey to the same disease organisms. Spores can transfer from tobacco products to your hands to the plants.


Pasteurizing Potting Soil

For bagged soil that’s questionable, you can pasteurize it in the oven. Don’t heat soil that contains timed release fertilizers. Use an oven-safe covered pot or baking dish, wet the soil, and heat the oven to 200°F. When the soil registers 140° on a meat thermometer, lower the oven temperature and maintain soil at that temperature for 30 minutes. This kills most pathogens. Wait for it to dry somewhat and to cool thoroughly before using. Various websites recommend different temperature levels from 140° to 300°. At the high end, beneficial microbes are killed off as well.

Let it cool down outdoors. Considering the pervasive “earthy” odor coming from hot soil, you might prefer buying a new bag of seedling mix or accept a small risk with the open bag in the garage.

Another method of pasteurizing (not sterilizing) soil is to place a heat-resistant container of soil in a black plastic bag. Place the bag in a sunny place outdoors on a warm day, and let the sun do the work for you. This is called solarization, and can raise the temperature inside the bag to 140-160°F. To prevent damage to the beneficial microbes, take the temperature, and maintain it at 140° for 30 minutes, opening the bag a bit to prevent overheating.

Most bagged potting soils and seedling mixes already have been heat-treated to eliminate pests. Close the bag securely and store in a cool dark place. The last and only time I pasteurized soil was nearly 50 years ago because that’s what the experts recommended.


2. Grow disease resistant varieties…


While fungicide and bactericide formulations—both organic and conventional—are available, I’d rather grow disease resistant varieties and not rely on spraying. Keep in mind that resistance is not 100% effective, particularly when plants are exposed to stressful weather or cultural conditions.

Certain varieties are more flavorful than others, but all well-grown fruits and vegetables from your own garden taste better than those purchased from grocery stores. Picked when vine-ripened perfect, anything coming from the garden will be superior to what’s found elsewhere except, perhaps, at farmers’ markets and farm stands. Freshly picked produce also has the highest nutrient content.

Digging in the garden is great exercise; proceed slowly at first. Working outside in nature feels good, and self-sufficiency is never amiss. A few steps from the back door gathering a green onion, spinach, dinosaur kale, and a little ripe sweet pepper for the veggie omelet is more rewarding than I can describe. You’ll see!

Those are just a few of the many benefits of growing our own vegetables. Using disease resistant varieties, if available, makes the job so much easier. Many new gardeners gave up after having suffered the disappointment of losing an entire crop to early blight or bacterial leaf spot. And we also have to deal with deer, rabbits, and insects!

Although this article concentrates primarily on edibles, flowering plants also have their own set of disease organisms. Again, look for resistant varieties, grow them in conditions that don’t favor infection, and look for remedies at the garden center.


…Especially Tomato Seedlings

tomato disease septoria?

Disease beginning on ‘Rutgers’ tomato.

Tomatoes and peppers, two of the most popular crops for home vegetable gardens, are vulnerable to many diseases. They’re caused by fungal, bacterial, or viral pathogens. In some areas, nematodes also can be a problem. Usually, we can harvest some fruits before disease claims them, but resistant plants last longer in the garden. Plants infected with viruses should be removed and destroyed. For fungal and bacterial pathogens, products at garden centers will help. Always read the labels.

Tomato diseases include Alternaria stem canker, early blight, late blight (Phytophthora; very few varieties are resistant to this one), Fusarium wilt, grey leaf spot, leaf mold, tobacco mosaic virus, tomato mosaic virus, tomato spotted wilt virus, and Verticillium wilt. Catalog listings use initials to indicate disease resistance. For tomatoes, AS, EB, LB, F, GLS, LM, TMV, ToMV, TSWV, and V, respectively, represent those diseases.

Tomatoes are weedy plants and normally produce good crops, despite many organisms that target them. Peppers are susceptible to several races of bacterial leaf spot, and basil to basil downy mildew. Some zinnias are plagued by powdery mildew. Weather conditions, such as high humidity and frequent rain, exacerbate these disease problems.

Most hybrid (or “F1”) tomatoes have some resistance to one or more pathogens, but not to all of them. ‘Big Beef Plus’ is resistant to a wide variety of diseases. ‘Damsel’ and ‘Defiant PhR’ are resistant to late blight. Hybrid seeds carry a higher price than open pollinated varieties due to the cost of research that developed them and the extra steps needed to produce hybrid seeds each year.

It’s so hot out there!


shading tomato flowers


If you live in a hot climate, look for tomato varieties that have been bred to produce better at high temperatures. The pollen in tomatoes and peppers, and others, can die at high temperatures. While these plants are comfortable at 65-80°F, pollen dies above 88°, 90°, or 92°, depending on the cultivar. No pollination = no fruits! A reference to “heat” or to the “south” in the plant’s variety name indicates its higher tolerance for heat.

Researchers are investigating thermo-tolerant genetics in wild tomato species (Solanum pimpinellifolium) and incorporating them in tomato breeding programs.

One trick to preserve viable pollen is lightly shading the plant in the hot afternoon hours. Attach shade fabric—a black woven mesh—to a support over and on the west side of the tomato or pepper plants. This provides a decrease of up to several degrees in hot climates or temporarily during a heat wave. In the photo, above, mesh bags from the grocery store protect fruits from squirrels and sun scald, and lightly shade new flowers and their pollen from high heat.

The young ‘Estiva’ tomato plants (“estiva” refers to summer), a hybrid bred for heat tolerance and great taste, lost most of their diseased bottom leaves in heavy rains, but those little fruits are still growing! I’ll plant them out this weekend, after the temperatures drop well below the 108° heat index value we have now. Recent weather has been in the record-breaking mid- to high 90’s F, with high humidity. Not my favorite conditions to dig in the garden…so I don’t.  I was not bred for heat tolerance!

***Update***: ‘Estiva’ tomatoes endured this hot summer and produced fruits past the first fall frosts. I covered them on chilly nights to ripen the last of the fruits. These were among the last tomatoes to succumb to the cold, in mid-November. Autumn 2022

A Few More Tomato Tips

Your best defense against tomato disease, in addition to growing disease resistant varieties, includes these tips:

  • Stake them. Tall indeterminate types need a 6-8′ tall stake, taller for some.
  • Space them farther apart, at least 3½-4′.
  • Thin the vines to 3 or 4 main stems by removing excess suckers.
  • Remove leaves on the bottom 12″ of the plants after they’ve become established.
  • Locate them where a breeze blows through the garden. These first 5 tips address increasing air circulation around and through the tomato plants.
  • Give them lots of direct sun—a minimum of 7 or 8 hours. The more sun they receive, the shorter the window of opportunity for pathogens to germinate on damp leaf surfaces.
  • Mulch the soil under the plants to prevent disease spores lying dormant in the soil from splashing onto and infecting the foliage. More on Page 4.
  • Water in the morning to early afternoon so all foliage is dry going into the night. Try to keep the foliage dry at all times and avoid handling wet foliage.
  • Water established plants heavily (1½”/week) when needed, but avoid giving little sips every day. Young seedlings need more frequent watering until their root systems expand.
  • Clip off leaves that show early symptoms (yellowing, spotting), and dip your pruners in alcohol when moving from plant to plant.
  • Don’t smoke near the garden, and wash hands thoroughly before working with plants.
  • Rotate your crops. Don’t plant a member of the Solanaceae family where any members have grown in the past 3-4 years. There’s more about crop rotation on Page 4.

All plants grown with good soil preparation, good air circulation, proper watering techniques, adequate sun, and appropriate fertilization are less stressed. Less stress equates to lower infection rates.

Growing Heirloom Seedlings


Heirloom tomatoes are always in demand because of their exceptionally good flavor. Heirlooms are open pollinated, which means gardeners can save seeds from fully ripened fruits each year for the next season’s garden. Because they’re not F1 hybrids but have been breeding true, for the most part, for many decades, heirlooms retain their traits from one generation to the next.

These varieties, however, don’t have much built-in disease resistance. Nevertheless, I’m growing a few heirlooms, and spacing them 4′ apart for improved air circulation. We’ll see what happens.

Commercially grown tomatoes must be able to survive long distance transportation and handling without damage. They’re picked early, when green or first showing color. Varieties of these tomatoes have skins that normally are tougher.

Heirloom tomatoes have more desirable thinner skins and, therefore, travel poorly. So, you won’t see them in grocery stores unless those stores buy from local farms. Heirloom tomatoes from the grocery store might cost $5.00/lb. or more! So, yes, it is worth growing a couple of heirloom tomato plants in our gardens.

A few prolonged and heavy rainy periods this spring almost wiped out certain tomato varieties, namely ‘Carmello’, ‘Brandywine’, and ‘German Johnson’. I still have a few that show less damage than others. ‘Black Krim’ and ‘Cherokee Purple’ are doing fairly well, although they are heirlooms. Most of the remaining plants will be set in the garden. There’s usually a breeze blowing through the property, and by spacing them appropriately, I should get plenty of fruits.


Basil Downy Mildew


basil downy mildew

First symptom of BDM: yellow blotches between the main veins.


Although this dreaded disease targets only basil, it hasn’t appeared yet this year. But I’m prepared.

Last year, I grew ‘Rutgers Obsession DMR’ (DMR = Downy Mildew Resistant), an acceptable substitute for our beloved ‘Genovese’ and other susceptible sweet basils. Last year’s ‘Obsession’ did not develop any basil downy mildew (BDM)—not one speck—although wet and humid weather presented a worthy challenge. Other basil varieties in the ground or in pots succumbed to the disease within a week of infection…even young seedlings.

This year, I’m growing ‘Rutgers Obsession DMR’ and also ‘Rutgers Devotion DMR’ outside all summer. In addition, I’m seeding the old favorites, including ‘Genovese’, ‘Italian Large Leaf’, Thai basil ‘Siam Queen’, ‘Marseillais Dwarf’, and ‘Tuscany’, a lettuce-leaf basil. A few non-resistant basil plants will come indoors at night when warranted, as described below. But I’ll stop seeding susceptible varieties, except for a few pots, and concentrate on the resistant ones for the farmers’ market if the disease appears in the neighborhood.

Several other BDM resistant varieties can be purchased as seeds or as started plants.

Avoid High Humidity

basil seedlings in clay pot

Healthy sweet basil, in a pot.

If you want to grow your favorite basil varieties that are not resistant to BDM, there is a way to prevent a total loss.

BDM spores move up from the south on the breeze or on infected plants shipped into the area. The spores don’t overwinter in cold climates. If spores land on a susceptible variety, they need a relative humidity above 80-85% for a couple of hours in order to germinate.

Even during pleasant weather, the relative humidity can reach 90% or higher in the 2-3 hours around dawn. That’s when the temperature is usually the coolest and, therefore, the relative humidity is the highest.

When plants show early symptoms of BDM, remove the affected leaves. Take potted basil plants indoors for the night, every night. Indoor conditions never reach those high humidity levels, so you can still grow your preferred basil varieties successfully with a little effort. Remember to place the plants back outdoors after the sun has been up for a couple of hours.

Follow this regimen during rainy weather, although the plants might need to spend a day or two inside. Find the brightest spot to keep them during their temporary stay indoors. If possible, provide some artificial light. Unless it’s wilting, avoid watering basil indoors. Less sunlight means the plant won’t be photosynthesizing optimally or using much water, and wet soil can initiate root rot.


Headings

Page 1: 1. Start with clean materials for seedlings. (Pasteurizing Potting Soil), 2. Grow disease resistant varieties… (…Especially Tomato Seedlings, It’s so hot out there!, A Few More Tomato Tips, Growing Heirloom Seedlings, Basil Downy Mildew, Avoid High Humidity)

Page 2: 3. Timing is important for seedlings. (The Fall Growing Season, Keeping Records, The Cooperative Extension Service, Starting Seedlings Outdoors, Don’t Start Seedlings Too Early, Cool Season Crops, Extending the Growing Season, Seedlings Transplanted Into Bigger Pots, Bunching Onions, The Brassicas, Brassicas In My Garden, Lettuce), 4. Is the temperature suitable for seedlings? (Miniature Incandescent Lights For Warmth, Water Temperature)

Page 3: 5. Start seedlings in small batches. (My Simple Infrastructure), 6. Seedlings need strong light. (Growing Seedlings Under Shop Lights), 7. Cull the weaklings and anomalies. 8. Prevent damping-off disease from killing your seedlings. (Actinovate), 9. Seedlings and plants need fertilizer. (The Elements, Read the Label)

Page 4: 10. Prepare the soil for your transplants. (Start With Good Drainage, Air Pore Space, Gypsum and Lime, Add Nutrient-Rich Amendments, Bury It), 11. Try succession planting for maximum yield. (Crop Rotation, Mulch), 12. Stop the pests before they ruin your garden. (Slugs and Snails, Larvae of Moths and Butterflies, Spider Mites and Thrips, Deer and Rabbits), Concluding

Return to the top of Page 1

10 Tips for Protecting Cool Season Vegetables

2019

updated 3/1/2024


Here are 10 Tips for protecting cool season vegetables from freezing temperatures.


cool season vegetables in the garden

Cool season vegetables: from the top, broccoli, leeks, ‘Red Russian’ kale, light green mustard greens, and collards.


Ready For Fall?


Throughout parts of the United States, and in chilly climates everywhere, gardeners are scrambling to save their tender plants. Most of us have brought in all the houseplants. More laissez-faire gardeners do nothing special to extend the season, beyond harvesting the last of the cherry tomatoes and clearing out the frosted vines.

And there are those of us who strive to keep cool season vegetables growing even in winter. And we’ll plant more of them! Soon I’ll transplant ‘Monstrueux de Viroflay’ spinach seedlings into pots, to grow on the deck through the winter. This French heirloom spinach has huge leaves with a milder flavor. It has lower levels of oxalates, so those who have been advised to avoid eating spinach might be able to eat this variety. Ask your doctor.

In early October, I planted 2 dozen onion sets (for green onions) in a 12″ pot on the deck. Green onions are ready for harvest, in mild weather, only a few weeks after planting the sets. To preserve them in the cold, I’ll cover them with plastic sheeting (Tip #2). Green and bunching onions grow more slowly in cold weather.

I planted more sets every couple of weeks and will soon plant the remaining bulbs before they dry up. A favorite bunching onion called ‘Nabechan’ has straight sides. Not having a bulb at the bottom makes it easier to harvest. Sets are not available for bunching onions, though, so they must be started from seeds.


Where There’s a Will, There’s a Way


USDA plant hardiness zone map

The USDA plant hardiness zone map.


Potted cool season vegetables will grow under a plastic covering in cold weather. To extend the season, strings of miniature incandescent Christmas lights (Tip #6) will raise the temperature to more comfortable levels. Later in this article, I will list all 10 Tips for protecting crops in winter.

Starting with the simplest ideas and progressing to the more advanced methods, find the level you’re most comfortable with this season. Your budget, your USDA plant hardiness zone (photo, above), and the types of crops themselves must factor into your decision.

As you gain confidence and become more motivated to keep the garden producingyou might decide to try the next level. Cost savings realized by growing your own fresh food might justify the expense of new materials.

It’s only through experimentation, by taking a chance, that you might discover all the opportunities—and the limits—of gardening challenges. This is how green thumbs are cultivated.

If you’ve never grown cool season vegetables, several articles at The Farm In My Yard provide detailed information to get you started. For a greater understanding of any issue, enter the term in the search bar or click it in the tag cloud.


The Advantage of This Latitude

I’ve been growing greens in winter for decades, for my customers and for my family. Fortunately for us, living in the southeast doesn’t present as difficult a winter hardship as would living in Montreal, Montana, or Scotland. But there are options for just about every climate.

There’s no substitute for stepping outside and collecting a green onion, a mild mustard leaf, and some kale and spinach for our Sunday morning omelet. We pick what we need when we need it.


Succession Planting: Warm, Then Cool Season Vegetables


Because our favorite greens love cool weather, they grow in the garden after the tomatoes, peppers, and cucumbers have been harvested. So, with some planning, you can schedule a succession of crops. When one crop finishes up, new transplants or seeds are ready to take its place. Now, that’s an efficient use of space!


cool season vegetables

Cool season vegetables and greens replace summer tomatoes and peppers. Plastic protects plants on very cold nights and the netting deters deer.


Radishes, beets, spinach, and other fast-growing plants can be sown directly into the garden in late summer to early autumn. After they’ve been harvested, there might be time for another quick fall crop.

Certain greens and root vegetables have a shorter window of time during which they retain the best quality. So don’t let them linger in the garden. On the other hand, some cool season vegetables can be harvested over many months of growing! That’s at a time when there are fewer weeds, fewer bugs, and less drought to worry about.

If the weather is still warm for the first round of seeds, look for varieties of cool season vegetables that are more heat tolerant. Some catalogs indicate the preferred soil temperature for each crop, or you can get that information from your agricultural extension office. Soil temperature can be lowered by irrigating during hot weather. Additionally, frames covered with knitted shade cloth, made from black polyethylene (available from Johnny’s Selected Seeds and others), provide consistent shade until the weather cools. That bit of shade can make the difference between seeds germinating in August or having to wait until late September to sow them.

Here in zone 7b (average lowest winter temperatures 5° to 10°F), we enjoy productive edible crops and herbs in the garden year-round…with some protection in winter, of course. But we’ve also grown them in colder Maryland winters.

Because I’ve been “advised” by the HOA to stop growing vegetables in the garden (photo, above), they’re now in pots (photo, below) on the fenced deck. (Note to self: next move, no HOA!) Young ‘Aspabroc’ miniature broccoli plants grow in a 20″ pot, where a tomato grew during in the summer. Italian parsley lasts all winter, and sharp-tipped pine cones discourage squirrels.

***Update***: In October, 2021, after my mother passed away, I moved to a small town in northern North Carolina. More property, more nature, woods in the back (where a bobcat and I came face-to-face!), no traffic, gorgeous topography, great friends, just a couple of degrees cooler than Charlotte, and no HOA to tell me what I must or can’t do on my property. 3/1/2024


potted broccoli

‘Aspabroc’ miniature broccoli and parsley.


Peas…Yummy!

Peas grow best in the garden’s “shoulder seasons”. That’s when temperatures can be cool to warm, and when frost is no surprise. So, before the end of tomato and pepper season, you can sow a pack of pea seeds next to a trellis and begin harvesting two months later.

Edible podded snap peas and snow peas are absolutely delicious. Many are eaten on the spot. And because they grow vertically, the vines take up little square footage. During the shoulder seasons, in moderate climates, they don’t normally require a protective covering.

pea vine

Peas growing next to the house, a warmer microclimate.

If you have facilities that can accommodate pea vines, such as a lean-to or a cool greenhouse (Tips #9, #10), this crop can be grown as the temperatures dip lower during the winter months. But there is a point below which the vines will be killed in unheated structures.

Last autumn’s loosely covered pea vines (photo, right) made it just fine through the mild winter and started bearing pods in late winter.

Look for disease resistant varieties when growing any vegetables or greens under cover. Plants are more susceptible to diseases when grown in humid conditions.


Gather Information

Get to know each crop, and how much cold it can tolerate with or without protection from freezing weather. I’ve researched calendars for scheduling vegetables in this zone and have found some of them, compared to my own experience, to be overly conservative. They restrict sowing and transplanting to a narrower period of the calendar than I’m willing to gamble with.

Gardening in a warmer microclimate offers more protection than growing plants out in the open. Planting against a sunny south-facing wall or in a protected corner out of the wind provides opportunities to extend the season.


bees and butterflies feed on nectar in winter

‘Red Russian’ kale in bud.


Kale, collards, spinach, Brussels sprouts, mustard spinach, arugula, leeks, and green onions can tolerate the coldest conditions, within reason. I cover the crops when temperatures dip below the mid 20’s. Even if they’re not covered, they will survive. But I want the plants to continue providing premium quality greens. If not stressed by very low temperatures all day and night, these crops will grow if daytime temperatures rise into the mid 40’s.

Cauliflower and ‘Bright Lights’ Swiss chard need to be covered earlier than other greens. Frost normally won’t kill the plants. But repeated freezing will damage the foliage, halting growth until warmer temperatures (or the protective coverings) return.

These crops and other cool season vegetables won’t need protection if grown farther south. Again, cold tolerance is variety specific, so try new cultivars now and then and see which ones work best for you. For example, ‘Green Magic’ broccoli does well when planted in early spring and again in early autumn. This variety needs a warmer temperature when forming its head. On the other hand, ‘Arcadia’ broccoli can mature in very cold weather, so this is the one I plant later in autumn. Another benefit is ‘Arcadia’s bumper crop of side shoots; in Charlotte, they produced for months.

For More Information

There is so much information online and in catalogs, books, and magazines. But, for local perspectives and information about other growing conditions, check with your agricultural extension office. And speak with helpful vendors at the neighborhood farmers’ market.

Garden clubs, botanical gardens, and garden centers selling seeds, supplies, and transplants sometimes offer classes covering various subjects. My “Cool Season Vegetables and Greens” presentations drew the most attendees. Many of my customers started with just one crop and then returned for more. A healthy addiction!

Keep Records

As you begin new garden projects, place labels with the plants, photograph progress, and take notes for future reference. Add some varieties you’ve never grown before to discover delightful new flavors. Observation of the varieties you’re growing in your garden is invaluable when planning future garden projects. There is no substitute for hands-on experience…and records of successes and failures!

Keeping detailed drawings of crop placement in the garden will help when considering crop rotation. Not growing plants from the same family in the same place every year helps decrease concentrations of pathogens and insects. But, because so many of the cool season vegetables are in the Brassicaceae family, it’s difficult to rotate these crops in our limited space.

Succession planting calls for sequential use of space, maximizing the amount of produce harvested through the seasons. It is especially important to prepare the soil before the fall or spring season, adding fresh compost, aged manure, or planting mix.

For optimal harvests, you’ll need to fertilize regularly as the plants grow. Instead of relying on memory, record the names of the products and when you applied them.

Have all underground utilities marked by your municipality before proceeding and keep a record of their locations. Call 8-1-1 to schedule an appointment.


Headings:

Page 1: Ready For Fall?, Where There’s a Will, There’s a Way (The Advantage Of This Latitude), and Succession Planting: Warm, Then Cool Season Vegetables (Peas, Yummy!, Gather Information)

Page 2: Seed or Transplant? (Seeds, Temperature, Transplants, More Favorites), Crops With Ornamental Edible Leaves (Tender Leaf Kales), Crops That Form Heads, Soil Fertility (The Importance of Microbes), Nutritional Benefits, and Ready For the 10 Tips?

Page 3: Tip #1: Move Tender Plants Indoors, Tip #2: “Quick! Cover Up!”, Tip #3: The Hot Water Bottle, Tip #4: Low Tunnels, Tip #5: Deal with the Wind, Tip #6: Add Christmas Lights, Tip #7: I’ll Have a Double

Page 4: Tip #8: A Simple Cold Frame For Cool Season Vegetables, Tip #9: A Lean-To, Tip #10: The Greenhouse, Finally!

Return to the top of Page 1

Tips For Planting A Potted Miniature Garden

2019


Down To Earth Garden Center, and Planting a Miniature Garden


On a recent drive to the mountains of North Carolina, I passed by Down To Earth Garden Center. Maybe it was the charming picket fence, or the need to save time and buy a few packs of vegetables for the deck pots. Either way, the inviting entrance lured me back.

Plus, when living in West Virginia, waaaay back in the 1970’s, I wholesaled potted houseplants to a popular shop called Down To Earth, in the downtown Morgantown retail district. Fond memories…


Down To Earth Garden Center is located at 1080 South Trade Street, in Tryon NC. Fran and Gary Garside are the owners, and Kiara and Dylan offered friendly greetings and help. After a quick turn around the yard, I asked permission to take a few photographs for the blog. Oliver, the friendly terrier, had no objections, either.

Here’s another small but meticulously maintained garden center.

Check out their facebook page, Down To Earth Garden Center, in Tryon NC.

Phone: 828 859-2283. Call for new hours.


The Newest Project


An empty blue ceramic pot sits in our front garden, begging for employment. A while ago, I sowed a pack of older zinnia seeds in it, but they didn’t germinate. So, the pot is looking for work. Construction on our home and others in the neighborhood this summer prohibited any large scale gardening, so I’m eager to exercise some creative horticulture before frost.


Thuja occidentalis 'Primo'

Thuja ‘Primo’, an arborvitae.


Seeing the dozen or so varieties of hardy dwarf evergreens at Down To Earth Garden Center, I instantly knew what my next project would be. The pot to be planted is roughly 16″ square and 8″ deep. There’s plenty of room for a collection of miniatures, some rocks and gravel, and driftwood with character.

The term “driftwood” is loosely applied here, referring to any piece of weathered wood or woody root. Most of the small pieces I’ve gathered have come from the woods, not from a body of water.


Fairy Gardens

In recent years, this style of garden has been called a “fairy garden”, but some gardeners simply refuse to call it that. Let’s just call them miniature gardens. If you or your grandchildren want to dress them up with happy gnomes and resin residences, go right ahead. But for me, a natural landscape is the way to go.

By the way, this is not a new trend in gardening. I remember planting terrariums for a florist in New Jersey, more than 4 decades ago. I used dwarf tropicals, driftwood, rocks and gravel, and life-like little “faux” mushrooms. Merchandisers, however, have captured attention from new audiences by calling them fairy gardens.

Any hobby shop you visit will be stocked with associated paraphernalia, from named fairies and cute cottages to stone staircases. This could be a fun introduction into gardening for our younger folks.


Tropicals For a Miniature Garden

Although I will be constructing a garden using cold-hardy species, you might prefer using tropicals for indoor gardens. Garden centers stock miniature plants in 1 1/2″ to 2″ pots for this purpose. You’ll find them as stores gear up for the busy fall (or spring) growing season, but many stock them year-round.

Some species stay small while others eventually will grow too large for a miniature garden. But for a year or so, they’ll do fine. You can find all sorts of ferns, Nephthytis, young palms, peperomia, pilea, baby tears, little succulents for sun, philodendron, and pothos. Young trees, such as Podocarpus, aralia (Polyscias), dracaena, Serissa, and Norfolk Island pine also are available.


Little Evergreens For the Miniature Garden


Picea and Thuja

dwarf evergreens

Some of the hardy dwarf evergreens at the garden center.

From Down To Earth, I selected Picea abies ‘Jana’, a Norway spruce, and Picea glauca ‘Blue Planet’, a white spruce. Each of these globular evergreens grows only 1″ to 2″ in a year when planted in the garden, and less than that in a pot. Their needles are a whopping 1/4″ to 1/3″ long!

Upright growing Thuja occidentalis ‘Primo’, an eastern arborvitae, grows 2″ to 4″ per year, and will serve as a vertical accent in the composition. Dwarf conifers are perfect for trough gardens, rock gardens, and also for outdoor railway layouts.

(***Update***: Each of the spruces grew less than 1″ this past year, and ‘Primo’ added only 1 1/2″ in height. All plants look great, although ‘Jana’ burned a bit at the top during a long stretch of hot weather—100°F heat index. 8/25/2020)

‘Primo’ could easily be mistaken for its cousin, Chamaecyparis, a well-loved genus which I often included in customers’ landscapes and in mine. This dwarf arborvitae has dense fans of tightly-packed foliage whorled around its stems—fabulous textural interest! ‘Primo’ was selected from a crop of seedlings at Iseli Nursery in 2004, and was released to the trade in 2017. Its foliage can take on deeper green to bronze tints in cold weather. When planted in the garden, this variety will grow to about 3′ tall and 1 1/2′ wide in 10 years.

A Holly Called ‘Jersey Jewel’

Down To Earth also had dwarf junipers, Cotoneaster, a ferny Chamaecyparis, and a holly with the cutest and tiniest round leaves. It was difficult narrowing down the choices to 3 plants. Hmmm…I might have to go back for that holly. (***Update***: A couple of months later, I did go back for that holly, Ilex crenata ‘Jersey Jewel’, when my visiting brother, Jeff, and I went for a drive in the mountains.)


The Cold Facts


All 3 dwarf evergreens are hardy to minus 30°F, or USDA zone 4. Because they will be kept above ground level, in the pot, their roots will not be insulated by surrounding garden soil. On an average winter night here in zone 7b (borderline 8a), however, the soil probably will freeze only an inch or two into the pot. I’m more concerned about summer heat in this area.

So, how, then, do spruces and firs survive way up in the frigid north? First, they evolved there, and their cellular chemistry has adapted to harsh conditions. Second, a blanket of snow and a layer of forest floor debris help protect plants’ roots, to a degree, even if air temperatures plummet to well below 0°. And those are the full-sized specimens, with roots that venture more deeply than the tiny evergreens I’ll be using in the pot.


Other Variables

Large pots in winter sunlight absorb more heat than small ones during the daytime, and release it to the atmosphere at night. And the more hours of sun, the better. You can see how a larger soil mass offers better protection from the cold than a smaller one. It takes more time for a greater volume of soil to release the warmth gathered during the daytime.

Consider, also, the color of the pot. Dark pots absorb more energy from the sun, sometimes making the difference between life and death for their inhabitants. In this case, I already have the blue pot, and it’s a light shade of blue at that. But later I’ll describe other tricks we can employ when dealing with harsh winter weather.

This container has survived many winters outdoors without cracking because it’s frost resistant. Still, there are no guarantees. For those pots that have great value to you, empty and clean them, and store them upside down in the shed or the garage.

Within reasonable limits, most of us in the U.S. can find something to grow in winter pots. Just look for the hardiest specimens you can find, and get some advice from an expert at your local garden center. If live plants are out of the question, consider berried stems, colorful twigs, cut greens, moss, pine cones, and other seasonal ornamentation for the decorative pots by the front door. Or you might choose to take the risk with live plants.


shallow pots

Low profile pottery, perfect for miniature gardens.


In Unusually Cold Conditions


Hardiness Zones

Each variety of tree, shrub, and perennial is assigned a winter hardiness zone. That zone represents the lowest temperatures it can tolerate when planted in the ground. It’s useful when labels include the range of tolerance, such as “USDA zones 4-7”.

Regions on the USDA plant hardiness zone map are divided in ten-degree increments. The additional “a” or “b” designation further narrows down each zone to slightly cooler or slightly warmer parts, respectively. So, zone 7b is 5° warmer in winter, on average, than zone 7a. The zone numbers increase as average winter temperatures increase from Canada to the southern U.S.

It’s not unusual in this area of North Carolina to see temperatures drop into single digits a few nights each winter. And, conversely, we sometimes have those glorious winters that rarely get below 25°! Normally, I recommend using plants for planters that are rated two zones hardier than the zone you’re living in. For example, a zone 5 Pieris japonica that should tolerate winter temperatures as low as -20° planted in the ground likely will survive a zone 7 winter (0° to 10°F) in a pot.


The Weather Report

The last weather report of the day will determine if anything needs to be done for the plants outside. I’ll probably move the miniature garden to the warmer back deck, which is protected by a fence. That’s where plants, including edibles in pots, will get the most hours of direct sun.

The corner between the shed and the back wall provides a cozy microclimate. And, if needed, I can move the miniature garden into the shed or indoors for the night. But I’d rather not; it’s rather heavy.


Cold Frames

Let’s say you live in the cold northern states, but you want to pot up a miniature conifer garden. You’ll need to provide some protection when temperatures drop so low that the plants are at risk. Here are a few suggestions for those areas where these conditions last for months.

Move the pot into a sunken cold frame, or one that is lightly heated by a heat mat or heat cables. Heeling (burying) the pot into the soil, inside the cold frame, will give more protection by insulating the root system. Or you could pile mulch around the pot up to the rim.

Where winter conditions are cold but not severe, heeling in the pot next to a south-facing wall might be all the protection required. Or move it to a covered sunny porch against the wall of the house. Avoid placing it where ice or snow from the roof might fall on the plants. Watch out for animals that like to dig. Surround the planting with deer netting or a wire barrier (chicken wire, hardware cloth) to prevent damage.

The cold side of a heated greenhouse, an unheated lean-to, a minimally heated sunroom, or a sunny garage window might work during the frigid winter months. The plants will need direct sun even though they’re dormant in winter, but keep them very cool. And don’t forget to water! When cold, the miniature garden will dry very slowly, but it still needs to be checked.

If it’s too warm, the plants will beak dormancy prematurely. But, without adequate sun, that new growth will be weak.

Here’s A Bright Idea

Another option is to surround the pot and soil with a string of indoor/outdoor miniature incandescent lights. Enclosing the whole thing, or just the pot, in plastic at night creates a “lightly” heated bubble of protection.

I’ll use this simplified version of a cold frame during periods of severe cold, meaning temperatures in single digits at night. But I probably won’t wait for the temperature to drop that low. These varieties are new to me, and I don’t want to lose them.

cold frame

Setting up the cold frame in autumn.

In the Maryland back yard, I assembled the cold frame (photo, right) every autumn. Succulents, geraniums, cyclamen, and other plants that tolerated cool temperatures, but not frost, spent the winters there. Edible cool season greens grew continuously under cover. And all received abundant sunlight in the back yard, on the south side of the house.

Cinderblocks and boards supported sheets of durable twinwall polycarbonate above the patio. Extra bricks on the north side (above cinder blocks) helped slope the cold frame toward the south for drainage and a better orientation toward winter sun. I used clear 4-mil plastic to cover the entire frame, sealing up the sides. And I weighed it down so it wouldn’t blow away.

The purpose of the strings of Christmas lights is to give gentle warmth, not light. So, use incandescent lights, not LED’s. The number of strings used in the cold frame varied with outdoor temperatures and with the amount of warmth needed for a particular group of plants. A string of 100 mini lights provides about the same warmth as a 40-watt light bulb.


Keeping Their Cool

These evergreens grow best when exposed to natural seasonal variations. But because the roots are above ground, they are more limited in what they can tolerate.

In any case, don’t keep hardy plants on display indoors or enclosed under plastic any longer than necessary. They might break dormancy, and could suffer cold damage when exposed to normal temperatures again. Open or remove the plastic covering every morning, before the sun heats the space.


Headings

Page 1: Down To Earth Garden Center, and Planting a Miniature Garden, The Newest Project (Fairy Gardens, Tropicals For a Miniature Garden, Little Evergreens For the Miniature Garden (Picea and Thuja, A Holly Called ‘Jersey Jewel’), The Cold Facts (Other Variables), and In Unusually Cold Conditions (Hardiness Zones, The Weather Report, Cold Frames, Here’s a Bright Idea, Keeping Their Cool)

Page 2: Tips for Potting Up the Miniature Garden (Double Potting), Plants For the Miniature Garden (Bloomers, Hardy Plants, Moss, Pruning), The Blue Pot, The Off-Centerpiece, More Plants For the Miniature Garden (Let’s Start Planting), The Little Fillers For the Miniature Garden (Acorus, Carex, and Ophiopogon, Eleocharis, A Welcome Weed and Viola), and The Small Stuff


Return to the top


Using Miniature Lights For Warmth


Miniature Lights for… Warmth?


miniature lights


Yes! You can use strings of miniature lights to prevent frost from damaging tender transplants in the garden.

This article originally was written for springtime applications. But read through, and you’ll see how the same principles work for cold weather gardening in many regions. These lights will keep greens in better condition, sometimes all the way through winter. Your cool season greens can produce for weeks or months beyond the early freezes!


Unpredictable


The weather has been so weird this spring. Some days it feels like June, and others skim the bird bath in ice. Lots of us already planted tender (easily damaged or killed by frost) vegetables and flowers. Without some protection, they will be injured by the cold nights that are still in our forecast.

If the nighttime temperatures are predicted to fall below 50°F, I’ll cover tomato and pepper transplants in the garden. A night or two in the 40’s probably won’t hurt most transplants if they’ve been properly hardened off. But consistently chilly weather will slowly rob the plants of their vigor. Peppers and basil are particularly sensitive to cold soil, and can be killed by it, even if temperatures aren’t close to freezing.

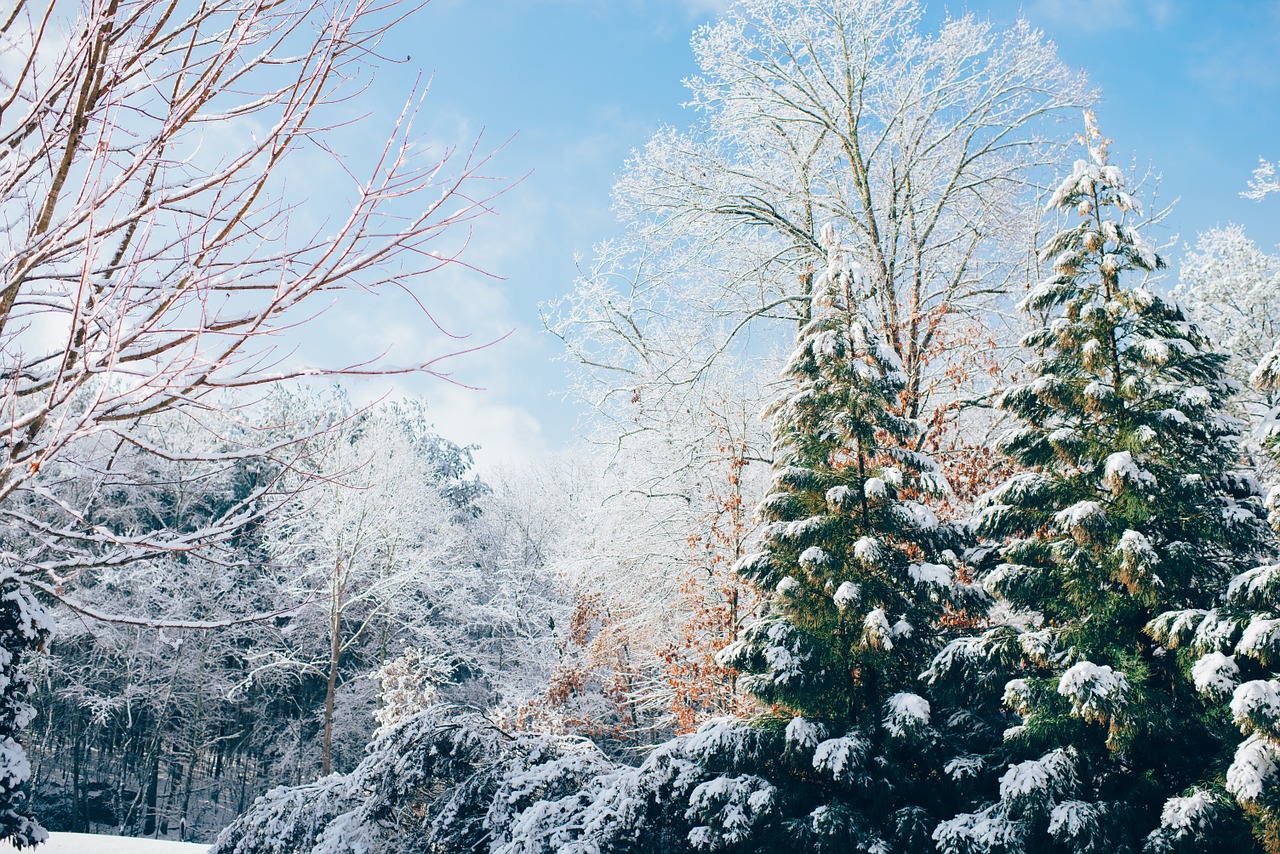
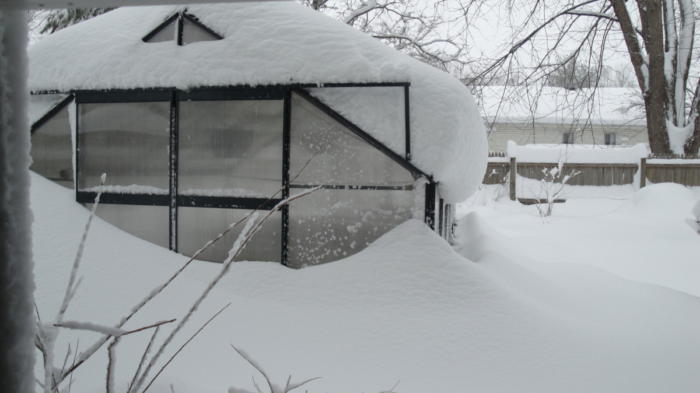
It’s amazing to see snow still flying in some of our northern states. It is beautiful…to watch on TV.


cold frame, with plants

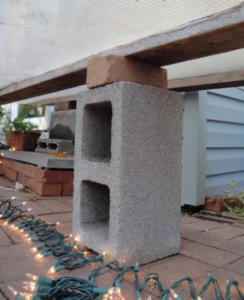
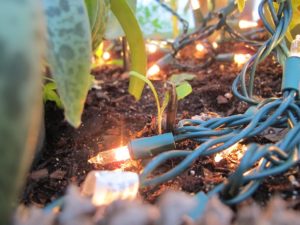
Early winter in the cold frame. Light strings snake around the bottoms of the pots.


Miniature Lights


Incandescent lights, as opposed to LED’s, give off gentle heat. 
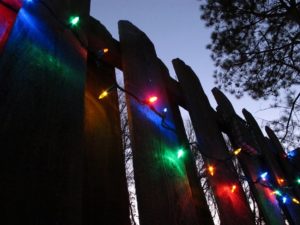
Those 100-bulb strings of miniature incandescent Christmas lights can increase the temperature under cold frames. They also protect tender plants in garden beds when covered with plastic sheets to hold the warmth.

mini lights under plastic cover

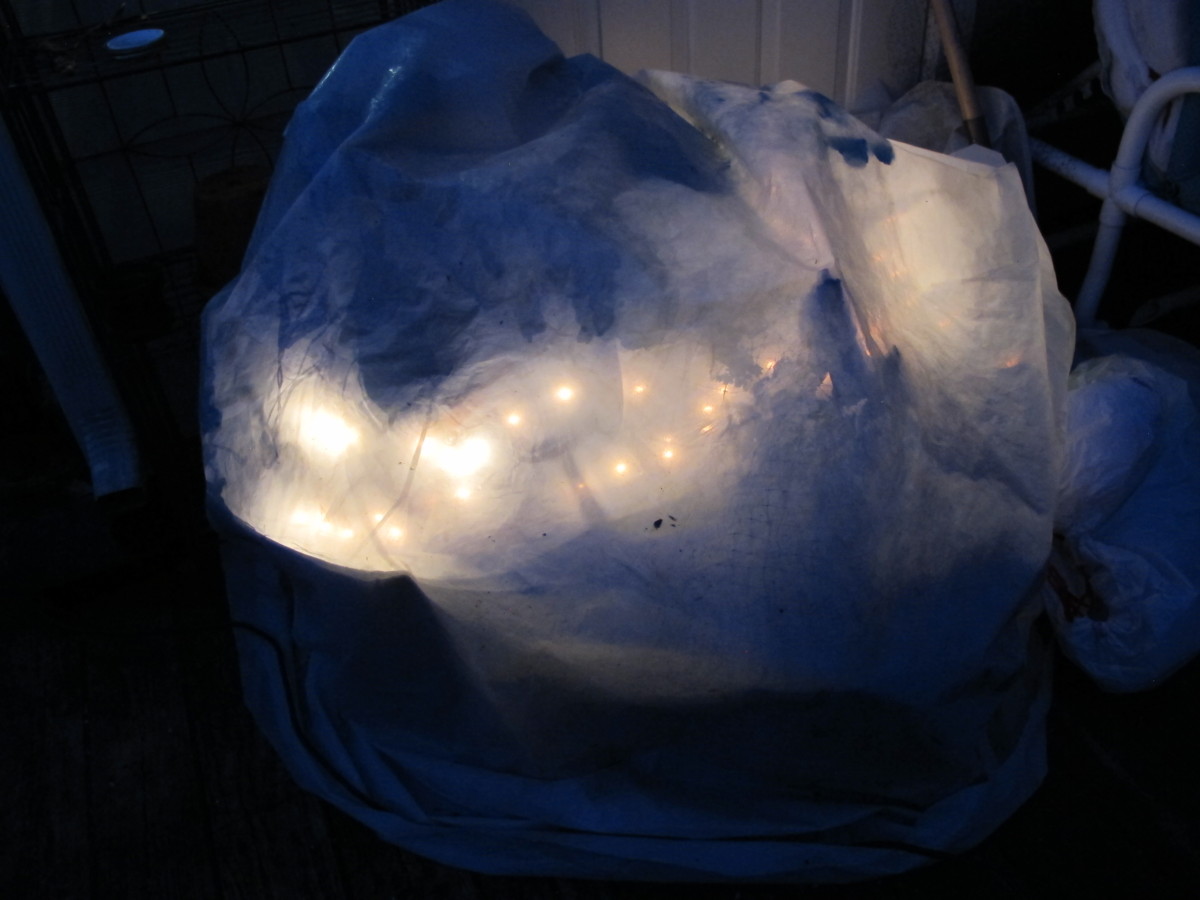
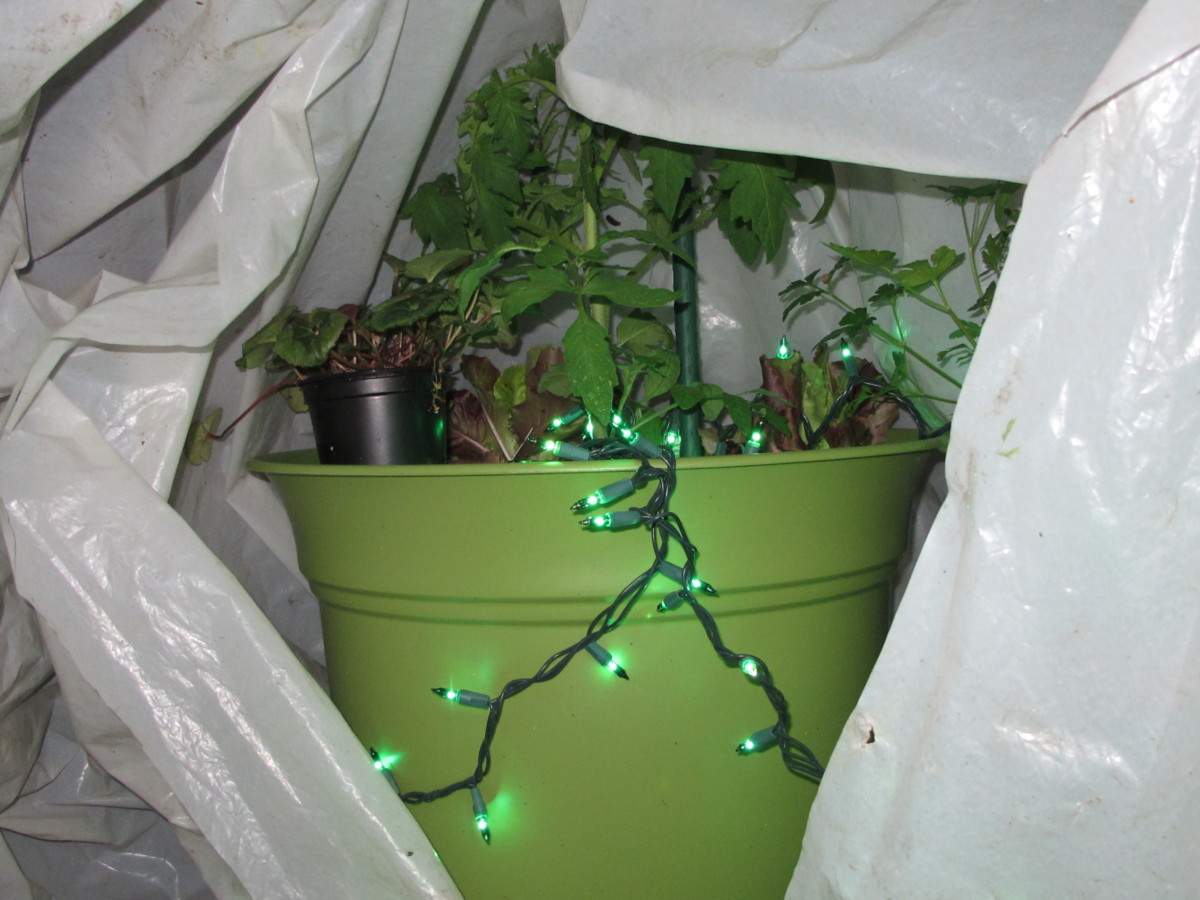
Potted plants under cover, warmed by miniature incandescent lights.

This is especially beneficial in those locations where an upside-down bushel basket will not sufficiently ward off the cold. And I’m not suggesting that you attempt to defy good garden sense by planting peppers in February in Minneapolis. There are limits!

When I calculated the wattages, square foot coverage, and costs, the miniature lights were the most economical option for my purposes. Each 100-bulb string provides warmth equivalent to a 40-watt incandescent bulb. I also considered heat mats and heat cables. Have a look around hardware stores and see what garden centers have available. Look for ideas online or with mail order companies selling farm, garden, horticultural, or greenhouse supplies.

Use “indoor/outdoor” products that are safe to use in humid environments. Space heaters designed for indoors are not good candidates outdoors. If you’re planning a project outside your comfort zone, check with licensed contractors, especially for electrical work.

(***Update***: Above average temperatures in the Carolinas carried into mid-fall, so the amaryllis bulbs refused to die down. Recent nighttime readings in the low to mid 20’s would have damaged the potted bulbs, so they’ve been enjoying temperatures in the mid 40’s, thanks to miniature lights and a plastic cover. Not forcing early dormancy on the plants gives them extra time to photosynthesize and, perhaps, an additional flower bud. Finally, the leaves are beginning to yellow, and soon they’ll come indoors to rest and to begin the bloom cycle. December, 2018)


And More Bright Ideas

Include snow loads and wind events (they will happen) in your plans. Slope the top of a cold frame away from the house to allow run-off. During the occasional heavy snowstorm in Maryland, I got up in the middle of the night to sweep off snow that had accumulated 8-12″. Toby, our second Rhodesian ridgeback, thought this was lots of fun. Although polycarbonate is very durable and will bend with weight, too much distortion will allow frigid air to enter and might collapse the frame.

There are more permanent alternatives to consider. Do-it-yourself greenhouse kits could be used specifically for fall and winter crops, heated or unheated. Familiarize yourself with local weather patterns to decide what’s feasible…or necessary. You might be able to convert a shed or construct a lean-to by adding a few materials readily available from the hardware store. Contact your local agricultural extension agent for practical suggestions or check out the numerous online videos.


Cold Frames With Miniature Lights


cold frame interior, miniature lights

Setting up cold frame with new strings of miniature lights.

Cold frames are simple glazed structures that give extra protection to plants when the weather is unsuitable for planting out. Young seedlings or transplants can be hardened off here until they’re ready for the garden. Also, plants that normally go dormant or die in winter can be kept green in a frame. And edible cool season vegetables can grow all winter in a cold frame where it’s too cold out in the open.

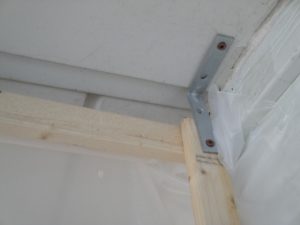
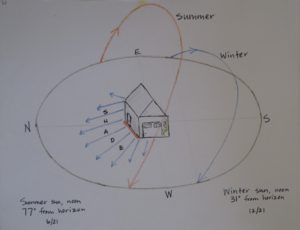
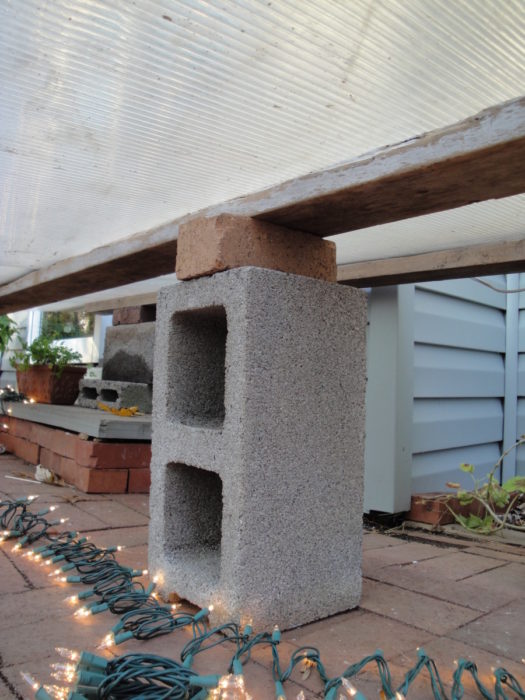
Try to orient the frame’s exposure toward the south (in the northern hemisphere), which will give the greatest benefit in terms of heat gain. Bricks on cinder blocks (photo, right) elevate the north edge of the glazing for rain run-off and a more favorable aspect to the sun.

Each hour of direct sunlight shining on the frame keeps the temperatures elevated and stores warmth in the ground. If possible, locate the cold frame out of the wind and in a warm microclimate on the south side of the house or shed.


Materials

Some gardeners use lengths of sturdy wire, arched and stuck in the ground, covered with clear plastic secured by fasteners. Or use long pieces of PVC tubing anchored over rebar sunk in the ground. Repurpose old storm windows or doors (without lead paint) propped on a support.

“Low tunnels” or “caterpillar tunnels” are available at garden centers or online, complete with supports and coverings.

For the large frame in Maryland (photos), I used rigid twinwall polycarbonate panels, covered with clear plastic film to close the sides. On very cold nights, I added more sheets of plastic, separated by “netted” plant flats that trapped air between the layers. This created dead air space and better insulation.


cold frame for cool season vegetables

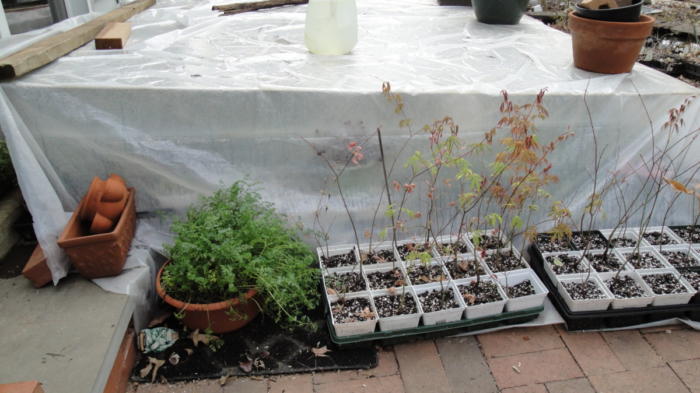
Cold frame in MD, vented in the daytime.
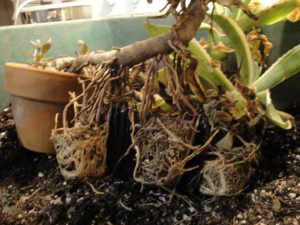
 

Houseplants

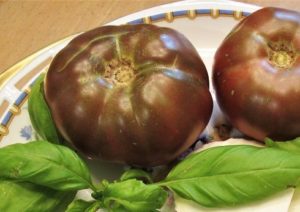
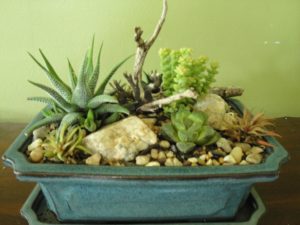
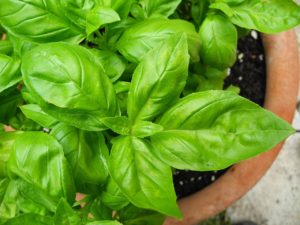
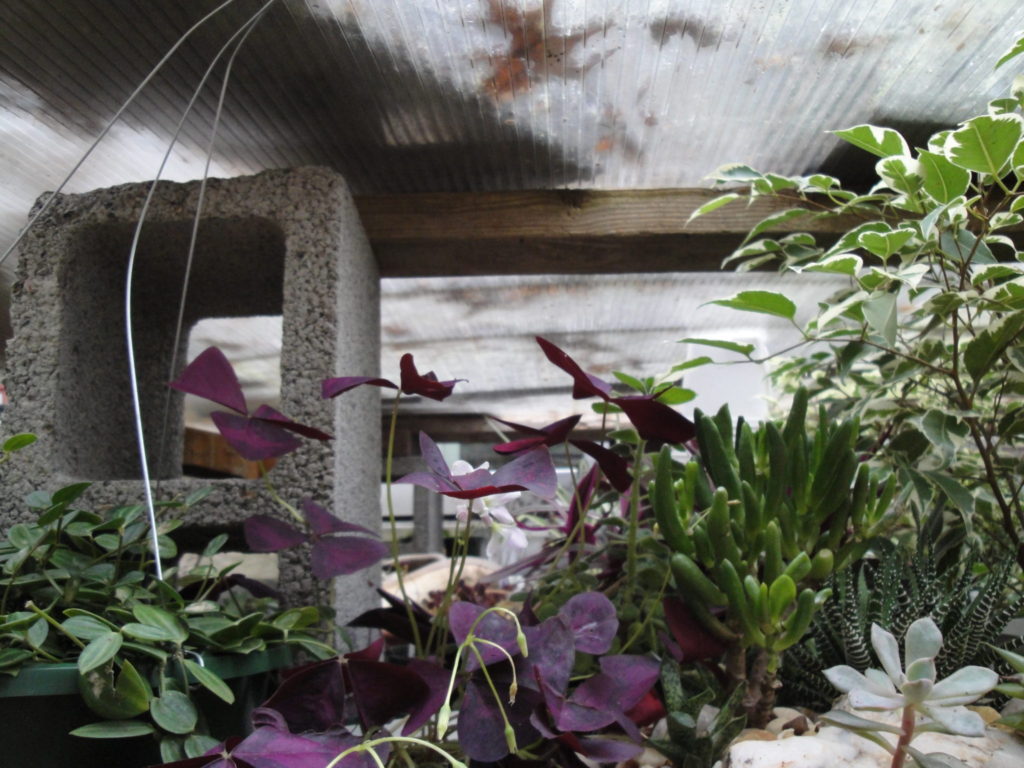
Oxalis, succulents, stellar geraniums, a variegated fig tree, and other houseplants (photo, top) survived the winter, although I did not expect them to grow. When cyclamen plants went out of bloom in the house, I moved them to the cold frame, where they happily set buds once again.

Plants that do not tolerate the slightest chill, such as African violet, Alocasia, pothos, philodendron, and basil, would not survive very long at temperatures below 60°F. They stayed indoors for the winter.


“Frame to Table”

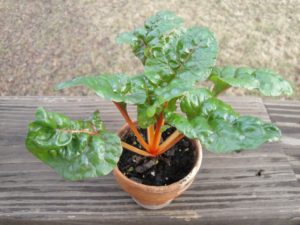
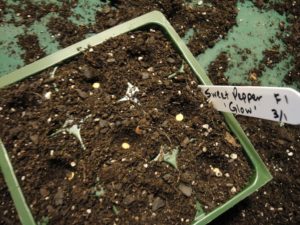
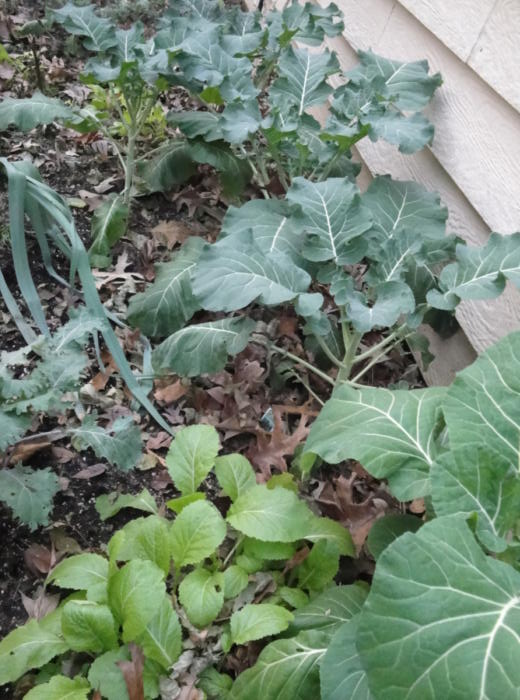
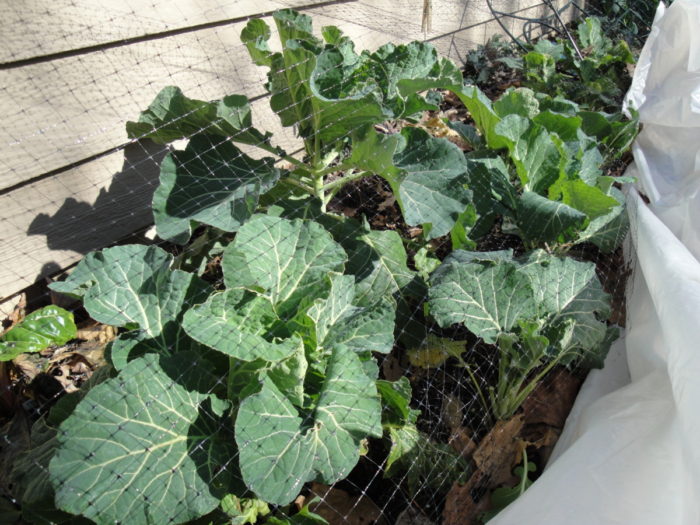
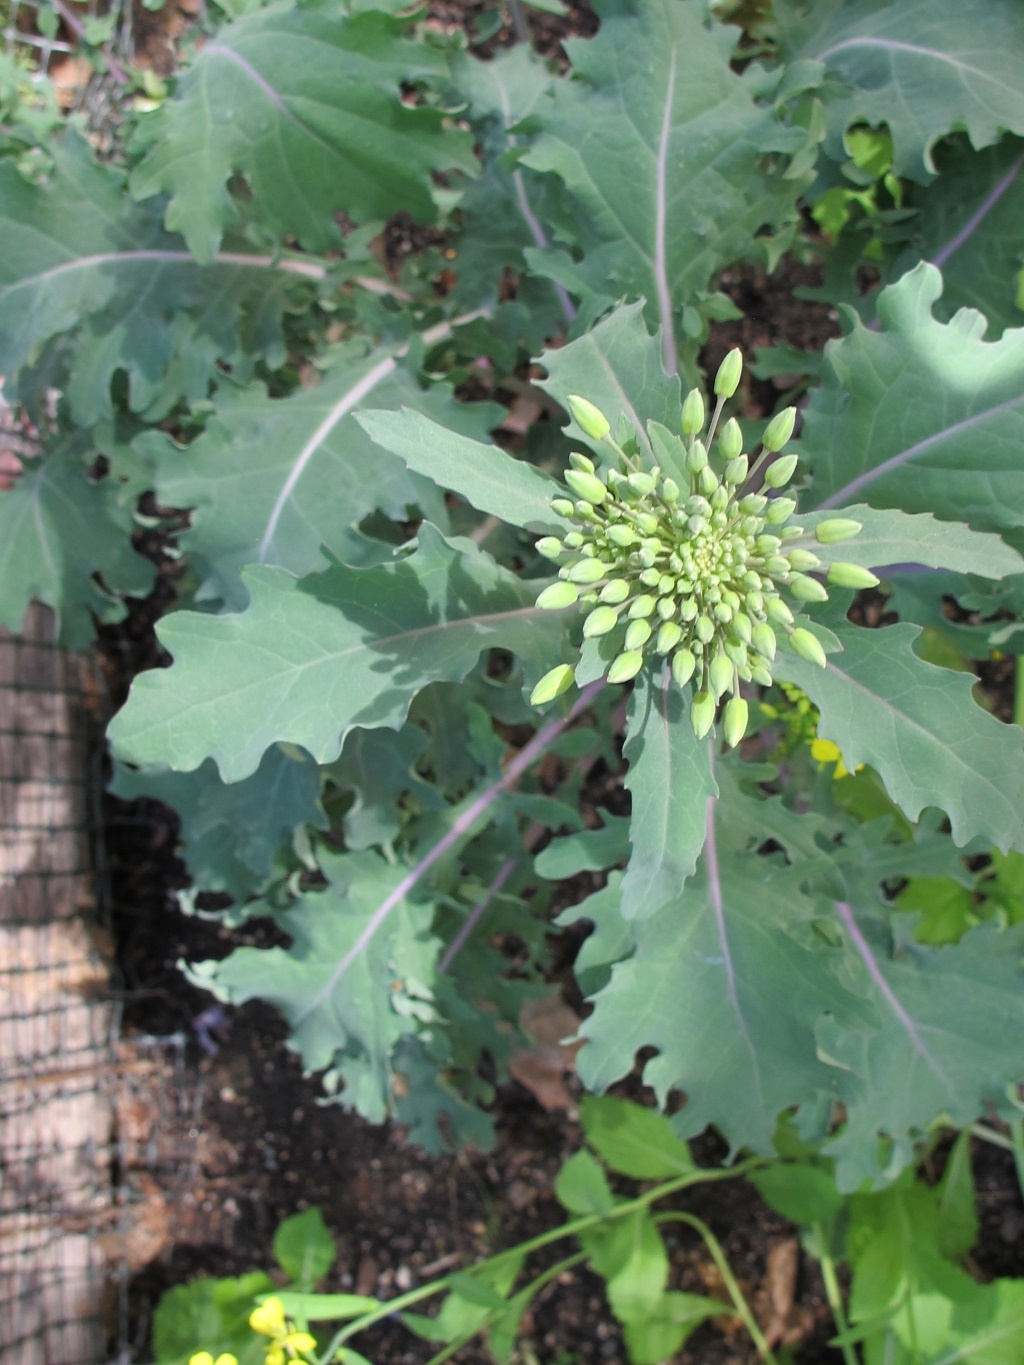
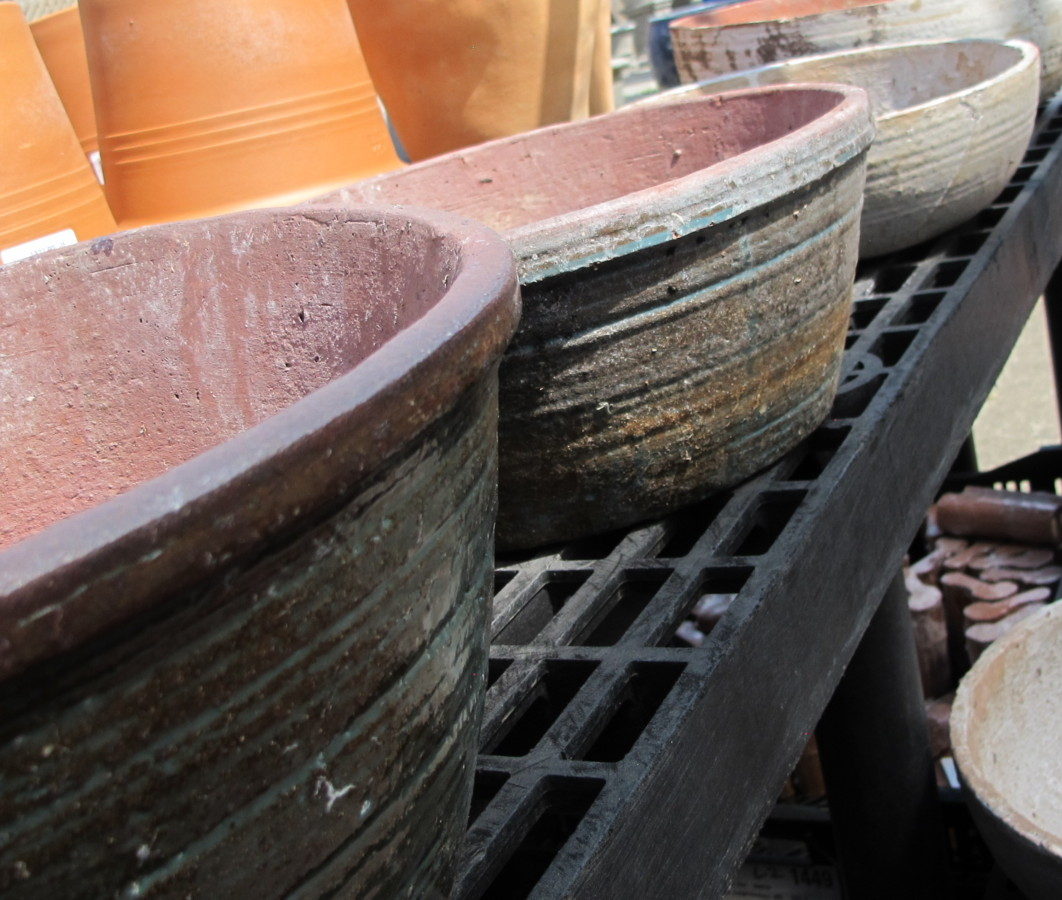
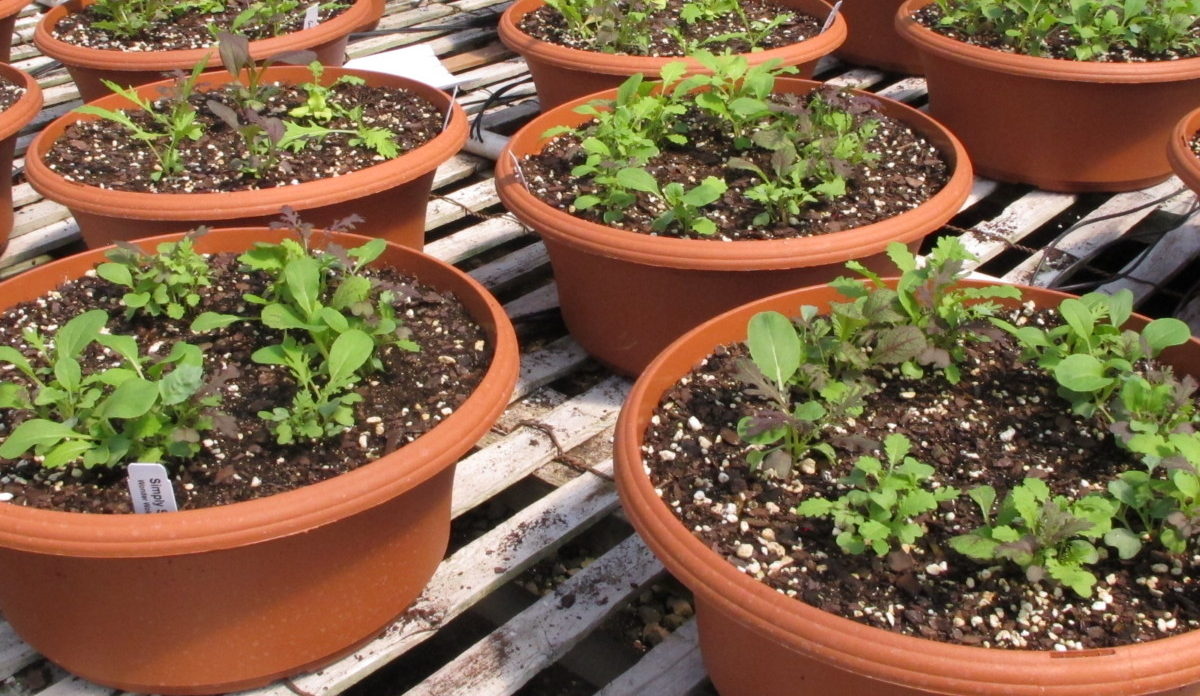
Without using miniature lights in Maryland’s colder winters, I would not have been able to harvest this assortment of greens. I grew lettuces, leeks, arugula, hon tsai tai, mustard spinach, dinosaur and ‘Red Russian’ kales, and spinach. And Swiss chard, tatsoi, pac choi, mini broccoli ‘Happy Rich’ in wide, shallow pots, about 6″ deep (such as those in photo). ‘Nabechan’ bunching onions and some greens grew in the ground on one end of the cold frame, while potted crops sat on the brick surface.

cool season vegetables

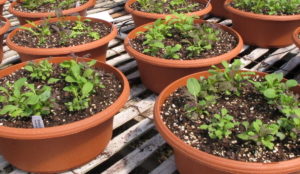
Greens growing in wide bowls.

Dense materials, such as brick and stone, absorb heat during the daytime and release it at night. I threaded strings of miniature lights between pots, on top of the brick patio. Broken light bulbs cause part or all of the string to fail, so be careful with them. Pots of greens and herbs placed close to the edge of the frame allowed easy access.

Herbs grew all winter in this cool but frost-free environment. Parsley, oregano, sweet marjoram, rosemary, thyme, chives, sage, French tarragon, and bronze fennel are a few of the herbs I grew in the frame. Cold frames are great for half-hardy species and those that normally stay dormant in winter. Italian oregano, tarragon, and chives, for example, retained their foliage instead of going fully dormant.

I added an adapter to the porch light socket near the patio door, and the lights’ extension cords plugged into that. With a simple flip of the switch from the cozy kitchen, the lights turned on or off. That’s one advantage of building your frames close to the house. 

Remember to vent the frame on sunny days, turning lights on or off as necessary. Close it up by mid- to late afternoon. 

Water as necessary, keeping the soil damp, but not wet. During mild periods of the season, add a dilute dose of fertilizer to those plants (mostly the greens) that are growing.

Power Outages

Have a contingency plan during power failures if you’re going to keep tender plants in your cold frame. Use old blankets (keep them dry), more layers of plastic, and gallon jugs filled with hot water. When this happened a few times in MD, I heated water on the wood stove for those hot water bottles and brought the most tender plants indoors.

Snow or straw piled up around the sides and a layer on top holds in a substantial amount of heat. Clear the top in the morning to allow sun to reach the plants. But if the weather is especially harsh and overcast, the plants won’t mind staying covered for a day or two.


The Maryland Greenhouse
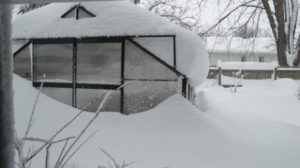
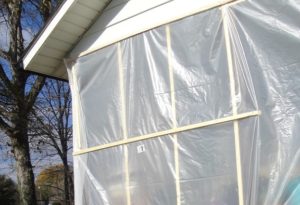
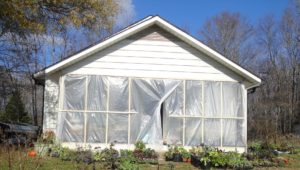
 

greenhouse for cool season vegetables

The small greenhouse in Maryland.


I built this greenhouse from a kit purchased from a horticultural supply company. It was fairly easy to put together, although some of the pre-drilled holes didn’t quite match up and the instructions weren’t great. But the twinwall polycarbonate and sturdy framing were able to withstand considerable weight from ice and snow. The structure was attached to a foundation, which was optional but recommended.

This is where I kept more flats of tender succulents. Placed on 2 x 2″ x 8′ posts propped up on cinder blocks near the ends, the flats were heated from below with strings of miniature lights. They had the additional protection of 1 or 2 layers of clear plastic secured on the sides and suspended a few inches over the plants. When nighttime temperatures plummeted to single digits, I added a couple of old bedsheets and another layer of plastic, and then removed them once the sun hit the greenhouse. None of the plants froze.

A second heavy duty indoor/outdoor extension cord reached the porch light adapter near the cold frame, so I could turn all the lights (in the cold frame and in the greenhouse) on or off from indoors.


Double Bubble

This extra “bubble” of lightly warmed air made it possible for frost intolerant plants to survive our zone 6b winter. A bubble inside a tightly sealed unheated greenhouse (or other structure) feels up to 2 or 3 zones (up to 20-30°F) warmer at night than outside air, and even warmer with miniature lights. Keep in mind, though, that each layer reduces the amount of light reaching the plants.

Two or three rows of tender plants—all under a single bubble—occupied the center of the greenhouse. Near the perimeter sat frost tolerant cool season greens in large black nursery pots. Dark colors absorb the sun’s energy, keeping soil unfrozen for longer periods of time. Large pots work better than small pots because they store more warmth. Sometimes I stored bales of potting soil, wrapped in black plastic, on the north edge, where the winter sun would not be blocked.

States in the middle and northern parts of the U.S., in USDA zones 4-6, benefit greatly from an extra barrier of protection from frigid temperatures. Cold hardy plants are more likely to survive than tender species in spaces with no supplemental heat.


Here in North Carolina
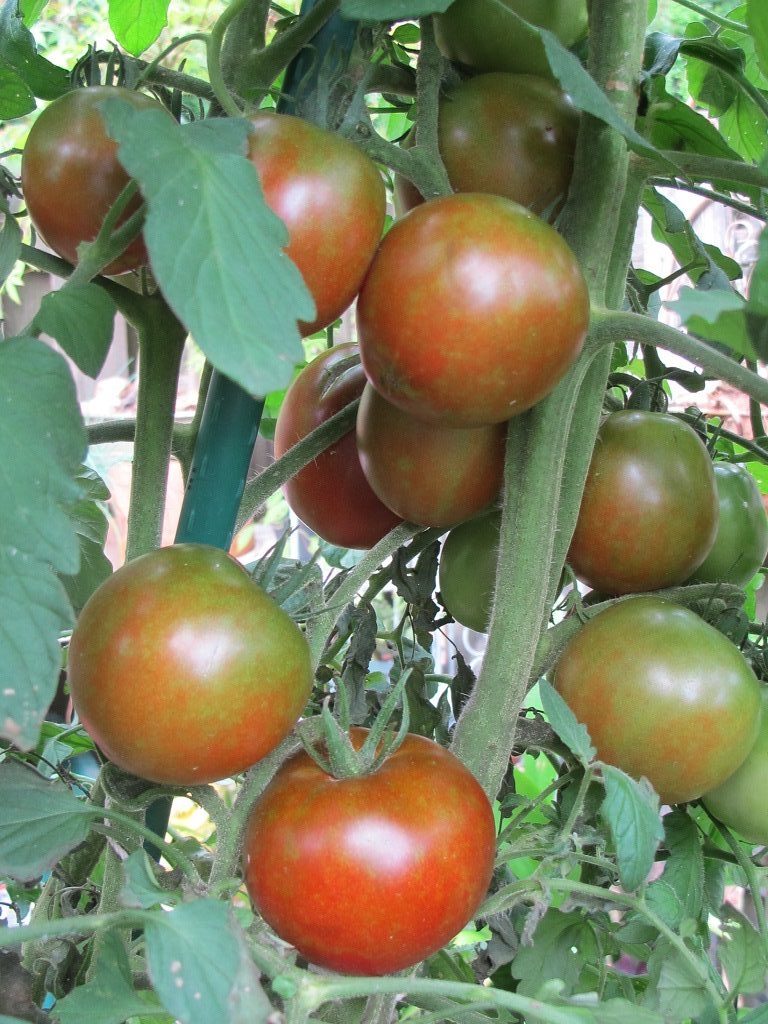
 

Since moving to Charlotte, North Carolina (USDA zone 7b/8a) in 2013, I’ve used clear plastic and miniature lights to ripen up the last of the summer vegetables. And they keep cool season greens and vegetables growing through the worst of our winter weather. To avoid any surprises, check the weather forecast daily.

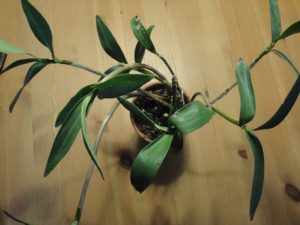
Succulents that moved with me from Maryland spend the winters in lighted cold frames after filling the sunny windows indoors (photo, right). Delicate species stay inside.

One year, an HVAC contractor came to check the heat pump, located near the lower patio. There were several flats of plants in a second cold frame down there, with miniature lights. That frame was not easily visible from the house. A couple of days later I discovered that the contractor had inadvertently disconnected the extension cord feeding power to those lights…and life to the plants! You know the rest of that story.
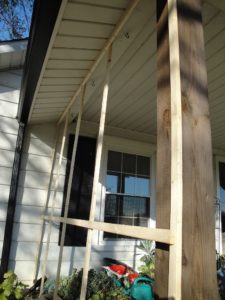
(***Update***: I just finished enclosing the sunny front porch at my new home in northern North Carolina, where I moved in October, 2021. This is where the succulents and other plants will spend the winter, aided by miniature Christmas lights. December, 2022)


Cautions


cold frame

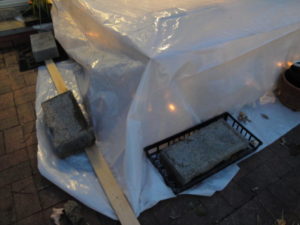
Cold frame covered with clear plastic and weighed down.

Make sure the miniature lights are rated for indoor/outdoor use, and that extension cords are also safe to use outdoors. I’ve been warming up the cold frames and garden plants like this for decades without mishap, except as noted above.

The tender succulents and bowls of mixed greens and herbs covered during the winter survived without damage. On nights that fell below 15°F, the temperature in the cold frame stayed in the high 30’s or 40’s, depending on the number of lights used.

Plants survived single-digit temperatures, helped by the old quilts and extra plastic placed over the frame at night. When needed, I added another string of lights. Placing the frame cover fairly close to the tops of the plants limited the volume of air those lights needed to heat. Not too close, though, or the foliage will feel the cold.

This works like a charm, but only if there’s a power source nearby. Be careful; don’t use extension cords that can’t carry the demand for power. Don’t hook up more than 2 or 3 light strings together.

There are few products on the market that demonstrate the phenomenon of planned obsolescence as clearly as cheap imported miniature lights. Stock up on them when they’re plentiful. They don’t last more than a couple of years with frequent use, and they’re becoming increasingly scarce in favor of LED’s. Tread carefully!

Lastly, instructions on the packaging recommend washing hands thoroughly after handling strings of lights. There might be some lead in the wire covering.


Miniature Lights Preferred


Christmas lights, plastic, cold frame

Mini lights warm up 2 large pots of young tomatoes.


There are other types of incandescents available but watch the wattage! If bulbs are hot to the touch, the plants will think so, too, so don’t place them close to the plants. The preferred miniature lights are barely warm, so they distribute the heat evenly and gently.

Make sure the bulbs are not in contact with the plastic covering or the leaves. Avoid letting the plastic cover touch the leaves; cold transfers through the plastic and will damage foliage.

It’s best to lay the strings on the ground, around—but not touching—the stem. The warmth will rise. For potted plants, wind some of the lights around the pots. Tall plants might require lights up into their branches.

If you’re not really trying to push the envelope, the plastic bag or old sheets probably will do the trick. It’s when that sudden blast of uncommonly cold weather comes around that prompts us to take extra measures.

(***Update***: In the photograph above, mini lights kept the young potted tomatoes [in 20″ pots] and a few other plants 15° warmer on an unusually cold spring night. I placed the miniature lights on the soil surface and wound them around the pots to keep the roots a bit warmer. Plastic was closed and secured with clips. April, 2019)


Out of Reach


Where lights are impractical, there is a solution. Use large plastic mulch or trash bags, and tuck in a hot water bottle. Seriously! A repurposed gallon milk jug filled with very hot water slowly gives off heat through the night. A little experimentation will tell you if the heat is given up too quickly (wrap the jug in an old towel to slow heat loss) or insufficiently (use 2 milk jugs or larger containers). Don’t place the hot water close to the foliage. Keep this in mind when the power goes out.

Those “water wall” products you see at garden centers work on the same principle. Water that heats up in the sunlight slowly gives up that heat to the plant at night.

Plastic bags that are nested, or layered, give better protection than a single layer. Spread the opening over a wide footprint (soil’s square footage) to capture heat rising from the ground. Or simply secure a large plastic sheet to a tall stake in the ground. Weigh down the covering with rocks or bricks to keep it in place and to seal out the cold. Remove the cover in the morning.


   *    *    *    *    *    *    *    *    *


I hope this information gets your garden successfully through the “shoulder” seasons, when temperatures can fluctuate wildly. Just a few readily available and inexpensive materials can prevent a total loss.

Later in the year, when autumn temperatures tumble, having materials ready for duty will extend the season. Rolls of 4-mil clear plastic—actually somewhat translucent—can be found in the hardware store’s paint department. This product (4- or 6-mil plastic) is less expensive than greenhouse film. If, however, you opt for permanent structures, the longer lasting film will be worth the investment.

If you’ve never grown cool season vegetables, these methods will open up a new world of growing opportunities. You can extend the season before and after the summer crops or protect tender ornamentals through the winter. No need to retire the trowel with the first fall frost!
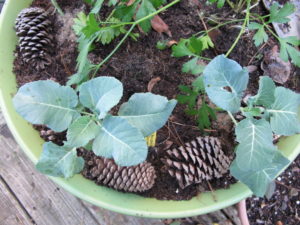
 

potted broccoli

Young broccoli ‘Arcadia’ in 20″ pot, where a tomato grew in the summer. Sharp-tipped pinecones discourage squirrels.


Return to the top