Tag Archive | twinwall polycarbonate

10 Tips for Protecting Cool Season Vegetables

2019

updated 3/1/2024


Here are 10 Tips for protecting cool season vegetables from freezing temperatures.


cool season vegetables in the garden

Cool season vegetables: from the top, broccoli, leeks, ‘Red Russian’ kale, light green mustard greens, and collards.


Ready For Fall?


Throughout parts of the United States, and in chilly climates everywhere, gardeners are scrambling to save their tender plants. Most of us have brought in all the houseplants. More laissez-faire gardeners do nothing special to extend the season, beyond harvesting the last of the cherry tomatoes and clearing out the frosted vines.

And there are those of us who strive to keep cool season vegetables growing even in winter. And we’ll plant more of them! Soon I’ll transplant ‘Monstrueux de Viroflay’ spinach seedlings into pots, to grow on the deck through the winter. This French heirloom spinach has huge leaves with a milder flavor. It has lower levels of oxalates, so those who have been advised to avoid eating spinach might be able to eat this variety. Ask your doctor.

In early October, I planted 2 dozen onion sets (for green onions) in a 12″ pot on the deck. Green onions are ready for harvest, in mild weather, only a few weeks after planting the sets. To preserve them in the cold, I’ll cover them with plastic sheeting (Tip #2). Green and bunching onions grow more slowly in cold weather.

I planted more sets every couple of weeks and will soon plant the remaining bulbs before they dry up. A favorite bunching onion called ‘Nabechan’ has straight sides. Not having a bulb at the bottom makes it easier to harvest. Sets are not available for bunching onions, though, so they must be started from seeds.


Where There’s a Will, There’s a Way


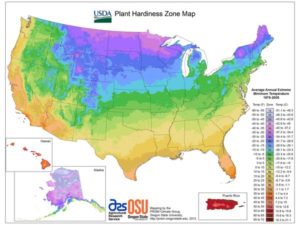
USDA plant hardiness zone map

The USDA plant hardiness zone map.


Potted cool season vegetables will grow under a plastic covering in cold weather. To extend the season, strings of miniature incandescent Christmas lights (Tip #6) will raise the temperature to more comfortable levels. Later in this article, I will list all 10 Tips for protecting crops in winter.

Starting with the simplest ideas and progressing to the more advanced methods, find the level you’re most comfortable with this season. Your budget, your USDA plant hardiness zone (photo, above), and the types of crops themselves must factor into your decision.

As you gain confidence and become more motivated to keep the garden producingyou might decide to try the next level. Cost savings realized by growing your own fresh food might justify the expense of new materials.

It’s only through experimentation, by taking a chance, that you might discover all the opportunities—and the limits—of gardening challenges. This is how green thumbs are cultivated.

If you’ve never grown cool season vegetables, several articles at The Farm In My Yard provide detailed information to get you started. For a greater understanding of any issue, enter the term in the search bar or click it in the tag cloud.


The Advantage of This Latitude

I’ve been growing greens in winter for decades, for my customers and for my family. Fortunately for us, living in the southeast doesn’t present as difficult a winter hardship as would living in Montreal, Montana, or Scotland. But there are options for just about every climate.

There’s no substitute for stepping outside and collecting a green onion, a mild mustard leaf, and some kale and spinach for our Sunday morning omelet. We pick what we need when we need it.


Succession Planting: Warm, Then Cool Season Vegetables


Because our favorite greens love cool weather, they grow in the garden after the tomatoes, peppers, and cucumbers have been harvested. So, with some planning, you can schedule a succession of crops. When one crop finishes up, new transplants or seeds are ready to take its place. Now, that’s an efficient use of space!
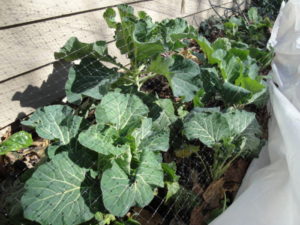


cool season vegetables

Cool season vegetables and greens replace summer tomatoes and peppers. Plastic protects plants on very cold nights and the netting deters deer.


Radishes, beets, spinach, and other fast-growing plants can be sown directly into the garden in late summer to early autumn. After they’ve been harvested, there might be time for another quick fall crop.

Certain greens and root vegetables have a shorter window of time during which they retain the best quality. So don’t let them linger in the garden. On the other hand, some cool season vegetables can be harvested over many months of growing! That’s at a time when there are fewer weeds, fewer bugs, and less drought to worry about.

If the weather is still warm for the first round of seeds, look for varieties of cool season vegetables that are more heat tolerant. Some catalogs indicate the preferred soil temperature for each crop, or you can get that information from your agricultural extension office. Soil temperature can be lowered by irrigating during hot weather. Additionally, frames covered with knitted shade cloth, made from black polyethylene (available from Johnny’s Selected Seeds and others), provide consistent shade until the weather cools. That bit of shade can make the difference between seeds germinating in August or having to wait until late September to sow them.

Here in zone 7b (average lowest winter temperatures 5° to 10°F), we enjoy productive edible crops and herbs in the garden year-round…with some protection in winter, of course. But we’ve also grown them in colder Maryland winters.

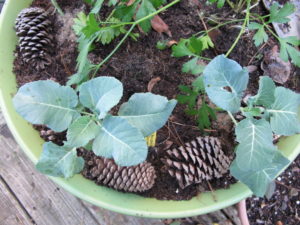
Because I’ve been “advised” by the HOA to stop growing vegetables in the garden (photo, above), they’re now in pots (photo, below) on the fenced deck. (Note to self: next move, no HOA!) Young ‘Aspabroc’ miniature broccoli plants grow in a 20″ pot, where a tomato grew during in the summer. Italian parsley lasts all winter, and sharp-tipped pine cones discourage squirrels.

***Update***: In October, 2021, after my mother passed away, I moved to a small town in northern North Carolina. More property, more nature, woods in the back (where a bobcat and I came face-to-face!), no traffic, gorgeous topography, great friends, just a couple of degrees cooler than Charlotte, and no HOA to tell me what I must or can’t do on my property. 3/1/2024


potted broccoli

‘Aspabroc’ miniature broccoli and parsley.


Peas…Yummy!

Peas grow best in the garden’s “shoulder seasons”. That’s when temperatures can be cool to warm, and when frost is no surprise. So, before the end of tomato and pepper season, you can sow a pack of pea seeds next to a trellis and begin harvesting two months later.

Edible podded snap peas and snow peas are absolutely delicious. Many are eaten on the spot. And because they grow vertically, the vines take up little square footage. During the shoulder seasons, in moderate climates, they don’t normally require a protective covering.

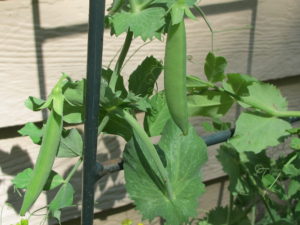
pea vine

Peas growing next to the house, a warmer microclimate.

If you have facilities that can accommodate pea vines, such as a lean-to or a cool greenhouse (Tips #9, #10), this crop can be grown as the temperatures dip lower during the winter months. But there is a point below which the vines will be killed in unheated structures.

Last autumn’s loosely covered pea vines (photo, right) made it just fine through the mild winter and started bearing pods in late winter.

Look for disease resistant varieties when growing any vegetables or greens under cover. Plants are more susceptible to diseases when grown in humid conditions.


Gather Information

Get to know each crop, and how much cold it can tolerate with or without protection from freezing weather. I’ve researched calendars for scheduling vegetables in this zone and have found some of them, compared to my own experience, to be overly conservative. They restrict sowing and transplanting to a narrower period of the calendar than I’m willing to gamble with.

Gardening in a warmer microclimate offers more protection than growing plants out in the open. Planting against a sunny south-facing wall or in a protected corner out of the wind provides opportunities to extend the season.


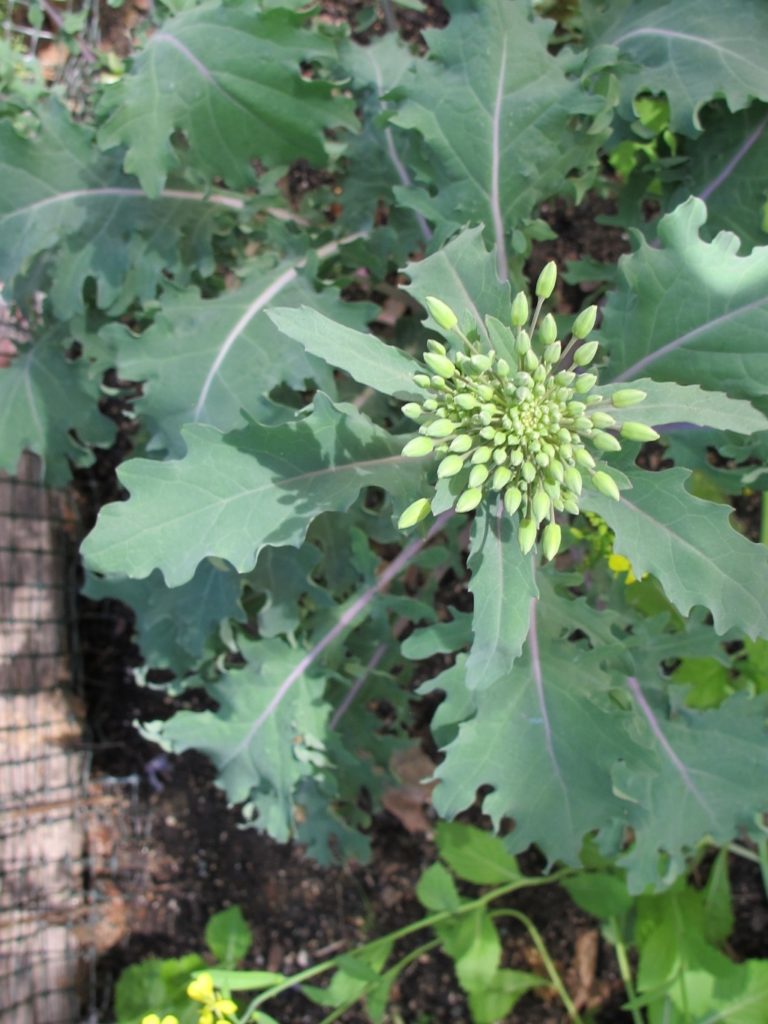
bees and butterflies feed on nectar in winter

‘Red Russian’ kale in bud.


Kale, collards, spinach, Brussels sprouts, mustard spinach, arugula, leeks, and green onions can tolerate the coldest conditions, within reason. I cover the crops when temperatures dip below the mid 20’s. Even if they’re not covered, they will survive. But I want the plants to continue providing premium quality greens. If not stressed by very low temperatures all day and night, these crops will grow if daytime temperatures rise into the mid 40’s.

Cauliflower and ‘Bright Lights’ Swiss chard need to be covered earlier than other greens. Frost normally won’t kill the plants. But repeated freezing will damage the foliage, halting growth until warmer temperatures (or the protective coverings) return.

These crops and other cool season vegetables won’t need protection if grown farther south. Again, cold tolerance is variety specific, so try new cultivars now and then and see which ones work best for you. For example, ‘Green Magic’ broccoli does well when planted in early spring and again in early autumn. This variety needs a warmer temperature when forming its head. On the other hand, ‘Arcadia’ broccoli can mature in very cold weather, so this is the one I plant later in autumn. Another benefit is ‘Arcadia’s bumper crop of side shoots; in Charlotte, they produced for months.

For More Information

There is so much information online and in catalogs, books, and magazines. But, for local perspectives and information about other growing conditions, check with your agricultural extension office. And speak with helpful vendors at the neighborhood farmers’ market.

Garden clubs, botanical gardens, and garden centers selling seeds, supplies, and transplants sometimes offer classes covering various subjects. My “Cool Season Vegetables and Greens” presentations drew the most attendees. Many of my customers started with just one crop and then returned for more. A healthy addiction!

Keep Records

As you begin new garden projects, place labels with the plants, photograph progress, and take notes for future reference. Add some varieties you’ve never grown before to discover delightful new flavors. Observation of the varieties you’re growing in your garden is invaluable when planning future garden projects. There is no substitute for hands-on experience…and records of successes and failures!

Keeping detailed drawings of crop placement in the garden will help when considering crop rotation. Not growing plants from the same family in the same place every year helps decrease concentrations of pathogens and insects. But, because so many of the cool season vegetables are in the Brassicaceae family, it’s difficult to rotate these crops in our limited space.

Succession planting calls for sequential use of space, maximizing the amount of produce harvested through the seasons. It is especially important to prepare the soil before the fall or spring season, adding fresh compost, aged manure, or planting mix.

For optimal harvests, you’ll need to fertilize regularly as the plants grow. Instead of relying on memory, record the names of the products and when you applied them.

Have all underground utilities marked by your municipality before proceeding and keep a record of their locations. Call 8-1-1 to schedule an appointment.


Headings:

Page 1: Ready For Fall?, Where There’s a Will, There’s a Way (The Advantage Of This Latitude), and Succession Planting: Warm, Then Cool Season Vegetables (Peas, Yummy!, Gather Information)

Page 2: Seed or Transplant? (Seeds, Temperature, Transplants, More Favorites), Crops With Ornamental Edible Leaves (Tender Leaf Kales), Crops That Form Heads, Soil Fertility (The Importance of Microbes), Nutritional Benefits, and Ready For the 10 Tips?

Page 3: Tip #1: Move Tender Plants Indoors, Tip #2: “Quick! Cover Up!”, Tip #3: The Hot Water Bottle, Tip #4: Low Tunnels, Tip #5: Deal with the Wind, Tip #6: Add Christmas Lights, Tip #7: I’ll Have a Double

Page 4: Tip #8: A Simple Cold Frame For Cool Season Vegetables, Tip #9: A Lean-To, Tip #10: The Greenhouse, Finally!
Return to the top of Page 1

Using Miniature Lights For Warmth


Miniature Lights for… Warmth?


miniature lights


Yes! You can use strings of miniature lights to prevent frost from damaging tender transplants in the garden.

This article originally was written for springtime applications. But read through, and you’ll see how the same principles work for cold weather gardening in many regions. These lights will keep greens in better condition, sometimes all the way through winter. Your cool season greens can produce for weeks or months beyond the early freezes!


Unpredictable


The weather has been so weird this spring. Some days it feels like June, and others skim the bird bath in ice. Lots of us already planted tender (easily damaged or killed by frost) vegetables and flowers. Without some protection, they will be injured by the cold nights that are still in our forecast.

If the nighttime temperatures are predicted to fall below 50°F, I’ll cover tomato and pepper transplants in the garden. A night or two in the 40’s probably won’t hurt most transplants if they’ve been properly hardened off. But consistently chilly weather will slowly rob the plants of their vigor. Peppers and basil are particularly sensitive to cold soil, and can be killed by it, even if temperatures aren’t close to freezing.

It’s amazing to see snow still flying in some of our northern states. It is beautiful…to watch on TV.


cold frame, with plants

Early winter in the cold frame. Light strings snake around the bottoms of the pots.


Miniature Lights


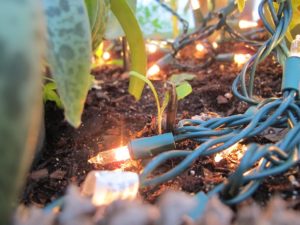
Incandescent lights, as opposed to LED’s, give off gentle heat. Those 100-bulb strings of miniature incandescent Christmas lights can increase the temperature under cold frames. They also protect tender plants in garden beds when covered with plastic sheets to hold the warmth.

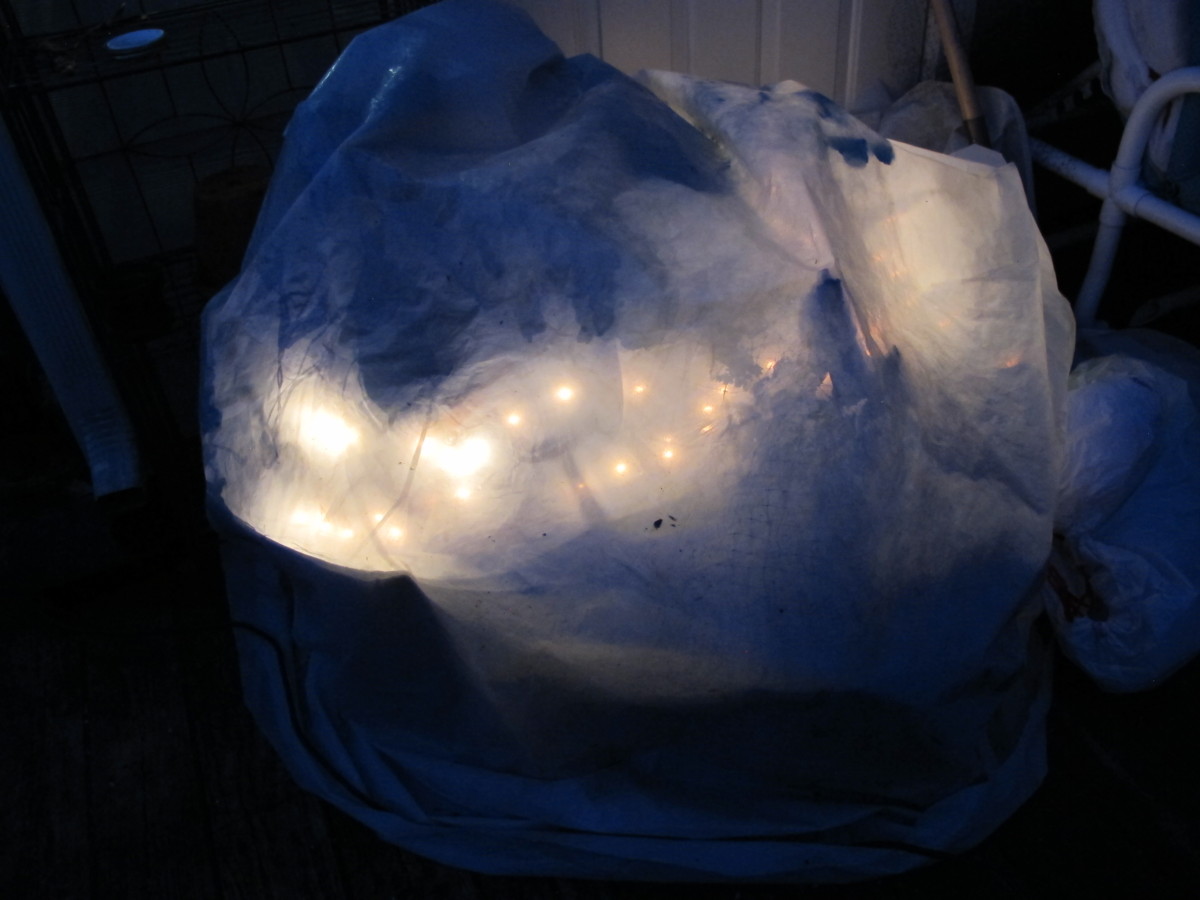
mini lights under plastic cover

Potted plants under cover, warmed by miniature incandescent lights.

This is especially beneficial in those locations where an upside-down bushel basket will not sufficiently ward off the cold. And I’m not suggesting that you attempt to defy good garden sense by planting peppers in February in Minneapolis. There are limits!

When I calculated the wattages, square foot coverage, and costs, the miniature lights were the most economical option for my purposes. Each 100-bulb string provides warmth equivalent to a 40-watt incandescent bulb. I also considered heat mats and heat cables. Have a look around hardware stores and see what garden centers have available. Look for ideas online or with mail order companies selling farm, garden, horticultural, or greenhouse supplies.

Use “indoor/outdoor” products that are safe to use in humid environments. Space heaters designed for indoors are not good candidates outdoors. If you’re planning a project outside your comfort zone, check with licensed contractors, especially for electrical work.

(***Update***: Above average temperatures in the Carolinas carried into mid-fall, so the amaryllis bulbs refused to die down. Recent nighttime readings in the low to mid 20’s would have damaged the potted bulbs, so they’ve been enjoying temperatures in the mid 40’s, thanks to miniature lights and a plastic cover. Not forcing early dormancy on the plants gives them extra time to photosynthesize and, perhaps, an additional flower bud. Finally, the leaves are beginning to yellow, and soon they’ll come indoors to rest and to begin the bloom cycle. December, 2018)


And More Bright Ideas

Include snow loads and wind events (they will happen) in your plans. Slope the top of a cold frame away from the house to allow run-off. During the occasional heavy snowstorm in Maryland, I got up in the middle of the night to sweep off snow that had accumulated 8-12″. Toby, our second Rhodesian ridgeback, thought this was lots of fun. Although polycarbonate is very durable and will bend with weight, too much distortion will allow frigid air to enter and might collapse the frame.

There are more permanent alternatives to consider. Do-it-yourself greenhouse kits could be used specifically for fall and winter crops, heated or unheated. Familiarize yourself with local weather patterns to decide what’s feasible…or necessary. You might be able to convert a shed or construct a lean-to by adding a few materials readily available from the hardware store. Contact your local agricultural extension agent for practical suggestions or check out the numerous online videos.


Cold Frames With Miniature Lights


cold frame interior, miniature lights

Setting up cold frame with new strings of miniature lights.

Cold frames are simple glazed structures that give extra protection to plants when the weather is unsuitable for planting out. Young seedlings or transplants can be hardened off here until they’re ready for the garden. Also, plants that normally go dormant or die in winter can be kept green in a frame. And edible cool season vegetables can grow all winter in a cold frame where it’s too cold out in the open.

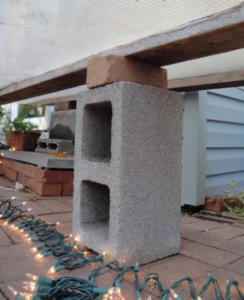
Try to orient the frame’s exposure toward the south (in the northern hemisphere), which will give the greatest benefit in terms of heat gain. Bricks on cinder blocks (photo, right) elevate the north edge of the glazing for rain run-off and a more favorable aspect to the sun.

Each hour of direct sunlight shining on the frame keeps the temperatures elevated and stores warmth in the ground. If possible, locate the cold frame out of the wind and in a warm microclimate on the south side of the house or shed.


Materials

Some gardeners use lengths of sturdy wire, arched and stuck in the ground, covered with clear plastic secured by fasteners. Or use long pieces of PVC tubing anchored over rebar sunk in the ground. Repurpose old storm windows or doors (without lead paint) propped on a support.

“Low tunnels” or “caterpillar tunnels” are available at garden centers or online, complete with supports and coverings.

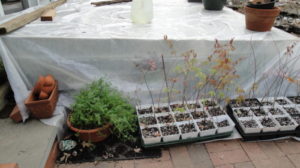
For the large frame in Maryland (photos), I used rigid twinwall polycarbonate panels, covered with clear plastic film to close the sides. On very cold nights, I added more sheets of plastic, separated by “netted” plant flats that trapped air between the layers. This created dead air space and better insulation.


cold frame for cool season vegetables

Cold frame in MD, vented in the daytime.


Houseplants

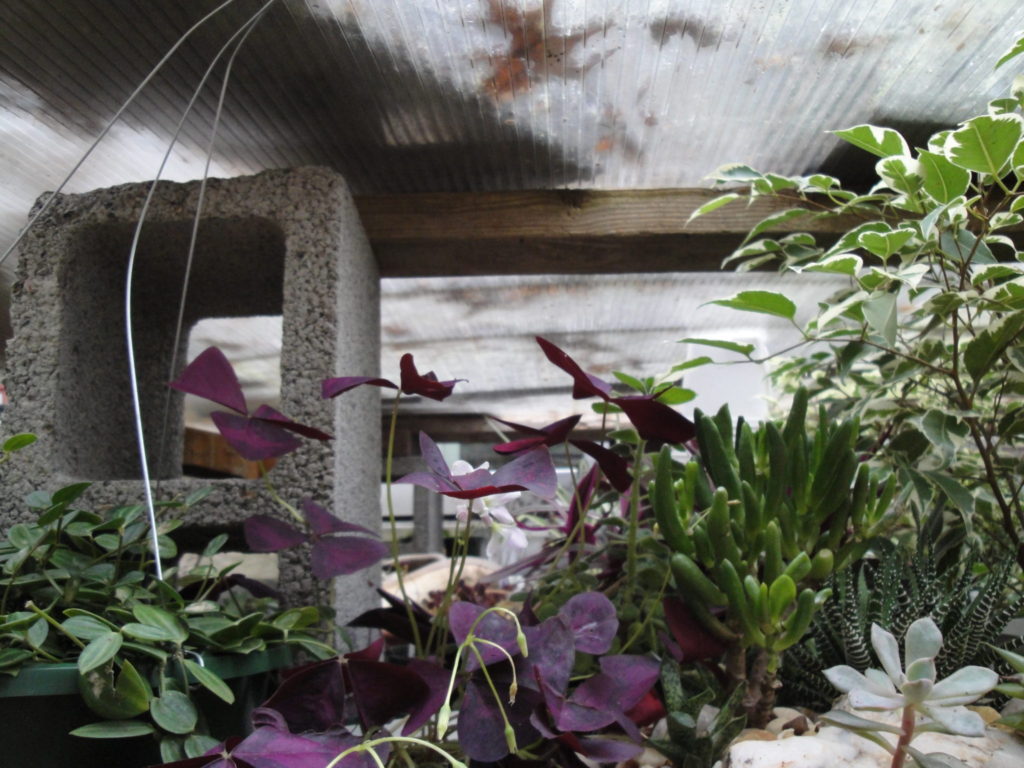
Oxalis, succulents, stellar geraniums, a variegated fig tree, and other houseplants (photo, top) survived the winter, although I did not expect them to grow. When cyclamen plants went out of bloom in the house, I moved them to the cold frame, where they happily set buds once again.

Plants that do not tolerate the slightest chill, such as African violet, Alocasia, pothos, philodendron, and basil, would not survive very long at temperatures below 60°F. They stayed indoors for the winter.


“Frame to Table”

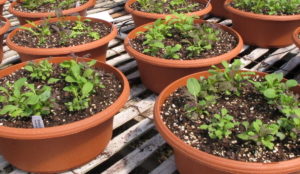
Without using miniature lights in Maryland’s colder winters, I would not have been able to harvest this assortment of greens. I grew lettuces, leeks, arugula, hon tsai tai, mustard spinach, dinosaur and ‘Red Russian’ kales, and spinach. And Swiss chard, tatsoi, pac choi, mini broccoli ‘Happy Rich’ in wide, shallow pots, about 6″ deep (such as those in photo). ‘Nabechan’ bunching onions and some greens grew in the ground on one end of the cold frame, while potted crops sat on the brick surface.

cool season vegetables

Greens growing in wide bowls.

Dense materials, such as brick and stone, absorb heat during the daytime and release it at night. I threaded strings of miniature lights between pots, on top of the brick patio. Broken light bulbs cause part or all of the string to fail, so be careful with them. Pots of greens and herbs placed close to the edge of the frame allowed easy access.

Herbs grew all winter in this cool but frost-free environment. Parsley, oregano, sweet marjoram, rosemary, thyme, chives, sage, French tarragon, and bronze fennel are a few of the herbs I grew in the frame. Cold frames are great for half-hardy species and those that normally stay dormant in winter. Italian oregano, tarragon, and chives, for example, retained their foliage instead of going fully dormant.

I added an adapter to the porch light socket near the patio door, and the lights’ extension cords plugged into that. With a simple flip of the switch from the cozy kitchen, the lights turned on or off. That’s one advantage of building your frames close to the house. 

Remember to vent the frame on sunny days, turning lights on or off as necessary. Close it up by mid- to late afternoon. 

Water as necessary, keeping the soil damp, but not wet. During mild periods of the season, add a dilute dose of fertilizer to those plants (mostly the greens) that are growing.

Power Outages

Have a contingency plan during power failures if you’re going to keep tender plants in your cold frame. Use old blankets (keep them dry), more layers of plastic, and gallon jugs filled with hot water. When this happened a few times in MD, I heated water on the wood stove for those hot water bottles and brought the most tender plants indoors.

Snow or straw piled up around the sides and a layer on top holds in a substantial amount of heat. Clear the top in the morning to allow sun to reach the plants. But if the weather is especially harsh and overcast, the plants won’t mind staying covered for a day or two.


The Maryland Greenhouse


greenhouse for cool season vegetables

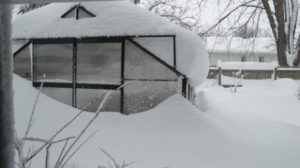
The small greenhouse in Maryland.


I built this greenhouse from a kit purchased from a horticultural supply company. It was fairly easy to put together, although some of the pre-drilled holes didn’t quite match up and the instructions weren’t great. But the twinwall polycarbonate and sturdy framing were able to withstand considerable weight from ice and snow. The structure was attached to a foundation, which was optional but recommended.

This is where I kept more flats of tender succulents. Placed on 2 x 2″ x 8′ posts propped up on cinder blocks near the ends, the flats were heated from below with strings of miniature lights. They had the additional protection of 1 or 2 layers of clear plastic secured on the sides and suspended a few inches over the plants. When nighttime temperatures plummeted to single digits, I added a couple of old bedsheets and another layer of plastic, and then removed them once the sun hit the greenhouse. None of the plants froze.

A second heavy duty indoor/outdoor extension cord reached the porch light adapter near the cold frame, so I could turn all the lights (in the cold frame and in the greenhouse) on or off from indoors.


Double Bubble

This extra “bubble” of lightly warmed air made it possible for frost intolerant plants to survive our zone 6b winter. A bubble inside a tightly sealed unheated greenhouse (or other structure) feels up to 2 or 3 zones (up to 20-30°F) warmer at night than outside air, and even warmer with miniature lights. Keep in mind, though, that each layer reduces the amount of light reaching the plants.

Two or three rows of tender plants—all under a single bubble—occupied the center of the greenhouse. Near the perimeter sat frost tolerant cool season greens in large black nursery pots. Dark colors absorb the sun’s energy, keeping soil unfrozen for longer periods of time. Large pots work better than small pots because they store more warmth. Sometimes I stored bales of potting soil, wrapped in black plastic, on the north edge, where the winter sun would not be blocked.

States in the middle and northern parts of the U.S., in USDA zones 4-6, benefit greatly from an extra barrier of protection from frigid temperatures. Cold hardy plants are more likely to survive than tender species in spaces with no supplemental heat.


Here in North Carolina


Since moving to Charlotte, North Carolina (USDA zone 7b/8a) in 2013, I’ve used clear plastic and miniature lights to ripen up the last of the summer vegetables. And they keep cool season greens and vegetables growing through the worst of our winter weather. To avoid any surprises, check the weather forecast daily.
Succulents that moved with me from Maryland spend the winters in lighted cold frames after filling the sunny windows indoors (photo, right). Delicate species stay inside.

One year, an HVAC contractor came to check the heat pump, located near the lower patio. There were several flats of plants in a second cold frame down there, with miniature lights. That frame was not easily visible from the house. A couple of days later I discovered that the contractor had inadvertently disconnected the extension cord feeding power to those lights…and life to the plants! You know the rest of that story.

(***Update***: I just finished enclosing the sunny front porch at my new home in northern North Carolina, where I moved in October, 2021. This is where the succulents and other plants will spend the winter, aided by miniature Christmas lights. December, 2022)


Cautions


cold frame

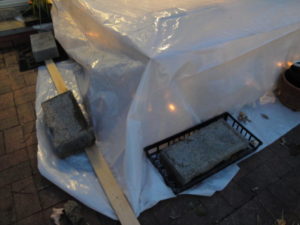
Cold frame covered with clear plastic and weighed down.

Make sure the miniature lights are rated for indoor/outdoor use, and that extension cords are also safe to use outdoors. I’ve been warming up the cold frames and garden plants like this for decades without mishap, except as noted above.

The tender succulents and bowls of mixed greens and herbs covered during the winter survived without damage. On nights that fell below 15°F, the temperature in the cold frame stayed in the high 30’s or 40’s, depending on the number of lights used.

Plants survived single-digit temperatures, helped by the old quilts and extra plastic placed over the frame at night. When needed, I added another string of lights. Placing the frame cover fairly close to the tops of the plants limited the volume of air those lights needed to heat. Not too close, though, or the foliage will feel the cold.

This works like a charm, but only if there’s a power source nearby. Be careful; don’t use extension cords that can’t carry the demand for power. Don’t hook up more than 2 or 3 light strings together.

There are few products on the market that demonstrate the phenomenon of planned obsolescence as clearly as cheap imported miniature lights. Stock up on them when they’re plentiful. They don’t last more than a couple of years with frequent use, and they’re becoming increasingly scarce in favor of LED’s. Tread carefully!
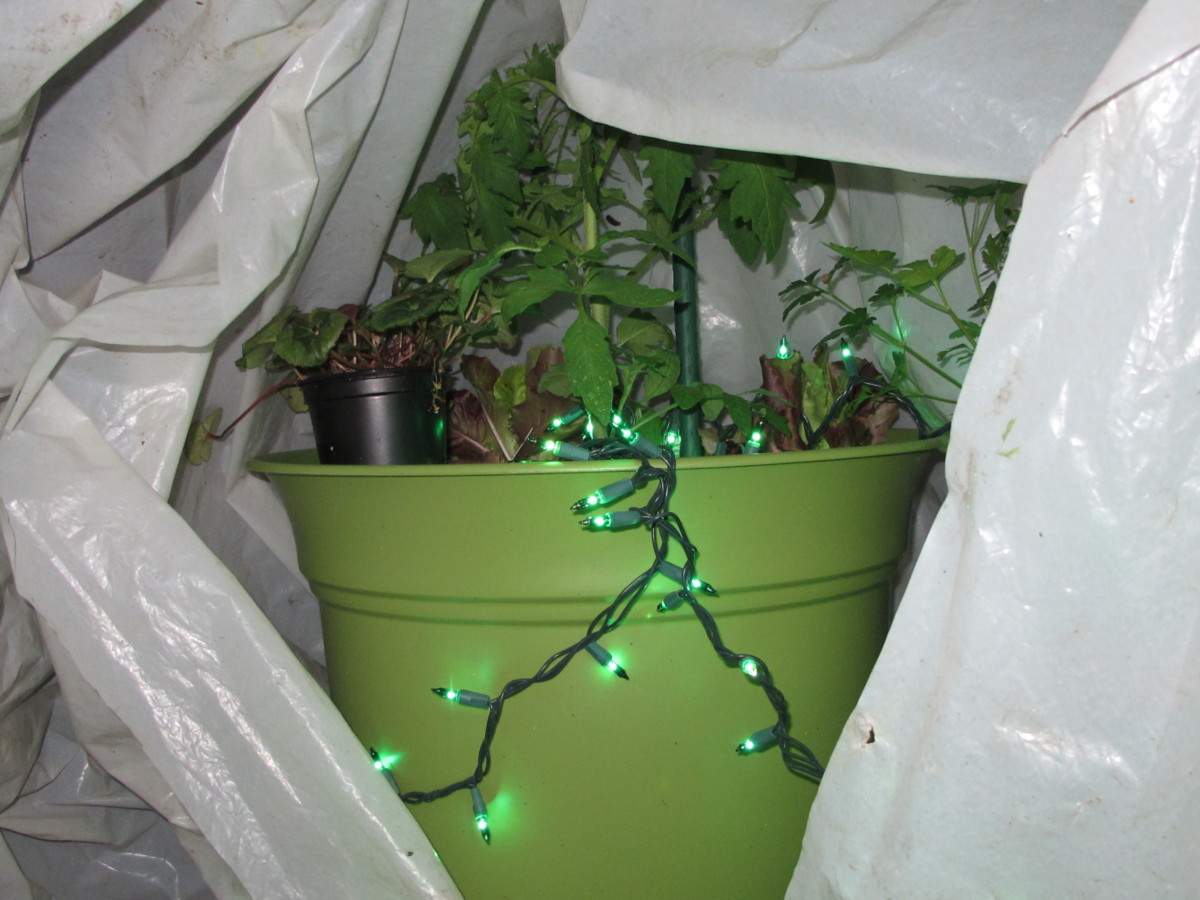
Lastly, instructions on the packaging recommend washing hands thoroughly after handling strings of lights. There might be some lead in the wire covering.


Miniature Lights Preferred


Christmas lights, plastic, cold frame

Mini lights warm up 2 large pots of young tomatoes.


There are other types of incandescents available but watch the wattage! If bulbs are hot to the touch, the plants will think so, too, so don’t place them close to the plants. The preferred miniature lights are barely warm, so they distribute the heat evenly and gently.

Make sure the bulbs are not in contact with the plastic covering or the leaves. Avoid letting the plastic cover touch the leaves; cold transfers through the plastic and will damage foliage.

It’s best to lay the strings on the ground, around—but not touching—the stem. The warmth will rise. For potted plants, wind some of the lights around the pots. Tall plants might require lights up into their branches.

If you’re not really trying to push the envelope, the plastic bag or old sheets probably will do the trick. It’s when that sudden blast of uncommonly cold weather comes around that prompts us to take extra measures.

(***Update***: In the photograph above, mini lights kept the young potted tomatoes [in 20″ pots] and a few other plants 15° warmer on an unusually cold spring night. I placed the miniature lights on the soil surface and wound them around the pots to keep the roots a bit warmer. Plastic was closed and secured with clips. April, 2019)


Out of Reach


Where lights are impractical, there is a solution. Use large plastic mulch or trash bags, and tuck in a hot water bottle. Seriously! A repurposed gallon milk jug filled with very hot water slowly gives off heat through the night. A little experimentation will tell you if the heat is given up too quickly (wrap the jug in an old towel to slow heat loss) or insufficiently (use 2 milk jugs or larger containers). Don’t place the hot water close to the foliage. Keep this in mind when the power goes out.

Those “water wall” products you see at garden centers work on the same principle. Water that heats up in the sunlight slowly gives up that heat to the plant at night.

Plastic bags that are nested, or layered, give better protection than a single layer. Spread the opening over a wide footprint (soil’s square footage) to capture heat rising from the ground. Or simply secure a large plastic sheet to a tall stake in the ground. Weigh down the covering with rocks or bricks to keep it in place and to seal out the cold. Remove the cover in the morning.


   *    *    *    *    *    *    *    *    *


I hope this information gets your garden successfully through the “shoulder” seasons, when temperatures can fluctuate wildly. Just a few readily available and inexpensive materials can prevent a total loss.

Later in the year, when autumn temperatures tumble, having materials ready for duty will extend the season. Rolls of 4-mil clear plastic—actually somewhat translucent—can be found in the hardware store’s paint department. This product (4- or 6-mil plastic) is less expensive than greenhouse film. If, however, you opt for permanent structures, the longer lasting film will be worth the investment.

If you’ve never grown cool season vegetables, these methods will open up a new world of growing opportunities. You can extend the season before and after the summer crops or protect tender ornamentals through the winter. No need to retire the trowel with the first fall frost!


potted broccoli

Young broccoli ‘Arcadia’ in 20″ pot, where a tomato grew in the summer. Sharp-tipped pinecones discourage squirrels.


Return to the top