Updated 3/18/2026
How To Make a Festive Evergreen Swag

As the holidays approach and the to-do list grows ever longer, quickly pulling together a swag or two before guests arrive is so easy. Would you like to try this? In this article, I’ll describe making an evergreen swag in 7 simple steps.
What is a swag, exactly?
An evergreen swag is a hanging cluster of ornamental greens—with or without embellishments—used primarily during the holiday seasons. It can have one point of attachment, or it could span between two or more supports. Personalize it with ribbon, ornaments, and other items that reflect your family’s style.
Hang swags on walls, porch posts, doors, fences, and gates. Attach one to the mailbox or the lamppost. Although the greens last longer in cold conditions outdoors, you can hang them indoors. Certain evergreens, particularly freshly cut Fraser and balsam firs and some of the cedars, smell absolutely wonderful for a while.
Step #1: Gather Materials For the Evergreen Swag
Using Evergreens From Your Gardens
-
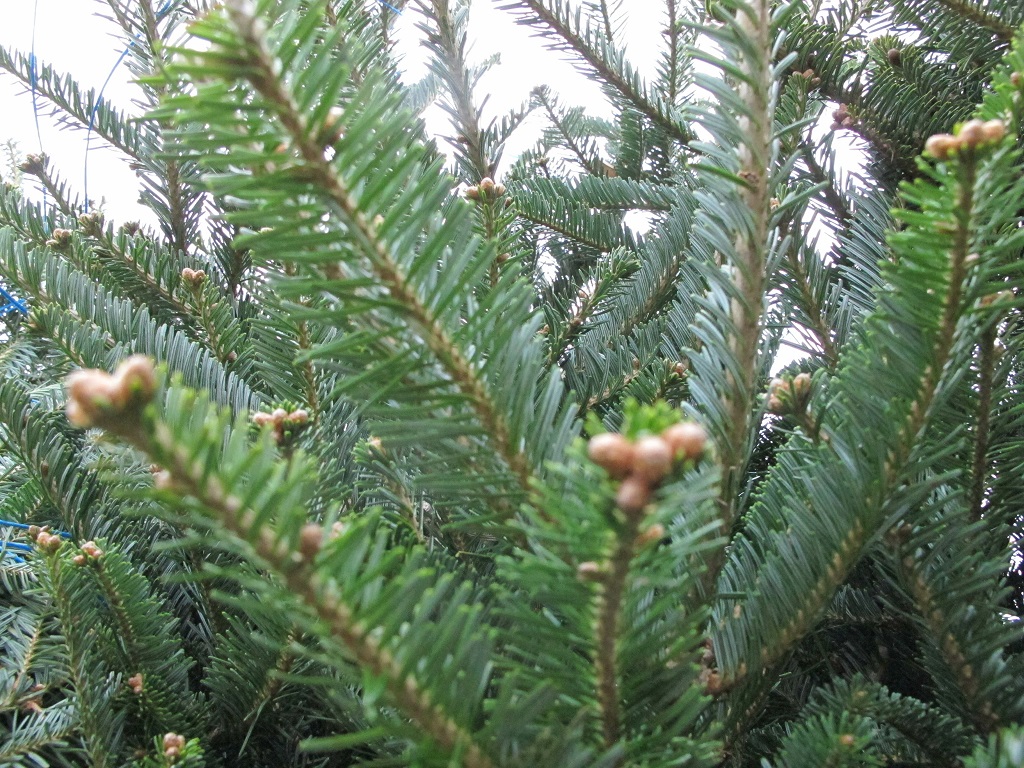
- Fraser fir.
-
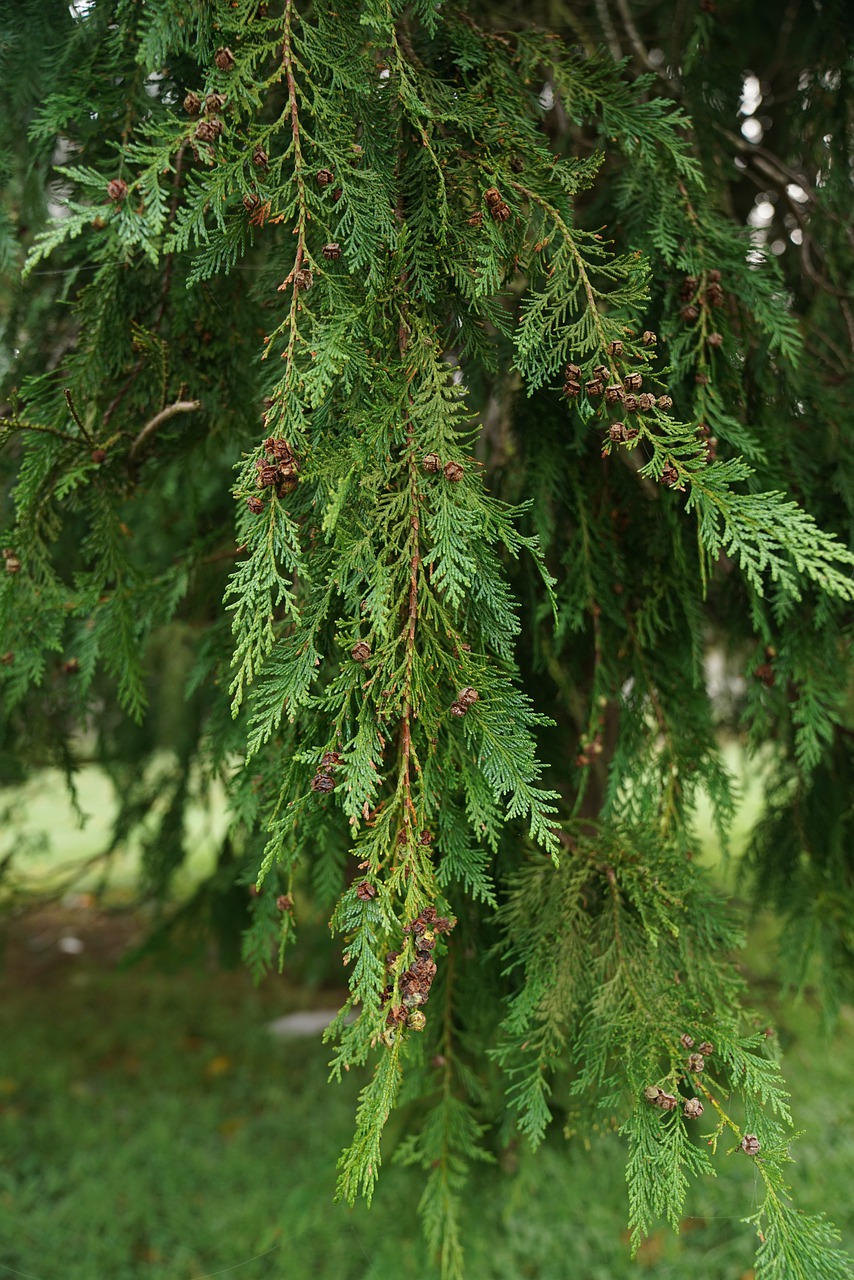
- Cypress.
-
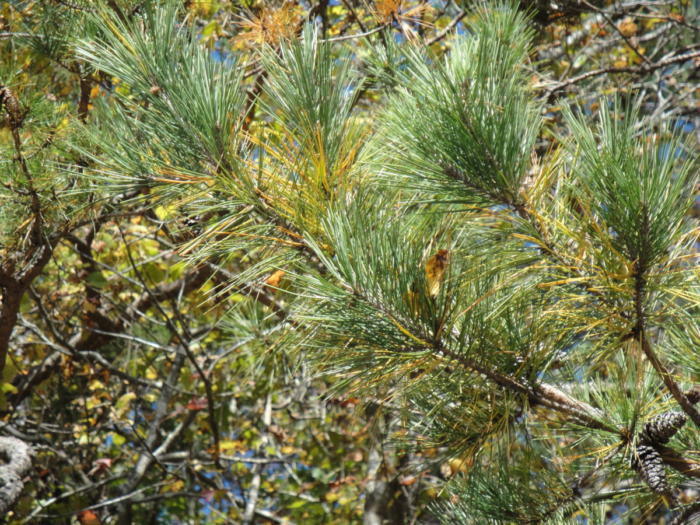
- White pine.
When searching for a new home in northern North Carolina, I noticed the southern magnolias (Magnolia grandiflora) and boxwoods (Buxus sempervirens) on this property. (“Great! Materials for swags and wreaths!”) Look for evergreens, twigs and buds with character, pine cones, dried grasses, and seedpods around your property. Perhaps you and your friends and neighbors can get together and trade materials…over hot chocolate and Christmas cookies, of course.
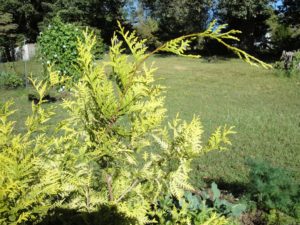
Chamaecyparis ‘Vintage Gold’.
A small Chamaecyparis pisifera ‘Vintage Gold’ (USDA zones 5-8) planted in late 2021 provides threadlike sprays of golden-yellow foliage. Bright yellow adds a great spark of color and shows up brilliantly against darker greens. Chamaecyparis—the false cypresses—are among my favorite evergreens for the landscape. Hinoki cypress adds soft texture and deep green swirled foliage for swags, wreaths, and table centerpieces.
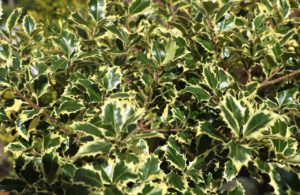
Variegated English Holly has yellow or white margins.
In the future, I’ll plant shrubs and conifers not only to enhance my surroundings, but also for nesting birds and as cut greens. The long, soft needles of white pine (Pinus strobus) add textural contrast to arrangements. The native species grows to huge proportions and it’s not fond of our hot summers, so I’ll look for smaller cultivars that could grow here in USDA zone 7b. When choosing varieties to add to your landscape, consider your plant hardiness zone.
Other evergreens, such as juniper, spruce, cedar, and cypress, can supply clippings for seasonal projects. Variegated English holly (Ilex aquifolium) and some of the dwarf hollies are on that growing wish list. Although traditional at Christmastime, holly leaves and berries don’t cling for a long time. I sometimes use small artificial berries when those little details would add to the design.
Buy a Taller Christmas Tree For More Greens
Fraser fir branches are one of the best greens to begin the project. Since this species doesn’t grow here (it loves the chill of taller mountains an hour from here), I use bottom branches from freshly cut Christmas trees purchased at Hawk’s Market in Elkin. Fraser fir lasts a fairly long period of time without much shedding. Trees are pruned while they’re growing, causing very dense growth. To make ornaments hang freely on your Christmas tree, thin out some of the branches and use them in evergreen swags and centerpieces.
Garden centers, farmers’ markets, florists, and craft shops stock various cut greens and supplies for creating swags, start to finish.
Experiment with unconventional sources of material, such as eucalyptus, bay leaves, and red- or yellow-twig dogwood stems. I’ve used a few leaves of variegated liriope or acorus tied in bunches and wired into arrangements.
You might prefer artificial materials, including the greens. Fresh poinsettias or magnolia blooms wouldn’t last on a swag, of course, but craft shops have “picks” in a wide range of styles and colors. They might or might not hold up to outdoor conditions, depending on what they’re made of. Handled and stored carefully, silks and flocked picks might last a few seasons.
Berries and Seedpods
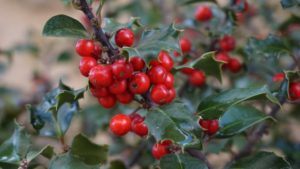
One of many hollies.
Use rosehips, holly berries, nandina berries, acorns from oak trees, nuts, and small fruits for ornamentation. Birds might help themselves to the berries.
Seedpods offer another dimension in decorating your evergreen swag. Siberian iris grows woody seedpods on strong stems. Use them in their natural state or spray paint them in a festive color.
Grow everlastings (several species of flowers whose dry seedpods hold up in winter arrangements) in the garden during the summer season. Scabiosa stellata and strawflowers are flowering annuals with stiff papery seedheads.
Although rather delicate, seedpods of biennial money plant, also called honesty (Lunaria annua), can be used in protected locations or indoors. Clean the seedpods by gently rubbing between your fingers, removing the outer coverings to reveal the shimmering membrane inside.
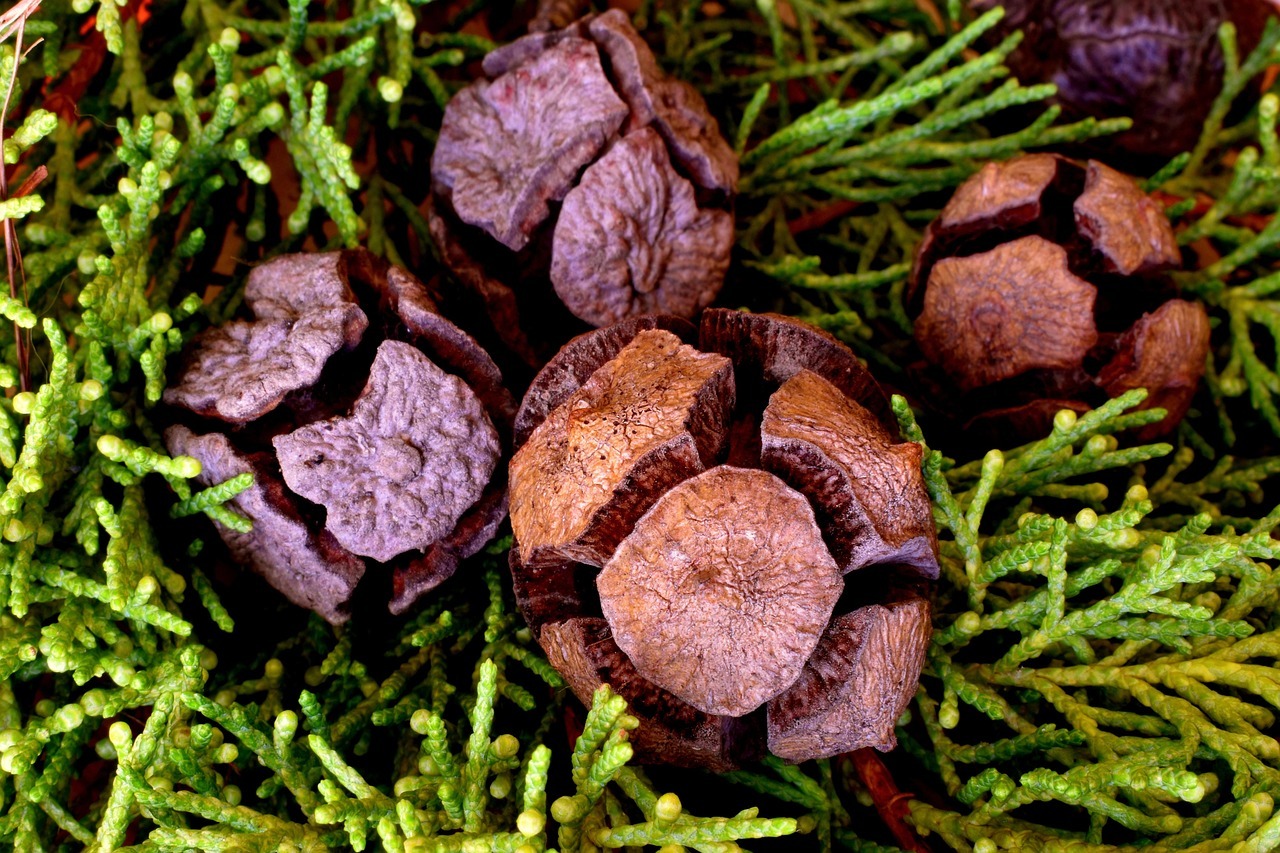
Cones
Gather pine cones from your property, or perhaps you have some tucked away in your craft corner. They last for years if kept dry.
Various evergreen species grow cones in different sizes, shapes, and shades of brown. Some have cute little cones ½-2″ long (hemlock, cypress) for smaller projects. Many pine species are 3-8″ long, and one—Coulter pine—has gigantic pine cones around 14″ long. Some have needle-sharp tips or sticky sap, so handle carefully.
Pine cones are the female reproductive parts of pine trees. The males generally are smaller and shed all that wind-blown pollen many months before pine cones mature. Seeds provide food for wildlife, and delicious pine nuts (“pignoli”) are harvested from about 20 species growing around the world.
When pine cones get wet, their scales close tightly. As they dry out, they begin opening up once again (photo, above).
Other Materials For the Evergreen Swag
In addition to the plant materials, you’ll need:
- a protected work surface
- pruners
- scissors
- pliers
- old scissors or wire cutters
- Wilt-Pruf, a biodegradable antidesiccant (optional, but highly recommended)
- a sprayer bottle
- a large bucket or bin for preparing a quantity of greens
- a large plastic trash bag or an old towel
- florist’s paddle wire—I use 26 gauge and the thicker 22 gauge (wire slowly breaks down in the environment, but be careful where you place it). Use pipe cleaners or zip ties for the loop and the bow, if you prefer.
- ribbon with wired edges. Outdoor ribbon holds up to the weather.
- sap/adhesive remover, or, preferably, cheap vegetable oil
- ornaments, bells, or other embellishments
Step #2: Prepare the Greens
For swags sold at the farmers’ market, I begin with the longest stems (up to 36″) from the Fraser fir Christmas tree. Use shorter stems for layering on the long stems and for smaller swags and centerpieces. Trim off any unusable parts.
During mild weather, set up an area outdoors, if possible, to cut the greens and when using Wilt-Pruf. Prepare a sprayer bottle by adding Wilt-Pruf to the water (read the label.) The dilution rate for Wilt-Pruf to water is 1:10 or a bit more dilute than that. Although the solution looks like skim milk, it dries clear. When it dries, it coats foliage with a waxy film which holds water in the plant tissues. This helps the greens last much longer, especially when used indoors. (I’ve used it in a colder climate for evergreens planted in autumn to protect them from drying winds.)
Place the greens in a single layer on the plastic, and spray thoroughly. Turn them over and spray again. Agitate the solution periodically. The goal is to cover all surfaces with the solution. Let the greens dry outside on the plastic or the towel (or the lawn), and shade them from warm sun.
If you’re making a few arrangements, fill the bin or bucket partway with the Wilt-Pruf solution. Dip the greens a few times into the solution. Let them drip, then lay them out to dry.
Leftover solution can be applied to the Christmas tree, letting it dry before bringing it indoors and adding lights and ornaments. Wilt-Pruf kept in the sprayer will gum up the works, so rinse thoroughly with soap and hot water. Flush soapy water and then clear water through the sprayer. Unused solution can be sprayed on most evergreens in the garden or dumped under the shrubs. It’s biodegradable.
If you don’t use Wilt-Pruf, soak the greens in cool water for several minutes before working with them. It’s a good idea to mist the greens now and then, even after completing the project.
Step #3: Layer the Greens
Reserve the fullest, longest fir stem for the base of the evergreen swag. Then layer on 2-4 more stems, each one a little shorter than the previous one. This gives the appearance of depth rather than looking two dimensional.
Adjust the stems so the swag doesn’t show large gaps when you look through it. Leave some of the smaller twigs near the base of the stem out of the loop (next paragraph), so the swag doesn’t look so constricted. Look for a balance of foliage on the left side and the right side. If needed, add another stem or two, or cut off a wayward twig.
Cut a piece of the 22-gauge (thicker) wire about 14″ long. Wrap it very tightly 1 or 2 times around the base of the stems, 2-3″ from the ends. Twist the wire ends tightly together 5-6 times to secure it. Use the ends to create a loop and twist the ends again several times to hold it together. Give the loop a tug to test it. Pliers help to tightly secure the wire.
An alternative to using fir is to substitute long, softly flowing branches of cedar. Port Orford cedar (Chamaecyparis lawsoniana), and incense cedar (Calocedrus decurrens) with its tiny yellowish cones, are elegant, fragrant greens. Add a bow with long tails for a simple arrangement.
Once all the greens have been secured, trim the cut ends to the same length, if desired. Cutting the stems at an angle facing behind the swag conceals the cut ends if you’d rather they not show, although they can be hidden by a bow.
Step #4: Add More Layers Of Greens On the Swag
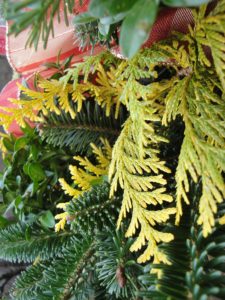
Colorful foliage of Chamaecyparis ‘Vintage Gold’ with boxwood and Fraser fir.
Adding greens with different textures or colors brings complexity to your design. Add one or a few sprigs of white pine, cypress, or cedar, and bushy boxwood stems near the top. Use the 26-gauge wire to secure the new greens near the top of the fir stems.
Consider color echoes when designing your swag. For example, a piece of yellow conifer picks up the gold in the ribbon or the ornaments you plan to use. Red berries echo the red in the bow.
Evergreen magnolia is a big bold addition, and is best used arching over the top of a large swag. The leaf reverse has a rust-colored surface, adding another detail.
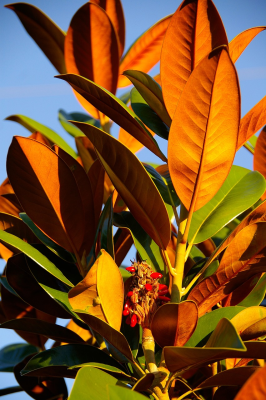
Southern magnolia.
Step #5: A Beautiful Bow For Your Evergreen Swag
Do you like the Victorian style, an organic woodsy design, or modern glitz? You can find ribbon to reflect any style for this year’s decorations. Look for a ready-made bow at the florist shop or garden center if your skills are not so advanced. Maybe someone can offer suggestions and make one for you while you wait.
Use wire to tie the bow tightly together and secure it onto the evergreen swag near the top. For a large bow, use the thicker wire. After the rest of the elements have been added, you can fluff open the loops of the bow. Wired edges in the ribbon help everything stay in place, and sturdy ribbon (more substantial wire) is required in the breezy outdoors.
You can save bows that are in good condition by stuffing the loops with tissue paper (optional) and carefully placing them in a plastic bin during the off-season.
There are plenty of YouTube videos showing how to make bows. With a little practice, you can master this part of the project, too. Here are 2 of them, from Welcome to the Woods and Maymay Made It Crafts:
Step #6: Cones from Evergreens
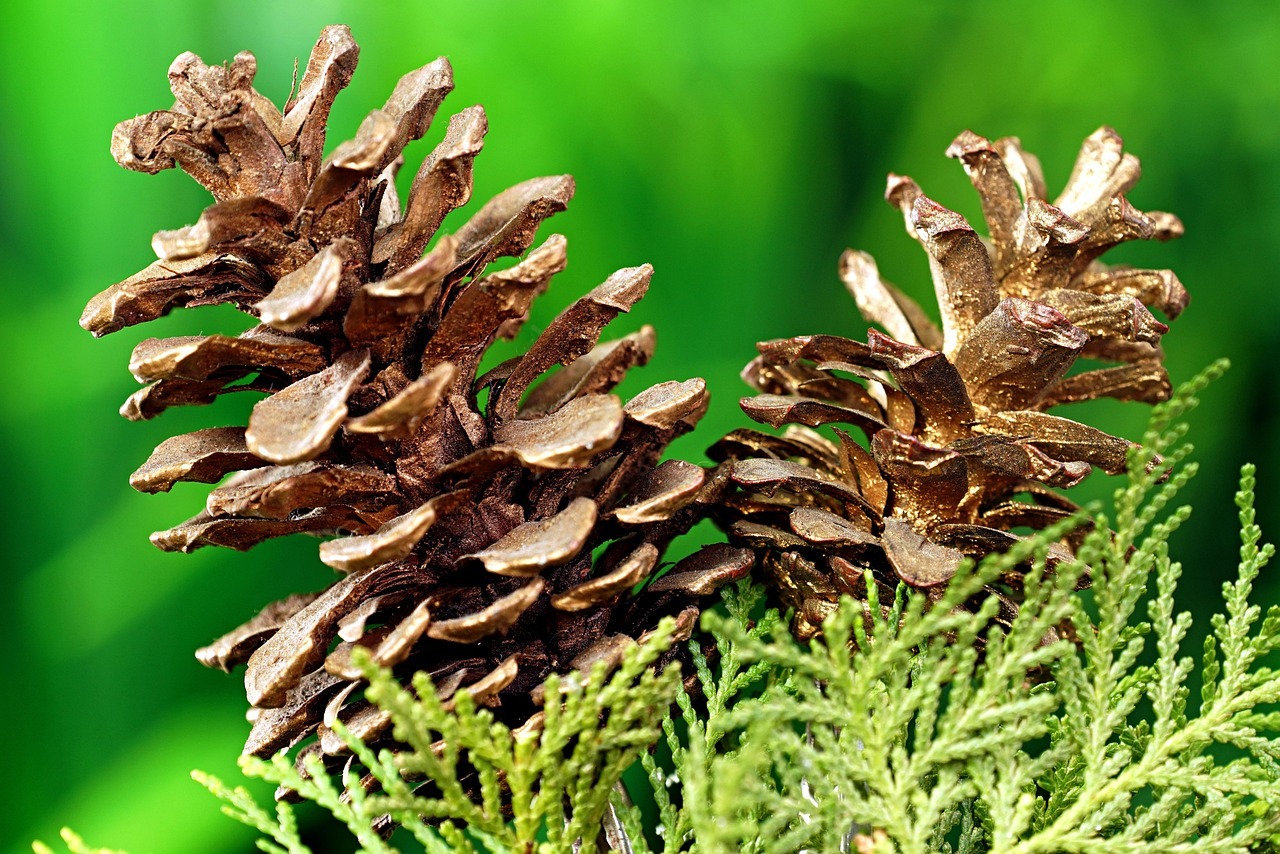
Choose 3 similar pine cones, and place them on the swag below the big bow at different levels. It’s okay if they’re not exactly the same size. I prefer an uneven number of elements, but that’s a personal choice. You might prefer 2 pine cones, or 6, or none at all. To use up the smallest cones, I wire 3 of them together and place a few clusters on a swag.
If you like the placement, cut a 12-16″ piece of the thinner wire for each pine cone. It might be easier to poke the wire through from the back of the swag, around a sturdy stem. Then, pull the ends together around the pine cone, between the scales, about 1/3 of the way from the top of the cone. Pull the wire tightly and twist the ends together to secure it. Cut off the excess wire or tuck it into the greens. The other option involves wrapping the wire around the pine cone and then wiring it onto the swag.
Does it all feel pretty stable? If it doesn’t, it might not hold together in the wind and rain. See if you can pull the wires tighter, twisting the excess at the back of the swag. Use pliers to pull and then tightly twist the wire.
If the swag swings around in the wind, shorten the loop or wire the lower part of the swag to the support. If necessary, screw 2 thin pieces of wood together (like a “T”), and build the swag on that.
Evergreens and pine cones might have sticky sap. Some gardeners use gloves when working with greens, with some loss in dexterity. Although it’s not recommended to use on the skin, sap remover cleans hands and tools. Wash with soap and water immediately afterward. My preferred option is vegetable oil, although it might take a bit longer to remove the sap.
Step #7: Finishing Touches For the Evergreen Swag

Little gift boxes on a table centerpiece. So cute.
This is the time for adding those finishing touches that individualize your project. Whether it’s a small brass horn, inexpensive Christmas balls or bells, small red “faux” apples or berries—or real ones. Get creative! In the photo above, I used a garland of tiny light blue gift boxes on the neck of this blue ceramic pot for an indoor centerpiece. These are made of paper and would not last long in the rain.
Deep, rich colors are best observed up close. From a distance, though, deep green evergreens and a burgundy bow look very dark. If you want to keep it there, you can lighten up the swag with bright red bow or a colorful plaid. Add frosted pine cones (painted white on the tips of the scales) or shiny ornaments. Some variegated English holly could do the trick or shine a spotlight on the area.
Maybe you’d like to remember your trip to Mardi Gras and drape some colorful beads on the swag. A string of battery-operated tiny fairy lights. Laminated bits of photographs or Christmas cards. Sea shells, painted acorns, a cool piece of driftwood… See what’s offered in craft shops and stores specializing in Christmas decorations. There are so many fabulous materials available for your evergreen swag! Get the family or friends involved and have fun with this easy project.
Merry Christmas
Celebrate the Winter Solstice
Happy Holidays!