Tag Archive | tomato

Patches For Pollinators: Less Grass To Mow

2022


patches for pollinators


Patches For Pollinators


In this article, I’ll describe how new garden spaces and “Patches for Pollinators” have decreased mowing time, while providing nectar and pollen for pollinators and seeds for songbirds. Also included is information about several insects found in the gardens this summer.

A common theme running through The Farm In My Yard is my goal of replacing much of the lawn with layered gardens, including trees, shrubs, perennials, bulbs, and annuals. Flowers and more natural surroundings attract bees and butterflies, toads and birds.

All the rest of the animal kingdom are showing up as well. Mice, moles, and voles…snakes and rabbits…foxes and deer. Lots of praying mantises, five-lined skinks, ladybugs, fireflies, and many insects I’ve never seen before. Occasionally, a cat sits patiently under the bird feeder until he’s shooed off. And some pests, too, such as…


…Japanese Beetles
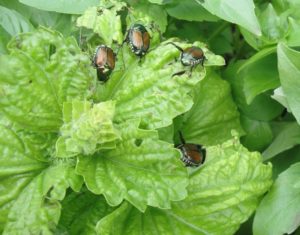
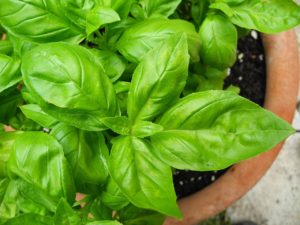
lettuce-leaf basil, Japanese beetles

Lettuce-leaf basil ‘Tuscany’, with Japanese beetles.

Japanese beetles (Popillia japonica), accidentally imported into the U.S., were first spotted in New Jersey in 1916. They’re present here (northern NC) in enormous numbers this year and demonstrate a particular fondness for my lettuce-leaf basil, marigolds, blueberries, and raspberries. But they will feed on hundreds of species, including linden, cherry, plum, birch, rose, grape, and hollyhock.

To prevent “skeletonized” foliage on farmers’-market-bound basil, I cover the plants with an old sheer curtain to exclude the beetles. Future plans include growing berries and other susceptible plants under insect screening, with allowances made for bumble bees to pollinate the flowers.

Although a few birds eat them, the damage these beetles do to the landscape and to my inventory far outweighs their benefit.

Japanese Beetle Life Cycle

With regular rainstorms, soil stays softer, allowing female beetles to repeatedly lay eggs deeper into the soil in July and August. There, the eggs and young grubs are not stressed by hot, dry soil. White C-shaped grubs feed voraciously on healthy roots (particularly those of lawn grasses), and, in autumn, descend deeper into the ground, protected from severe cold.

In spring, grubs rise closer to the surface to continue feeding. In late spring, well-fed larvae pupate in the ground, and adult beetles emerge in early summer. Moist soil—from rain or irrigation—contributes to this beetle’s success. Where the ground is soft and moist in summer and fall, you can count on large populations of Japanese beetles the following year.

Incidentally, chewed plant tissues emit certain scents which attract even more beetles. That’s why we find them congregating in large numbers in the tops of blueberry bushes or in rose flowers.

Applying Milky Spore powder, a bacterium, to the property (grass and gardens) in early autumn kills grubs feeding on roots. This remedy isn’t 100% effective because beetles fly in from quite a distance—miles, in fact. At the very least, there will be fewer grubs devouring roots in your landscape. If you can encourage the entire neighborhood to apply Milky Spore, everyone will benefit. Except Japanese beetles. Moles, by the way, feed on these grubs. Plenty of those around, as well.

Other than that, I’m not fertilizing the lawn, applying any chemicals, or reseeding. In the future, I might work on a limited amount of presentable lawn close to the house. But for now, since the lawn comprises about 75% weeds and undesirable grasses, I’m just cutting it. Besides, much of that ground will be turned over, amended, and planted with something other than grass.


Less Grass To Mow With Patches For Pollinators


New Gardens

When I bought the house in late 2021, the lawn covered about half the property, taking 5½-6 hours to cut with a walk-behind self-propelled mulching mower. Part of the lawn’s square footage has been taken up by the many plants installed last fall and winter. They’re the beginnings of new gardens, which will expand as I propagate perennials, seed the annuals, and plant drifts of new shrubs. Space taken up by low-maintenance gardens will decrease the time required to cut grass.

 

foxglove

Foxglove.


Several white oaks (Quercus alba) tower over the property, providing a high canopy for proposed shady gardens underneath. About 200 tiny foxgloves just began germinating from seeds sown in a pot. Some will be sold at the market, and many will be planted in morning sun or under the trees’ dappled shade.

Foxglove (Digitalis purpurea) is toxic to most warm-blooded animals, including rabbits and deer. (It is a source of pharmaceuticals, but only under a doctor’s care.) The greatest risk to these plants is from dead twigs falling from the old oak trees.

Foxglove is a biennial, and, if happy, drops seeds at the end of its growth cycle for a self-sustaining colony of plants with stately flower spikes, from cream and pink, and rose to purple. It blooms in spring to early summer, then sheds seeds and dies. After those tiny seeds germinate in summer, young plants will remain dormant in winter. They’ll bloom the following spring, thus repeating the cycle. Insects and hummingbirds gain sustenance from the flowers.

From Crape Myrtle To Virginia Sweetspire
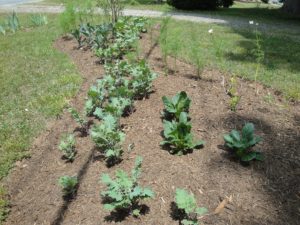
 

patches for pollinators, garden bed with flowers and edible greens

‘Red Russian’ kale, komatsuna, and tiny itea, foreground, plus kales, collards, cosmos, and crape myrtle, toward the back, after planting and mulching.


Growing plants from seed is one way to economically fill a large garden bed. I started a new garden last fall, close to the street, where I planted a pink crape myrtle (Lagerstroemia indica) and 2 tiny Virginia sweetspires (Itea virginica ‘Henry’s Garnet’) brought from Charlotte.

Early this year, I turned over the ground to a depth of 10″ between the shrubs and beyond, and added leaf mold and black topsoil from the woods. Also incorporated into the soil was a generous portion of chopped oak leaves stored in trash bags since the previous autumn.

All this loosening of the soil and the additional materials created a raised bed about 22′ long and 6-8′ wide. It’s an irregular shape with a curved outline. And, naturally, it will be enlarged over the years.
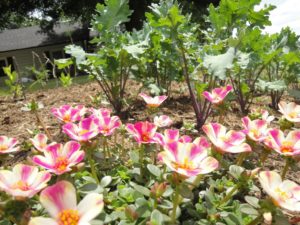
purslane, pink and white flowers

Purslane and ‘Red Russian’ kale.

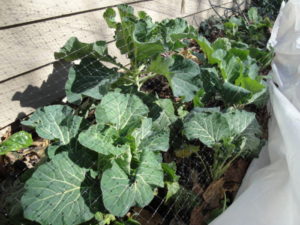
This garden is where I’d planned to have a mass of large light pink cosmos. So, I grew ‘Cupcakes Blush’ from seed and planted about 40 of them in 2 groups. Between them, I added dozens of blue-gray ‘Lacinato’ kale, the similar but more purple ‘Dazzling Blue’ dinosaur kale, and the frilly ‘Red Russian’ kale. Behind the crape myrtle, I planted 10 collards, with rounded light grayish-green leaves. On the end, near the itea, I added a few clumps of komatsuna ‘Green Giant’, with broadly rounded dark green leaves. These plants complement each other in both color and form, and all the greens (kale, collards, komatsuna) are edible.

I picked up a purslane at a local roadside stand. It had solid deep pink flowers on a low, spreading plant. But the heat, apparently, turned the new flowers pink and white striped. So, I stuck that into the “pink garden”, and put a few cuttings near it, which are now growing.

Not In the Pink

I won’t grow ‘Cupcakes Blush’ cosmos again because it took too long to grow and fill out. It didn’t have the number of flowers hyped in the catalog, and fewer than half were light pink!

The fast-growing greens are winners in both vegetable and flower gardens. They’ll look even better when paired with blooming violas in fall and winter. The fact that they survived at all during this overheated summer is a marvel. Adding ‘Scarlet Frills’ mustard greens (edible) will echo the burgundy fall color of the iteas and crape myrtle.
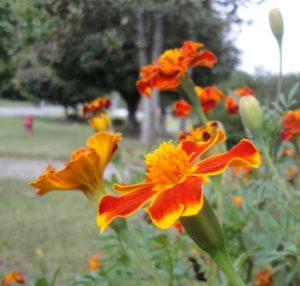
 

Marigolds.


***Update***: Close to 2½-3 months of frost-free weather is just too long to put up with plants that aren’t delivering. So, all the “pink” cosmos were taken out in early August, and replaced with dwarf marigolds (photo, above), dwarf ‘Cosmic Orange’ cosmos, and coppery-leaved coleus. Much better. But the pink purslane will have to move. The crape myrtle bloomed very lightly this first season in the garden. 8/6/2022


Vegetable Gardens

This property includes a sizable fenced garden, partially shaded by the oaks on the east side of the house. As the sun’s arc shifts through the year, the garden receives more or less sun than it did the previous month.

Last autumn, I stuffed oak leaves into large trash bags, and stored them next to the foundation over the winter. In early February, I incorporated a few of those bags of leaves into the top 12″ of this garden’s soil, along with aged cow manure. After planting the greens, a thick layer of oak leaves was applied as a mulch, keeping soil moist, cooler, and weed-free. By late spring, the greatly improved soil was well-populated by earthworms, and the organic matter will continue to break down for months to come.

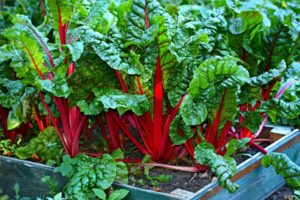
I’ll dig and amend more of this garden and add cool season greens, such as spinach, Swiss chard, green onions, and leeks. And peas, of course—the edible-podded ‘Sugar Snap’ and a variety of snow pea called ‘Oregon Giant’. It’ll receive more hours of sun after the trees defoliate. The brassicas (arugula, broccoli, miniature broccoli ‘Happy Rich’, Brussels sprouts, cabbage, cauliflower, collards, kale, mustard greens, pac choi, and others), or cruciferous crops, figure prominently in autumn and winter gardens and in the kitchen.

Hostas brought from Maryland a decade ago grow plump in the composted soil on the shadiest end of the garden. I’ll add more varieties of hostas here, safe from deer, until it’s time to pot them up for the market.

Miniature Broccoli ‘Happy Rich’
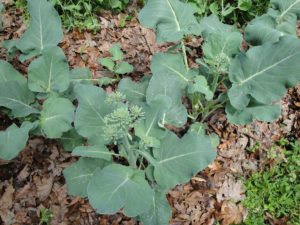
 

mini broccoli 'Happy Rich'

Miniature broccoli ‘Happy Rich’ planted 14-16″ apart, with peas behind them.


Brassicas (plants in the Brassicaceae family) appreciate moist, well-composted soil, generous portions of aged cow manure, and neutral pH. Here in USDA zone 7, many types of greens can grow in cold weather, even through the winter. I plant several kinds of brassicas every fall. During severely cold periods, a loose covering of clear plastic keeps the foliage in good condition.

Late last winter and in spring, I set out about 30 plants of miniature broccoli ‘Happy Rich’ on the north end of the garden, farthest from the oaks. While the trees were leafless, the plants grew in full sun. Now, in summer, these brassicas enjoy a couple of hours of mid-day shade from the hot sun.

This is one of my all-time favorite vegetables. Maybe even the favorite. I eat this versatile broccoli a few times a week, sell some at the Elkin Farmers’ Market, and donate a bunch when the market hosts cooking demonstrations. Great sweet flavor, and super healthy!

(***Update***: These same plants produced small harvests into mid-November. Then, with cooler weather, leaves grew larger. Unusually cold fall weather—up to 20 degrees colder than average—has caused them to decline earlier than expected. However, after the oaks dropped their leaves, the broccoli grew more vigorously, almost until Christmas, 2022. That’s why ‘Happy Rich’ is my favorite vegetable—9 months of harvests!)

‘Happy Rich’ and Insects
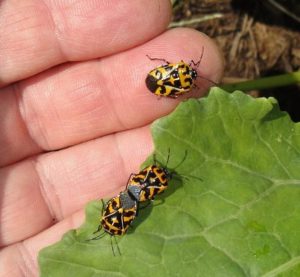
 

harlequin bugs on cabbage

Harlequin bugs on cabbage.


‘Happy Rich’ branches out after each cut, producing more stems, leaves, and small heads to harvest. Four species of caterpillars (from 3 species of moths and 1 butterfly) prove quite troublesome all season long, even beyond the first frosts. To prevent them from ruining the brassicas, I spray every 7-10 days with Bt (Bacillus thuringiensis). This isn’t a chemical, but a naturally occurring bacterium that kills larvae of moths and butterflies.

Bright orange and black harlequin bugs (photo, above) also feed on brassicas, spotting and distorting the heads and leaves. I squish them when I see them.
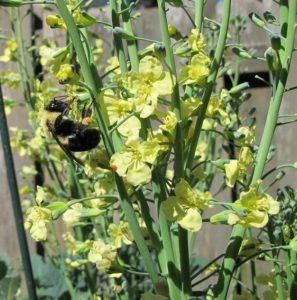
 

patches for pollinators, bumble bee on broccoli flowers

Broccoli ‘Arcadia’ and a bumble bee in spring.


As the plants finish up their last harvests now and in spring, some of the stems will bloom. Beneficial insects, especially bumble bees, honey bees, sweat bees, and tiny braconid wasps, collect nectar and pollen from the flowers. Heading broccoli has yellow flowers, but ‘Happy Rich’ has pure white flowers on stems up to 5′ tall.

Tomatoes

After warm weather had settled into the area, I planted several tomatoes and peppers among the mini broccoli plants.
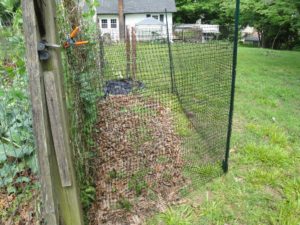
 

tomatoes protected from deer

A small garden for cherry tomatoes.


Another section, north of the garden, gets sunlight longer into the season. There, I secured posts and strung deer netting between them (photo, above). It’s a narrow space, so deer won’t jump into it. This small area has a few cherry tomatoes, which can lean against the stronger existing fence, where edible-podded peas grew from late winter to early summer. You can see the pea vines growing through the fence.

Tobacco Hornworms
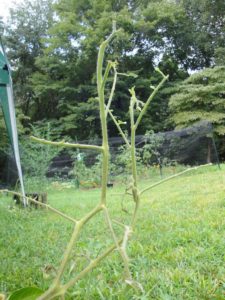
Tomato plant denuded by tobacco hornworm.

If one of your tomato plants seems a lot less leafy than it did yesterday, it might have a tobacco hornworm (slash markings) or a tomato hornworm (V-shaped markings). This very hungry caterpillar is the larval stage of a hawkmoth. A few weeks after a ‘German Johnson’ tomato went into the garden, it suddenly lost all its foliage. I’ve seen this before and knew to search for a 4″-long green caterpillar.

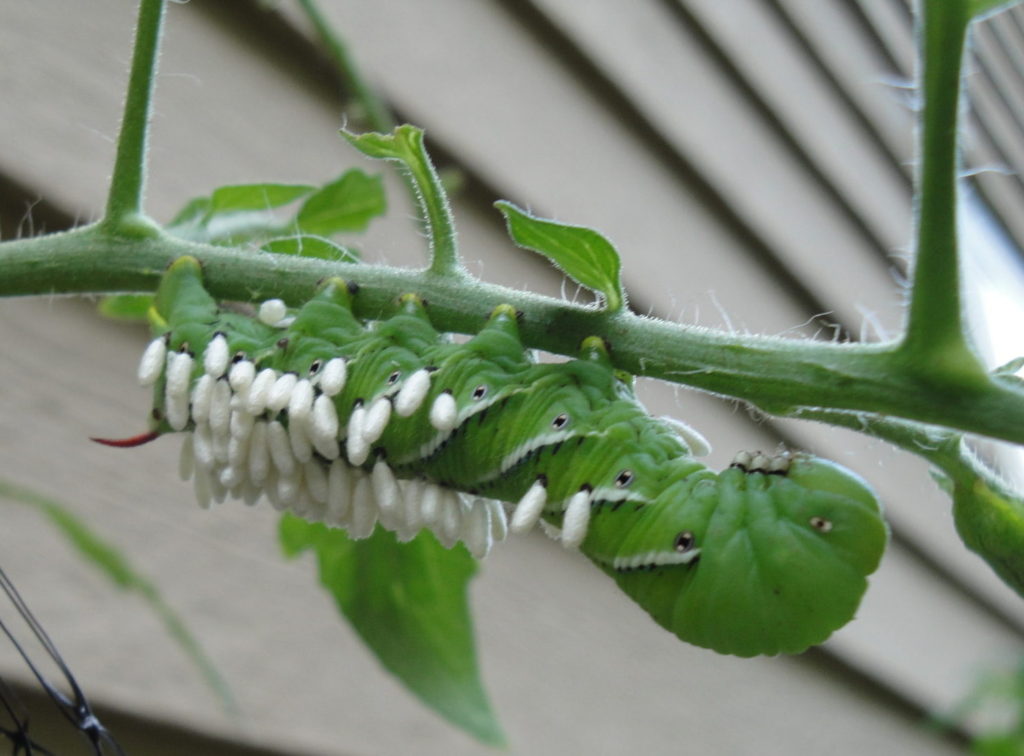
Several hornworms were found munching on the tomatoes this season. Most were carrying the pupae of a parasitic wasp and had stopped feeding. These pupae look like small grains of white rice. A female wasp lays eggs on or in the caterpillar. The eggs hatch into tiny larvae, which eat the inner tissues of the caterpillar, weakening or killing their host. Those should be left alone.

The few that hadn’t been parasitized lived out their lives on old tomato plants tossed behind the gardens. Birds or other animals might eat them.

Two dozen tomato plants that weren’t good enough to sell found homes in a few other areas around the property. Most are surrounded by posts and deer netting, although the deer did find—and destroy—90% of the big sunflowers meant for the winter songbirds… …


***Tomato Update***:

(This section added 9/4/2022.)

Tomatoes generally are underproducing. Those getting just an hour more sun are yielding fairly well, but not abundantly. Gardeners in this region experienced devastating blights on tomatoes from frequent rainstorms and persistent humidity.

After planting cleaned up not-quite-dead tomato plants, I sprayed them with a solution of dissolved aspirin. Here’s another link. They recovered better than I had any hope of expecting. Although not receiving the recommended biweekly spraying, they’re still producing fruits.

Later in the season, tomatoes had sun scald due to the sparse foliage, so I shaded new fruits with mesh bags, old peat pots, or large cucumber leaves. Sun scald causes tomatoes to rot.
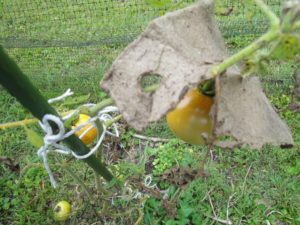
 

tomato shaded with peat pot to prevent sun scald

Tomato shaded by old peat pot.


Headings

Page 1: Patches For Pollinators (Japanese Beetles, Japanese Beetle Life Cycle), Less Grass To Mow With Patches For Pollinators (New Gardens, From Crape Myrtle To Virginia Sweetspire, Not In the Pink, Vegetable Gardens, Miniature Broccoli ‘Happy Rich’, ‘Happy Rich’ and Insects, Tomatoes, Tobacco Hornworms, Tomato Update)

Page 2: Long Vines That Might Smother the Grass (Next To the Tree Stumps), Patches For Pollinators: Don’t Mow Here (Weeds To Watch, Early Patches For Pollinators, Late Spring and Summer Patches For Pollinators, Patches For Pollinators: Living Proof, The Saddleback Caterpillar), The Pretty Moths and Butterflies

Return to the top

Seedlings For Your Garden: 12 Tips


2022


seedlings, zucchini


Starting Seedlings For Your Garden


Busy spring! This lengthy article focuses on starting and caring for seedlings and getting them established in the garden. If I’m not working on the seedlings, I’m working in the gardens, creating new beds and expanding those started last fall and winter. Winter weather was delightfully mild to allow planting right through the cold season. The weeds and I have come to an understanding, and in the next article, I’ll tell you how in “Patches for Pollinators”.

Foremost on the agenda has been starting plants to sell at our local Elkin Farmers’ Market. It’s been a challenge this year, keeping plants in good condition with high heat, heavy humidity, and frequent rainstorms. If I had a climate-controlled greenhouse, there might have been fewer losses. But, for the most part, my company, Wellspring Gardens, is producing more seedlings than I can sell at the market.

Some of that overproduction is destined for the vegetable gardens. It will yield small harvests of produce to sell at the market in addition to what’s needed in the kitchen. This is new territory for me, adding produce to the plants offered at the farmers’ market.

I might even consider canning, which I’ve never done…but let’s not get ahead of ourselves. That would be helpful, though, considering the rapidly rising prices at the grocery store. For that reason alone—the impact of rampant inflation on our wallets—it’s wise to learn how to grow at least a few vegetables.


sun's path

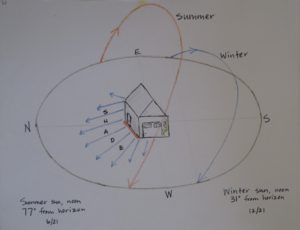
The sun’s path across the sky, Charlotte NC.


Watching how the sun tracks across the sky from month to month reveals good spots for the sun worshipers and areas where leafy greens should thrive in partial sun. This is my first summer in this house. The massive oak trees create shifting shade patterns that cause me to periodically rethink the plans.

So, let’s begin!


12 Tips For Starting Seeds


1. Start with clean materials for seedlings.


pepper 'Glow' seeds and cell pack

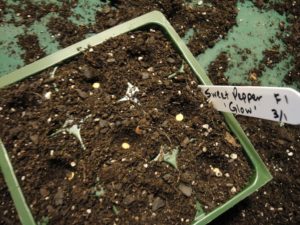
Sweet pepper ‘Glow’, started in 9-cell packs.


This calls for packaged seedling mix or fine-grained potting soil. Don’t use “dirt” from the garden, with its pathogens, insects, weed seeds, and worms that disrupt soil structure around tiny roots. In addition to the unknowns lurking in garden soil, its high clay content causes drainage issues in containers.

Soil used previously for potted plants is not a good medium for your seedlings. It’s often depleted of nutrients, might contain pathogens, and the organic matter has partially decomposed. If it’s only one season old, it’s probably safe for potted annuals, when mixed with fresh potting soil, or incorporated into the backfill for that new sourwood tree. Or simply throw it under the shrubs or into the compost pile.

Because seedlings are susceptible to soil-borne diseases, play it safe and start with pasteurized bagged seedling mix or potting soil. This, however, doesn’t guarantee a successful outcome, as many disease spores are air-borne. But we can increase the odds of success by using clean materials.

When reusing cell packs, pots, and flats for seeding, wash them in a 10% bleach solution, and rinse well before proceeding. Don’t smoke around plants, and wash hands thoroughly before working with them. Tobacco and other plants in the nightshade family (Solanaceae, including tomato, pepper, eggplant, and potato) can fall prey to the same disease organisms. Spores can transfer from tobacco products to your hands to the plants.


Pasteurizing Potting Soil

For bagged soil that’s questionable, you can pasteurize it in the oven. Don’t heat soil that contains timed release fertilizers. Use an oven-safe covered pot or baking dish, wet the soil, and heat the oven to 200°F. When the soil registers 140° on a meat thermometer, lower the oven temperature and maintain soil at that temperature for 30 minutes. This kills most pathogens. Wait for it to dry somewhat and to cool thoroughly before using. Various websites recommend different temperature levels from 140° to 300°. At the high end, beneficial microbes are killed off as well.

Let it cool down outdoors. Considering the pervasive “earthy” odor coming from hot soil, you might prefer buying a new bag of seedling mix or accept a small risk with the open bag in the garage.

Another method of pasteurizing (not sterilizing) soil is to place a heat-resistant container of soil in a black plastic bag. Place the bag in a sunny place outdoors on a warm day, and let the sun do the work for you. This is called solarization, and can raise the temperature inside the bag to 140-160°F. To prevent damage to the beneficial microbes, take the temperature, and maintain it at 140° for 30 minutes, opening the bag a bit to prevent overheating.

Most bagged potting soils and seedling mixes already have been heat-treated to eliminate pests. Close the bag securely and store in a cool dark place. The last and only time I pasteurized soil was nearly 50 years ago because that’s what the experts recommended.


2. Grow disease resistant varieties…


While fungicide and bactericide formulations—both organic and conventional—are available, I’d rather grow disease resistant varieties and not rely on spraying. Keep in mind that resistance is not 100% effective, particularly when plants are exposed to stressful weather or cultural conditions.

Certain varieties are more flavorful than others, but all well-grown fruits and vegetables from your own garden taste better than those purchased from grocery stores. Picked when vine-ripened perfect, anything coming from the garden will be superior to what’s found elsewhere except, perhaps, at farmers’ markets and farm stands. Freshly picked produce also has the highest nutrient content.

Digging in the garden is great exercise; proceed slowly at first. Working outside in nature feels good, and self-sufficiency is never amiss. A few steps from the back door gathering a green onion, spinach, dinosaur kale, and a little ripe sweet pepper for the veggie omelet is more rewarding than I can describe. You’ll see!

Those are just a few of the many benefits of growing our own vegetables. Using disease resistant varieties, if available, makes the job so much easier. Many new gardeners gave up after having suffered the disappointment of losing an entire crop to early blight or bacterial leaf spot. And we also have to deal with deer, rabbits, and insects!

Although this article concentrates primarily on edibles, flowering plants also have their own set of disease organisms. Again, look for resistant varieties, grow them in conditions that don’t favor infection, and look for remedies at the garden center.


…Especially Tomato Seedlings

tomato disease septoria?

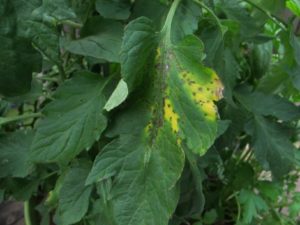
Disease beginning on ‘Rutgers’ tomato.

Tomatoes and peppers, two of the most popular crops for home vegetable gardens, are vulnerable to many diseases. They’re caused by fungal, bacterial, or viral pathogens. In some areas, nematodes also can be a problem. Usually, we can harvest some fruits before disease claims them, but resistant plants last longer in the garden. Plants infected with viruses should be removed and destroyed. For fungal and bacterial pathogens, products at garden centers will help. Always read the labels.

Tomato diseases include Alternaria stem canker, early blight, late blight (Phytophthora; very few varieties are resistant to this one), Fusarium wilt, grey leaf spot, leaf mold, tobacco mosaic virus, tomato mosaic virus, tomato spotted wilt virus, and Verticillium wilt. Catalog listings use initials to indicate disease resistance. For tomatoes, AS, EB, LB, F, GLS, LM, TMV, ToMV, TSWV, and V, respectively, represent those diseases.

Tomatoes are weedy plants and normally produce good crops, despite many organisms that target them. Peppers are susceptible to several races of bacterial leaf spot, and basil to basil downy mildew. Some zinnias are plagued by powdery mildew. Weather conditions, such as high humidity and frequent rain, exacerbate these disease problems.

Most hybrid (or “F1”) tomatoes have some resistance to one or more pathogens, but not to all of them. ‘Big Beef Plus’ is resistant to a wide variety of diseases. ‘Damsel’ and ‘Defiant PhR’ are resistant to late blight. Hybrid seeds carry a higher price than open pollinated varieties due to the cost of research that developed them and the extra steps needed to produce hybrid seeds each year.

It’s so hot out there!


shading tomato flowers


If you live in a hot climate, look for tomato varieties that have been bred to produce better at high temperatures. The pollen in tomatoes and peppers, and others, can die at high temperatures. While these plants are comfortable at 65-80°F, pollen dies above 88°, 90°, or 92°, depending on the cultivar. No pollination = no fruits! A reference to “heat” or to the “south” in the plant’s variety name indicates its higher tolerance for heat.

Researchers are investigating thermo-tolerant genetics in wild tomato species (Solanum pimpinellifolium) and incorporating them in tomato breeding programs.

One trick to preserve viable pollen is lightly shading the plant in the hot afternoon hours. Attach shade fabric—a black woven mesh—to a support over and on the west side of the tomato or pepper plants. This provides a decrease of up to several degrees in hot climates or temporarily during a heat wave. In the photo, above, mesh bags from the grocery store protect fruits from squirrels and sun scald, and lightly shade new flowers and their pollen from high heat.

The young ‘Estiva’ tomato plants (“estiva” refers to summer), a hybrid bred for heat tolerance and great taste, lost most of their diseased bottom leaves in heavy rains, but those little fruits are still growing! I’ll plant them out this weekend, after the temperatures drop well below the 108° heat index value we have now. Recent weather has been in the record-breaking mid- to high 90’s F, with high humidity. Not my favorite conditions to dig in the garden…so I don’t.  I was not bred for heat tolerance!

***Update***: ‘Estiva’ tomatoes endured this hot summer and produced fruits past the first fall frosts. I covered them on chilly nights to ripen the last of the fruits. These were among the last tomatoes to succumb to the cold, in mid-November. Autumn 2022

A Few More Tomato Tips

Your best defense against tomato disease, in addition to growing disease resistant varieties, includes these tips:

  • Stake them. Tall indeterminate types need a 6-8′ tall stake, taller for some.
  • Space them farther apart, at least 3½-4′.
  • Thin the vines to 3 or 4 main stems by removing excess suckers.
  • Remove leaves on the bottom 12″ of the plants after they’ve become established.
  • Locate them where a breeze blows through the garden. These first 5 tips address increasing air circulation around and through the tomato plants.
  • Give them lots of direct sun—a minimum of 7 or 8 hours. The more sun they receive, the shorter the window of opportunity for pathogens to germinate on damp leaf surfaces.
  • Mulch the soil under the plants to prevent disease spores lying dormant in the soil from splashing onto and infecting the foliage. More on Page 4.
  • Water in the morning to early afternoon so all foliage is dry going into the night. Try to keep the foliage dry at all times and avoid handling wet foliage.
  • Water established plants heavily (1½”/week) when needed, but avoid giving little sips every day. Young seedlings need more frequent watering until their root systems expand.
  • Clip off leaves that show early symptoms (yellowing, spotting), and dip your pruners in alcohol when moving from plant to plant.
  • Don’t smoke near the garden, and wash hands thoroughly before working with plants.
  • Rotate your crops. Don’t plant a member of the Solanaceae family where any members have grown in the past 3-4 years. There’s more about crop rotation on Page 4.

All plants grown with good soil preparation, good air circulation, proper watering techniques, adequate sun, and appropriate fertilization are less stressed. Less stress equates to lower infection rates.

Growing Heirloom Seedlings


Heirloom tomatoes are always in demand because of their exceptionally good flavor. Heirlooms are open pollinated, which means gardeners can save seeds from fully ripened fruits each year for the next season’s garden. Because they’re not F1 hybrids but have been breeding true, for the most part, for many decades, heirlooms retain their traits from one generation to the next.

These varieties, however, don’t have much built-in disease resistance. Nevertheless, I’m growing a few heirlooms, and spacing them 4′ apart for improved air circulation. We’ll see what happens.

Commercially grown tomatoes must be able to survive long distance transportation and handling without damage. They’re picked early, when green or first showing color. Varieties of these tomatoes have skins that normally are tougher.

Heirloom tomatoes have more desirable thinner skins and, therefore, travel poorly. So, you won’t see them in grocery stores unless those stores buy from local farms. Heirloom tomatoes from the grocery store might cost $5.00/lb. or more! So, yes, it is worth growing a couple of heirloom tomato plants in our gardens.

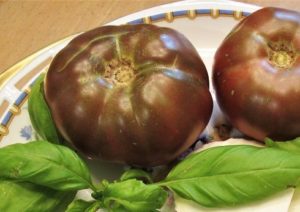
A few prolonged and heavy rainy periods this spring almost wiped out certain tomato varieties, namely ‘Carmello’, ‘Brandywine’, and ‘German Johnson’. I still have a few that show less damage than others. ‘Black Krim’ and ‘Cherokee Purple’ are doing fairly well, although they are heirlooms. Most of the remaining plants will be set in the garden. There’s usually a breeze blowing through the property, and by spacing them appropriately, I should get plenty of fruits.


Basil Downy Mildew


basil downy mildew

First symptom of BDM: yellow blotches between the main veins.


Although this dreaded disease targets only basil, it hasn’t appeared yet this year. But I’m prepared.

Last year, I grew ‘Rutgers Obsession DMR’ (DMR = Downy Mildew Resistant), an acceptable substitute for our beloved ‘Genovese’ and other susceptible sweet basils. Last year’s ‘Obsession’ did not develop any basil downy mildew (BDM)—not one speck—although wet and humid weather presented a worthy challenge. Other basil varieties in the ground or in pots succumbed to the disease within a week of infection…even young seedlings.

This year, I’m growing ‘Rutgers Obsession DMR’ and also ‘Rutgers Devotion DMR’ outside all summer. In addition, I’m seeding the old favorites, including ‘Genovese’, ‘Italian Large Leaf’, Thai basil ‘Siam Queen’, ‘Marseillais Dwarf’, and ‘Tuscany’, a lettuce-leaf basil. A few non-resistant basil plants will come indoors at night when warranted, as described below. But I’ll stop seeding susceptible varieties, except for a few pots, and concentrate on the resistant ones for the farmers’ market if the disease appears in the neighborhood.

Several other BDM resistant varieties can be purchased as seeds or as started plants.

Avoid High Humidity

basil seedlings in clay pot

Healthy sweet basil, in a pot.

If you want to grow your favorite basil varieties that are not resistant to BDM, there is a way to prevent a total loss.

BDM spores move up from the south on the breeze or on infected plants shipped into the area. The spores don’t overwinter in cold climates. If spores land on a susceptible variety, they need a relative humidity above 80-85% for a couple of hours in order to germinate.

Even during pleasant weather, the relative humidity can reach 90% or higher in the 2-3 hours around dawn. That’s when the temperature is usually the coolest and, therefore, the relative humidity is the highest.

When plants show early symptoms of BDM, remove the affected leaves. Take potted basil plants indoors for the night, every night. Indoor conditions never reach those high humidity levels, so you can still grow your preferred basil varieties successfully with a little effort. Remember to place the plants back outdoors after the sun has been up for a couple of hours.

Follow this regimen during rainy weather, although the plants might need to spend a day or two inside. Find the brightest spot to keep them during their temporary stay indoors. If possible, provide some artificial light. Unless it’s wilting, avoid watering basil indoors. Less sunlight means the plant won’t be photosynthesizing optimally or using much water, and wet soil can initiate root rot.


Headings

Page 1: 1. Start with clean materials for seedlings. (Pasteurizing Potting Soil), 2. Grow disease resistant varieties… (…Especially Tomato Seedlings, It’s so hot out there!, A Few More Tomato Tips, Growing Heirloom Seedlings, Basil Downy Mildew, Avoid High Humidity)

Page 2: 3. Timing is important for seedlings. (The Fall Growing Season, Keeping Records, The Cooperative Extension Service, Starting Seedlings Outdoors, Don’t Start Seedlings Too Early, Cool Season Crops, Extending the Growing Season, Seedlings Transplanted Into Bigger Pots, Bunching Onions, The Brassicas, Brassicas In My Garden, Lettuce), 4. Is the temperature suitable for seedlings? (Miniature Incandescent Lights For Warmth, Water Temperature)

Page 3: 5. Start seedlings in small batches. (My Simple Infrastructure), 6. Seedlings need strong light. (Growing Seedlings Under Shop Lights), 7. Cull the weaklings and anomalies. 8. Prevent damping-off disease from killing your seedlings. (Actinovate), 9. Seedlings and plants need fertilizer. (The Elements, Read the Label)

Page 4: 10. Prepare the soil for your transplants. (Start With Good Drainage, Air Pore Space, Gypsum and Lime, Add Nutrient-Rich Amendments, Bury It), 11. Try succession planting for maximum yield. (Crop Rotation, Mulch), 12. Stop the pests before they ruin your garden. (Slugs and Snails, Larvae of Moths and Butterflies, Spider Mites and Thrips, Deer and Rabbits), Concluding

Return to the top of Page 1

Grow a Potted Tomato: A Step-By-Step Guide


How To Grow a Potted Tomato


young tomato plants

Young tomato plants.


This year’s plan is to grow two potted tomato plants on the deck, inside the fence and away from deer. But less than a week ago, it snowed! For the near future, we’ll be having temperatures in the 70’s F, and in the 50’s at night. It’s time!

Judging by the numbers of people shopping at the garden centers, I’m not the only optimist out there. Always check your local forecast to see if it’s safe to plant tender edibles. Our friends in the North are still shoveling snow. Sorry, guys. Here are today’s purchases, and the step-by-step guide on page 2.


potted tomato


Tomatoes


Warm temperatures turn thoughts to tomato plants, so off to the garden center I went. Since we rarely buy tomatoes from the grocery store in the winter, we’ve been looking forward to this moment.

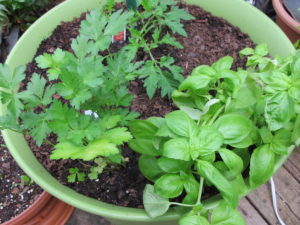
In one of the pots, I’ll include a young flat-leaf parsley and a sweet basil I bought at the grocery store a few weeks ago. The two herbs will be planted on the south side of the heirloom ‘Rutgers’ tomato, so they won’t be shaded. I’ll remove tomato leaves that interfere with the herbs. In case raccoons and squirrels set their sights on a lovely ripe fruit, bird netting wrapped around the fruiting plants will deter them.

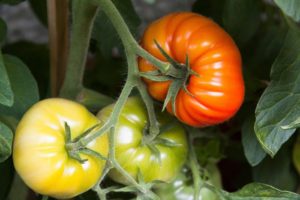
Unfortunately, direct sunlight is decreasing in the vegetable garden, next to the house, as the trees to the south grow larger. Even so, the new ‘Sun Gold’ cherry tomato will go into the garden; if any tomato will produce a crop, ‘Sun Gold’ will. Besides, it did well enough last year. It produces loads of bright orange super sweet tomatoes, great for salads and snacking. Bet you can’t eat just one!


Basil


Tuscany basil

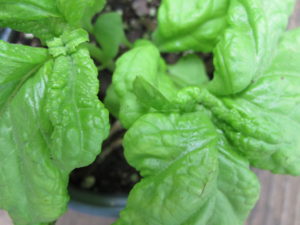
‘Tuscany’ basil.

The garden center also had ‘Tuscany’ basil, a light green lettuce-leaf type, with huge puckered leaves. It is wonderfully sweet and lightly spicy, with a hint of fresh anise flavor. ‘Genovese’ and lettuce-leaf basil are among my favorites for Tomato-Basil Salad.

And I added to the cart a pot of ‘Siam Queen’ Thai basil, for the baked salmon. Basil needs warmer temperatures, so they’ll stay in pots for a while, and come inside at night. Potted basil will come indoors even in summer, during rainy or humid weather. That’s when Basil downy mildew becomes a problem.

Curly parsley, a rogue seedling with last year’s flat-leaf parsley, and arugula survived the winter and still look good enough to hold onto for a while. The enclosed deck is a warmer microclimate, where winter temperatures are always higher than on the other side of the fence.

Although there’s some potting soil around, I’ll need more to fill those large pots and a few others. So, I bought the largest bag of soil the garden center carries. There’s enough packaged fertilizer left over from last year.


Caterpillars, Anyone?


I always keep a supply of Bt for battling the caterpillar invasions. Bacillus thuringiensis (Bt) is an organic alternative to substances I’d rather not consume, yet many people still consider it a “chemical”. It is not. Bt is a naturally occurring bacterium. An occasional spraying with Bt on the cole crops (kale, broccoli, cabbage, etc.) and on parsley and dill will save them from utter destruction!


tobacco hornworm

The tobacco hornworm on a tomato leaf.


Sometimes, 1 or 2 tobacco hornworms attack our tomato plants. They look very similar to the tomato hornworm, which has V-shaped markings instead of the tobacco hornworm’s slashes (photo, above). They’re difficult to see because they blend so well with the foliage.

Left undisturbed, these larvae will develop into a type of hawk moth. But this very hungry caterpillar, as it grows, consumes large quantities of leaves, and leaves behind…well, you know what it leaves behind.

This nature nerd, as a young student, kept a tiny caterpillar indoors, and supplied daily rations of tomato leaves. Well, it grew enormous and wandered off to a secluded spot to pupate. My greatest fear was that my mother would find it. I finally found it, and donated it to a teacher’s Wardian case.

Spraying with Bt kills these hidden caterpillars if you can’t find them. It is more effective, however, when used on young caterpillars. But, if they have little things on their skin that look like grains of rice (photo, above), just pluck off the caterpillars and place them in the shrubs. A small female parasitic wasp laid eggs on or in the caterpillar, and the wasp larvae fed on and will soon kill the caterpillars. The “rice” grains are pupating wasps. And some little animal might appreciate a morsel such as this.


tomatoes


Big Pots


I bought two 7′ tall stakes and two 20″ diameter lime green pots, at first considered somewhat disagreeable, but now perfectly acceptable. This shade of green blends in with the greens and browns on the deck. When summer heat is a problem, light colors reflect some of the hot sun bearing down on the pots. This helps moderate soil temperature, which rises in a dark pot. Conversely, in the winter, black pots absorb warmth, keeping hardy herbs and cool season greens happy.

Discounted prices on vegetable transplants accomplished their intended effect: I bought more than I had planned. So, now there are 2 sweet peppers to plant, one a “green-to-red-when-ripe” bell, and the other a ‘Lunchbox’ orange.


Peppers


Lunchbox peppers

‘Lunchbox’ sweet peppers.


‘Lunchbox’ peppers are small and colorful (red, orange, or yellow—a separate color on each plant). I add them to omelets, salads, stir-fries, shrimp and vegetables with rice, and pizza.

They add great color accents as well as a higher vitamin C content than green peppers. In fact, one medium-large ripe lunchbox pepper has 100% of the RDA for Vitamin C.

It takes almost 3 weeks longer for a pepper to mature from the green stage to the colorful one. Normally, I would have waited a week or two for the pepper plants, but they were on sale…and it has been quite mild…

(“Weather Alert: severe thunderstorm watch, possible large hail, winds gusting to 60 miles per hour”. Time to move some things around outside.)


One More Tomato

The heirloom ‘Black Prince’ tomato is not as susceptible to cracking as some of the other black tomatoes. And the fruits are smaller. This one substitutes for the ‘Black Krim’ I was looking for.

If ‘Black Prince’ doesn’t do well enough, I’ll pull it out and plant something else. That’s one of the many advantages of living where the growing season is long. (***Update***: The ‘Black Prince’ has grown taller than the 7′ stake, and it is loaded with medium-sized fruits! I’ve already picked more than 20 richly flavored “black” tomatoes. Photo at end of Page 2. June 25, 2019)


And Zucchini

zucchini

Zucchini with fruits.

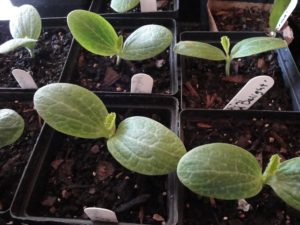
The fourth of the four-for-$10 deal is a zucchini called ‘Black Beauty’. The seedlings have barely grown beyond the seed leaf stage, and they, with the basil, come indoors at night.

A 50-pound bag of aged cow manure rounded out the purchase.

I’ll plant the zucchini into a nursery pot, and later into the garden. But for now, the garden is still packed with cool season vegetables and greens.


Headings

Page 1: How To Grow a Potted Tomato, Tomatoes, Basil, Caterpillars, Anyone?, Big Pots (Peppers, One More Tomato, And Zucchini)

Page 2: A Step-By-Step Guide To Planting a Potted Tomato, Maintaining Your Potted Tomato, Temperature, Watering a Potted Tomato, Fertilizing a Potted Tomato, (How Often?, Blossom End Rot), Limiting the Suckers On Your Potted Tomato

Return to the top

No Fruits On Your Tomato Plants?

2018


Here Are Some Simple Solutions If Your Tomato Plants Have No Fruits In July and August


tomatoes


No Fruits In Hot Weather?


It looks as if we’re in for more above-normal temperatures in the Southeast through the growing season. No surprise there! I’m going to spend a few minutes to explain why we often have no fruits on our tomato plants when it gets real hot outside. In most years, though, production picks up again in late August or September when the temperatures drop several degrees.

bee, pollenThe main crop that most home gardeners are concerned with is the tomato, although this could happen to peppers, eggplants, and other vegetables as well. When temperatures soar into the 90’s F, the pollen produced in the flower is “denatured”, or, essentially, killed. No pollen means no fruits!

When the air is very still or humid, the pollen grains are less likely to be dispersed. But, we can’t control the weather, so I’ll concentrate on what we can do.


Try Some Shade For Tomatoes With No Fruits


beach umbrella--shade for tomatoes with no fruits in summer


Before you replace your vegetables with agaves and astroturf, there is something you can try in order to harvest a continuous crop. If temperature is the problem, and not lack of pollinating insects, you can simply provide a bit of shade during the hottest part of the day, usually from 1:00 to 5:00 in the afternoon.


Here’s How:

Some tall stakes stuck in the ground and an old sheer curtain could work. Make sure any covering is above the foliage, so air flow is not impeded. One day, a customer stopped by the garden center where I used to work and wanted to thank me for the suggestion. He said he finally (after many years of trying!) was able to get tomatoes in the hot summer months by simply repositioning the patio umbrella to shade his tomatoes for a couple of hours in the afternoon.

Look for black UV stabilized polyethylene mesh, sold as “knitted shade cloth”, from garden supply companies. Johnny’s Selected Seeds lists the product in their catalog. For the hot south, a product that casts 30% shade works well. Or you might find that 50% shade works better. Position it overhead, and on the west side to cut the harsh afternoon sun. A little experimenting will indicate the best arrangement.

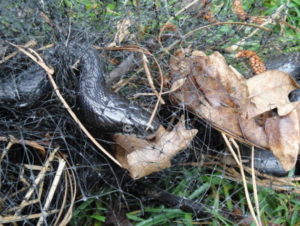
Rat snake caught in bird netting. yes, it was freed.

This non-venomous snake was freed by snipping the mesh, starting at the tail end.

If you have a package of black deer netting, folding it over several times will give you about the same effect as the shade cloth. Check it daily, though, for snakes that can get caught up in it. A few times, I used sharp-pointed scissors to free non-venomous snakes that had become entangled in the netting.

Another option is lattice or snow fence attached to a sturdy frame.

The point is not to block all the light. You just want to moderate the harsh sun for a few hours a day, dropping the temperature to below 90 degrees. Not every growing season will require this mitigation. But, if you don’t see tiny tomatoes growing on your plants in mid-summer, this is one option you can try. When the temperatures moderate, remove the covering.


Shading the Flowers and Fruits


light shade helps crops with no fruits


Sometimes it’s not practical or necessary to entirely shade the large plants on the deck. So, I’ll use those mesh bags found in the produce section at the grocery store (holding avocados, tangerines, etc.). When it’s hot, I drape the mesh over the young flower cluster. It will stay in place as the fruit develops. This helps keep the animals away and prevents sun scald.

Occasionally we have summers when the temperature hovers in the mid to high 90’s for weeks at a time, not cooling off much at night. We might not get any tomatoes at that time, until the weather cools. But we do harvest more tomatoes by shading than if we did nothing.


Cultivars


sun gold tomato

‘Sun Gold’ tomato with netting to keep animals away.

Select varieties that are more heat-resistant; their pollen tolerates higher temperatures. Names that allude to the south or to heat are clues that those varieties could grow better in warm climates. ‘Phoenix’, ‘Estiva’, ‘Arkansas Traveler’, ‘Florida 91’, ‘Creole’, ‘Heatmaster’, and ‘Summer Set’ are cultivars often cited as being heat-resistant.

‘Better Boy’, ‘Terenzo’, and ‘Black Krim’ also should do well. The bright orange cherry tomato, ‘Sun Gold’, produces abundantly in our hot summers.

‘Big Beef’ has always been quite productive here and is highly disease resistant. If you must grow your favorites that are susceptible to heat, try using the shade cloth.

Check online or ask your local cooperative extension agent for information on recommended cultivars in your region. The varieties that had bountiful harvests every year when you lived in Buffalo, New York, might be disappointing in Birmingham, Alabama.


Pick Earlier


During very hot weather, fruits might not fully “color-up” to catalog pictures, so don’t leave them too long on the vine. Pick them once they’ve developed some color.

Let them ripen on the kitchen counter, but never in the refrigerator. Tomatoes exposed to temperatures below the mid 50’s undergo cellular changes that rob them of flavor and texture. Certain genes that enhance flavonoids in ripening fruits become inactive in cool temperatures.

Especially during periods of drought, thirsty animals know what’s inside those juicy ripe tomatoes! You won’t miss out on much flavor by picking them a day or two early…but they will.

Letting ripe fruits stay on the vine inhibits the production of new flowers. The plant thinks it has done its job by providing seeds for the next generation. Removing ripe or almost ripe fruits reminds the plant to resume its responsibilities.


Mulch


pine straw mulch if crops have no fruits

Pine straw.


Mulch the soil all around the plants with a thick layer of airy mulch, such as pine straw or oak leaves. Clean chemical-free grass clippings mixed with shredded leaves can be used, but not so deep that decomposition generates even more heat. These materials add organic matter to the soil as they break down, keeping the earthworms and the microbes happy, and provide nutrients to the plants. 

Mulch also helps prevent disease spores lying dormant in the soil from splashing onto the lower leaves of the plant. And, of course, it holds moisture in the soil and keeps it a little cooler.


Water 


No fruits? Supply enough cooling water.

Water thoroughly during hot, dry weather to moisten the top 10″ to 12″ of soil once or twice a week (more often in sandy soils). Established vegetables, in average soil, need 1″ to 2″ of water per week. Here’s why:

  • Lack of water causes wilt, stressing the plant.
  • Lack of water causes flower-drop. (Incidentally, flower-drop early in the season can be caused by cool weather.)
  • To prevent blossom-end rot, there needs to be enough moisture in the soil to keep calcium in solution.
  • Fruits that crack are responding to uneven soil moisture levels, although some cultivars are more susceptible to this. Cracked fruits are still edible, after checking for little critters (insects, slugs, sowbugs) that might be sipping the fluids. Ordinarily, it’s safer to discard fruits that have been partially eaten by raccoons or squirrels.
  • And a good watering in hot weather cools down the soil. But first check the temperature of the water coming out of a hose that sits in the sun. It could be too hot for plants. Don’t overdo the watering, which will dilute the flavor of ripening fruits and cause other problems.

Thorough and deep soil preparation invites roots to grow where the soil is cooler and where there’s more moisture. The more we can minimize stressful conditions, the more likely our vegetable garden will perform the way we’d like it to.


Better Pollination


Hand-Pollinate Flowers If No Fruits Are Growing


If pollinating insects are not plentiful around your garden, try hand-pollinating your tomatoes and peppers. Usually just shaking, tapping, or vibrating the flower is sufficient for the task.

Each tomato and pepper flower is perfect, containing both male and female flower parts. So, they can self-pollinate as well as receive pollen from other tomato plants. This will work if the pollen hasn’t already been killed by heat.

Photo, above right, shows simple procedure for pollinating a tomato flower. Gently flick, or tickle, a mature, but not old, flower to move pollen to the stigma.

The pepper (photo, above left) was unlabeled and purchased at a big box store. It had a big floppy habit. There were no fruits on it for the longest time, and I was about to remove it. But I gave it one last try, and hand-pollinated all the flowers. Since then, it has yielded a dozen big bell peppers, and it’s still full of fruit.


‘African Blue’ Basil

Plant an ‘African Blue’ basil near the garden. This is an ornamental basil and a pollinator magnet! Because it is sterile and can’t set seed, it keeps flowering all summer long. You can find this variety in late spring or summer as potted transplants.

Few plants attract as many pollinators. Having one of these plants near your vegetables will guarantee visits from honey bees, bumble bees, butterflies, and other pollinators. In fact, bumble bees often spend the night among its flowers, ready to go to work as soon as the sun comes up.


*   *   *   *   *   *   *   *   *


So, if you’re following sound horticultural practices and can’t understand why your vegetables have no fruits, try shading them for a few hours. Or perhaps one of the other suggestions will work for you.

I’ve had dozens of customers over the years who have tried shading when nothing else worked, and now they enjoy vine-ripened tomatoes and peppers without interruption. Tomato-basil salad, coming up!


water and vegetables


Return to the top

Vegetables in Containers: How To Grow Them

2018

No Garden Space? No Problem!


Growing Vegetables in Containers


peppers and green onions in a pot

Peppers and onions.


Before I started this blog, I managed the Edibles Department for a few years at an independent garden center in Charlotte, North Carolina. As some of our customers downsized to apartment living or to a condo with a balcony, they didn’t want to give up growing their own herbs and vegetables. So, they were glad to hear that they could grow vegetables in containers…as long as the balcony was on the right side of the building. And the right side for vegetables is the sunny side of the building.

Lack of direct sunlight and adequate growing space are limiting factors. Look around, though, and you might come up with some ideas. For example, some of our customers were given permission from their condo associations to garden in common areas. Running for open association board positions yourselves is one way to garner support. I encourage you to attend board meetings, bringing your neighbors, a plan, and a promise to maintain the site.

Neighborhood community gardens are another possibility, although there often is a waiting list. With so much emphasis on eating healthy foods, little pocket parks and community gardens are popping up all over the country.


For Your Convenience

damaged tomato, squirrel

A young tomato damaged by a squirrel.

Another reason to grow vegetables in containers is simply to have them close at hand when they’re needed. A few steps out the kitchen door to a handful of cherry tomatoes and a ripe ‘Flavorburst’ sweet pepper for today’s salad has its charms.

Keeping the pots elevated on the deck prevents some animals, such as deer and rabbits, from making off with the fruits of your labor. Won’t stop the raccoons, though. (***Update***: Or the squirrels; one thought this little green tomato had something to offer. Discard any fruits that have been chewed on by animals. If needed, I’ll wrap the potted tomato plants, growing on the deck, in bird netting. June, 2019.)


Sun? Not So Much


The choices for edibles in a shady spot are limited. The ones that might succeed in bright shade are arugula, cilantro, parsley, lemon balm (interesting research with Alzheimer’s), French sorrel, and seasonal leafy greens. With just a bit more sun, basil, rosemary, oregano, and maybe a cucumber plant could grow for you.

Reflected light counts, to a degree, including light bouncing off light-colored walls. And a white surface under the pots reflects more light onto the vegetables in containers.

Remember to monitor the sun’s path throughout the seasons. Once trees drop their leaves in the fall, your balcony or patio might receive more direct sunlight than it did in the summer. This opens up all kinds of possibilities for potted cool-season greens and vegetables. Pay close attention to expected temperature changes for the duration of your crops.

Fruiting plants, such as tomatoes, peppers, eggplants, and squash need at least 6, and preferably 7 or 8 hours of direct sun. These vegetables also need warm summery weather.


Approaching Summer Solstice

Our vegetable garden is now receiving the maximum amount of light, with the sun directly overhead. In the springtime of the last two years, heavy rains caused the tree canopy up on the berm, to the south, to swell with heavy, overhanging branches. Trees now cast considerable shade early and late in the day for most of the growing season. So, I planted fewer tomato plants and more greens.

Two large ‘Big Beef’ tomatoes are beginning to ripen, and a whole lot of ‘Sun Gold’ and ‘Mexico Midget’ cherry tomatoes. So, even with less than ideal conditions, there will be something to harvest.


At Julia’s Request

Several family members from New Jersey and California recently visited us in North Carolina. I promised Julia this article about growing summer vegetables in containers.


Vegetables In Containers: Which Ones?


Sweet and hot peppers, tomatoes, and eggplants can be grown in containers, as well as zucchini, yellow summer and Patty Pan squashes, cucumbers, and green beans. Also, it’s easy to grow most herbs in pots. Green onions, carrots, potatoes, and peas can grow in pots!
It’s just a matter of the details. One of those details is to look for dwarf or bush varieties of the crops you want to grow. There’s even a variety of corn (‘On Deck’) that grows in large pots.

One of the popular combinations I used to sell included a sweet or a hot pepper planted with two herbs. Theme combinations (‘Jalapeno’ pepper-cilantro-Greek oregano; ‘Carmen’ frying pepper-Italian oregano-dwarf parsley ‘Titan’) grew in 14″ pots. Customers found them irresistible if they were bearing fruit.

Growing more varieties of leafy greens in containers has become a priority as our garden becomes more shaded. In addition, greens can grow all year in regions with moderate winters.


Starting With Tomatoes


Much of the information in “Starting With Tomatoes” also applies to other vegetables in containers.


'Blueberry' tomato

Potted ‘Blueberry’ cherry tomato.


Beginning with America’s favorite, tomatoes grow well in pots. Will it be a beefsteak or a cherry? An heirloom or a modern hybrid? A slicer or a sauce-type? Determinate? Indeterminate (it keeps growing until frost, bearing fruit all summer)? Black, red, yellow, or orange? Striped or solid? There are many thousands of varieties of tomatoes to choose from!
potted 'Terenzo' tomato, with red fruits

‘Terenzo’ tomato.

A dwarf tomato called ‘Terenzo’ (photo, right) can grow in a 10″ hanging basket, but a ‘Cherokee Purple’ heirloom or a ‘Big Beef’ needs something considerably larger. For the large varieties, I use pots at least 20″ in diameter.

The long-vining indeterminate cherry types (‘Sun Gold’, ‘Black Cherry’, ‘Mexico Midget’) can grow in a pot as small as 14″ in diameter, but they’d be happier in bigger pots. You’ll need to pay closer attention to water and fertility when using smaller pots.


Vegetables In Containers: Types Of Pots

Each kind of pot has both advantages and disadvantages.

Summer vegetables generally fare better in larger pots rather than smaller pots. Although the pot looks enormous compared to the transplant’s diminutive size, don’t be tempted to plant more than one tomato per pot. You’ll be amazed how quickly that one tomato plant fills a 20″ pot. A new transplant in a large pot runs a greater risk of root rot during rainy weather. But, placing it under an overhang will prevent this loss. It’ll be different once more roots and foliage have grown.

An indeterminate tomato, such as ‘Cherokee Purple’, ‘Sun Gold’, or ‘Black Krim’, can share a 20″ diameter pot (photo, below) with a couple of herbs, such as parsley and oregano. Plant the tomato toward the back of the pot, on the north side (northern hemisphere), and plant the herbs near the southern rim.

Terra Cotta

Terra cotta looks good and has some weight. But clay is porous, so water vapor passes through the pot to the air outside, quickly drying the soil. If you want to use your large clay pots, you could line them with food-grade plastic and punch some holes in the bottom for drainage. This will slow down the evaporation process.

Certainly, use clay pots if you prefer, but prepare to water more often.

Ceramic Pots

Ceramics are beautiful and heavy, and can be expensive. Soil temperature rises uncomfortably on the sunny side unless the pot is shaded. Try using light colored pots in the summer, which will reflect most of the heat.

If you’re unsure of the safety of the glaze, line the inside of the pot with food-grade plastic bags, poking several holes in the bottom for drainage. But, I would choose a different pot if a sticker on the bottom warns “Not for direct contact with food”.

You could also plant the tomato in a large nursery pot, and then insert it into the decorative glazed container. Make sure both pots have drainage holes. This “double-potting” allows air circulation around the interior pot and eliminates concerns about questionable glazes.


vegetables in containers, green pot

Tomato ‘Rutgers’, sweet basil, and Italian parsley in a 20″ wide pot, April, 2019.


Plastic and Vinyl

These pots are inexpensive, readily available, and easily moved. They’re also the most likely to blow over in windy weather. But this is the first choice for most gardeners. Most of these pots last a few to several years in the sun, but, eventually, sunlight will degrade the material.

Wood Containers

Untreated cedar or redwood and half whiskey barrels are suitable for growing vegetables in containers. Check to make sure the pots drain freely.


Reservoirs and Other Considerations

Earth boxes and plastic pots often have built-in reservoirs or detachable saucers. And you can purchase caster kits and trellises for increased functionality. Some gardeners have the option to move their plants from the morning sun on one side of the deck to the afternoon sun on the other side; wheels make this so much easier.

Caution: some of the reservoirs are too deep before the water begins to exit the overflow hole, and can cause young plants to rot if the soil stays sodden all the time. You could drill a hole in the side, below the overflow hole, reducing the capacity of the reservoir. Or simply tilt the pot to allow excess water to drain. Older plants, full of foliage, will absorb water in the bottom of the planter, as long as it isn’t raining for several days straight.

Mosquitoes and Tree Roots

Add a piece of Mosquito Dunks to prevent mosquitoes from maturing in the secluded reservoir. They need only a few days in warm weather to complete their life cycle. Or tip the container to drain all excess water.

A pot sitting directly on soil anywhere near trees or shrubs will invite their roots to invade. Believe me, they will try to grow in that beautiful composted soil. Elevate the pot off the ground. This also facilitates drainage from the pot.

A few pieces of broken flagstone or “pot feet” raise the pots above the surface of the deck, helping to preserve the deck’s finish.

Saucers

Use saucers under the pots, but don’t let water remain in them for more than an hour. Plant roots need oxygen as much as they need water. Water in the saucer prevents air from entering the bottom of the pot.

Saucers aren’t absolutely necessary, but help if the soil has gone too dry. Just keep filling them until no more water is absorbed by the soil. In tall pots, though, the force of gravity will prevail over capillary action, preventing water from reaching the top of the root ball. So, you’ll also need to water the top portion of soil.

During long periods of rainy weather, I remove the saucers, or turn them upside down and keep them under the containers. This is impractical, however, if the pot weighs 50 pounds. Consider removing the saucer and using a few pieces of broken flagstone or brick to elevate the pots, if necessary.


Potting Soil

pot for new chives division

Reused polyester fiberfill covers the drainage hole.

Before filling the pot, place a small handful of polyester fiberfill (from a hobby store) over the drainage hole. This prevents soil from eroding through the hole, and prevents earthworms and other critters from entering. If you pull some of it through the hole to a point at the bottom, excess water will continue to drain. This is helpful for potted plants that rot easily during long stretches of rainy weather (succulents, lavender, thyme, sage). This synthetic material doesn’t rot, so it’s reusable.

Use a good quality potting soil that drains well, but has peat moss to hold moisture. In addition to the peat moss, the mixture will have perlite (white particles that help drainage), pine bark chips (drainage), lime (to adjust the pH), compost or a starter charge of fertilizer, and often a wetting agent (to help the soil absorb water).

Amending the Potting Soil

Feel free to experiment with mixtures of different materials. Soils with a lot of bark (pine fines) in the mix tend to dry out faster. You can mix in smaller-particle loamy topsoil, spongy peat moss, aged manure, or compost to help slow water loss. Water-absorbing crystals might help, too. But moisten them before you add them to the soil. If you don’t, you’ll understand why I italicized the word “before”.

Adding a layer of undyed mulch on top of the soil helps conserve water and keep the soil a bit cooler.

While some gardeners add rocks to the bottom of the pot, I never do. It was thought the rocks increased drainage, but the opposite is true; they create a perched water table in the layer of soil right above the rocks. Water percolating through the soil profile is held in this layer by capillarity, and often rots roots trying to grow there, limiting the useful volume of soil.


Headings

Page 1: Growing Vegetables In Containers, Sun? Not So Much, Vegetables In Containers: Which Ones?, and Starting With Tomatoes (Vegetables In Containers: Types Of Pots, Reservoirs and Other Considerations, Mosquitoes and Tree Roots, Saucers, Potting Soil (Amending the Potting Soil)…

Page 2: Transplanting the Tomato, Water, Going Away?, Staking, Fertilizing Vegetables In Containers, Blossom End Rot, On PH, Pollination), Peppers and Eggplants, Cucumbers, Squash (Squash Vine Borers), Green Onions (Bunching Onions from Seed), Leafy Greens, and Picking Vegetables In Containers

Return to the top

Tomatoes: Stake, Water, and Prune

2018


How Are the Tomatoes Doing?


'Rutgers' tomatoes on a staked plant

A staked ‘Rutgers’ tomato.


The recent stretch of warm, sunny weather has helped the tomatoes and peppers double in height. It’s time to secure them to stakes or to cage them if you haven’t already done so. Once the last of the broccoli side shoots have been harvested from our garden, a zucchini will go there. And cucumber ‘Diva’ will be planted after the cauliflower has been picked, but that’s a while off.

Check with your local Master Gardeners office to see what else is safe to plant now, or look online for a handy planting schedule available from your local agricultural extension office. Keep in mind, though, that these are only guidelines. Weather trends and microclimates will dictate what’s safe to plant.


And Peppers?


Healthy pepper plant with red and green fruits

Sweet bell pepper.

Since the varieties of peppers that I planted don’t grow taller than 3′, the tomato cages will be used to support them. The metal cages are only about 3′ tall, once the prongs are anchored into the ground. These short cages are useless for tall tomatoes.

Peppers and tomatoes are in the same family (Solanaceae), by the way, so they need many of the same growing conditions.

As the plants grow, steer the young side shoots through the openings. A sweet bell pepper loaded with 5″ fruits will appreciate the extra support for the limbs. A high wind or a pelting rainstorm can cause heavy branches to split from the main stem. Small-fruited pepper plants can be staked, caged, or allowed to grow without support.

Keep an eye on the weather, though. A forecast calling for windy conditions might prompt you to put something in place before the storm arrives.


Determinate Or Indeterminate Tomatoes


Tomato varieties are categorized as either determinate or indeterminate. This pertains to their habit of growth and when they set fruit.

Determinate tomatoes generally stay short and set fruit within a concentrated period of time. Varieties such as ‘Roma’, ‘Celebrity’, and ‘Patio’ permit the grower to harvest most of the fruits at once—good for canning or making sauce. Although determinates tend to be short, some varieties will grow quite vigorously and might require staking.

Indeterminate tomatoes, such as ‘Big Beef’, ‘Sun Gold’, ‘Nepal’, and ‘Cherokee Purple’, continue growing throughout the season, and often produce right up to frost.

Even though both the cherry tomato ‘Sun Gold’ and the heirloom ‘Cherokee Purple’ are indeterminate tomatoes, the latter may grow to only 5′, whereas ‘Sun Gold’ can grow twice as tall. Learning about the different varieties you want to grow will indicate what kind of staking or caging you’ll have to do. You can always add a taller stake later, if needed.


Staking


trellis

Because we grow indeterminate tomatoes, we use 7′ or 8′ tall vinyl-covered metal stakes. Oak or bamboo stakes are available, as are collapsible wire cages. A decorative trellis is both attractive and functional. Anchor the supports far enough into the ground to prevent them from falling over.

Shoe laces make perfect ties for tomato plants. They’re soft and they can be retied as the stems grow in girth. You can also use twine, twist-ems, clothesline, or anything else that won’t cut into the stem. Some gardeners use ties in a figure-8 fashion, around the stake and around the stem. Or simply loop it once or twice around the stem and stake.

Check frequently through the summer to make sure the stem isn’t being constricted by the ties. Don’t tie so tightly that there is no room for movement or growth. Some bending and swaying in the breeze strengthens the plants.

Staking elevates foliage off the moist soil, decreasing the likelihood of disease.


orange cherry tomatoes

‘Sun Gold’ cherry tomatoes.


Young Plants


Consider the balance between the amount of foliage and the number of fruits. A young tomato plant with only a few leaves will not be able to support ripening fruits. It could show early symptoms of nutrient deficiency.

Examine the newest growth at the top of the plant. The tip growth of a very young plant might show signs of withering, or turn tan in color, or simply refuse to grow if it is also trying to supply nutrients to ripening fruit. Boron, a micronutrient needed in tiny amounts, is critical for new growth. The growth tip will sacrifice itself and future growth in order to do what a plant wants to do, which is to set seed in its fruits.

It’s best to remove all fruits on a very young plant. A sparsely-leaved plant struggles to get enough carbohydrates (the products of photosynthesis) into the fruits. This contributes to slow growth and mediocre flavor.


Suckers


As the tomato plants grow, add more ties, every foot or so, to prevent the tops from flopping over. At the same time, take a look at the stems, and decide which suckers will have to be pruned. Don’t confuse the suckers with the flower stalks that arise from the stems. The flowers are yellow and quite conspicuous.


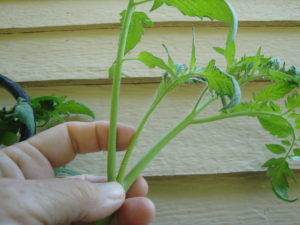
Some more basic terminology: A sucker is the common name for the new shoot emerging from the angle between the top of a leafstalk (the petiole) and the stem (photo, above left). The side branch starts out as an axillary bud and grows rapidly. There are axillary buds above most leaves, and the branches, too, will sprout even more suckers. So, you see why it’s important to inspect your tomato vines frequently.

tomato leaf

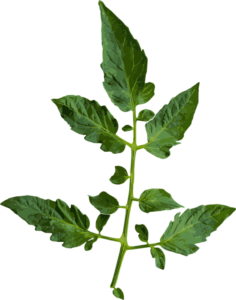
A tomato’s compound leaf.

Suckers that are not removed will soon become main stems. The main reason I sucker tomatoes is for increased air circulation. This helps prevent many kinds of diseases from infecting the plants in this humid area. Many gardeners have commented that limiting the number of stems results in fewer, but larger, fruits.

Also, tomatoes will develop better color and flavor, and contain more antioxidants, if they’re exposed to gentle rays of the sun. This is especially true for the “black” tomatoes, such as ‘Black Krim’, ‘Kakao’, and ‘Cherokee Purple’.

A few more terms for you: The tomato leaf is a compound leaf, composed of the petiole and several leaflets, attached by petiolules. And the main rib of the leaf is called a rachis.


How Many Main Stems?

tomato sucker

Index finger points to a sucker.

Tomatoes are weedy plants and will grow lots of side branches. For most of the growing season, I keep only 3 or 4 main stems growing on each plant. Near the end of the season, I’m less particular about controlling growth. By then, I’m thrilled to harvest anything off the vines.

Since each of those side branches will try to grow, any suckers that I don’t want to grow into main stems will be removed.

Limiting the growth of foliage encourages better air circulation, helping prevent diseases from ruining your crop. Some growers permit only 1 or 2 stems to grow, but I don’t believe enough products of photosynthesis get to the ripening tomatoes. Just a hunch.

The plant has one thing on its mind, and that is to procreate! In order to do that—well, yes, after pollination—the fruits have to be adequately nourished until the seeds mature. And since all nourishment comes from photosynthesis, the plant needs to have enough leaf surface, and enough direct sunlight, to carry out this vital function.


Can I Root Those Suckers?

If, in early summer, you wish you had planted more tomatoes, you can root healthy 4″ to 5″ long suckers. They root quickly in 3″ or 4″ pots of moist soil, kept humid and in light shade. Simply bury the whole stem in each pot, keeping only a couple of leaves above the soil surface. You can also root them directly into the garden, kept moist and shaded until roots become established.

If it wilts all the time, remove a leaf or two from the bottom of the stem, or cut large leaves in half. A big, leafy cutting won’t be able to root or absorb water fast enough to keep the leaves turgid. Make sure the cutting has good contact with moist soil. Perhaps rooting cuttings in a glass of water will work better for you.

When the cuttings start growing, gradually introduce them to more sun before they’re finally planted out. Tomato suckers root fast, so if you don’t see results within 10 days, start new ones.

The sucker is genetically identical to the parent plant, so the fruits will be the same. This applies to both heirlooms and hybrids.


Limb It Up


Since the first suckers will appear near the bottom of the plant, you might be inclined to let them develop as Main Stem #2 and Main Stem #3. Always keep disease prevention in mind when dealing with tomatoes. I prefer to snip out those bottom suckers and, instead, let the plant start branching 10″ or 12″ above ground level.

As the stem grows taller, remove the bottom leaves, too. That’s right; this permits free air flow underneath the plant. And the soil surface will dry faster, further decreasing the incidence of disease.


red tomatoes

Headings

Page 1: How Are the Tomatoes Doing?, And Peppers?, Determinate Or Indeterminate Tomatoes, Staking, Young Plants, Suckers (How Many Main Stems?, Can I Root Those Suckers?), and Limb It Up

Page 2: Sun Scald, Blossom End Rot: Tomatoes and Peppers, Watering Tomatoes, Deer, and They’re Weeds, After All!

Return to the top


Tips For Growing a Tomato Plant


A Tomato Plant For Your Garden


tomatoes


Anyone who has grown a tomato plant and experienced sublime sun-ripened perfection understands the joy that awaits those new to this endeavor. But it takes a little skill. Starting with light, I’ll explain the basics here. And be sure to read related posts to get the full picture.


How Much Sun For a Tomato Plant?


young 'Cherokee Purple' tomato on the vine

‘Cherokee Purple’ tomato.

A tomato plant requires at least 7 hours of direct sun. Sure, many sources of information recommend 6 hours, and you’ll certainly have some success. But, for best performance, give it 7 or 8 hours or more.

Tomatoes produce more flowers in a sunnier location. And their leaves will make more “food” (carbohydrates resulting from photosynthesis) that keeps plants growing and producing. More hours of sun maintains drier foliage for a longer period of time. And drier foliage means fewer problems with disease.

Now if you don’t have a spot that gets 7 hours of sun, but it gets 5, you might be able to get fruits from a cherry tomato plant. Instead of being disappointed with the lower-yielding but yummy heirlooms or the big beefsteaks, try ‘Sun Gold’ or the other cherry tomatoes. ‘San Marzano’ and ‘Juliet’ also are worth considering for five or six hours of sun. Because they are high-yielding, you’ll probably harvest something.

But, in full sun, cherry tomatoes produce so many fruits that you’ll be giving them away by the bowlful. Really…they’ll have produced hundreds of fruits on a tall vine by the end of summer.


cherry tomato photo

A “hand” of cherry tomatoes.


Options

If you have the space, some experimentation might yield promising results. Try growing tomatoes in large pots on the sunny patio, and plant greens where there isn’t enough sun for tomatoes. Or perhaps a corner of the sunny rose garden can be given over to edibles that need full sun, if the soil hasn’t been treated with chemicals.

I don’t often recommend cutting down trees. Removing a silver maple that seeded near the vegetable garden, however, will make the garden more productive, and, if permitted, that’s the way to go. When selecting trees for an average size property, choose small-growing trees and locate them far from gardens requiring full sun. Consider their mature size and where the shade will fall from one season to the next.


More Light For a Tomato Plant


Here are some tricks to coax more production out of your edible plants if the sun exposure is less than ideal:

  • Plant in as sunny a spot as you have, perhaps near a white or light-colored wall, which will reflect more light toward the tomatoes. Or, using a little resourcefulness, create a reflective wall with tall stakes and white fabric.
  • Lay repurposed light-colored empty mulch or potting soil bags on the soil, on the sunny side of the plants. Anchor them with stones or bricks. Punch lots of holes in the plastic so the plants will get enough water from rain or irrigation. Don’t allow water to collect for more than a few days or you’ll have trouble with mosquitoes.
  • Porous synthetic or woven mulches are available from garden supply companies. White mulch helps reflect the light and also keeps soil cooler. Additionally, a source of light from below the plant confuses insect pests and might cause them to take up residence elsewhere.
  • Use a few stakes instead of one, or a wide trellis, for a tomato plant, tying main stems farther out from the core of the plant. This will get more light onto leaves that otherwise would have been heavily shaded.


Crop Rotation


zucchini with yellow flowers

Zucchini.

If space allows, locate your tomatoes, peppers, potatoes, and eggplants (all members of the nightshade family) where none of them have been grown for the last 3 or 4 years. This crop rotation lessens the likelihood of heavy insect and disease outbreaks from one year to the next. It prevents disease spores and insect larvae from building up in the soil and infecting new foliage.

Tomatoes and other members of the nightshade family (Solanaceae) are affected by certain insects and diseases that generally do not bother other families of vegetables. Cucurbits (zucchini, cucumber, squash) and brassicas (broccoli, kale, cauliflower) have their own problems, as do the other plant families.


Disease Resistance


You’ll notice on seed packets, labels, and in catalog descriptions, a series of capital letters after the cultivar’s name. Those letters are initials for the diseases to which that cultivar is resistant. For example, ‘Big Beef’ tomato has the letters AS, F2, L, N, TMV, and V after its name. They represent the diseases Alternaria stem canker, Fusarium wilt (races 1 and 2), Grey leaf spot, Nematodes (not a disease but a tiny worm), Tobacco mosaic virus, and Verticillium wilt, respectively.

Most hybrids have been bred to withstand some disease pressure. Heirlooms are more susceptible to disease, but the flavor of their fruits is superior to that of many varieties commonly found at garden centers. If you have the space, try growing one or two heirlooms in addition to disease resistant varieties.

(***Update***: In 2019, I grew 2 heirloom tomato plants in large pots, and both succumbed to disease well before the end of the summer. We had an especially wet and humid season, but I knew the odds when I’d bought them. Still, each one produced several dozen fruits before removal.)

Susceptibility to disease varies from one area of the country to another, so you might never see some of the diseases that pop up elsewhere.


red tomatoes


Weather plays an important role, too, and there’s nothing we can do about that. Choosing at least one disease resistant tomato plant is wise.

To a certain degree, we can manage the environment and our gardening practices in ways that discourage insects and diseases. I almost always include an heirloom tomato plant in my garden, knowing that it is more vulnerable to disease, but it’s worth the effort.


Disease Prevention For a Tomato Plant


For gardeners with limited garden space, crop rotation is not an option. In that case, consider mulching your plants with coarse, chunky material, such as pine bark mulch. Having a dry surface under the plants, as opposed to a moist surface that can harbor disease organisms, is another line of defense. Those large chunks will dry faster than the surface of clay soil or shredded hardwood mulch. Several inches of seed-free straw or dry oak leaves also work.

Porous landscape fabric is another barrier you can use. This product is available in both biodegradable and synthetic materials.

Using pine mulch or fabric will help keep dormant spores of soil-borne diseases, deposited from previous crops, from splashing up onto the low-growing foliage, infecting new plants. Always remove diseased foliage to the trash. Spores can, of course, be blown in from elsewhere, but it’s always best to exercise that ounce of prevention when we can.

Yes, problems can crop up. But usually there is enough fresh produce harvested from your own back yard to consider the garden a worthwhile project.


Air Circulation and Suckers

tomato sucker removed

Tomato sucker removed.

Air circulation around each plant is another factor in disease prevention. I plant tomatoes 4 feet apart in the garden and permit only 3 or 4 main stems to develop on each one. Some growers limit the number of stems to just 2 and space the plants closer together.

A tomato plant is a weedy thing, and, left to its own devices, will create a tangled twining mess of stems and leaves. That doesn’t mean it won’t produce fruit. However, controlling the growth improves air circulation, which keeps the foliage healthier.

As tomato plants grow, suckers grow from axillary buds in the angle between the leaf and the stem. Those suckers will grow into more main stems if not limited. Simply snip out the suckers that have been selected for removal.

Tie stems to tall, sturdy stakes to lift tall plants off the ground. Removing suckers and staking a tomato plant increases the air circulation around and through the foliage, prolonging the plant’s life.

When the plants have been established for a few weeks, and they’re growing vigorously, remove the bottom leaves to get more air circulating underneath the plants. I keep about 12″ of the stem leaf-free. Keep the foliage as dry as possible and avoid handling wet plants.


When Disease Strikes


tomato disease septoria?

‘Rutgers’ tomato infected with disease (Septoria?).


Diseased plants will start losing foliage, generally from the bottom up. Leaves become yellow, spotted, puckered, or crispy brown. Widespread disease requires removal of the plants.

If a disease has just been noticed, though, remove to the trash all spotty, blighted leaves with clippers that have been dipped in a 10% bleach solution before going to the next plant. Disease can spread from plant to plant on infected tools and hands.

Spraying the plants with an appropriate remedy might save the plants. Several copper-, bicarbonate-, and microbe-based fungicides are available for organic growers.

Prevent the deadly tobacco mosaic virus from infecting tomatoes and peppers by never smoking near the vegetable garden, and by washing hands thoroughly before working there. Tobacco is related to tomatoes and peppers, and disease spores might be present in the product.

Occasionally we see tomato plants with leaves at the top all twisted and contorted. Sometimes they’re discolored as well. This can result from the application of herbicides, if not on your property, then from a few houses away. The chemical is carried on the breeze, and it takes minute quantities to affect tomatoes. Either cut the plants back to healthy foliage or replace with new transplants. Check also for leafhoppers and aphids inside curled leaves.


Sun Scald


sun scald on peppers

Sun scald on sweet peppers.


On Peppers

Strong sun hitting the fruits on very hot afternoons can cause sun scald. Keeping enough leaf cover will protect the fruits. Patches of sun scald are the parts of the fruit that were perpendicular to the hottest rays of the sun.

Don’t thin pepper plants; they’re especially vulnerable to sun scald. These fruits (photo, above) from a young and sparsely-leaved ‘Lemon Dream’ pepper were not adequately shaded. But the good parts don’t have to go to waste. Simply remove the affected parts.


Tomatoes Exposed To Sun

ingredients for tomato basil salad, cherokee purple tomato

‘Cherokee Purple’ tomatoes and basil.

I prefer 3 or 4 stems on a tomato plant instead of 2; there are more leaves to lessen the sun’s intensity without entirely shading the fruits.

The flavor is more intense in some varieties (such as ‘Cherokee Purple’, ‘Black Krim’, and other “black” tomatoes) if the fruits are exposed to some direct sunlight. Morning sun is more gentle than hot afternoon sun. But on hot days, exposed tomatoes can get sun scald. Pick those tomatoes, remove the mushy parts affected by sun scald, and eat them right away, before they start rotting.

Sunlight gives fruits a richer color, increasing levels of anthocyanins. What are they? Anthocyanins, the blue and red pigments in fruits and vegetables, are powerful antioxidants, which help fight inflammation and play an important part in cancer prevention.

When you consider how much effort is required to support large amounts of ripening fruit on a mature tomato plant, it seems rational that 3 or 4 leafy stems will be able to produce a lot more “food” (carbohydrates from photosynthesis) for the developing fruits. This will help the fruits achieve full size and, more importantly, full flavor.


Return to the top


Headings

Page 1: It’s Time To Plant Tomatoes!, How Much Sun For a Tomato Plant? (Options), More Light For a Tomato Plant, Crop Rotation, Disease Resistance, Disease Prevention For a Tomato Plant (Air Circulation and Suckers, When Disease Strikes), and Sun Scald (On Peppers, Tomatoes Exposed To Sun)

Page 2: Time to Plant!, Plant Tomatoes Deeper, Trichomes, Stake or Cage a Tomato Plant?, And Water, and Deer

Soil Prep 101 For Your Vegetable Garden


cool season vegetables

Cool season vegetables and greens.


Finding the Perfect Spot for Your Vegetable Garden


For the purpose of this post, I’ll assume that your vegetable garden will be flush with the surrounding lawn, rather than in a raised bed. However, sound horticultural principles apply to either method. Locate the garden where it gets lots of direct sunlight, and avoid low areas that collect water after heavy rain. Place it close to a source of water.

Now that you’ve found the perfect spot for your vegetable garden, you’re ready for Soil Prep 101. The types of crops you plant in any season are weather-dependent, so make sure weather patterns in your location suit the peppers, basil, kale, or cauliflower.

Although this article concentrates on preparing beds for vegetable gardens, the principles apply to other plants as well, including new shrub borders and flower gardens for pollinators. Page 2 of this article has tips for improving the soil’s tilth, or workability, for most garden projects.

Prerequisites for this class: “How to Prepare the Soil: An Introduction” and “Yes, But Is It Sunny In the Winter?”


Swiss chard in a raised vegetable garden

Swiss chard in a raised bed.


Depending on your level of affinity for precise measurement, you can use either a measuring tape or simple paces to mark the dimensions of your garden. Gardeners who want to indulge in culinary experimentation by growing a wide variety of crops might regret not having made the vegetable garden large enough from the outset. Consider the possibility of expansion in the future.


How Much Sun Does the Vegetable Garden Need?


There is no substitute for sunlight. Without at least 6 hours of direct sun, the results will be disappointing. Anything less than that will reduce and delay the harvest.

Indirect, dappled, and filtered light don’t really count. In fact, during most of the growing season, fruiting plants perform so much better with 7 or 8 hours of sun, minimum! There are other types of crops that can be grown in less than full sun, including leafy greens (lettuce, arugula) and a few herbs (cilantro, parsley).


Layout


Tomato.

Someone out there is asking, “Do I run the rows (the long axes) east-to-west or south-to-north?” Good question! If your plans include growing several tomato plants and maybe some pole beans on a trellis, and you prefer one long plot that is accessible from both sides, I recommend east-to-west.

Long-term plants (tomatoes, peppers, etc.) will continue to get good sunlight all season. Spaced properly, they won’t cast as much shade on each other, especially as fall approaches and the sun sinks lower in the sky. But, if your garden receives sun all day, it won’t make much difference to main season crops.

Cool season crops, grown from fall through early spring, however, will get more sun when planted east-to-west. They’ll face the sun all day even though the days are short.

Taller plants should be planted on the north side of any plot (northern hemisphere), so they don’t shade smaller plants nearby. Some varieties of staked indeterminate tomatoes can grow 8′ tall!


lettuce basket, a portable vegetable garden

Lettuce growing in a basket.


On properties where spatial considerations are limited, do what you can to provide enough direct sun to those crops you can’t live without. Your crops might not be lined up in neat rows, but rather planted individually in a sunny corner over here and another by the back gate. Doesn’t matter. Do what works for you!

Container-grown crops, such as this lettuce basket (photo, above), can be moved around as conditions change.


Multiple Vegetable Garden Beds


With ample space, a series of garden beds can be laid out in a grid. When deciding where the plants will go, always keep in mind that you want to prevent tall plants from shading short plants, with few exceptions. Using straight pathways makes maneuvering the wheelbarrow and equipment easier.

Crops that prefer cooler, part-shade conditions as the weather warms can be planted between the taller plants or in the partial shade they cast. Those include late spring lettuces, arugula, cilantro, and spinach.

savoy cabbage

Savoy cabbage.

Having several plots allows for crop rotation, planting one family of plants in Plot A this year, in Plot B next year, and so on. This helps prevent the soil from being severely depleted of certain micronutrients and from allowing populations of insects and diseases to build up.

The nightshade family (Solanaceae: tomato, pepper, eggplant, potato), the cucurbits (Cucurbitaceae: cucumber, summer squash, zucchini, melon, pumpkin), and the brassicas (Brassicaceae: broccoli, cabbage, cauliflower, kale, Brussels sprouts) are groups of plants that benefit from being rotated every 4 or more years.

To clarify, one member of a family (tomato, for example) should not be planted where any member of that family (tomato, pepper, eggplant, potato) has grown in the past few years.

This is a good reason to keep a record describing where you plant each crop every year, as well as documenting successes and losses. Knowing the family names that crops belong to also helps with crop rotation.


Seed Or Transplant?


antique seed packet

Don’t go overboard if this is your first attempt. You’re not obligated to germinate every pack of seeds you bought. There’s always next season. Most seeds will remain viable for a few years if kept dry and cool.

Starting out with young tomato, pepper, or slow-growing parsley transplants might be more practical than growing them from seed, even though it is more expensive. You’ll find them at garden centers, farmers’ markets, and local hardware stores, and the growers often have good suggestions for cultivation.

If you’re late getting the vegetable garden going, transplants will save you several weeks of growing time. You can always supplement with fast sprouting varieties of seeds, such as those mentioned in the next section.

Starting plants from seed is a welcome challenge to many and is a source of fascination for children—and for adults, too. Don’t laugh, but, for me, it’s a thrill when the catalogs start showing up in the mailbox. I would never discourage you from exploring this facet of gardening. And, of course, there are so many excellent varieties available from seed that never show up in retail stores as transplants.


Seedlings For Vegetable Gardens Need Sun

Seedlings of fruiting crops need at least 6-8 hours of direct sunlight for strong growth. Use clean pots, pasteurized seed starting mix, and a waterproof tray. Provide the proper temperature for germination.

If you don’t have very sunny windows or a greenhouse, consider starting seeds under shop lights with daylight tubes. I use 4′ long fixtures that hold 2 tubes each. Seedlings growing very close to the tubes—only a few inches away—grow strong stems and roots.

Lettuces, arugula, and other leafy greens tolerate fewer hours of sun, although they appreciate full sun during the cooler months.

Avoid starting seeds too early in the season. This could result in leggy, weak plants that might not perform up to par in the garden.


seedlings

Broccoli ‘Happy Rich’ and Arugula ‘Astro’ seeded into cell packs (late winter, 2022).


Seeding Directly Into the Garden

Some crops grow easily from seed sown directly into the vegetable garden. Peas and beans, for example, and radishes, beets, and carrots are just a few species that can be planted right into prepared ground. Dinosaur kale, mustard spinach, mesclun, leaf lettuce mixes, zucchini, spinach, and cucumbers are more crops that can be directly seeded.

Read all the information on the packet, paying special attention to when to start and how deeply to sow the seeds. Although these crops germinate readily, gardeners must still watch out for pests, both above and below ground, and turns in the weather.


Spacing the Plants


It’s important to calculate how much square footage each of your plants requires, or at least to get a rough idea. On graph paper, map the proposed garden to scale. Use the plants’ spacing recommendations found on the label or the seed packet for the amount of space needed.

With a 1/4″ grid, each square can represent 6″ or 12″ of garden space. The diagram is optional, but it can help in future years when considering crop rotation.

It’s better to have more than enough room rather than not enough; plants don’t respond well to crowding. The seemingly large gaps between the major crops can be interplanted with “ephemerals”—those plants that grow quickly and are harvested before the majors achieve full size. Examples include radishes and lettuce between tomato plants, or green onions and beets between autumn-grown Brussels sprouts.


If It Looks Like This…


dry cracked soil

Clay soil shrinks as it dries, creating surface cracking.

Soil that dries as hard as a brick is impossible to work with. You can thoroughly water the area the day before or start digging a day or two after a good rain. Avoid digging or walking in the garden when the soil is wet. This compresses the soil, squeezing out tiny channels of air space that are critical for healthy root growth.

Sandy soil that drains too fast should be amended with copious amounts of organic matter. Bagged topsoil is also available, but quality varies widely. The tiny clay particles in clay loam help hold water and nutrients in the soil.

In a large vegetable garden, plan for pathways every 4′ or 5′, and restrict foot traffic to those areas. Use pavers, flagstones, pine bark, or even that old pile of bricks for the pathways. You can get very creative with stonework, and your garden can be the neighborhood show-stopper, but don’t lay out the stones until the end of the soil prep process.

Let’s begin! Please turn the page…


Return to the top

Headings

Page 1: Finding the Perfect Spot for Your Vegetable Garden, How Much Sun Does the Vegetable Garden Need?, Layout, Multiple Vegetable Garden Beds, Seed Or Transplant? (Seedlings For Vegetable Gardens Need Sun, Seeding Directly Into the Garden), Spacing the Plants, and If It Looks Like This…

Page 2: Remove Sod, Tilth, Soil Prep (The First Dig: Loosen the Clay, The Second Dig: Add Drainage Materials, Organic Matter vs. “Organic”, The Third Dig: Add Organic Matter), Fertilizers, Rake Smooth and Pave, Agricultural Extension and Soil Tests (To Lime Or Not to Lime, and What is pH?)