Page 4
10. Prepare the soil for your transplants.

Take a look at the article, “Soil Prep 101 For Your Vegetable Garden”, for detailed information on getting the soil in great shape before planting.
Most plants will grow okay when planted in average soil. But, for extraordinary plants, start with well-prepared garden soil. Find out what makes the difference for the crops you’re planting, whether it’s adjusting the pH, adding generous portions of aged cow manure or compost, or applying a particular kind of fertilizer. Look through this blog for articles that address your issues.
Start With Good Drainage

High clay content causes cracks when soil dries.
Almost all the gardens I’ve planted started out with heavy clay soil. Clay is quite fertile, but air, water, and roots do not readily penetrate through tightly packed tiny clay particles. It holds a lot of water, but when it dries, it dries like a brick.
Conversely, in times of daily rain, roots suffocate from lack of oxygen and can rot, killing the plant. Avoid working the soil when it’s wet, although it is easier to dig when it’s damp to lightly moist.
Expecting great results will be disappointing when gardening in heavy, sticky clay. Intensively managed edible crops and blooming plants need assistance for bountiful harvests and healthy growth.
Improve drainage by first loosening 10-16″ of the soil throughout the bed. Then incorporate a few to several inches of pine fines (sometimes called soil conditioner) and coarse sand (large-grained angular-edged) or grit in that full depth of loosened soil. These amendments introduce larger air pore spaces through the soil profile, greatly improving drainage. This is the most important step and will set you up for years of pleasant experiences working in the garden.
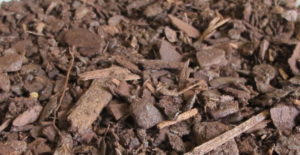
Pine fines.
The better news is that, if done properly the first time, you won’t have to repeat the procedure—at least, not any time soon.
Annual tilling damages the microbial network and beneficial nematodes in the soil. We’re beginning to appreciate the mutually beneficial relationship between plant performance and the millions of species of microbes living in close association with the root system.
Air Pore Space
It’s important to mix these materials into the soil rather than simply layering them. Water doesn’t readily move from one layer to another if the air pore space (the spaces between soil particles) is different between the layers. Instead, layering creates a perched water table in the soggy soil particles above each layer of large-grained material.
Gravity just isn’t powerful enough to pull that excess water into the large air pore space. Capillarity and the cohesive nature of water molecules fight to keep water in the soil—between tiny particles—instead of draining it away.
After mixing in the amendments, the soil should look and feel markedly different from when you started this process. If it still feels like sticky clay and refuses to crumble, incorporate more drainage materials, particularly the pine fines.
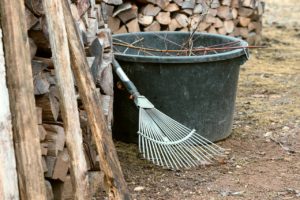
Rake the surface to even out low spots. It doesn’t have to be perfect because we’re not done yet. Avoid walking or pulling machinery over loosened soil to prevent compaction. When working within the garden beds, use a board to distribute your weight. Plan on using paths through the garden and restrict foot traffic there.
Gypsum and Lime
Consider applying gypsum granules once a year for a few years, especially if an impermeable layer of hardpan underlies the subsoil. Gypsum (calcium sulfate) supplies both calcium and sulfur without altering the soil’s pH. This amendment flocculates tiny clay particles into larger clay particles, opening up minute air channels in the soil. Over time, this improves the soil, helping it drain faster.
Lime works in a similar way, but it’s important to know the soil’s pH before adding lime. Both of these materials work best when applied a few months before planting the garden and will seep into the soil with rain or irrigation. If they’re needed, however, now is better than later.
I highly recommend getting a soil test before planting. Find out how to do this from your cooperative extension service. Different areas of the country might have more alkaline soil that requires sulfur to lower the pH, or sandy soil that needs water-holding materials for successful gardening.
Sorry, still not done…
Add Nutrient-Rich Amendments
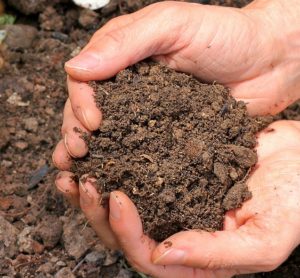
Compost.
Add amendments that contribute organic matter and nutrients to the top layer of soil, where the roots will be growing. Incorporate a couple of inches of compost, aged cow manure, leaf mold, and planting mixes in the top 4-6″ of loosened soil.
Billions of microbes living in a handful of soil break down organic matter into simpler nutrients that can be absorbed by plant roots. These microbes are active in warm soil but dormant in winter.
Nutrients dissolving in the rain or irrigation water will filter down to the plants’ roots. Placing compost or manure deeper in the soil—beyond the reach of the roots—is a waste of valuable material.
You might be wondering about that perched water table between 2 different kinds of soil media (loosened soil, and loosened soil plus organic materials). Good question. The presence of clay particles through the full depth of soil will ensure drainage through the medium. Also, the air pore spaces aren’t that different.
Last fall and over the winter, I buried chopped oak leaves and kitchen refuse into the gardens, mixing them with existing soil. Now, 6 months later, those gardens have copious amounts of rich, mostly decomposed organic matter. When the soil is moist, it is absolutely writhing with happy earthworms! The number of earthworms working that soil is inversely proportional to the guilt I feel when plucking a juicy worm out of the ground for the ~40-year-old Japanese fire-bellied newt. Here he is:
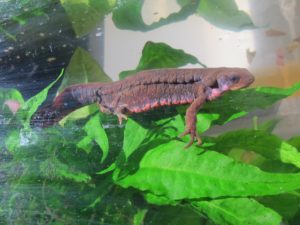
The only survivor of 4 newts purchased before my kids were born…long, long ago.
Bury It
I don’t maintain a compost pile, but instead bury kitchen vegetable scraps in one of the gardens. Microbes, tiny soil-dwelling insects, sowbugs, and earthworms feed on this material, and it disappears within 10 days in warm weather. Excrement left behind by these ground dwellers also enriches the soil, and the worms, of course, open up tunnels throughout the soil profile. Rarely, animals dig up the debris for the egg shells, but they don’t cause much disturbance.
I add other material, such as twigs, dead plants, and old flower stems, to the brush piles. These structures shelter insects and animals from predators, winter weather, and summer storms. Caterpillars and native bees pupate in brush piles and repopulate the property early in the season. This ensures a wide variety of pollinators and readily available food sources for birds, toads, skinks, and praying mantises active at that time.
When adding new plants to the garden, include another dose of organic matter, such as compost or aged manure dug shallowly into the soil. Covering it with soil or mulch prevents the sun’s ultraviolet light from killing beneficial microbes.
11. Try succession planting for maximum yield.
Have you seen food prices skyrocketing? My goodness, the prices go up every time I go to the store, and sometimes the shelves are bare. A productive garden will help defray the high cost of providing healthy meals for you and your family. And the greens and vegetables are available a few steps from the kitchen door.
We can harvest a bounty from a fairly small garden if it’s managed intensively. And that includes planting a crop in the same place where one was just harvested, if there’s enough sunlight. Here’s a bonus: keeping the soil surface covered with a leafy canopy lessens time spent weeding.
Instead of letting the soil lie fallow, have some young seedlings or seeds ready to pop into the ground when space opens up. Add some compost and/or aged cow manure, and those little plants will respond accordingly. Mel Bartholomew’s book, Square Foot Gardening, was one of the first to describe this intensive method of growing vegetables in succession.
Succession planting requires supplemental nutrients, so have your packages of fertilizer ready. Most crops in the ground should be fertilized every 2-6 weeks, depending on the fertilizer of choice and the plants themselves.
Last week in the fenced vegetable garden, I interplanted young tomatoes among the ‘Happy Rich’ mini broccoli, which probably will stop producing cuts next month. Sweet peppers were interplanted among a younger section of ‘Happy Rich’. By late July, these tomatoes and peppers will start producing fruits. Others planted earlier will soon yield fruits…I’m just waiting for them to color up.
In cool weather, I’ll interplant fast-growing head lettuces, radishes, green onions, or arugula between the larger-growing broccoli and cauliflower.
Crop Rotation
Vegetables within a family generally are susceptible to the same pathogens and insects. Using a different plant family to replace the one that was harvested helps prevent a build-up of pathogens or insects in the soil that commonly affect those plants. For example, when the carrots (in the Apiaceae family) have been harvested, plant lettuces (Asteraceae), beans (Fabaceae), or radishes (Brassicaceae) in that area instead of parsnips, parsley, fennel, or another crop of carrots.
It helps to become familiar with the family names of commonly grown crops. Keep this information in a journal, along with seasonal diagrams of vegetable bed rotations.
If possible, avoid planting a member of one family if any member of that same family has grown in that location in the past 3-4 years. Plant tomatoes in a plot where no tomatoes, potatoes, peppers, or eggplants have grown in the past few years. That’s the essence of crop rotation.
Gardeners with several vegetable plots can rotate crops with a few to several years of rotations. Most, though, don’t have that luxury. There’s room for only one garden, and that’s where the tomatoes and peppers have to go every year.
In this case, practice methods that lessen the chance of infection. Number 1 in importance—use disease resistant varieties. Very well-prepared soil is less stressful for plants than trying to grow them in compacted clay or shallow topsoil. In addition, space your crops a little farther apart than is recommended, keep foliage dry, and mulch the garden. Treat diseases right away or remove the plants if a remedy hasn’t worked.
Mulch

Autumn leaves, including oak.
I use dry autumn leaves, bagged and stored over the winter, as mulch in the gardens. Several century-old white oaks supply all the leaves I could ever dream of having. A layer of mulch prevents disease spores in the soil from splashing up into the foliage. It also keeps the soil moist, cooler, and free of weeds.
Look for leaves that don’t mat down when moist. Oak leaves—particularly white oaks—curl, allowing good air circulation near the soil surface. Norway maples, on the other hand, stick together. Shred them first and add small twigs, pine fines, or pine needles to keep them more open. And use them in a thin layer.
12. Stop the pests before they ruin your garden.
All crops can be started directly in the garden, but their tender tissues are susceptible to damage from slugs, snails, and cutworms. A few slugs can wipe out a whole bed of week-old lettuce seedlings overnight. Starting seedlings in pots or cell packs first develops tougher stems and leaves that are less attractive to the pests.
Older plants might be attacked by squash bugs, bean beetles, potato beetles, and white flies, among others. Your agricultural extension agent can help with identification and recommendations.
Find the method that works best for you to prevent hungry pests from gaining access to the seedlings. Here’s a sampling of what you might encounter in your gardens, but is, by no means, a complete list.
Slugs and Snails
For slugs, particularly where there’s a lot of rain or frequent irrigation, try using slug bait (organic Sluggo) or copper tape secured to the side of a raised bed. Copper creates a mild shock to the slugs as they crawl over it, and usually causes them to turn around.
Another option is to lay a board on moist soil near the plants. Slugs and snails will congregate there after feeding through the night. In the morning, use a knife to slice them in half. You can collect many, many offenders this way. Also, look underneath your pots, near the drainage holes, for slugs and snails hiding from the sun.
Other gardeners use diatomaceous earth, but I’ve not had good success using this product. Perhaps it’s because I water frequently. You could sink a bowl of beer in the ground, which might lure slugs to their death.
Larvae of Moths and Butterflies
Bt (Bacillus thuringiensis), a naturally occurring bacterium, kills cutworms in the soil when they come to the surface to feed on sprayed seedlings. It also kills larvae of other moths and butterflies, and nothing else. Perfectly safe to use on edibles. Keep in mind that a few seedlings will be sacrificed until cutworm populations decline. Brand names include Dipel and Thuricide; read the labels.
As squash vines begin blooming, they attract moths that are squash vine borers in their larval stage. This gray and orange moth, rarely seen, lays eggs on older parts of the stem. Upon hatching, the little caterpillar chews a hole through the stem and eats internal tissues. Consequently, the plant collapses in total wilt. After feeding on the Bt-sprayed stem, however, the larvae stop eating and die before they kill the plant. Scout the squash plants (summer and winter squash, zucchini, pumpkins) periodically for eggs on the lower stems, and pick them off. (The solid stems of butternut squash prevent larvae from entering the plant.) Spray stems and petioles with Bt every few days or after rain.
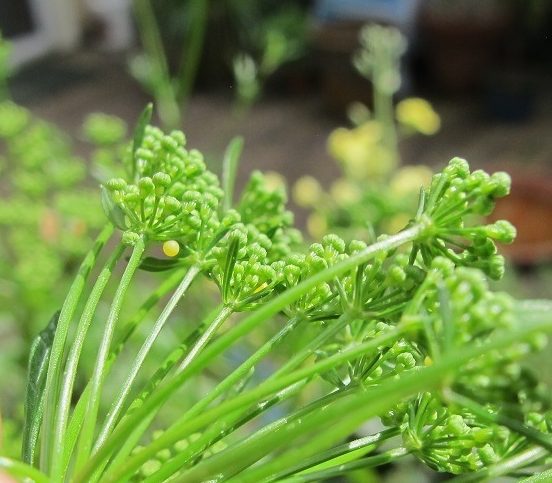
-

- Yellow egg, left of center, on parsley.
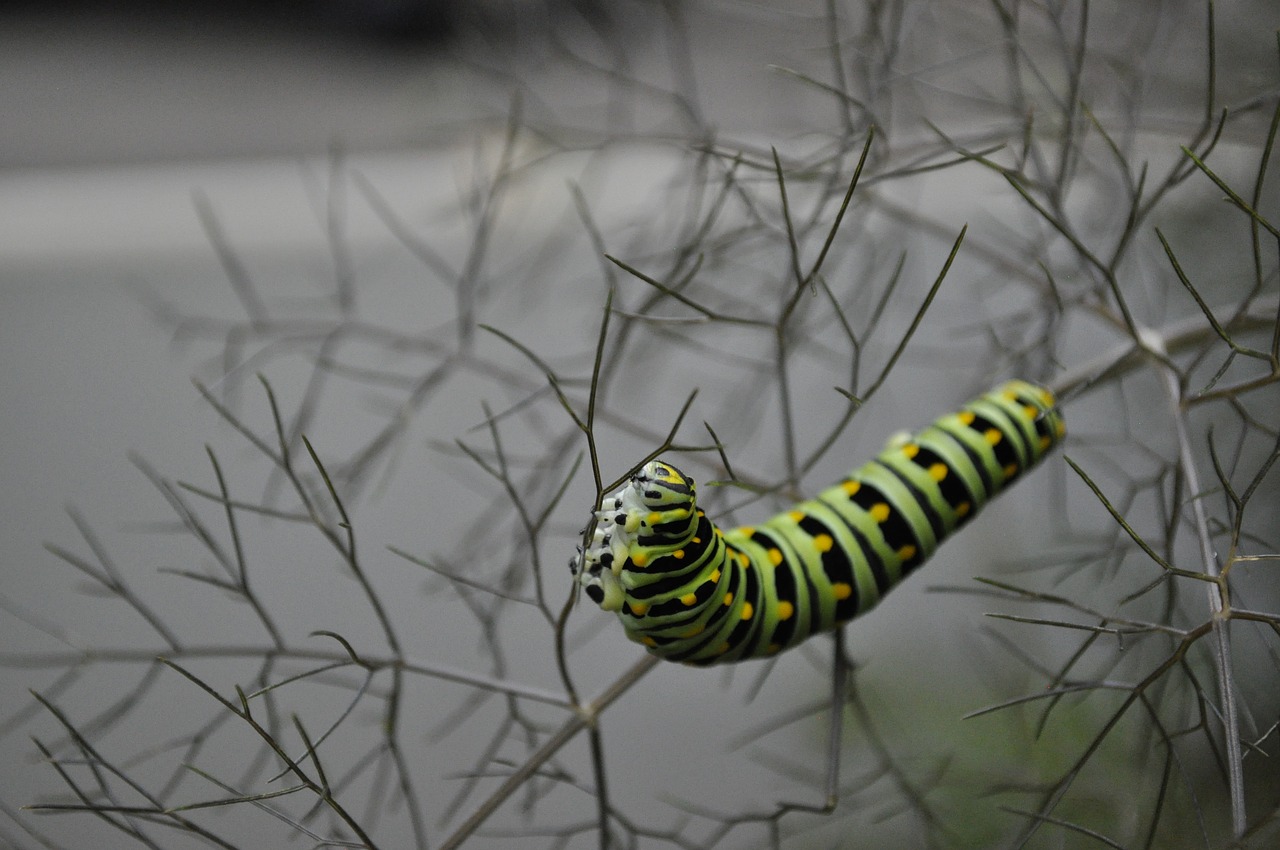
-
- Larva of black swallowtail butterfly on bronze fennel.
-
- Black swallowtail butterfly.
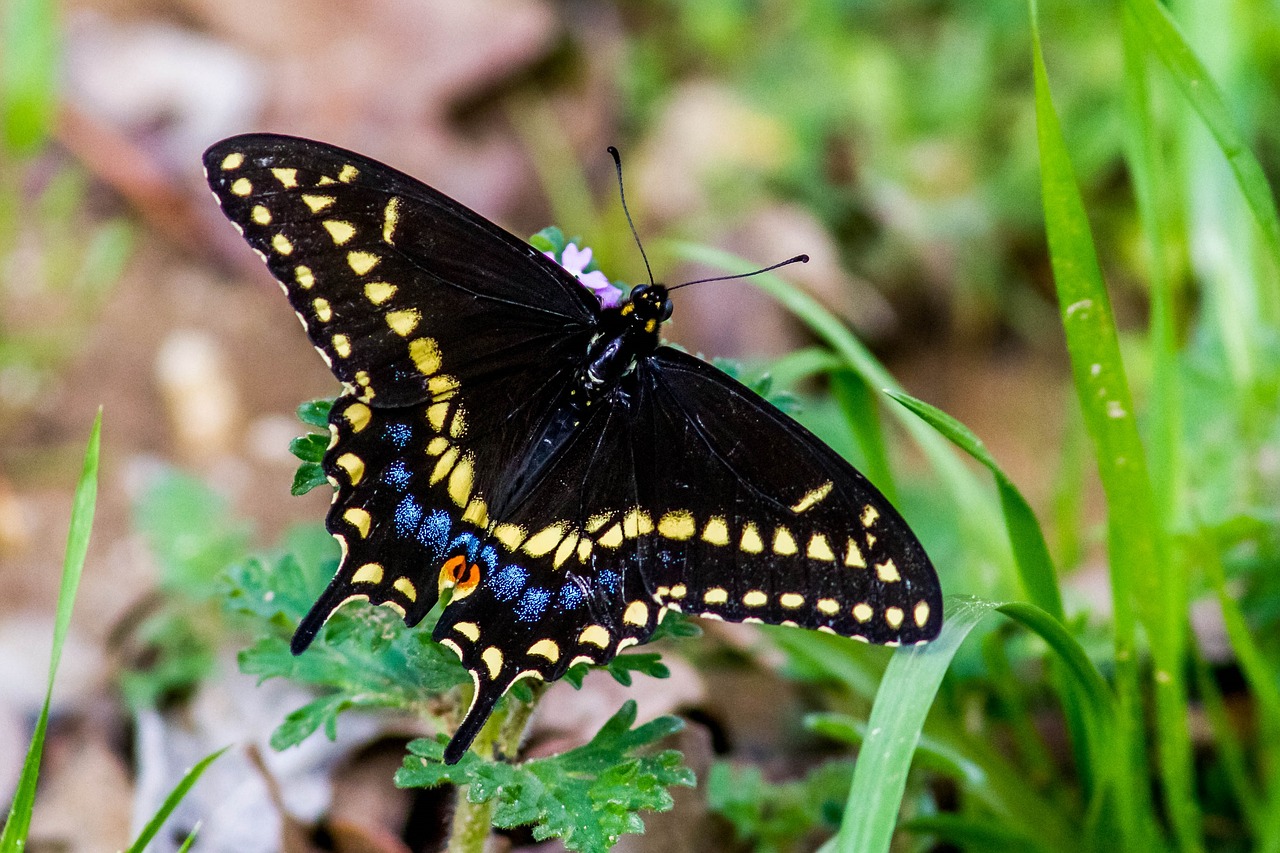
Check dill, parsley, and cilantro for larvae of the black swallowtail butterfly (photo, above). If you enjoy seeing butterflies, plant one or a few bronze fennel plants a suitable distance from the herbs. Transfer the caterpillars to the fennel. The youngest ones look like brown and white bird poop. Bronze fennel grows large enough to accommodate a few hungry caterpillars. This isn’t likely to inflict permanent damage to this perennial. And, because all these herbs are in the Apiaceae family, the black swallowtails feed from any of them.
-
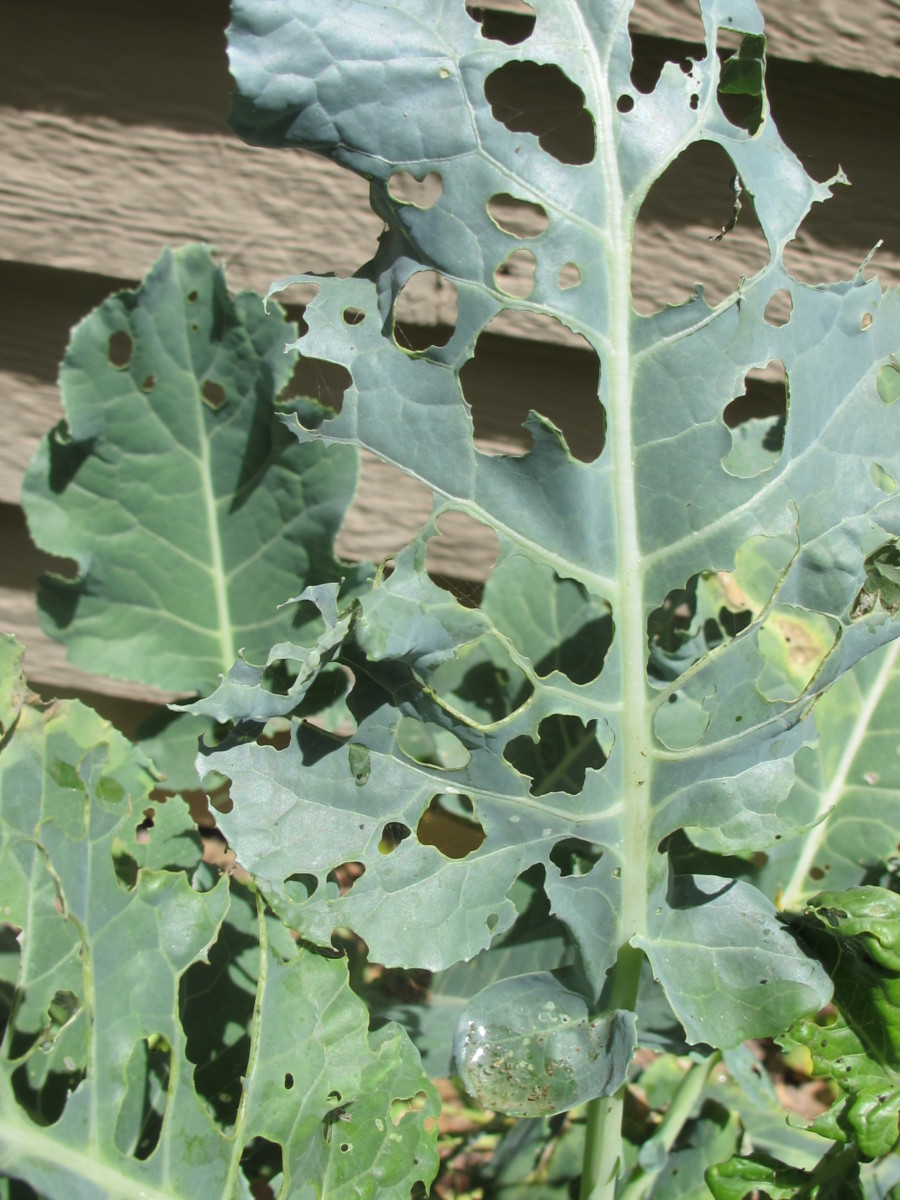
- Cabbage worms on broccoli.
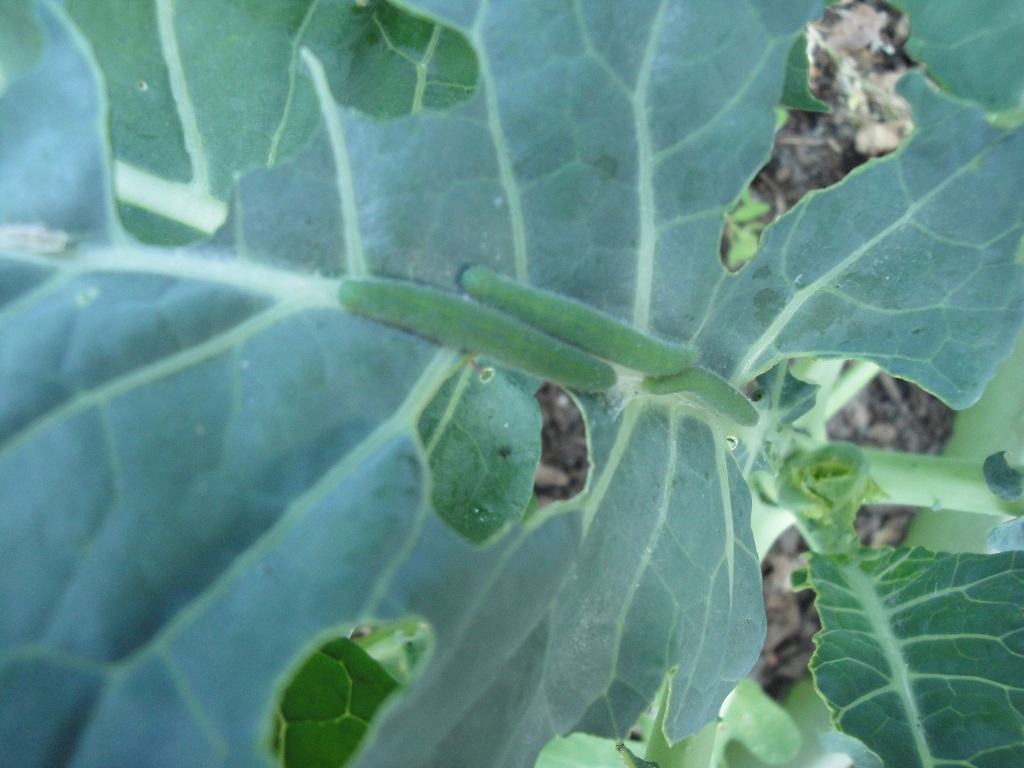
-
- Broccoli leaves eaten by caterpillars.
-
- Cross-striped cabbageworm, becoming more common here, on mustard greens. Expect several generations per season. Look for clusters of white woolly eggs.
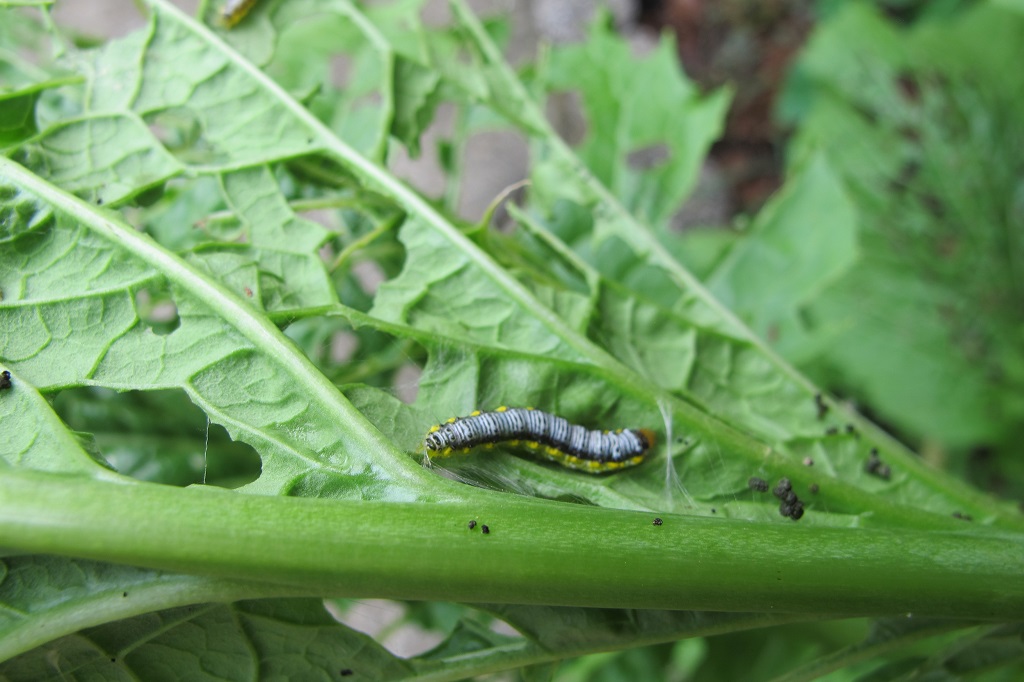
For my favorite group of edibles—the brassicas—spraying Bt on each plant is essential for a decent crop. After heavy rain or on a 5-10-day basis, applying a solution of Bt to the broccoli, cabbage, kale, and the others (photo, above) will save your crops.
As long as I see those cabbage white butterflies flitting about the brassicas in the daytime (most moths fly at night), I’m prepared to do battle with a sprayer bottle of fresh Bt solution. Use a super-fine spray so the droplets don’t bead off the waxy foliage. It helps to add 1-2 drops of dish soap to the sprayer. Spray the bottoms of the leaves also, so rain won’t remove all of the Bt.
Each region has perhaps hundreds of species of caterpillars feeding on various plants in both cultivated and wild areas. Let those little holes in the leaves reassure you that many of the insects causing them will be found by wrens, bluebirds, toads, and lizards…unless the Bt gets to them first. I never spray wholesale throughout the property…just the plants I need for the kitchen or for the farmers’ market.
Aphids
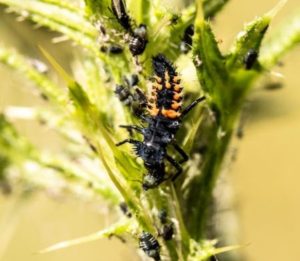
Larval form of ladybug.
These little plant lice come in almost every color. Look for them on the undersides of lettuce leaves and on new growth of many kinds of plants. They insert a stylet into the plant’s phloem tubes and suck out the sugary fluids.
Sometimes, we see a clear sticky residue coating the foliage beneath where they’re feeding. Spores of black sooty mold colonize this nutrient-rich substrate (the aphids’ excrement), turning the surface black.
Ladybug (or ladybird beetle) larvae feed on huge numbers of aphids—many more than the adults. Before ladybugs arrive in high numbers to feed on them, simply give the aphids a strong spray from the hose to dislodge them or use a solution of horticultural oil. Read the label.
Spider Mites and Thrips
Spider mites, tiny spider relatives, thrive in hot, dry weather. You’ll see light-colored pinpoint dots on the leaf surface. Those dots are dead cells that spider mites fed from. To test for the presence of spider mites, hold a sheet of white paper under the plant’s leaves, and tap the stem several times. Minuscule spots crawling over the paper are the mites.
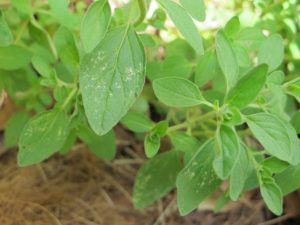
Thrips damage on Italian oregano.
An insect called thrips causes similar damage when it scrapes the surface of the leaf to drink sap oozing from the wound. Scars from thrips damage look like small white or tan scratches on the leaf (photo, above). This insect is a master at finding the tiniest crevices in which to hide.
Spider mites drown easily. When using the hose outside, I splash affected plants, especially the bottoms of the leaves, with water. If that doesn’t work, a solution of horticultural oil smothers insects, spider mites, and their eggs, but those light-colored spots won’t green up again.
Deer and Rabbits

Deer resting among the untouched daffodils.
It’s never fun walking out to the garden only to find…missing plants! These animals, and groundhogs, too, feed on a wide variety of plants, including their favorite hosta, lilies, parsley, and tomatoes. Voles follow mole tunnels and work underground, feeding on roots.
I used 5′ metal posts and deer netting purchased at the local hardware store to temporarily protect plants. Deer won’t leap into a narrow fenced garden with a few obstacles (stakes, trellises) in it. We can’t spray deer repellents on edible plants, so physical barriers are the best options. An 8-8½’ tall permanent fence is the best, but most costly, solution.
Exclude rabbits by pinning the netting to the ground or weighing it down with bricks. If they dig tunnels to reach the plants, create a flange 2′ out from the fence.
I plan to build more permanent beds with protective screening on a framework to keep out animals and large insect pests. Those areas will do double-duty as unheated but productive winter gardens when covered with clear plastic.
Concluding
This is a lot of material to absorb, and thanks for being patient while reading through it. Bookmark this article and refer back to it and the links when needed.
After a few years of practice and trying new plants, gardening will feel more intuitive. Scores of customers through the decades reported to me that they wished they had grown their own seedlings years before they finally did give it a try.
Check out the many topics covered in The Farm In My Yard by clicking a photo in the sidebar (changes seasonally), on a term in the tag cloud, or by entering a term in the search bar. I hope you find some useful information!
As always, happy gardening.
Headings
Page 1: 1. Start with clean materials for seedlings. (Pasteurizing Potting Soil), 2. Grow disease resistant varieties… (…Especially Tomato Seedlings, It’s so hot out there!, A Few More Tomato Tips, Growing Heirloom Seedlings, Basil Downy Mildew, Avoid High Humidity)
Page 2: 3. Timing is important for seedlings. (The Fall Growing Season, Keeping Records, The Cooperative Extension Service, Starting Seedlings Outdoors, Don’t Start Seedlings Too Early, Cool Season Crops, Extending the Growing Season, Seedlings Transplanted Into Bigger Pots, Bunching Onions, The Brassicas, Brassicas In My Garden, Lettuce), 4. Is the temperature suitable for seedlings? (Miniature Incandescent Lights For Warmth, Water Temperature)
Page 3: 5. Start seedlings in small batches. (My Simple Infrastructure), 6. Seedlings need strong light. (Growing Seedlings Under Shop Lights), 7. Cull the weaklings and anomalies. 8. Prevent damping-off disease from killing your seedlings. (Actinovate), 9. Seedlings and plants need fertilizer. (The Elements, Read the Label)
Page 4: 10. Prepare the soil for your transplants. (Start With Good Drainage, Air Pore Space, Gypsum and Lime, Add Nutrient-Rich Amendments, Bury It), 11. Try succession planting for maximum yield. (Crop Rotation, Mulch), 12. Stop the pests before they ruin your garden. (Slugs and Snails, Larvae of Moths and Butterflies, Spider Mites and Thrips, Deer and Rabbits), Concluding