Archives

The Resilience of Plants


resilience of plants

Drimiopsis maculata.


It happens to everyone. We’re busy with the kids’ activities, our jobs, or the weather isn’t convenient. Sometimes we just can’t get to all those chores on the list. These cool drizzly days before the gardening season kicks into gear provide the opportunity to tend some of those plants I’ve neglected for months or, admittedly, for years. The fact that they survived attests to the resilience of plants.

It’s rare when any of them actually die; that’s not a good look for someone who’s in her 50th year of professional horticulture! But, after growing these plants for decades, I know how far they can go before reaching the point of no return. Not the best way to garden, but that’s reality for many of us.

This article describes a few examples of the adaptability of plants.


The Resilience of Plants: Confined Spaces


Drimiopsis Maculata

Drimiopsis maculata is one of the leopard lilies native to Africa. This species (photo, above) and 2 other leopard lilies that I grow (Ledebouria socialis and Drimiopsis kirkii) are perennials where winters don’t approach the freezing point. The specific epithet, maculata, refers to the deep green, sometimes purplish, spots on new spring growth. Foliage grows from bulbs on or just below the soil surface. These 3 species are classified in the Asparagaceae family.

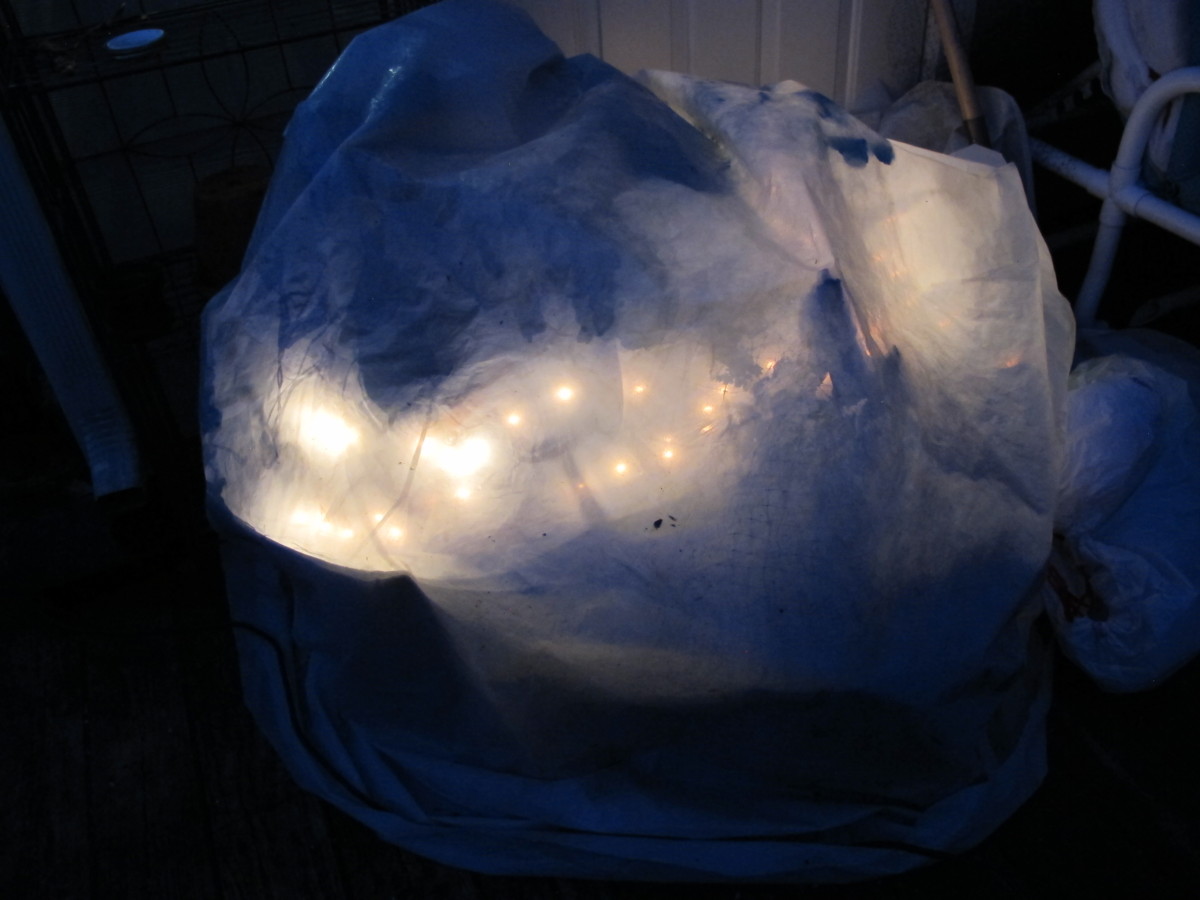
They prefer average to cool temperatures indoors from fall to spring, and often shed some of the previous year’s foliage. Leopard lilies tolerate temperatures down into the 40’s F, so they’re spending the winter on the enclosed porch with only the sun, an additional plastic bubble, and miniature incandescent Christmas lights for warmth. Although it might drop below 20° outside the porch, nighttime temperatures won’t get below 45° under the bubble.

I simply don’t have enough direct sunlight inside (or a greenhouse) for hundreds of small plants. Anticipating that Arctic Blast (down to 0°) on December 24, 2022, I moved all the tender plants indoors the night before. Good thing, because the power went out for a few hours at the coldest time of day, around dawn. No power, no lights, no plants! It’s only when outdoor temperatures drop below the low teens that I move the tropicals indoors.

This clump and a few others stayed in 4½” pots for over a decade, since I last potted them up in Maryland. (I moved to North Carolina in 2013 and to this house in 2021.) They grew in only an inch of soil before I divided them in late summer, 2022. Because most of the organic matter had decomposed over that period of time, the level of the soil surface dropped a few inches lower in the pot.

In late winter or spring, the bulbs sprout shortly after repotting (photo, below). Normally, I repot plants in spring to mid-summer, but this species is amenable to transplanting at other times, given good growing conditions.
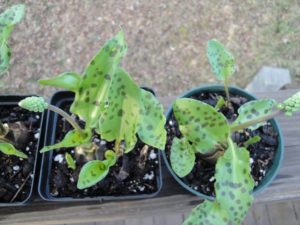
 

resilience of plants, drimiopsis after dividing

New growth and flowers on Drimiopsis.


Classification Confusion

The lily family and related families include many species that demonstrate the resilience of plants. These are some of the toughest plants for problem spots in the garden. I also brought from Maryland several hostas (Asparagaceae family) that had stayed in 4½” pots for over a decade. They leafed out nicely every spring, but never attained a good size until after I’d planted them at this rural North Carolina property in the autumn of 2021.

Cousins of drimiopsis that tolerate some neglect include ponytail palm (Beaucarnea recurvata), daylilies (Hemerocallis spp.), liriope, grape hyacinth (Muscari spp.), agave, and asparagus fern.

The huge lily family (Liliaceae) has undergone adjustments over recent decades. Genera of the original Liliaceae family have been redistributed among 10 families, all of which remain members of the same order, Liliales. The new taxonomy is based on modern studies of molecular biology (genetics) rather than on the number of tepals and the placement of the ovary in the flowers (physical characteristics). Liliaceae hasn’t been entirely disbanded, according to the APG, the Angiosperm Phylogeny Group; fifteen genera are still classified in the Liliaceae family.

Binomial Nomenclature

Swedish botanist, physician, and taxonomist Carl Linnaeus (1707-1778), later Carl von Linné, categorized thousands of plant species in his 2-volume 1753 work, Species Plantarum. Incorporating some of the discoveries of Georg Eberhard Rumphius (German-born botanist) from the 1600’s, Species Plantarum is considered the first attempt at organizing plant species according to a hierarchical system of binomial nomenclature.

Briefly, binomial nomenclature is a system of identifying organisms by assigning them 2 names: a genus and a specific epithet. Together, the 2 terms represent a species. For example, Liriope muscari ‘Royal Purple’ is the scientific or botanical name for a certain variety of the species. Lilyturf is the common name that also can refer to other species of liriope and Ophiopogon. The genus is always capitalized, while the specific epithet almost always begins with a lower-case letter. The species is italicized, but the variety (‘Royal Purple’) is not.

Everywhere around the world, gardeners and scientists use the same Latinized scientific name to identify a particular plant, whereas its common name might refer to several different unrelated species. The genus name is often used as a common name, as in liriope, hosta, and drimiopsis, as long as the reference is clear.

The taxonomical hierarchy after species proceeds to family, order, class, phylum, and kingdom. Genetic similarities and differences determine whether 2 plants are related closely enough to group them in the same genus or separately. The closer 2 species appear on the phylogenetic tree, the more likely they’re able to interbreed.

With modern genetic research, taxonomists have reworked several other plant families, including Lamiaceae (many of the herbs we use daily) and Asteraceae (the composites, perhaps the largest family of plants).


Swiss Chard
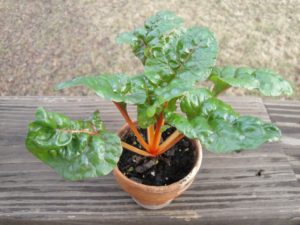
 

resilience of plants, Swiss chard in 2" pot

Swiss chard ‘Bright Lights’.


Here’s a little cutie that sits on the kitchen windowsill, right behind the sink. This Swiss chard ‘Bright Lights’ gets several hours of direct sunlight in the morning and early afternoon, and bright indirect light the rest of the day. Chilly nighttime temperatures don’t bother it. It found a temporary home in the nearest empty pot when I thinned it from a cluster of vegetable seedlings. And there it stayed.

What makes this plant special is the fact that I potted it up in March of 2022! And it has been in its 2¼” clay pot all this time! The other seedlings planted last spring grew to their normal 18″ height. This one stands a diminutive 3″ tall.

I’m not keeping it for the purpose of harvesting leaves; there’s not much to pick, after all. It looks perfectly healthy, as long as it gets watered every 1-3 days, depending on temperature. Every 3 weeks, I add a tablespoon of dilute fertilizer, such as Sea-Plus or fish emulsion—just enough to keep it in good color, but no more than that.

I’m curious to see how long this orange-stemmed miniaturized plant will last. Short-season (spinach, lettuce) or fast-growing (tomato) plants would not last long in such tiny quarters. Swiss chard is a foliage plant for close to a year before it flowers, so it has tolerated these conditions. Now and then, a leaf turns yellow and is pinched off, but new foliage continues to grow. (***Update***: still going strong in late June 2023.)


Agave
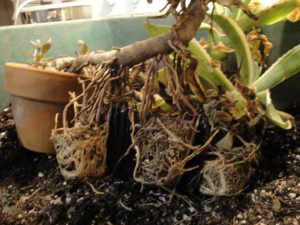
 

resilience in plants, agave


Another cousin of the lily family and a desert dweller, agave (in the Agavaceae family) is a very forgiving plant. I brought 2 varieties from Maryland. They slowly grew new leaves and strong stems with adventitious roots. Although confined in deteriorating 9-cell market packs for a long, long time (~15 years), they rooted into anything near them that stayed still for a year. In the photo, above, the last of the agaves rooted into a nearby clay pot and unoccupied cells of the (removed) market pack. The resilience of plants once again has been demonstrated by this plant’s will to survive.

I buried most of the long stem into a clay pot with barely damp potting soil and no additional water. I’ll water this one very sparingly until it shows signs of new growth.

Succulents and other plants native to dry, harsh climates are masters of survival. They store water in stems, roots, and swollen leaves protected by a thick, waxy epidermis. Species needing constant moisture would not have endured this neglect.


The Old Orchid
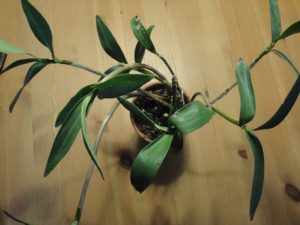
 

resilience of plants, mini orchid in 3" pot for 45 years

Dendrobium kingianum.


When I lived in Morgantown, West Virginia in the 1970’s, a friend and I drove out to The Glasshouse Works, over the border in Ohio. This nursery carried a dazzling assortment of plant species and varieties.

One of my purchases was a small orchid called Dendrobium kingianum. After returning home, I planted it in a 3″ clay pot. Every few years, I refresh the medium, using pine fines, long-fibered sphagnum moss, perlite, and a bit of potting soil.

It rarely blooms, and I propagate it when rooted plantlets form on the stems. An aerial plantlet is called a keiki, Hawaiian for “the little one”. It has been over 45 years now, and the orchid still resides in that 3″ pot.


Bonsai

 

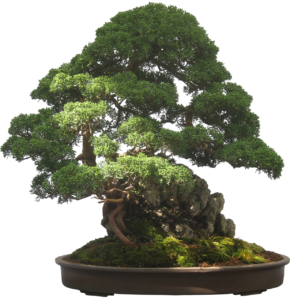
Bonsai Plant Pot Tree Leaves - 20706085 / Pixabay


Bonsai are the ultimate in meticulous care, incredible beauty, and sometimes astonishing age. Many large botanical gardens have collections that truly are worth visiting. Specimens can be several hundred years old and grow in pots only a couple of inches deep. Or they might be trained on a carefully chosen slab of rock.

Plants trained as bonsai usually are woody perennials, either deciduous or evergreen shrubs and trees. Successful bonsai require very specific care in trimming, root pruning, watering, and fertilizing according to seasonal cycles. Most important is the degree of artistry that contributes to a credible bonsai, one that expresses the appearance of an exquisitely aged specimen.

Bonsai exemplify the resilience of plants, considering the means by which they’re maintained over decades or centuries. Each specimen requires a tailored set of precise horticultural skills to keep it healthy.

(No, that’s not my plant in the photo, but this style of gardening deserves a mention.)


Headings

Page 1: The Resilience of Plants: Confined Spaces (Drimiopsis Maculata, Classification Confusion, Binomial Nomenclature, Swiss Chard, Agave, The Old Orchid, Bonsai)

Page 2: The Resilience of Plants: Opportunity (A Plant In a Strange Place, Young Lavender, Another Surprise Seedling), The Resilience of Plants: Recovery (Cryptanthus, Propagating Bromeliads, The Petunia, Giant Redwoods Define the Resilience of Plants, Wildfires)
Return to the top

Seedlings For Your Garden: 12 Tips


2022


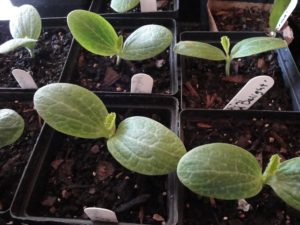
seedlings, zucchini


Starting Seedlings For Your Garden


Busy spring! This lengthy article focuses on starting and caring for seedlings and getting them established in the garden. If I’m not working on the seedlings, I’m working in the gardens, creating new beds and expanding those started last fall and winter. Winter weather was delightfully mild to allow planting right through the cold season. The weeds and I have come to an understanding, and in the next article, I’ll tell you how in “Patches for Pollinators”.

Foremost on the agenda has been starting plants to sell at our local Elkin Farmers’ Market. It’s been a challenge this year, keeping plants in good condition with high heat, heavy humidity, and frequent rainstorms. If I had a climate-controlled greenhouse, there might have been fewer losses. But, for the most part, my company, Wellspring Gardens, is producing more seedlings than I can sell at the market.

Some of that overproduction is destined for the vegetable gardens. It will yield small harvests of produce to sell at the market in addition to what’s needed in the kitchen. This is new territory for me, adding produce to the plants offered at the farmers’ market.

I might even consider canning, which I’ve never done…but let’s not get ahead of ourselves. That would be helpful, though, considering the rapidly rising prices at the grocery store. For that reason alone—the impact of rampant inflation on our wallets—it’s wise to learn how to grow at least a few vegetables.


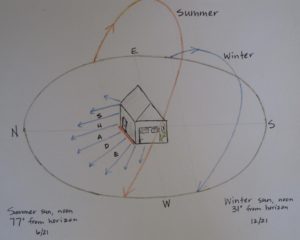
sun's path

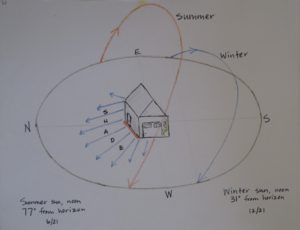
The sun’s path across the sky, Charlotte NC.


Watching how the sun tracks across the sky from month to month reveals good spots for the sun worshipers and areas where leafy greens should thrive in partial sun. This is my first summer in this house. The massive oak trees create shifting shade patterns that cause me to periodically rethink the plans.

So, let’s begin!


12 Tips For Starting Seeds


1. Start with clean materials for seedlings.


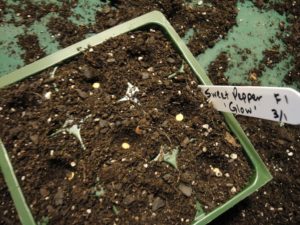
pepper 'Glow' seeds and cell pack

Sweet pepper ‘Glow’, started in 9-cell packs.


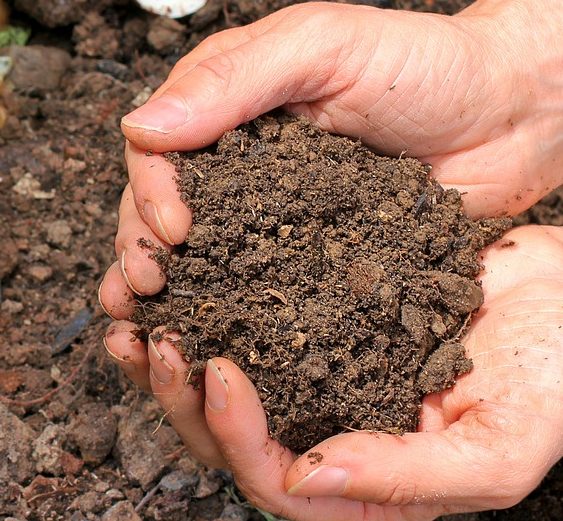
This calls for packaged seedling mix or fine-grained potting soil. Don’t use “dirt” from the garden, with its pathogens, insects, weed seeds, and worms that disrupt soil structure around tiny roots. In addition to the unknowns lurking in garden soil, its high clay content causes drainage issues in containers.

Soil used previously for potted plants is not a good medium for your seedlings. It’s often depleted of nutrients, might contain pathogens, and the organic matter has partially decomposed. If it’s only one season old, it’s probably safe for potted annuals, when mixed with fresh potting soil, or incorporated into the backfill for that new sourwood tree. Or simply throw it under the shrubs or into the compost pile.

Because seedlings are susceptible to soil-borne diseases, play it safe and start with pasteurized bagged seedling mix or potting soil. This, however, doesn’t guarantee a successful outcome, as many disease spores are air-borne. But we can increase the odds of success by using clean materials.

When reusing cell packs, pots, and flats for seeding, wash them in a 10% bleach solution, and rinse well before proceeding. Don’t smoke around plants, and wash hands thoroughly before working with them. Tobacco and other plants in the nightshade family (Solanaceae, including tomato, pepper, eggplant, and potato) can fall prey to the same disease organisms. Spores can transfer from tobacco products to your hands to the plants.


Pasteurizing Potting Soil

For bagged soil that’s questionable, you can pasteurize it in the oven. Don’t heat soil that contains timed release fertilizers. Use an oven-safe covered pot or baking dish, wet the soil, and heat the oven to 200°F. When the soil registers 140° on a meat thermometer, lower the oven temperature and maintain soil at that temperature for 30 minutes. This kills most pathogens. Wait for it to dry somewhat and to cool thoroughly before using. Various websites recommend different temperature levels from 140° to 300°. At the high end, beneficial microbes are killed off as well.

Let it cool down outdoors. Considering the pervasive “earthy” odor coming from hot soil, you might prefer buying a new bag of seedling mix or accept a small risk with the open bag in the garage.

Another method of pasteurizing (not sterilizing) soil is to place a heat-resistant container of soil in a black plastic bag. Place the bag in a sunny place outdoors on a warm day, and let the sun do the work for you. This is called solarization, and can raise the temperature inside the bag to 140-160°F. To prevent damage to the beneficial microbes, take the temperature, and maintain it at 140° for 30 minutes, opening the bag a bit to prevent overheating.

Most bagged potting soils and seedling mixes already have been heat-treated to eliminate pests. Close the bag securely and store in a cool dark place. The last and only time I pasteurized soil was nearly 50 years ago because that’s what the experts recommended.


2. Grow disease resistant varieties…


While fungicide and bactericide formulations—both organic and conventional—are available, I’d rather grow disease resistant varieties and not rely on spraying. Keep in mind that resistance is not 100% effective, particularly when plants are exposed to stressful weather or cultural conditions.

Certain varieties are more flavorful than others, but all well-grown fruits and vegetables from your own garden taste better than those purchased from grocery stores. Picked when vine-ripened perfect, anything coming from the garden will be superior to what’s found elsewhere except, perhaps, at farmers’ markets and farm stands. Freshly picked produce also has the highest nutrient content.

Digging in the garden is great exercise; proceed slowly at first. Working outside in nature feels good, and self-sufficiency is never amiss. A few steps from the back door gathering a green onion, spinach, dinosaur kale, and a little ripe sweet pepper for the veggie omelet is more rewarding than I can describe. You’ll see!

Those are just a few of the many benefits of growing our own vegetables. Using disease resistant varieties, if available, makes the job so much easier. Many new gardeners gave up after having suffered the disappointment of losing an entire crop to early blight or bacterial leaf spot. And we also have to deal with deer, rabbits, and insects!

Although this article concentrates primarily on edibles, flowering plants also have their own set of disease organisms. Again, look for resistant varieties, grow them in conditions that don’t favor infection, and look for remedies at the garden center.


…Especially Tomato Seedlings

tomato disease septoria?

Disease beginning on ‘Rutgers’ tomato.

Tomatoes and peppers, two of the most popular crops for home vegetable gardens, are vulnerable to many diseases. They’re caused by fungal, bacterial, or viral pathogens. In some areas, nematodes also can be a problem. Usually, we can harvest some fruits before disease claims them, but resistant plants last longer in the garden. Plants infected with viruses should be removed and destroyed. For fungal and bacterial pathogens, products at garden centers will help. Always read the labels.

Tomato diseases include Alternaria stem canker, early blight, late blight (Phytophthora; very few varieties are resistant to this one), Fusarium wilt, grey leaf spot, leaf mold, tobacco mosaic virus, tomato mosaic virus, tomato spotted wilt virus, and Verticillium wilt. Catalog listings use initials to indicate disease resistance. For tomatoes, AS, EB, LB, F, GLS, LM, TMV, ToMV, TSWV, and V, respectively, represent those diseases.

Tomatoes are weedy plants and normally produce good crops, despite many organisms that target them. Peppers are susceptible to several races of bacterial leaf spot, and basil to basil downy mildew. Some zinnias are plagued by powdery mildew. Weather conditions, such as high humidity and frequent rain, exacerbate these disease problems.

Most hybrid (or “F1”) tomatoes have some resistance to one or more pathogens, but not to all of them. ‘Big Beef Plus’ is resistant to a wide variety of diseases. ‘Damsel’ and ‘Defiant PhR’ are resistant to late blight. Hybrid seeds carry a higher price than open pollinated varieties due to the cost of research that developed them and the extra steps needed to produce hybrid seeds each year.

It’s so hot out there!


shading tomato flowers


If you live in a hot climate, look for tomato varieties that have been bred to produce better at high temperatures. The pollen in tomatoes and peppers, and others, can die at high temperatures. While these plants are comfortable at 65-80°F, pollen dies above 88°, 90°, or 92°, depending on the cultivar. No pollination = no fruits! A reference to “heat” or to the “south” in the plant’s variety name indicates its higher tolerance for heat.

Researchers are investigating thermo-tolerant genetics in wild tomato species (Solanum pimpinellifolium) and incorporating them in tomato breeding programs.

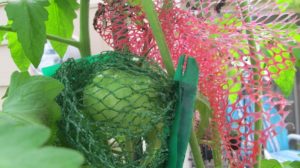
One trick to preserve viable pollen is lightly shading the plant in the hot afternoon hours. Attach shade fabric—a black woven mesh—to a support over and on the west side of the tomato or pepper plants. This provides a decrease of up to several degrees in hot climates or temporarily during a heat wave. In the photo, above, mesh bags from the grocery store protect fruits from squirrels and sun scald, and lightly shade new flowers and their pollen from high heat.

The young ‘Estiva’ tomato plants (“estiva” refers to summer), a hybrid bred for heat tolerance and great taste, lost most of their diseased bottom leaves in heavy rains, but those little fruits are still growing! I’ll plant them out this weekend, after the temperatures drop well below the 108° heat index value we have now. Recent weather has been in the record-breaking mid- to high 90’s F, with high humidity. Not my favorite conditions to dig in the garden…so I don’t.  I was not bred for heat tolerance!

***Update***: ‘Estiva’ tomatoes endured this hot summer and produced fruits past the first fall frosts. I covered them on chilly nights to ripen the last of the fruits. These were among the last tomatoes to succumb to the cold, in mid-November. Autumn 2022

A Few More Tomato Tips

Your best defense against tomato disease, in addition to growing disease resistant varieties, includes these tips:

  • Stake them. Tall indeterminate types need a 6-8′ tall stake, taller for some.
  • Space them farther apart, at least 3½-4′.
  • Thin the vines to 3 or 4 main stems by removing excess suckers.
  • Remove leaves on the bottom 12″ of the plants after they’ve become established.
  • Locate them where a breeze blows through the garden. These first 5 tips address increasing air circulation around and through the tomato plants.
  • Give them lots of direct sun—a minimum of 7 or 8 hours. The more sun they receive, the shorter the window of opportunity for pathogens to germinate on damp leaf surfaces.
  • Mulch the soil under the plants to prevent disease spores lying dormant in the soil from splashing onto and infecting the foliage. More on Page 4.
  • Water in the morning to early afternoon so all foliage is dry going into the night. Try to keep the foliage dry at all times and avoid handling wet foliage.
  • Water established plants heavily (1½”/week) when needed, but avoid giving little sips every day. Young seedlings need more frequent watering until their root systems expand.
  • Clip off leaves that show early symptoms (yellowing, spotting), and dip your pruners in alcohol when moving from plant to plant.
  • Don’t smoke near the garden, and wash hands thoroughly before working with plants.
  • Rotate your crops. Don’t plant a member of the Solanaceae family where any members have grown in the past 3-4 years. There’s more about crop rotation on Page 4.

All plants grown with good soil preparation, good air circulation, proper watering techniques, adequate sun, and appropriate fertilization are less stressed. Less stress equates to lower infection rates.

Growing Heirloom Seedlings


Heirloom tomatoes are always in demand because of their exceptionally good flavor. Heirlooms are open pollinated, which means gardeners can save seeds from fully ripened fruits each year for the next season’s garden. Because they’re not F1 hybrids but have been breeding true, for the most part, for many decades, heirlooms retain their traits from one generation to the next.

These varieties, however, don’t have much built-in disease resistance. Nevertheless, I’m growing a few heirlooms, and spacing them 4′ apart for improved air circulation. We’ll see what happens.

Commercially grown tomatoes must be able to survive long distance transportation and handling without damage. They’re picked early, when green or first showing color. Varieties of these tomatoes have skins that normally are tougher.

Heirloom tomatoes have more desirable thinner skins and, therefore, travel poorly. So, you won’t see them in grocery stores unless those stores buy from local farms. Heirloom tomatoes from the grocery store might cost $5.00/lb. or more! So, yes, it is worth growing a couple of heirloom tomato plants in our gardens.

A few prolonged and heavy rainy periods this spring almost wiped out certain tomato varieties, namely ‘Carmello’, ‘Brandywine’, and ‘German Johnson’. I still have a few that show less damage than others. ‘Black Krim’ and ‘Cherokee Purple’ are doing fairly well, although they are heirlooms. Most of the remaining plants will be set in the garden. There’s usually a breeze blowing through the property, and by spacing them appropriately, I should get plenty of fruits.


Basil Downy Mildew


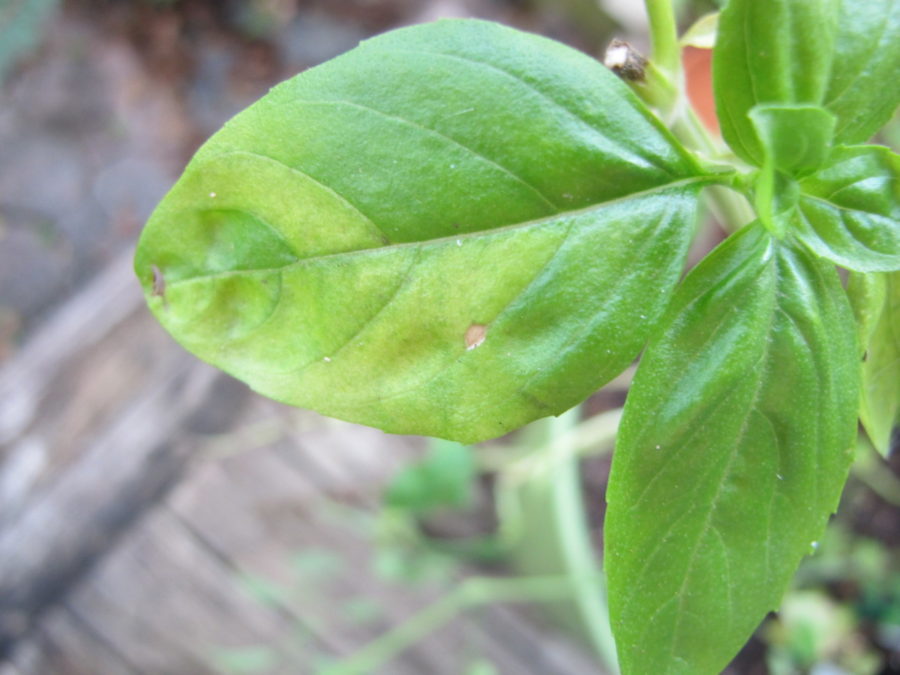
basil downy mildew

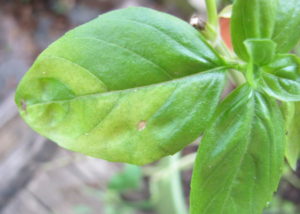
First symptom of BDM: yellow blotches between the main veins.


Although this dreaded disease targets only basil, it hasn’t appeared yet this year. But I’m prepared.

Last year, I grew ‘Rutgers Obsession DMR’ (DMR = Downy Mildew Resistant), an acceptable substitute for our beloved ‘Genovese’ and other susceptible sweet basils. Last year’s ‘Obsession’ did not develop any basil downy mildew (BDM)—not one speck—although wet and humid weather presented a worthy challenge. Other basil varieties in the ground or in pots succumbed to the disease within a week of infection…even young seedlings.

This year, I’m growing ‘Rutgers Obsession DMR’ and also ‘Rutgers Devotion DMR’ outside all summer. In addition, I’m seeding the old favorites, including ‘Genovese’, ‘Italian Large Leaf’, Thai basil ‘Siam Queen’, ‘Marseillais Dwarf’, and ‘Tuscany’, a lettuce-leaf basil. A few non-resistant basil plants will come indoors at night when warranted, as described below. But I’ll stop seeding susceptible varieties, except for a few pots, and concentrate on the resistant ones for the farmers’ market if the disease appears in the neighborhood.

Several other BDM resistant varieties can be purchased as seeds or as started plants.

Avoid High Humidity

basil seedlings in clay pot

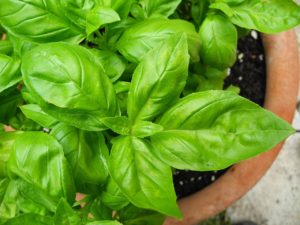
Healthy sweet basil, in a pot.

If you want to grow your favorite basil varieties that are not resistant to BDM, there is a way to prevent a total loss.

BDM spores move up from the south on the breeze or on infected plants shipped into the area. The spores don’t overwinter in cold climates. If spores land on a susceptible variety, they need a relative humidity above 80-85% for a couple of hours in order to germinate.

Even during pleasant weather, the relative humidity can reach 90% or higher in the 2-3 hours around dawn. That’s when the temperature is usually the coolest and, therefore, the relative humidity is the highest.

When plants show early symptoms of BDM, remove the affected leaves. Take potted basil plants indoors for the night, every night. Indoor conditions never reach those high humidity levels, so you can still grow your preferred basil varieties successfully with a little effort. Remember to place the plants back outdoors after the sun has been up for a couple of hours.

Follow this regimen during rainy weather, although the plants might need to spend a day or two inside. Find the brightest spot to keep them during their temporary stay indoors. If possible, provide some artificial light. Unless it’s wilting, avoid watering basil indoors. Less sunlight means the plant won’t be photosynthesizing optimally or using much water, and wet soil can initiate root rot.


Headings

Page 1: 1. Start with clean materials for seedlings. (Pasteurizing Potting Soil), 2. Grow disease resistant varieties… (…Especially Tomato Seedlings, It’s so hot out there!, A Few More Tomato Tips, Growing Heirloom Seedlings, Basil Downy Mildew, Avoid High Humidity)

Page 2: 3. Timing is important for seedlings. (The Fall Growing Season, Keeping Records, The Cooperative Extension Service, Starting Seedlings Outdoors, Don’t Start Seedlings Too Early, Cool Season Crops, Extending the Growing Season, Seedlings Transplanted Into Bigger Pots, Bunching Onions, The Brassicas, Brassicas In My Garden, Lettuce), 4. Is the temperature suitable for seedlings? (Miniature Incandescent Lights For Warmth, Water Temperature)

Page 3: 5. Start seedlings in small batches. (My Simple Infrastructure), 6. Seedlings need strong light. (Growing Seedlings Under Shop Lights), 7. Cull the weaklings and anomalies. 8. Prevent damping-off disease from killing your seedlings. (Actinovate), 9. Seedlings and plants need fertilizer. (The Elements, Read the Label)

Page 4: 10. Prepare the soil for your transplants. (Start With Good Drainage, Air Pore Space, Gypsum and Lime, Add Nutrient-Rich Amendments, Bury It), 11. Try succession planting for maximum yield. (Crop Rotation, Mulch), 12. Stop the pests before they ruin your garden. (Slugs and Snails, Larvae of Moths and Butterflies, Spider Mites and Thrips, Deer and Rabbits), Concluding

Return to the top of Page 1

Rocks For Drainage In Pots: Do They Really Help?


Should We Add Rocks For Drainage?


Rocks for drainage?


This issue of adding rocks or gravel to a pot for better drainage has been debated for generations by amateur as well as professional gardeners. Gardening programs from decades ago recommended adding a few inches of gravel or broken clay pottery to the bottom of a pot before filling with potting soil.

That method has been put to the test and soundly debunked. It doesn’t work. In fact, it can retain even more water close to the plant’s roots!

Many gardeners are eager to start filling their patio pots with flowers and herbs. Or perhaps vegetable gardening in containers is on the agenda. For some, it has been a long, cold winter, and this activity signals the beginning of a new growing season. But, before buying that big bag of gravel for your pots, look over this information and see if you might consider doing things differently.


Ingredients In Potting Soil


Potting soils are composed of a few or several ingredients in various proportions. Certain components absorb and retain moisture around plant roots while others help the soil drain faster. Some materials do both, depending on how finely they were milled.

This article describes how components behave in potting soil, and how gravity and other forces exert their influence on drainage and water retention. I’ll also suggest why it’s better to exclude rocks for drainage in pots.

Here are some of the ingredients commonly found in potting soils, in addition to water and air:


Organic materials, which help retain water:

  • peat moss, which holds water between its fibers
  • coconut coir, chopped into fine particles (for water retention) or left in longer fibers (more aeration)
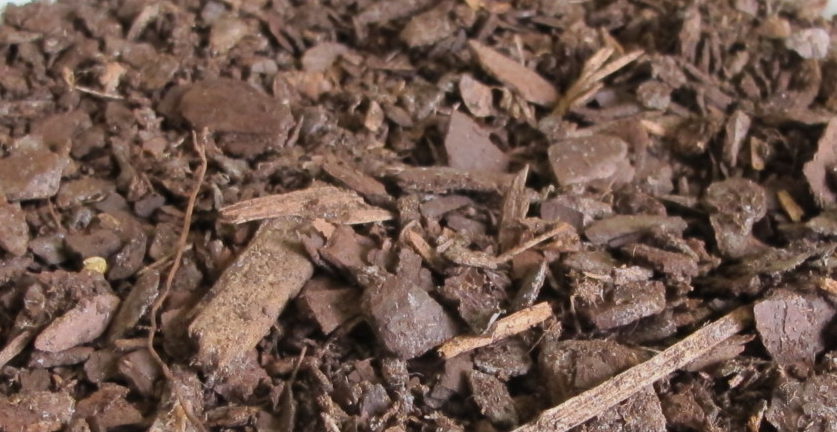
  • pine fines, which decompose quite slowly; most often used to facilitate drainage in potting soil and in gardens, but finely milled pine fines hold water
  • compost, a nutrient-rich material
  • aged manure, composted to kill pathogens


Potting soils might contain other types of materials, including ground shellfish, kelp, alfalfa meal, rice hulls, sawdust, charcoal, blood meal, bone meal, earthworm castings, and bat guano. Some manufacturers add various species of beneficial microbes.

Although not organic matter, fine clay holds water between its particles. Most potting soils contain no soil and are, in fact, soilless. A few include loam in the mix.

“Sinking Soil Syndrome”

You might have noticed the surface of the soil dropping lower in an old potted houseplant. The soil probably isn’t eroding through the drainage hole in the bottom of the pot, so where is it going?

Organic matter in the soil decomposes. As it oxidizes, and gets “used up”, its volume reduces considerably. Over time, you’ve seen the soil level dropping an inch or two, maybe more. On the contrary, sand and other gritty materials hold their volume.

The remedy for this sinking soil syndrome is to take the plant out of the pot and to refresh the potting soil. Pack new soil firmly around the roots to prevent settling. Don’t cover the stems or the crown of the plant with soil—just the roots. After that, the plant should be fine for another few years.


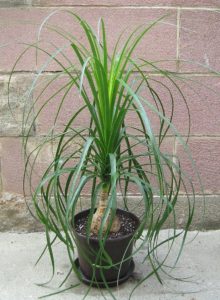
Elefantenfuß (Beaucarnea recurvata)

Beaucarnea recurvata, ponytail palm.


Several years ago, I was about to transplant a severely potbound ponytail palm (like the one in photo, above) into a larger clay pot. That plant came with me from Maryland and had been in its 4½” pot for close to a decade. It’s a very durable plant!

After removing it from the plastic pot, all that remained under the trunk were the roots, perlite, and sand clinging to the roots. It looked like a wire sculpture—a tracery of root and grit and mostly air taking the shape of the pot, but no peat moss or other organic matter. It transplanted successfully, and now sits on the back deck in mild weather.

Reusing Potting Soil

Many customers have asked about potting new plants into potting soil that has been used before. If there is still a substantial organic component and the soil has good tilth, then it can be used again. But, first, fluff up the soil and supplement with compost, potting soil, or some of the other amendments.

Rather than risk infecting new plants, toss old soil that held diseased plants into an active compost pile or the woods. Plants known to be vulnerable to soil-borne diseases (basil, in particular) are best planted in fresh potting soil and a thoroughly cleaned pot. When I lost an heirloom tomato to a fungal disease a few years ago, I removed the plant and the top layer of soil. After adding fresh potting soil, I planted a disease-resistant tomato, which grew fine for the rest of the season.


Inorganic materials, which increase drainage:

  • perlite, a heat-expanded mineral, those little white particles
  • expanded rock, such as PermaTill, another heat-expanded mineral
  • horticultural grit
  • vermiculite, not used as often today because it can compress and lose its drainage capacity
  • coarse or sharp sand and gravel—angular-edged particles, as opposed to rounded particles, can help drainage if they aren’t too small


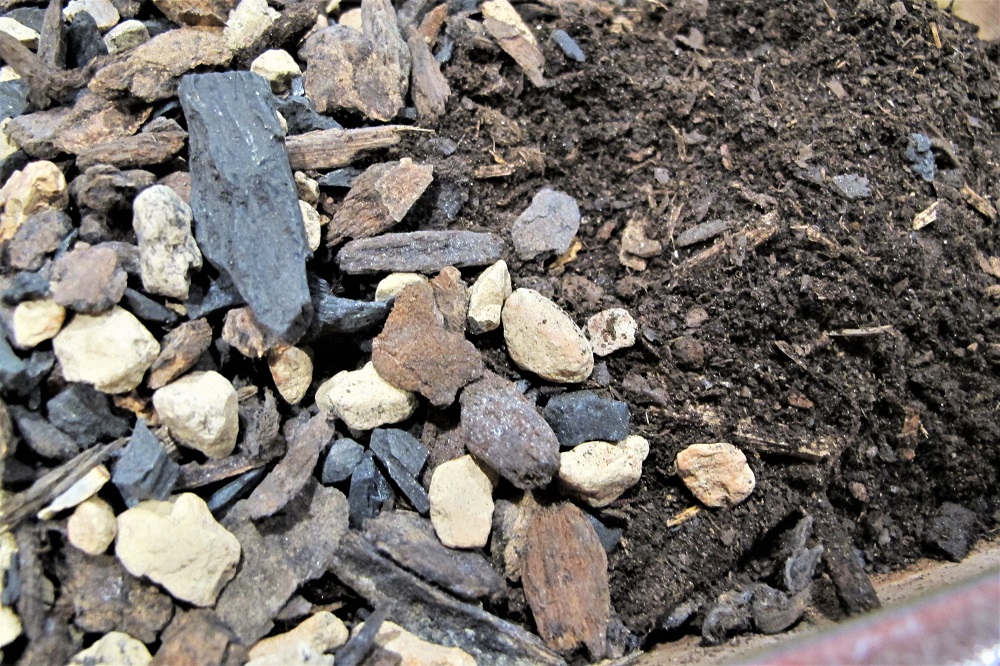
Chunky expanded clay and rock, often found in succulent and orchid mixes (photo, above), provide fast drainage and excellent air circulation around the roots.

Qualities such as tilth, water retention, nutrient capacity, and aeration of the soil are determined by the particular combination of materials and the sizes of their particles. Larger particles tend to facilitate aeration and drainage, while tiny particles (especially clay soil) retain water in the tight spaces between them.


Air Pore Space and Gravity


Air pore spaces occupy the voids between soil particles when they’re not taken up by water. Water flows through the soil profile, following the force of gravity. As water drains away and as the roots absorb it, air infiltrates the medium, providing oxygen for the roots. Plant cells use oxygen in respiration, as they oxidize the products of photosynthesis (glucose) and expel carbon dioxide as a waste product.

“Wait, what?” Yes, plants give off carbon dioxide during respiration. The net effect in each 24-hour period, however, is more oxygen given off during photosynthesis than is consumed during respiration. This process creates energy needed by plants to make new cells and to carry out hundreds of cellular activities.

wilt, marjoram 'Compactum'

Wilted marjoram ‘Compactum’.

Plants continually grow tiny new root hairs right behind the expanding root tips. Oxygen is critical to respiration and, therefore, to new root growth. These short-lived root hairs do most or all of the water absorption and interact with beneficial fungal mycorrhizae in almost all species of plants.

Brassicas (broccoli, cabbage, kale, etc.) do not participate in this mycorrhizal/root relationship. A few other groups of plants (Ericaceous plants, orchids, sedges, spinach, and beets) have rare forms of mycorrhizae colonizing in or around their roots.

Saturated soil kills root hairs. If this condition persists, the roots themselves will die and not regrow. If roots and root hairs can’t supply water to the leaves, the foliage wilts. The plant’s wilted appearance looks the same as when the plant has been deprived of water. Either overwatering or underwatering prevents water from reaching the leaves once the roots have been suffocated or dehydrated.


Feel the Soil

An extended period of wilt and wet soil is a common reason for plant failure. Even if the soil surface feels dry, there’s usually adequate moisture deeper into the pot. That’s why we recommend feeling the soil an inch or two into the pot.

Soil texture, pot size, sunlight, temperature, the plant’s leaf surface area, and, of course, frequency of watering influence how quickly potting soil drains and dries.


Capillarity

The force that works in opposition to gravity is capillary action. Water drains between soil particles, thanks to gravity, allowing most of the excess to pass through the holes in the bottom of the pot. But water also can move upward or sideways in the pot due to capillary action.

Capillarity is part cohesion and part adhesion, two kinds of forces between molecules. Cohesion is the attraction of water molecules to each other. Adhesion is the attraction of water molecules to other substances, such as particles of potting soil or the xylem tubes in a plant’s vascular system. In capillary attraction, adhesion is a stronger force than cohesion, so water molecules will stick to and be drawn between particles or along the inside surfaces of xylem.

As water molecules on the soil surface evaporate, they’re replaced by water molecules below them because of capillarity.

So, there’s a constant battle waged between gravity and capillarity. Water moves toward the bottom of the pot, but is limited by capillarity, which pulls it upward. What does this have to do with using rocks for drainage in a pot? I’ll explain in a moment. But first…

A Simple Experiment

Here’s an experiment that illustrates these points. Because organic soils often don’t contain wetting agents, which help the soil absorb water more readily, look for fresh potting soil that is not certified organic. Fill a short pot and a tall pot with dry or barely damp potting soil, using no rocks. Pack it in evenly and moderately firmly.

Now, place each pot in a shallow bowl of warm water. Why warm? Because soil absorbs warm water faster than it absorbs cold water. If the water disappears into the soil, add more to the bowl.

Wait an hour or so. In the short pot, you’ll see moisture on the surface. It might take longer for the larger pot to absorb water. If water remains in the bowl without moving all the way to the surface in the tall pot, the force of gravity has exceeded the ability for capillarity to pull the water farther upward. Moisture can wick into the soil by capillarity only up to a certain point.

If the tall pot is moist on the surface, the soil might have more water-retentive components than drainage materials. Tiny clay particles also can absorb water and hold it tightly. Try using a taller pot. Watering a plant in a very tall pot from the saucer usually necessitates additional water applied to the surface when capillarity fails to moisten the soil all the way to the top.

Movement of moisture within the medium depends on the dimensions of the container and the texture of the soil. Soil with larger air pore spaces will have more difficulty absorbing water all the way to the surface of the pot.


Water Tables and Rocks For Drainage 


The Perched Water Table

It seems logical that soil would drain better when rocks are added to the bottom of the pot. But, to the contrary, rocks can slow down water trying to exit through the drainage holes. And it all has to do with those air pore spaces.

Gravel by itself has large air pore spaces between the pieces. So, water will pass through them after some of it adheres to the surface of the gravel. You’d think that potting soil on top of the gravel should drain freely. While water does drain freely close to the surface of the soil, percolation slows as the water approaches the layer of gravel.

Gravity removes much of the excess water. At some point, though, water does not move readily from soil (with small air pore spaces) to the rocks (with large air pore spaces). The water sits at the bottom of the soil volume and hesitates moving into the rocks. This creates a “perched water table”, a layer of soggy soil above the rocks.

How Soil Drains In the Garden


drainage to a stream


Soil in the garden behaves differently. Gravity continuously pulls water down through the soil profile. Water percolates toward an aquifer, or it hits a layer of extremely compacted clay soil, called hardpan. When it hits the hardpan, water either pools there or slowly drains down the slope of the hardpan a foot or a few feet underground.

Much of the water, of course, will be used by plants, drain downslope, or evaporate to the atmosphere. The rest of the surface runoff drains toward roads, storm basins, or ditches, ultimately ending up in streams and other bodies of water.

Remember the Wet Sponge Experiment?

Soak a rectangular sponge in water until it’s saturated. Held horizontally, it contains the maximum amount of water the sponge can hold. Now, turn it upright, with the bottom edge horizontal. More water drips from the bottom of the sponge, right? The longer vertical axis of the sponge allows more water to drain as water passes from one part of the sponge to a lower part.

The air pore space is consistent throughout the sponge, so water is pulled through. You’ll notice that the bottom of the sponge is the wettest part. But eventually it will stop dripping. Now, hold the sponge on an angle, and the sponge will drip a bit more water from the corner to the air below.

At one point, the sponge will feel wet, but it won’t drip. As long as there’s material for water to drain to, you might be able to coax more water from the sponge. For example, if you hold a paper towel—even a wet one—to the bottom of the sponge, the paper towel will draw more water from the sponge because of gravity.

Air under the sponge—or gravel in the bottom of a pot—has large air pore spaces. Consequently, water won’t move from the sponge—or from the potting soil—into the gravel. Gravity can do only so much; after that, some kind of material with similar air pore space is needed to draw water through the soil. Then, when no more water can drain by gravity, capillarity will hold water in the sponge or in the perched water table.


The Water Table

We see that the flow of water is impeded at the interface between the soil and the rocks. A pot filled with only potting soil (no rocks for drainage) also holds water above the bottom of the pot. After excess water drains through the holes, that lowest region of soil will feel wet compared to the upper layer.

The difference between a pot with rocks for drainage and one without rocks is the soil volume occupied by the roots. A plant grows a more extensive root system in a pot without rocks, allowing larger and more vigorous top growth. A plant with a compromised root system, from soil that drains poorly, ordinarily will not grow as vigorously. In fact, it might get off to a difficult start due to the presence of constant moisture in the perched water table.

Conformation of nursery pots I’ve bought over the years consider these aspects of soil drainage. Here’s one where the bottom of the pot is molded higher in the center. This dome directs water toward and out the drainage holes. Bi-level drainage holes encourage air to circulate in the bottom of the pot (photo, below).


rocks for drainage, not needed in pot with domed bottom

A 6″ pot with a domed bottom for better drainage.


In Saturated Soil

Capillarity helps hold water among the soil particles until roots can absorb it. But, if the roots can’t use that water, they can rot if the excess can’t drain away. This water fills the air pore spaces, cutting off air circulation around the roots. Soon, anaerobic decomposition begins and contributes to root failure.

lavender

Lavender must have good drainage.

A full pot of thirsty annuals in hot sun or a large leafy tomato might be able to absorb all that water, but plants that need less moisture will suffer. Lavender, rosemary, succulents, orchids, and other plants requiring perfect drainage can be damaged in saturated soil. For these kinds of plants, keeping them potbound (not overpotting), using terra cotta pots, watering less often, and placing them under cover during rainy weather will help.

In addition to those suggestions, add more plants to the container you want to use. More foliage dries the soil faster. Remove the mulch, at least until the young plants have grown. Before potting up, incorporate extra drainage material into the soil. This is especially important when using large pots.


Rocks For Drainage and Weight

I have used rocks for drainage on very few occasions. Businesses and schools hired me to fill concrete or ceramic planters. The extra weight of rocks prevented the pots from “walking away”. Amending the potting soil to facilitate drainage through the entire soil profile is the preferred method.

First, I covered the drainage holes with synthetic landscape fabric or a handful of polyester fiberfill. Then heavy rocks and gravel went into the bottom third of the large container. Instead of piling soil directly on top of the gravel, I added a layer of landscape fabric over the sloped surface of gravel and up the inside of the pot. Then I filled the space with soil.

Landscape fabric prevented soil from eroding into the gravel. Sloping the fabric, so water concentrated at a low point, helped remove more water from the soil, into the rocks, and out the drainage hole.

Sometimes I added rocks and/or charcoal for drainage when planting houseplants in decorative containers without drainage holes. Still, we should check for accumulating water and tip the planter on its side to let stagnant water drain out. Or use a dry wooden dowel to periodically test for moisture.

Otherwise, I never add rocks for drainage in a pot.


10 Tips for Protecting Cool Season Vegetables

2019

updated 3/1/2024


Here are 10 Tips for protecting cool season vegetables from freezing temperatures.


cool season vegetables in the garden

Cool season vegetables: from the top, broccoli, leeks, ‘Red Russian’ kale, light green mustard greens, and collards.


Ready For Fall?


Throughout parts of the United States, and in chilly climates everywhere, gardeners are scrambling to save their tender plants. Most of us have brought in all the houseplants. More laissez-faire gardeners do nothing special to extend the season, beyond harvesting the last of the cherry tomatoes and clearing out the frosted vines.

And there are those of us who strive to keep cool season vegetables growing even in winter. And we’ll plant more of them! Soon I’ll transplant ‘Monstrueux de Viroflay’ spinach seedlings into pots, to grow on the deck through the winter. This French heirloom spinach has huge leaves with a milder flavor. It has lower levels of oxalates, so those who have been advised to avoid eating spinach might be able to eat this variety. Ask your doctor.

In early October, I planted 2 dozen onion sets (for green onions) in a 12″ pot on the deck. Green onions are ready for harvest, in mild weather, only a few weeks after planting the sets. To preserve them in the cold, I’ll cover them with plastic sheeting (Tip #2). Green and bunching onions grow more slowly in cold weather.

I planted more sets every couple of weeks and will soon plant the remaining bulbs before they dry up. A favorite bunching onion called ‘Nabechan’ has straight sides. Not having a bulb at the bottom makes it easier to harvest. Sets are not available for bunching onions, though, so they must be started from seeds.


Where There’s a Will, There’s a Way


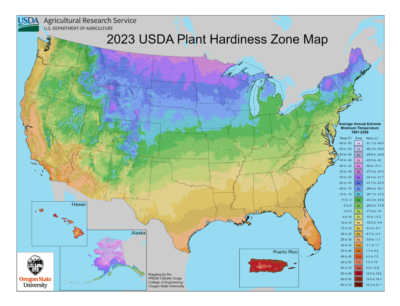
USDA plant hardiness zone map

The USDA plant hardiness zone map.


Potted cool season vegetables will grow under a plastic covering in cold weather. To extend the season, strings of miniature incandescent Christmas lights (Tip #6) will raise the temperature to more comfortable levels. Later in this article, I will list all 10 Tips for protecting crops in winter.

Starting with the simplest ideas and progressing to the more advanced methods, find the level you’re most comfortable with this season. Your budget, your USDA plant hardiness zone (photo, above), and the types of crops themselves must factor into your decision.

As you gain confidence and become more motivated to keep the garden producingyou might decide to try the next level. Cost savings realized by growing your own fresh food might justify the expense of new materials.

It’s only through experimentation, by taking a chance, that you might discover all the opportunities—and the limits—of gardening challenges. This is how green thumbs are cultivated.

If you’ve never grown cool season vegetables, several articles at The Farm In My Yard provide detailed information to get you started. For a greater understanding of any issue, enter the term in the search bar or click it in the tag cloud.


The Advantage of This Latitude

I’ve been growing greens in winter for decades, for my customers and for my family. Fortunately for us, living in the southeast doesn’t present as difficult a winter hardship as would living in Montreal, Montana, or Scotland. But there are options for just about every climate.

There’s no substitute for stepping outside and collecting a green onion, a mild mustard leaf, and some kale and spinach for our Sunday morning omelet. We pick what we need when we need it.


Succession Planting: Warm, Then Cool Season Vegetables


Because our favorite greens love cool weather, they grow in the garden after the tomatoes, peppers, and cucumbers have been harvested. So, with some planning, you can schedule a succession of crops. When one crop finishes up, new transplants or seeds are ready to take its place. Now, that’s an efficient use of space!


cool season vegetables

Cool season vegetables and greens replace summer tomatoes and peppers. Plastic protects plants on very cold nights and the netting deters deer.


Radishes, beets, spinach, and other fast-growing plants can be sown directly into the garden in late summer to early autumn. After they’ve been harvested, there might be time for another quick fall crop.

Certain greens and root vegetables have a shorter window of time during which they retain the best quality. So don’t let them linger in the garden. On the other hand, some cool season vegetables can be harvested over many months of growing! That’s at a time when there are fewer weeds, fewer bugs, and less drought to worry about.

If the weather is still warm for the first round of seeds, look for varieties of cool season vegetables that are more heat tolerant. Some catalogs indicate the preferred soil temperature for each crop, or you can get that information from your agricultural extension office. Soil temperature can be lowered by irrigating during hot weather. Additionally, frames covered with knitted shade cloth, made from black polyethylene (available from Johnny’s Selected Seeds and others), provide consistent shade until the weather cools. That bit of shade can make the difference between seeds germinating in August or having to wait until late September to sow them.

Here in zone 7b (average lowest winter temperatures 5° to 10°F), we enjoy productive edible crops and herbs in the garden year-round…with some protection in winter, of course. But we’ve also grown them in colder Maryland winters.

Because I’ve been “advised” by the HOA to stop growing vegetables in the garden (photo, above), they’re now in pots (photo, below) on the fenced deck. (Note to self: next move, no HOA!) Young ‘Aspabroc’ miniature broccoli plants grow in a 20″ pot, where a tomato grew during in the summer. Italian parsley lasts all winter, and sharp-tipped pine cones discourage squirrels.

***Update***: In October, 2021, after my mother passed away, I moved to a small town in northern North Carolina. More property, more nature, woods in the back (where a bobcat and I came face-to-face!), no traffic, gorgeous topography, great friends, just a couple of degrees cooler than Charlotte, and no HOA to tell me what I must or can’t do on my property. 3/1/2024


potted broccoli

‘Aspabroc’ miniature broccoli and parsley.


Peas…Yummy!

Peas grow best in the garden’s “shoulder seasons”. That’s when temperatures can be cool to warm, and when frost is no surprise. So, before the end of tomato and pepper season, you can sow a pack of pea seeds next to a trellis and begin harvesting two months later.

Edible podded snap peas and snow peas are absolutely delicious. Many are eaten on the spot. And because they grow vertically, the vines take up little square footage. During the shoulder seasons, in moderate climates, they don’t normally require a protective covering.

pea vine

Peas growing next to the house, a warmer microclimate.

If you have facilities that can accommodate pea vines, such as a lean-to or a cool greenhouse (Tips #9, #10), this crop can be grown as the temperatures dip lower during the winter months. But there is a point below which the vines will be killed in unheated structures.

Last autumn’s loosely covered pea vines (photo, right) made it just fine through the mild winter and started bearing pods in late winter.

Look for disease resistant varieties when growing any vegetables or greens under cover. Plants are more susceptible to diseases when grown in humid conditions.


Gather Information

Get to know each crop, and how much cold it can tolerate with or without protection from freezing weather. I’ve researched calendars for scheduling vegetables in this zone and have found some of them, compared to my own experience, to be overly conservative. They restrict sowing and transplanting to a narrower period of the calendar than I’m willing to gamble with.

Gardening in a warmer microclimate offers more protection than growing plants out in the open. Planting against a sunny south-facing wall or in a protected corner out of the wind provides opportunities to extend the season.


bees and butterflies feed on nectar in winter

‘Red Russian’ kale in bud.


Kale, collards, spinach, Brussels sprouts, mustard spinach, arugula, leeks, and green onions can tolerate the coldest conditions, within reason. I cover the crops when temperatures dip below the mid 20’s. Even if they’re not covered, they will survive. But I want the plants to continue providing premium quality greens. If not stressed by very low temperatures all day and night, these crops will grow if daytime temperatures rise into the mid 40’s.

Cauliflower and ‘Bright Lights’ Swiss chard need to be covered earlier than other greens. Frost normally won’t kill the plants. But repeated freezing will damage the foliage, halting growth until warmer temperatures (or the protective coverings) return.

These crops and other cool season vegetables won’t need protection if grown farther south. Again, cold tolerance is variety specific, so try new cultivars now and then and see which ones work best for you. For example, ‘Green Magic’ broccoli does well when planted in early spring and again in early autumn. This variety needs a warmer temperature when forming its head. On the other hand, ‘Arcadia’ broccoli can mature in very cold weather, so this is the one I plant later in autumn. Another benefit is ‘Arcadia’s bumper crop of side shoots; in Charlotte, they produced for months.

For More Information

There is so much information online and in catalogs, books, and magazines. But, for local perspectives and information about other growing conditions, check with your agricultural extension office. And speak with helpful vendors at the neighborhood farmers’ market.

Garden clubs, botanical gardens, and garden centers selling seeds, supplies, and transplants sometimes offer classes covering various subjects. My “Cool Season Vegetables and Greens” presentations drew the most attendees. Many of my customers started with just one crop and then returned for more. A healthy addiction!

Keep Records

As you begin new garden projects, place labels with the plants, photograph progress, and take notes for future reference. Add some varieties you’ve never grown before to discover delightful new flavors. Observation of the varieties you’re growing in your garden is invaluable when planning future garden projects. There is no substitute for hands-on experience…and records of successes and failures!

Keeping detailed drawings of crop placement in the garden will help when considering crop rotation. Not growing plants from the same family in the same place every year helps decrease concentrations of pathogens and insects. But, because so many of the cool season vegetables are in the Brassicaceae family, it’s difficult to rotate these crops in our limited space.

Succession planting calls for sequential use of space, maximizing the amount of produce harvested through the seasons. It is especially important to prepare the soil before the fall or spring season, adding fresh compost, aged manure, or planting mix.

For optimal harvests, you’ll need to fertilize regularly as the plants grow. Instead of relying on memory, record the names of the products and when you applied them.

Have all underground utilities marked by your municipality before proceeding and keep a record of their locations. Call 8-1-1 to schedule an appointment.


Headings:

Page 1: Ready For Fall?, Where There’s a Will, There’s a Way (The Advantage Of This Latitude), and Succession Planting: Warm, Then Cool Season Vegetables (Peas, Yummy!, Gather Information)

Page 2: Seed or Transplant? (Seeds, Temperature, Transplants, More Favorites), Crops With Ornamental Edible Leaves (Tender Leaf Kales), Crops That Form Heads, Soil Fertility (The Importance of Microbes), Nutritional Benefits, and Ready For the 10 Tips?

Page 3: Tip #1: Move Tender Plants Indoors, Tip #2: “Quick! Cover Up!”, Tip #3: The Hot Water Bottle, Tip #4: Low Tunnels, Tip #5: Deal with the Wind, Tip #6: Add Christmas Lights, Tip #7: I’ll Have a Double

Page 4: Tip #8: A Simple Cold Frame For Cool Season Vegetables, Tip #9: A Lean-To, Tip #10: The Greenhouse, Finally!

Return to the top of Page 1

How To Transplant Houseplants

2019


Time To Transplant Houseplants?


potting soil, how to transplant houseplants


As the end of the growing season approaches, we need to prioritize all the chores that need attention. Do the houseplants require transplanting? The plants that summered outdoors must come back inside soon, before frost damages the foliage or kills the plants.

They’ve been luxuriating on the porch, in higher humidity and brighter light than they usually receive inside. It’s no wonder they look fabulous! So, reintroduce them to indoor conditions while the days are still somewhat long and before the furnace kicks on and dries the air.

Perennials that looked picture perfect in May now look a little stressed after those record high temperatures. And the tired vegetable garden needs fresh compost or aged manure before setting the fall crops.

In a few weeks, flowering bulbs will arrive at garden centers…with pansies, violas, snapdragons, dusty miller, and Heuchera, trailing ivy, and hardy grasses. You’ve been dreaming of those beautiful combination planters, like the ones you saw last autumn at the garden center. But first things first.


Should We Transplant Houseplants Now?


Let’s start with the houseplants. Exposing tropicals to cooling temperatures outdoors, as autumn takes hold, could stress your houseplants. And some of those plants are pleading for attention right now.

While certain plants can tolerate cooler temperatures (cyclamen, ferns, English ivy, succulents, ponytail palm), others can’t. The aroids (peace lily, Dieffenbachia, Anthurium, Philodendron, Alocasia, Chinese evergreen, pothos), prayer plants (Calathea, Maranta), and some of the begonias, for example, should come indoors before temperatures dip below 60°F.

Although they won’t be killed by a few nights in the 50’s, or even the 40’s, you don’t want to prolong their discomfort. Chilling stresses many of our tropical houseplants, and can rot roots and disfigure foliage.


Inspect Them First


Scale on Ficus neriifolia (leaves are 7/16″ wide).

You probably won’t need to transplant houseplants, summering on the porch, that were repotted in the spring. All you need to do now is to inspect them for insects and spider mites before bringing them indoors. Check the bottom of the pot for slugs and sowbugs hiding around the drainage hole.

Clean up the leaves, too, and remove any that are discolored, insect-eaten, or damaged. Peel away the entire leaf, so none of the leaf stems (petioles) remain that later will turn yellow or brown.

After the inspection, clean the pots, wash the saucers, and place the plants in front of the windows where they seemed to thrive last winter.


Horticultural Oil

The dwarf Ficus neriifolia contracted a scale infestation, so I sprayed it with a horticultural oil solution. For insects and mites, horticultural oil works very well. It smothers the pests and is safe to use on most plants, including edibles.

Wiping the horticultural oil solution on smooth leaves (fiddle-leaf fig, pothos, peace lily) with a soft sponge removes dust, grime, and residue from water and fertilizers. It gives them a nice luster without appearing artificial. Read the label; I prefer to use less oil than is recommended on the label—to start with, anyway. Horticultural oil makes surfaces slippery, so be careful.


fiddle-leaf fig

The fiddle-leaf fig, Ficus lyrata.


Do Your Houseplants Actually Need Bigger Pots?


potted plant bonsai

Evergreen bonsai.

Knowing if the plant needs repotting, when to repot, and how large a pot to use is half the battle.

Does it wilt often? Perhaps instead of repotting, the plant needs to be deeply watered. Or maybe the roots have rotted in waterlogged soil, or the water rushes right through without moistening the soil.

I’ve seen a lot of dead plants over the years, and many simply were in pots that were too large. “Aren’t we supposed to transplant houseplants every year, just like our children outgrow their shoes every year?” No; once they have matured, plants can stay potbound for quite some time.

“If I transplant houseplants into bigger pots, won’t that make them grow faster and bigger?” No, another myth! If you transplant houseplants into pots twice the size they need, they more likely will die faster.

Large pots hold large quantities of soil and water. When the moisture is not used by the plant, the sodden mass just sits there, cutting off the oxygen supply and rotting the roots. So, if the entire volume is not tightly filled with roots, the plant doesn’t need to be repotted.

Many houseplants like being potbound. English ivy (Hedera helix), pothos (Epipremnum aureum), Philodendron, palm trees, Ficus trees, African violets, succulents, snake plants (formerly Sansevieria, now Dracaena), and bonsai prefer somewhat cramped quarters. Many potted herbs (rosemary, lavender, chives, sage, thyme) also fare better when potbound. But, in order to ensure good health, gardeners must provide nutrients according to the needs of the particular plant, and according to the time of year.

It’s helpful to know the habits and preferences for each kind of plant. For example, although the 4′ tall variegated snake plant (Dracaena trifasciata ‘Laurentii’) eventually will need a 10″ or 12″ pot, its cousin, the dwarf bird’s nest species (D. hahnii), can stay in a 4″ or 5″ pot for many years!


Fertilizing Houseplants

Most tropical plants spending the winter indoors won’t need fertilizer until late winter or early spring. If they continue to grow and look healthy, and they’re receiving good light, though, diluted solutions (1/4 to 1/2 strength) can be added every 4 to 6 weeks. Err on the side of using less fertilizer in winter.

As long as they’re properly watered and fertilized, your plants can remain perfectly happy while potbound. In fact, they’re easier to manage this way, since there’s less likelihood of overwatering. But you’ll have to water more frequently.

Look for products formulated for foliage houseplants or for flowering plants. They’re available in several forms: timed-release prills (use a low dose from fall through winter), liquids, granules, and soluble crystals. Read the label.


Fungus Gnats

Plants in smaller pots are less susceptible to diseases, root rot from overwatering, and fungus gnats. Ever have those annoying little “fruit flies” around your houseplants? The simplest remedy is to allow the soil surface to dry out.

Female fungus gnats lay eggs on moist soil. When the tiny larval worms emerge, they eat small roots, sap on cuttings, fungus, and organic matter in the top inch or two of the soil. Let the surface of the soil dry before watering again, and you’ll have fewer fungus gnats. See if adding a 1/2-1″ layer of pine fines as a mulch might prevent gnats from laying eggs.

Yellow sticky cards are good for catching flying insects. A card placed horizontally near the plants, on the pot’s rim, or in a sunny window attracts the most gnats.


Save the Spider!

spider plant

A green spider plant.

The spider plant in the 4″ pot that your girlfriend gave you two months ago is literally crawling out of the pot. She propagated it from one of her own plants, so it has sentimental value.

Spider plants, related to other strong-rooted Asparagaceae (formerly Liliaceae) family members, develop roots that circle around the inside of the pot. The vigorously growing roots raise the entire plant higher in the pot, opening up air spaces around the root ball. This dries out the finer roots, and water gushes immediately through the drainage holes without moistening the soil. Clearly, it’s time to work on this one.


When Should I Transplant Houseplants?


A good time to transplant houseplants is in spring to mid- or late summer. Plants that recover slowly (for example, succulents) should be repotted, if needed, by mid-summer. In autumn and winter, plants receive fewer hours of daylight, photosynthesizing at a reduced level. Our slower growing tropicals don’t grow much foliage in autumn and in winter. And roots also are reluctant to grow.

Cooler temperatures, compared to the balmy summer days spent on the porch, cause systems to slow down. So, trying to force plants to grow at a time when they’re entering semi-dormancy often does more harm than good. Plopping a plant’s almost dormant root system into wet soil and expecting it to grow is asking the plant to do something against its nature. It would rather stay semi-dormant.

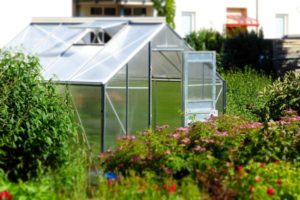
greenhouseProviding a greenhouse atmosphere—warm, humid, and sunny—keeps your houseplants in much better condition, even through the shortest days of winter. Optimal light levels increase rates of photosynthesis, respiration, and transpiration. As a result, they might grow almost as fast as they did in June.
But most of us deal with dryer air, energy-saving chilly nights, and dim lighting (in the plants’ eyes) until the hyacinths bloom outside.

Plants, both indoors and out, take on renewed vigor once the days lengthen closer to springtime. Some of us humans do, too.


How Big Should the Pots Be?


succulent dish garden

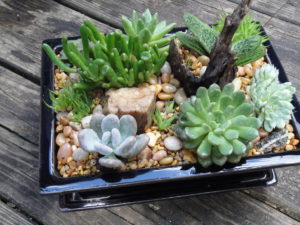
Succulent dish garden in ceramic bonsai tray.

I’ve grown dwarf peperomias and miniature succulents, such as Echeveria minima and Haworthia truncata, in 2″ pots for many years. Since the succulents are prone to rot in wet soil, keeping them very potbound decreases the chances. There simply isn’t that much soil in the little clay pot, and it dries fast in direct sunlight.

Most of the succulents I enjoy growing are on the small side, anyway. Almost all are in 1½” to 4″ pots, and others have been planted in larger, but shallow, bonsai trays (photo, right).

I brought with me from Maryland a 4½” pot of Drimiopsis kirkii, one of the leopard lilies, and it has yet to be repotted into a larger pot, 6 years later. Its cousin, Drimiopsis maculata, however, grows from bulbs which multiply faster than those of D. kirkii. So D. maculata gets divided more often, but they’re still in 4½” pots.

Dracaena hahnii, the dwarf snake plant, lived happily for years in a 4½” pot. The small, glossy-leaved Spathiphyllum wallissii would have complained if it had been bumped up into anything larger than its 6½” plastic pot.


pink cyc.

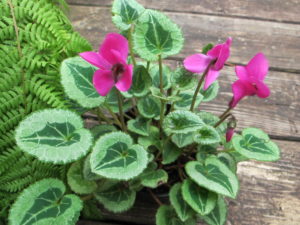
We’ve had this miniature cyclamen for years.


A pink flowering miniature cyclamen stays in its 4½” pot (photo, above), year after year. It is now coming out of dormancy and beginning to grow new foliage, contrary to what most other plants are doing. That’s because its growth cycle calls for cool to cold, but not freezing, temperatures in order to set flower buds. It will be fertilized accordingly, for a full canopy of marbled leaves.

The plant’s habit and its root structure help determine the required pot size. In general, transplant houseplants into pots that are only 1″ to 2″ wider, and only if they need it.


The Old Weeping Fig

weeping fig

Variegated weeping fig.

A weeping fig (Ficus benjamina), given time, will grow to the ceiling. Instead of raising the roof, its height can be managed by “aesthetically” cutting stems back in the spring, when it will respond faster.

I grew a variegated weeping fig in a 14″ pot for about 15 years, in front of a big window that received a few hours of morning sun. When the tree grew to almost 8′ tall, above the top of the window, I pruned it back a few feet. Then, when it regrew, all the foliage was once again in the sun and at eye level.


African Violets


African violet

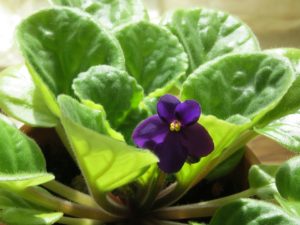
A healthy African violet.


African violets (Saintpaulia ionantha) are happy to stay in 4″ pots for years. Miniature African violets need smaller pots than that.

A rule of thumb for pot size and an African violet is to plant it in a pot that is 1/3 the spread of the foliage. So, a 4″ pot will accommodate a plant that is 12″ wide. Plants in top condition might take a slightly larger pot, but you have to pay very close attention to moisture and soil drainage.

“What should I do with an African violet that has a long trunk?”

As these plants grow new leaves from the top of the rosette, older leaves lower on the stem die off. That’s part of their natural growth pattern. When the plant develops a trunk, it’s time to make an adjustment. But don’t do this if the plant is slowing its growth. Spring to mid-summer is a better time for this procedure.

Remove the plant from its pot and slice off the bottom third of the root ball. Shave off a small amount from the sides as well. Wash the pot, check the plant for insects (mealybugs, especially), and treat with horticultural oil if necessary.

Place a small amount of African violet potting soil in the bottom of the pot. These plants like peat moss in their mix. Set the plant in the pot, and fill in the sides with more soil, using a chop stick to firm soil in the gap.

Part of the trunk will now be loosely covered with soil, and it will grow new roots. The top of the root ball should be lower in the pot than it grew previously. (Yes, this is exactly what we don’t ordinarily recommend.) Water it in, using lukewarm (about 85°F) water. Keeping the soil too wet will rot the trunk and the roots.

Use the kitchen sink sprayer to wash soil off the leaves, using lukewarm water. Towel off the water drops, and let the plant dry in a warm location.

It’s less stressful for these plants if this is done every year or two, before the trunk grows a few inches tall. But I have seen perfectly happy violets with long stems curling over the edge of their pots.

“What are those marks on the leaves?”

Water the soil—always lukewarm for African violets—and avoid wetting the leaves. If water splashes on the leaves, absorb it with a towel, and let the plant dry in a warm place. As drops of water chill on this plant’s leaves, unsightly tan or brown rings and lines will be left behind.

Grow African violets at 70 to 74°, and fertilize regularly with a product formulated for this genus.


Less Is More

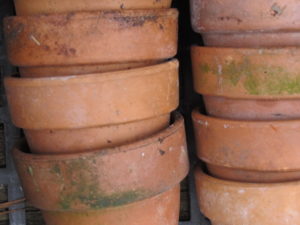
stack of clay pots, transplant houseplantsMove miniature species of plants into something only 1/2″ to 1″ larger, if they need it. I know; that doesn’t seem like it could make much of a difference. But for the plant whose roots, in the wild, might be crammed between layers of sedimentary rock on a blustery cliff, 1/2″ is plenty.

Large-growing plants require new pots up to 2″ wider in diameter. Peace lily (robust varieties of Spathiphyllum), weeping fig (Ficus benjamina), Chinese evergreen (Aglaonema spp.), and larger palm species can be moved from 6″ starter pots into 8″ pots. And, importantly, this assumes that the roots tightly fill the smaller pot.

Many of the tropicals will survive and prosper over the next several months, even while very potbound. If they’re already in 8″ pots, they’ll likely be fine until spring, when they can be potted on if needed. The 6′ tall fiddle-leaf fig in an 8″ nursery pot, though, can go into a 10″ pot, since the heated sunroom has floor-to-ceiling windows. Sunny conditions encourage plants to grow new roots, but carefully monitor soil moisture. Avoid watering houseplants (especially succulents) on cloudy days.

If growing conditions in your home are not ideal, but plants absolutely need to be repotted, transplant them now, before fall, into slightly larger pots. Wait until spring to transplant large houseplants, if it’s needed at all.

Houseplants don’t require repotting every year. Once they have attained a mature size, they no longer need to be moved into progressively larger pots. Instead, regularly fertilizing with products formulated for houseplants will supply all the nutrients they need.


Headings:

Page 1: Should We Transplant Houseplants Now?, Inspect Them First, Do Your Plants Actually Need Bigger Pots? (Fertilizing Houseplants, Fungus Gnats, Save the Spider!), When Should I Transplant Houseplants?, How Big Should the Pots Be? (The Old Weeping Fig, African Violets, Less Is More)

Page 2: Prepare for Transplant (Root Insects, Speaking of Spider Plants, Roots-Air-Water-Light) and Potting Up (Score the Root Ball, Potting Soil, Begin Filling the Pot, Downsizing, Water It In)


Return to the top


More Quick Tips for Today’s Garden


More Quick Tips For Today’s Garden


Here are several more quick tips for the gardens in early spring. Several links have been provided, where you’ll find more details.


1. Fertilize Violas and Pansies


It’s no wonder these cold-hardy little biennials are seen all around town. They’re planted in median strips, at neighborhood entrances, around shopping centers, and in our gardens.

They live through the winter, delighting all of us with their colorful, cheerful appearance. Cold is what they like; in late spring or early summer, they will fail in the heat. This year, we had a very mild winter in zone 7b Charlotte, so they looked beautiful all season.


wire basket with cool wave pansies

A wire basket with hardy violas and ‘Cool Wave’ pansies.


Quick tips: As long as they’re in active growth, fertilize every 6 or 8 weeks, even in the winter! Use fertilizer that has a higher percentage of phosphorus, the middle number on a package. A ratio of 1-2-1 or 1-3-1 will work. Those three numbers represent the percentages of nitrogen, phosphorus (phosphate), and potassium (potash) in the product. They are always listed in that order: N-P-K.

Keep in mind that violas and pansies need acidic soil. You can mix peat moss into the bed in preparation for planting, also incorporating pine fines (soil conditioner) to improve drainage. Or use a product (Soil Acidifier) that will lower the pH, if your soil tests on the high side. Soil that has been limed might be too alkaline for violas, which prefer a pH level around 5.5 to 6.0.

If you have a spare hour or so, deadhead (pinch off) the old faded flowers. Whether or not that actually helps promote bloom, it certainly will improve the appearance of the plants, especially for pansies.


2. Harvest Greens


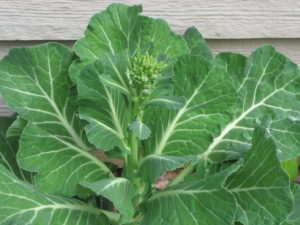
collards

Collards, with flower bud.


Recently I cleaned the vegetable garden. I harvested most, but not all, of the greens that have been producing since last fall.

Later today or tomorrow, I will wash and sauté the greens down to “wilt”. Then they will be divided into portions and frozen in plastic zip lock bags. The next time I make soup from scratch (or from a can), a rice dish with rotisserie chicken, lasagna, or buy a store-bought pizza, one or two of those bags of greens will be added to the dish. That’s an easy way to add greens to a meal, and increase the nutritional content.

The two large clumps of collards will make a fabulous Collards Soup. For that, I use a large stockpot, which makes about a gallon of soup. I also freeze some of it in plastic containers for later use.

tokyo bekana

Chinese cabbage ‘Tokyo Bekana’.

In addition to the collards, I harvested mustard greens and dinosaur and ‘Red Russian’ kales. The light green Chinese cabbage ‘Tokyo Bekana’ will be added to the next salad. Swiss chard ‘Bright Lights’ remains in the garden, and should last until autumn if it’s partially shaded.

The vegetable garden next to the house is becoming increasingly shaded. The trees on the berm to the south have grown larger and wider over the past 5 years. At this point I’m seriously considering growing a couple of tomato plants in containers on the enclosed deck, safe from the deer.

The sweet pepper plant did well enough in the garden, so it will go there again this year. But most of that garden will contain a variety of greens, green onions, leeks, and probably a cucumber. It’s still the perfect place for fall and winter greens because it’s a warm microclimate, being right next to the house. And at that time, the trees are leafless, so there’s more sun.


The Beneficials

Quick tips: Several of the brassicas are in flower, so I left a few of them in the garden for the honey bees and the tiny braconid wasps. During late winter and early spring, few food sources are available for these beneficial insects, so I like to help when I can. And you can add some flowers to a salad or as a garnish.


3. Plant More Cool Season Greens and Vegetables


dinosaur kale in flower

Dinosaur kale in bloom.

Broccoli ‘Happy Rich’ is ready! So I made a trip to the garden center a few days ago to pick up a few pots of this delicious miniature broccoli. Ordering seeds is just not feasible right now; I’d have lost 4 or 5 weeks of growing time, so I went for the quick fix: transplants!

Broccoli ‘Imperial’ is one of the varieties recommended for growing in the spring and late summer. This crop will be able to tolerate the warmth of the late spring season, when it will be harvested. I love broccoli. So many vitamins, minerals, phytonutrients…and protein too.

Carrot, radish, and beet seeds can be planted now, even before frost has retreated north. Pea seeds could have gone into the ground weeks ago, but the ones I planted in the fall made it through the winter, and are now flowering and making pea pods (photo, below).

As space opens up in the garden, I’ll sow seeds of mesclun, tatsoi, leeks, and maybe ‘Scarlet Frills’ mustard for its beautiful and fairly spicy foliage, adding some spark to salads!


pea vine

Fast growing edible-podded peas on a trellis.


Check with your local agricultural extension service for a chart describing what can be planted when. It wouldn’t be a bad idea to get a soil test, to remove doubt about the pH or which nutrients need to be added.


Lettuce


Salanova lettuce

Pots of ‘Salanova’ lettuce ready for the garden.


A few pots and market packs of lettuce purchased over the past week will supplement the patch of lettuce seedlings that survived the winter in the garden. Smaller plants will continue to grow after the mature heads have been harvested.

A red butterhead lettuce called ‘Skyphos’ is reliable even in warm temperatures, up to a point. It retains very good flavor when others turn bitter in the heat.

When trying to extend the lettuce harvest, look for varieties that tolerate high temperatures. Varieties listed for planting at this time include ‘Nancy’ (green butterhead), ‘Vulcan’ (red leaf), ‘Sparx’ (Romaine), ‘Muir’ and ‘Magenta’ (summer crisp), and ‘Skyphos’, of course, one of the favorites I’ve grown for years. The heirloom ‘Black Seeded Simpson’, a loose-leaf lettuce, and ‘Outredgeous’ Romaine are more options for a spring garden.


healthy greens--AllStar Gourmet lettuce mix

Johnny’s Selected Seeds’ Allstar Gourmet lettuce mix.


Quick tips: ‘Red Sails’ lettuce is too pretty to pass up, and it can grow well into spring. Leafy vegetables with deep green color and red pigments, the anthocyanins, have more antioxidants. These nutrients help us fight many illnesses, including cancer and inflammation. So, I always prefer richly colored varieties.

More Quick Tips: How To Grow Lettuce

Lettuce seed germinates readily at a soil temperature in the 60’s F. It will take longer, but seeds will even germinate at 45°. They won’t, however, do anything above 75° or so.

Lettuce appreciates very rich, moist soil. Fertilize every couple of weeks with high nitrogen fish emulsion, earthworm castings, or compost if the soil temperature has increased. And provide ground limestone for calcium and to raise the pH, which prevents tip burn. If a soil test indicates proper pH for greens, add gypsum instead, which also provides calcium but doesn’t change the pH. It’s best to deal with pH months ahead of planting crops.

Organic products rely on soil microbes to break them down and to make their nutrients available to plant roots. But, in winter, microbes are dormant, so I use a synthetic soluble fertilizer.

As the weather warms up, give lettuce morning sun, which is less harsh than hot afternoon sun. You can plant a quick crop between young tomato plants, in partial shade.

Watch out for slugs; scatter granules of organic Sluggo outside the lettuce bed, to draw them away from their intended meal. Slugs can transmit a form of meningitis when ingested, so… And aphids can be a problem, too, but you can just wash them away.


4. Pick the Parsley


parsley for chicken soup

Italian (flat-leaf) parsley.

This versatile herb gives fresh flavor to meat, fish, and poultry dishes, sauces, soups, potatoes, eggs, salads, sandwiches, garlic bread, mayonnaise, and herb butter.

The addition of vitamin- and mineral-rich parsley enhances just abut anything you cook. But add it late in the cooking process, in the last few minutes, as you would most leafy herbs. Cooked for a long time, the flavors will evaporate away.

Concerned about your breath? Chew on a couple of leaves; the chlorophyll will freshen it.

There are two main groups of parsley:

  1. flat-leaf, plain, or Italian (‘Giant of Italy’, a new improved sweeter ‘Peione’, and smaller ‘Titan’)
  2. curled leaf parsley (‘Favorit’, ‘Double moss curled’, ‘Paramount’), famous as a garnish and pretty as a garden edging, but also edible.

Decades ago, as a kid, I remember seeing my grandmother in her Englewood, New Jersey, kitchen, holding a huge bunch of flat-leaf parsley inside her arm. Nanny was the real thing—Sicilian-born and a great cook—so for those looking for real parsley flavor, go for the flat-leaf.

When I was growing up, my mother (Nanny’s daughter) always used curly parsley. Several years ago, I asked her why she used the curled and not the flat-leaf. She said the Italian parsley always tasted funny, so she preferred the curled. Do you know which other herb looks like flat-leaf parsley? That’s right…she must have bought cilantro! Neither of us likes this herb at all! So, if you’ve been reluctant to buy or grow flat-leaf parsley, see if its resemblance to cilantro might be the root of that problem.


Here’s good news: it’s easy to grow!

Parsley (Petroselinum crispum) is a biennial member of the Apiaceae family, a cousin of dill, cilantro, carrot, and fennel. Set young transplants into the garden in early spring, through the summer, and in the fall. Fertilize every few weeks with a high nitrogen product, such as fish emulsion. Parsley also is adaptable to growing in potted herb gardens.

In areas with moderately cold winters, it will tolerate freezing temperatures. The foliage will stay in better condition if it receives some protection from a warmer microclimate, such as next to a south-facing wall. Or grow it in a cold frame in colder climates.

parsley with flower stems

Flat leaf parsley, going to flower.

Quick tips: Plant parsley in rich soil. Amended with compost or aged manure to a depth of 12″ or more, parsley will develop a large root system when grown in the ground. ‘Gigante’ (or ‘Giant of Italy’) grows into a massive mound of dark green leaves, 2′ tall and wider than that. In spring, the stems begin to grow tall, preparing for its blooming phase (photo, right).

This is parsley’s natural cycle of growth as a biennial. It’s seeded in one year, grows, overwinters once, and then flowers the next spring or early summer. Sometimes parsley goes to flower the first year if it was seeded very early.

Harvest the plant before it goes to flower, or when you notice that the stems are growing tall (photo, right). If you wait much longer than that, the sweet flavor will become strong or bitter. Cut the stem at soil level, and remove any yellow or pale green leaves.

Cut parsley stems will stay fresh for a few days in a glass of water on the counter or in the refrigerator.


Prepare the rest this way:

  • Wash the parsley thoroughly in cool running water. Shake off as much water as you can, or put it through a salad spinner.
  • Have a couple of 1- or 2-cup plastic containers handy.
  • Remove thick stems. Cut and reserve the leaflets, and keep them intact.
  • Transfer leaflets to the plastic containers, packing them in tightly.
  • Freeze the containers.
  • The next time you need some parsley for soup or tomato sauce or roasted vegetables, simply flake off the quantity you need. Chop them before adding to cooking.
  • Simple! Although it doesn’t look like fresh parsley (it looks wilted), the flavor is better than the dried option. And it takes up less space than chopped parsley frozen in ice cubes.


Who’s eating all the parsley?

Deer and Rabbits

quick tips: dont feed the rabbits!


Does this sound familiar? The parsley is growing beautifully, it has great color, and it’s providing lots of clippings for the kitchen. All of a sudden, the leaves disappeared…overnight! Well, we’re not the only ones who are fond of parsley. Deer and rabbits like it, too. They can do a lot of damage in one sitting.

Quick tips: You can’t use chemical deer repellents, but you can construct a frame around the parsley plants. If you have a big old lamp shade with “ribs”, remove the fabric and replace it with bird (deer) netting. The bigger the shade, the better. Anchor it to the ground so it can’t be kicked over. Or fabricate something yourself from hardware cloth or chicken wire. Make sure young rabbits won’t be able to squeeze through the openings. The goal is to physically exclude animals from reaching the parsley, cilantro, and dill.

Black Swallowtail Butterfly Caterpillars


black swallowtail butterfly egg on parsley

Yellow egg, left of center, on parsley flower bud.


If the parsley looks smaller than it did last week, look for little caterpillars feeding on the leaves. The female black swallowtail lays tiny yellow eggs on plants in the Apiaceae family (parsley, cilantro, fennel, dill). She deposits them primarily on the bottoms of the leaves. They’re hard to spot, but once you’ve learned to recognize them, you can simply rub them off.

Quick tips: Look for young caterpillars a few days or a week later, in case you missed a few of the eggs. The young brown and white larvae look like bird droppings, appearing less appealing to predators. An organic approach is to spray with Bt (Bacillus thuringiensis), a naturally occurring bacterium. Bt causes caterpillars of moths and butterflies to stop feeding, and they’ll die a day or two later.

But I like butterflies!

caterpillar on fennel

Black swallowtail larva on fennel.

Quick tips: Now, if you would rather keep the butterflies, as I do, simply transfer caterpillars from the parsley to a bronze fennel plant. Bronze fennel is a large growing and pretty perennial herb, and a food source for this insect. The fennel is edible for us as well, in salads or to garnish fish.

As the larvae grow, they turn into large black and green striped caterpillars (photo, right). These parsley worms, as they’re sometimes called, will consume more and more of the foliage. Not a problem for the vigorous bronze fennel, but a smaller parsley plant can disappear in a flash.


5. Weed!


Dandelions, chickweed, and hairy bittercress top the list of winter weeds around here. In untended fields, the bright yellow flowers of wintercress cover acres of ground, not unattractive at all!

Your local garden center can help with products that prevent weed seeds from germinating or that will kill weeds after they sprout. Don’t use them, though, near the edibles. Bring fresh samples with you. Diligent weeding and mulch are recommended.


Dandelion


Derived from the French “dent de lion”, dandelion refers to the toothed (dent) edges of the leaves. Bright yellow flowers dot the landscape from late winter on. If they are not killed or removed, each of those flowers will develop into a cluster of seeds. This method of seed dispersal, by the wind, is called anemochory.

Quick tips: This weed develops a taproot sometimes more than a foot deep. Leaving part of the taproot behind after “pulling” the weed will result in a new dandelion regrowing from the root. Either remove the entire root (there’s a tool for that), spot treat with a non-selective herbicide, or use a broadleaf weed killer. Always read the labels. Keep weed killers away from herbs and vegetables.

The dandelion in our lawns (Taraxacum officinale) looks similar to edible “dandelion greens”, in the species Cichorium intybus, a type of chicory.


Chickweed


chickweed, quick tips: remove the seeds

Common chickweed, with small white daisy flowers.


Chickweed grows close to the ground, spreading about 1 1/2′ wide. Thick mats of this weed will hide among the lawn grasses, winter greens, and last year’s fallen leaves. Their seeds germinate in cool seasons, and the plants grow fast, lodging against walls and other objects that trap winter warmth.

If you pull the top, the roots have such a strong hold on the soil that the stem will stretch and break off. In a couple of weeks, you’ll have the pleasure of pulling it again. Grasp firmly under the crown of the plant, just below where the stem meets the soil, and make sure you get the roots.

Two species that often grow here in North Carolina are common chickweed and the more hairy mouse-ear chickweed.

Quick tips: Don’t wait as long as I did for this garden chore. Next winter, there will be an even bigger crop of chickweed. That’s not such a bad thing, though, because tender young greens are edible. Like many greens, common chickweed (Stellaria media) is very high in vitamins and minerals. One website claims it is fairly high in oxalic acid; for those with certain health conditions, check with your doctor. Add it to salads, soups, sandwiches, and stir-fries.


Hairy Bittercress

bitter cress. Quick tip: remove weeds before they seed about.

Hairy bittercress.

This species of cress (Cardamine hirsuta) is a short but abundant winter annual that grows a small rosette of edible bitter foliage, topped by a cluster of white flowers. It is related to broccoli and cabbage, in the Brassicaceae family. Disturbed seedpods open explosively, dispersing seeds in every direction. Ballochory is the name of this method of seed dispersal.

The “ounce of prevention is worth a pound of cure” axiom certainly holds true with weeds. Many times more weeds will grow in the next season if they are allowed to go to seed.

Not all of them will germinate, though. Seeds can remain viable for decades, patiently waiting underground for that moment when the soil is disturbed. Exposing the seed to favorable conditions, such as light, water, and the right temperature, is all they need to germinate.


6. Take a Moment to Just Enjoy Spring


There will always be more quick tips for the garden, but they can wait. Take the kids or the dog or yourself outside, listen to the sounds of nature, and just enjoy being!


Japanese maple, new leaves. Quick tip: enjoy spring!

New leaves on Japanese maple.


Return to the top

Quick Tip for Today’s Garden: Start Here!


Some Quick Tips In Today’s Garden


As the weather warms, it’s time to turn our attention to a few garden chores. I’m going to attempt to keep each Quick Tip short, and direct you to the links where you’ll find a lot more details.


snow crocus

Early crocuses.


Quick Tip #1: Spring-Flowering Bulbs


It’s no secret—I love spring-flowering bulbs! My last home in Maryland had thousands of them. Jolly daffodils, fragrant hyacinths, early snowdrops, crocuses in every color, big clumps of wood hyacinths, electric blue scilla and tiny pink ones… Grape hyacinths in white, pink, and shades of blue… Species tulips, Ipheion, Chionodoxa, the reliable spreading Puschkinia, and stately Allium. There were fritillarias, Eranthis (photo below), Erythronium, Dutch and rock garden iris, and the invasively spreading Ornithogalum. Even a snake’s head iris or two.


eranthis, quick tip #1

Winter aconite (Eranthis hyemalis).


Bulbs bloomed before the winter snows had melted away, all the way through spring. Five months of flowers! Before one finished its bloom cycle, others began theirs. But spring-flowering bulbs weren’t the only stars of the garden. There were Helleborus and Siberian Iris, lilies and azaleas, and Fothergilla, Viburnum and Tiarella among the many other shrubs, trees, and perennials. And violas, of course!

“Okay, so what should I do with them now?”


Fertilize Them

By early spring, daffodil foliage is fully developed here in the Carolinas, and the early varieties are beginning to fade. Fertilize when the bulbs are near or at peak bloom. The reason I prefer not to fertilize them as soon as the foliage emerges is because the nutrients could cause exuberant growth. The soft growth in these leaves and flowers is more likely to cause them to flop over.

Use a complete product formulated specifically for bulbs rather than just bone meal. Foliage will continue to photosynthesize for weeks, sending energy to the bulbs, “restocking the larder”. Carbohydrates stored in the bulbs sustain the plants through their summer dormancy and ensure that the bulbs will flower again next year.

Lightly fertilize the bulb beds again in late summer to autumn, when new roots emerge from the bulbs. Water well if the soil is dry from drought. If you’ve tended annuals above the bulbs and fertilized them now and then, you can skip the bulbs’ fall fertilization.


Wait For Them To Yellow Naturally

In an effort to tidy up the yard, many gardeners braid the green leaves or remove them entirely after the blooms fade. But the bulbs rely on spring sunshine reaching the leaves to make enough food for themselves. That’s how the bulbs grow larger and develop flower buds for next year’s display.

Wait until the foliage is yellow or brown before cutting it at soil level. Don’t braid or knot the leaves, which interferes with photosynthesis.


Remove Old Flowers


remove daffodil seedpods, quick tip #1

Daffodil ‘Tête-à-Tête’ with faded flower and developing seedpod.


Snip off old flowers before they have a chance to ripen seeds. This is especially important for the large flowers, such as daffodil, hyacinth, and tulip.

All energy should be directed into plumping up the bulbs for next year instead of into seed production. Small bulbs are often encouraged to spread by seed, so it is not critical to deadhead them.


Divide Them

Did your daffodils bloom heavily this spring? Or did you see a lot of leaves and only a few blooms? If the plantings seem to be declining, wait until the foliage has turned yellow or brown. Then carefully dig up the clumps, label the colors or the cultivar names, if known, divide, and transplant them. The most common reasons for fewer flowers are:

  • Not enough direct sun. As our landscapes mature, the shrubs’ branches begin to overgrow the bulbs. Shading the bulbs’ foliage weakens them to the point that they die out.
  • Not planted deep enough. Shallowly planted bulbs divide up, forming many small bulblets, which are too small to flower.
  • Wet soil that kills the bulbs. Plant new ones this fall in well-prepared beds, making sure water drains freely. Incorporate a large amount of pine fines, coarse sand, and/or horticultural grit, which elevates the bed. Gypsum helps improve drainage if used annually for a few or several years.
  • Poor soil or soil that is severely compacted cannot sustain life. There’s no shortcut when it comes to soil preparation. But if there’s not much you can do about soil quality, plant grape hyacinths, galanthus, puschkinia, and crocuses. These are planted closer to the surface. With some bulb fertilizer and a cover of mulch (1″ or 2″ of shredded hardwood), they’ll have a good chance of surviving.


Quick Tip #2: Liriope, Mounding Or Spreading?


Liriope (pronounced “lir eye’ uh pee”) is a workhorse of a ground cover. One of my favorite plants to use in large drifts under trees or through a shrub border is a variety called ‘Royal Purple’.  It blooms in mid- to late summer, depending on location.

I don’t know why this cultivar is not well-known in landscape circles, but the common “blue lilyturf” is the one usually seen. The flower of ‘Royal Purple’, as the name suggests, is a rich deep purple and far prettier in the garden. Try it in front of or near large chartreuse or gold hostas for a stunning combination.


liriope royal purple?, quick tip #2

Liriope muscari ‘Royal Purple’.


The Spreading Liriope Spicata

There are two species of liriope often seen at garden centers. One is Liriope spicata, an aggressive spreader, and the one that gives lilyturf a bad reputation. It will creep into narrow cracks in the sidewalk, it will invade the territory originally claimed by Heuchera and other perennials, and it will take over the lawn.

Sure, there are some applications where this species has value, such as in inaccessible areas, in ditches, or on banks. It also will cover large areas under trees. Liriope is related to hosta and daylily in the Asparagaceae family, and all can effectively prevent soil erosion. They have extensive root systems that knit the soil together. But, if you want liriope that doesn’t spread, choose the mounding varieties of liriope.


The Mounding Liriope Muscari

The other species, Liriope muscari, grows in clumps and does not run all over the place. L. muscari is the species to which ‘Royal Purple’ belongs. Another popular variety, with cream- or yellow-variegated leaves, brightens up a shady area and has rich purple flowers. There’s a white flowering variety called ‘Monroe’s White’, for shade, and a pink one, and some with lavender or fan-shaped flowers.

The clumps will expand over time, but they’re well-behaved in garden beds. Most cultivars grow in sun or in shade. In regions with hot summers, though, morning sun or dappled shade is less stressful than full or afternoon sun.

Notice the mnemonic?

Quick tip: “spreading spicata” and “mounding muscari” refer to those species’ growth habits. When shopping for this plant, look for the species that will suit the purpose for which it was intended. The invasive tendency of Liriope spicata has turned many people off to any kind of liriope.


Cutting Back


quick tip--cut back liriope

Old tattered foliage of liriope.


Narrow leaves begin to emerge in late winter to mid-spring. Last year’s foliage can look a little ragged by springtime, especially in colder areas of the country. The tips of the leaves often become frayed, and much of the foliage might have turned brown over winter. And the local deer population can cause damage. Place some dried blood among the clumps to discourage them, or spray with a deer repellent, especially as they come into bloom.

liriope--new foliage emerging

New foliage emerging in center of clump.

Before applying a fresh layer of mulch to dress up the beds for the season, cut back the old liriope foliage. This will remove the old foliage, considered unsightly by some gardeners. Raise the lawnmower’s deck, if necessary, and mow down the liriope to remove old brown foliage.

But this must be done before new leaves begin to shoot up from the center of the clump. Delaying this until after new growth has emerged will chop off the ends of tender leaves, leaving brown tips on new green growth. And don’t try this on recently planted liriope, which can be yanked out of the ground.

An alternative is to cut each clump by hand if there aren’t that many plants. Sharp scissors will do the trick. You can either collect the trimmings and compost them, or let them lie on the ground, to be covered by fresh mulch. Remove diseased foliage to the trash. A string trimmer might work, if it cuts and doesn’t shred the leaves.


And Fertilize

When there are so many chores that need attention in spring, I usually bury old leaves under a fresh 1″ layer of shredded hardwood mulch. The buried leaves will break down in the soil. Be sure to leave the crown of the plant uncovered.

Before applying mulch, broadcast granular fertilizer, such as 10-10-10, to the liriope, but prevent it from landing in the crown of the plant. Compost is an excellent fertilizer.


Liriope Diseases

Liriope can sometimes be infected with anthracnose, a disease that causes reddish-brown spots or dieback on leaves when they should be dark green. Remove clippings from the garden when cutting back the foliage of infected plants. Keep the foliage dry and increase air circulation by not crowding plants. Thinning the tree branches in the canopy above the liriope planting will allow more light to reach the plants.

Crown rot shows up as yellowing or browning at the base of the leaves, eventually consuming the entire plant. These plants should be removed and discarded. Avoid watering late in the day, which keeps leaves wet during the night when diseases take hold. Try not to include them in the irrigation pattern.

Plant liriope in well-drained soil, and, once established, water them in the morning once a week during times of drought, but don’t keep them wet. Annual applications of gypsum will help condition the soil and improve drainage.


Spacing

liriope sparsely planted

Liriope planted about 2′ apart

A common mistake is planting this ground cover too sparsely. These clumping liriopes (photo) are planted over 2′ on center. Liriope will not expand to fill the spaces between these plants any time soon. Instead, weeds will take this opportunity to colonize the bed.

Planted 12″ to 14″ apart, liriope will cover the ground, shading it and cutting down on much of the potential weeding.

In soil that is well-amended with compost and pine fines, liriope will expand more vigorously and have better-looking foliage in winter. In poor soils, it probably won’t die, but it will struggle.


Quick Tip #3: Garden Bed Edging


There are many contrivances designed to mark the edge of a bed. Whatever your personal preference is, go for it—white scalloped concrete or wire segments, bricks on a diagonal tilt, wooden ties, or heavy black plastic spiked to the ground.

I used a garden spade, with a sharp straight blade, to simply cut a steep angle 3″ into the ground. This suffices to stop most lawn grasses from spreading into the bed for a few months.

Diagonal brick edging looks quaint in Williamsburg. But if I used bricks, I preferred to “plant” them end-to-end almost flush with the ground. This forms a convenient mowing strip between the bed and the lawn, over which the mower’s wheels could follow the outline of the bed. And it’s less conspicuous.

In the back yard, in the informal Maryland gardens, gray or brown rocks lined the beds. If they were unearthed from and couldn’t be used on landscape work sites, I took them home. The edging was softened by plants that crept over and between them. There was no grass in the back yard, so these rocks functioned to define the mulch pathways and raised borders.


Is the Edging Too Conspicuous?

Brightly colored materials edging garden beds, such as colorful rocks or painted concrete segments, are conspicuous by their presence. The edging materials can end up getting all the attention instead of your exquisitely designed plant combinations. See if the boundaries can be maintained with the spade or with more muted shades of planted bricks or stones.


Headings

Page 1: Quick Tip #1: Spring-Flowering Bulbs (Fertilize Them, Wait For Them To Yellow Naturally, Remove Old Flowers, Divide Them), Quick Tip #2: Liriope: Mounding Or Spreading? (The Spreading Liriope Spicata, The Mounding Liriope Muscari, Cutting Back, And Fertilize, Liriope Diseases, Spacing), and Quick Tip #3: Garden Bed Edging (Is the Edging Too Conspicuous?)

Page 2: Quick Tip #4: Cutting Back Sedum ‘Autumn Joy’ (Other Perennials That Could Benefit), Quick Tip #5: How To Divide Hosta (Hosta Flowers, Fertilizer, Divide and Multiply: Preparation, and Dig, Divide, and Replace), and Quick Tip #6: Pruning Early-Flowering Shrubs (Renewal Pruning, A Personal Perspective on Pruning)

Return to the top

Hardening Off: Getting Ready To Plant


Plants Are In the Garden Centers, But Is It Warm Enough To Plant Them In the Garden?


blueberry 'Patriot'

Early spring flowers and leaves on the potted blueberry.


Our local garden centers are stocking up for early spring sales, and it’s great seeing all this color! Some of the plants can go into the garden soon, after hardening off.

Blueberries, redbuds, and pink dogwoods—nursery trees and shrubs that overwintered in local outdoor conditions—can be planted now. If there’s cold weather coming, that’s okay; these plants are used to it. If it’s severely cold and established plants have started leafing out, they’ll probably show some damage on the tender foliage. But they’ll recover.


Time For Tender Plants?


The tender warm-season types, such as basil, tomatoes, peppers, dahlia, cosmos, and caladium, can’t be planted until the weather has settled and the soil has warmed up. They must have frost-free weather. They also need to undergo a process known as “hardening off” before being subjected to the elements outdoors.

April 10 is the average date of our last spring frost (Charlotte NC, zone 7b/8a), but normally that’s still too early for peppers and basil. In most years, by that date, the soil hasn’t warmed up sufficiently for them.

snow, bird feeder

Snow on one of the bird feeders.

Tomatoes and many annuals can be planted around mid-April if the weather cooperates. They can tolerate cooler soil than peppers, but not frost or cold soil. Last year, in a mild spring, I planted a tomato in late March. A few cold nights necessitated covering it, but it survived.

It’s rare, but not unknown, for a snow squall to blow through Charlotte in April. Recent weather patterns sometimes indicate suitability for transplanting, but that doesn’t guarantee pleasant weather will continue.

(***Update*** April 2, 2019: Well, it snowed this morning! The 1/2″ of snow was the most we’ve seen here all winter. Other than placing the potted blueberry under an overhang next to the house, I didn’t protect any of the plants outside. The shrub is in bloom, waiting for the bees to pollinate it, but frost would have ruined the flowers. The temperature stayed several degrees above freezing next to the wall.)


Cold Soil


Soil might require more time to warm up after a cold, wet winter. And a prolonged stretch of cloudy skies, with no sun, will delay warming the soil. Maybe you’ve had a milder-than-average winter, as we’ve had here in the Carolinas. Still, pay close attention to the weather forecast.

Have protective covers (row covers, plastic sheets, old blankets) and maybe some strings of incandescent miniature lights handy, just in case.


Lobularia 'deep Lavender Stream'

Lobularia ‘Deep Lavender Stream’ likes cool weather, but cover during hard frost. Wonderful fragrance.


Hardening Off


snapdragon 'Snaptastic' strain, needs hardening off before planting

Snapdragons need hardening off before planting.

Most bedding plants and edibles begin life in greenhouses, shielded from cold temperatures and wind. Their leaves are quite tender in this protected environment. When these plants are suddenly exposed to outdoor conditions, though, the shock of full sun, colder temperatures, and a brisk breeze will cause them to wither. They might not recover.

Hardening off is the process of gradually toughening up the plants’ tissues to prevent wilt in the wind, scorch in the sun, or damage from the cold.

Each species or variety has a range of temperatures it can tolerate. So, even though acclimated dianthus can go outdoors here in mid-March or earlier, acclimated dahlias can’t. Dianthus can tolerate hard frost, but dahlia can’t.

Annuals are often categorized as being “half-hardy” or “tender”. Look for signage in garden center departments that indicate whether the plants can take some frost and cool temperatures, or none at all. Before purchasing all the plants your garden will need, find out which ones will tolerate cool weather or some frost, and plant those first.

Most greenhouses prepare their plants to some degree. Moved outdoors to tables exposed to the elements, these plants are hardening off naturally. Ask the salesperson if it’s safe to plant your selections or if they’ve been hardened off. Set them in the garden at the appropriate time; prepare to cover them at night if new foliage could be damaged by a late frost. The extent of damage depends on the species and on the severity of the weather.

Some garden centers display plants in lightly heated space, out of the wind. Frost-tolerant varieties with new growth emerging in these conditions will need hardening off before transplanting to the garden. Perennials that have fully leafed out in a greenhouse, compared to the same varieties established in the ground, might need protection if planted out. Delay planting or cover them on chilly nights.


Some Like It Quite Warm

Temperature-sensitive species, such as caladium, grown from tubers, will languish or re-enter dormancy in cool (not even frosty) weather. Cool to a caladium is anything below 65°F. Tender young plants can be killed by a light frost. Pepper plants and basil will suffer in cold soil, especially cold wet soil, even if the air temperature is above 50°.

We often see cold-sensitive annuals (caladium, vinca, zinnia, basil) at the big stores more than a month before it’s safe to plant them. That’s a gamble some are willing to take. They need warm weather and warm soil, so I’m not even tempted. Not yet.


The Process of Hardening Off


dusty miller, plant after hardening off

Dusty miller (Senecio) is a short-lived perennial.


Hardening off is a gradual process. Over a period of about a week, introduce home-grown seedlings and greenhouse plants to outdoor conditions. These plants need a period of adjustment if they have been pampered in a protective environment.

Start hardening off the plants by placing the flats or pots in a protected place outside, out of the wind. Give them 2 hours of gentle morning sun the first couple of days, and then dappled sun or light shade for the rest of the day. Strong sun, cold, and wind might be too harsh at this point, particularly for home-grown seedlings.

If the weather is especially inclement, you might have to delay placing them outside. Exercise caution with tender annuals (coleus, impatiens, zinnia), basil, and other plants that need warm temperatures.

Cool season vegetables and herbs (kale, broccoli, lettuce, parsley, cilantro), half-hardy annuals, and hardy perennials (Heuchera, Hosta, Sedum) can withstand chilly temperatures. But they still need hardening off if they’re coming directly from a heated greenhouse.

If the plants show no signs of stress (wilt or scorch), leave them outside a while longer. Give them direct sunlight. Be careful not to burn them in unusually high temperatures and strong sun. Don’t coddle the young plants by keeping them in the shade, though, unless shade is what they require. However, plants that need some shade in the summer usually tolerate or enjoy a few hours of direct sun on cool days in late winter through mid-spring.

Gradually lengthen the amount of time the plants spend outside in the sun and breeze. Keep the seedlings damp to moist, but not wet. Check them periodically for wilt. The plants will dry out much faster in warm sunshine and moving air. Finally, if the weather is suitable, plant them.


At the End Of the Day

Bring them inside in the afternoon if a drop in temperature is expected. Soon, the plants will be able to stay outside at night if the temperature is within their range of tolerance. Forgetting to bring the warmth-loving plants back inside is a sad story I’ve heard more than once.


If the Plants Are Really Tender…

plants under lights, plant outside after hardening off

…they might not be able to tolerate more than 30 minutes of gentle outdoor sun or dappled shade the first day. This is often the case with home-grown seedlings which didn’t receive enough direct sunlight indoors. Weak seedlings won’t tolerate any direct sunlight the first few days without withering and will take longer to adjust to outdoor conditions.

The root system of a seedling grown in inadequate light will be weak and won’t be able to supply enough water to the leaves. That’s one reason why it wilts so readily when placed outside. Also, the cuticle, the protective waxy surface layer of the leaf, is underdeveloped in low light.

Hardening off these frail plants might not be worth the effort. If they don’t improve in a few days, consider buying stronger transplants from the garden center or the farmers’ market. You might have enough time, though, to start new seedlings indoors. This time, give the seedlings stronger sunlight, place them closer to artificial light, or run the lights a few more hours each day.

Vigorous young tomatoes grow like weeds and can be planted lower in the ground. They’ll hardly skip a beat, so I’d consider keeping them as long as they have some good leaves and improve in outdoor conditions.


Plants Grown Under Lights Need Hardening Off

The photograph, above, shows a multi-tube light fixture positioned several inches above potted plants. As long as the lights are on 14-18 hours per day, the seedlings will grow into strong plants.

I used to start most seedlings indoors under 4′ long light fixtures (shop lights). I installed 2 daylight fluorescent tubes per fixture, before LED’s became commonplace. Flats were placed only 2-3″ below the tubes. Light intensity drops precipitously as distance from the lights increases. That’s why ceiling lights do almost nothing for sun-loving plants.

Plants grow beautifully under artificial light, close to the tubes. They’ll never see a cloudy day! But don’t place them so close that they could feel the heat. Old tubes decrease in efficiency and feel hotter.

Perhaps you have a south-facing bay window that gets natural sunlight all day, and the seedlings look sturdy and healthy. That’s great! However, they still require hardening off, gradually exposing them to wind and full sunshine. Otherwise, even these sturdy plants will wilt from the stress of sudden exposure to the elements. Outdoor sun is more intense than indoor sun because windows absorb and reflect much of the sun’s energy.


Do I Have To?

Now, it’s entirely possible that your plants will thrive without any hardening off whatsoever. Perhaps the garden center took care of that for you by keeping them outdoors, exposed to the elements. After all, many gardeners purchase their plants and have them in the garden within the hour.

That’s fine, if the weather is mild, and perhaps overcast, or if the plants have been fully hardened off. With a favorable forecast, consider planting in late afternoon or evening to lessen the shock.

If plants require hardening off, limit the process to as short a period of time as possible.


A Gamble In the Garden


USDA plant hardiness zone map

The USDA plant hardiness zone map, revised 2012.


As our average nighttime temperatures rise, the likelihood of frost diminishes. But we must be prepared for that dreaded surprise, when the temperatures plummet lower than the weather forecaster predicted.

Here in USDA plant hardiness zone 7b, a moderate part of the Southeast, we’re entering the “shoulder season”. This is when the weather can be delightful or it can be a little “iffy”. As in, “iffyou put that basil in the garden now, it will surely die!” Okay, seriously… March can bring us beautiful 75° days, and then we can have 3 drizzly days in the 40’s. Nighttime temperatures can be 42° or 22°. Okay for kale transplants, but not okay for okra or Thai basil.

Tokyo Bekana

Chinese cabbage ‘Tokyo Bekana’, coming into flower.

That’s currently the pattern in our location—warm and then cool. Edible greens don’t mind at all. Cool season greens and vegetables planted now should do very well, after hardening off. In fact, they could have been planted a month ago with no problem! But we didn’t have snow on the ground like our friends in the North.

The cool season vegetables already in the garden have been producing non-stop since autumn, after the tomatoes and peppers had been pulled out. I’m not in any hurry to see the end of the mustard greens, collards, and kale. Soon I’ll harvest collards for a big pot of soup. Love these mild winters!


Early Green Onions: No Hardening Off Needed

green onions

Green onions planted from onion sets.

A few weeks ago, I planted about 50 green onion sets, or young bulbs, and they’re already a few inches tall (photo, right). If cold weather comes for a visit, that’s no problem. Their little patch sits right against the south-facing wall of the house, in a comfortable microclimate.

Although we’ll still have some frosty nights, the onions won’t need to be covered. They can be gently tugged from the moist soil without damage, since they’re not yet heavily rooted.

Delicate young growth of onions and bunching onions grown from seed will require hardening off.


Headings

Page 1: Time For Tender Plants?, Cold Soil, Hardening Off (Some Like It Quite Warm, The Process of Hardening Off, At the End Of the Day, If the Plants Are Really Tender, Plants Grown Under Lights Need Hardening Off, Do I Have To?), and A Gamble In the Garden (Early Green Onions: No Hardening Off Needed)

Page 2: What Can I Plant After Hardening Off? (The Safest Bet: Pansies and Violas, Half-Hardy Annuals, Helleborus, Heuchera), The Warm Color Palette, The Cool Color Palette, and Spring: The Season of Rebirth

Return to the top


Starting Seeds for Cool Season Greens


Starting Seeds for Cool Season Greens 


dinosaur kale, 7/18/19


The coldest part of winter has passed for most of us, and it’s time to start seeds for cool season greens. Late winter transitioning to spring is my favorite time of the year. That’s when I start seeds for early harvests. This article covers details for growing some of the early greens, particularly spinach and the brassicas. On Page 3 is a recipe for a veggie omelet, an easy way to get more greens into the diet.

If the garden were bare, I would have started seeds a few weeks ago. But the greens in the vegetable garden continue to offer harvests. Unfortunately, the “list of wants” from the seed catalog is far more extensive than the garden’s square footage can accommodate! It’s time for the last harvest of collards for soup; that’ll open up some space.

While we’re harvesting established cool season greens, I’ll start several new crops indoors. These plants will be plugged into the garden as space opens up. But the seedlings will not be kept in their little pots very long; this stresses the plants and causes them to bolt, or to flower prematurely. (Photo, above: dinosaur kale germinated at night; it will green up in the sunlight.)


The First of the Cool Season Greens: Spinach


spinach 'Monstrueux de Viroflay' in pot

Young spinach ‘Monstrueux de Viroflay’.


I would have sown spinach directly into the garden by now, but we’ve had a long run of chilly rain. The soil is so wet that it’s doubtful any seedlings would even be tempted to germinate. At this time of the year, pay close attention to the weather forecasts. Conditions could deviate considerably from the averages.

It’s not good to dig in soil this wet anyway. That would drive out air spaces and ruin the tilth of the soil by compacting it. 

As temperatures begin to moderate, slugs come out in force and will decimate any seedlings that dare to grow in this weather. Rain: good for slugs. Sluggo: bad for slugs! Organic Sluggo pellets attract and kill slugs and snails. This version of the product contains materials (iron phosphate) that add nutrients to the soil. Check the label, though; Sluggo has other products with added ingredients. The organic option is safe to use around the edibles.


Spinach From Seed Is Easy!

Spinach germinates readily, from 50°F up to the mid 70’s (soil temperature), as soon as the ground can be worked in late winter or early spring. For better chances of success, choose varieties that are disease resistant and slow-bolting. In well-prepared soil, spinach is one of the easiest crops to seed directly into the garden.

Prepare the bed by incorporating 2″ to 3″ of compost and/or aged manure into the top 5″ of soil. Spinach prefers soil pH near neutral, from 6.5 to 7.3. A soil test will indicate how much lime, if any, should be added to raise the pH.

For baby leaf harvest, sow the seeds thickly in a patch, about 1″ apart. For full-size leaves, space the seeds a few inches apart, with rows 8-10″ apart. Crowding the seeds too closely or poor soil will result in a disappointing crop.

‘Monstrueux de Viroflay’

There’s a wonderful variety called ‘Monstrueux de Viroflay’ (photos, above and below), a French heirloom dating to 1866. It grows very large for spinach, up to 20″ tall with 10″ leaves, and should be spaced several inches apart.

Viroflay, or Monster, as it is often called, is lower in oxalic acid, or oxalates, than other spinach varieties. It might be acceptable for people with health concerns that prohibit spinach consumption. Check with your doctor.

Keep the soil moist and add organic fertilizers, such as fish emulsion, Sea-Plus, or earthworm castings, every 2 weeks. In cold soil, however, liquid synthetic fertilizers high in nitrogen work better than the organics. Microbes in the soil break down organic material and make those nutrients available to plant roots. But microbes are dormant in cold soil, so they can’t perform this vital service. They’ll become more active as the soil warms up in late winter or early spring.


spinach seedlings

‘Monstrueux de Viroflay’ spinach seedlings.

Spinach Bowl

Another option is to sow seeds directly into a 14″ wide, 6″ deep bowl filled with fresh potting soil (photo, above). The pot has drainage holes. Portability allows me to bring the pot indoors on especially cold nights while the cool season greens are beginning to germinate. And moisture levels can be carefully monitored.

Since the sappy crooked pine tree that shaded the deck from afternoon sun has been cut down, conditions on the fenced-in deck are more favorable to growing vegetables in containers.

Fill the pot with potting soil to within an inch of the rim. Simply scatter seeds on the surface, a couple of inches apart for smaller varieties and a few inches apart for Viroflay. Cover with another 1/3″ to 1/2″ of soil. Water…and wait… Spinach’s two seed leaves, the cotyledons, are easily differentiated from other seedlings by their long narrow shape. Thin as necessary; you can eat the culls.

Don’t neglect fertilizing potted greens. Rain and irrigation quickly wash nitrogen out of the soil.


Harvesting Spinach

Spinach.

Harvesting the crowns begins within 4 or 5 weeks, depending on weather and soil fertility. Pick individual leaves at any age, allowing the central growing tip to continue producing new leaves. Or cut the entire plant at the soil line before flower buds begin to grow.

By sowing new crops of spinach every week or two, you’ll have continuous harvests of spinach, as long as the weather favors growth.

Spinach quickly bolts, or goes to flower, at temperatures above 75°. Dry or nutrient-poor soil stresses the plants. And spinach will flower prematurely if the plants are stressed by growing too close together.

Harvest the entire plant if you notice flower buds forming. Cutting off the flowers will not stimulate spinach to grow a new bunch of leaves. Instead, start more seeds.

Use spinach steamed as a side dish, or in sauces, soups, smoothies, salads, pasta dishes, or an omelet.


And Then the Brassicas


cool season greens grown as microgreens

These microgreens are mostly brassicas.


The Brassicaceae family is a huge group of edibles. It includes arugula, broccoli, Brussels sprouts, cabbage, cauliflower, collards, kale, komatsuna, mizuna, mustard greens, pac choi, radish, tatsoi, turnip, and others.

All members have similarly notched seed leaves, or cotyledons. Those are the first two heart-shaped leaves to emerge from the seeds (photo, above). Because the seed leaves are already formed inside the seed, the little plant can begin photosynthesizing—and feeding itself—immediately upon germination. True leaves, which develop after the seed leaves, are also similar for most of the cruciferous vegetables. That’s why it’s important to label your pots so you can distinguish “this” seedling from “this other similar looking” seedling.


Include On the Label:

  • the name of the crop (dinosaur kale)
  • the name of the cultivar (‘Black Magic’)
  • the date of sowing (brassicas germinate in less than a week if sown indoors)

Store leftover seeds in their original packets, and make sure the cultivar name is included on the label. Store in a cool, dry place, such as the refrigerator. Most seeds of cool season greens are viable for 2 years or so. If not already indicated, mark the year of purchase on the packet.

It’s helpful to keep a record of the varieties you’ve tried and liked or disliked. Include how you started the seeds (in 4″ pots or cell-packs, under lights, directly in the garden), the dates you seeded and transplanted, and the weather conditions. Include notes on what was successful and what wasn’t, and possible explanations. Did the seeds germinate and then keel over and die (damping-off disease)? Did critters eat your cool season greens as soon as they started growing? Should the seeds have been started earlier? Or later?

There are successes and failures in every gardener’s life. Being able to pinpoint the reasons for a disappointing crop will enable you to be more watchful or to try a different approach next time. Check with your local cooperative extension office, through state land-grant colleges and universities, for advice. Failure is a learning experience, not a reason to stop trying!


Damping-Off

Damping-off disease can appear soon after germination. Sometimes, diseased seedlings don’t even appear above the soil, looking as though the seeds didn’t sprout at all. The small seedling develops a narrowed brown spot on the stem. Then the top of the plant falls over, and the seedling dies. This is caused by several species of fungus, whose spores are in the air, in the soil, in the water, or on the seeds themselves.

Damping-off often accompanies:

  • poor air circulation
  • high humidity
  • crowding
  • low light
  • low temperatures
  • reusing old soil
  • and overwatering

Space the seeds farther apart, run a small fan nearby, water in the morning, and increase the temperature and light levels if they’re low.

The first time I used the organic biological fungicide called Actinovate, life became a bit sweeter. It is costly, but a much safer option than chemical fungicides. And, with the number of seedlings I grow each year, a wise investment. Make up a small amount of the solution when needed and apply from a spray bottle or a small watering can when sowing the seeds and as soon as the seeds germinate. Always exercise caution when using sprays, and read the labels.


Caterpillars on Cool Season Greens

When the weather warms up in mid- or late spring, you’ll notice butterflies and moths flying around your cool season greens. How nice, you might think. But those lovely insects are on a mission, and that mission is to find suitable plants on which to lay their eggs.


Most of the brassicas are targeted by the female:

  • Cabbage Moth (or Diamondback Moth)
  • Cabbage Looper
  • the velvety green Imported Cabbageworm (also called the Small White Butterfly or Cabbage White Butterfly—white with black markings). Look for them lined up on the leaf’s midrib.
  • Cross-striped Cabbageworm (fine black stripes across the back, yellow stripe on the sides).
  • A few other species target particular brassicas or are limited geographically.

Here in my North Carolina garden, the 1¼” long Imported Cabbageworm has been the most commonly seen caterpillar on the brassicas. It is well-camouflaged in the green foliage. But for the past couple of years, populations of the Cross-striped Cabbageworm have been increasing. They’re especially pesky when lodged among the broccoli florets. Sometimes I don’t see them until I begin cutting the broccoli (just remove them). Inspecting the produce and spraying Bt regularly takes care of that.

Eggs hatch in a few days to a week, and immediately get to work chewing little holes and then bigger holes in your broccoli, kale, and other brassicas.


Harlequin bugs on cabbage


Another insect feeding on brassicas is the black and orange harlequin bug (photo, above). I squish them when I see them, although they’ll see you approaching them and will try to hide. They cause whitish blotches and distortions in the foliage.

Bacillus Thuringiensis (Bt)

As soon as you notice the white moths and butterflies flitting near the brassicas, it’s time to get the sprayer bottle ready. The imported cabbageworm is the larval stage of a butterfly and the one you’ll see in the daytime. The other caterpillars are moth larvae and are active at dusk or at night.

Mix up a solution of Bt, Bacillus thuringiensis, available from the garden center. Dipel and Thuricide are brand names for Bt. It doesn’t take long for these voracious little caterpillars to inflict considerable damage to your plants, so don’t delay.

Spray both the upper and lower surfaces of the foliage, occasionally agitating the solution. Begin spraying a few days after first seeing the moths, or certainly when you see holes appearing. Set the sprayer nozzle to a very fine spray; larger drops of water will bead off the waxy foliage. One or two drops of dish soap in the sprayer will help the solution stick to the foliage if you can’t get a fine spray.

It washes off in the rain, but any Bt clinging on the reverse (bottom leaf surface) might be enough for the current batch of caterpillars. Spray the brassicas every 5 to 10 days, as long as the insects are active.


sprayer


How Does Bt Work?

Bt is a naturally occurring bacterium that disrupts the caterpillar’s digestive system when ingested. The insects stop feeding immediately and die within a day or two. Spray as soon as you notice them because young caterpillars are more susceptible to Bt than older caterpillars.

Bt effectively rids the garden of moth and butterfly larvae, including swallowtails that eat parsley. Although they won’t bother your broccoli, black swallowtail larvae feed on parsley and its relatives in the Apiaceae family, including dill, cilantro, and bronze fennel.

The tradeoff? Fewer moths and butterflies, but more undamaged produce. I enjoy watching the black swallowtail butterflies, though, so I plant the large perennial bronze fennel for the caterpillars picked off the parsley and dill. Bt targets larvae of moths and butterflies, and nothing else.

After picking the crops, I sometimes let the caterpillars feast on the remains. Those caterpillars might feed another brood of baby birds or green anoles at that time of year. Once cold autumn weather has settled into the area, these caterpillars will no longer be around to bother the fall crop. Autumn is another delightful time to garden.

Bt is perfectly safe to use on edibles. Use up the diluted solution within a few days. Store Bt in a cool location out of the sun. Buy a small fresh bottle every couple of years, as this is a live organism, not a chemical.


Headings

Page 1: Starting Seeds for Cool Season Greens, The First of the Cool Season Greens: Spinach (Spinach from Seed Is Easy!, ‘Monstrueux de Viroflay’, Spinach Bowl, Harvesting Spinach), And Then the Brassicas (Include On the Label, Damping-Off, Caterpillars on Cool Season Greens, Bacillus Thuringiensis [Bt], How Does Bt Work?)

Page 2: Broccoli (Improve the Soil for Cool Season Greens, Harvesting and Side Shoots, When the Brassicas Bloom), Mini Broccoli (Early Sprouting Broccoli and ‘Spring Raab’, Broccoli ‘Happy Rich’, Who’s My Favorite?, Gai Lan and ‘De Cicco’, Sowing Seeds, Late Sprouting Broccoli)

Page 3: Dinosaur Kale, Hardening Off Cool Season Greens (Gradual Changes), Growing Plants Under Lights (More Tips Using Artificial Light), Getting More Cool Season Greens Into Your Diet, A Veggie Omelet Recipe Using Cool Season Greens

Return to the top

The USDA Plant Hardiness Zone Map

updated 4/5/2024


Find Your USDA Plant Hardiness Zone


2023 USDA plant hardiness zone map


Throughout this blog and at other gardening sites, we often refer to a plant’s “hardiness zone”. Find your location on the map to identify your zone.

Since moving to northern North Carolina in 2021, I’m now in Zone 7b. Here, the average annual extreme minimum winter temperature is 5-10° F. My location, though, is not far from the higher elevations of zone 7a (0-5° F). According to the older 2012 map, where I live was clearly in zone 7a.

At this USDA map website, enter your zip code to see if your area increased or decreased in the average extreme minimum temperature. Where I live, that temperature is 2° higher than it was in 2012. This does not mean that overall temperatures have increased an average of 2° F, just the lowest extreme minimum temperature.

Gardeners in other countries have similar systems of categorizing climate ratings.

Since I moved to North Carolina in 2013, we’ve had a few winters when the lowest temperatures fell almost to 0°F. We’ve also had a couple of seasons in the past few years when I rarely needed a winter jacket.

The 2023 map above replaces the 2012 map. Most zones of the country have been shifted upward a bit to reflect the slightly higher average extreme winter temperatures. But that won’t stop Mother Nature from testing the limits. These are averages, after all.


Microclimates


microclimate that raises the temperature just a few degrees, compared to out in the open, can make a huge difference. You can find a microclimate simply by placing the winter garden on the south side (in the northern hemisphere) of the house, a solid fence, or the shed. There’s a little wiggle room in your USDA plant hardiness zone if you can take advantage of warmer microclimates.

In late February of 2024, I placed flats of the first cool season greens of the year on the south/southeast side of the enclosed porch. Here, they can grow where the temperatures are 1-3 degrees warmer at night than 15′ from the house and they’re protected from the wind. Now that they’re well rooted, the brassicas and lettuces will tolerate freezing temperatures before they’re sold or set into the garden.


spinach Monstrueux de Viroflay, French heirloom

Potted spinach ‘Monstrueux de Viroflay’, a French heirloom.


The USDA Plant Hardiness Zone On the Label


Most vegetables, greens, annual flowers, and herbs are rated “cool season” or “warm or main season” plants. They are not generally assigned USDA plant hardiness zone numbers on their labels. Check with your local agricultural extension office for a planting timetable.

Parsley and cilantro, pansies and violas, kale and green onions are considered cool tolerant. And some will tolerate warm temperatures as well. But basil, zinnias, and bell peppers are warm season plants and cannot tolerate frost or prolonged exposure to temperatures below 50°F. Depending on your climate zone, you’ll be able to grow tender sweet basil outdoors beginning somewhere between February and June.
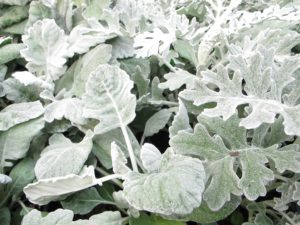
Each tree, shrub, and perennial is given a zone number, an indication of how much cold it can tolerate in winter. A plant’s zone rating signifies the likelihood of its survival after an average winter. Some plants also are assigned heat zone ratings, which is helpful in hot climates.

Strawberries and raspberries, for example, are hardy in zones 3 or 4 to 7 or 8, depending on variety. Blueberries, as a group, have a wide range of temperature tolerance, growing in zones 3 to 10. Certain varieties, such as highbush and lowbush blueberries, grow toward the cooler end of the range, while rabbiteye blueberries are suited to the warmer southeastern U.S.


A Little More Protection


cold frame for cool season vegetables

Cold frame in Maryland.

With simple materials, there are a number of ways to protect cool season greens in winter. From wind barriers to low tunnels to a cool greenhouse, some of these tips will work for you.

On very cold nights, cover with clear plastic sheeting to retain the heat gained during the daytime. Adding a string of miniature incandescent lights will raise the temperature even higher in a cold frame. Don’t forget to open the cover in the morning. Temperatures rise quickly inside a closed frame.

During bitterly cold or icy weather, the clear plastic sheets stay in place in the daytime, without over-heating the plants beneath the cover. Loosely drape the plastic over the crops, allowing excess heat to escape when the sun shines. All of our winter crops bounce back after a night of below-freezing temperatures. I loosely cover them at 25° F to prevent an interruption in their progress and damage to the foliage.

In late afternoon, I’ll secure the plastic if the nighttime temperatures are expected to drop below the low 20’s. Many of the cool season greens can survive with no winter protection in warmer zones. Each variety of cabbage, broccoli, or cauliflower, for example, has a more defined range of tolerance, so choose cultivars carefully.

Another option is to plant a dense evergreen hedge on the north or northwest side of the garden, or wherever your prevailing winter winds come from. Evergreens help diffuse and divert frigid winter winds.


The Sun’s Path


The sun’s zenith rises in the sky as summer approaches and begins to fall again after the first day of summer. Although the shortest day and the first day of winter is December 21, our lowest winter temperatures occur around the third week of January. Similarly, the hottest part of summer occurs a few weeks after the first day of summer.

As you plan the location of your vegetable garden, remember that a winter garden receives fewer hours of light. Try to orient it toward due south for the best exposure.

If there are deciduous trees south of the garden, you might actually get more sun in the winter, when the trees are leafless, than in the summer.


the suns path

The sun’s path across the sky, in southern North Carolina.


As an avid vegetable gardener, I will find ways to grow a few rounds of greens and vegetables all through the year. I’ll never move to a colder zone if I can’t grow my favorite greens in winter. The average extreme minimum temperature creeping a bit higher on the thermometer makes it just slightly easier to succeed.

In addition to the plant’s hardiness zone, other factors contribute to the tree’s or the perennial’s success or failure in your garden. Time of planting, general health of the plant, ongoing care, and soil condition all have an impact. Begin with the plant’s hardiness zone, though, because that’s the one factor we can’t control.


Return to the top

What Is Wrong With My Houseplants?


2019: HAPPY NEW YEAR!


Does your list of New Year’s Resolutions include paying more attention to your houseplants? Now that the busy holidays are over, we’re almost back to our routines. The plants look forward to returning to their normal locations. They missed those bright windows!

If you’re dissatisfied with your plants’ appearance, today might be a good day to give all the houseplants a thorough examination and a good cleanup.


 Philodendron selloum, easy houseplants

Philodendron selloum adds a tropical element to the indoor environment.


What Is Wrong With My Houseplants?


Let’s begin with some easily recognized problems:

  • the plant has collapsed into a sad-looking heap of wilted foliage
  • leaf tips are brown
  • leaves are turning yellow
  • many of the leaves are dropping off
  • the flowers are gone

But your houseplants have sentimental value, so they’re not going into the trash…or into the compost pile. And you know they probably will recover with a little attention. After all, the same thing happened last year.

A home without houseplants looks sterile—to me, anyway—so there will always be indoor plants wherever we live. They rid the air of benzene, formaldehyde, and other pollutants. In return, we get a small boost in the humidity and oxygen content of the air we breathe.

And we enjoy living with nature. Many studies point to the psychological benefits of living with plants at home, at the office, in school, and in the community.

With the renewed interest in growing houseplants, a huge number of species and varieties are available. Popular plants, such as Fiddle-leaf fig (Ficus lyrata), are in such high demand at garden centers that supply is often difficult to maintain.

cold frame before covering, with mini lights

Several dozen plants are protected here, and will be covered with plastic for the night.

There are hundreds of plants in my collection, from 1″ tall miniature Haworthias to a 6′ tall 40-year-old ponytail palm (Beaucarnea recurvata).

Many succulents and half-hardy perennials spend the winter in the cold frame outdoors, heated with a few strings of miniature incandescent Christmas lights and covered with 2 or 3 sheets of clear plastic (photo, right). There’s just not enough room inside for everyone!

We often have warm winter days in the Carolinas. This gives some houseplants the opportunity to spend a few afternoon hours on the enclosed deck, basking in the mild sunshine.
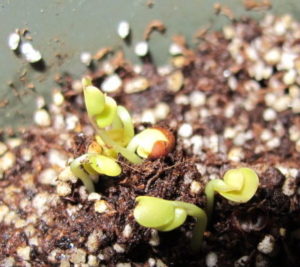


My Peace Lily Is Wilting


Spathiphyllum, or peace lily, popular houseplants

Peace lily, Spathiphyllum.

Wilt in peace lilies due to underwatering is a common problem. There are few plants that exemplify wilt more clearly than this one. A dry but still living peace lily, once watered thoroughly, will recover. But a few leaves might turn yellow, and they won’t green up again.
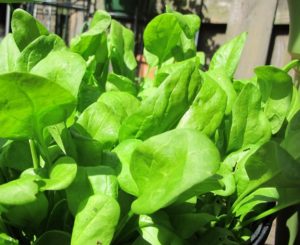
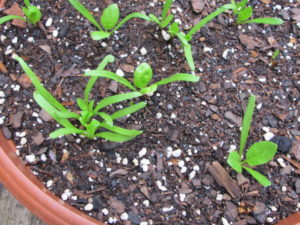
Peace lily (Spathiphyllum spp.) is commonly available and a good choice for beginning gardeners. You see them in malls and offices all over the country, where lush foliage lends a tropical flair to indoor spaces. Garden centers sell cultivars ranging from robust five-foot-tall specimens to table-top varieties less than 10″ tall.

They like soil that stays lightly moist all the time. But roots that stay wet all the time (from overwatering, overpotting, sitting in a wet saucer, or poorly-drained soil) are unable to “breathe”. Air and water are equally important to root health. Tiny root hairs that absorb moisture rot in wet soil, so the plant can’t get water to the leaves, causing the familiar wilt. A plant can wilt from either dry or constantly wet soil.


Keeping the Peace Lily Tidy

Strelitzia

Bird of paradise.

When yellow leaves appear, remove the entire leaf—both the blade (the wide part) and the petiole (the narrow leaf stem). The petiole is connected to the crown, stem, or the main trunk of a plant by a thin layer of cells. That layer of cells, the abscission layer, helps the petiole separate from the main part of the plant if the leaf is no longer useful.

After cutting off most of the yellow leaf, peel off the last bit of the yellow or brown petiole. If it is difficult to remove, as in large cultivars, cut the base of the petiole longitudinally down the center, toward the stem or the crown. Now you can easily peel off each half of the remaining petiole.

This works on other species with strong leaf attachments, such as Bird of paradise (Strelitzia, photo, above), yucca, palm, and dracaena. Removing all those dead fragments greatly improves the plant’s appearance.

Easy to Grow

Peace lilies are not demanding when it comes to light. Provide bright indirect light or morning sun for continuous growth. Disregard the advice that they thrive in “low light”. Sure, they’ll survive for a while, but brighter light toughens the tissues. New growth emerges thicker and stronger.

Plants photosynthesize and grow faster and often bloom in those locations, sometimes emitting a trace of scent soon after the white spathe flowers open. During the shorter days of the year, peace lilies welcome a few hours of direct sun.


peace lily, flowers. easy houseplants

Peace lilies in bloom.


When the flower turns brown, snip off most of the stalk, wait a few days, and then pull out the remaining part of the shrinking brown stalk. You could remove it earlier, but sometimes a few green leaves are inadvertently removed at the same time. Once again, this keeps the plant tidy, with no lingering dead remnants.


How Often Should I Water My Peace Lily?

The Environmental Variables

diagram, wilted plantTemperature, light, humidity, fullness of the plant (number of leaves), pot size and type (porous or non-porous), soil composition, and air circulation affect moisture in the soil. A furnace cycling on more often during cold weather necessitates frequent watering of thirsty plants. Knowing how these variables work in conjunction with each other, for each species, will determine how often your plant needs water.

A full and potbound (roots tightly filling the pot) peace lily, in morning sun at 72°F, and in potting soil that drains fast (has a lot of bark chips), for example, might need water every 2 or 3 days. On the other hand, one that was recently transplanted into soil with mostly peat moss and kept in a room at 65°, in indirect light, with 15 other plants nearby (higher humidity) might need water every 5 or 10 days. That’s why it’s so difficult to answer the question, “How often should I water it?”

Most varieties of peace lily are potted into 6″ to 10″ diameter pots. Stick your finger into the soil an inch or two down from the surface. If the surface of the soil feels dry, but there’s damp soil below that, the plant does not need water.

Waiting to water your plants until they begin to wilt is not a good idea. Delaying for only one day could cause another leaf to turn yellow. Or the plant will refuse to produce new foliage.

How Can I Tell When To Water?

A better course of action is to feel the moisture in the soil and the weight of the plant and pot. Eventually, you’ll learn to recognize that when it feels “this” dry or light in weight, it’s time to water. Some gardeners rely on inexpensive soil moisture meters, but I don’t consider them to be very accurate.

And water your peace lily thoroughly! Not just a little bit that moistens the top 2″ of soil. Instead, give it enough to moisten the entire root ball. Some water will drain into the saucer, and a dry pocket of soil might soak up that excess. Drain off any excess that remains in the saucer after 15 minutes.

Many of us conserve energy in winter by keeping the thermostat in the mid to high 60’s F during the daytime and in the low 60’s at night. If you’re growing plants from the tropics, they appreciate being given lukewarm water, about 85° or 90°. This includes ficus, philodendron, pothos, African violet, Alocasia, Aglaonema, and spathiphyllum. Dry soil absorbs lukewarm water more readily than it does cold water.


Upon Careful Examination

Place a fully wilted peace lily in a bucket filled with lightly warmed water up to the pot’s rim. You might have to weigh down the pot. Keep it there for an hour or two, then let it drain. If it doesn’t revive after a few hours, remove the plant from its pot and examine the roots.

Certain materials used at the wholesale nursery, once dry, can resist absorbing water. It’s possible that, even though the plant had been transplanted into better quality potting soil, the plant’s original root ball stayed dry and was unable to produce new roots. When transplanting any plant, tease out some of the roots on the surface of the root ball, especially one that is solidly filled with roots. This helps stimulate the formation of new roots that will quickly grow into fresh potting soil.

I’ve worked on plants that seemed to have moist soil, yet remained in a wilted state. One of these conditions was usually the cause:

  • The plant was repotted too deeply, rotting the petioles and the crown of the plant. The crown should remain at soil level, where the green top growth meets the roots. Very few plants survive being planted lower in the soil. Rule of thumb: the original soil surface should be visible after repotting.
  • Over time, the organic matter (peat moss, wood products) in soil breaks down and loses most of its volume. Consequently, the soil surface drops lower in the pot. If roots are visible under the crown and are exposed to the air, add fresh potting soil to cover the roots. You might have to remove the plant from the pot and add soil under the roots to raise the crown to the proper level. Either way, don’t bury the crown.
  • The roots were not teased out from the root ball, and remained within the tight confines of the original root ball. The root ball dried out before new roots could grow into the moist new soil.
  • New potting soil was loosely added around the root ball, and not firmed in next to the roots. Moderate pressure against the roots helps develop a healthy root system, and fills any voids in the pot that could dry out delicate root hairs. It also prevents water from rushing through the pot, following the path of least resistance, and not soaking in.
  • The plant’s soil was wet for too long, and the rotted roots couldn’t regrow. Fungal and bacterial pathogens build up in wet soil and cause more problems.
  • The temperature in the room or of the water was too low. 
  • The plant was overfertilized, burning the roots. Many people think that fertilizing more often or using more than the recommended concentration makes plants grow faster. It doesn’t. Overfertilizing makes plants die faster. High salt concentrations draw water out of the roots, killing them.

Many of the problems we have with houseplants can be avoided if we keep them potbound in the winter. Cooler soil temperatures and shorter days do not favor root growth at this time of the year. It’s better to delay repotting houseplants into larger containers, if they need it, until spring to mid summer.


Headings:

Page 1: What Is Wrong With My Houseplants?, My Peace Lily Is Wilting, How Often Should I Water My Peace Lily? (The Environmental Variables, How Can I Tell When To Water?, Upon Careful Examination)

Page 2: How Often Should I Water Houseplants?, Should I Fertilize My Houseplants?, Brown Tips On Houseplants (Overwatering, Underwatering, Overfertilization, Disease, Guttation, Fluorine), Yellow Leaves, and My Houseplants Are Dropping Leaves

Page 3: Succulents (Porous Pots, Repotting and Refreshing), Ferns (Raise the Humidity), Pothos and Philodendron, Snake Plant (What is CAM?), English Ivy (Spider Mites), Will They Flower Some More?, and Before You Know It


Return to the top


Poinsettias: Merry and Bright!


Poinsettias in December


red poinsettia


Poinsettias have long been associated with Christmas celebrations and are the most popular indoor flowering plants. They appear as early as mid-November in every garden center, grocery store, florist, Christmas craft show, and hardware store across the country.

Recently, I bought one called ‘Ruby Frost’ (bred by Syngenta). It’s a short plant that fits perfectly under a table lamp. I prefer some of the novelty colors, such as the very pale, creamy peach Premium ‘Apricot’, but I didn’t see it this year. ‘Visions of Grandeur’ (Ecke) is another favorite, with soft pale pink bracts. It is stunning when grown to a large size.

Over 100 varieties are available, with new ones advertising improved features, such as darker leaves and longer-lasting bracts. The colorful parts, sometimes called flowers, are actually modified leaves called bracts. True flowers are the small yellow and red parts in the center of the youngest bracts. Poinsettias are also being bred for resistance to necrotic leaf margins, a physiological condition where the edges of bracts or leaves turn brown due to calcium deficiency.


History of Poinsettias


As you can see from the photograph below, wild poinsettias look quite different from the ones we grow today in greenhouses. The plant is native to tropical deciduous forests of Mexico, where they grow from 2′ to 12′ tall.

Seven hundred years ago, the Aztecs called the plant Cuetlaxochitl, and used the red bracts for dye. The white latex had antipyretic properties, and the Aztecs used it for treating fever (but don’t try this at home). King Netzahualcoyotl considered the poinsettia a symbol of purity, as did the Aztec King Montezuma in the 1500’s.


wild poinsettia

Wild poinsettia.


The first U.S. ambassador to Mexico (1825-1829), Joel Roberts Poinsett, introduced the plant to the United States in 1825 after seeing them in the area now known as Taxco. Poinsett, a physician and botanist, shipped specimens to his greenhouse in Greenville (or Charleston, depending on source), South Carolina. He also sent plants to Philadelphia botanist John Bartram, who, in turn, gave plants to Robert Bruist, a nurseryman who named them Euphorbia pulcherrima Willd.

poinsettia cyathia

Poinsettia flowers, the cyathia.

More than 700 species belong to the Euphorbia genus, a member of the Euphorbiaceae, or spurge, family, and have in common the characteristic white sticky latex sap. A Euphorbia flower generally comprises a single female flower, without sepals, surrounded by male flowers in a cyathium (plural: cyathia). The small flowers are located in the center of the colorful bracts, which attract the attention of pollinators.

Poinsettias are not poisonous, as was previously thought. Children and family pets chewing on the leaves or stems find out fast that better things await them on, or under, the dinner table. Those rare individuals who are allergic to the sap and develop a rash should immediately seek medical attention.


The Christmas Connection


poinsettia

The origin of poinsettias as a Christmas tradition began in the 1500’s, in Mexico, with a poor young girl named either Pepita or Maria. Because she was unable to provide a gift to celebrate Jesus’ birthday, she was inspired by an angel to gather weeds into a bouquet and to place them by the church altar. Red blossoms sprouted from the weeds, the story goes, which turned into poinsettias.

By the 1600’s, Franciscan priests in Mexico included them in Christmas celebrations. Around the same time, the writings of a botanist named Juan Balme began to appear, describing the poinsettia.


Modern Culture of Poinsettias


In 1923, Mrs. Enteman of Jersey City, New Jersey, discovered the first oak-leaved seedling and named it, appropriately, ‘Oak Leaf’. This was the first selection suitable for pot culture. Up until the 1960’s, all selections and sports are credited with having ‘Oak Leaf’ heritage.

Poinsettias were first grown as cut flowers (‘True Red’, ‘Early Red’), and were raised in outdoor fields before moving into greenhouses in the 1960’s. Paul Ecke, a California nurseryman, began breeding, in the 1920’s, most of the varieties grown today. His company discovered a way to breed plants that branched freely. So, for decades, this secret method allowed Ecke to remain the dominant grower…until the secret was revealed by a student, this story goes. Good branching structure and shorter stems culminated in their ‘Eckespoint Freedom’, in 1992.

Pennsylvania State University, the University of Maryland, and several commercial breeding programs proliferated in the 1950’s. Dr. Robert N. Stewart, of the Univ. of Maryland’s Agricultural Research Center in Beltsville MD, bred poinsettias with stiff stems, large bracts, and new colors. ‘Paul Mikkelsen’, named in 1963, was the first long-lasting poinsettia crop. ‘Annette Hegga Red’, with multi-bracted stems from pinching, and other sports were imported from Norway in 1964.

Before these new improvements came on the gardening scene, poinsettias grew long stems and were trained to look like a paperclip—“tromboning”, it was called.

Currently, California leads the nation (total: 34 million plants) in the number of poinsettias grown. The USDA reports that, in 2013, California grew 6 million plants. North Carolina came in second, with 4.4 million pots grown. Then Texas with 3.7 million pots, and Florida and Ohio, each with about 3 million pots. Red is the most popular color, claiming ¾ of all U.S. sales, followed by white, and then pink.

Poinsettias accounted for 23% of all U.S. indoor flowering potted plant sales in 2013. They contributed $144 million of the $618 million in this category.


Varieties


Looking for a basic red poinsettia is no longer a simple task. There are cherry reds and scarlet reds, deep velvety reds and burgundies. Some bloom early and some bloom later, and can last in color for months! There are plants with dark green foliage or a lighter shade of green. And there’s ‘Winter Rose’ (Ecke) with bracts that are curled, resembling a rosette. ‘Carousel’ (Ecke) adds a bit of a frill, with its wavy-edged bracts. ‘Mirage’ and ‘Lyra’ (both from Syngenta) were introduced in 2017. Every year or two, new introductions come to the marketplace.

Solid pinks, in shades from very pale to vibrant, and from clear pink to peach to salmon, broaden the palette. And, of course, there’s white, although most white poinsettias are creamy yellow and mature somewhat white, as in ‘Freedom White’ and the recent ‘Merry White’ (Selecta). The newer ‘Princettia’ series does have a pure white variety, and also several pink shades. These colors offer tones that fit better, stylistically, in many homes.


If bright rich orange is your color, there’s a poinsettia for you! ‘Lemon Drop’ and ‘Gold Rush’ bring even more color selections. But the traditional reds, such as the ‘Freedom’, ‘Prestige’, ‘Premier’, and ‘Viking’ series are still the favorites and readily available.

For those who dare, spray paints and glitter can be applied. White poinsettias suddenly, magically, become blue or purple! Very striking, unnatural some would say, and not for the faint of heart!


Variegated Bracts and Foliage


variegated poinsettia

A poinsettia with variegated bracts.


Variegated leaves, with creamy yellow margins, add another dimension, as in ‘Holly Point’. The newer ‘Tapestry’ (Ecke; photo, end of this section) is more vigorous than ‘Holly Point’ and more resistant to necrotic leaf margins. Foliage is gray-green in the center, and bracts are cherry red.

‘Mars Marble’ has cream margins with soft pink in the center of the bracts. ‘Christmas Angel Marbella’ (Selecta) also has creamy margins around salmon-pink centers.

For something a little different, there are series with spotted and splotched bracts. ‘Glitter’ (Ecke), ‘Shimmer Surprise’, ‘Tri-Color’, and ‘Jingle Bells’ look as if they’ve been splattered by white or pink paint. Some cultivars have yellow spots!

‘Ice Punch’ has red bracts with a blaze of pinkish white in the center. ‘Ruby Frost’ offers marbling in shades of pink, white, and red. (Note: the plant I purchased was labeled ‘Ruby Frost’, but it differs in appearance from photos in NC State Poinsettia Trials.)


‘Strawberries and Cream’ (photo, below) is a diminutive variety, often grown in a 4 1/2″ pot. It has oak-leaved bracts that are cream on the margin and deep salmon pink in the center. Because of its size, it fits nicely in a basket with small-leaved English ivy, a Norfolk Island pine, and a young fern. Cover the pots with Spanish moss, add a bow, and you’re all set!

To hide bare stems near the bottom of the plant, simply add sprigs of evergreens and pine cones. Or use them in baskets, lined with plastic to prevent leakage, with other plants surrounding the bare stems. Keep them in the pots and move the plants around until you arrive at a pleasing arrangement.


Headings

Page 1: Poinsettias in December, History of Poinsettias, The Christmas Connection, Modern Culture of Poinsettias, Varieties, and Variegated Bracts and Foliage

Page 2: How To Care For Poinsettias (Growing Conditions), Outdoors For the Summer, And Back Indoors Again, and National Poinsettia Day

Return to the top


This Is Why Fall Color Happens


forest, fall color


One of the most phenomenal transformations in nature occurs in autumn when leaves take on fall color.  


Deciduous tree canopies change from shades of green to the reds, oranges, yellows, browns, and purples associated with this time of year. A drive along the Blue Ridge Parkway, or even a glimpse out the window to the Japanese maple in the courtyard, elicits feelings of delight and wonder.

Equal to the spectacle unfolding in front of us, as we watch colors brighten from day to day, is the curiosity for an explanation. Why does fall color happen?


Plant Pigments and Fall Color


fall color

Looking up in Lincolnton NC.


It all starts with plant pigments, which give leaves their color.

Sandwiched between a leaf’s upper epidermis and the lower epidermis is a layer of cells called the mesophyll. The mesophyll is composed of the upright cells of the palisade layer, near the surface of a leaf, and the more loosely arranged spongy mesophyll. Both kinds of cells within the mesophyll contain chloroplasts, with chlorophylls “a” and “b”. Also present within the leaf is a network of vascular tubes—phloem and xylem—which carry water and nutrients between the leaves and the roots.

These chlorophylls absorb wavelengths from different parts of the spectrum. Chlorophyll a absorbs violet-blue and orange-red wavelengths, and chlorophyll b absorbs blue light. All plants have “a” but not all plants have “b”. In lower light levels, “b” more efficiently absorbs energy from available light and transfers that energy to “a”.

In autumn, as chlorophyll degrades into transparent compounds, the carotenoids become the dominant colors. Those pigments were there all along, but the green chlorophyll masked them. We don’t see the oranges and the yellows until the greens begin to die down.


tree leaves

Spring foliage on maple tree in the woods.


Chlorophyll


maple leaves, fall color

Oak leaves, at Mabry Mill, Meadows of Dan, VA (2020).

The green pigment is the familiar chlorophyll. We see it every day as plants grow and produce foliage. Chlorophyll, contained within a cell’s chloroplast, is responsible for manufacturing sugars during photosynthesis. Carbohydrates, made from oxygen and hydrogen in water, and carbon from carbon dioxide, permit growth and development of the plant. Chlorophyll is continually depleted and replenished throughout the season.

We see green leaves because most of the green wavelengths in light are not absorbed but are reflected instead. Chlorophyll pigments absorb primarily red and blue wavelengths.

Changes occur in late summer as days shorten and temperatures drop. Cells at the base of the leaf’s petiole, where it attaches to the stem, begin to cut off the vascular system. Water and nutrients no longer move freely between the leaves and the stems. Production of new chlorophyll stops, revealing the yellows and oranges. Sometimes the leaf veins are the last parts to change color and remain green as the rest of the leaf turns color (photo, above).


Carotenes and Xanthophylls


yellow fall color, maple in charlotte nc

A maple tree in Charlotte NC.


Carotenoids are composed of xanthophylls and carotenes. These are the yellow, orange, and brown shades seen in plants and animals—daffodils, corn, buttercups, bananas…and canaries, egg yolks, shrimp, fish, and flamingos. These pigments absorb wavelengths from the blue and some of the green parts of the light spectrum, which chlorophyll can’t absorb efficiently.

Xanthophylls and carotenes protect foliage from oxidative stress (cell damage) during photosynthesis. When the tree is exposed to strong sun, carotenoids absorb excess energy from excited chlorophyll molecules and release it as heat. In autumn, carotenes protect leaves as the nutrients are withdrawn from the leaves to the stems. The tree will re-use these nutrients when new foliage emerges in spring.

Beta-carotene, lycopene, lutein, and zeaxanthin are more carotenoids, present in leafy greens, fruits, and vegetables. These pigments are good for plants and for us, too—in squash, sweet potatoes, tomatoes, colorful ripe peppers, carrots, oranges, apricots, and grapefruit.

Between 15 and 30% of tree species have yellow or orange fall color. Trees that turn these colors include hickory, ash, redbud, yellow poplar, birch, aspen, black cherry, sycamore, maple, fringe tree, cottonwood, sassafras, Parrotia, pomegranate, alder, ginkgo, witch hazel, and Katsura.


orange fall color, lincolnton nc

Lincolnton NC.


Red twig dogwood ‘Arctic Fire’ and yellow-twig dogwood ‘Flaviramea’ stems turn color in cold weather and good sun. Cut back the plants in late winter, almost to the ground, to encourage a multitude of young twigs that will take on color later that fall.

Brown is often the color of cell walls and can appear in the absence of other pigments. Sometimes, leaves turn brown without turning color as a result of an early freeze. A Japanese maple that normally turns red in autumn, for example, can turn brown when the temperature suddenly plummets. Also, a tree that has been cut down in late summer or fall will turn brown instead of displaying its usual fall color. More on that later, under marcescence.


Anthocyanins


red fall color, crape myrtle

Fall color of crape myrtle, Cane Creek Park, Waxhaw NC.


What about the red colors? Unlike the yellows and oranges, the red pigments, called anthocyanins, are produced in the sap when sugars break down in bright light.

This happens after some of the chlorophyll has degraded in autumn and as phosphate levels decrease. Phosphates break down sugars manufactured by chlorophyll in the summer in order to carry out cell activities. However, in the fall, phosphates and other nutrients move from the leaves to the stems.

You might notice that in some years, the red colors are more vibrant than in other years. Rich red colors are visible when anthocyanins are produced in greater quantities. Bright sunny days and cool but not freezing temperatures foster the blazing displays we look forward to each year. 


berries

Edible berries with high levels of healthy anthocyanins.


Nutritionists encourage us to “eat all the colors” of vegetables, greens, and fruits. Anthocyanins, among the most powerful antioxidants, are found in many fruits and vegetables, including apples, cranberries, blueberries, strawberries, blackberries, cherries, grapes, plums, and red lettuce.

Carotenoids can combine with anthocyanins to form deep orange, scarlet red, and bronze fall colors.

In temperate regions, about 10% of the trees turn red or burgundy. But the percentage can be as high as 70% in areas such as New England. Some plants with predominantly anthocyanin pigments include maple, oak, sweet gum, tupelo, sourwood, dogwood, cherry, and persimmon. Purple-leaved cultivars of smokebush and redbud turn deep red in autumn.


Variety Selection in Your Landscape


burgundy fall color, Japanese maple with lantern

Certain varieties of Japanese maple display great color in summer and again in autumn.


When choosing shrubs and trees for your landscape, be sure to ask the nursery about fall color. There could be several cultivars within a species, each with a different color in autumn.

Japanese maple in fall color, new gardens

Japanese maple.

Japanese maple (Acer palmatum), for example, comes in many varieties. Red-leaved cultivars of this tree seem to be the preferred choices among customers. Foliage that remains mostly red all summer will gradually deepen to a rich reddish burgundy. And then it suddenly looks as though the plant is on fire, turning bright red. On the other hand, green-leaved cultivars can be multi-colored in the fall, or rich orange, or sunny yellow. It just depends on the cultivar.

If you’re looking for a specimen tree, and fall color is a factor, visit garden centers and public gardens in autumn when the trees show fall color. Research the full botanical names (Genus, specific epithet, and ‘Cultivar’) of the varieties you like.

This is not a guarantee, however, that young potted trees will have the same fall color as established trees. Plants in nursery pots can behave differently than plants in the garden, so take that into consideration.


Fall Color Might Depend on Weather


parrotia persica, reddish fall color in snow

Parrotia persica in the snow.


Seasonal weather conditions also affect a tree’s fall color. In the Maryland garden, a Parrotia persica grew in an island bed. The leaves of this witch hazel relative often turned a bright yellow color. In other years it was amber-gold, and, more rarely, salmon-red.

Prolonged mild fall weather also affects the display. That Parrotia (photo, above) occasionally held its leaves until December. Many oak species keep their orange, russet, rich red, or brown leaves through early winter before shedding them.

Red fall color is particularly dependent upon weather conditions. In 2018, trees that normally turned brilliant red were rather dull here in Charlotte. The heavy rains, high winds, and overcast weather did not promote the production of anthocyanins.


Hormones and Abscission


Abscisic acid (ABA), produced in terminal buds, slows growth and signals the plant to produce bud scales that protect the buds over winter. ABA is also produced in the root system and is translocated to the leaves during drought in the growing season, signaling the leaves’ stomates to close. This reduces transpiration, conserving water content in the plant.

Hormones produced in leaves and in the tips of twigs influence development of the abscission layer. This layer is a few cells thick, characterized by short cells with thin walls, and sits between the base of the leaf stem (petiole) and the twig. During the growing season, higher levels of auxin regulate the influence of ethylene, two hormones, resulting in the leaves’ ability to remain attached. Auxin levels fall in autumn, however, exposing cells in the abscission layer to the effects of ethylene, which promotes leaf detachment.

Cells between the petiole and the twig are differentiated, disintegrating on the leaf end and depositing lignin and suberin on the twig side. This layer of cells is weakened, causing the leaves to fall off by their own weight or with help from wind and rain. Enzymes, such as pectinases, help the process by breaking down cell walls.

Remaining on the twig is a leaf scar, with remnants of vascular strands. Over several days, lignin (tough woody tissue) and suberin (corky bark tissue) will seal the fresh leaf scar, protecting it from infection and desiccation.


Marcescence


beech tree, winter

Beech tree.


Oaks (Quercus spp.) sometimes remain in brown leaf until early spring. Beech trees (Fagus grandifolia) can be spotted in the winter forest by their tan leaves dangling from the branches. Leaf retention through winter is called marcescence. The reason for this trait is open to speculation.


Nutrient Release

One theory claims that, by holding onto its leaves until new foliage is about to sprout, those newly fallen leaves will stay near the tree’s root system instead of blowing away in the winter winds. Since they have yet to begin decomposition, the nutrients locked inside the leaves will be released at a time when they can benefit the tree—when growth resumes in spring.


Browsing Animals

Another theory indicates that browsing animals are less likely to feed on marcescent twigs. In studies where deer were presented with both marcescent twigs and leafless twigs, they chose the leafless twigs.


Weather Abatement

Maybe the dead leaves help slow down fierce winds, protecting the buds from drying out. Even better is the accumulation of snow, as in the photograph (above) of a beech tree, decreasing exposure even more.

Another possibility is the protective shade cast by marcescent twigs on thin-barked trees, such as beech (photo, below). Large differences in temperatures, between night and day, can damage tissues on the south or southwest side of the trunk. Frost cracks and sun scald can be minimized when the trunk is partially shaded by brown leaves during the warm hours of the day.

If cracks occur, callus tissue will seal them, and healthy bark will compartmentalize the wound. There’s no need to paint it with “wound sealer” products. And never fill the cracks or hollows with concrete or dump rocks and debris at the base of a tree!

When a severe early frost suddenly kills a tree’s foliage, the abscission layer would not have had enough time to mature. Consequently, leaves can cling until those cellular changes occur. Young oak trees might exhibit this feature, but it often disappears with maturity. Sometimes only parts of the tree have leaves that cling.

You might have noticed that trees felled in the summer often hold onto their brown leaves.


beech tree marcescence

Beech tree in winter, Charlotte NC.


Why Do Leaves Fall Off?


For a plant to keep its leaves all year long, resources would have to be consumed at a time when they are less efficiently gathered. When light levels are less than optimal, and cold temperatures suppress metabolic processes, it’s easier for the plant to reabsorb nutrients and drop leaves. Water loss, insect predation, foraging animals, and damage from ice, snow, and high winds are some reasons why it just isn’t worth staying in leaf through the winter. The cost is too great.

pine needles, in fall

Pine tree with aging needles.

Conifers, on the other hand, have adapted to those conditions, and are able to photosynthesize all year. But they do slow down in cold weather. And the sticky sap in some species (pines, spruce, fir, and others) effectively fends off animals and most insects.

Evergreens drop some of their foliage each year; needles don’t cling forever. Some homeowners are alarmed when they see a large percentage of brown needles fall to the ground. That’s normal, as long as the tips of the stems remain green. A pine needle carpet is an effective mulch.


Protective Red Fall Color


Scientists have long speculated on the merits of anthocyanins—the red and purple pigments. Those adhering to the Photoprotection Theory claim that anthocyanins protect leaves from harmful effects of light. This pigment also helps the tree absorb nutrients more efficiently in cooler conditions, before leaf drop.

mustard greens 'Miz America'

‘Miz America’ mustard greens and other brassicas.

Coevolution Theory claims that insects avoid feeding on leaves high in anthocyanins. The red fall foliage color signals them to stay away, but red berries signal birds to come and feast. (***Update***: Growing many flats of colorful fall greens illustrates this point. Among brassicas [mustard, kale, broccoli, cabbage], the deep reddish burgundy ‘Miz America’, one of the mustard greens, is entirely free of damage from caterpillars that ravage green varieties in this group. 10/7/2022)

Dogwood trees, hollies, barberry, and pyracantha have red berries that attract birds. After consuming them, the animals help distribute the seeds. Poison ivy has whitish berries that birds eat, but its foliage is fiery red, signaling birds to come around.


fall color in red berries of winterberry

Fall color in berries of a dwarf winterberry, Ilex verticillata, at Freedom Park, Charlotte NC.


Red colors in some species of maple trees are produced by a different metabolic process than through chlorophyll breakdown. These anthocyanins aid in preventing competition with the tree’s own offspring by stunting the growth of saplings trying to grow nearby. This is one type of allelopathy.


But Only Part of the Tree is Turning Color


fall color


You might have noticed that a portion of a tree is prematurely turning color while the rest of the tree is still green. I’m not referring to an even coloring at the ends of branches, but rather to the one branch that is conspicuously different in color from the rest of the canopy. That branch is stressed…

  • on the side of the tree where the roots are exposed to hot sun and poor, dry soil, such as on a south-facing slope (northern hemisphere).
  • from root compaction.
  • due to root disturbance, from working in the soil under the tree, severing roots.
  • because it’s heavily shaded and not contributing to photosynthesis.
  • from the tree being coppiced, or cut back to the ground. As several stems regrow, the dominant ones interfere with the others. Weaker stems will show early color and die.
  • due to girdling roots. Maple trees are notorious for this. Look for and sever a root that crosses over the base of the trunk. The trunk will try to grow over the root, but could end up being constricted. Look up from that point, and you might see branches that are developing early fall color. One indication of a girdling root is the absence of an even flare all around the base of the tree. One side of the trunk will look flat where it enters the ground.
  • from clotheslines, hammock ropes, or other items tied around the trunk or branches, eventually girdling the stem.
  • where lightning or physical damage stripped bark off the side of a trunk, killing parts of the tree above the damage which no longer receive water and nutrients.
  • from insects and diseases causing disruption in the flow of water and nutrients, affecting parts or all of the tree canopy. This can happen at the base of a leaf, a twig or branch, in the trunk, or in the roots.


Fall Color and Species Distribution


red fall color in maple tree

Red fall color in a maple tree, Lincolnton NC.


Some parts of the world are known for their fall color. Southern Canada, parts of the northern U.S., Scandinavia, northern and western regions of Europe north of the Alps, the Russian Caucasus region, Japan, parts of China, the Korean peninsula, Argentina, Chile, southern Brazil, and New Zealand’s South Island are some.

Certainly, there are pockets in millions of places around the world with absolutely dazzling fall displays! One option is to create your own by including in your landscape a few specimens with spectacular fall color.

In this country, changes in color begin as early as September in the higher elevations of the Rocky Mountains, far north Minnesota, and upper New England (far north New York state, Vermont, New Hampshire, and southwest Maine). Southern states, part of the Atlantic coast, and the California interior between mountain ranges begin their autumn displays in November. Check out this map, where you can see how fall color progresses throughout the country.


Speaking of Cold


North America is home to a diverse habitat of 800 species of trees, including 70 oaks. Northern Europe has fewer—51 species, 3 or which are oaks. These numbers do not include cultivars of the species. One thing scientists can agree on: they can’t agree on the number of tree species inhabiting the planet. Some say the number is 10,000, and others estimate over 100,000 species.

During the Ice Ages, North American tree species in southern regions and along the north-south mountain ranges were spared extinction caused by glaciers. As glaciers expanded from the north, trees were able to find refuge farther south of their original range. This took place over thousands of years. The last Ice Age occurred from 18,000 years ago to approximately 12,000 years ago.

However, in Europe, glaciers covered a larger area of land. The Alps acted as a massive barrier to species trying to retreat toward southern latitudes. Those trees were cornered, and then covered up by mile-thick sheets of ice, causing mass extinctions. This explains the disparity in the number of tree species between North America and Europe.

At the height of the last Ice Age, about 18,000 years ago, glacial ice covered one third of the planet’s land surface. Today, about 10% of the land is covered by ice.


Fall color is nature’s last hurrah of the season. 


I hope you’ll consider planting trees and shrubs that have brilliant autumn color. If you’re not planning to do any landscaping, you can still enjoy the colors of autumn by visiting parks and public gardens, or by taking a leisurely stroll through the neighborhood. Maybe it’s time for a road trip. Don’t forget the camera!


fall color

Love it.


Return to the top

Plan Now for Spring-Flowering Bulbs

2018


Time For Spring-Flowering Bulbs


colorful tulips, daffodils, muscari

Spring-flowering bulbs in a public garden.


In a few days, we finally will see some almost normal temperatures in this part of the southeast. It’s time to think about spring-flowering bulbs that will be planted over the next 2 or 3 months. Get comfortable; this is a long essay on the big topic of spring-flowering bulbs.

It often happens: when the daffodils, tulips, and wonderfully fragrant hyacinths bloom in February, March, and April, that’s when many customers ask for the bulbs. But most bulbs are planted in the fall and into early winter. Their roots develop as the soil cools in late summer and autumn, but growth above ground is delayed until months later.

It is no longer uncommon for garden centers to sell potted bulbs in spring. So, if you missed out on the fall planting season, or if you want to see the flower colors before planting, inquire with the growers. Vendors at spring home and garden shows and farmers’ markets also sell pots of budded or blooming bulbs.


yellow daffodils, cane creek park

Daffodils are reliable, easy to grow, and not eaten by animals.


Many thousands of varieties of bulbs are available to gardeners. Each region of the country has its favorites, based on ease of culture, resistance to hungry animals, and familiarity with what people “usually” grow there.

If you want something more unusual but your local sources don’t carry it, you can probably find it online or through mail order catalogs. Find out what the bulbs require before investing in 2,000 pink tulips that can’t take the heat in your back yard.


On the Subject of Tulips


pink tulips

Tulips are not deer-proof.

Large-flowering hybrid tulips grow in the cooler northern half of the United States, down to Zone 7. A few will perennialize in slightly warmer climates. The smaller species tulips will grow a bit farther into the South.

Tulip bulbs planted among the roots of trees and shrubs might work slightly better than those in open beds. The soil there is somewhat cooler and dryer. They’re not fond of warm temperatures and high moisture levels.

Many gardeners here in the piedmont of North Carolina plant tulips with the expectation of only one glorious show, and then tear them out when flowers fade. Beautiful as they are, tulips in zone 8 or warmer usually do not come back for an encore performance the next year. Even zone 7 is a challenge for them.

And that’s okay with a lot of people, including designers of public parks and municipal common spaces. But, wow, what a show...if you can keep the deer and rabbits away from them! They are especially fond of tulips, and I highly recommended using deer repellents. When using a solution in a sprayer, set the nozzle to a fine mist. A coarse droplet will simply bead off the waxy foliage and flowers without sticking.

Voles, too, eat tulip bulbs. Planting tulips with PermaTill (small, expanded gravel used for drainage) around them usually deters the voles. Stainless steel mesh planting baskets will exclude burrowing animals from the root zone. And squirrels have been known to do a little transplanting of their own. Products are available to help prevent these problems.


How Bulbs Work


crocus pickwick, white with purple stripes

Striped ‘Pickwick’ and purple ‘Remembrance’ crocus, in the Maryland garden.


A bulb is a shortened stem, with roots that emerge from the basal plate when the temperature cools in the fall. The basal plate, clearly visible on hyacinths, is a rounded disc of tissue at the bottom of the bulb. Tightly folded undeveloped leaves surrounding the flower shoot contain food for the plant during dormancy. A bulb has all the parts necessary to complete its life cycle: root initials in the basal plate, a growing tip, leaves, stems, and flowers.

daffodil and beeThe rooting bulbs remain safely tucked underground until the soil begins to warm up in spring. That signals the plants to burst from the ground with their beautiful, cheerful flowers. We bid another winter adieu! Hungry bees and other pollinators emerging on warm spring days feed on pollen and nectar from spring-flowering bulbs, when little else is in bloom.

The foliage must be given enough time to photosynthesize and to store carbohydrates in the bulbs. This food will sustain the plant during dormancy, and ensure that more buds will develop for next year’s flowers. So, after the flowers finish up, let the plants wither naturally. Foliage can be removed after at least half of it has yellowed.


First, a few words on summer- and fall-blooming bulbs


Garden centers stock most of the summer-blooming bulbs in spring to early summer. You can find bulbs, corms, tubers, and rhizomes of lilies, gladiolus, canna, caladium, iris, and calla at that time of the year. Nurseries also offer potted specimens as they come into growth.


Elephant Ears

For dramatic foliage plants, look for elephant ears (Alocasia and Colocasia spp.), which grow only a foot tall to over 6′ tall. These are tropical plants and will die with frost, unless the tubers are dug and stored over winter. Planted in the ground in regions where frost doesn’t penetrate the soil, they usually survive the winter.


Caladium

caladium

Caladium, in late spring.

The colorful caladiums are tropical and need warmer soil temperatures in winter in order to survive, even when dormant. Some gardeners dig up and save the tubers every year, but most purchase new tubers or potted plants in spring to mid summer.

Foliage colors include green, white, chartreuse, pink, peach, and red, and can be mottled, edged in a contrasting color, streaked, or spotted. Their spathe-like flowers are not showy and usually removed.

For the past four years, I’ve kept a large Italian terra cotta pot outdoors in the summer. It contains a white caladium, a few kinds of brake (Pteris) ferns, and trailing clumps of Pilea ‘Aquamarine’, with its reddish stems and incredible pewter-blue, rounded leaves. It’s also home to whatever else dropped in. This year: some bulbs of tender Ledebouria socialis (leopard lily), a miniature African violet, and Dendrobium kingianum, a small orchid that has lived in a 3″ clay pot for over 4 decades.

Dormant Caladium

When the weather cools, the whole pot comes indoors to the sunny kitchen, where the caladium goes dormant. One by one, the leaves turn yellow, and the caladium sleeps through the winter. At average indoor temperatures, it remains dormant.

Instead of digging out the tubers, I leave them in the soil, caring for the rest of the plants as needed. Every couple of years, some potting soil is added under the plants, and the pot goes outdoors to light shade. And each year, the caladium comes back after about a month of warm weather. It’s a heavy feeder, so fertilize caladium every 2-3 weeks while it’s in leaf.
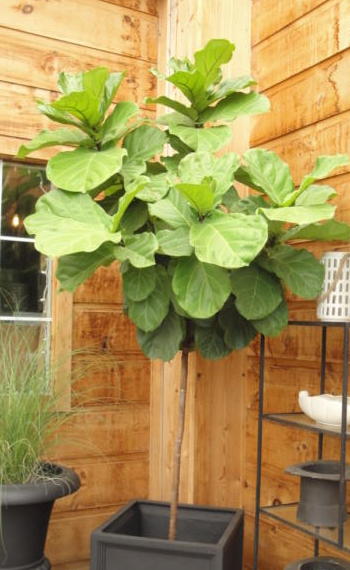
Dormant caladium tubers that remain surrounded by soil over the winter are more likely to return the next year than dry, loose tubers kept in a bag. Keep them dry if by themselves in a pot; damp is okay, if in company with other plants.


amaryllis

This variety is always the first amaryllis to bloom.


Amaryllis

Amaryllis (photo, above) is a beautiful late fall to spring flowering plant. Dormant bulbs can be found at garden centers at this time of year, alongside the spring-flowering bulbs. Potted in the fall, Amaryllis bulbs begin blooming indoors around the holidays.


Colchicum Autumnale


This is one of my favorites partly because the plant is animal-proof and partly because it blooms in the fall. Sometimes slugs can be a problem. Scattering Sluggo granules near the Colchicum will take care of that.

The bulbs will appear in some, but not many, garden centers, along with the daffodils and other spring-flowering bulbs. Left on a windowsill, the bulb produces flowers with no encouragement necessary! But I prefer to plant these hardy bulbs in the garden. Colchicum is the source of a potentially toxic pharmaceutical component, so grow with care.

Only the flowers make an appearance in autumn; colchicum foliage arrives in spring and lasts a short period of time.

Placed near a shrub called Purple Beautyberry (Callicarpa dichotoma or C. americana), the Colchicum ‘Waterlily’ flowers perfectly echo the color of the shrub’s berries (photo, above).

Once planted, they soon begin blooming in white (‘Alba’) and shades of lavender-pink. ‘Waterlily’, available from Wayside Gardens, has many petals, pale in color until exposed to light. It has the appearance of a water lily, but it is not an aquatic plant. After 2 years in the ground, one bulb will produce dozens of flowers. This plant is sometimes called “fall crocus”, but it is not to be confused with…


…Fall Crocus

Species crocus bulbs, with saffron on the left.


A few hardy crocuses bloom in the fall. One is saffron crocus, Crocus sativus, which gives us our most expensive spice, harvested from the female flower part, the red style and stigma. Only 3 threads of saffron are laboriously harvested from each flower, explaining its very high cost. Incidentally, saffron has been used as a spice for 3500 years. And for more trivia–saffron crocus is a sterile triploid whose ancestry is open to speculation.

There are other bluish (C. speciosus ‘Cartwrightianus’) and white (C. kotschyanus) fall crocuses available. The lavender-blue color positively glows in the setting sun. This color is rare in the garden at this time of the year, and a welcome surprise when the flowers emerge through the Liriope and other short groundcovers.

Crocus, technically, grows from a corm, but, for simplicity, is often called a bulb.


Return to the top

Headings

Page 1: Time For Spring Flowering Bulbs, On the Subject of Tulips, How Bulbs Work, and First, a few words on summer- and fall-blooming bulbs (Elephant Ears, Caladium, Amaryllis, Colchicum Autumnale, Fall Crocus)

Page 2: Color Effects, Formal and Informal, Naturalizing in Lawns, Naturalizing in Meadows, If You’re New To Spring-Flowering Bulbs, When Planting Drifts of Bulbs (Microclimates and Timing, Laying Out the Beds), and Aftercare

Page 3: Galanthus, Crocus (Snow Crocus, Giant Dutch Crocus), Eranthis, Muscari, and Puschkinia

Page 4: Hyacinthoides, Tulipa (Tulips In Zones 7 and South, Species Tulips), Hyacinthus, Narcissus (Buying Daffodil Bulbs, Linnaeus, the RHS, and the ADS, Planting Daffodils, Fragrant Daffodils), and Allium

Page 5: Maintenance, Tricks to Hide Maturing Foliage, Stinzenplanten, Forcing Spring-Flowering Bulbs, Rock Gardens, and Don’t Overlook the Little Ones


The Fiddle-Leaf Fig: Ficus Lyrata


“What’s Wrong With My Fiddle-Leaf Fig?”


There are few houseplants that exemplify architectural presence to the degree that Ficus lyrata does. Turn the pages in any home decor magazine or visit an online furniture showroom and you’ll see a statuesque fiddle-leaf fig in the corner of a perfectly-appointed living room. “That’s what mine used to look like,” you’re thinking, as you lament the pitiable specimen clinging to life in the spare bedroom.

Large plants can cost hundreds of dollars. Even a small bushy fiddle-leaf fig at the garden center can run $40.00 or more. It’s worthwhile to get this one right. The following suggestions might help.


Light


fiddle-leaf fig, Ficus lyrata

A fiddle-leaf fig grown as a standard.


Indoors, the fiddle-leaf fig prefers 2 or 3 hours of direct sunlight in the morning or early afternoon, and bright indirect light the rest of the day. During the summer months, keep the plant away from hot sun; it needs adequate air circulation between the plant and the window. Leaves can burn if they’re too close to the glass.

Skylights, light-colored floors and walls, and large windows that expose the plant to very bright indirect light for most of the day might provide enough light for the fig to remain reasonably healthy. But growth will be stronger in partial sun.

During the cooler months of the year, figs welcome a few more hours of direct sunlight.


Blame It On Hormones

The segment of a young stem (the internode) between leaf attachments (the nodes) will lengthen in response to lower light levels. Hormones cause cells in the shady side of the stem to elongate. That’s why the stem turns toward the light (phototropism).

A fully shaded stem will stretch as the plant searches for a stronger source of light. This stretch will be noticeable in the softer tip growth; woody stems won’t elongate.

If the leaves were stacked closely together at one point, and now they’re spaced farther apart along the stem, the plant is not getting as much light as it was before. Adequate sunlight keeps a plant more compact by preventing internode stretch.

Don’t place the plant in low light or in the corners of a room despite what you see in those magazines or in other media. If the fig tree doesn’t receive adequate light, it will begin to decline. One of the first signs that the plant is in decline is loss of leaves. And fig trees are notorious for signaling distress!


Watering the Fiddle-Leaf Fig


watering can

When the top 2″ or 3″ of soil in a large pot feels dry to the touch, it might be time to water. Don’t just feel the surface of the soil, though. You must feel the soil well below the surface. Although it feels dry on the top of the root ball, the soil could be moist enough 6″ down.

A narrow unfinished wooden dowel inserted most of the way into the soil will indicate the need for water if it comes up dry. Let it sit in place for 15-20 minutes before removing it.

Most moisture meters I’ve tested did not truly measure the moisture in the soil. The expensive models should be more accurate. Or lift the pot. After a while, you get a “feel” for how heavy a pot of moist soil weighs.

A full, leafy plant in a small pot dries faster than an overpotted sparsely-leaved plant. Don’t allow the entire root ball to go completely dry, but don’t keep it wet all the time either. If in doubt, don’t water, especially in cloudy weather. If there’s no sign of wilt, the fiddle-leaf fig can go another day or two without watering.

Never let the plant sit in a saucer of water for more than 20 minutes. Remove any water that is not absorbed through the drainage holes in that period of time. The soil in a tall pot will absorb water by capillarity up to a certain point. At that level, the force of gravity overpowers capillary action, so you will need to apply more water to the dry soil near the top.

A fig tree that is often overwatered or allowed to sit in water too long will suffer root rot and might not recover. Fungal infections from overwatering cause brown patches in older leaves. Eventually, all the leaves could fall off the tree.

Use water that is warmer than room temperature. In winter, lukewarm water for tropical plants keeps them more comfortable. Here, I keep indoor air temperatures between 60° and 68°F in winter. Water, tested with an aquarium thermometer, should read around 85° to 90° for plants such as figs, pothos, philodendron, Chinese evergreen, basil, alocasia, and African violet.

Water well enough to moisten the entire root ball. Not watering thoroughly results in dry soil lower in the pot, and roots there will die off. Applying small amounts of water a couple of times a week is not a good practice. Water thoroughly; then let the soil dry.


A Hasty Exit

Sometimes, water exits the drainage holes immediately after watering. In this case, the soil mass might have shrunk, which happens when soil has thoroughly dried out. Also, during transportation, the root ball might have shifted in the pot.

A gap has opened up between the inside of the pot and the outside of the root ball. Water finds the path of least resistance, following that air space to the holes at the bottom of the pot. But most of the soil stays dry. Fill the space with potting soil, using a dowel to firm in the new soil. Then the water will more slowly percolate through the root ball.


Humidity


sprayer


Fig trees, like many tropical plants, benefit from additional humidity when the air is dry. Simply grouping plants together will raise humidity in their vicinity, and all will benefit.

Using large saucers filled with pebbles and water will help raise humidity. The bottom of the pot should always be above the water level in the saucer. This arrangement is easier to maintain for smaller pots. If your home is especially dry, consider using a humidifier.

The positive effects of misting last only as long as there is a film of water on the leaves. And that’s only a few minutes. When water evaporates, a small amount of white mineral residue from the water persists on the leaf. It will build up over time but can be removed by wiping the leaves with a solution of horticultural oil on a soft cloth. Don’t use vegetable oil or mayonnaise. Look for horticultural oil. It’s a good idea to periodically wash the foliage to remove dust and grime.

Keeping foliage damp for long periods of time can initiate bacterial infections. Both young and older leaves can develop brown spots and yellow patches. These infected leaves will fall off.

Don’t place a fiddle-leaf fig where HVAC registers blow cold or hot dry air toward the foliage. Tender new leaves will turn brown on the edges. Louvered registers usually can be closed or use a deflector to change the direction of the air flow.

By the way, it’s normal for the fig tree to drop an older leaf or two now and then. As long as there is a net gain of healthy foliage, it’s probably not a concern.


Temperature  


Avoid placing fiddle-leaf figs in cold drafts. These plants, members of the mulberry family (Moraceae), originated in warm, humid areas of western Africa. They appreciate temperatures that are at least 63° to 65° at night and 68° to 70° in the daytime. But keep in mind that the higher the temperature, the lower the relative humidity.

If you keep your house in the mid 70’s in the winter, and are not uncomfortable dropping the temperature a few degrees, the higher relative humidity will benefit both you and your plants.


Fertilization


Plants purchased from garden centers are usually fertilized on a schedule, so ask a salesperson if your plant is due for fertilization. For the fiddle-leaf fig, and for all plants, it’s better to underfertilize than to overfertilize.

Too much fertilizer will burn the roots and could kill the plant. It will not make the plant grow faster! If you accidentally gave the plant too much fertilizer, flush a few to several gallons of clear water through the root system to flush out the excess. Use the fertile drained water in the garden rather than letting it go down the drain.

Use balanced fertilizers formulated for houseplants, such as 12-12-12 or 20-20-20, every 5 or 6 weeks during the growing season, usually March through October in the northern hemisphere. Follow dilution rates indicated on the package. Plants growing in less than ideal conditions, though, should be fertilized less often or at more diluted rates.

If the plant is in poor health, fertilize once at one-third the recommended rate, and try to improve the growing conditions. Wait to see how the plant responds before resuming the regular schedule. Fertilizing a plant that doesn’t need it or one that is frail (from something other than lack of nutrients) will exacerbate any problems it already has.

You won’t have to fertilize as often if you use slow-release (or timed-release) products. They simplify our gardening chores and are a great convenience. The prills are used up faster at warm temperatures and in moist conditions, such as when the plant is placed outdoors in the summer. For example, a timed-release product that says “6 months” on the label might need to be reapplied in 3-4 months at 85°.


Repotting  


When the roots are very crowded in the pot, it might be time to repot your plant. Consider doing this task in mid-spring to early summer. This will give your plant enough time to grow a strong root system before winter comes.

Don’t wait until autumn to do this, because shorter daylength and cooler indoor temperatures slow down plant processes. The fig will grow new roots very slowly, if at all, in average indoor conditions. That’s when a plant can suffer root rot. New soil that has no roots growing in it stays wet for a long period of time, which can damage nearby roots.

Choose a nursery (or ordinary plastic) pot that’s only 1-2″ larger in diameter. Score the outside of the root ball in several places with a knife. Or tease out roots from the surface of the root ball. This slight injury to the roots stimulates rapid re-rooting.

Don’t put a small plant into a huge pot thinking this will make it grow faster. It won’t.

All new soil goes below and around the original root ball, never on top of it. Heavily composted potting soil should have coarse sand and pine fines mixed in for better drainage. Firm it in well, filling all gaps between the root ball and the pot. For residential purposes, a large 7′ or 8′ tall plant can stay in a 14″ to 18″ pot indefinitely.

Since nutrition will be provided by fertilizer, there is no need to repot more often than every year or two while the plant is young. Recently repotted plants will not need fertilizer for at least 6 to 8 weeks, or until new soil has filled with roots.

Don’t worry if your fig is getting potbound. It’s easier to manage a fiddle-leaf fig in a somewhat tight pot. And it runs a lower risk of damage from overwatering.


Headings

Page 1: “What’s Wrong With My Fiddle-Leaf Fig?”, Light (Blame It On Hormones), Watering the Fiddle-Leaf Fig (A Hasty Exit), Humidity, Temperature, Fertilization, and Repotting

Page 2: But If You Want a Nicer Pot (Double-Potting), The Finishing Touches, Pruning the Fiddle-Leaf Fig (When To Prune), Outdoor Living (Before Moving Back Indoors), Insects and Mites, and Picture Perfect

Return to the top 

Basil Downy Mildew: Symptoms and Solutions

2018


healthy green basil

Healthy basil.


Basil Downy Mildew In the U.S.


Basil downy mildew is a devastating disease caused by the pathogen Peronospora belbahrii. This disease has been active in the United States since 2007, and for several years before that in Europe. BDM is thought to have originated nearly 90 years ago in Africa.

This water mold targets a very specific host—basil. Just basil. There are related species that attack other members of the Lamiaceae family, such as coleus, but it’s basil I’ll concentrate on today.

I’m writing about it now because some of you might have given up growing basil. If you’ve struggled with it the last few years, I’m going to offer some tips so you can once again enjoy your home-grown basil. And then I’ll share my favorite Tomato-Basil Salad recipe, a summertime staple around here.


Symptoms Of Basil Downy Mildew


basil downy mildew

Yellowing between main veins.


Let me begin by describing the symptoms of BDM. The plants might start the season looking great, all green or purple and… oh, that fragrance!… You probably harvested several clippings, using them in salads, on pizza, in tomato sauce. What’s summer without fresh basil?!

And suddenly it went downhill from there. The leaves developed blotchy yellow or pale green sections between the main veins. The discoloration then spread over most of the leaf surface. The leaf reverse (the lower surface) was covered in a fuzzy gray film early the next morning, followed by little black dots.

Those tiny black specks are the fruiting structures (sporangia) of basil downy mildew. They puffed out microscopic spores that were carried on the breeze to infect other basils. The plants became spotty overall, and never regained their strength.

In only a few days, the affected leaves turned yellow. Some of the tips of the stems remained green, but, eventually, they, too, showed symptoms. And most of the leaves dropped off.

You fertilized, you spoke kind, encouraging words. And you commiserated with friends. Yet nothing helped. How disappointing!


Spores and Relative Humidity


All is not lost. With some insight into how this disease works, you might be able to stop the progression of BDM and get more mileage out of your plants. Another option is to start with healthy new transplants and take precautions so it doesn’t happen again.

You might have noticed that basil downy mildew started showing up and spreading quickly during wet or humid weather. Good observation! In fact, spores require around 85% relative humidity for a few hours in order to germinate.

Even if the weather is quite dry or only slightly humid, the basil still can become infected. How? As the nighttime temperature drops, the relative humidity climbs. After a period of high humidity, the spores begin to germinate on susceptible varieties of basil.

Let’s say the daytime temperatures are in the 80’s F, with comfortably low humidity around 40%. With no rain in the forecast, you might think you’re in the clear. The problem is that the period of time just before dawn is when the relative humidity is at its highest reading of the day. It could easily reach 90%! The lower the temperature drops during the night, the higher the relative humidity rises.

So…limiting humidity around basil can keep the plant just outside the reach of the disease. If you live in an area that gets extremely hot and dry in the summer, your basil might survive unscathed. That’s happened only 2 or 3 times in my gardens since BDM started showing up in the mid-Atlantic and southern states.


Reducing Humidity


no basil downy mildew on potted plants brought indoors at night

Potted sweet basil.

How do you limit the humidity? Simple! That’s why I’m writing this now, before everyone gets their basil plants into the garden. Here are some suggestions for you:

Basil grown in the garden should be situated in an area with excellent air circulation. Don’t plant it in the middle of a bed, with neighboring plants all around, or next to a fence.

Planting basil near a paved surface, or surrounded by paved surfaces, has the benefit of having less square footage that’s able to absorb moisture. The goal is to reduce as many sources of moisture as possible. And that includes overhead watering! If you’ve read the posts about tomatoes, you’ve learned the importance of keeping foliage dry.

BDM can show up in one neighborhood while entirely missing the next one. It might not appear at all if the summer is very hot and dry and if the nights don’t cool down very much. Or it might not show up until rain returns after a long, dry summer.

Certain weather conditions, such as frequent rainstorms and persistently high humidity, foster the widespread and enduring presence of basil downy mildew. Once the spores are in the air, growing basil is a lost cause… Or is it?


The Ultimate Solution: Potted Basil


herb garden, toad

This pot will come inside at night, after releasing the toad.

Basil grows well in containers. An airy exposure up on the deck could be a good spot for it. Or sitting on a brick patio, or under the umbrella when it’s especially hot. Check your plants every day for those tell-tale light-colored blotches, and remove those leaves immediately.

If it looks like a losing battle, move the pot indoors for the night. That’s right! Get used to it if you want to—no, must—have fresh basil.

As long as you’re not living in the middle of a bog, the humidity indoors will never reach the levels required to grow BDM. And then place the basil back outside the next morning. On rainy days, keep the potted basil indoors, in a bright spot. Yes, it’s work, but worth the effort.

A few varieties of basil don’t get the disease, and plant breeders are working feverishly to bring more to market. Naturally, all of my favorites, including ‘Genovese’, ‘Yevani’, ‘Mrs. Burns’ Lemon’, ‘Tuscany’, and ‘Siam Queen’ DO get basil downy mildew. And, yes, I DO bring in the potted plants at night once the disease has reached the area or before rainy weather comes near.

Those that, in my experience, seem to be resistant are ‘Cardinal’, ‘Kapoor tulsi’ (holy basil), and ‘African Blue’ basil, but they’re not my favorites in the kitchen. ‘Eleonora’ is another that has been advertised as having “intermediate” resistance, but I have seen advanced cases of BDM on this variety.

(***Update***: New cultivars developed by Rutgers University will be worth trying. Look for ‘Rutgers Devotion DMR’, ‘Rutgers Obsession DMR’, ‘Rutgers Passion DMR’, and ‘Rutgers Thunderstruck DMR’. I grew ‘Rutgers’ Obsession DMR’ outdoors all summer, in 2021, and still have a cutting growing in the kitchen window. This variety did not develop any symptoms of BDM. Success! 1/22/2022)

Always remember: when you think about basil, think about how relative humidity can affect its health.


tomato basil salad

Tomato-basil salad.


Tomato-Basil Salad


Here’s a recipe for Tomato-Basil Salad, like Caprese salad, but with extra bits:

  • Ripe tomatoes, cut into chunks, juice included
  • Yellow or white onion, thinly sliced
  • Cucumber, alternately-peeled (no need to peel the thin-skinned ‘Diva’), halved and sliced
  • Mozzarella cheese, medium chunks
  • Sweet basil, usually ‘Genovese’ for us
  • Extra virgin olive oil
  • Red wine vinegar, or white wine vinegar if you prefer
  • Fresh Italian oregano, chopped; dried will work
  • Salt and pepper to taste

Measurements aren’t that important. Tomatoes are the main ingredient, and you can use all reds or mix the colors. Not too much onion. Certainly enough basil, and don’t use so much oregano that it overpowers the rest. Mother likes hers more vinegary. Oh, and get a nice loaf of bread for dunking. Enjoy!


Return to the top

Tips For Growing a Tomato Plant


A Tomato Plant For Your Garden


tomatoes


Anyone who has grown a tomato plant and experienced sublime sun-ripened perfection understands the joy that awaits those new to this endeavor. But it takes a little skill. Starting with light, I’ll explain the basics here. And be sure to read related posts to get the full picture.


How Much Sun For a Tomato Plant?


young 'Cherokee Purple' tomato on the vine

‘Cherokee Purple’ tomato.

A tomato plant requires at least 7 hours of direct sun. Sure, many sources of information recommend 6 hours, and you’ll certainly have some success. But, for best performance, give it 7 or 8 hours or more.

Tomatoes produce more flowers in a sunnier location. And their leaves will make more “food” (carbohydrates resulting from photosynthesis) that keeps plants growing and producing. More hours of sun maintains drier foliage for a longer period of time. And drier foliage means fewer problems with disease.

Now if you don’t have a spot that gets 7 hours of sun, but it gets 5, you might be able to get fruits from a cherry tomato plant. Instead of being disappointed with the lower-yielding but yummy heirlooms or the big beefsteaks, try ‘Sun Gold’ or the other cherry tomatoes. ‘San Marzano’ and ‘Juliet’ also are worth considering for five or six hours of sun. Because they are high-yielding, you’ll probably harvest something.

But, in full sun, cherry tomatoes produce so many fruits that you’ll be giving them away by the bowlful. Really…they’ll have produced hundreds of fruits on a tall vine by the end of summer.


cherry tomato photo

A “hand” of cherry tomatoes.


Options

If you have the space, some experimentation might yield promising results. Try growing tomatoes in large pots on the sunny patio, and plant greens where there isn’t enough sun for tomatoes. Or perhaps a corner of the sunny rose garden can be given over to edibles that need full sun, if the soil hasn’t been treated with chemicals.

I don’t often recommend cutting down trees. Removing a silver maple that seeded near the vegetable garden, however, will make the garden more productive, and, if permitted, that’s the way to go. When selecting trees for an average size property, choose small-growing trees and locate them far from gardens requiring full sun. Consider their mature size and where the shade will fall from one season to the next.


More Light For a Tomato Plant


Here are some tricks to coax more production out of your edible plants if the sun exposure is less than ideal:

  • Plant in as sunny a spot as you have, perhaps near a white or light-colored wall, which will reflect more light toward the tomatoes. Or, using a little resourcefulness, create a reflective wall with tall stakes and white fabric.
  • Lay repurposed light-colored empty mulch or potting soil bags on the soil, on the sunny side of the plants. Anchor them with stones or bricks. Punch lots of holes in the plastic so the plants will get enough water from rain or irrigation. Don’t allow water to collect for more than a few days or you’ll have trouble with mosquitoes.
  • Porous synthetic or woven mulches are available from garden supply companies. White mulch helps reflect the light and also keeps soil cooler. Additionally, a source of light from below the plant confuses insect pests and might cause them to take up residence elsewhere.
  • Use a few stakes instead of one, or a wide trellis, for a tomato plant, tying main stems farther out from the core of the plant. This will get more light onto leaves that otherwise would have been heavily shaded.


Crop Rotation


zucchini with yellow flowers

Zucchini.

If space allows, locate your tomatoes, peppers, potatoes, and eggplants (all members of the nightshade family) where none of them have been grown for the last 3 or 4 years. This crop rotation lessens the likelihood of heavy insect and disease outbreaks from one year to the next. It prevents disease spores and insect larvae from building up in the soil and infecting new foliage.

Tomatoes and other members of the nightshade family (Solanaceae) are affected by certain insects and diseases that generally do not bother other families of vegetables. Cucurbits (zucchini, cucumber, squash) and brassicas (broccoli, kale, cauliflower) have their own problems, as do the other plant families.


Disease Resistance


You’ll notice on seed packets, labels, and in catalog descriptions, a series of capital letters after the cultivar’s name. Those letters are initials for the diseases to which that cultivar is resistant. For example, ‘Big Beef’ tomato has the letters AS, F2, L, N, TMV, and V after its name. They represent the diseases Alternaria stem canker, Fusarium wilt (races 1 and 2), Grey leaf spot, Nematodes (not a disease but a tiny worm), Tobacco mosaic virus, and Verticillium wilt, respectively.

Most hybrids have been bred to withstand some disease pressure. Heirlooms are more susceptible to disease, but the flavor of their fruits is superior to that of many varieties commonly found at garden centers. If you have the space, try growing one or two heirlooms in addition to disease resistant varieties.

(***Update***: In 2019, I grew 2 heirloom tomato plants in large pots, and both succumbed to disease well before the end of the summer. We had an especially wet and humid season, but I knew the odds when I’d bought them. Still, each one produced several dozen fruits before removal.)

Susceptibility to disease varies from one area of the country to another, so you might never see some of the diseases that pop up elsewhere.


red tomatoes


Weather plays an important role, too, and there’s nothing we can do about that. Choosing at least one disease resistant tomato plant is wise.

To a certain degree, we can manage the environment and our gardening practices in ways that discourage insects and diseases. I almost always include an heirloom tomato plant in my garden, knowing that it is more vulnerable to disease, but it’s worth the effort.


Disease Prevention For a Tomato Plant


For gardeners with limited garden space, crop rotation is not an option. In that case, consider mulching your plants with coarse, chunky material, such as pine bark mulch. Having a dry surface under the plants, as opposed to a moist surface that can harbor disease organisms, is another line of defense. Those large chunks will dry faster than the surface of clay soil or shredded hardwood mulch. Several inches of seed-free straw or dry oak leaves also work.

Porous landscape fabric is another barrier you can use. This product is available in both biodegradable and synthetic materials.

Using pine mulch or fabric will help keep dormant spores of soil-borne diseases, deposited from previous crops, from splashing up onto the low-growing foliage, infecting new plants. Always remove diseased foliage to the trash. Spores can, of course, be blown in from elsewhere, but it’s always best to exercise that ounce of prevention when we can.

Yes, problems can crop up. But usually there is enough fresh produce harvested from your own back yard to consider the garden a worthwhile project.


Air Circulation and Suckers

tomato sucker removed

Tomato sucker removed.

Air circulation around each plant is another factor in disease prevention. I plant tomatoes 4 feet apart in the garden and permit only 3 or 4 main stems to develop on each one. Some growers limit the number of stems to just 2 and space the plants closer together.

A tomato plant is a weedy thing, and, left to its own devices, will create a tangled twining mess of stems and leaves. That doesn’t mean it won’t produce fruit. However, controlling the growth improves air circulation, which keeps the foliage healthier.

As tomato plants grow, suckers grow from axillary buds in the angle between the leaf and the stem. Those suckers will grow into more main stems if not limited. Simply snip out the suckers that have been selected for removal.

Tie stems to tall, sturdy stakes to lift tall plants off the ground. Removing suckers and staking a tomato plant increases the air circulation around and through the foliage, prolonging the plant’s life.

When the plants have been established for a few weeks, and they’re growing vigorously, remove the bottom leaves to get more air circulating underneath the plants. I keep about 12″ of the stem leaf-free. Keep the foliage as dry as possible and avoid handling wet plants.


When Disease Strikes


tomato disease septoria?

‘Rutgers’ tomato infected with disease (Septoria?).


Diseased plants will start losing foliage, generally from the bottom up. Leaves become yellow, spotted, puckered, or crispy brown. Widespread disease requires removal of the plants.

If a disease has just been noticed, though, remove to the trash all spotty, blighted leaves with clippers that have been dipped in a 10% bleach solution before going to the next plant. Disease can spread from plant to plant on infected tools and hands.

Spraying the plants with an appropriate remedy might save the plants. Several copper-, bicarbonate-, and microbe-based fungicides are available for organic growers.

Prevent the deadly tobacco mosaic virus from infecting tomatoes and peppers by never smoking near the vegetable garden, and by washing hands thoroughly before working there. Tobacco is related to tomatoes and peppers, and disease spores might be present in the product.

Occasionally we see tomato plants with leaves at the top all twisted and contorted. Sometimes they’re discolored as well. This can result from the application of herbicides, if not on your property, then from a few houses away. The chemical is carried on the breeze, and it takes minute quantities to affect tomatoes. Either cut the plants back to healthy foliage or replace with new transplants. Check also for leafhoppers and aphids inside curled leaves.


Sun Scald


sun scald on peppers

Sun scald on sweet peppers.


On Peppers

Strong sun hitting the fruits on very hot afternoons can cause sun scald. Keeping enough leaf cover will protect the fruits. Patches of sun scald are the parts of the fruit that were perpendicular to the hottest rays of the sun.

Don’t thin pepper plants; they’re especially vulnerable to sun scald. These fruits (photo, above) from a young and sparsely-leaved ‘Lemon Dream’ pepper were not adequately shaded. But the good parts don’t have to go to waste. Simply remove the affected parts.


Tomatoes Exposed To Sun

ingredients for tomato basil salad, cherokee purple tomato

‘Cherokee Purple’ tomatoes and basil.

I prefer 3 or 4 stems on a tomato plant instead of 2; there are more leaves to lessen the sun’s intensity without entirely shading the fruits.

The flavor is more intense in some varieties (such as ‘Cherokee Purple’, ‘Black Krim’, and other “black” tomatoes) if the fruits are exposed to some direct sunlight. Morning sun is more gentle than hot afternoon sun. But on hot days, exposed tomatoes can get sun scald. Pick those tomatoes, remove the mushy parts affected by sun scald, and eat them right away, before they start rotting.

Sunlight gives fruits a richer color, increasing levels of anthocyanins. What are they? Anthocyanins, the blue and red pigments in fruits and vegetables, are powerful antioxidants, which help fight inflammation and play an important part in cancer prevention.

When you consider how much effort is required to support large amounts of ripening fruit on a mature tomato plant, it seems rational that 3 or 4 leafy stems will be able to produce a lot more “food” (carbohydrates from photosynthesis) for the developing fruits. This will help the fruits achieve full size and, more importantly, full flavor.


Return to the top


Headings

Page 1: It’s Time To Plant Tomatoes!, How Much Sun For a Tomato Plant? (Options), More Light For a Tomato Plant, Crop Rotation, Disease Resistance, Disease Prevention For a Tomato Plant (Air Circulation and Suckers, When Disease Strikes), and Sun Scald (On Peppers, Tomatoes Exposed To Sun)

Page 2: Time to Plant!, Plant Tomatoes Deeper, Trichomes, Stake or Cage a Tomato Plant?, And Water, and Deer

Soil Prep 101 For Your Vegetable Garden


cool season vegetables

Cool season vegetables and greens.


Finding the Perfect Spot for Your Vegetable Garden


For the purpose of this post, I’ll assume that your vegetable garden will be flush with the surrounding lawn, rather than in a raised bed. However, sound horticultural principles apply to either method. Locate the garden where it gets lots of direct sunlight, and avoid low areas that collect water after heavy rain. Place it close to a source of water.

Now that you’ve found the perfect spot for your vegetable garden, you’re ready for Soil Prep 101. The types of crops you plant in any season are weather-dependent, so make sure weather patterns in your location suit the peppers, basil, kale, or cauliflower.

Although this article concentrates on preparing beds for vegetable gardens, the principles apply to other plants as well, including new shrub borders and flower gardens for pollinators. Page 2 of this article has tips for improving the soil’s tilth, or workability, for most garden projects.

Prerequisites for this class: “How to Prepare the Soil: An Introduction” and “Yes, But Is It Sunny In the Winter?”


Swiss chard in a raised vegetable garden

Swiss chard in a raised bed.


Depending on your level of affinity for precise measurement, you can use either a measuring tape or simple paces to mark the dimensions of your garden. Gardeners who want to indulge in culinary experimentation by growing a wide variety of crops might regret not having made the vegetable garden large enough from the outset. Consider the possibility of expansion in the future.


How Much Sun Does the Vegetable Garden Need?


There is no substitute for sunlight. Without at least 6 hours of direct sun, the results will be disappointing. Anything less than that will reduce and delay the harvest.

Indirect, dappled, and filtered light don’t really count. In fact, during most of the growing season, fruiting plants perform so much better with 7 or 8 hours of sun, minimum! There are other types of crops that can be grown in less than full sun, including leafy greens (lettuce, arugula) and a few herbs (cilantro, parsley).


Layout


Tomato.

Someone out there is asking, “Do I run the rows (the long axes) east-to-west or south-to-north?” Good question! If your plans include growing several tomato plants and maybe some pole beans on a trellis, and you prefer one long plot that is accessible from both sides, I recommend east-to-west.

Long-term plants (tomatoes, peppers, etc.) will continue to get good sunlight all season. Spaced properly, they won’t cast as much shade on each other, especially as fall approaches and the sun sinks lower in the sky. But, if your garden receives sun all day, it won’t make much difference to main season crops.

Cool season crops, grown from fall through early spring, however, will get more sun when planted east-to-west. They’ll face the sun all day even though the days are short.

Taller plants should be planted on the north side of any plot (northern hemisphere), so they don’t shade smaller plants nearby. Some varieties of staked indeterminate tomatoes can grow 8′ tall!


lettuce basket, a portable vegetable garden

Lettuce growing in a basket.


On properties where spatial considerations are limited, do what you can to provide enough direct sun to those crops you can’t live without. Your crops might not be lined up in neat rows, but rather planted individually in a sunny corner over here and another by the back gate. Doesn’t matter. Do what works for you!

Container-grown crops, such as this lettuce basket (photo, above), can be moved around as conditions change.


Multiple Vegetable Garden Beds


With ample space, a series of garden beds can be laid out in a grid. When deciding where the plants will go, always keep in mind that you want to prevent tall plants from shading short plants, with few exceptions. Using straight pathways makes maneuvering the wheelbarrow and equipment easier.

Crops that prefer cooler, part-shade conditions as the weather warms can be planted between the taller plants or in the partial shade they cast. Those include late spring lettuces, arugula, cilantro, and spinach.

savoy cabbage

Savoy cabbage.

Having several plots allows for crop rotation, planting one family of plants in Plot A this year, in Plot B next year, and so on. This helps prevent the soil from being severely depleted of certain micronutrients and from allowing populations of insects and diseases to build up.

The nightshade family (Solanaceae: tomato, pepper, eggplant, potato), the cucurbits (Cucurbitaceae: cucumber, summer squash, zucchini, melon, pumpkin), and the brassicas (Brassicaceae: broccoli, cabbage, cauliflower, kale, Brussels sprouts) are groups of plants that benefit from being rotated every 4 or more years.

To clarify, one member of a family (tomato, for example) should not be planted where any member of that family (tomato, pepper, eggplant, potato) has grown in the past few years.

This is a good reason to keep a record describing where you plant each crop every year, as well as documenting successes and losses. Knowing the family names that crops belong to also helps with crop rotation.


Seed Or Transplant?


antique seed packet

Don’t go overboard if this is your first attempt. You’re not obligated to germinate every pack of seeds you bought. There’s always next season. Most seeds will remain viable for a few years if kept dry and cool.

Starting out with young tomato, pepper, or slow-growing parsley transplants might be more practical than growing them from seed, even though it is more expensive. You’ll find them at garden centers, farmers’ markets, and local hardware stores, and the growers often have good suggestions for cultivation.

If you’re late getting the vegetable garden going, transplants will save you several weeks of growing time. You can always supplement with fast sprouting varieties of seeds, such as those mentioned in the next section.

Starting plants from seed is a welcome challenge to many and is a source of fascination for children—and for adults, too. Don’t laugh, but, for me, it’s a thrill when the catalogs start showing up in the mailbox. I would never discourage you from exploring this facet of gardening. And, of course, there are so many excellent varieties available from seed that never show up in retail stores as transplants.


Seedlings For Vegetable Gardens Need Sun

Seedlings of fruiting crops need at least 6-8 hours of direct sunlight for strong growth. Use clean pots, pasteurized seed starting mix, and a waterproof tray. Provide the proper temperature for germination.

If you don’t have very sunny windows or a greenhouse, consider starting seeds under shop lights with daylight tubes. I use 4′ long fixtures that hold 2 tubes each. Seedlings growing very close to the tubes—only a few inches away—grow strong stems and roots.

Lettuces, arugula, and other leafy greens tolerate fewer hours of sun, although they appreciate full sun during the cooler months.

Avoid starting seeds too early in the season. This could result in leggy, weak plants that might not perform up to par in the garden.


seedlings

Broccoli ‘Happy Rich’ and Arugula ‘Astro’ seeded into cell packs (late winter, 2022).


Seeding Directly Into the Garden

Some crops grow easily from seed sown directly into the vegetable garden. Peas and beans, for example, and radishes, beets, and carrots are just a few species that can be planted right into prepared ground. Dinosaur kale, mustard spinach, mesclun, leaf lettuce mixes, zucchini, spinach, and cucumbers are more crops that can be directly seeded.

Read all the information on the packet, paying special attention to when to start and how deeply to sow the seeds. Although these crops germinate readily, gardeners must still watch out for pests, both above and below ground, and turns in the weather.


Spacing the Plants


It’s important to calculate how much square footage each of your plants requires, or at least to get a rough idea. On graph paper, map the proposed garden to scale. Use the plants’ spacing recommendations found on the label or the seed packet for the amount of space needed.

With a 1/4″ grid, each square can represent 6″ or 12″ of garden space. The diagram is optional, but it can help in future years when considering crop rotation.

It’s better to have more than enough room rather than not enough; plants don’t respond well to crowding. The seemingly large gaps between the major crops can be interplanted with “ephemerals”—those plants that grow quickly and are harvested before the majors achieve full size. Examples include radishes and lettuce between tomato plants, or green onions and beets between autumn-grown Brussels sprouts.


If It Looks Like This…


dry cracked soil

Clay soil shrinks as it dries, creating surface cracking.

Soil that dries as hard as a brick is impossible to work with. You can thoroughly water the area the day before or start digging a day or two after a good rain. Avoid digging or walking in the garden when the soil is wet. This compresses the soil, squeezing out tiny channels of air space that are critical for healthy root growth.

Sandy soil that drains too fast should be amended with copious amounts of organic matter. Bagged topsoil is also available, but quality varies widely. The tiny clay particles in clay loam help hold water and nutrients in the soil.

In a large vegetable garden, plan for pathways every 4′ or 5′, and restrict foot traffic to those areas. Use pavers, flagstones, pine bark, or even that old pile of bricks for the pathways. You can get very creative with stonework, and your garden can be the neighborhood show-stopper, but don’t lay out the stones until the end of the soil prep process.

Let’s begin! Please turn the page…


Return to the top

Headings

Page 1: Finding the Perfect Spot for Your Vegetable Garden, How Much Sun Does the Vegetable Garden Need?, Layout, Multiple Vegetable Garden Beds, Seed Or Transplant? (Seedlings For Vegetable Gardens Need Sun, Seeding Directly Into the Garden), Spacing the Plants, and If It Looks Like This…

Page 2: Remove Sod, Tilth, Soil Prep (The First Dig: Loosen the Clay, The Second Dig: Add Drainage Materials, Organic Matter vs. “Organic”, The Third Dig: Add Organic Matter), Fertilizers, Rake Smooth and Pave, Agricultural Extension and Soil Tests (To Lime Or Not to Lime, and What is pH?)

Yes, But Is It Sunny In the Winter?


Before you start digging, you must first decide where the garden will be located. Many factors should be considered, and the most important one is exposure to the sun. Just outside the back door seems like the logical choice. It’s always sunny next to the patio for summer barbecues. And it’s close to the kitchen and to the water faucet.


Yes, But Is It Sunny In the Winter?


sunshine through trees


That spot is fine, if you’re interested in growing main-season vegetables. But later this year, you’d like to venture into the world of Asian greens and other cool-season vegetables. First you will need to know if it will be sunny in the winter. The garden patch gets full sun in June, but it might be entirely shaded by the house in December!


The Sun’s Path


the sun's path, south side of house is sunny in the winter

The sun’s path across the sky, in southern NC.


The sun’s path and the shadows cast by buildings and trees vary greatly from season to season and from one latitude to another. On the shortest day of the year (the first day of winter) where I live in North Carolina, the sun rises only 31 degrees above the southern horizon. At that time, it rises and sets south of the true east-west axis. On the longest day of the year (the first day of summer), the sun is 77 degrees above the horizon, and rises and sets north of the east-west axis.

A north-facing back yard might be shaded by the house in winter due to low, slanting rays of January sun. In this case, move the proposed garden site farther away from the house. You will be able to enjoy both summer and cool-season crops. Your efforts can be divided among a few plots around the property. Plant each one with the crops that are best suited there at a particular time of the year.

Deciduous trees, such as maple, oak, and cherry, drop their leaves in autumn. Most cool-season greens will receive enough light as it filters through the stems and branches of trees. In our garden (photo, below), you can see shadows cast by twigs and branches from trees growing on the berm to the south. But, by the time the trees leaf out in spring, the sun is almost directly overhead. Tomatoes and peppers planted then will get enough sun, but as the tree canopy expands, the garden will be less sunny in the winter. Time for a bigger garden…elsewhere!


Is Your Garden Sunny In the Winter?


cool season vegetables, sunny in the winter

Cool season vegetables and greens. Plastic covers garden on very cold nights, and netting protects plants from deer.


In regions of the country with moderate winter temperatures, greens can be harvested through the season if the garden gets at least 5 hours of direct sun per day. Leafy greens (spinach, kale, mustard, tatsoi, Swiss chard, lettuce, and many others) will grow fairly well with slightly less sun than that required by head-forming vegetables, such as cabbage, broccoli, Brussels sprouts, and cauliflower.

But exposure to the sun for a longer period of time in winter is always best. The plants grow faster and stronger, and the soil absorbs more heat from the sun during the daytime. More heat prevents the soil from freezing deeply.

Using protective cold frames over the garden moderates severely cold temperatures by trapping the sun’s heat. Warmth is stored in the soil, and released to the plants during the night. Some crops, such as kale, collards, broccoli, parsley, arugula, and cilantro, tolerate cold weather. They often survive without any protection, in the southern half of the country, until they go to flower (or into the stockpot) in spring!

I’ll talk more about cold frames and other protective devices in future posts, and you might have guessed that I’m a fan. On sunny days, of course, cold frames have to be vented in order to release hot air and to get fresh air (with carbon dioxide) in.


Locate the Garden


So, once you decide which crops you want to grow—whether they’re warm-season or cool-season, or both—you can start by observing the path of the sun. Get your young math genius out there, with sticks and string, a level, a compass, and a protractor. Find how the sun and shadows track across the sky at different times of the year. Vegetable gardening could become a great family pastime!

Something else that could influence the location of the garden is the existence of underground conduit, utilities, and cables. Call your local officials (8-1-1) to have the utilities marked before digging anywhere. Tree roots also are a hassle. Guess which one wins if there are maple tree roots infiltrating the vegetable garden.


stone circle, sunny in the winter

Free-Photos / Pixabay. Stone circles built thousands of years ago were ceremonial and helped indicate when crops could be planted.


Return to the top

How to Prepare the Soil: An Introduction


trowel in soil


Along with the early daffodils comes really beautiful weather. It’s been sunny, the birds are singing…not too hot, not too cold. It’s time to prepare the soil. But first, we need to understand it.


Prepare the Soil


Herbs, vegetables, and flowers are going to be living—hopefully, thriving—in your garden for several months. For trees and shrubs, providing a good home will see them through the next decade, or the next century! It pays to give them the best conditions you can provide, and it all starts below the surface of the ground.


Axiom of the day: soil preparation is 90% of your effort.


If that sounds like work to you, you are correct! But you’re reading this presumably because past results have fallen short of expectations, and you want to improve your gardening skills. I’ve played in the “dirt” professionally for 50 years and can honestly assert: successful gardening depends on the health of the soil.

And here’s the good news. Thorough soil preparation will have benefits for many years to come. You won’t have to prepare the soil to this extent again.


The Soil Is Alive


Microbes


prepare the soil for seedlings

Seedlings in prepared soil.


Soil is more complex than meets the eye. There is a dynamic interplay among minerals, organic matter, air, and moisture. Earthworms, insects, nematodes, and tiny microbes also contribute. Healthy soil is teeming with life! These organisms play an important role in how soil functions. Without them, organic matter would not break down into those vital nutrients needed by all plants.

Vast mycelial mats of beneficial fungi, or mycorrhizae, live in close association with roots. Millions—or perhaps a billion—species of these beneficial microbes inhabit soils around the globe, many of which live within or around a particular species’ roots. Researchers estimate that there could be a trillion species of microbes living in air, soil, water, and living organisms.

Soil-borne mycorrhizae have enzymes that can unlock, or chelate, micronutrients tightly bound to soil particles, making them available to plants. These organisms can gather water and provide it to plants even though the plants’ roots don’t have direct access to moisture. And these microbes act as barriers to certain soil pathogens.

Bacillus, Streptomyces, and Pseudomonas are common bacterial microbes. Fungal mycorrhizae, such as Trichoderma, Hebeloma, and Glomus help roots absorb water and phosphorus. Other microbes, such as viruses and archaea, also inhabit the rhizosphere, the area surrounding the roots. Gardeners are familiar with the nitrogen-fixing bacteria (Rhizobium) that increase yields in legumes.

Scientists have only recently begun deciphering the enormous number of microbes and what they do for or to plants. Only a few plant families, including Brassicaeae, do not have associations with fungal mycorrhizae. Blueberries and other plants in the Ericaceae family (azalea, rhododendron) have very limited associations with mycorrhizae.

Microbes benefit from the symbiotic relationship with roots by getting carbohydrates in return. The numbers of microbes inhabiting just a tablespoonful of soil are staggering. Believe it or not, that’s greater than the number of people living on the planet! Of course, not all of these microbes are beneficial; many cause diseases in plants and animals.


Tilth

earthworm castings

Nutrient-rich earthworm castings.

Consider yourself lucky if your soil has good tilth, or friability, to begin with. Perhaps all you’ll need to do to prepare it is to add compost, aged manure, or some fertilizer periodically.

Soil stays more biologically active over a long period of time if it is not disturbed by frequent tilling. Beneficial fungi and nematodes are especially sensitive to major disturbances. Simply scratching products into the soil surface and watering them in preserves existing microbial populations in the soil.

There are several soil types distributed throughout the United States. They’re determined primarily by the kind of bedrock beneath the surface, the kinds of vegetation growing there, climate, and management practices employed through the centuries. Minerals from rock, eroded by water and wind, will be deposited downstream or downwind.


Soil Composition

Soil is composed of:

  • mineral matter (rocks, sand, silt, clay)
  • organic matter (carbon-containing [once-living] compounds such as compost, aged manure, dead roots, dead organisms). Never use fresh manure; the ammonia content can harm plants, and it might harbor pathogens.
  • living organisms (such as earthworms, nematodes, microbes, insects)
  • air
  • water

Tilth and fertility are determined by relative proportions of these materials. All kinds of soils benefit from the addition of compost and other organic materials. I confess to going a little overboard on these amendments when I prepare the soil. But the plants look great!

You might be fortunate to start with soil that has good tilth. It already has physical characteristics which promote plant growth. Or experience indicates that the roots will need some encouragement to grow beyond the original root ball.

Soil that is a rocky clay, for example, dries to the consistency of brick, and will need lots of amendments to improve drainage and to encourage roots to grow vigorously. On the other hand, sandy soils need materials that will improve water and nutrient retention. Instead of repeatedly failing with plants that can’t adapt to your soil, try starting out with those that can. Working the garden over the years will condition the soil sufficiently so you’ll be able to grow more species.


foxglove

Biennial foxglove (Digitalis purpurea).


Simply digging a hole in the ground, adding a cupful of compost, and plopping the plant in place won’t do the trick in heavy clay or rocky soils. Depth of topsoil, drainage patterns, ratio of clay to organic matter, air pore space (the space between particles), and, of course, fertility and pH, all enter into the equation.

The rich, black ground in our West Virginia garden needed no amendments at all; the foxgloves grew 7 feet tall! Still, I added organic matter every time new plants went into the ground.


From Awful to Awesome


First, the Awful Bit

Our first house in Maryland sat on the crest of a hill. Sunrises and sunsets were spectacular, but the soil was just awful. It was all clay and shale. Any organic matter that did exist blew away or washed down the slope. That “dirt” refused to yield even to the most enthusiastic shovel.

I created a vegetable garden farther down the slope, next to the greenhouse, that gave us fabulous crops of tomatoes and peppers. Digging in autumn leaves, vegetable scraps from the kitchen, and discarded material from my horticultural business greatly improved the soil. It didn’t take long for decomposition to begin and for the earthworms to show up.


wheelbarrow with compost to prepare the soil


Almost Awesome

A few years later, we moved farther south to a community that had been carved out of an old oak and hickory forest. Although the soil quality was better here than at the previous property, I continued to prepare the soil with every new project for the next 3 decades.

Before planting rhododendrons (like the one in the photo, below) in the afternoon shade, I added peat moss and pine fines to the soil. These materials were not merely thrown on top of the ground. Instead, generous quantities of amendments were incorporated (not layered) into the top 12″ to 18″ of existing soil. Then, I mixed nutrient-rich LeafGro (locally sourced compost) into the top 8″ of loosened soil.

This effort created a well-balanced mixture, composed of existing clay and loam, and the added peat moss, composted pine bark, and compost. After that, the soil remained undisturbed except for top dressings of fertilizer, compost, or mulch.


rhododendron

Rhododendron catawbiense.


I left the ditch behind the shrub border undisturbed, allowing rainwater to travel down the slope. Water that did not drain away would have meant death for the shallowly rooted rhododendrons.

Blueberries must have very acidic conditions, in a range from about 4.3 to 5.3 pH. Rhododendrons, azaleas, and hollies like their pH a bit higher than that, but still on the acidic side. Peat moss and pine fines incorporated into the soil helped provide the acidity and aeration.


calibrachoa with chlorosis

This calibrachoa has chlorosis from high pH.


Petunia, calibrachoa, pansy, and viola also benefit from a lower (acidic) pH. Plants growing in soil with closer to neutral pH will have sickly yellowish leaves with green veins (photo, above).


A Shady Oasis

Gradually, most of the back yard grew into a private woodland. Japanese snowbell (Styrax japonica), paperbark maple (Acer griseum), Pieris, Abelia, Viburnum, Kolkwitzia, and a group of monarch birches (Betula maximowicziana) were the main players. And the rhododendrons and existing vegetation, of course.

Mulched pathways meandered under the cool canopy, and all sorts of shrubs and perennials luxuriated in that rich soil. There was a small pond, a greenhouse, and no grass to mow in the back yard. Awesome. (***Update***: As it often happens, subsequent owners of the house altered the property to suit their needs and removed almost all of those plants.)


Monitor Soil Health Over Time


Preparing the soil for vegetables is not difficult, and the results will last for years. Most varieties prosper in improved soil 10 to 14 inches deep. Lettuce and radishes need only 5 or 6 inches.

Using the space efficiently and intensively calls for carefully managing the soil. Vegetables grow quickly, fruit heavily, and, therefore, require frequent additions of nutrients. 

Thoroughly preparing the existing soil will pay dividends, spelling the difference between getting a few vegetables from the garden (“Why bother?”) and having a truly abundant harvest (“Take some veggies, please!”). And, if you properly prepare the soil at the start, you’ll never have to repeat the effort to that degree.

Keep in mind, though, that, as organic matter breaks down and is absorbed by plants and other living things, you’ll need to add more compost. For top performance, plants need balanced fertilizers that are appropriate for specific uses, such as for vegetables, flowers, spring flowering bulbs, or the shrub border. That’s in addition to the compost or aged manure you originally used to prepare the soil. Lack of nutrients and compacted soils are among the top reasons for low crop yields.


Soil Testing

Contact your local Master Gardeners program, or the agricultural extension office, for information on soil testing. The results will indicate which amendments to add, and whether the pH is appropriate for the plants you want to grow. The report also includes a breakdown of the soil components: clay, silt, sand, and organic matter. Normally, I add more organic matter than soil tests recommended.

Soil pH is a measure of acidity or alkalinity. Neutral is 7.0, with acidic values below that and alkaline values above 7.0. A simple soil test will indicate pH and nutrient levels. Soil pH affects the availability of nutrients to plant roots, with most vegetables preferring pH levels between 6.0 and 7.3.

Years ago, a landscape client wanted to prepare the soil for a vegetable garden on the property she and her young family had just bought. She expressed concern for “bad things” in the ground, so I suggested that she ask for a lead test in addition to the basic tests. The cost of the basic test is very reasonable, but extra requests will raise the fee. No matter; it’s worth the cost.

The report showed a surprisingly high lead content in the soil, unusual for a newer home. So, you don’t want vegetables growing there! She submitted tests from different areas, and felt confident that the original spot was unique. Something probably had been dumped there before the house was built. Later, the family was going to have the contaminated soil professionally removed.

Lead Paint

trowel in soilIn 1977, the Consumer Product Safety Commission banned the use of lead paint in residential properties. If you live near an industrial region, a busy highway, or where lead paint might be a concern, I strongly advise testing for lead before you prepare the soil. Local zoning authorities should have records on past property use. For more information, contact the National Lead Information Center at 800 424-5323.

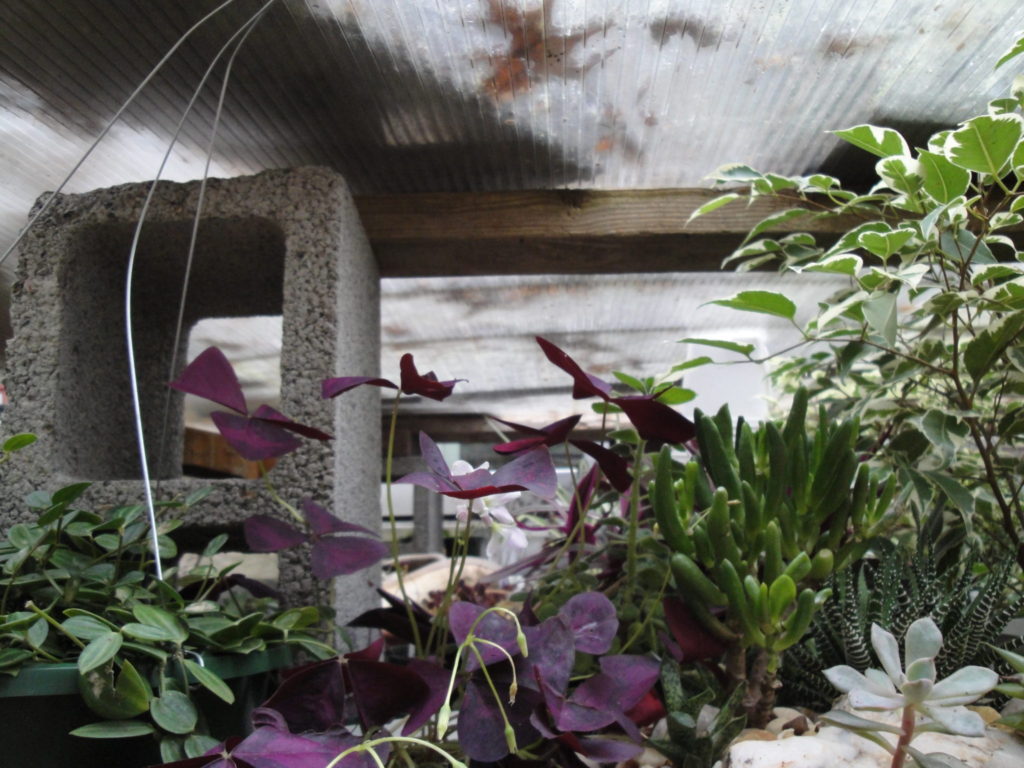
Lead poses a serious health risk, especially to young children. There is no level of lead that is considered “safe enough”. And most of us grow our own vegetables for the health benefits, after all.

For now, gather your tools and your help, and pace yourselves. This is not something to be accomplished in the hour before your daughter’s softball game. So, you might as well turn it into a party—arrange for pizza delivery at the end of the day! You certainly will have deserved it.


pizza


Return to the top

Using Miniature Lights For Warmth


Miniature Lights for… Warmth?


miniature lights


Yes! You can use strings of miniature lights to prevent frost from damaging tender transplants in the garden.

This article originally was written for springtime applications. But read through, and you’ll see how the same principles work for cold weather gardening in many regions. These lights will keep greens in better condition, sometimes all the way through winter. Your cool season greens can produce for weeks or months beyond the early freezes!


Unpredictable


The weather has been so weird this spring. Some days it feels like June, and others skim the bird bath in ice. Lots of us already planted tender (easily damaged or killed by frost) vegetables and flowers. Without some protection, they will be injured by the cold nights that are still in our forecast.

If the nighttime temperatures are predicted to fall below 50°F, I’ll cover tomato and pepper transplants in the garden. A night or two in the 40’s probably won’t hurt most transplants if they’ve been properly hardened off. But consistently chilly weather will slowly rob the plants of their vigor. Peppers and basil are particularly sensitive to cold soil, and can be killed by it, even if temperatures aren’t close to freezing.

It’s amazing to see snow still flying in some of our northern states. It is beautiful…to watch on TV.


cold frame, with plants

Early winter in the cold frame. Light strings snake around the bottoms of the pots.


Miniature Lights


Incandescent lights, as opposed to LED’s, give off gentle heat. Those 100-bulb strings of miniature incandescent Christmas lights can increase the temperature under cold frames. They also protect tender plants in garden beds when covered with plastic sheets to hold the warmth.

mini lights under plastic cover

Potted plants under cover, warmed by miniature incandescent lights.

This is especially beneficial in those locations where an upside-down bushel basket will not sufficiently ward off the cold. And I’m not suggesting that you attempt to defy good garden sense by planting peppers in February in Minneapolis. There are limits!

When I calculated the wattages, square foot coverage, and costs, the miniature lights were the most economical option for my purposes. Each 100-bulb string provides warmth equivalent to a 40-watt incandescent bulb. I also considered heat mats and heat cables. Have a look around hardware stores and see what garden centers have available. Look for ideas online or with mail order companies selling farm, garden, horticultural, or greenhouse supplies.

Use “indoor/outdoor” products that are safe to use in humid environments. Space heaters designed for indoors are not good candidates outdoors. If you’re planning a project outside your comfort zone, check with licensed contractors, especially for electrical work.

(***Update***: Above average temperatures in the Carolinas carried into mid-fall, so the amaryllis bulbs refused to die down. Recent nighttime readings in the low to mid 20’s would have damaged the potted bulbs, so they’ve been enjoying temperatures in the mid 40’s, thanks to miniature lights and a plastic cover. Not forcing early dormancy on the plants gives them extra time to photosynthesize and, perhaps, an additional flower bud. Finally, the leaves are beginning to yellow, and soon they’ll come indoors to rest and to begin the bloom cycle. December, 2018)


And More Bright Ideas

Include snow loads and wind events (they will happen) in your plans. Slope the top of a cold frame away from the house to allow run-off. During the occasional heavy snowstorm in Maryland, I got up in the middle of the night to sweep off snow that had accumulated 8-12″. Toby, our second Rhodesian ridgeback, thought this was lots of fun. Although polycarbonate is very durable and will bend with weight, too much distortion will allow frigid air to enter and might collapse the frame.

There are more permanent alternatives to consider. Do-it-yourself greenhouse kits could be used specifically for fall and winter crops, heated or unheated. Familiarize yourself with local weather patterns to decide what’s feasible…or necessary. You might be able to convert a shed or construct a lean-to by adding a few materials readily available from the hardware store. Contact your local agricultural extension agent for practical suggestions or check out the numerous online videos.


Cold Frames With Miniature Lights


cold frame interior, miniature lights

Setting up cold frame with new strings of miniature lights.

Cold frames are simple glazed structures that give extra protection to plants when the weather is unsuitable for planting out. Young seedlings or transplants can be hardened off here until they’re ready for the garden. Also, plants that normally go dormant or die in winter can be kept green in a frame. And edible cool season vegetables can grow all winter in a cold frame where it’s too cold out in the open.

Try to orient the frame’s exposure toward the south (in the northern hemisphere), which will give the greatest benefit in terms of heat gain. Bricks on cinder blocks (photo, right) elevate the north edge of the glazing for rain run-off and a more favorable aspect to the sun.

Each hour of direct sunlight shining on the frame keeps the temperatures elevated and stores warmth in the ground. If possible, locate the cold frame out of the wind and in a warm microclimate on the south side of the house or shed.


Materials

Some gardeners use lengths of sturdy wire, arched and stuck in the ground, covered with clear plastic secured by fasteners. Or use long pieces of PVC tubing anchored over rebar sunk in the ground. Repurpose old storm windows or doors (without lead paint) propped on a support.

“Low tunnels” or “caterpillar tunnels” are available at garden centers or online, complete with supports and coverings.

For the large frame in Maryland (photos), I used rigid twinwall polycarbonate panels, covered with clear plastic film to close the sides. On very cold nights, I added more sheets of plastic, separated by “netted” plant flats that trapped air between the layers. This created dead air space and better insulation.


cold frame for cool season vegetables

Cold frame in MD, vented in the daytime.


Houseplants

Oxalis, succulents, stellar geraniums, a variegated fig tree, and other houseplants (photo, top) survived the winter, although I did not expect them to grow. When cyclamen plants went out of bloom in the house, I moved them to the cold frame, where they happily set buds once again.

Plants that do not tolerate the slightest chill, such as African violet, Alocasia, pothos, philodendron, and basil, would not survive very long at temperatures below 60°F. They stayed indoors for the winter.


“Frame to Table”

Without using miniature lights in Maryland’s colder winters, I would not have been able to harvest this assortment of greens. I grew lettuces, leeks, arugula, hon tsai tai, mustard spinach, dinosaur and ‘Red Russian’ kales, and spinach. And Swiss chard, tatsoi, pac choi, mini broccoli ‘Happy Rich’ in wide, shallow pots, about 6″ deep (such as those in photo). ‘Nabechan’ bunching onions and some greens grew in the ground on one end of the cold frame, while potted crops sat on the brick surface.

cool season vegetables

Greens growing in wide bowls.

Dense materials, such as brick and stone, absorb heat during the daytime and release it at night. I threaded strings of miniature lights between pots, on top of the brick patio. Broken light bulbs cause part or all of the string to fail, so be careful with them. Pots of greens and herbs placed close to the edge of the frame allowed easy access.

Herbs grew all winter in this cool but frost-free environment. Parsley, oregano, sweet marjoram, rosemary, thyme, chives, sage, French tarragon, and bronze fennel are a few of the herbs I grew in the frame. Cold frames are great for half-hardy species and those that normally stay dormant in winter. Italian oregano, tarragon, and chives, for example, retained their foliage instead of going fully dormant.

I added an adapter to the porch light socket near the patio door, and the lights’ extension cords plugged into that. With a simple flip of the switch from the cozy kitchen, the lights turned on or off. That’s one advantage of building your frames close to the house. 

Remember to vent the frame on sunny days, turning lights on or off as necessary. Close it up by mid- to late afternoon. 

Water as necessary, keeping the soil damp, but not wet. During mild periods of the season, add a dilute dose of fertilizer to those plants (mostly the greens) that are growing.

Power Outages

Have a contingency plan during power failures if you’re going to keep tender plants in your cold frame. Use old blankets (keep them dry), more layers of plastic, and gallon jugs filled with hot water. When this happened a few times in MD, I heated water on the wood stove for those hot water bottles and brought the most tender plants indoors.

Snow or straw piled up around the sides and a layer on top holds in a substantial amount of heat. Clear the top in the morning to allow sun to reach the plants. But if the weather is especially harsh and overcast, the plants won’t mind staying covered for a day or two.


The Maryland Greenhouse


greenhouse for cool season vegetables

The small greenhouse in Maryland.


I built this greenhouse from a kit purchased from a horticultural supply company. It was fairly easy to put together, although some of the pre-drilled holes didn’t quite match up and the instructions weren’t great. But the twinwall polycarbonate and sturdy framing were able to withstand considerable weight from ice and snow. The structure was attached to a foundation, which was optional but recommended.

This is where I kept more flats of tender succulents. Placed on 2 x 2″ x 8′ posts propped up on cinder blocks near the ends, the flats were heated from below with strings of miniature lights. They had the additional protection of 1 or 2 layers of clear plastic secured on the sides and suspended a few inches over the plants. When nighttime temperatures plummeted to single digits, I added a couple of old bedsheets and another layer of plastic, and then removed them once the sun hit the greenhouse. None of the plants froze.

A second heavy duty indoor/outdoor extension cord reached the porch light adapter near the cold frame, so I could turn all the lights (in the cold frame and in the greenhouse) on or off from indoors.


Double Bubble

This extra “bubble” of lightly warmed air made it possible for frost intolerant plants to survive our zone 6b winter. A bubble inside a tightly sealed unheated greenhouse (or other structure) feels up to 2 or 3 zones (up to 20-30°F) warmer at night than outside air, and even warmer with miniature lights. Keep in mind, though, that each layer reduces the amount of light reaching the plants.

Two or three rows of tender plants—all under a single bubble—occupied the center of the greenhouse. Near the perimeter sat frost tolerant cool season greens in large black nursery pots. Dark colors absorb the sun’s energy, keeping soil unfrozen for longer periods of time. Large pots work better than small pots because they store more warmth. Sometimes I stored bales of potting soil, wrapped in black plastic, on the north edge, where the winter sun would not be blocked.

States in the middle and northern parts of the U.S., in USDA zones 4-6, benefit greatly from an extra barrier of protection from frigid temperatures. Cold hardy plants are more likely to survive than tender species in spaces with no supplemental heat.


Here in North Carolina


Since moving to Charlotte, North Carolina (USDA zone 7b/8a) in 2013, I’ve used clear plastic and miniature lights to ripen up the last of the summer vegetables. And they keep cool season greens and vegetables growing through the worst of our winter weather. To avoid any surprises, check the weather forecast daily.
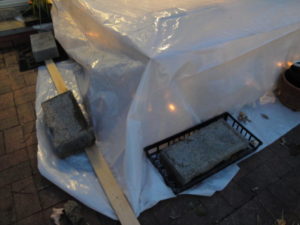
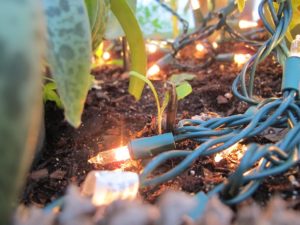
Succulents that moved with me from Maryland spend the winters in lighted cold frames after filling the sunny windows indoors (photo, right). Delicate species stay inside.

One year, an HVAC contractor came to check the heat pump, located near the lower patio. There were several flats of plants in a second cold frame down there, with miniature lights. That frame was not easily visible from the house. A couple of days later I discovered that the contractor had inadvertently disconnected the extension cord feeding power to those lights…and life to the plants! You know the rest of that story.

(***Update***: I just finished enclosing the sunny front porch at my new home in northern North Carolina, where I moved in October, 2021. This is where the succulents and other plants will spend the winter, aided by miniature Christmas lights. December, 2022)


Cautions


cold frame

Cold frame covered with clear plastic and weighed down.

Make sure the miniature lights are rated for indoor/outdoor use, and that extension cords are also safe to use outdoors. I’ve been warming up the cold frames and garden plants like this for decades without mishap, except as noted above.

The tender succulents and bowls of mixed greens and herbs covered during the winter survived without damage. On nights that fell below 15°F, the temperature in the cold frame stayed in the high 30’s or 40’s, depending on the number of lights used.

Plants survived single-digit temperatures, helped by the old quilts and extra plastic placed over the frame at night. When needed, I added another string of lights. Placing the frame cover fairly close to the tops of the plants limited the volume of air those lights needed to heat. Not too close, though, or the foliage will feel the cold.

This works like a charm, but only if there’s a power source nearby. Be careful; don’t use extension cords that can’t carry the demand for power. Don’t hook up more than 2 or 3 light strings together.

There are few products on the market that demonstrate the phenomenon of planned obsolescence as clearly as cheap imported miniature lights. Stock up on them when they’re plentiful. They don’t last more than a couple of years with frequent use, and they’re becoming increasingly scarce in favor of LED’s. Tread carefully!
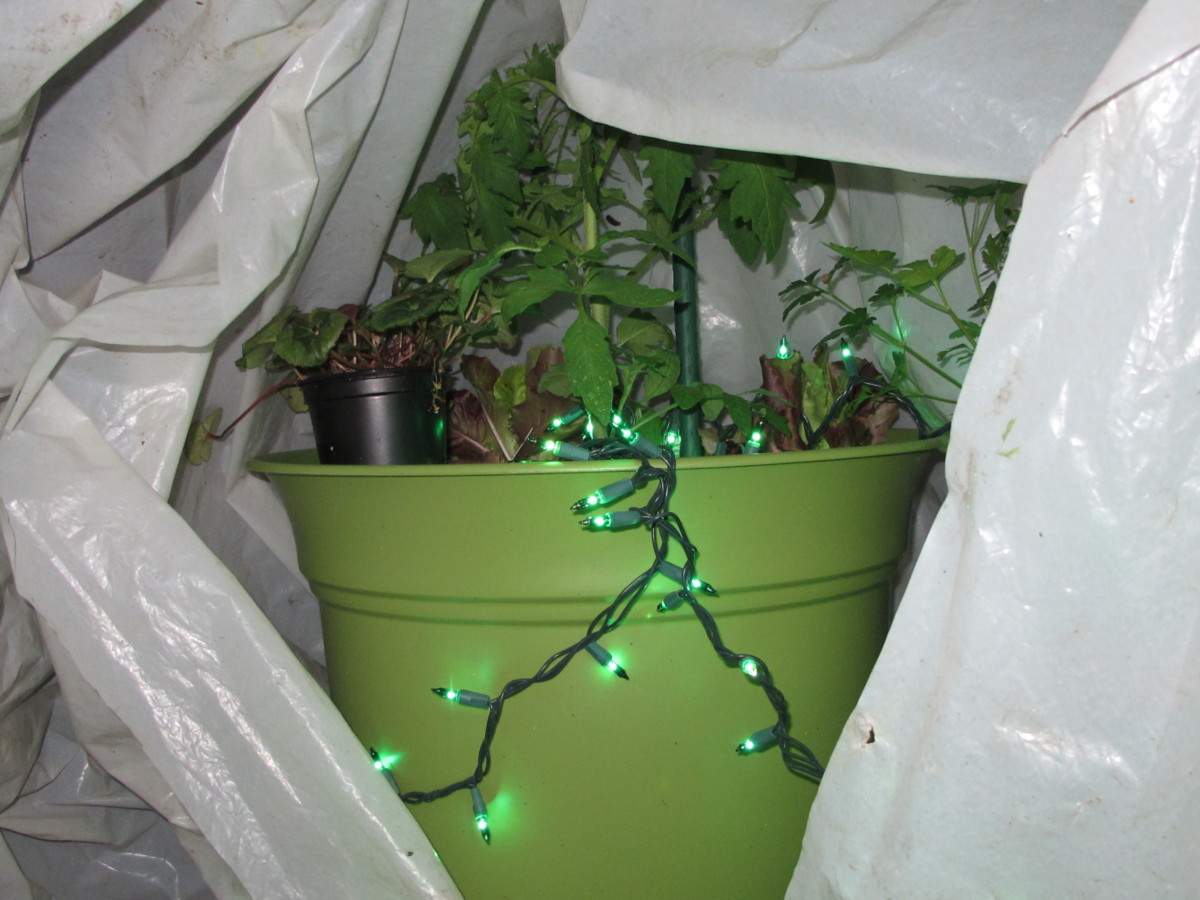
Lastly, instructions on the packaging recommend washing hands thoroughly after handling strings of lights. There might be some lead in the wire covering.


Miniature Lights Preferred


Christmas lights, plastic, cold frame

Mini lights warm up 2 large pots of young tomatoes.


There are other types of incandescents available but watch the wattage! If bulbs are hot to the touch, the plants will think so, too, so don’t place them close to the plants. The preferred miniature lights are barely warm, so they distribute the heat evenly and gently.

Make sure the bulbs are not in contact with the plastic covering or the leaves. Avoid letting the plastic cover touch the leaves; cold transfers through the plastic and will damage foliage.

It’s best to lay the strings on the ground, around—but not touching—the stem. The warmth will rise. For potted plants, wind some of the lights around the pots. Tall plants might require lights up into their branches.

If you’re not really trying to push the envelope, the plastic bag or old sheets probably will do the trick. It’s when that sudden blast of uncommonly cold weather comes around that prompts us to take extra measures.

(***Update***: In the photograph above, mini lights kept the young potted tomatoes [in 20″ pots] and a few other plants 15° warmer on an unusually cold spring night. I placed the miniature lights on the soil surface and wound them around the pots to keep the roots a bit warmer. Plastic was closed and secured with clips. April, 2019)


Out of Reach


Where lights are impractical, there is a solution. Use large plastic mulch or trash bags, and tuck in a hot water bottle. Seriously! A repurposed gallon milk jug filled with very hot water slowly gives off heat through the night. A little experimentation will tell you if the heat is given up too quickly (wrap the jug in an old towel to slow heat loss) or insufficiently (use 2 milk jugs or larger containers). Don’t place the hot water close to the foliage. Keep this in mind when the power goes out.

Those “water wall” products you see at garden centers work on the same principle. Water that heats up in the sunlight slowly gives up that heat to the plant at night.

Plastic bags that are nested, or layered, give better protection than a single layer. Spread the opening over a wide footprint (soil’s square footage) to capture heat rising from the ground. Or simply secure a large plastic sheet to a tall stake in the ground. Weigh down the covering with rocks or bricks to keep it in place and to seal out the cold. Remove the cover in the morning.


   *    *    *    *    *    *    *    *    *


I hope this information gets your garden successfully through the “shoulder” seasons, when temperatures can fluctuate wildly. Just a few readily available and inexpensive materials can prevent a total loss.

Later in the year, when autumn temperatures tumble, having materials ready for duty will extend the season. Rolls of 4-mil clear plastic—actually somewhat translucent—can be found in the hardware store’s paint department. This product (4- or 6-mil plastic) is less expensive than greenhouse film. If, however, you opt for permanent structures, the longer lasting film will be worth the investment.

If you’ve never grown cool season vegetables, these methods will open up a new world of growing opportunities. You can extend the season before and after the summer crops or protect tender ornamentals through the winter. No need to retire the trowel with the first fall frost!


potted broccoli

Young broccoli ‘Arcadia’ in 20″ pot, where a tomato grew in the summer. Sharp-tipped pinecones discourage squirrels.


Return to the top

A Microclimate and Frost Protection


Just when you thought it was safe to plant tomatoes!


Microclimate


thermometer

C and F.

Call it impulse or ignorance, the natural inclination for most of us gardeners is to push the season. I’ll admit it; I planted tomatoes and a sweet pepper here in North Carolina about 2 weeks ago, knowing very well that I might have to protect them at night.

But I’m ready, with plastic bags and bamboo stakes, and large sheets of clear plastic, if needed. Plus, the garden is located close to the warmer south side of the house. The sun’s warmth collects in the soil and in the wall, releasing it slowly over the nighttime hours. Peppers are more sensitive to chilly temperatures, so they get covered first.

Even though this cozy little microclimate gives a few degrees of protection, I’m not about to cause any discomfort to my new plants, nor to check their growth. So, I covered them when the nighttime temperature was predicted to fall below 50°F. That’s not even close to freezing, but that’s what I mean. I don’t want them to get close to freezing. And neither do they!

Incidentally, research indicates that tomatoes and peppers might yield more fruit if they have been exposed, when young, to temperatures in the high 40’s to low 50’s. But those plants will need to have been fully hardened off in order to withstand the less hospitable environment.


Microclimate: Where To Find It

Maybe your property has a warmer microclimate that will protect newly planted flowers or vegetables. Close to the south side of the house, a shed or garage could work. Or the sunny side of a solid fence. Perhaps your vegetable and cutting gardens are surrounded by massive stone walls…perfect. A dense hedge will cut wind speed and offer some protection.

A sunny porch, carport, or the protected corner of a patio might keep those young plants happier than if they were planted out in the garden just now. Who isn’t tempted by those first plants offered at garden centers, even though we know it’s way too early?

Direct sunlight warms the soil and surrounding structures. The area needs to be open to the southern sky (if you live in the northern hemisphere). A garden on the south side of a brick wall is great, but not if it’s shaded by a white pine tree. Dark colors absorb more of the sun’s energy, so they’ll release more warmth at night.

You can create a microclimate simply by covering sensitive plants with old bedsheets or sheets of plastic before the sun sets. Prop them up so the material is not touching the tender foliage. During the shoulder seasons, temperatures can fluctuate between seasonal and cruel. There are limits to the degree of protection afforded by microclimates.

Another option is to construct a temporary cold frame, with some sort of a support (bales of hay, cinderblocks, wooden boards) and a clear covering (lead-free old windows, patio door, clear rigid plastic, or plastic film). The cold frame can stay in place for as long as it serves your purpose, but you’ll need to open the covering to let cool, fresh air inside. Heat builds up quickly under clear glazing.


Always Check the Weather Forecast


In this Zone 7b location, April 15th is considered “safe” for most tender, main season edibles and flowers, but it is always advised to check the weather forecast daily. If the forecast had called for a long stretch of cold rainy weather, I would have delayed planting. No one wants to be planted in cold, wet soil.

More sensitive species, such as cucumber, zucchini, and basil, will not be planted until the soil has warmed up considerably.


Diascia flirtation pink

Diascia ‘Flirtation’ is one of my favorites for the shoulder seasons, when it could be warm or frosty.


Among flowers, caladium, scaevola, streptocarpella, zinnia, and vinca are a few that prefer warm soil before planting out. Their foliage will wilt or show damage even if the temperature hasn’t reached the freezing point.

The alyssum, snapdragon, and diascia, however, did just fine without protection, and even prefer cooler temperatures.

Frost occurs first out in the open—in the middle of the lawn or on the rooftops. Plants that can tolerate cool temperatures will be unharmed in a protective microclimate. They might be damaged, however, if they’re far from the house and subjected to a freeze. Just 5 or 10′ can make a difference!


Frost Last Night


frost on leaf


This morning I was surprised to see frost on the rooftops and ice in the puddles on top of the cold frame. It wasn’t “supposed” to get below 35°, but the temperature dropped well below freezing. The plants in the cold frame and in the garden are fine. Late yesterday afternoon, I covered the tomatoes and the pepper with large, heavy plastic bags (with more plastic bags layered inside for insulating dead air space) supported by a couple of sticks in the ground.

The larger the “footprint” of the covering, the better; the larger area of covered soil allows more heat stored in the ground to rise. And it was breezy yesterday, so a couple of bricks held the plastic in place.

Don’t forget to uncover the plants in the morning, as soon as sunlight reaches the area. It doesn’t take long for the inside air temperature to rise high enough to stress the plants.

There are some tricks you can use to fool…or assist…Mother Nature, and I’ll write about those in the future. You might want to adopt some common sense methods of protecting plants to stretch the season. In addition to taking advantage of microclimates, one of those tricks involves strings of miniature incandescent lights, like the ones you strung on the Christmas tree. So don’t pack them away in the attic just yet!


for a warm microclimate, add mini lights


Return to the top