To say that the year 2020 was a tumultuous one is a grand understatement. From politics to pandemics, I don’t think I’ve seen a time with greater divisions among the population and even between family members. But let’s leave all of that behind for a while, and enjoy some homemade chicken soup.
Here’s a recipe for winter’s ultimate comfort food: Chicken Soup. While some cooks make soup with more broth or egg noodles, I like to add lots of vegetables and some cooked pasta. This is a must for anyone feeling hammered by a cold or the flu. Feel free to adjust the proportions of ingredients to suit your family. I make about a gallon at a time, and freeze portions for later use.
Ingredients for Chicken Soup
1 package of 3 or 4 chicken breast halves, with skin and bones, rinsed (excess fat or skin removed)
salt and pepper
all-purpose unbleached flour
butter and olive oil or vegetable oil
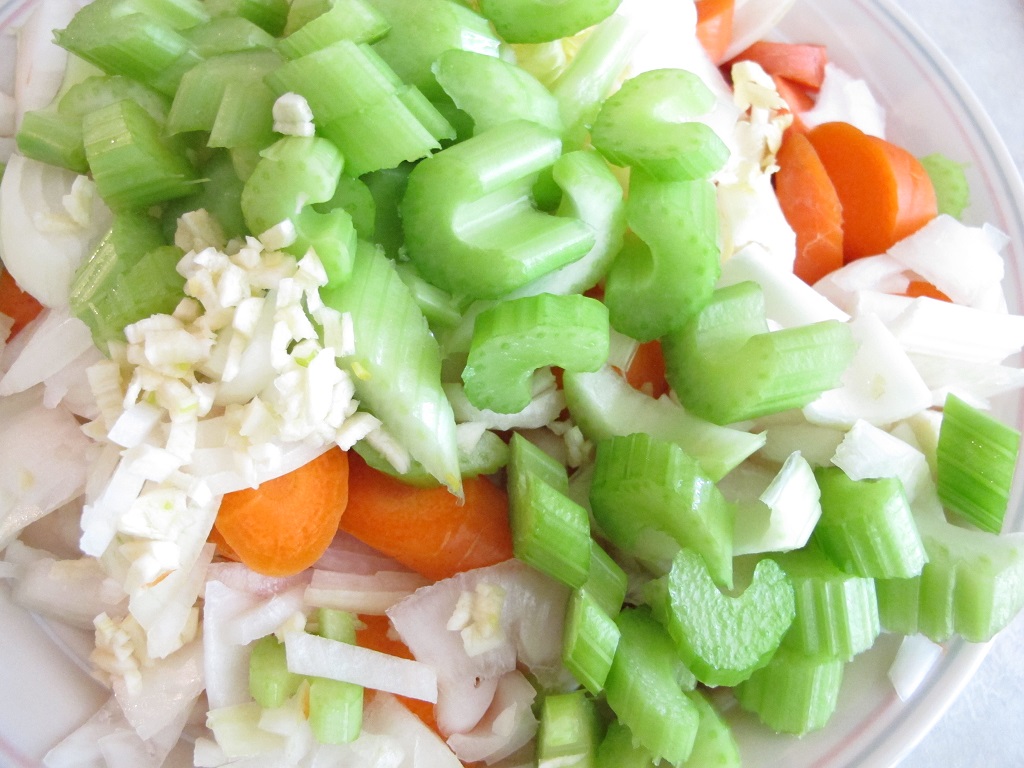
2 to 4 stalks celery, cut into slices
1 or 2 yellow onions, sliced or chopped
3 to 5 carrots, sliced
2 large cloves fresh garlic, crushed or minced
several white buttonmushrooms
2 bay leaves
3 or 4 15-ounce cans of low sodium, no MSG chicken broth, plus 2 or 3 cans of water
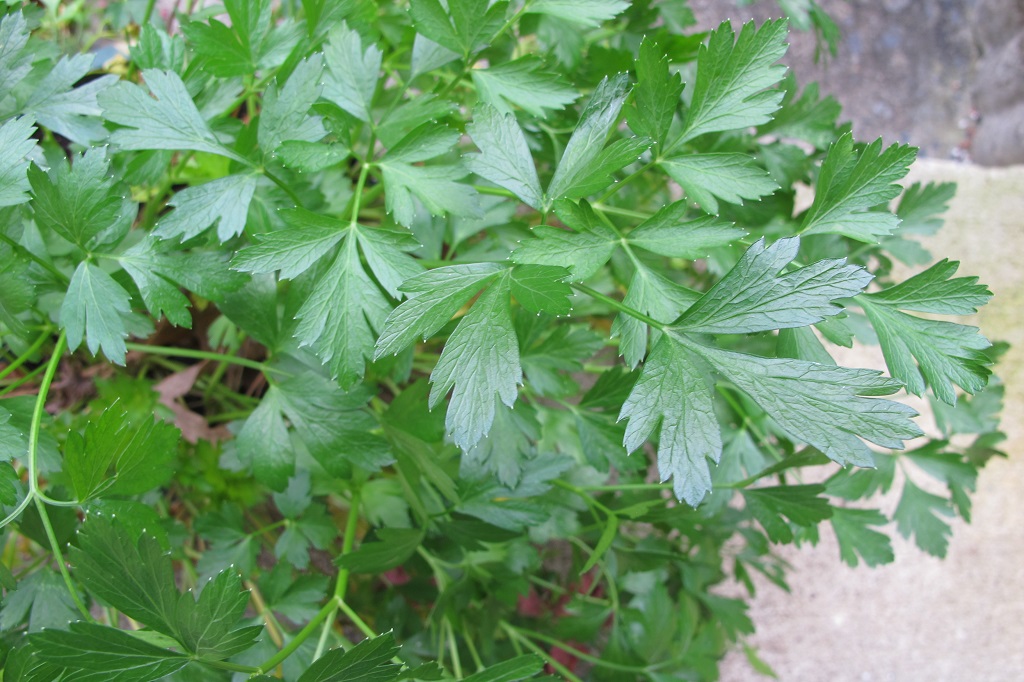
herbs: a handful of fresh Italian flat-leaf parsley (chopped), 2 to 3 tsp. Italian oregano (and some sweet marjoram if you like), and 1 tsp. French thyme. Measurements can vary, depending on your preference. If using dried herbs, use half as much as the amounts specified for fresh. Start with small amounts, and add more if desired. Parsley is always much better used fresh, and is widely available.
leftovers: vegetables and/or cooked rice or barley (optional)
enriched pasta (mini farfalle, elbows, penne, broken spaghetti…), pre-cooked or cooked separately while the soup is simmering, drained
grated Romano cheese
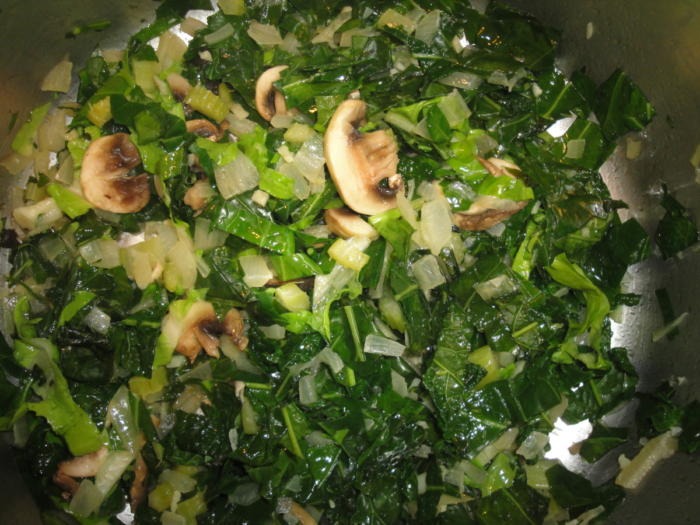
Vegetables to saute.
Italian (flat-leaf) parsley.
The Process: Making Chicken Soup
Prepare the Chicken
Place about 1 cup of the flour in a bowl.
Add 1/2 to 3/4 tsp. salt and 1/4 tsp. black pepper. Mix well.
Rinse the chicken well and pat dry with a paper towel.
Add chicken to the bowl, coating each piece, pressing flour onto all surfaces.
Next…
Place a large stockpot, with a heavy bottom, on the stove.
Add a few T. oil and butter. Heat it up, at medium or medium high heat.
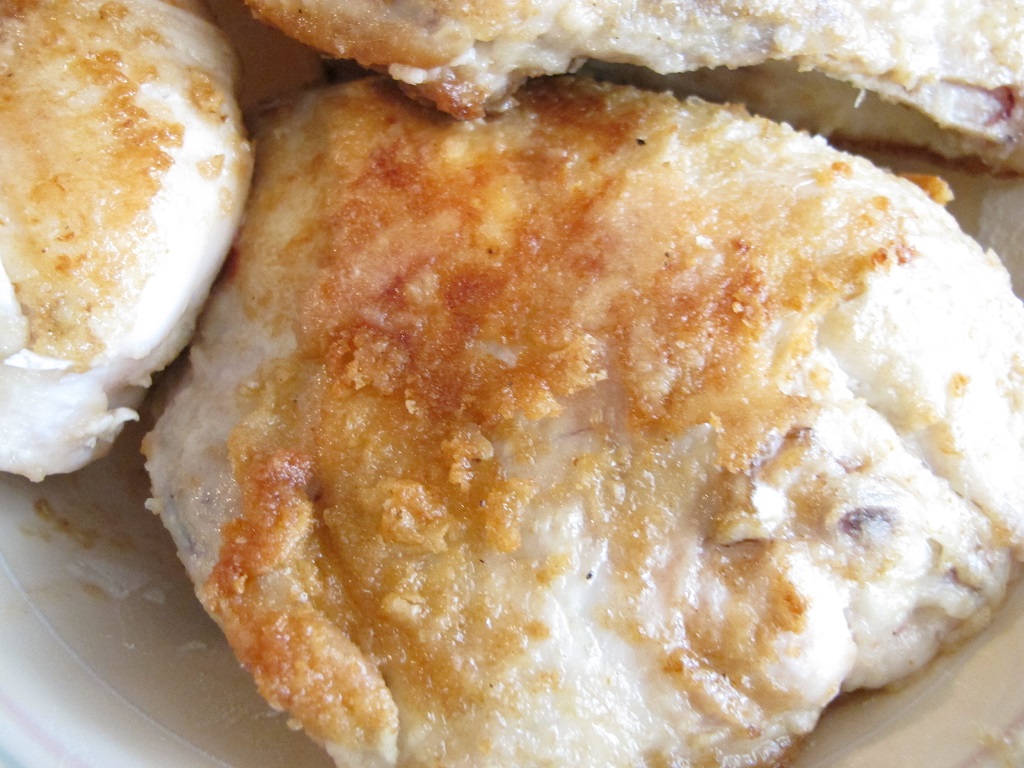
Add each piece of chicken, after flouring it, to the hot pot. Sometimes I spoon more of the flour mixture onto the chicken, and cook it some more. This helps thicken the broth just a bit. (Don’t save the leftover flour. Discard it to prevent contamination.)
Sear the outside of the chicken, both sides, until it’s golden brown, but not burned. Adjust the heat if necessary. It will not be done inside, but will cook more when added to the broth. Move the chicken around to prevent sticking or turn down the heat. The brown residue will add flavor to the soup.
Once the chicken has browned, remove it to a dish, and turn down the heat.
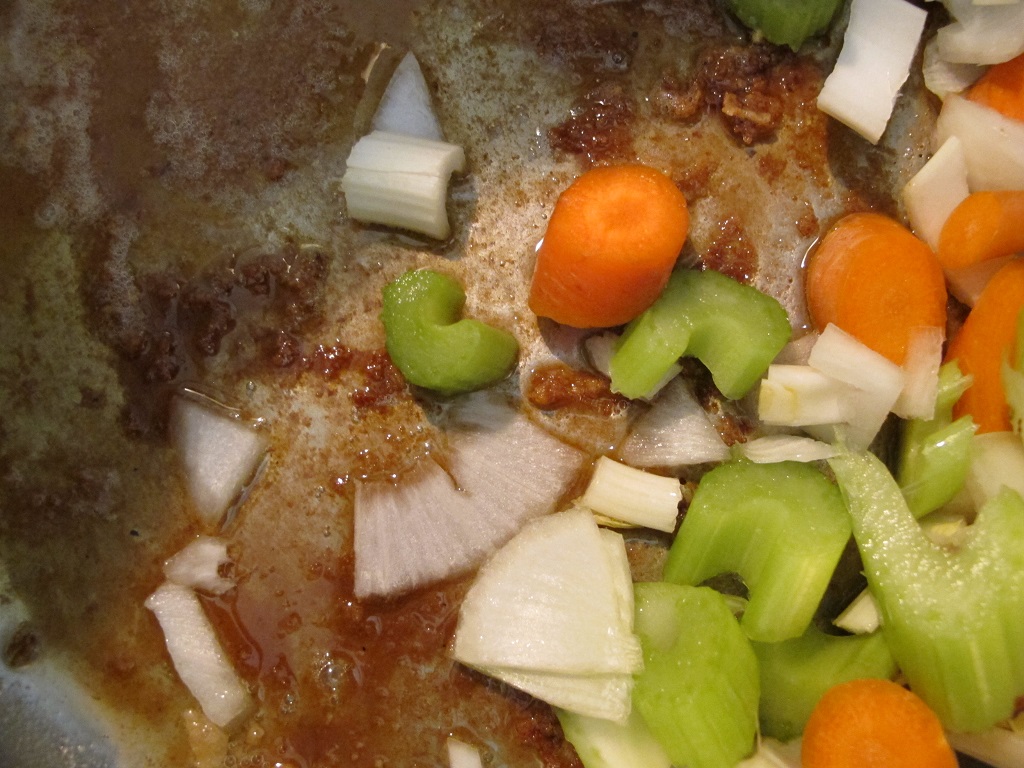
Now, add the chopped or sliced fresh vegetables (celery, onion, carrot, garlic, mushroom), but not the greens, stirring often. The residue will loosen up, or use a wooden spoon to help it along. Sauté until the vegetables are lightly softened, but not browned.
And Then…
Add the broth and water, and stir. Turn up the heat to a boil, then lower the heat to a low simmer.
Add the bay leaves. Other herbs will be added later.
Add the chicken and its drippings back to the pot. Keep it on a very low simmer, not a vigorous boil, for 40 (smaller chicken pieces) to 60 minutes. Very low heat keeps the chicken more tender.
10 minutes before it’s done, add the thyme.
Remove bay leaves.
Add salt and pepper to taste. Broth is often quite high in sodium, so don’t over-salt.
Remove chicken to a clean dish. You might want to use a large spoon to hold the pieces together; the meat could fall off the bones. Check the soup for tiny bones that might have fallen to the bottom of the pot.
Discard the chicken skin. Cut the meat and add back to the soup. I usually reserve some of the chicken for a stir-fry or freeze it separately for later use.
Add fresh greens and low simmer a few minutes to wilt.
Stir in cooked pasta.
Add leftover vegetables (such as cooked peas, corn, green beans), if desired.
Reheat and stir the soup, then serve. Top with grated Romano cheese and a sprinkling of fresh parsley.
Seared chicken.
Vegetables added to flavorful drippings.
Mixed vegetables cooking.
Chicken soup and biscuits.
You also might enjoy homemade collards soup. It’s more comfort food for winter or for those not feeling so well. Most of the herbs and greens I use in cooking are started from seeds. At any time of the year, there’s something to pick for soups, salads, veggie omelets, and stir-fries.
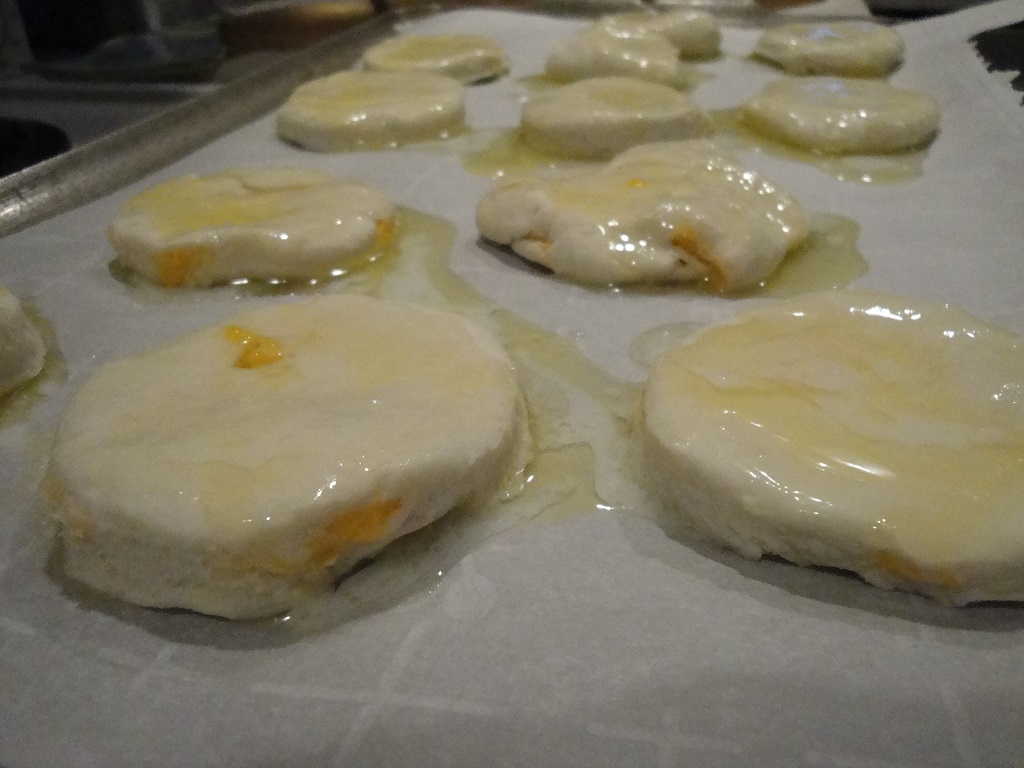
Easy Buttery Biscuits
I just started making these last month. They are so good! But, in an effort to not overindulge in carbohydrates, I won’t make them often.
Very simple:
Preheat oven to 425º F.
Melt 3 T. butter in a small pot.
Prepare a baking sheet lined with parchment paper.
Place 1 1/4 cups of self-rising flour into a bowl. This makes a dozen biscuits.
Add a dash of salt (optional).
Add about 3/4 cup heavy cream to the flour. Mix well with a fork. Add more flour if it’s too sticky.
Turn out onto a floured surface and knead for a minute.
Use a rolling pin to flatten the dough to about 1/3″ thick or slightly thicker.
Use a cookie cutter or a juice glass to shape biscuits and move them to the cookie sheet.
The last bit of dough can be shaped by hand so none is wasted. It might come out lumpy, and that’s perfectly fine. Call it “rustic”.
Spoon melted butter over the tops, dripping down the sides. The dough will absorb the butter.
Bake until the tops turn golden, about 15 minutes. Turn the sheet halfway through if your oven has a hot spot.
Serve with more butter (optional, but…). Next time I might add some shredded cheddar cheese to the dough. (***Update***: Yesterday, I made a batch of biscuits, half with cheese and half without. In the cheesy part, add thin pieces of cheddar to half the dough. Then fold the dough, roll it, and proceed with recipe. I haven’t decided which option I like better; hmm…this calls for a taste test. January 27, 2021)
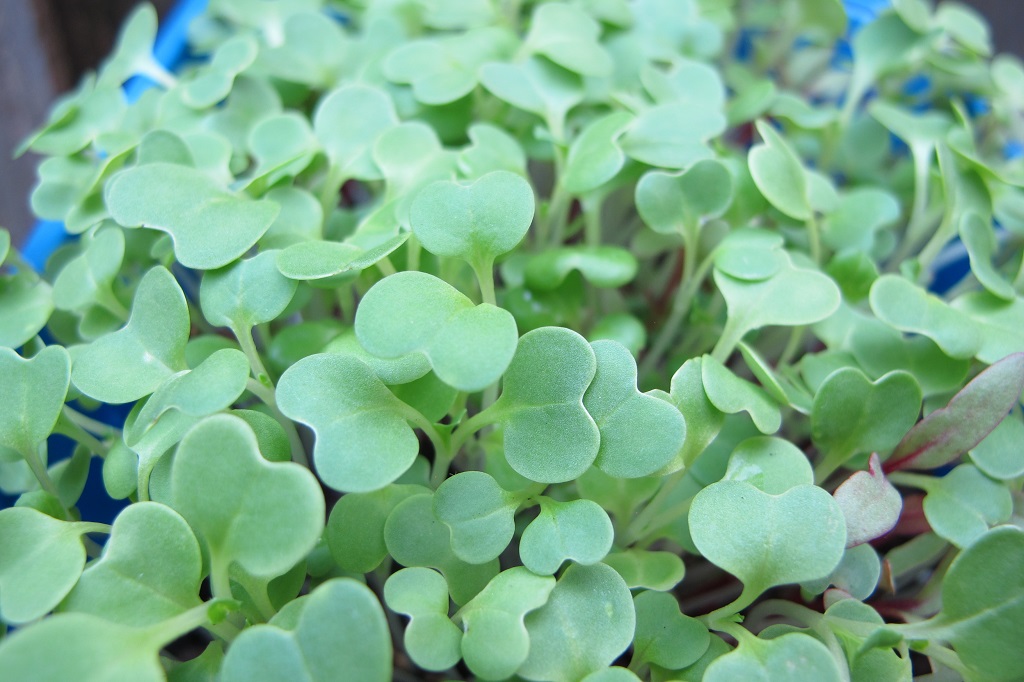
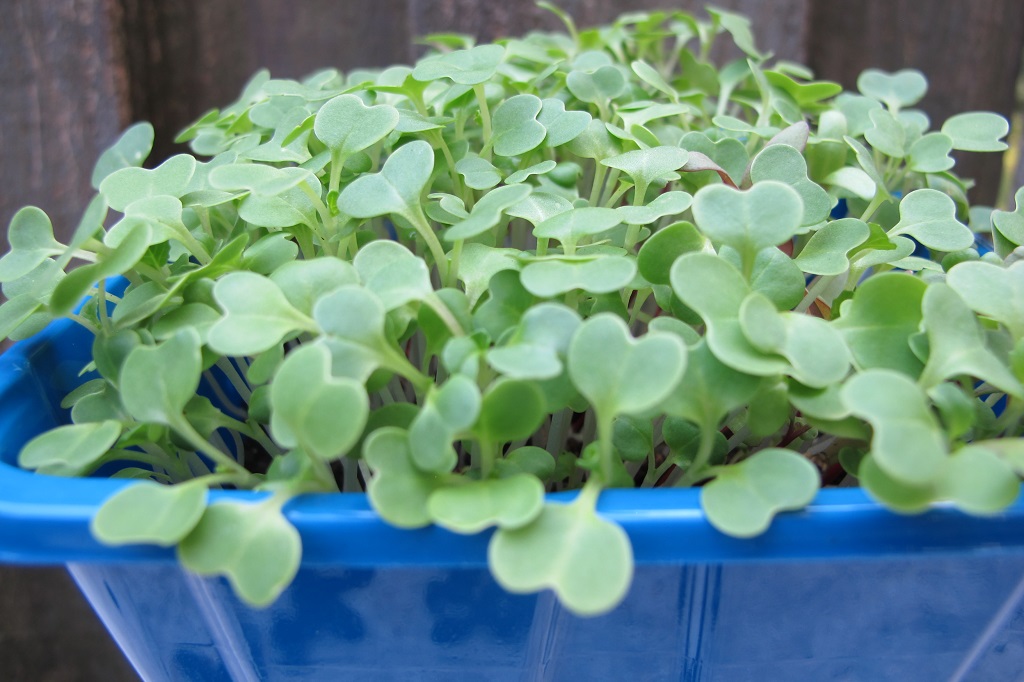
A mixture of microgreens, primarily brassicas, and a few beets.
Here’s an easy way to grow nutrient-dense plants in a tiny space without lifting a trowel. Have you ever tried growing microgreens? This is such a simple method of incorporating the most concentrated sources of antioxidants and other nutrients into your diet.
Maybe you’re not sure about all those supplements in the health food store, and you want to go the more natural route. Besides, the experts tell us, vitamins and minerals are best obtained from a wide variety of foods, including fresh fruits and vegetables.
Eating from several of the plant families ensures that we get a diverse assortment of nutrients. Greens provide a hefty helping of antioxidants, vitamins, and minerals, but missing from the plant world is Vitamin B-12. This is of particular concern among vegetarians.
Vitamin B-12 is found in seafood, meats, dairy, and fortified cereals. Because I don’t eat red meat at all, and other animal proteins only a few times per week, I take Vitamin B complex, among a few other supplements.
If you have any questions, ask your health care professional.
Why Are Microgreens So Good For Us?
Certain nutrients have gained prominence over the past decades, as research suggests their efficacy in maintaining good health. Although not among the basic food categories needed for survival (carbohydrates, fats, protein, vitamins, and minerals), these substances help us fight or prevent many serious illnesses, including cancer. Phytonutrients, polyphenols, prebiotics, and antioxidants—oh, my! Sure, it can be confusing.
Research indicates that microgreens have between 4 and 40 times more nutrients than a similar amount of the full grown crops. That’s all it took to convince me!
Seed suppliers sell individual varieties as well as mixtures. Accordingly, they’ll vary in color and flavor. The mixtures I use are primarily composed of the brassicas, and here’s why…
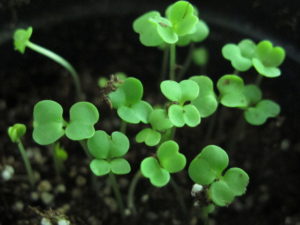
The Brassicaceae Family
Arugula ‘Astro’ seedlings.
Let’s start with the First Family of Plant Nutrition, the cabbage and broccoli relatives. Plant taxonomists changed the name of this family from Cruciferae to Brassicaceae (“brass·i·kay’·see·ee”), but the terms cruciferous vegetable, brassica, and cole crops refer to the same group of plants. These brassicas have uniquely beneficial properties that set them apart from other plant families.
I’ve written many times in The Farm In My Yard about the health benefits of these plants. If you do just one thing to improve your diet, start with the brassicas. It helps that these microgreens are really easy to grow.
This family comprises many types of super-healthy plants. I include at least one in my diet every day: arugula, broccoli, Brussels sprouts, cabbage, cauliflower, collards, kale, mizuna, mustard greens, pac choi, tatsoi, turnip greens, and others.
You can harvest brassicas grown as microgreens within 3-4 weeks of sowing. Give them at least 6 hours of direct sunlight for optimal growth. With less than ideal conditions, you’ll still be able to harvest greens, but they’ll take longer to grow and they might lack some color. For the full complement of phytonutrients, though, give them sun.
Health Benefits of the Brassicas
Adopting a healthy lifestyle presupposes dropping some bad habits, and incorporating those that contribute to greater longevity. Adding half a cup of microgreens might not negate the harm done by smoking or your daily dose of mac and cheese, but it’s a start. Consuming foods from the brassica group helps:
reduce inflammation
slow the aging process (skin, eyes, joints, brain, vascular system)
reduce the chances of getting age-related macular degeneration and cataracts
reduce the risk of cancer, heart disease, type 2 diabetes, dementia
These greens and vegetables contain varying amounts of Vitamins A, B complex, C, E, and K. They contain calcium, fats (Omega-3), fiber, folate, iron, magnesium, manganese, potassium, protein, zinc, and more. Some of these nutrients are among the dozens of types of antioxidants, which neutralize potentially harmful free radicals.
What Are Free Radicals?
Remember learning about atoms, electrons, and protons? Well, here’s a summary:
The atom contains protons and neutrons in the positively-charged nucleus. The nucleus accounts for more than 99.9% of the atom’s mass. Surrounding the nucleus are the orbits, or shells, which hold the negatively-charged electrons. Up to two electrons fill the inner shell (“1 shell”), up to eight electrons fill the next shell (“2 shell”) and other shells contain up to 2 times the square of the shell number.
The number of protons (equal to the atomic number in the periodic table) distinguishes oxygen from carbon or sulfur or any other element. A stable atom, one that is inert, has an equal number of protons and electrons. Atoms of different elements bond together to form molecules, such as sugar, proteins, and water.
In order to become stable, atoms must complete their outer shells. They do that by stealing one or more electrons from, or giving them to, another atom. The outer shell is where chemical reactions with other atoms take place. Chemical bonds hold the atoms together. When weak bonds split between atoms or molecules, free radicals are formed.
These unstable free radicals seek to steal electrons from nearby molecules. This sets up a chain reaction of instability—one molecule stealing from another molecule—causing oxidative stress.This cascade of interactions is what can damage our cells. Cancer and other inflammatory diseases can begin if the disruption occurs near cell nuclei or membranes.
Those free radicals form in response to stresses in our bodies, including pollutants and toxins in our cells and bloodstream, and enzymes present in the normal process of digestion. We are healthier if there are more antioxidants than free radicals in our systems.
What Are Antioxidants?
Antioxidants are substances that prevent oxidative stress and reduce inflammation. They can be vitamins, minerals, or any of the many thousands of phytonutrients. Deep green, red, orange, and other colorful plant pigments are loaded with antioxidants.
Vitamin E is the most abundant fat-soluble antioxidant, and might protect us from heart disease by limiting LDL (low-density lipoprotein) oxidation and plaque formation.
Vitamin C is the most abundant water-soluble antioxidant. It, too, donates electrons to free radicals, ending the damaging cascade of instability. Vitamin C shows promise in the fight against cancer, especially types that affect the mouth, larynx, and esophagus. (Discuss diagnoses and treatments with your doctor.)
In recent studies, researchers used isotopes to track the uptake of these nutrients. They associate antioxidants, such as beta-carotene, lutein, and lycopene, with possible avenues of cancer treatment.
Glucosinolates
Phytonutrients are a major category of nutrients found in the brassicas. Of particular interest among this group are the glucosinolates, which include sulforaphanes. These substances are not found in significant amounts—or at all—in any other family of plants. These compounds, numbering more than 100 kinds, are key players in lowering the risk of cancer and inflammatory diseases. Different phytonutrients are found in brassicas eaten raw and in those which are cooked.
That’s why this is my go-to vegetable family. Every day. While preparing these greens for cooking, I also eat a few raw pieces. When possible, I’ll cut or chop the broccoli or kale (or any brassica) and let it “rest” on the kitchen counter for 30-60 minutes, so the enzyme, myrosinase, can start transforming precursors of sulforaphanes into the sulforaphanes themselves in the damaged plant cells. Heat destroys this essential enzyme, so we would miss out on those powerful sulforaphanes if we cooked the greens right away. Eating raw brassicas also delivers the benefit of sulforaphanes. Broccoli sprouts contain the highest amounts of these beneficial nutrients.
Before you think you’re protected because of the three little broccoli florets you just had with your steak dinner, think again. Consider making brassicas and other vegetables the main attraction, and using chicken, beef, or pork as condiments. If this is too big a leap, try adding more vegetables and decreasing the amount of meat consumed over time. Baby steps are better than not moving at all.
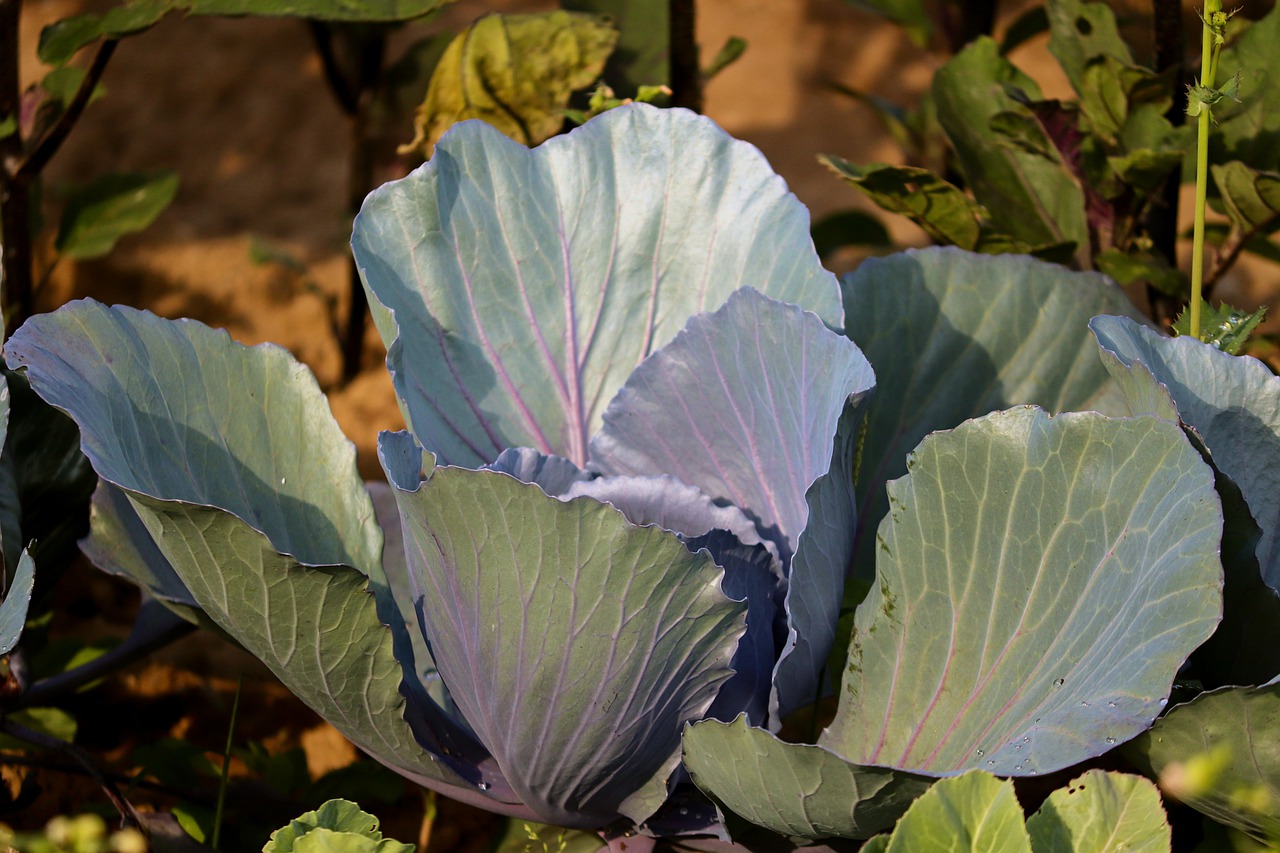
Mature red cabbage, one of the brassicas.
Other Plant Families for Microgreens, Sprouts, or Shoots
The Amaranthaceae Family
Amaranth, beets, quinoa, spinach, and Swiss chard are members of this family. Because of the higher oxalate content in this group, check with your doctor if you’re prone to kidney stones. Lots of pigments are found in amaranth, beet greens, and ‘Bright Lights’ Swiss chard, adding color to your clippings.
The Amaryllidaceae Family
This is the onion group, which also includes garlic, green onion, leeks, and shallots. Seedlings are very finely textured and take longer to grow.
The Apiaceae Family
Many useful herbs and vegetables belong to this family: carrot, chervil, cilantro, cutting celery, dill, fennel, parsley. All can be grown as microgreens.
The Asteraceae Family
This group includes endive, the lettuces, single marigold, radicchio, and sunflowers. Look for varieties that have red pigments, which have more anthocyanins. Anthocyanins are powerful antioxidants.
The Cucurbitaceae Family
Cucumber, melons, and squash plants have large seed leaves, so the seeds are sown father apart.
Grains and Legumes
Alfalfa, barley, oats, rice, winter wheat; chickpeas, lentils, mung beans, pea and pea tendrils.
Microgreens on caprese salad.
Headings
Page 1: Mmm…Microgreens!, Why Are Microgreens So Good For Us? (The Brassicaceae Family, Health Benefits of the Brassicas, What Are Free Radicals?, What Are Antioxidants?, Glucosinolates), and Other Plant Families For Microgreens, Sprouts, or Shoots
Page 2: What Are Microgreens?, What Are Shoots?, What Are Sprouts?, and How To Grow Microgreens, (How To Use Microgreens, The Container, The Soil, The Seeds, Maintenance, Yellow Leaves?)
Tomatoes, A Tribute to My Mother, Takotsubo, and A Tactic Called “Just One Leaf”
Open any food or garden section in print or online sites, and you’ll see articles on the benefits of eating healthy greens and colorful foods. Today, I’ll show how you can start adding leafy greens to your diet without being terribly inconvenienced. And I’ll mention how it might have saved my life.
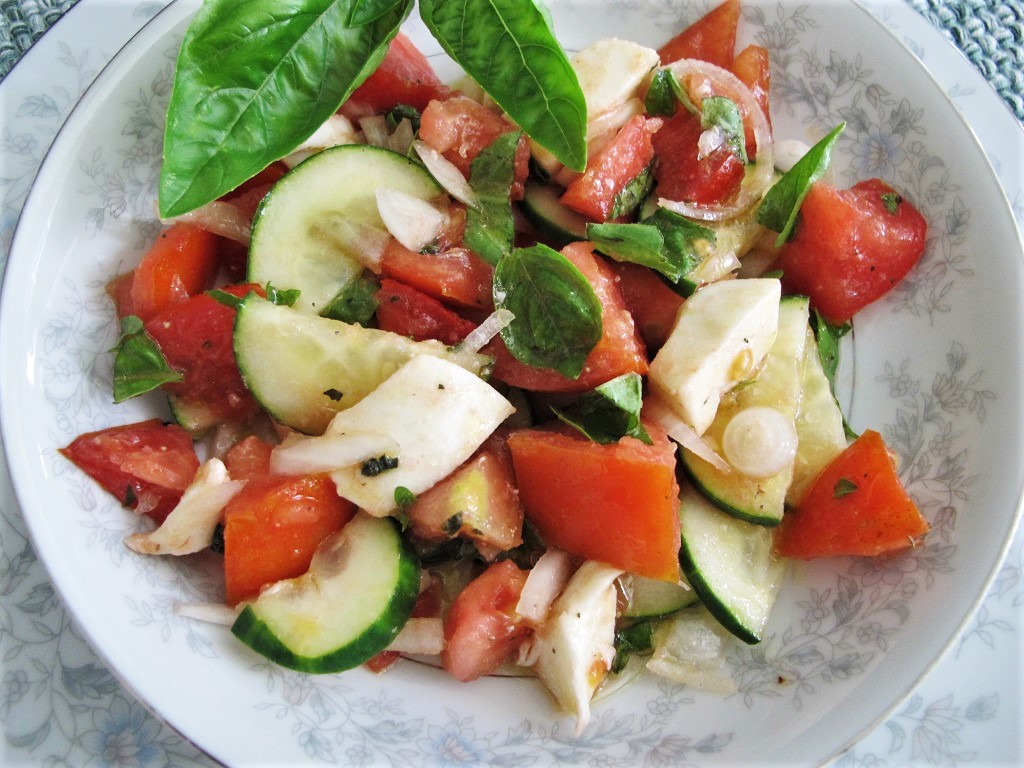
How exciting—the first two ripe tomatoes of the season came off the vine this morning. And there’s some beautiful ‘Genovese’ basil begging to be picked. So, you can guess what’s for dinner tonight:
Tomato-Basil Salad!
It’s so easy to prepare:
ripe tomatoes, cut into chunks, including the juice
freshly picked sweet basil
cucumber, cubed or sliced
thinly sliced onion
mozzarella cheese
Italian oregano
extra virgin olive oil
red wine vinegar
salt and pepper
Mix it all together, and enjoy with some good bread for dunking (optional). This salad hits the spot when it’s hot, for one person or for a crowd.
But First, A Tribute To My Mother
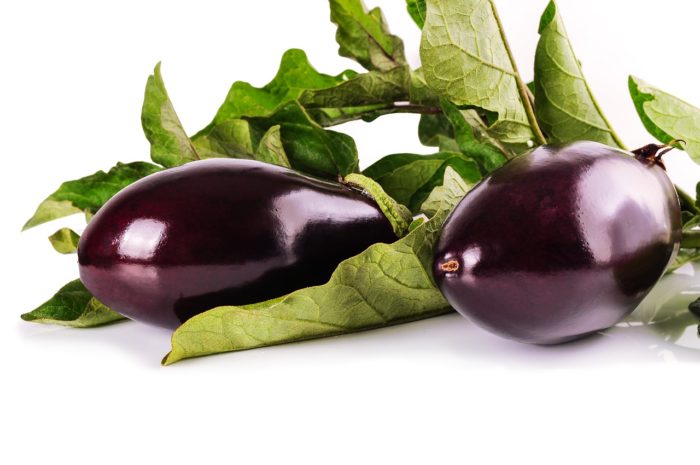
My mother and I have lived together for the past 7 1/2 years. Many of the ripe tomatoes from the garden ended up in tomato-basil salad, a summertime staple for this family of Italian descent. How we loved our eggplant parmigiana, vegetarian lasagna, manicotti, and stuffed artichokes! How we loved to eat! In so many of our memories growing up and growing older—the holidays with family, sitting around the table for hours—good food always featured prominently.
Early last month, I had notified my family that there wasn’t much time left for Mother. So, my siblings prepared for a visit, and my sister sent an early Mother’s Day bouquet of white roses, purple statice, and baby’s breath—very much appreciated.
One brother came from out of town and spent the day with us, recalling some of the funnier family moments. We had ravioli and Easy Broccoli One for dinner. I’m a firm believer in the health-giving powers of broccoli, so I prepared it one way or another quite often. I’ve joked before about broccoli being Mother’s “favorite”, and she did too. “Oh, what a surprise—broccoli … … thank you…” She ate well that evening, better than any day in recent months.
But, the next morning, her time had come. She passed quickly and peacefully while I spoke to her and with 9-1-1. A friend said that the sense of hearing is the last to go, which gives some consolation, knowing she might have heard me.
“Don’t Forget To Watch Bob Ross”
My mother lived for 95 years, leaving behind a brood of 4 children, 11 grandchildren, and 8 great-grandchildren. Photographs of family reunions, grandkids, and the great-grandchildren sat in a neat pile within reach of her favorite chair. Mother often lamented the fact that the family had scattered all over the country and couldn’t get together more often for the holidays.
She enjoyed driving her little Toyota, running errands nearby, right up until early last year. Have Rollator, will travel! When speaking with friends on the phone, her humorous references to the “joys” of growing old brought a smile to my face. Humor is the best medicine.
She was an artist, as a few relatives are and were, and I’m inclined to pick up the brush myself and give it a whirl (photo, above—a detail from one of her paintings). I don’t have to wonder very long where this stubborn streak of independence or rebelliousness came from…or my love of animals and of all nature. So, maybe some of her talents run through my veins as well. I hope so. Sure, we had occasional disagreements, but the foundation of our commitment to family was unshaken.
Stress, Nevertheless
People often speak of “a good death”, and, in all honesty, we could not have asked for a more peaceful departure. The next few days, though, taught me that the body reacts to experiences differently than the brain does. While my brain thought I was handling this major event quite calmly, my body had a different opinion.
Soon after Mother had died, the four of us siblings got together, telling stories while dividing those belongings she had gathered—and loved—for nearly a century. Whether it was the distress of a misplaced ring or the stress of her passing, I ended up in the hospital three days later.
With Covid concerns at the time, I drove myself to the emergency room, with moderate chest pain. My mother had had serious heart disease for a few decades but was able to function fairly normally with assistance from her medications and her cardiologist. But I had to wonder: is it my turn? My blood pressure had soared to a dangerous level, so I was admitted.
After several tests over the next two days, the doctors did not find any “separation of the layers” or blockages in my coronary arteries, and the valves were working as they should. But my blood pressure stayed very high. Blood tests also showed the presence of those markers when the heart has been impaired.
One consequence of blood pressure this high could be stroke, and my release from the hospital was contingent upon healthier numbers. A few medications attempted to normalize the readings, and one in particular did an astonishingly good job of lowering those numbers to 79/51. Won’t be taking that one again! (It was hydralazine.)
Takotsubo Two!
Almost 4 years previously, I woke at 4:00 in the morning with a stabbing pain in the center of my chest. Considering our family history, I thought it could have been a heart attack. The ambulance came, the EMT recorded my blood pressure at 275/135, and off to the hospital I went.
The usual tests were performed, and a cardiologist administered a catheterization to trace the blood flow in and around my heart. The score: although I was lightly sedated, his words indicating that I had “the arteries of a 20-year-old” were music to my ears. After decades of being more than careful with diet, I wondered if I had needlessly missed out on all those BLT’s, pasta, and toffee cookies.
On the day of discharge from the hospital, another cardiologist explained what happened. He said one of the lower chambers of the heart (the left ventricle) had ballooned out, giving it an odd outline. Good news—I would fully recover but would experience fatigue for a few months. He and a dietician recommended continuing with a diet heavy in healthy leafy greens and losing some weight.
What’s Takotsubo?
That’s when I first heard the term “Takotsubo”. This Japanese word means “octopus pot”, a reference to the interior shape of the affected ventricle. The syndrome was first described in Japan in 1990. More than 90% of the cases involve women, aged 58 to 75 (check, and check).
So, it happened again. This time, though, stress was very much the precipitating cause. Often called “broken heart syndrome” or “stress-induced cardiomyopathy”, a sudden life-changing event, such as the loss of a loved one, winning a lottery, being assaulted, or a car accident, can trigger Takotsubo syndrome. Most cases are due to a stressor, but around one-fourth occur for no discernible reason.
The ring, by the way, was found after my return from the hospital.
Add Just a Little More Green
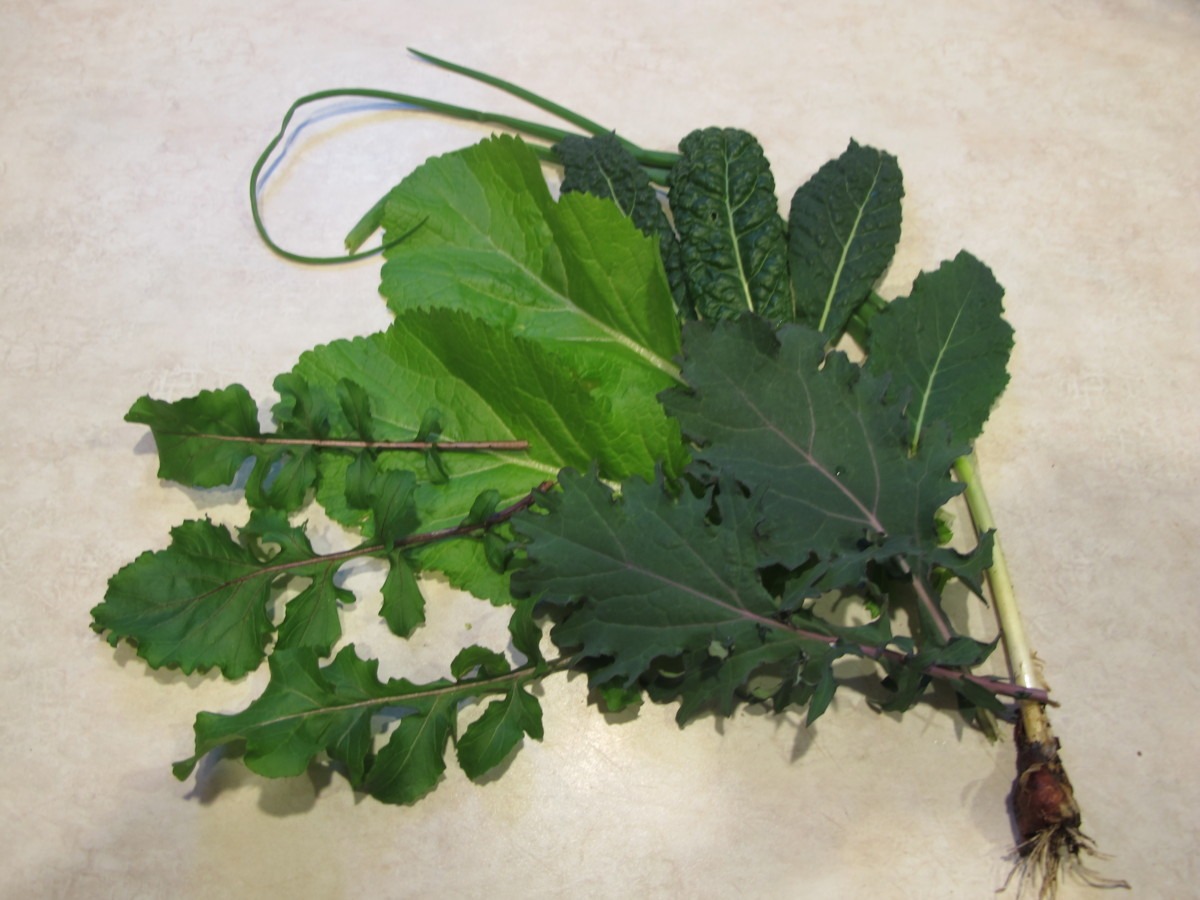
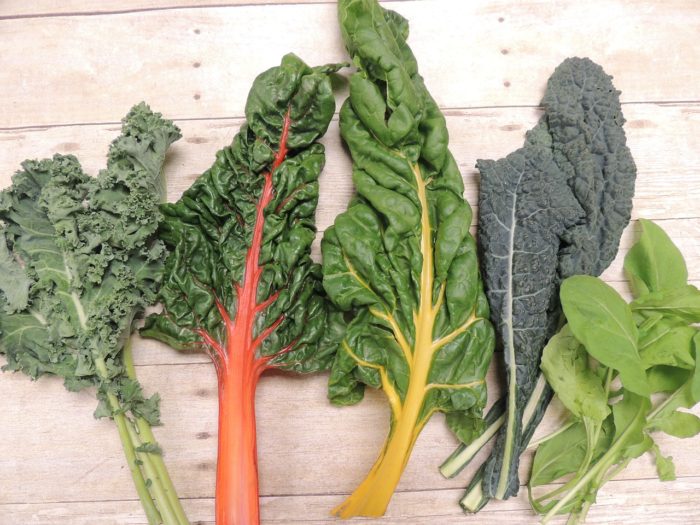
Greens from the garden: green onion, mustard greens, dinosaur kale, arugula, ‘Red Russian’ kale.
I’m not a nutritionist. All I know is what I’ve read or heard over the years and observed from family members. The purpose for writing this article is simply to credit how changing my diet many years ago might have prevented a stroke or a heart attack, possibly saving my life during these two bouts with Takotsubo. (Even though the death rate from this condition is fairly low, other contributing factors and our family history concerned me.) You, too, might decide to make some improvements in your own family’s habits.
Take from it what you want—and take heart—this doesn’t have to happen overnight. I encourage you not to wait, however, until after you’ve gotten your first stent to make some changes. We did eat pretty well growing up. But, in retrospect, we consumed more carbohydrates than is currently considered healthy, and certainly fewer healthy greens.
Simply adding fresh leafy greens to soup, a smoothie, sauces, salads, a stir-fry, store-bought pizza, or rice and pasta dishes is a great step toward a healthier future. Grocery stores offer a much wider variety of greens than they did decades ago.
Growing your own plants from seed opens up so many more options. And you can’t beat the convenience of walking a few feet out the kitchen door to pick fresh healthy greens for today’s omelet or soup. Many of them can be grown in pots on the deck or the balcony if you don’t have garden space.
At the end of this article is a list of links to posts I’ve written about growing and using greens. You’ll notice the frequency with which I refer to “the brassicas” (broccoli, cabbage, cauliflower, collards, kale, etc.), the source of the most beneficial and densely packed nutrients.
Try this: a simple egg salad sandwich, on rye, made with one hard-boiled egg, mayonnaise, green olives, chopped dinosaur kale (a brassica, and super healthy), and topped with lettuce. Add chopped onion, if you like. No salt needed. I usually serve it on a bed of lettuce or mixed greens, without the bread. You can do the same with tuna or chicken salad. Adding “Just One Leaf” of kale significantly elevated the nutritional value.
Greens In Small Steps
Easing into dietary improvements by making small changes might meet with less resistance from your family. Perhaps starting a garden and letting the kids participate will get them engaged.
Children who help care for a garden are more likely to eat what they harvest. Start with easy crops, such as dinosaur or ‘Red Russian’ kale, collards, lettuce, a cherry tomato, Swiss chard, and radishes. Mustard greens are colorful and fast-growing—‘Florida Broadleaf’ has mild mustard flavor (and it self-seeds), while ‘Scarlet Frills’ offers a spark of heat and spice. These are easily grown from seed.
Nasturtium ‘Alaska’, easy from seed, needs darkness for germination.
If your garden has good, rock-free soil, sow a pack of carrot seeds, and thin them properly. You’ll find traditional orange carrots and also nearly white, yellow, red, and purple varieties. ‘Rainbow’ is a blend of colors. Watch how excited your children will be when they harvest their buried treasure! Try growing ‘Adelaide’, a miniature carrot, in 6″ pots. Delicious, and so cute.
A customer at the farmers’ market in Rockville MD added chopped ‘Alaska’ nasturtium flowers and leaves to his grilled hamburgers. Each bite revealed a different combination of colors. Every year, he came to the market for his “burger-fetti” nasturtiums. Look for ways to introduce greens and colors at mealtime to make it fun.
Just One Leaf
As the first bits of greens have been accepted, keep adding more leafy greens (Just One Leaf or two at a time) and cutting down on some of the carbohydrates and animal proteins. Get creative in the kitchen. Soon, you’ll notice a boost in energy and might reach for a handful of nuts and a cup of green tea for a mid-afternoon snack, packed with vitamins and minerals, fiber, phytonutrients, and protein, instead of a chocolate doughnut.
Unless it’s absolutely necessary, I never peel fruits and vegetables. The skins have more antioxidants, fiber, and vitamins than the flesh. So, I don’t peel apples, peaches, carrots, cucumbers (some are less bitter, such as ‘Diva’), eggplants, sweet/white/pigmented potatoes, tomatoes, or zucchini.
But I Miss My…
Once in a while, it’s perfectly okay to indulge in an ice cream sundae or Christmas cookies. But you might find that the desire for such decadent treats decreases as your interest in healthy foods increases. Sugar is addictive!
Over time, adding healthy greens to the spaghetti sauce, a stir-fry, or the morning smoothie will become second nature. Not doing so might make you feel as though you’re missing out.
Eat Your Colors
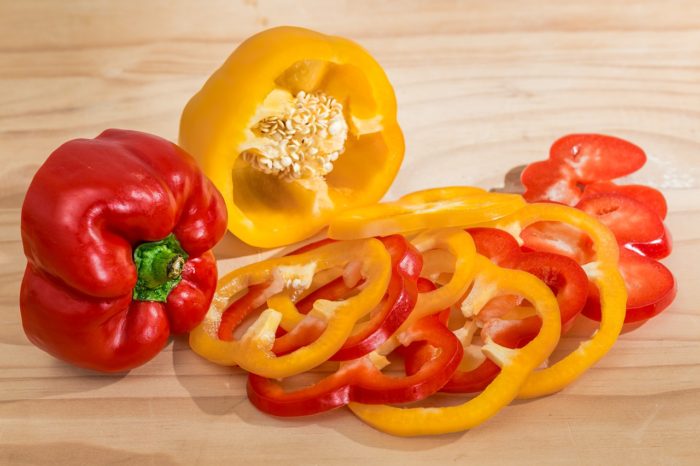
Ripe sweet bell peppers.
You’ll discover a new appreciation for incorporating colorful greens and vegetables into your salads. Deep green, purple, red, orange, and yellow pigments are filled with healthy antioxidants and other nutrients.
These plant pigments help prevent many major illnesses, including cancer, heart disease, type 2 diabetes, age-related macular degeneration, inflammation, premature aging, and other disorders. Understand that they will help prevent illness. Do your best to eliminate other risk factors, too, and you know what they are.
Ask your doctor if you have any dietary concerns. While it is true that spinach, Swiss Chard, and beet greens (in the Amaranthaceae family) are high in oxalates, we need to examine the relationship between oxalate content and kidney stones. Some nutritionists believe that including more meat in the diet lowers the blood pH level, while a primarily plant-based diet raises the pH and lowers the incidence of kidney stones. Kale, incidentally, has extremely low levels of oxalates.
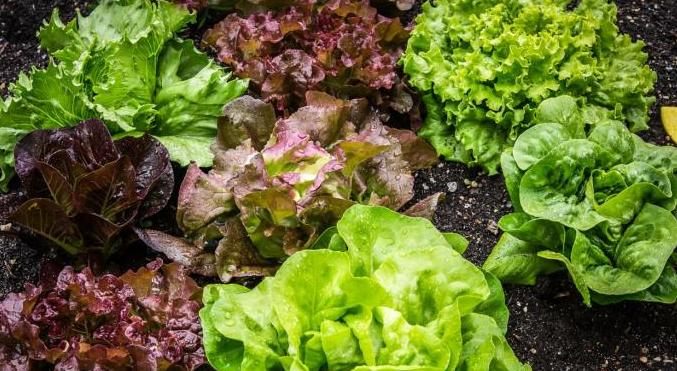
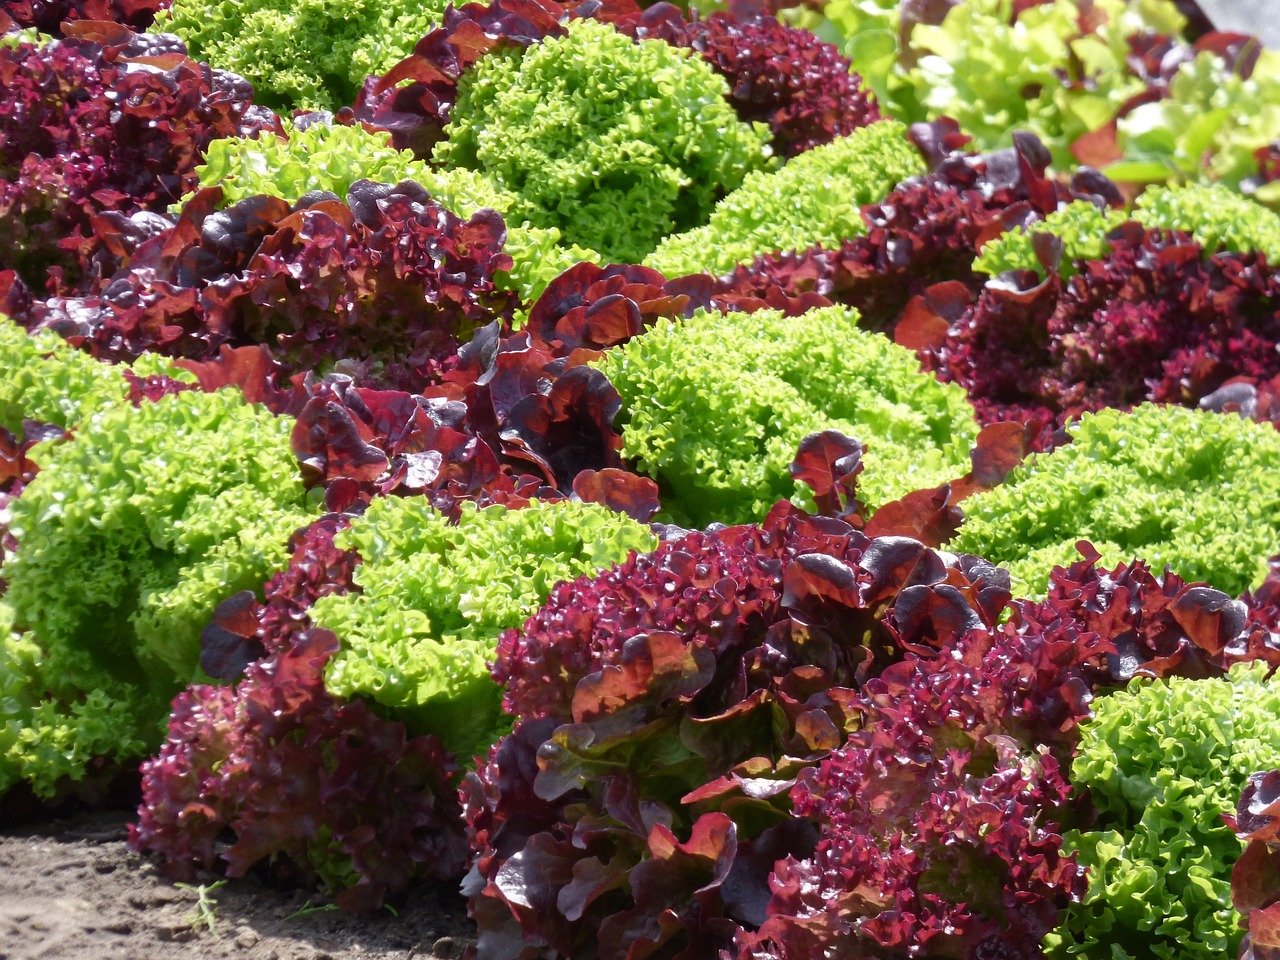
Add these to your salad and you’ll soon say good-bye to pale iceberg wedges:
deep green and red lettuces
purplish ‘Red Russian’ or blue-gray dinosaur kale (brassica)
baby beet greens (more nutrients than the roots)
turnip greens (brassica)
arugula (brassica)
spinach
Swiss chard
radish (brassica)
shredded red cabbage (brassica)
Asian greens, such as tatsoi, mustard, mizuna, napa cabbage, ‘Tokyo Bekana’ (brassicas)
broccoli leaves, or stems and small heads of ‘Happy Rich’ (brassica)
purple and orange carrots (heated carrots have more available antioxidants)
ripe lunchbox sweet pepper (red, orange, yellow; orange bell peppers are extremely high in zeaxanthin, an antioxidant that’s good for the eyes)
tomato, cucumber, green onion, celery, cooked button mushrooms, lightly roasted pecans, feta or bleu cheese, fresh basil, avocado, a hard-boiled egg, kalamata olives
and a simple homemade dressing: extra virgin olive oil, red wine vinegar, water, fresh minced garlic, some herbs (small amounts of Italian oregano, and maybe thyme and sweet marjoram) and lemon if you like, some Dijon mustard, and salt and pepper
Colorful lettuces.
Headings
Page 1: Tomato-Basil Salad, But First, A Tribute To My Mother (Stress, Nevertheless, Takotsubo Two!), Add Just a Little More Green (Greens In Small Steps, Just One Leaf, But I Miss My…), Eat Your Colors, and Add these to your salad…
Page 2: The Veggie Omelet With Greens (Juice?, Or Cereal?), How It All Began (Close To Home, The Food Pyramid), But How Safe Are the Complex Carbs? (The Insulin Response, Too Many Carbs), In Conclusion, and Links
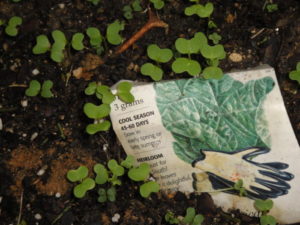
The coldest part of winter has passed for most of us, and it’s time to start seeds for cool season greens. Late winter transitioning to spring is my favorite time of the year. That’s when I start seeds for early harvests. This article covers details for growing some of the early greens, particularly spinach and the brassicas. On Page 3 is a recipe for a veggie omelet, an easy way to get more greens into the diet.
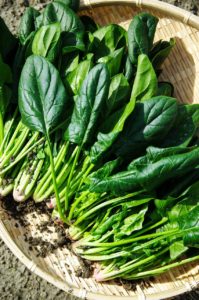
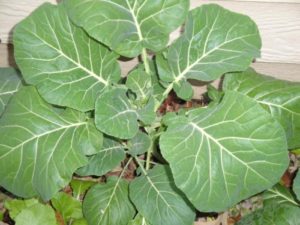
If the garden were bare, I would have started seeds a few weeks ago. But the greens in the vegetable garden continue to offer harvests. Unfortunately, the “list of wants” from the seed catalog is far more extensive than the garden’s square footage can accommodate! It’s time for the last harvest of collards for soup; that’ll open up some space.
While we’re harvesting established cool season greens, I’ll start several new crops indoors. These plants will be plugged into the garden as space opens up. But the seedlings will not be kept in their little pots very long; this stresses the plants and causes them to bolt, or to flower prematurely. (Photo, above: dinosaur kale germinated at night; it will green up in the sunlight.)
The First of the Cool Season Greens: Spinach
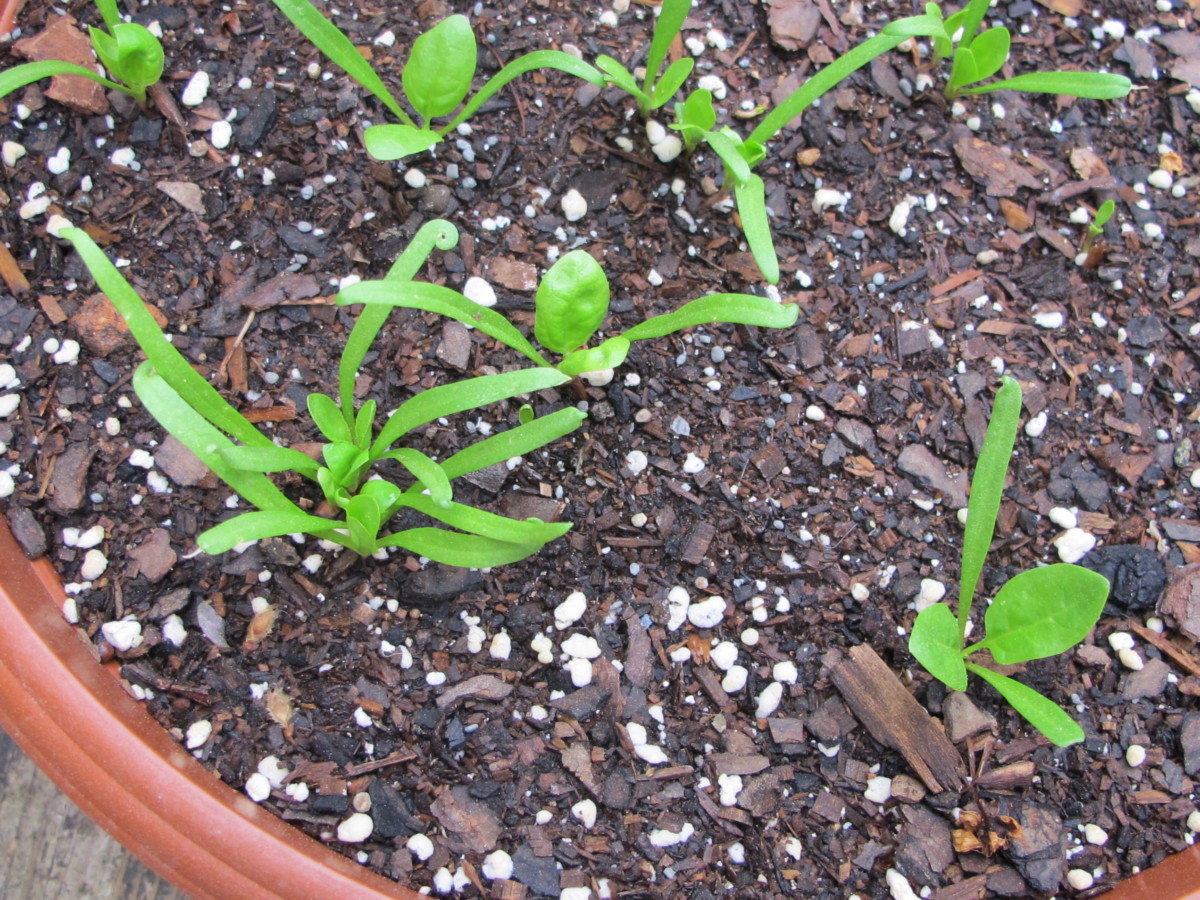
Young spinach ‘Monstrueux de Viroflay’.
I would have sown spinach directly into the garden by now, but we’ve had a long run of chilly rain. The soil is so wet that it’s doubtful any seedlings would even be tempted to germinate. At this time of the year, pay close attention to the weather forecasts. Conditions could deviate considerably from the averages.
It’s not good to dig in soil this wet anyway. That would drive out air spaces and ruin the tilth of the soil by compacting it.
As temperatures begin to moderate, slugs come out in force and will decimate any seedlings that dare to grow in this weather. Rain: good for slugs. Sluggo: bad for slugs! Organic Sluggo pellets attract and kill slugs and snails. This version of the product contains materials (iron phosphate) that add nutrients to the soil. Check the label, though; Sluggo has other products with added ingredients. The organic option is safe to use around the edibles.
Spinach From Seed Is Easy!
Spinach germinates readily, from 50°F up to the mid 70’s (soil temperature), as soon as the ground can be worked in late winter or early spring. For better chances of success, choose varieties that are disease resistant and slow-bolting. In well-prepared soil, spinach is one of the easiest crops to seed directly into the garden.
Prepare the bed by incorporating 2″ to 3″ of compost and/or aged manure into the top 5″ of soil. Spinach prefers soil pH near neutral, from 6.5 to 7.3. A soil test will indicate how much lime, if any, should be added to raise the pH.
For baby leaf harvest, sow the seeds thickly in a patch, about 1″ apart. For full-size leaves, space the seeds a few inches apart, with rows 8-10″ apart. Crowding the seeds too closely or poor soil will result in a disappointing crop.
‘Monstrueux de Viroflay’
There’s a wonderful variety called ‘Monstrueux de Viroflay’ (photos, above and below), a French heirloom dating to 1866. It grows very large for spinach, up to 20″ tall with 10″ leaves, and should be spaced several inches apart.
Viroflay, or Monster, as it is often called, is lower in oxalic acid, or oxalates, than other spinach varieties. It might be acceptable for people with health concerns that prohibit spinach consumption. Check with your doctor.
Keep the soil moist and add organic fertilizers, such as fish emulsion, Sea-Plus, or earthworm castings, every 2 weeks. In cold soil, however, liquid synthetic fertilizers high in nitrogen work better than the organics. Microbes in the soil break down organic material and make those nutrients available to plant roots. But microbes are dormant in cold soil, so they can’t perform this vital service. They’ll become more active as the soil warms up in late winter or early spring.
‘Monstrueux de Viroflay’ spinach seedlings.
Spinach Bowl
Another option is to sow seeds directly into a 14″ wide, 6″ deep bowl filled with fresh potting soil (photo, above). The pot has drainage holes. Portability allows me to bring the pot indoors on especially cold nights while the cool season greens are beginning to germinate. And moisture levels can be carefully monitored.
Since the sappy crooked pine tree that shaded the deck from afternoon sun has been cut down, conditions on the fenced-in deck are more favorable to growing vegetables in containers.
Fill the pot with potting soil to within an inch of the rim. Simply scatter seeds on the surface, a couple of inches apart for smaller varieties and a few inches apart for Viroflay. Cover with another 1/3″ to 1/2″ of soil. Water…and wait… Spinach’s two seed leaves, the cotyledons, are easily differentiated from other seedlings by their long narrow shape. Thin as necessary; you can eat the culls.
Don’t neglect fertilizing potted greens. Rain and irrigation quickly wash nitrogen out of the soil.
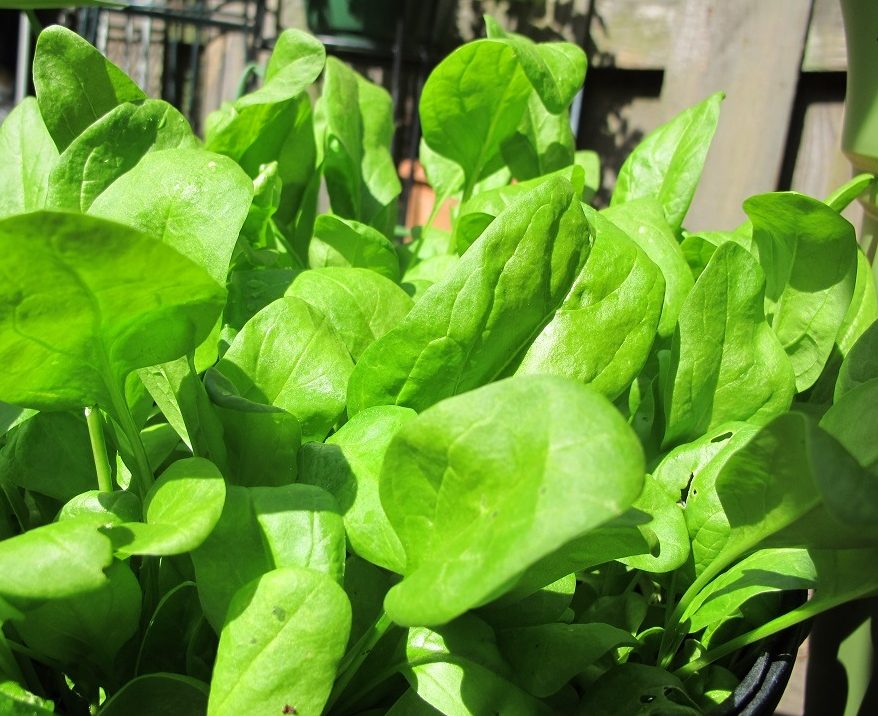
Harvesting Spinach
Spinach.
Harvesting the crowns begins within 4 or 5 weeks, depending on weather and soil fertility. Pick individual leaves at any age, allowing the central growing tip to continue producing new leaves. Or cut the entire plant at the soil line before flower buds begin to grow.
By sowing new crops of spinach every week or two, you’ll have continuous harvests of spinach, as long as the weather favors growth.
Spinach quickly bolts, or goes to flower, at temperatures above 75°. Dry or nutrient-poor soil stresses the plants. And spinach will flower prematurely if the plants are stressed by growing too close together.
Harvest the entire plant if you notice flower buds forming. Cutting off the flowers will not stimulate spinach to grow a new bunch of leaves. Instead, start more seeds.
Use spinach steamed as a side dish, or in sauces, soups, smoothies, salads, pasta dishes, or an omelet.
And Then the Brassicas
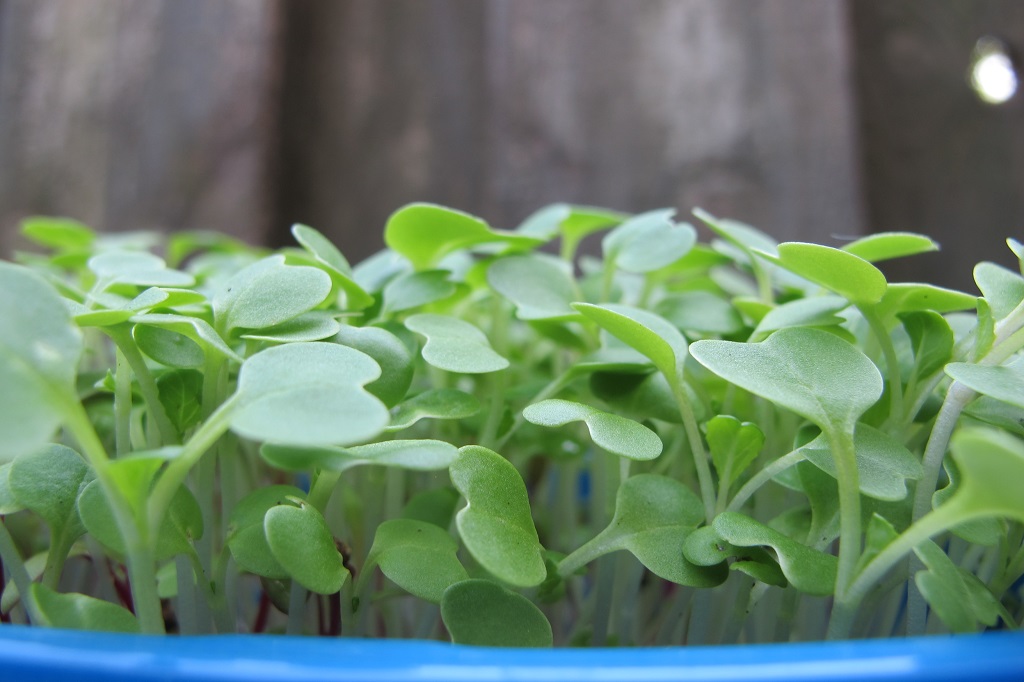
These microgreens are mostly brassicas.
The Brassicaceae family is a huge group of edibles. It includes arugula, broccoli, Brussels sprouts, cabbage, cauliflower, collards, kale, komatsuna, mizuna, mustard greens, pac choi, radish, tatsoi, turnip, and others.
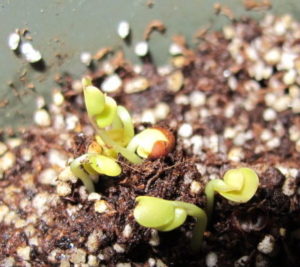
All members have similarly notched seed leaves, or cotyledons. Those are the first two heart-shaped leaves to emerge from the seeds (photo, above). Because the seed leaves are already formed inside the seed, the little plant can begin photosynthesizing—and feeding itself—immediately upon germination. True leaves, which develop after the seed leaves, are also similar for most of the cruciferous vegetables. That’s why it’simportant tolabel your pots so you can distinguish “this” seedling from “this other similar looking” seedling.
Include On the Label:
the name of the crop (dinosaur kale)
the name of the cultivar (‘Black Magic’)
the date of sowing (brassicas germinate in less than a week if sown indoors)
Store leftover seeds in their original packets, and make sure the cultivar name is included on the label. Store in a cool, dry place, such as the refrigerator. Most seeds of cool season greens are viable for 2 years or so. If not already indicated, mark the year of purchase on the packet.
It’s helpful to keep a record of the varieties you’ve tried and liked or disliked. Include how you started the seeds (in 4″ pots or cell-packs, under lights, directly in the garden), the dates you seeded and transplanted, and the weather conditions. Include notes on what was successful and what wasn’t, and possible explanations. Did the seeds germinate and then keel over and die (damping-off disease)? Did critters eat your cool season greens as soon as they started growing? Should the seeds have been started earlier? Or later?
There are successes and failures in every gardener’s life. Being able to pinpoint the reasons for a disappointing crop will enable you to be more watchful or to try a different approach next time. Check with your local cooperative extension office, through state land-grant colleges and universities, for advice. Failure is a learning experience, not a reason to stop trying!
Damping-Off
Damping-off diseasecan appear soon after germination. Sometimes, diseased seedlings don’t even appear above the soil, looking as though the seeds didn’t sprout at all. The small seedling develops a narrowed brown spot on the stem. Then the top of the plant falls over, and the seedling dies. This is caused by several species of fungus, whose spores are in the air, in the soil, in the water, or on the seeds themselves.
Damping-off often accompanies:
poor air circulation
high humidity
crowding
low light
low temperatures
reusing old soil
and overwatering
Space the seeds farther apart, run a small fan nearby, water in the morning, and increase the temperature and light levels if they’re low.
The first time I used the organic biological fungicide called Actinovate, life became a bit sweeter. It is costly, but a much safer option than chemical fungicides. And, with the number of seedlings I grow each year, a wise investment. Make up a small amount of the solution when needed and apply from a spray bottle or a small watering can when sowing the seeds and as soon as the seeds germinate. Always exercise caution when using sprays, and read the labels.
Caterpillars on Cool Season Greens
When the weather warms up in mid- or late spring, you’ll notice butterflies and moths flying around your cool season greens. How nice, you might think. But those lovely insects are on a mission, and that mission is to find suitable plants on which to lay their eggs.
Cross-striped cabbageworm, becoming more common here, on mustard greens. Expect several generations per season. Look for clusters of white woolly eggs.
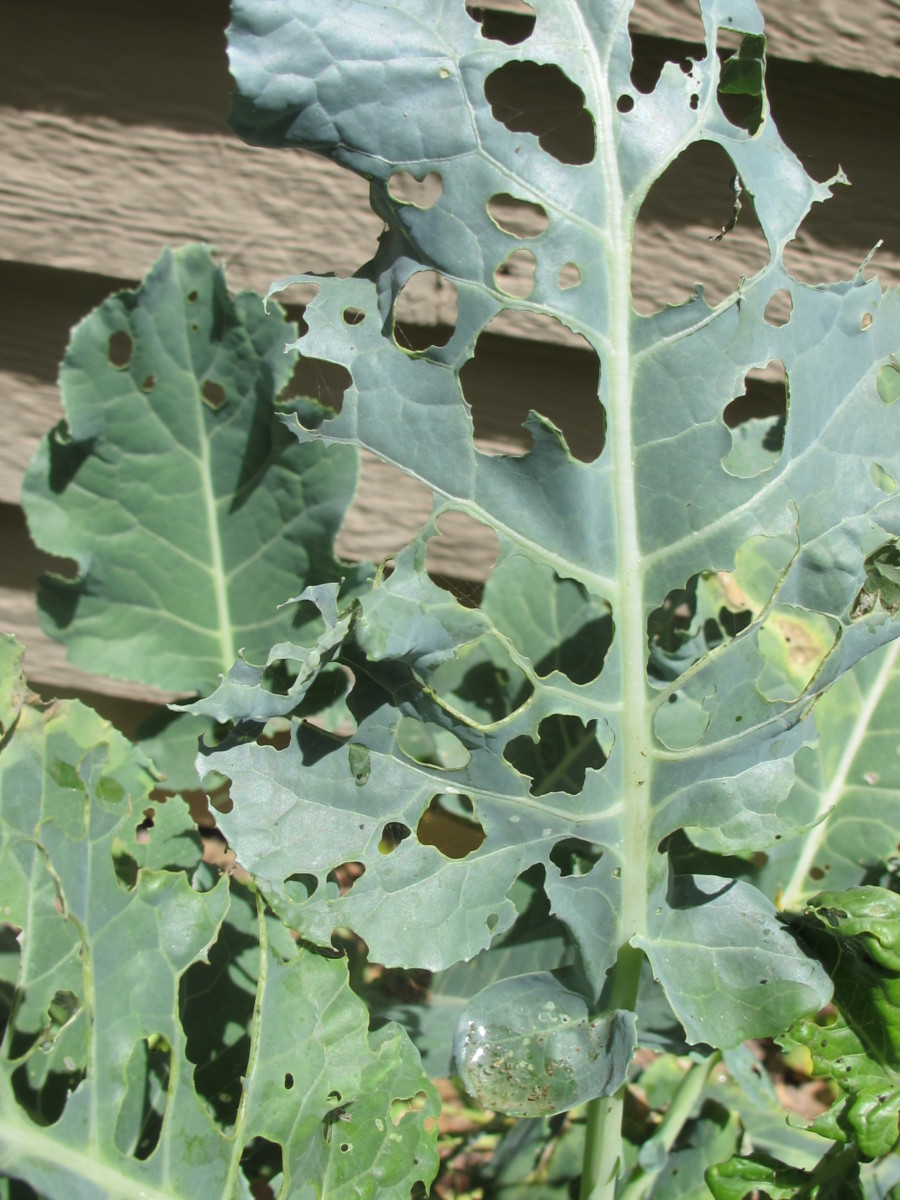
Broccoli leaves eaten by caterpillars.
Most of the brassicas are targeted by the female:
Cabbage Moth (or Diamondback Moth)
Cabbage Looper
the velvety green Imported Cabbageworm (also called the Small White Butterfly or Cabbage White Butterfly—white with black markings). Look for them lined up on the leaf’s midrib.
Cross-striped Cabbageworm (fine black stripes across the back, yellow stripe on the sides).
A few other species target particular brassicas or are limited geographically.
Here in my North Carolina garden, the 1¼” long Imported Cabbageworm has been the most commonly seen caterpillar on the brassicas. It is well-camouflaged in the green foliage. But for the past couple of years, populations of the Cross-striped Cabbageworm have been increasing. They’re especially pesky when lodged among the broccoli florets. Sometimes I don’t see them until I begin cutting the broccoli (just remove them). Inspecting the produce and spraying Bt regularly takes care of that.
Eggs hatch in a few days to a week, and immediately get to work chewing little holes and then bigger holes in your broccoli, kale, and other brassicas.
Harlequin bugs on cabbage
Another insect feeding on brassicas is the black and orange harlequin bug (photo, above). I squish them when I see them, although they’ll see you approaching them and will try to hide. They cause whitish blotches and distortions in the foliage.
BacillusThuringiensis (Bt)
As soon as you notice the white moths and butterflies flitting near the brassicas, it’s time to get the sprayer bottle ready. The imported cabbageworm is the larval stage of a butterfly and the one you’ll see in the daytime. The other caterpillars are moth larvae and are active at dusk or at night.
Mix up a solution of Bt, Bacillus thuringiensis, available from the garden center. Dipel and Thuricide are brand names for Bt. It doesn’t take long for these voracious little caterpillars to inflict considerable damage to your plants, so don’t delay.
Spray both the upper and lower surfaces of the foliage, occasionally agitating the solution. Begin spraying a few days after first seeing the moths, or certainly when you see holes appearing. Set the sprayer nozzle to a very fine spray; larger drops of water will bead off the waxy foliage. One or two drops of dish soap in the sprayer will help the solution stick to the foliage if you can’t get a fine spray.
It washes off in the rain, but any Bt clinging on the reverse (bottom leaf surface) might be enough for the current batch of caterpillars. Spray the brassicas every 5 to 10 days, as long as the insects are active.
How Does Bt Work?
Bt is a naturally occurring bacterium that disrupts the caterpillar’s digestive system when ingested. The insects stop feeding immediately and die within a day or two. Spray as soon as you notice them because young caterpillars are more susceptible to Bt than older caterpillars.
Bt effectively rids the garden of moth and butterfly larvae, including swallowtails that eat parsley. Although they won’t bother your broccoli, black swallowtail larvae feed on parsley and its relatives in the Apiaceae family, including dill, cilantro, and bronze fennel.
The tradeoff? Fewer moths and butterflies, but more undamaged produce. I enjoy watching the black swallowtail butterflies, though, so I plant the large perennial bronze fennel for the caterpillars picked off the parsley and dill. Bt targets larvae of moths and butterflies, and nothing else.
After picking the crops, I sometimes let the caterpillars feast on the remains. Those caterpillars might feed another brood of baby birds or green anoles at that time of year. Once cold autumn weather has settled into the area, these caterpillars will no longer be around to bother the fall crop. Autumn is another delightful time to garden.
Bt is perfectly safe to use on edibles. Use up the diluted solution within a few days. Store Bt in a cool location out of the sun. Buy a small fresh bottle every couple of years, as this is a live organism, not a chemical.
Headings
Page 1: Starting Seeds for Cool Season Greens, The First of the Cool Season Greens: Spinach (Spinach from Seed Is Easy!, ‘Monstrueux de Viroflay’, Spinach Bowl, Harvesting Spinach), And Then the Brassicas (Include On the Label, Damping-Off, Caterpillars on Cool Season Greens, Bacillus Thuringiensis [Bt], How Does Bt Work?)
Page 2: Broccoli (Improve the Soil for Cool Season Greens, Harvesting and Side Shoots, When the Brassicas Bloom), Mini Broccoli (Early Sprouting Broccoli and ‘Spring Raab’, Broccoli ‘Happy Rich’, Who’s My Favorite?, Gai Lan and ‘De Cicco’, Sowing Seeds, Late Sprouting Broccoli)
Page 3: Dinosaur Kale, Hardening Off Cool Season Greens (Gradual Changes), Growing Plants Under Lights (More Tips Using Artificial Light), Getting More Cool Season Greens Into Your Diet, A Veggie Omelet Recipe Using Cool Season Greens
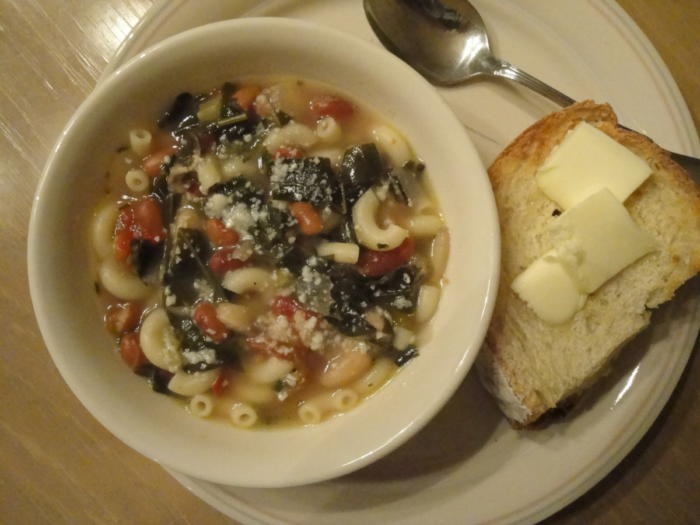
Here’s a hearty, healthy soup that will chase away that winter chill. Collards Soup, with greens and herbs freshly picked from the vegetable garden, offers balance to the delectables that we enjoyed over the holidays. Served with a chunk of warmed bread and melting butter…perfect!
Remember Paul Simon’s lyrics in “Sounds of Silence”? “I turned my collards to the cold and damp…” No? He didn’t say that?
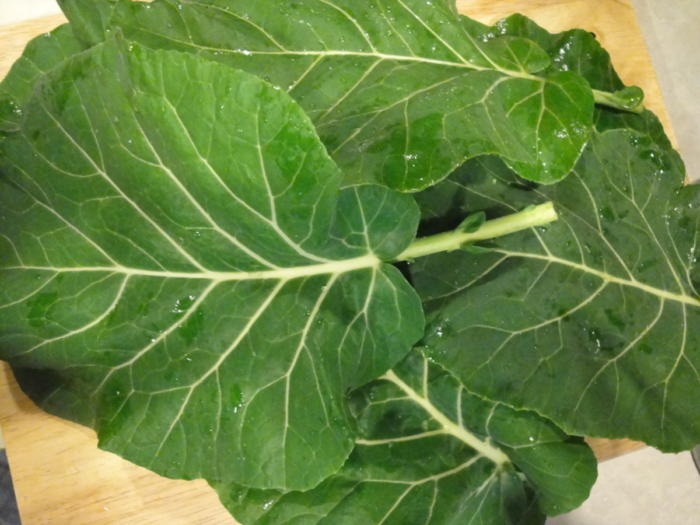
A few leaves of collards from the garden.
Ingredients
A few strips of bacon, cooked. Save 1 or 2 tablespoons of the fat (optional).
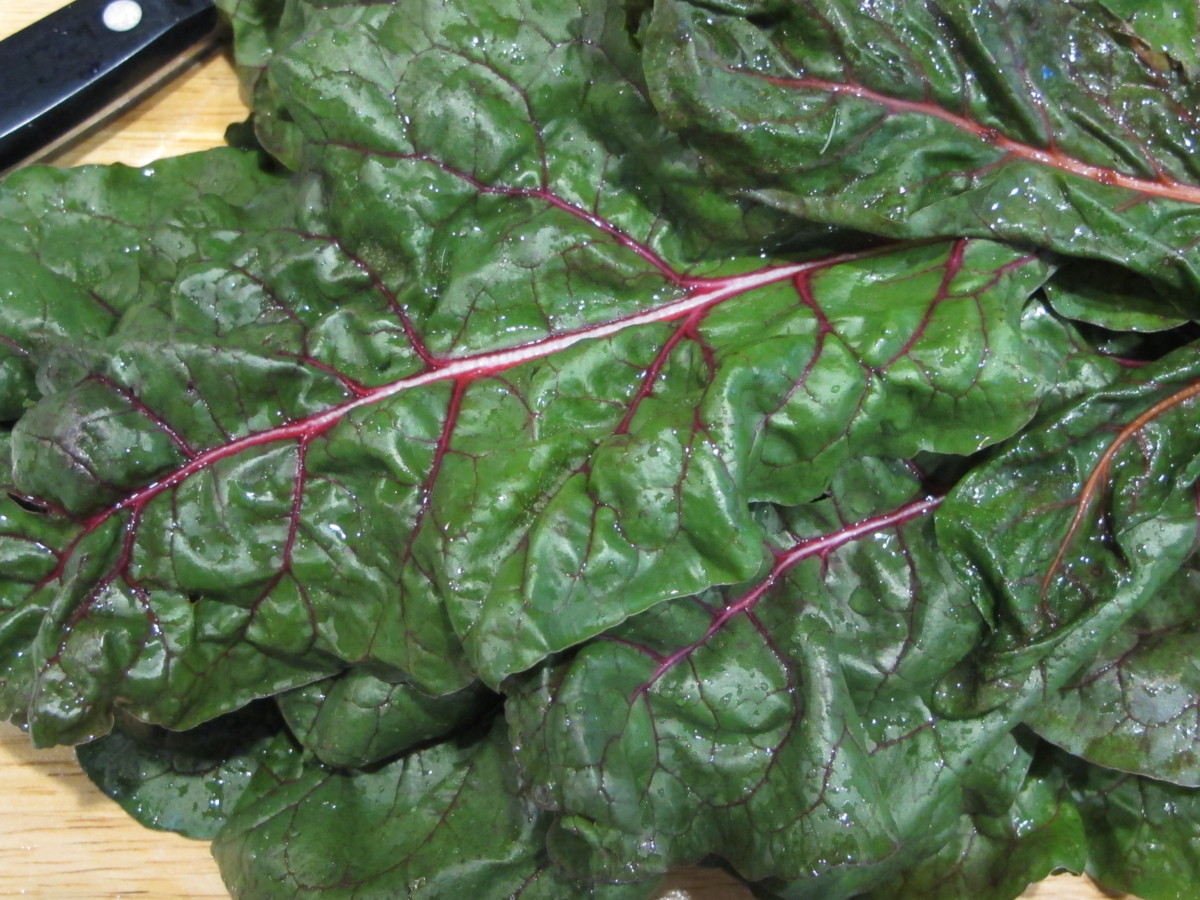
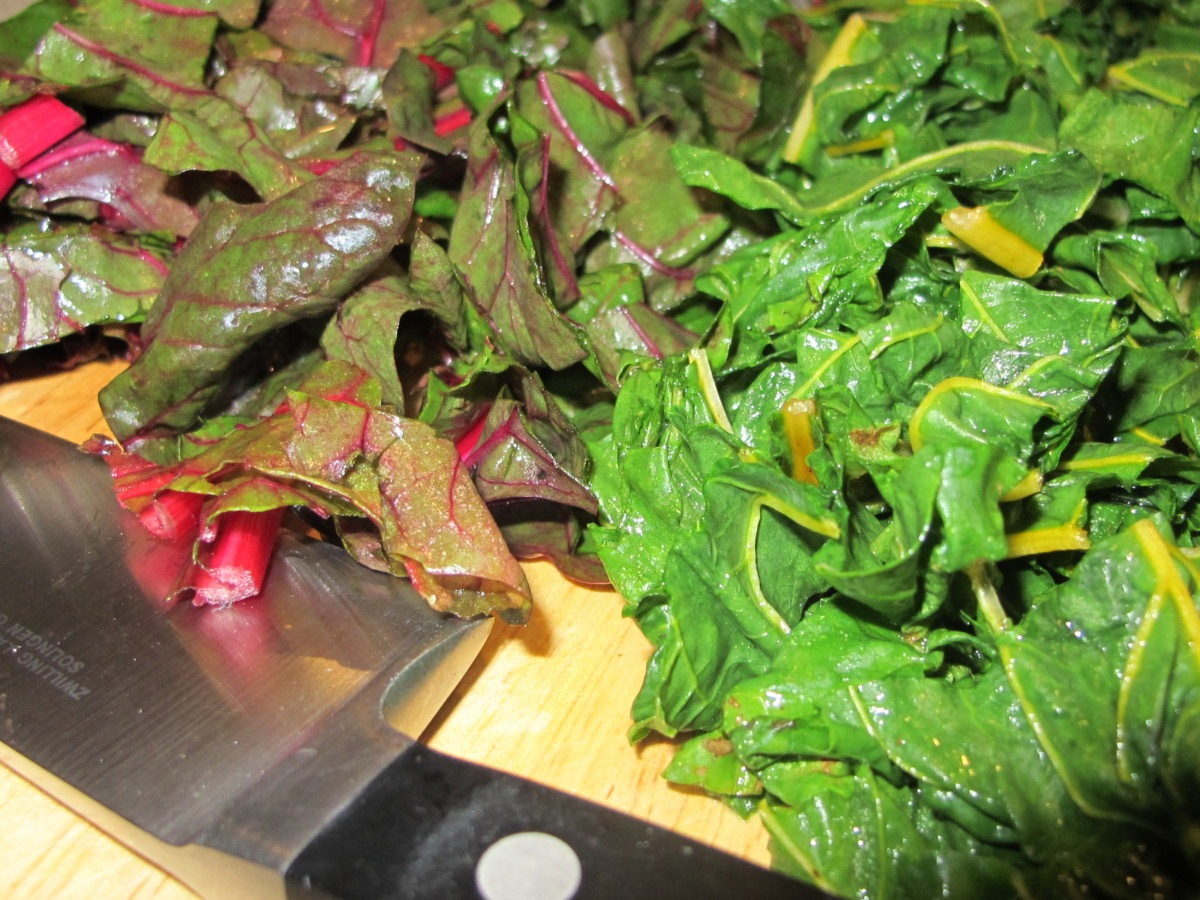
A large bunch of fresh collard greens, washed, with largest part of rib removed. Cut into bite-size pieces and set aside.
A handful of ‘Lacinato’ (dinosaur) kale or ‘Red Russian’ kale leaves, washed, with large rib removed. Cut into ribbons and add to the collards.
2 tablespoons butter, and more for the bread
3 tablespoons extra virgin olive oil
1 large onion, chopped
1 stalk celery, coarsely chopped
2 or 3 medium garlic cloves, minced
A few white button mushrooms, sliced
3 or 4 15-ounce cans of low salt chicken broth, plus 2 or 3 cans of water
1 or 2 bay leaves
2 or 3 teaspoons apple cider vinegar
2 15-ounce cans of beans (cannellini, pinto, or others), drained and lightly rinsed
1 15-ounce can diced or stewed tomatoes
1/2 to 3/4 teaspoon dried thyme, or a bit more if using fresh
1 to 1 1/2 teaspoons dried marjoram, or 2 teaspoons fresh. Substitute Italian oregano if preferred, or use a combination. Add more herbs if desired.
3 tablespoons or a small handful fresh Italian (flat-leaf) parsley, coarsely chopped
2 to 3 cups cooked (al dente) enriched Barilla pasta (extra protein, Omega-3’s, fiber), such as elbows or mini farfalle
Salt and pepper
Grated Romano cheese
Bright green collards, ready for the broth.
The Process
Cook the bacon, reserving some of the fat. Set aside.
In a large stockpot, heat butter and olive oil.
Add onion and celery. Cook at medium heat, stirring, until almost tender.
Add garlic. Cook for a few minutes, stirring. (Never brown the garlic.)
Add collards, kale, mushrooms, and some bacon fat, if desired. Cook for a few minutes, stirring, until they turn bright green.
Add chicken broth, water, vinegar, bay leaf, and crumbled bacon. Raise heat to a boil, then turn down to a low simmer for 15-20 minutes. Stir occasionally.
Add beans and simmer for 10 minutes.
Add tomatoes and thyme, and simmer, stirring occasionally, for 10 minutes.
Add marjoram and parsley, and simmer for another 5 minutes.
Add cooked pasta, heat, and stir.
Salt and pepper to taste.
Done! Now, serve with grated Romano cheese and your favorite bread. This will make about 8 servings. Add more chicken stock and water if needed.
You Can Grow Them!
Collards in the garden, late December.
Collards and kale are among the easiest crops to grow in the vegetable garden. As members of the family Brassicaceae, these plants are among the most concentrated sources of vitamins, minerals, and phytonutrients in the plant kingdom! Just one or two leaves added to omelets, pizza, store-bought soup, and rice or pasta dishes will add significantly to the meal’s nutrient content.
A few collards and several kale plants (dinosaur and ‘Red Russian’), among other crops grown through the winter, supply us with enough greens to pick almost every day. They’re super cold-hardy, and get covered with clear plastic when the temperature plummets to the low 20’s F.
On the Subject of Bacon
Since there are few occasions in this blog when the subject of bacon comes up, let me add that December 30 is National Bacon Day. We have Hernando de Soto (c. 1500-1542, Spanish explorer, looking for gold and a passage to China), to credit, or to blame, for introducing pigs to the Americas. In 1539, he brought 13 pigs to the southeastern U.S., which multiplied to a herd of 700 within 3 years. De Soto died of fever, and his body was laid to rest in the Mississippi River, which he and his crew were the first Europeans to discover.
A few morsels: About 10,000 years ago, wild pigs were domesticated in Central Asia…just under 10% of the pig is processed into bacon…just over half of American households have bacon in the refrigerator.
An occasional indulgence in foods that are generally perceived to be not so healthy is more than compensated by increasing the proportions of greens and vegetables in our diets. So, I will enjoy that bacon and a piece of good bread, guilt-free, every now and then, or these buttery biscuits that are so easy to make from scratch. Hope you enjoy this one! Happy New Year!
It’s hard to believe it’s already time to start seeds for fall greens and vegetables. I’ve been putting it off because of the hot weather we’ve been having. But, unless I want to buy transplants, seeds will have to be started soon. You folks up north probably have sown seeds for the broccoli and cauliflower by now, and certainly the Brussels Sprouts.
Here in North Carolina, fall seems a long time away, but in order for us to harvest those fall greens, we need to start sowing seeds now. Remember to locate your fall/winter garden where it will receive adequate sunlight. And, of course, I’ll sow successive crops through the rest of summer and early fall, as space permits.
Because we have a long growing season in the Carolinas, we can squeeze in another crop of summer vegetables. Zucchini, summer squash, cucumber, and beans can be sown again. But with the encroaching canopy of the trees on the berm, south of the garden, I’ll be planting only cool-season vegetables. The ‘Diva’ cucumber is loaded with fruits. And I will wait patiently for every last fruit to ripen on the tomatoes and peppers.
(***Update***: A few days ago, a large and dangerously crooked pine tree was taken down, and now there’s more afternoon sun for the tomatoes and peppers. More sun also gives us opportunities to grow containerized vegetables and fall greens inside the fence, protected from deer.)
If They Can’t Take the Heat
Spinach.
Temperatures are still too hot to sow lettuce and spinach outdoors, so I’ll wait another week or two. It’s still in the 90’s! They can be started indoors, in air-conditioned space, if needed.
Check the temperature of the soil before sowing seeds in the garden. Direct sun beating down on the dark soil surface can raise the temperature too high and dry it out very quickly. Look for one of those “Easy Tunnels”, or fabricate something yourself, to partially shade the soil and the tender young seedlings. You can purchase knitted shade fabric, made from black polyethylene, from mail order suppliers. In the southern states, 30-50% shading should work during the late summer months. This could lower the temperature by 10° or 15°F. Keep the soil surface moist to ensure good germination and to cool it down.
The best germination occurs between 60° and 75°F for lettuce and spinach. I usually put transplants into the garden instead of sowing seeds directly because hungry slugs, snails, and cutworms find tiny seedlings very tender and delicious.
Organic Sluggo will bait the mollusks (slugs and snails) to their deaths, and Bacillus thuringiensis (Bt), sprayed on the seedlings, will kill cutworms. Slug baits made with iron phosphate, such as organic Sluggo, are far less harmful to pets and to people than products containing metaldehyde, so be sure to read the labels.
One way to gather up a whole lot of slugs is to place a board, maybe 1′ x 2′, over damp soil. Go out and check the underside early the next morning, old knife in hand, and cut them quickly in half or squish them any way you choose…but, don’tuse saltin the garden!
Choosing Varieties of Fall Greens
Sowing seeds for fall greens and vegetables, which prefer cool weather, can be tricky in July’s heat. Look online or through seed catalogs for lettuce, spinach, broccoli, and other crops that are described as being heat tolerant varieties. Yes, all lettuce and broccoli varieties prefer cool temperatures, but some will take warmer or colder weather than others as they form heads. If you’re buying transplants, ask the grower.
Either way, plan to provide some sort of device that will lower the temperature during these last hot weeks of summer. For later harvests, I’ll sow seeds that grow cool and mature in cold weather, and they will not need the shade fabric. Plants grow better with more hours of direct sun as the temperatures cool down.
Check with your local agricultural extension office for recommendations or for a planting calendar.
Planting Young Transplants
Soil
Rich, dark soil with lighter brown clumps of clay, before incorporating.
Starting a vegetable garden with soil that has not been conditioned could result in a mediocre or poor harvest. Fall greens grow faster and larger in well-prepared soil.
Garden soil for these crops needs additional organic matter (compost, composted cow manure), drainage material (pine fines, coarse sand), and sometimes lime. A soil test will indicate the need for lime.
Our fall greens are being planted in soil that has been worked for 6 years, so it’s in very good condition. I will, however, continue to add compost, fertilizer, or manure to the garden.
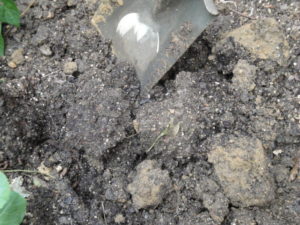
When digging soil, bring some of the lower-level clay up to the surface, and turn under the richer topsoil 4″ to 6″ deep (a few inches deeper for tomatoes, in spring). Over time, the clay soil on the surface will improve as mulch decomposes or when compost is added as a top dressing. Here you can see clumps of light brown clay that were brought to the surface of the soil (photo, above) before they were broken up.
Roots
Growers use pots and market packs of various sizes, including small 9-cell packs, 4-cell packs, 2″ peat pots and 4″ plastic pots. The smaller the root ball, the more carefully you will have to monitor the care.
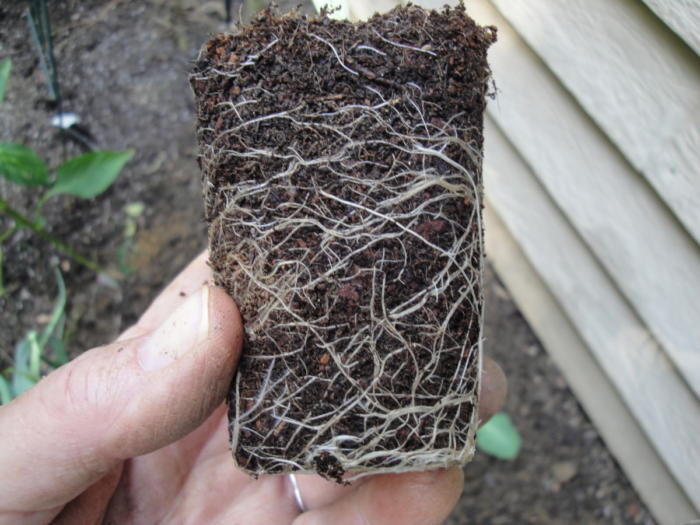
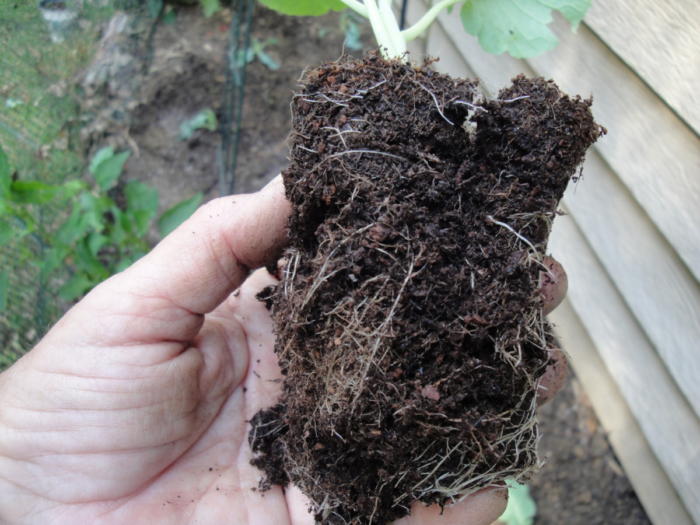
Broccoli roots before…
…and after.
An important step before planting is to rough up the outside of the root ball (photos, above). This slightly injures the inner root layer called the pericycle, stimulating the plant to quickly send out new lateral roots into the soil. Be careful not to so severely damage the root system that the plant can’t supply water to the leaves on a hot, sunny day. Do this for every plant that is about to be repotted or planted into the garden.
A root ball that’s tightly packed with roots can be shallowly scored down the sides in a few places. Use a knife, a rock, or even a twig. Or use a cultivator to pry out some of the roots.
To Bury or Not To Bury?
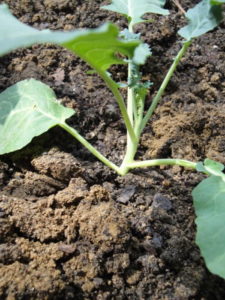
Broccoli ‘Arcadia’ from 4-cell-pack.
Most youngvegetable transplants can be placed an inch deeper into the soil, or up to the bottom leaves. If the plant is more mature and has developed a somewhat woody or tough stem, plant it at the same level it was growing in the pot. But always, if possible, choose younger transplants.
Older plants can be stressed by being potbound or underfertilized, and might go to flower or head up prematurely, yielding undersized harvests. Young plants will require more time to grow, but they will give you the largest heads of lettuce, broccoli, cauliflower, and cabbage. If in doubt, plant the top of the root ball level with the soil surface.
Firm the soil around the roots and stem using medium pressure. Humidity in the soil between the soil particles will encourage the stem to grow fine roots without interference from tightly packed soil. Watering the plant will help the soil settle in around the root system and provide much-needed moisture.
Broccoli ‘Arcadia’ in winter.
These are same broccoli ‘Arcadia’ plants photographed in late December (photo, above). Trees on the berm cast too much shade until leaves dropped off, delaying harvest. When the garden gets more sun, heads should form in mid to late winter.
Fertilizer
Planting fall greens and vegetables into late September, I mix a handful of granular organic vegetable fertilizer into the planting area. These crops grow beautifully with adequate nitrogen, so I will soon use higher nitrogen fish emulsion. Another application of fish emulsion will be made every 2-3 weeks through November, or every 2 weeks for potted greens.
Mustard seedlings in the garden.
Microbes in the soil break down organic compounds and make nutrients available to the roots.But, as the weather cools significantly, microbial activity slows down. I’ll use synthetic soluble fertilizers a few times in winter to keep the plants growing.
Greens and vegetables will grow all winter here, with some protection during very cold weather. This is worth the effort, since I can pick beautifully fresh kale and spinach for the Sunday omelet, or a big bunch of collards for collards soup.
Mustard ‘Florida Broadleaf’ was sown in late September, and germinated a few days later. The thinned seedlings will be used in soup, salad, or an omelet. Spinach sprouted about a week later.
Arugula
Arugula flowers.
Arugula ‘Astro’ seedlings.
Love, love arugula! A forkful of salad greens that has a piece of arugula in it…mmm… The variety I prefer is ‘Astro’. It’s not as hot as the wild types, and it tolerates warmer temperatures. Arugula will self-sow if it likes where it’s growing. Just let it flower and set seed. The papery seed capsules release the seeds, which germinate within 2 weeks, during favorable weather, near the mother plant.
It grows well in morning sun, during warm weather, and in moist, rich soil. Those who are more adventurous than I might enjoy growing the hotter ‘Wasabi’. Arugula doesn’t look like a member of the family Brassicaceae, but it, too, is in that famous family.
You might have seen the term “cruciferous” being used when describing members of the family Brassicaceae. It refers to the flowers of these plants, which have 4 petals arranged in the shape of a crucifix. The terms brassica, cole crops, and crucifer (or cruciferous) refer to the same plants.
Broccoli
One of the most nutrient-rich foods, broccoli is a must in my garden. Nutrients include protein, Vitamins A, several B’s, C, K, minerals, fiber, and their famous phytonutrients. To say that we eat broccoli in one form or another every 2 or 3 days is not an exaggeration. Just ask Mother.
Broccoli crowns.
Heat and cold tolerance ranges from poor to excellent, depending on the cultivar. In this zone 7b area, ‘Imperial’ can be sown in July or planted as transplants from July through August; Johnny’s Selected Seeds’ catalog rates it “excellent” in heat tolerance for broccoli. Normally, broccoli grows best in cool weather, but you can extend the harvest by choosing 2 or 3 varieties that are suited to the weather at different times of the year.
The variety that will see us through the winter is cold-hardy ‘Arcadia’, which grows a large number of side shoots once the main head has been harvested. For that reason, don’t cut off too many leaves when you do harvest broccoli, because each of those leaves could be topped by another side shoot.
By the way, tender broccoli leaves are edible as well. Add them to soup, a smoothie, pasta, or a stir-fry. After the harvest is done, I keep the plants in the garden to flower. Bumble bees and other early risers are fond of this bounty, and the flowers are quite pretty!
Bumble bee visiting broccoli flowers in early spring.
Miniature Broccoli ‘Happy Rich’
Broccoli ‘Happy Rich’.
I’ve grown ‘Happy Rich’ for many years. This plant grows a small head at the end of a stem, harvested ideally before the white flowers open. Each of those little green beads is a flower bud, and even if the buds start opening when the stems are picked, they’re still going to the kitchen.
The head will never get to the same size as regular broccoli, but the flavor is superb. Once the little heads have been cut off with 5″ to 8″ of the stem, the plant will branch out and grow more little heads. The stem, the leaves, and the head are edible—steamed, stir-fried, or added to soup or a pasta dish.
Two plants have been growing in the garden since the spring, and they don’t look very happy. It’s been a hot summer, so I didn’t expect them to survive this long.
Bt
Cabbage worms on broccoli.
The white cabbage moths visit frequently—more frequently, alas, than I do with the bottle of Bt.
Bt is an abbreviation for Bacillus thuringiensis, a naturally-occurring bacterium that kills caterpillars of moths and butterflies (but not sawflies). Before you groan “no chemicals”, Bt is used by organic growers and it’s been around for decades. Perfectly safe, even for pollinators, and not a chemical.
All brassica crops are targeted by a few kinds of moths, which lay eggs on the leaves. They soon hatch into voraciously hungry and well-camouflaged caterpillars. After consuming some of the Bt, they stop feeding and die shortly thereafter. Young caterpillars are more easily controlled than older caterpillars. Thuricide and Dipel are two brand-name products with Bt as the active ingredient.
Page 1: Ready To Sow Fall Greens and Vegetables?, If They Can’t Take the Heat (Choosing Varieties of Fall Greens), Planting Young Transplants (Soil, Roots, To Bury Or Not To Bury?, Fertilizer), Arugula, Broccoli, and Miniature Broccoli ‘Happy Rich’ (Bt)
Page 2: Brussels Sprouts, Cabbage, Cauliflower, Collards, Kale, Lettuce, Nutritional Considerations of Fall Greens (Where’s the Beef?), and Only the Beginning
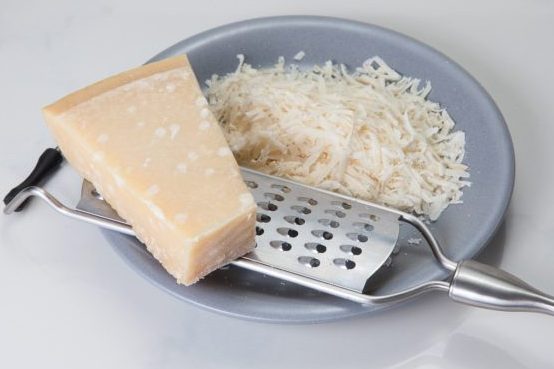
One of the favorite dishes from our kitchen is Eggplant Parmigiana. First, I have to admit that I never use Parmesan. Locatelli Romano is our preferred cheese for Italian dishes. Purchased as a solid wedge, and grated in batches, it’s always on hand in the refrigerator.
As a kid, I would “borrow” a chunk of Romano from my Sicilian grandmother’s kitchen, and hide under the table where I could savor every little bite. Mmm….so good!
Over the years, I’ve tried many recipes for Eggplant Parmigiana, but it wasn’t until last year that I came up with this combination. An organized kitchen is helpful as this dish is being orchestrated. And having some potted herbs outside the kitchen door is very handy.
Have These Ready
one 13″x 9″ Pyrex baking dish, or other dish that can take low heat from the stovetop, and oven heat
2 non-stick frying pans, medium to large, for eggplant
separate bowls to hold zucchini and eggplant slices
pie plate for eggs and water
wide bowl for bread crumbs
Ingredients
1 or 2 small zucchini, yellow or green, unpeeled, cut into 1/4″ slices
2 medium (less seedy than large) fresh eggplants, unpeeled, cut lengthwise into 1/4″ slices (no need to “bleed” out moisture)
Your favorite meatless tomato sauce
2 cups or more seasoned bread crumbs; see below
2 eggs plus 1 Tbsp. water, stirred together in pie plate
Extra virgin olive oil
butter
1 lb. mozzarella cheese, sliced
About 3/4 lb. Provolone cheese, thinly sliced
1 to 1 1/2 cups Romano cheese, grated
1 or 2 cups wilted greens, such as spinach, arugula, Swiss chard, and dinosaur kale. Or use 1 or 2 bags of prepared greens. Greens are optional, but recommended. You can also use fresh greens.
Bread Crumbs—Ingredients
Mix together all these ingredients in the bowl:
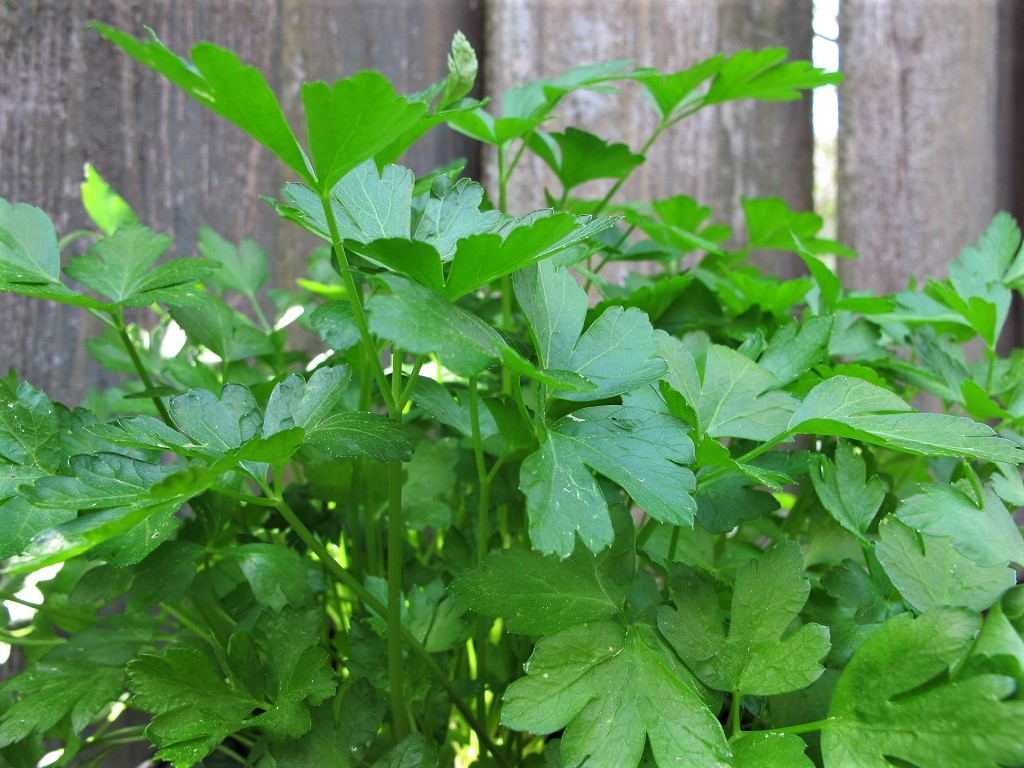
Flat-leaf parsley.
Several slices dry rye, whole wheat, and/or white bread, processed to medium-fine crumbs. I collect odds and ends in an open bag in the refrigerator, letting them dry.
1/2 to 2/3 cup grated Romano cheese
2 or 3 cloves fresh garlic, minced
3 Tbsp. fresh flat leaf parsley, chopped
1 Tbsp. fresh or 1-1 ½ tsp. dry Italian oregano
1/2 tsp. salt, or to taste
1/4 tsp. pepper, or to taste
1/4 tsp. thyme, French preferred
The Process
Place baking dish on small burner of stove. Add a layer of sauce to coat the bottom of the pan.
Add zucchini slices close together in single layer, on top of sauce in baking dish. Turn on stove to very low heat, which will begin softening the zucchini as eggplant is being prepared. Move the pan around so no spots overheat. Turn over zucchini slices once for even heating. Make sure your dish will be safe to use like this. (If you prefer not to heat the pan, add some time when baking the eggplant.)
In frying pans, add olive oil and a little bit of butter. Not too much.
One slice at a time, dip eggplant in egg bath, then press into bread crumbs, coating both sides.
Add breaded eggplant slices to frying pans (I use 2 pans to speed up the process), and sauté over medium heat until medium brown. Don’t use high heat; this will brown the bread crumbs, leaving eggplant raw.
Place cooked eggplant slices close together, in a single layer on top of zucchini, into baking dish.
Continue sautéing eggplant slices, adding oil and butter as needed. While the next batch is cooking, add a layer of Romano, mozzarella, and Provolone cheeses, and more sauce, to the baking dish.
Add the greens in the middle layers.
Continue Layering
Continue layering eggplant, cheeses, and sauce until dish is filled. Usually there are 2 or 3 layers of eggplant. You can add leftover egg and bread crumbs, finishing with sauce.
Drizzle 1 or 2 Tbsp. olive oil over the top, plus a couple of pinches of oregano.
Bake at 350 degrees, loosely covered with foil. If the pan is filled to the top, place an old cookie sheet on the bottom rack to catch the spillover. If sauce is watery, lower heat, loosen foil, and cook a bit longer.
It’s done when sauce is gently bubbling all over, usually 40 to 50 minutes.
Serve with extra grated Romano cheese and sauce, if needed.
Wasn’t that easy? Maybe not the first time, but it is delicious! Serve with some good bread and a green salad or tomato-basil salad. Maybe some wine…good company…and…
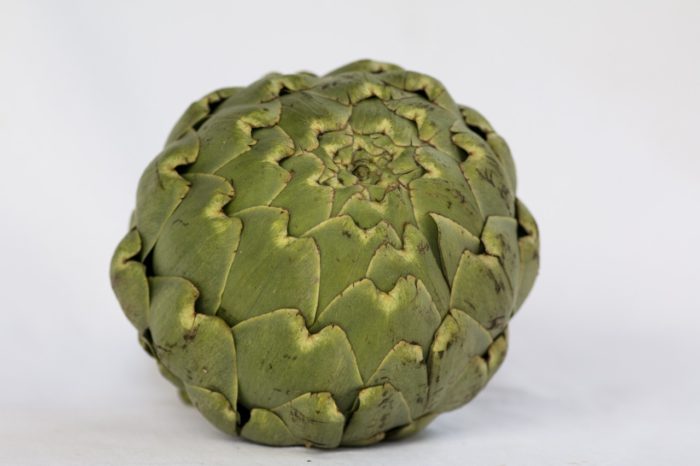
Fresh artichoke.
…Stuffed Artichokes
Snip the points off the artichoke leaves, remove the smallest bottom leaves, trim the stem to an inch or so, rinse, and drain.
Use the bread crumb recipe above, adding more Romano cheese, salt, and garlic. Place the artichoke in the bowl of bread crumbs and spoon the mixture between the leaves. Use your fingers to firm more crumbs between the leaves.
Place in artichoke holders and add 2 to 3 cups of water in a heavy stock pot. Drizzle olive oil, 2 or 3 Tbsp. water, and a dash of salt over the tops of the artichokes.
Using a covered stock pot, 2 well-stuffed large artichokes will need 2 to 3 hours on a low simmer to steam. Add water as necessary. They’re done when you can easily remove a large leaf. When you pull the leaf through your teeth, the green part is tender and will scrape off. (Artichoke greens are good for gut health.) Some prefer to use a pressure cooker, which speeds things up considerably.
Stuffed artichokes can be made ahead of time and reheated in the oven, covered with foil.
This dinner was a big hit when relatives came to town earlier this month. Enjoy!
Cauliflower just picked from the garden, planted last fall.
Here’s an easy recipe I’ve adapted from something seen last year in “Southern Living”. Mother took some shrimp out of the freezer, and I had just picked this beautiful head of cauliflower. Add a few other ingredients, and — Bingo, a Winner!
About 1 or 2 cups fresh green beansor haricots verts, cut into 1 1/2″ pieces (frozen will work)
1 1/2 cups small fresh cauliflower florets
One or two ‘Lunchbox’ sweet peppers for color, diced (optional)
3 green onions, green and white parts sliced separately
Leftover vegetables (optional)
1 large or 2 medium fresh garlic cloves, minced
1/4 tsp. tsp. dried ginger
1 large egg
1 tsp. butter
2 or 3 Tbsp. coarsely chopped fresh basil
2/3 tsp. toasted sesame oil
1 or 2 Tbsp. soy sauce
Bunching onions.
Lunchbox peppers.
Green beans.
The Process
First, start cooking a pot of flavored rice, or plain rice, if you prefer, according to package instructions. I use Rice Pilaf. Don’t overcook it, or it will be sticky. Set it aside when it’s done (about 15 to 20 minutes), and start the rest of the recipe after you get the rice going.
Heat a large non-stick wok or other pan. Add half the oil, half the salt, and the shrimp. Cook hot, turning occasionally, until shrimp is no longer clear. This takes only 2 minutes or so. Remove shrimp; set aside.
Add the green beans, cauliflower, and ‘Lunchbox’ pepper to the remaining liquids in the pan, along with the garlic, ginger, the rest of the oil, and the white part of the green onions. Stir frequently for about 2 minutes, at medium-high heat. This is a good opportunity to use up leftovers, such as broccoli, dinosaur kale, peas, and carrots.
Add the rest of the salt and 2 1/2 to 3 cups cooked rice. Cook and stir until rice is just a bit dried. This takes a minute or two. Lower heat if necessary.
Push the rice mixture to one side, and add butter to the open area. Add the egg to the butter, scramble, and chop in the pan while it’s cooking. When the egg is done, mix it into the rice.
Add shrimp, soy sauce, basil, and toasted sesame oil. Stir to heat evenly.
Garnish with green parts of green onion.
This recipe for Shrimp, Vegetable, and Rice Stir-Fry takes only half an hour to prepare, and serves 2 to 4. Yummy.
When there’s a bumper crop of kale, collards, spinach, Swiss Chard, or any of the other greens (which are so good for you, by the way), this is what you can do. Whether your winter greens are looking a little tired, or you just need to remove them to make space for the warm-season vegetables, many are asking that question.
Curly kale, Swiss chard, dinosaur kale, arugula.
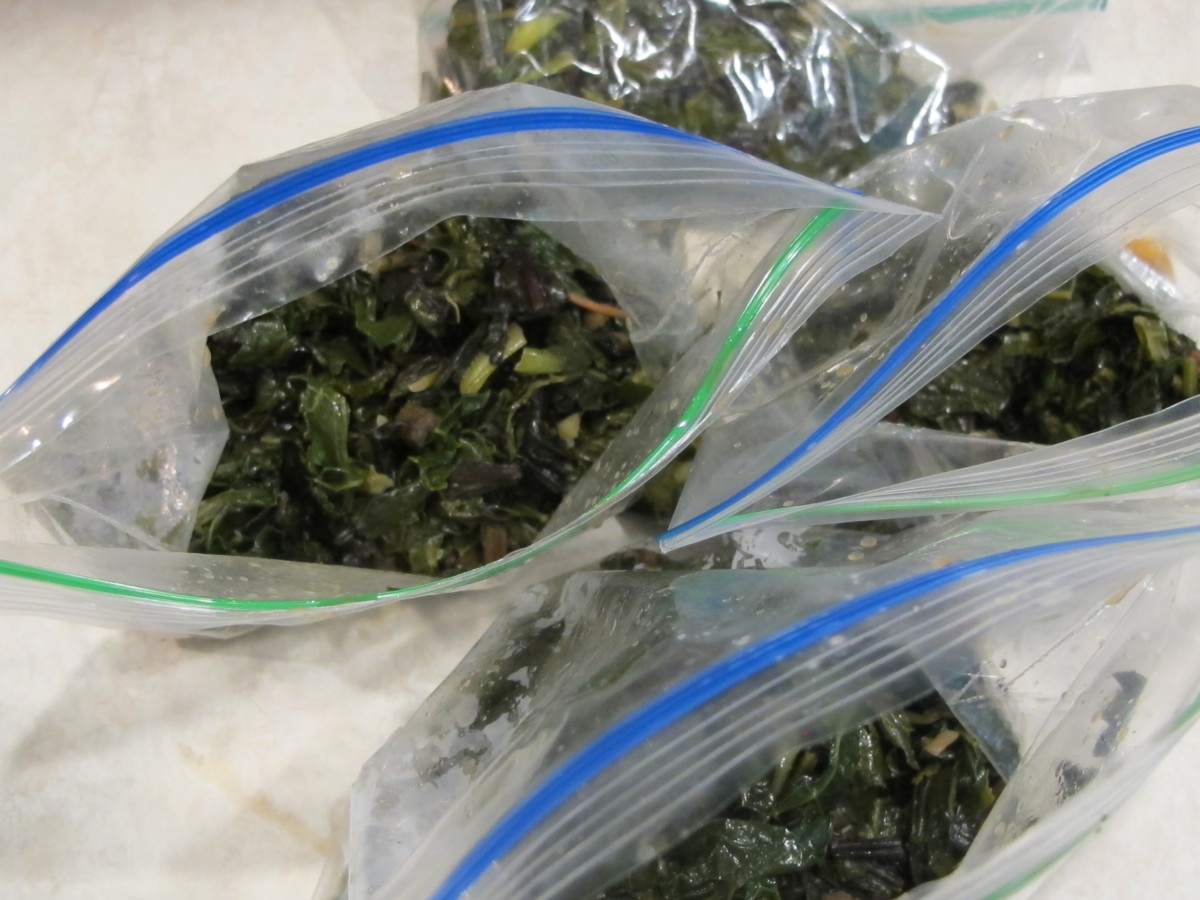
Cook ‘n’ Freeze Those Greens
Have a few zip-lock sandwich bags handy.
Select healthy-looking greens and wash thoroughly. Inspect carefully for slugs, caterpillars, and other insects.
Cut and remove the thickest of the midribs.
Separate the varieties, or combine them.
Cut into wide ribbons, or thin, if you prefer.
Get out the Big Wok, or any other large, heavy pot.
Add 2 Tbsp. olive oil and 1 Tbsp. butter, more or less, to the pan. Heat it up.
Add a clove or two of minced fresh garlic. Saute until it begins to turn a pale golden color, but not brown (browned garlic is burned and tastes awful).
Add the greens. Lots of them.
Turn the greens continuously over low-medium heat, so they’re well-coated with the oil. You’ll see that they wilt down quickly.
Season with salt and pepper (optional).
When evenly wilted, allow to cool somewhat.
Ladle half a cup or a cupful into each sandwich bag.
Squeeze out the air, seal up the bags, and set aside to cool.
Put them into a larger freezer bag or plastic container.
Freeze. Use within a few months.
In the Kitchen
***Update*** July 11, 2019: I harvested all the remaining Swiss chard and kale from last year (photos, below) and cooked them up this morning. There was a cup of leftover chicken stock, so that, too, was added to the pot while the vegetables cooked.
Swiss chard ‘Bright Lights’.
Swiss chard.
‘Lacinato’ and ‘Red Russian’ kale.
Cooked greens ready to freeze.
Next time you make soup or an omelet, bring home a pizza, or serve rotisserie chicken over seasoned rice, add a bag of these magical greens. Add these greens to a dish of lasagna or eggplant parmigiana. Simple! Put a bag in the refrigerator in the morning to thaw for that night’s dinner. Even canned soup from the grocery store is more nutritious after adding these greens. Fresh leaves added when the soup is heating up wilt almost instantly and double the vitamin content.
When you realize how simple this is—and how good it is for you—you’ll plant a whole lot more this fall. It’s easy to sneak these greens into your cooking, and your finicky eaters might not even notice!
Veggie omelet with fresh microgreens. You could also use a bag of thawed greens in the fold.
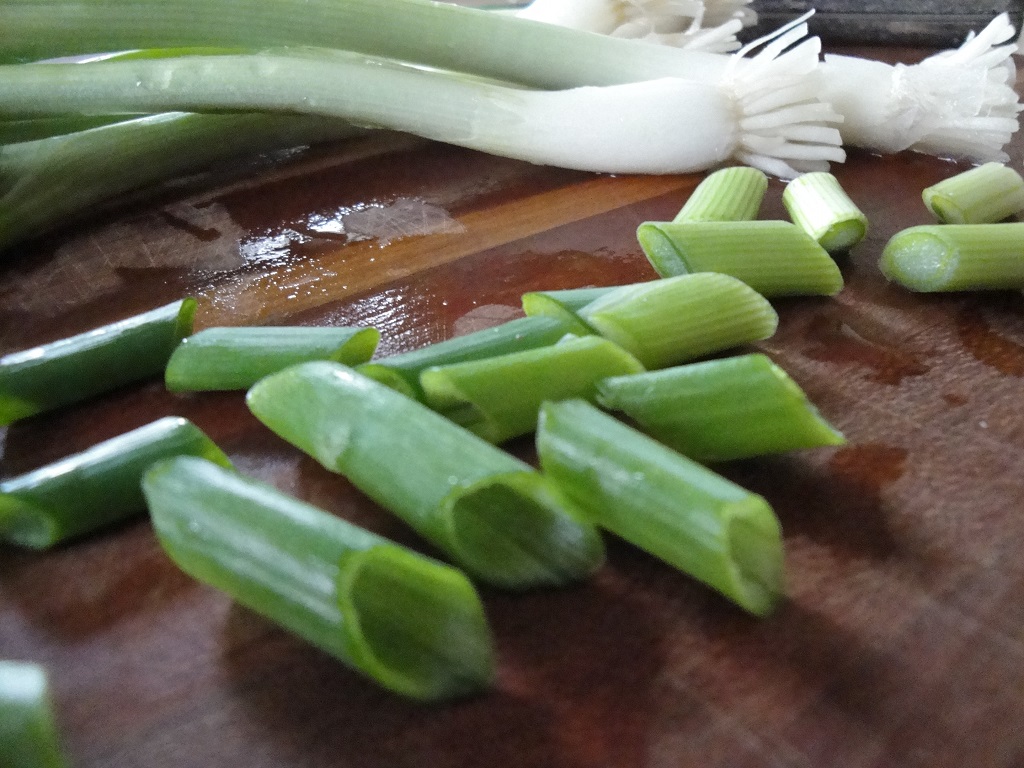
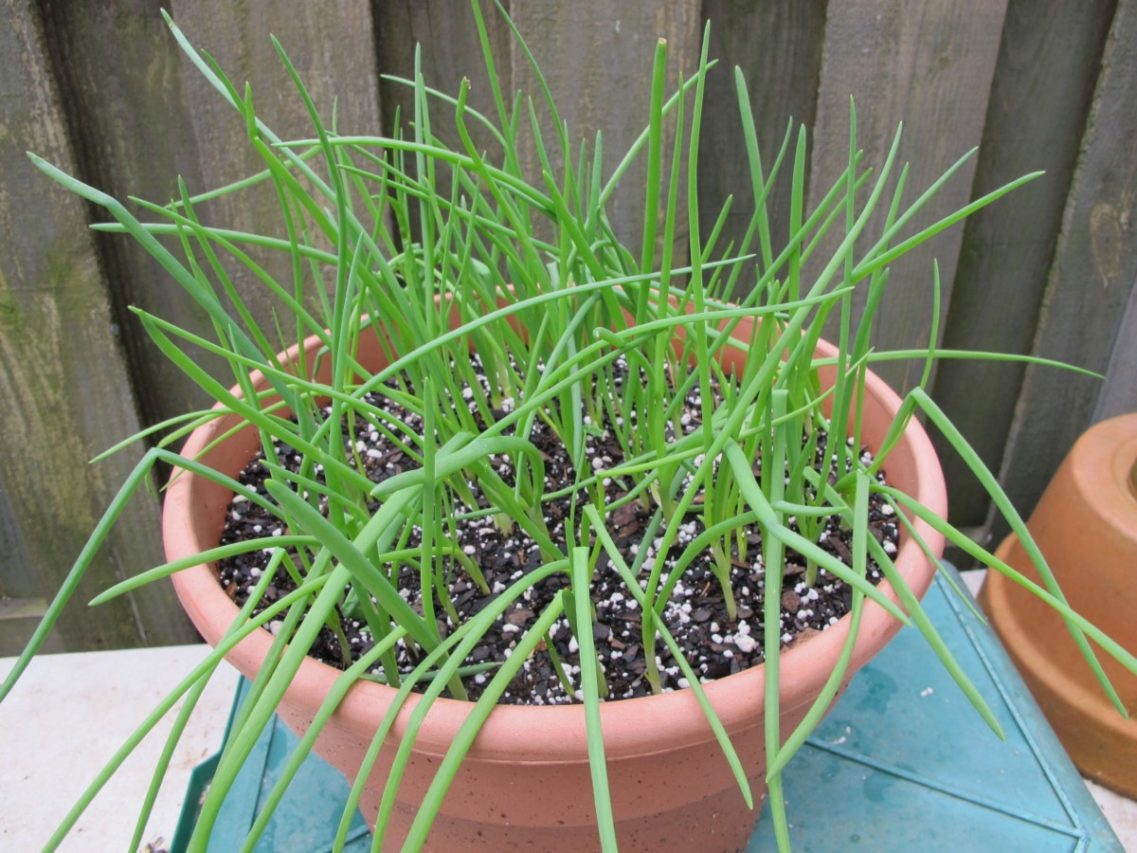
In a patch of soil under the cold frame in the old Maryland garden, I grew several dozen Japanese bunching onions. Although the frame was cold in the winter, it didn’t freeze, and those little plants provided us with all the green onions we needed for 5 or 6 years without replanting!
So, how do you get sustainable bunching onions? After describing two species of onions and sowing seeds, I’ll explain the “sustainable” part.
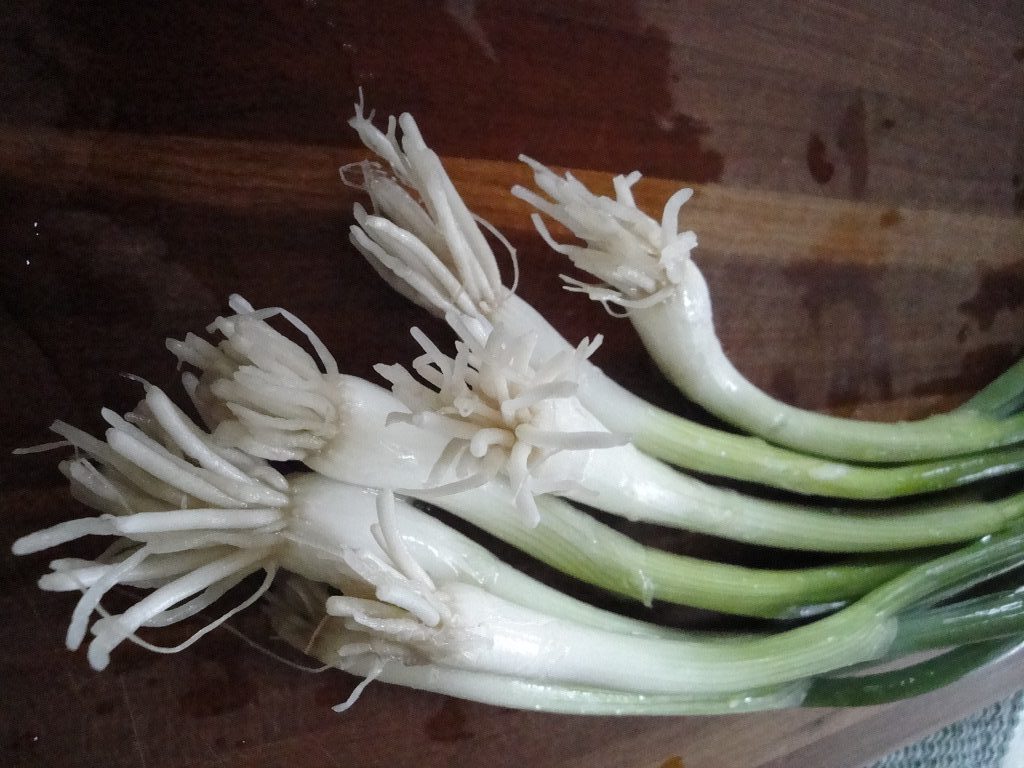
Bunching onions purchased from the grocery store.
Two Species of Onions
Allium Cepa, the Bulbing Onion
Allium cepa is the commonly grown bulbing onion. Onion sets, small immature bulbs, can be purchased from garden centers in late winter and sometimes in autumn. Plant onion sets a few inches underground, and pull them as green onions before they form bulbs. Planting sets every couple of weeks will provide a continuous harvest.
Left longer in the garden and spaced properly, though, the bulbs will grow larger. Your garden’s latitude, which affects day length in the growing season, will determine which onion varieties will successfully form bulbs.Short-day onions are grown in the southern United States, and long-day or intermediate varieties are grown farther north.
Check with your local agricultural extension office for names of varieties that will mature as bulbs in your region. Bulbing onions also can be grown from seed or purchased in bunches of young seedlings, but most varieties require more than 110 days to mature.
Allium Fistulosum, the Bunching Onion
The variety I grew in the cold frame was called ‘Nabechan’. This variety is a member of the species, Allium fistulosum. Japanese bunching onions, or scallions, don’t grow bulbs. Several varieties are available, and all remain straight-sided, with minor swelling at the base. Bunching onions are available as seeds for home gardeners.
Bunching onions are the ones usually sold in small bunches at the grocery store (photo, above). I use them in salads, omelets, stir-fries, and soups. Once or twice a week, I add a green onion to the spinach, mushrooms, a colorful lunchbox pepper, and kale in the veggie omelet. It’s really good with cheese and microgreens or slices of avocado in the fold…maybe some bacon on the side, and rye toast.
Although both species of onions can be harvested as green onions, the ones I sold at farmers’ markets were ‘Nabechan’ bunching onions. They were ready for the market when the 15 or 20 seedlings in 6″ or 6½” pots approached a harvestable size. Here’s how to grow them, if you’d like to give it a try.
Starting Seeds For Bunching Onions
Sow the seeds 1/4″ deep and about 1/4″ apart in 6″ pots filled with seedling mix. Water gently, so the seeds aren’t dislodged. They germinate well at temperatures around 70° to 80° F.
When the seeds germinate, give them full direct sunlight (6 hours at least), and lower the temperature. They thrive with cool to moderate temperatures, but avoid subjecting them to frost at this early stage. Inadequate light creates weak seedlings and feeble roots.
Keep the soil moist. Onions have shallow roots, and fail when grown too dry. Fertilize every 2 weeks with fish emulsion, Sea-Plus, or any complete fertilizer.
Transplanting Seedlings Of Bunching Onions
Once they’ve grown a few inches tall and are easier to handle, the seedlings will need to be spaced farther apart.
First, fill the new pot or pots with dampened potting soil to within 4-5″ of the rim. Yes, that seems too low, but more potting soil will be added as the seedlings grow. Firm it in lightly.
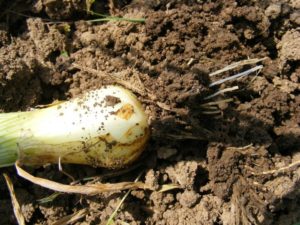
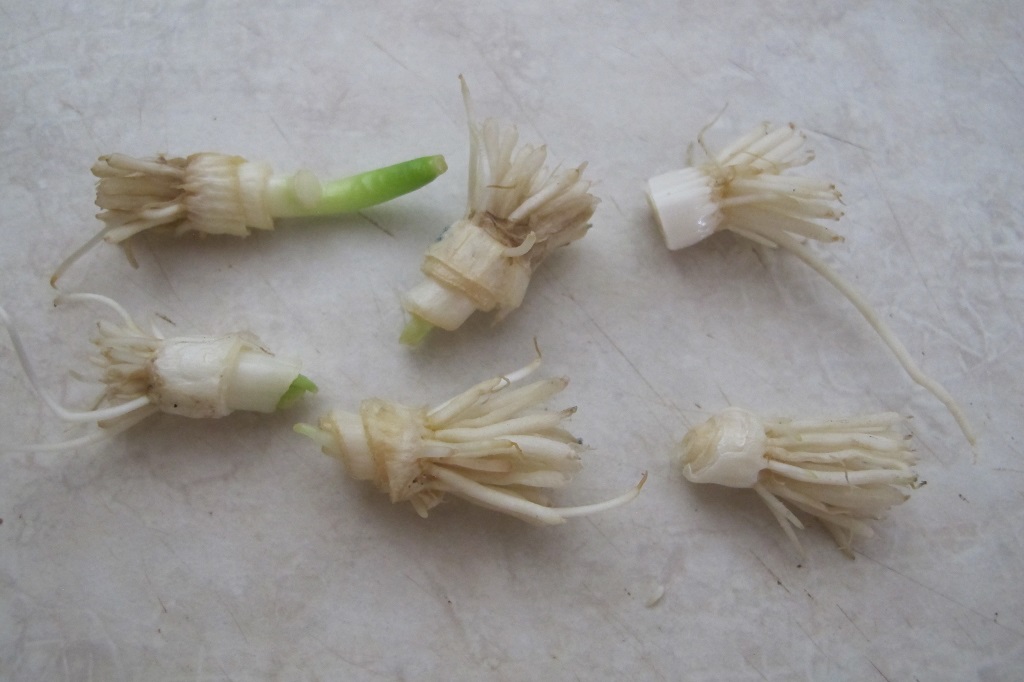
Where To Place the Crown
Now, gently ease the young plants and the soil mass out of the pot. Don’t let exposed roots dry out during this process. Cover them with a damp towel as you work.
You’ll see the 3 main parts of the onion: the green leaves, the white roots, and the region between the leaves and the roots, called the crown.
Hold up the seedling’s leaves and transplant it into the new pot. Space seedlings 3/4-1″ apart. It might be easier using a pencil to poke a hole into the soil for the roots. Plant with the crown at the soil surface, and lightly firm the soil around its roots. Add a small amount of potting soil over the bases of the stems to stabilize them. Plant them in wider nursery pots, if you choose, where they can remain until harvested. But they won’t require a deep pot.
Water the seedlings and place the pot in direct sun. But avoid harsh hot sun for a couple of days while the roots recover.
Growing Long White Stems
The trick to getting those long white stems is simply to plant the seedlings lower in the soil.Excluding light prevents chlorophyll from developing, blanching the stem. Leeks, another member of the Amaryllidaceae family, get their long white stems in the same way.
Every 10-14 days, add soil between the seedlings, an inch or so at a time, while holding the leaves upright. Although this sounds contrary to normal horticultural practices, the onions will recover. Chlorophyll in the covered stems will be reabsorbed by the plants.
Older leaves will turn brown and can be removed. But strong new foliage will emerge while the underground stem continues to thicken. It’s important to give seedlings full sun for optimal photosynthesis.
The pot is finished when the soil surface is about 1″ below the rim of the pot. The bunching onions will have 4″ or 5″ of white stem below the green leaves (longer than in the photo of store-bought onions, above).
Introduce the seedlings to stronger sun and cooler temperatures outside in the daytime. Protect them from frost while they’re hardening off. With good growing conditions (direct sun, moderate to cool temperatures, moist soil, and fertilizer every 2 weeks), the onions can remain in pots until they’re harvested.
Here’s Another Method of Seeding Bunching Onions
‘Evergreen’ bunching onions.
In the photo above, I started seeds about 1½” above the bottom of a 6½” pot, and spaced them farther apart. Adding soil every couple of weeks blanched the stems. Spacing them farther apart from the beginning obviates the need for transplanting.
I tilted the pot on the plant stand outside so the seedlings could catch the rays of the low sun during the shortest days of the year. On cold nights, the pot came indoors. These are seedlings of a variety called ‘Evergreen’.
Planting Bunching Onions Outdoors in the Garden
If you want to grow bunching onions in the ground, plant the pot of seedlings as a unit, covering the stems with 1″ to 2″ of soil. With good soil preparation and careful monitoring, young seedlings can be transplanted into the garden at this stage, weather permitting.
Seeding directly into prepared garden soil is another option if you can monitor progress and keep pests away. Remove weeds when they’re small; onions’ roots can be damaged even with shallow cultivation. By the way, deer and rabbits don’t eat onions.
As the seedlings grow, occasionally hill up soil around the base of the plants to lengthen the white stems. Within about 2 months of seeding, the bunching onions are ready to pull as needed in the kitchen. Younger plants are especially delicate and tender as a garnish. If they’re spaced an inch apart, the seedlings won’t need to be thinned.
Non-bulbing onions are easier to pull from the soil than other types of green onions that have begun to form bulbs. That’s why I prefer growing Japanese bunching onions for green onions. If needed, use a narrow trowel or a butter knife to help pry them from the soil if you want to harvest the whole plant or if bulbs have started forming when using onion sets.
Negi Onions
Bunching onions traditionally are sown in cell packs with several seeds per cell. Later, they’re planted out without separating the seedlings, allowing them to grow and be harvested as a “bunch”. But, in order to grow “sustainable” bunching onions, they need to be grown separately from each other.
In the popular “Negi” method of growing bunching onions, seedlings are spaced farther apart from the beginning and hilled deeply over time. These scallions are older and larger than the ones I grow, resembling leeks.
Here’s the Sustainable Part
This is where bunching onions become sustainable bunching onions.
Instead of pulling out the entire plant when harvesting, insert a knife into the soil a few inches, making a cut through the stem 1/2″ to 2/3″ above the root system. By leaving the bottom of the stem and the roots intact, the plant will regenerate and give you another green onion after 2 or 3 weeks of favorable weather!
Experience will sharpen your aim, but whether the stem was cut too high or too low, it doesn’t matter. It’s all edible. If you removed the whole stem accidentally, just cut off the bottom 1/2″, with roots, and replant 2″ below ground. It’ll take longer to grow, but it probably will survive.
With some protection in colder climates, it’s possible to harvest mature bunching onions all winter long. That’s why I grew them in a cold frame. Just be sure to plant enough of them. Depending on the temperature, they might remain semi-dormant and not regrow until the soil warms up. And what a surprise to see them vigorously re-emerge in the spring to provide another year of harvests!
“Can I Plant Bunching Onions From the Store?”
Cut stems from the grocery store, later planted into a pot.
Sure can! Buy a bunch of green onions (as in the photo at the top), looking for those with clean white roots. Choose the stems you intend to use in cooking, and cut 1/2″ above the crown. Don’t let them dry out, and plant 2″ deep into a pot of lightly moist soil as soon as possible. Adding more soil later will lengthen the white part of the stem. Cut stems initially planted too deeply might exhaust themselves before reaching the light.
In the photo above, I cut these bunching onions over a period of a few days, and placed them in a clear plastic bag with 2 drops of water. Until a pot of soil had been prepared, the bag sat on the counter, in bright indirect light. You can see the older ones already sprouting. Growing onions in water, even short term, can turn them mushy and really smelly. That’s why planting them directly in soil is preferred.
Keep the pot moist and sunny, and you’ll see a green onion growing probably within 7 to 10 days during the growing season. In the middle of cold winter weather, though, keep the pot in a cool but sunny window indoors or in a cold frame. Soil that freezes could kill the root at this stage. Pick the entire plant or cut the stem when it has grown to the desired size.
Bottoms Up!
If you’re growing green onions from onion sets, this is one of the easiest crops to grow. Seedlings take a little more patience. Because they retain good flavor and substance for a long time, you can harvest what you need and let the rest of the bunching onions continue to grow. Sometimes, all I need is a single green leaf for a small omelet or a garnish.
Here’s to sustainability! Oh, and the reason why those ‘Nabechan’ bunching onions in Maryland failed after several years: contractors replacing the siding on the house trampled them to mush.
These were planted as onion sets in late winter, before starting seeds of bunching onions. They’ll be harvested as green onions or when they have small bulbs.