Tag Archive | kale

Starting Seeds for Cool Season Greens
 

Starting Seeds for Cool Season Greens 


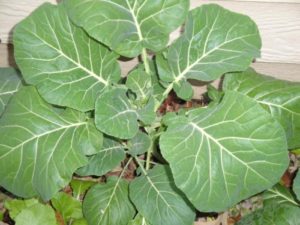
dinosaur kale, 7/18/19


The coldest part of winter has passed for most of us, and it’s time to start seeds for cool season greens. Late winter transitioning to spring is my favorite time of the year. That’s when I start seeds for early harvests. This article covers details for growing some of the early greens, particularly spinach and the brassicas. On Page 3 is a recipe for a veggie omelet, an easy way to get more greens into the diet.

If the garden were bare, I would have started seeds a few weeks ago. But the greens in the vegetable garden continue to offer harvests. Unfortunately, the “list of wants” from the seed catalog is far more extensive than the garden’s square footage can accommodate! It’s time for the last harvest of collards for soup; that’ll open up some space.

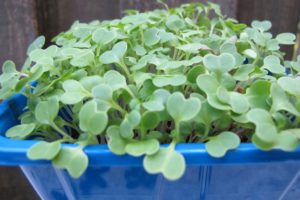
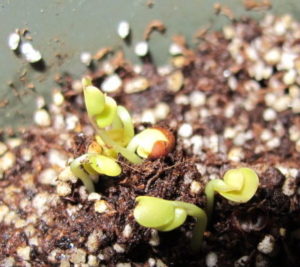
While we’re harvesting established cool season greens, I’ll start several new crops indoors. These plants will be plugged into the garden as space opens up. But the seedlings will not be kept in their little pots very long; this stresses the plants and causes them to bolt, or to flower prematurely. (Photo, above: dinosaur kale germinated at night; it will green up in the sunlight.)


The First of the Cool Season Greens: Spinach


spinach 'Monstrueux de Viroflay' in pot

Young spinach ‘Monstrueux de Viroflay’.


I would have sown spinach directly into the garden by now, but we’ve had a long run of chilly rain. The soil is so wet that it’s doubtful any seedlings would even be tempted to germinate. At this time of the year, pay close attention to the weather forecasts. Conditions could deviate considerably from the averages.

It’s not good to dig in soil this wet anyway. That would drive out air spaces and ruin the tilth of the soil by compacting it. 

As temperatures begin to moderate, slugs come out in force and will decimate any seedlings that dare to grow in this weather. Rain: good for slugs. Sluggo: bad for slugs! Organic Sluggo pellets attract and kill slugs and snails. This version of the product contains materials (iron phosphate) that add nutrients to the soil. Check the label, though; Sluggo has other products with added ingredients. The organic option is safe to use around the edibles.


Spinach From Seed Is Easy!

Spinach germinates readily, from 50°F up to the mid 70’s (soil temperature), as soon as the ground can be worked in late winter or early spring. For better chances of success, choose varieties that are disease resistant and slow-bolting. In well-prepared soil, spinach is one of the easiest crops to seed directly into the garden.

Prepare the bed by incorporating 2″ to 3″ of compost and/or aged manure into the top 5″ of soil. Spinach prefers soil pH near neutral, from 6.5 to 7.3. A soil test will indicate how much lime, if any, should be added to raise the pH.

For baby leaf harvest, sow the seeds thickly in a patch, about 1″ apart. For full-size leaves, space the seeds a few inches apart, with rows 8-10″ apart. Crowding the seeds too closely or poor soil will result in a disappointing crop.

‘Monstrueux de Viroflay’

There’s a wonderful variety called ‘Monstrueux de Viroflay’ (photos, above and below), a French heirloom dating to 1866. It grows very large for spinach, up to 20″ tall with 10″ leaves, and should be spaced several inches apart.

Viroflay, or Monster, as it is often called, is lower in oxalic acid, or oxalates, than other spinach varieties. It might be acceptable for people with health concerns that prohibit spinach consumption. Check with your doctor.

Keep the soil moist and add organic fertilizers, such as fish emulsion, Sea-Plus, or earthworm castings, every 2 weeks. In cold soil, however, liquid synthetic fertilizers high in nitrogen work better than the organics. Microbes in the soil break down organic material and make those nutrients available to plant roots. But microbes are dormant in cold soil, so they can’t perform this vital service. They’ll become more active as the soil warms up in late winter or early spring.


spinach seedlings

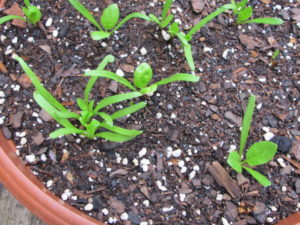
‘Monstrueux de Viroflay’ spinach seedlings.

Spinach Bowl

Another option is to sow seeds directly into a 14″ wide, 6″ deep bowl filled with fresh potting soil (photo, above). The pot has drainage holes. Portability allows me to bring the pot indoors on especially cold nights while the cool season greens are beginning to germinate. And moisture levels can be carefully monitored.

Since the sappy crooked pine tree that shaded the deck from afternoon sun has been cut down, conditions on the fenced-in deck are more favorable to growing vegetables in containers.

Fill the pot with potting soil to within an inch of the rim. Simply scatter seeds on the surface, a couple of inches apart for smaller varieties and a few inches apart for Viroflay. Cover with another 1/3″ to 1/2″ of soil. Water…and wait… Spinach’s two seed leaves, the cotyledons, are easily differentiated from other seedlings by their long narrow shape. Thin as necessary; you can eat the culls.

Don’t neglect fertilizing potted greens. Rain and irrigation quickly wash nitrogen out of the soil.


Harvesting Spinach
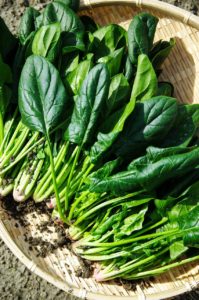
Spinach.

Harvesting the crowns begins within 4 or 5 weeks, depending on weather and soil fertility. Pick individual leaves at any age, allowing the central growing tip to continue producing new leaves. Or cut the entire plant at the soil line before flower buds begin to grow.

By sowing new crops of spinach every week or two, you’ll have continuous harvests of spinach, as long as the weather favors growth.

Spinach quickly bolts, or goes to flower, at temperatures above 75°. Dry or nutrient-poor soil stresses the plants. And spinach will flower prematurely if the plants are stressed by growing too close together.

Harvest the entire plant if you notice flower buds forming. Cutting off the flowers will not stimulate spinach to grow a new bunch of leaves. Instead, start more seeds.

Use spinach steamed as a side dish, or in sauces, soups, smoothies, salads, pasta dishes, or an omelet.


And Then the Brassicas


cool season greens grown as microgreens

These microgreens are mostly brassicas.


The Brassicaceae family is a huge group of edibles. It includes arugula, broccoli, Brussels sprouts, cabbage, cauliflower, collards, kale, komatsuna, mizuna, mustard greens, pac choi, radish, tatsoi, turnip, and others.

All members have similarly notched seed leaves, or cotyledons. Those are the first two heart-shaped leaves to emerge from the seeds (photo, above). Because the seed leaves are already formed inside the seed, the little plant can begin photosynthesizing—and feeding itself—immediately upon germination. True leaves, which develop after the seed leaves, are also similar for most of the cruciferous vegetables. That’s why it’s important to label your pots so you can distinguish “this” seedling from “this other similar looking” seedling.


Include On the Label:

  • the name of the crop (dinosaur kale)
  • the name of the cultivar (‘Black Magic’)
  • the date of sowing (brassicas germinate in less than a week if sown indoors)

Store leftover seeds in their original packets, and make sure the cultivar name is included on the label. Store in a cool, dry place, such as the refrigerator. Most seeds of cool season greens are viable for 2 years or so. If not already indicated, mark the year of purchase on the packet.

It’s helpful to keep a record of the varieties you’ve tried and liked or disliked. Include how you started the seeds (in 4″ pots or cell-packs, under lights, directly in the garden), the dates you seeded and transplanted, and the weather conditions. Include notes on what was successful and what wasn’t, and possible explanations. Did the seeds germinate and then keel over and die (damping-off disease)? Did critters eat your cool season greens as soon as they started growing? Should the seeds have been started earlier? Or later?

There are successes and failures in every gardener’s life. Being able to pinpoint the reasons for a disappointing crop will enable you to be more watchful or to try a different approach next time. Check with your local cooperative extension office, through state land-grant colleges and universities, for advice. Failure is a learning experience, not a reason to stop trying!


Damping-Off

Damping-off disease can appear soon after germination. Sometimes, diseased seedlings don’t even appear above the soil, looking as though the seeds didn’t sprout at all. The small seedling develops a narrowed brown spot on the stem. Then the top of the plant falls over, and the seedling dies. This is caused by several species of fungus, whose spores are in the air, in the soil, in the water, or on the seeds themselves.

Damping-off often accompanies:

  • poor air circulation
  • high humidity
  • crowding
  • low light
  • low temperatures
  • reusing old soil
  • and overwatering

Space the seeds farther apart, run a small fan nearby, water in the morning, and increase the temperature and light levels if they’re low.

The first time I used the organic biological fungicide called Actinovate, life became a bit sweeter. It is costly, but a much safer option than chemical fungicides. And, with the number of seedlings I grow each year, a wise investment. Make up a small amount of the solution when needed and apply from a spray bottle or a small watering can when sowing the seeds and as soon as the seeds germinate. Always exercise caution when using sprays, and read the labels.


Caterpillars on Cool Season Greens

When the weather warms up in mid- or late spring, you’ll notice butterflies and moths flying around your cool season greens. How nice, you might think. But those lovely insects are on a mission, and that mission is to find suitable plants on which to lay their eggs.


Most of the brassicas are targeted by the female:

  • Cabbage Moth (or Diamondback Moth)
  • Cabbage Looper
  • the velvety green Imported Cabbageworm (also called the Small White Butterfly or Cabbage White Butterfly—white with black markings). Look for them lined up on the leaf’s midrib.
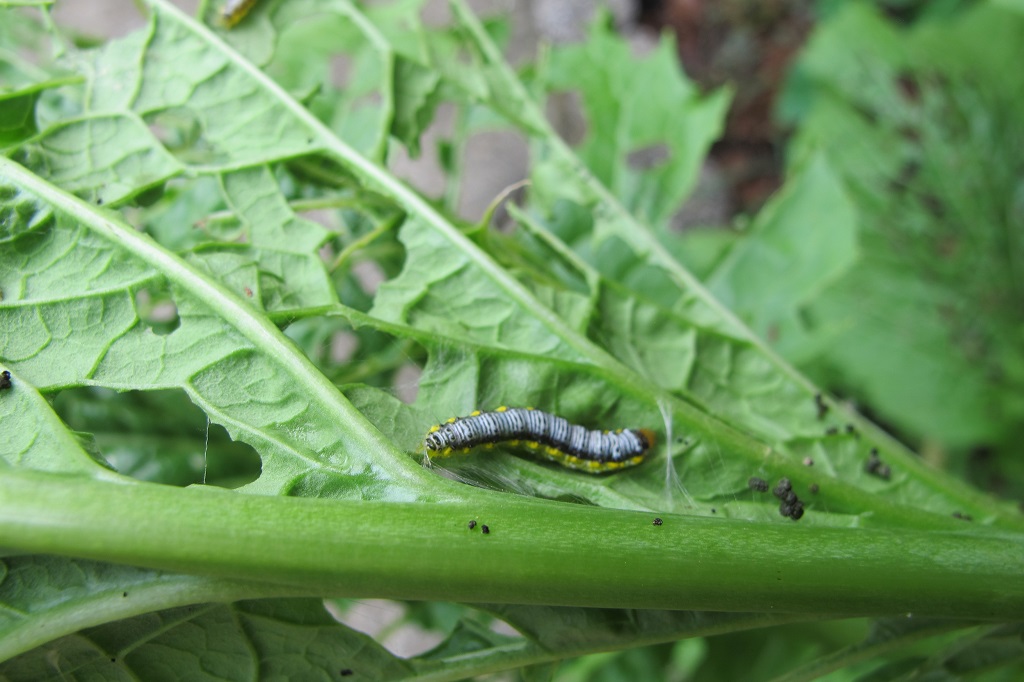
  • Cross-striped Cabbageworm (fine black stripes across the back, yellow stripe on the sides).
  • A few other species target particular brassicas or are limited geographically.

Here in my North Carolina garden, the 1¼” long Imported Cabbageworm has been the most commonly seen caterpillar on the brassicas. It is well-camouflaged in the green foliage. But for the past couple of years, populations of the Cross-striped Cabbageworm have been increasing. They’re especially pesky when lodged among the broccoli florets. Sometimes I don’t see them until I begin cutting the broccoli (just remove them). Inspecting the produce and spraying Bt regularly takes care of that.

Eggs hatch in a few days to a week, and immediately get to work chewing little holes and then bigger holes in your broccoli, kale, and other brassicas.
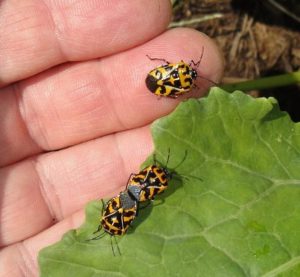
 

Harlequin bugs on cabbage


Another insect feeding on brassicas is the black and orange harlequin bug (photo, above). I squish them when I see them, although they’ll see you approaching them and will try to hide. They cause whitish blotches and distortions in the foliage.

Bacillus Thuringiensis (Bt)

As soon as you notice the white moths and butterflies flitting near the brassicas, it’s time to get the sprayer bottle ready. The imported cabbageworm is the larval stage of a butterfly and the one you’ll see in the daytime. The other caterpillars are moth larvae and are active at dusk or at night.

Mix up a solution of Bt, Bacillus thuringiensis, available from the garden center. Dipel and Thuricide are brand names for Bt. It doesn’t take long for these voracious little caterpillars to inflict considerable damage to your plants, so don’t delay.

Spray both the upper and lower surfaces of the foliage, occasionally agitating the solution. Begin spraying a few days after first seeing the moths, or certainly when you see holes appearing. Set the sprayer nozzle to a very fine spray; larger drops of water will bead off the waxy foliage. One or two drops of dish soap in the sprayer will help the solution stick to the foliage if you can’t get a fine spray.

It washes off in the rain, but any Bt clinging on the reverse (bottom leaf surface) might be enough for the current batch of caterpillars. Spray the brassicas every 5 to 10 days, as long as the insects are active.


sprayer


How Does Bt Work?

Bt is a naturally occurring bacterium that disrupts the caterpillar’s digestive system when ingested. The insects stop feeding immediately and die within a day or two. Spray as soon as you notice them because young caterpillars are more susceptible to Bt than older caterpillars.

Bt effectively rids the garden of moth and butterfly larvae, including swallowtails that eat parsley. Although they won’t bother your broccoli, black swallowtail larvae feed on parsley and its relatives in the Apiaceae family, including dill, cilantro, and bronze fennel.

The tradeoff? Fewer moths and butterflies, but more undamaged produce. I enjoy watching the black swallowtail butterflies, though, so I plant the large perennial bronze fennel for the caterpillars picked off the parsley and dill. Bt targets larvae of moths and butterflies, and nothing else.

After picking the crops, I sometimes let the caterpillars feast on the remains. Those caterpillars might feed another brood of baby birds or green anoles at that time of year. Once cold autumn weather has settled into the area, these caterpillars will no longer be around to bother the fall crop. Autumn is another delightful time to garden.

Bt is perfectly safe to use on edibles. Use up the diluted solution within a few days. Store Bt in a cool location out of the sun. Buy a small fresh bottle every couple of years, as this is a live organism, not a chemical.


Headings

Page 1: Starting Seeds for Cool Season Greens, The First of the Cool Season Greens: Spinach (Spinach from Seed Is Easy!, ‘Monstrueux de Viroflay’, Spinach Bowl, Harvesting Spinach), And Then the Brassicas (Include On the Label, Damping-Off, Caterpillars on Cool Season Greens, Bacillus Thuringiensis [Bt], How Does Bt Work?)

Page 2: Broccoli (Improve the Soil for Cool Season Greens, Harvesting and Side Shoots, When the Brassicas Bloom), Mini Broccoli (Early Sprouting Broccoli and ‘Spring Raab’, Broccoli ‘Happy Rich’, Who’s My Favorite?, Gai Lan and ‘De Cicco’, Sowing Seeds, Late Sprouting Broccoli)

Page 3: Dinosaur Kale, Hardening Off Cool Season Greens (Gradual Changes), Growing Plants Under Lights (More Tips Using Artificial Light), Getting More Cool Season Greens Into Your Diet, A Veggie Omelet Recipe Using Cool Season Greens
Return to the top

Collards Soup: Comfort Food for Winter


Collards Soup


Here’s a hearty, healthy soup that will chase away that winter chill. Collards Soup, with greens and herbs freshly picked from the vegetable garden, offers balance to the delectables that we enjoyed over the holidays. Served with a chunk of warmed bread and melting butter…perfect!

Remember Paul Simon’s lyrics in “Sounds of Silence”? “I turned my collards to the cold and damp…” No? He didn’t say that?


collards greens

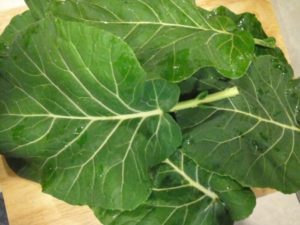
A few leaves of collards from the garden.


Ingredients


  • A few strips of bacon, cooked. Save 1 or 2 tablespoons of the fat (optional).
  • A large bunch of fresh collard greens, washed, with largest part of rib removed. Cut into bite-size pieces and set aside.
  • A handful of ‘Lacinato’ (dinosaur) kale or ‘Red Russian’ kale leaves, washed, with large rib removed. Cut into ribbons and add to the collards.
  • 2 tablespoons butter, and more for the bread
  • 3 tablespoons extra virgin olive oil
  • 1 large onion, chopped
  • 1 stalk celery, coarsely chopped
  • 2 or 3 medium garlic cloves, minced
  • A few white button mushrooms, sliced
  • 3 or 4 15-ounce cans of low salt chicken broth, plus 2 or 3 cans of water
  • 1 or 2 bay leaves
  • 2 or 3 teaspoons apple cider vinegar
  • 2 15-ounce cans of beans (cannellini, pinto, or others), drained and lightly rinsed
  • 1 15-ounce can diced or stewed tomatoes
  • 1/2 to 3/4 teaspoon dried thyme, or a bit more if using fresh
  • 1 to 1 1/2 teaspoons dried marjoram, or 2 teaspoons fresh. Substitute Italian oregano if preferred, or use a combination. Add more herbs if desired.
  • 3 tablespoons or a small handful fresh Italian (flat-leaf) parsley, coarsely chopped
  • 2 to 3 cups cooked (al dente) enriched Barilla pasta (extra protein, Omega-3’s, fiber), such as elbows or mini farfalle
  • Salt and pepper 
  • Grated Romano cheese


collards greens cooking

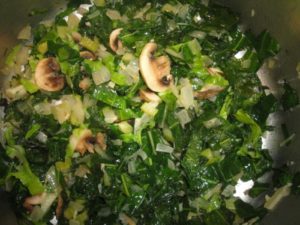
Bright green collards, ready for the broth.


The Process


  • Cook the bacon, reserving some of the fat. Set aside.
  • In a large stockpot, heat butter and olive oil.
  • Add onion and celery. Cook at medium heat, stirring, until almost tender.
  • Add garlic. Cook for a few minutes, stirring. (Never brown the garlic.)
  • Add collards, kale, mushrooms, and some bacon fat, if desired. Cook for a few minutes, stirring, until they turn bright green.
  • Add chicken broth, water, vinegar, bay leaf, and crumbled bacon. Raise heat to a boil, then turn down to a low simmer for 15-20 minutes. Stir occasionally.
  • Add beans and simmer for 10 minutes.
  • Add tomatoes and thyme, and simmer, stirring occasionally, for 10 minutes.
  • Add marjoram and parsley, and simmer for another 5 minutes.
  • Add cooked pasta, heat, and stir.
  • Salt and pepper to taste.
  • Done! Now, serve with grated Romano cheese and your favorite bread. This will make about 8 servings. Add more chicken stock and water if needed.


You Can Grow Them!


collards

Collards in the garden, late December.


Collards and kale are among the easiest crops to grow in the vegetable garden. As members of the family Brassicaceae, these plants are among the most concentrated sources of vitamins, minerals, and phytonutrients in the plant kingdom! Just one or two leaves added to omelets, pizza, store-bought soup, and rice or pasta dishes will add significantly to the meal’s nutrient content.

A few collards and several kale plants (dinosaur and ‘Red Russian’), among other crops grown through the winter, supply us with enough greens to pick almost every day. They’re super cold-hardy, and get covered with clear plastic when the temperature plummets to the low 20’s F.


On the Subject of Bacon


Since there are few occasions in this blog when the subject of bacon comes up, let me add that December 30 is National Bacon Day. We have Hernando de Soto (c. 1500-1542, Spanish explorer, looking for gold and a passage to China), to credit, or to blame, for introducing pigs to the Americas. In 1539, he brought 13 pigs to the southeastern U.S., which multiplied to a herd of 700 within 3 years. De Soto died of fever, and his body was laid to rest in the Mississippi River, which he and his crew were the first Europeans to discover.

A few morsels: About 10,000 years ago, wild pigs were domesticated in Central Asia…just under 10% of the pig is processed into bacon…just over half of American households have bacon in the refrigerator.

An occasional indulgence in foods that are generally perceived to be not so healthy is more than compensated by increasing the proportions of greens and vegetables in our diets. So, I will enjoy that bacon and a piece of good bread, guilt-free, every now and then, or these buttery biscuits that are so easy to make from scratch. Hope you enjoy this one! Happy New Year!


collards soup

Collards soup is ready. Enjoy!


Return to the top

Time To Think About Fall Greens and Vegetables


Ready To Sow Fall Greens and Vegetables?


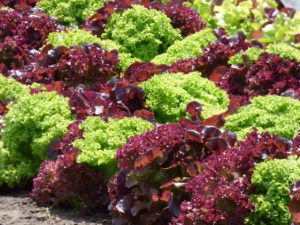
Lettuce Red Lettuce Green Lettuce - PMAnguita / Pixabay

Several varieties of head lettuces.


It’s hard to believe it’s already time to start seeds for fall greens and vegetables. I’ve been putting it off because of the hot weather we’ve been having. But, unless I want to buy transplants, seeds will have to be started soon. You folks up north probably have sown seeds for the broccoli and cauliflower by now, and certainly the Brussels Sprouts.

Here in North Carolina, fall seems a long time away, but in order for us to harvest those fall greens, we need to start sowing seeds now. Remember to locate your fall/winter garden where it will receive adequate sunlight. And, of course, I’ll sow successive crops through the rest of summer and early fall, as space permits.

Because we have a long growing season in the Carolinas, we can squeeze in another crop of summer vegetables. Zucchini, summer squash, cucumber, and beans can be sown again. But with the encroaching canopy of the trees on the berm, south of the garden, I’ll be planting only cool-season vegetables. The ‘Diva’ cucumber is loaded with fruits. And I will wait patiently for every last fruit to ripen on the tomatoes and peppers.

(***Update***: A few days ago, a large and dangerously crooked pine tree was taken down, and now there’s more afternoon sun for the tomatoes and peppers. More sun also gives us opportunities to grow containerized vegetables and fall greens inside the fence, protected from deer.)


If They Can’t Take the Heat


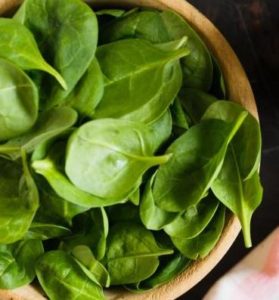
spinach in a bowl

Spinach.

Temperatures are still too hot to sow lettuce and spinach outdoors, so I’ll wait another week or two. It’s still in the 90’s! They can be started indoors, in air-conditioned space, if needed.

Check the temperature of the soil before sowing seeds in the garden. Direct sun beating down on the dark soil surface can raise the temperature too high and dry it out very quickly. Look for one of those “Easy Tunnels”, or fabricate something yourself, to partially shade the soil and the tender young seedlings. You can purchase knitted shade fabric, made from black polyethylene, from mail order suppliers. In the southern states, 30-50% shading should work during the late summer months. This could lower the temperature by 10° or 15°F. Keep the soil surface moist to ensure good germination and to cool it down.

The best germination occurs between 60° and 75°F for lettuce and spinach. I usually put transplants into the garden instead of sowing seeds directly because hungry slugs, snails, and cutworms find tiny seedlings very tender and delicious.

Organic Sluggo will bait the mollusks (slugs and snails) to their deaths, and Bacillus thuringiensis (Bt), sprayed on the seedlings, will kill cutworms. Slug baits made with iron phosphate, such as organic Sluggo, are far less harmful to pets and to people than products containing metaldehyde, so be sure to read the labels.

One way to gather up a whole lot of slugs is to place a board, maybe 1′ x 2′, over damp soil. Go out and check the underside early the next morning, old knife in hand, and cut them quickly in half or squish them any way you choose…but, don’t use salt in the garden!


Choosing Varieties of Fall Greens


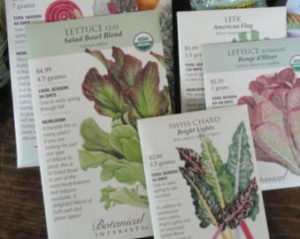
botanical interests seeds 

Sowing seeds for fall greens and vegetables, which prefer cool weather, can be tricky in July’s heat. Look online or through seed catalogs for lettuce, spinach, broccoli, and other crops that are described as being heat tolerant varieties. Yes, all lettuce and broccoli varieties prefer cool temperatures, but some will take warmer or colder weather than others as they form heads. If you’re buying transplants, ask the grower.

Either way, plan to provide some sort of device that will lower the temperature during these last hot weeks of summer. For later harvests, I’ll sow seeds that grow cool and mature in cold weather, and they will not need the shade fabric. Plants grow better with more hours of direct sun as the temperatures cool down.

Check with your local agricultural extension office for recommendations or for a planting calendar.


Planting Young Transplants


Soil

turned soil

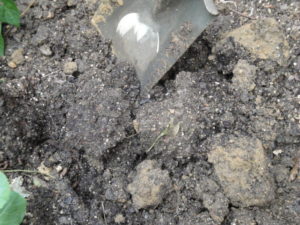
Rich, dark soil with lighter brown clumps of clay, before incorporating.

Starting a vegetable garden with soil that has not been conditioned could result in a mediocre or poor harvest. Fall greens grow faster and larger in well-prepared soil.

Garden soil for these crops needs additional organic matter (compost, composted cow manure), drainage material (pine fines, coarse sand), and sometimes lime. A soil test will indicate the need for lime.

Our fall greens are being planted in soil that has been worked for 6 years, so it’s in very good condition. I will, however, continue to add compost, fertilizer, or manure to the garden.

When digging soil, bring some of the lower-level clay up to the surface, and turn under the richer topsoil 4″ to 6″ deep (a few inches deeper for tomatoes, in spring). Over time, the clay soil on the surface will improve as mulch decomposes or when compost is added as a top dressing. Here you can see clumps of light brown clay that were brought to the surface of the soil (photo, above) before they were broken up.


Roots

Growers use pots and market packs of various sizes, including small 9-cell packs, 4-cell packs, 2″ peat pots and 4″ plastic pots. The smaller the root ball, the more carefully you will have to monitor the care.


An important step before planting is to rough up the outside of the root ball (photos, above). This slightly injures the inner root layer called the pericycle, stimulating the plant to quickly send out new lateral roots into the soil. Be careful not to so severely damage the root system that the plant can’t supply water to the leaves on a hot, sunny day. Do this for every plant that is about to be repotted or planted into the garden.

A root ball that’s tightly packed with roots can be shallowly scored down the sides in a few places. Use a knife, a rock, or even a twig. Or use a cultivator to pry out some of the roots.


To Bury or Not To Bury?

broccoli

Broccoli ‘Arcadia’ from 4-cell-pack.

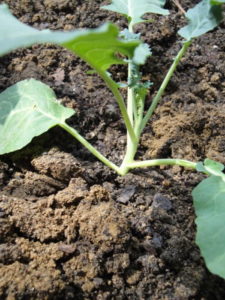
Most young vegetable transplants can be placed an inch deeper into the soil, or up to the bottom leaves. If the plant is more mature and has developed a somewhat woody or tough stem, plant it at the same level it was growing in the pot. But always, if possible, choose younger transplants.

Older plants can be stressed by being potbound or underfertilized, and might go to flower or head up prematurely, yielding undersized harvests. Young plants will require more time to grow, but they will give you the largest heads of lettuce, broccoli, cauliflower, and cabbage. If in doubt, plant the top of the root ball level with the soil surface.

Firm the soil around the roots and stem using medium pressure. Humidity in the soil between the soil particles will encourage the stem to grow fine roots without interference from tightly packed soil. Watering the plant will help the soil settle in around the root system and provide much-needed moisture.


broccoli in winter

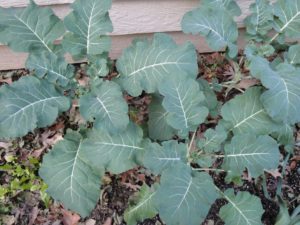
Broccoli ‘Arcadia’ in winter.


These are same broccoli ‘Arcadia’ plants photographed in late December (photo, above). Trees on the berm cast too much shade until leaves dropped off, delaying harvest. When the garden gets more sun, heads should form in mid to late winter.


Fertilizer

Planting fall greens and vegetables into late September, I mix a handful of granular organic vegetable fertilizer into the planting area. These crops grow beautifully with adequate nitrogen, so I will soon use higher nitrogen fish emulsion. Another application of fish emulsion will be made every 2-3 weeks through November, or every 2 weeks for potted greens.

mustard seedlings

Mustard seedlings in the garden.

Microbes in the soil break down organic compounds and make nutrients available to the roots. But, as the weather cools significantly, microbial activity slows down. I’ll use synthetic soluble fertilizers a few times in winter to keep the plants growing.

Greens and vegetables will grow all winter here, with some protection during very cold weather. This is worth the effort, since I can pick beautifully fresh kale and spinach for the Sunday omelet, or a big bunch of collards for collards soup.

Mustard ‘Florida Broadleaf’ was sown in late September, and germinated a few days later. The thinned seedlings will be used in soup, salad, or an omelet. Spinach sprouted about a week later.


Arugula


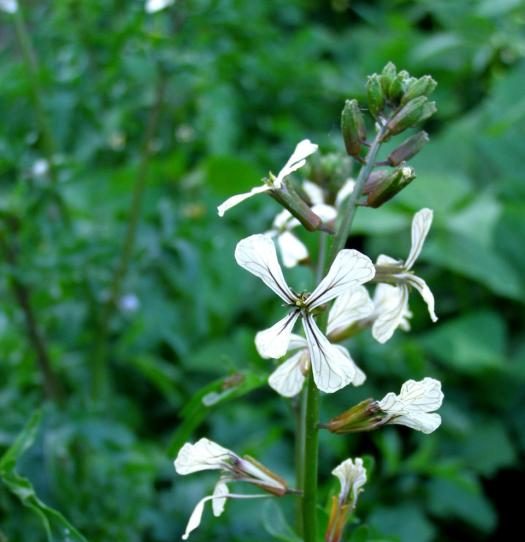
Love, love arugula! A forkful of salad greens that has a piece of arugula in it…mmm… The variety I prefer is ‘Astro’. It’s not as hot as the wild types, and it tolerates warmer temperatures. Arugula will self-sow if it likes where it’s growing. Just let it flower and set seed. The papery seed capsules release the seeds, which germinate within 2 weeks, during favorable weather, near the mother plant.

It grows well in morning sun, during warm weather, and in moist, rich soil. Those who are more adventurous than I might enjoy growing the hotter ‘Wasabi’. Arugula doesn’t look like a member of the family Brassicaceae, but it, too, is in that famous family.

You might have seen the term “cruciferous” being used when describing members of the family Brassicaceae. It refers to the flowers of these plants, which have 4 petals arranged in the shape of a crucifix. The terms brassica, cole crops, and crucifer (or cruciferous) refer to the same plants.


Broccoli


One of the most nutrient-rich foods, broccoli is a must in my garden. Nutrients include protein, Vitamins A, several B’s, C, K, minerals, fiber, and their famous phytonutrients. To say that we eat broccoli in one form or another every 2 or 3 days is not an exaggeration. Just ask Mother.

broccoli crowns

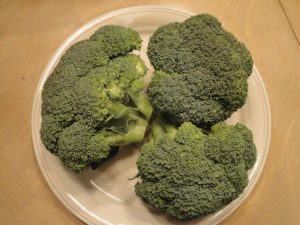
Broccoli crowns.

Heat and cold tolerance ranges from poor to excellent, depending on the cultivar. In this zone 7b area, ‘Imperial’ can be sown in July or planted as transplants from July through August; Johnny’s Selected Seeds’ catalog rates it “excellent” in heat tolerance for broccoli. Normally, broccoli grows best in cool weather, but you can extend the harvest by choosing 2 or 3 varieties that are suited to the weather at different times of the year.

The variety that will see us through the winter is cold-hardy ‘Arcadia’, which grows a large number of side shoots once the main head has been harvested. For that reason, don’t cut off too many leaves when you do harvest broccoli, because each of those leaves could be topped by another side shoot.

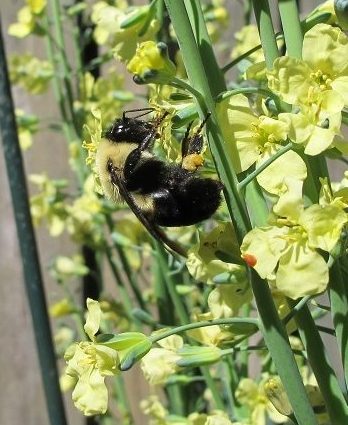
By the way, tender broccoli leaves are edible as well. Add them to soup, a smoothie, pasta, or a stir-fry. After the harvest is done, I keep the plants in the garden to flower. Bumble bees and other early risers are fond of this bounty, and the flowers are quite pretty!


broccoli flowers and bumblebee

Bumble bee visiting broccoli flowers in early spring.


Miniature Broccoli ‘Happy Rich’


broccoli happy rich, delicious fall greens

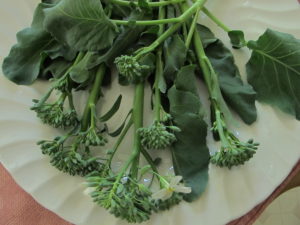
Broccoli ‘Happy Rich’.

I’ve grown ‘Happy Rich’ for many years. This plant grows a small head at the end of a stem, harvested ideally before the white flowers open. Each of those little green beads is a flower bud, and even if the buds start opening when the stems are picked, they’re still going to the kitchen.

The head will never get to the same size as regular broccoli, but the flavor is superb. Once the little heads have been cut off with 5″ to 8″ of the stem, the plant will branch out and grow more little heads. The stem, the leaves, and the head are edible—steamed, stir-fried, or added to soup or a pasta dish.

Two plants have been growing in the garden since the spring, and they don’t look very happy. It’s been a hot summer, so I didn’t expect them to survive this long.


Bt


caterpillars on broccoli

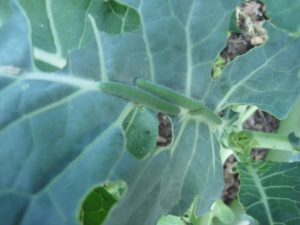
Cabbage worms on broccoli.


The white cabbage moths visit frequently—more frequently, alas, than I do with the bottle of Bt.

Bt is an abbreviation for Bacillus thuringiensis, a naturally-occurring bacterium that kills caterpillars of moths and butterflies (but not sawflies). Before you groan “no chemicals”, Bt is used by organic growers and it’s been around for decades. Perfectly safe, even for pollinators, and not a chemical.

All brassica crops are targeted by a few kinds of moths, which lay eggs on the leaves. They soon hatch into voraciously hungry and well-camouflaged caterpillars. After consuming some of the Bt, they stop feeding and die shortly thereafter. Young caterpillars are more easily controlled than older caterpillars. Thuricide and Dipel are two brand-name products with Bt as the active ingredient.


Return to the top

Page 1: Ready To Sow Fall Greens and Vegetables?, If They Can’t Take the Heat (Choosing Varieties of Fall Greens), Planting Young Transplants (Soil, Roots, To Bury Or Not To Bury?, Fertilizer), Arugula, Broccoli, and Miniature Broccoli ‘Happy Rich’ (Bt)

Page 2: Brussels Sprouts, Cabbage, Cauliflower, Collards, Kale, Lettuce, Nutritional Considerations of Fall Greens (Where’s the Beef?), and Only the Beginning