Tag Archive | deer

Seedlings For Your Garden: 12 Tips


2022


seedlings, zucchini


Starting Seedlings For Your Garden


Busy spring! This lengthy article focuses on starting and caring for seedlings and getting them established in the garden. If I’m not working on the seedlings, I’m working in the gardens, creating new beds and expanding those started last fall and winter. Winter weather was delightfully mild to allow planting right through the cold season. The weeds and I have come to an understanding, and in the next article, I’ll tell you how in “Patches for Pollinators”.

Foremost on the agenda has been starting plants to sell at our local Elkin Farmers’ Market. It’s been a challenge this year, keeping plants in good condition with high heat, heavy humidity, and frequent rainstorms. If I had a climate-controlled greenhouse, there might have been fewer losses. But, for the most part, my company, Wellspring Gardens, is producing more seedlings than I can sell at the market.

Some of that overproduction is destined for the vegetable gardens. It will yield small harvests of produce to sell at the market in addition to what’s needed in the kitchen. This is new territory for me, adding produce to the plants offered at the farmers’ market.

I might even consider canning, which I’ve never done…but let’s not get ahead of ourselves. That would be helpful, though, considering the rapidly rising prices at the grocery store. For that reason alone—the impact of rampant inflation on our wallets—it’s wise to learn how to grow at least a few vegetables.
 

sun's path

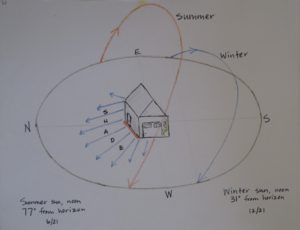
The sun’s path across the sky, Charlotte NC.


Watching how the sun tracks across the sky from month to month reveals good spots for the sun worshipers and areas where leafy greens should thrive in partial sun. This is my first summer in this house. The massive oak trees create shifting shade patterns that cause me to periodically rethink the plans.

So, let’s begin!


12 Tips For Starting Seeds


1. Start with clean materials for seedlings.
 

pepper 'Glow' seeds and cell pack

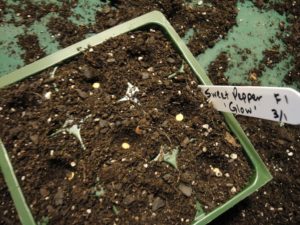
Sweet pepper ‘Glow’, started in 9-cell packs.


This calls for packaged seedling mix or fine-grained potting soil. Don’t use “dirt” from the garden, with its pathogens, insects, weed seeds, and worms that disrupt soil structure around tiny roots. In addition to the unknowns lurking in garden soil, its high clay content causes drainage issues in containers.

Soil used previously for potted plants is not a good medium for your seedlings. It’s often depleted of nutrients, might contain pathogens, and the organic matter has partially decomposed. If it’s only one season old, it’s probably safe for potted annuals, when mixed with fresh potting soil, or incorporated into the backfill for that new sourwood tree. Or simply throw it under the shrubs or into the compost pile.

Because seedlings are susceptible to soil-borne diseases, play it safe and start with pasteurized bagged seedling mix or potting soil. This, however, doesn’t guarantee a successful outcome, as many disease spores are air-borne. But we can increase the odds of success by using clean materials.

When reusing cell packs, pots, and flats for seeding, wash them in a 10% bleach solution, and rinse well before proceeding. Don’t smoke around plants, and wash hands thoroughly before working with them. Tobacco and other plants in the nightshade family (Solanaceae, including tomato, pepper, eggplant, and potato) can fall prey to the same disease organisms. Spores can transfer from tobacco products to your hands to the plants.


Pasteurizing Potting Soil

For bagged soil that’s questionable, you can pasteurize it in the oven. Don’t heat soil that contains timed release fertilizers. Use an oven-safe covered pot or baking dish, wet the soil, and heat the oven to 200°F. When the soil registers 140° on a meat thermometer, lower the oven temperature and maintain soil at that temperature for 30 minutes. This kills most pathogens. Wait for it to dry somewhat and to cool thoroughly before using. Various websites recommend different temperature levels from 140° to 300°. At the high end, beneficial microbes are killed off as well.

Let it cool down outdoors. Considering the pervasive “earthy” odor coming from hot soil, you might prefer buying a new bag of seedling mix or accept a small risk with the open bag in the garage.

Another method of pasteurizing (not sterilizing) soil is to place a heat-resistant container of soil in a black plastic bag. Place the bag in a sunny place outdoors on a warm day, and let the sun do the work for you. This is called solarization, and can raise the temperature inside the bag to 140-160°F. To prevent damage to the beneficial microbes, take the temperature, and maintain it at 140° for 30 minutes, opening the bag a bit to prevent overheating.

Most bagged potting soils and seedling mixes already have been heat-treated to eliminate pests. Close the bag securely and store in a cool dark place. The last and only time I pasteurized soil was nearly 50 years ago because that’s what the experts recommended.


2. Grow disease resistant varieties…


While fungicide and bactericide formulations—both organic and conventional—are available, I’d rather grow disease resistant varieties and not rely on spraying. Keep in mind that resistance is not 100% effective, particularly when plants are exposed to stressful weather or cultural conditions.

Certain varieties are more flavorful than others, but all well-grown fruits and vegetables from your own garden taste better than those purchased from grocery stores. Picked when vine-ripened perfect, anything coming from the garden will be superior to what’s found elsewhere except, perhaps, at farmers’ markets and farm stands. Freshly picked produce also has the highest nutrient content.

Digging in the garden is great exercise; proceed slowly at first. Working outside in nature feels good, and self-sufficiency is never amiss. A few steps from the back door gathering a green onion, spinach, dinosaur kale, and a little ripe sweet pepper for the veggie omelet is more rewarding than I can describe. You’ll see!

Those are just a few of the many benefits of growing our own vegetables. Using disease resistant varieties, if available, makes the job so much easier. Many new gardeners gave up after having suffered the disappointment of losing an entire crop to early blight or bacterial leaf spot. And we also have to deal with deer, rabbits, and insects!

Although this article concentrates primarily on edibles, flowering plants also have their own set of disease organisms. Again, look for resistant varieties, grow them in conditions that don’t favor infection, and look for remedies at the garden center.


…Especially Tomato Seedlings

tomato disease septoria?

Disease beginning on ‘Rutgers’ tomato.

Tomatoes and peppers, two of the most popular crops for home vegetable gardens, are vulnerable to many diseases. They’re caused by fungal, bacterial, or viral pathogens. In some areas, nematodes also can be a problem. Usually, we can harvest some fruits before disease claims them, but resistant plants last longer in the garden. Plants infected with viruses should be removed and destroyed. For fungal and bacterial pathogens, products at garden centers will help. Always read the labels.

Tomato diseases include Alternaria stem canker, early blight, late blight (Phytophthora; very few varieties are resistant to this one), Fusarium wilt, grey leaf spot, leaf mold, tobacco mosaic virus, tomato mosaic virus, tomato spotted wilt virus, and Verticillium wilt. Catalog listings use initials to indicate disease resistance. For tomatoes, AS, EB, LB, F, GLS, LM, TMV, ToMV, TSWV, and V, respectively, represent those diseases.

Tomatoes are weedy plants and normally produce good crops, despite many organisms that target them. Peppers are susceptible to several races of bacterial leaf spot, and basil to basil downy mildew. Some zinnias are plagued by powdery mildew. Weather conditions, such as high humidity and frequent rain, exacerbate these disease problems.

Most hybrid (or “F1”) tomatoes have some resistance to one or more pathogens, but not to all of them. ‘Big Beef Plus’ is resistant to a wide variety of diseases. ‘Damsel’ and ‘Defiant PhR’ are resistant to late blight. Hybrid seeds carry a higher price than open pollinated varieties due to the cost of research that developed them and the extra steps needed to produce hybrid seeds each year.

It’s so hot out there!
 

shading tomato flowers


If you live in a hot climate, look for tomato varieties that have been bred to produce better at high temperatures. The pollen in tomatoes and peppers, and others, can die at high temperatures. While these plants are comfortable at 65-80°F, pollen dies above 88°, 90°, or 92°, depending on the cultivar. No pollination = no fruits! A reference to “heat” or to the “south” in the plant’s variety name indicates its higher tolerance for heat.

Researchers are investigating thermo-tolerant genetics in wild tomato species (Solanum pimpinellifolium) and incorporating them in tomato breeding programs.

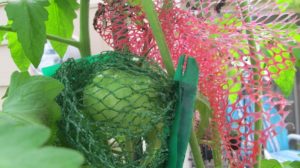
One trick to preserve viable pollen is lightly shading the plant in the hot afternoon hours. Attach shade fabric—a black woven mesh—to a support over and on the west side of the tomato or pepper plants. This provides a decrease of up to several degrees in hot climates or temporarily during a heat wave. In the photo, above, mesh bags from the grocery store protect fruits from squirrels and sun scald, and lightly shade new flowers and their pollen from high heat.

The young ‘Estiva’ tomato plants (“estiva” refers to summer), a hybrid bred for heat tolerance and great taste, lost most of their diseased bottom leaves in heavy rains, but those little fruits are still growing! I’ll plant them out this weekend, after the temperatures drop well below the 108° heat index value we have now. Recent weather has been in the record-breaking mid- to high 90’s F, with high humidity. Not my favorite conditions to dig in the garden…so I don’t.  I was not bred for heat tolerance!

***Update***: ‘Estiva’ tomatoes endured this hot summer and produced fruits past the first fall frosts. I covered them on chilly nights to ripen the last of the fruits. These were among the last tomatoes to succumb to the cold, in mid-November. Autumn 2022

A Few More Tomato Tips

Your best defense against tomato disease, in addition to growing disease resistant varieties, includes these tips:

  • Stake them. Tall indeterminate types need a 6-8′ tall stake, taller for some.
  • Space them farther apart, at least 3½-4′.
  • Thin the vines to 3 or 4 main stems by removing excess suckers.
  • Remove leaves on the bottom 12″ of the plants after they’ve become established.
  • Locate them where a breeze blows through the garden. These first 5 tips address increasing air circulation around and through the tomato plants.
  • Give them lots of direct sun—a minimum of 7 or 8 hours. The more sun they receive, the shorter the window of opportunity for pathogens to germinate on damp leaf surfaces.
  • Mulch the soil under the plants to prevent disease spores lying dormant in the soil from splashing onto and infecting the foliage. More on Page 4.
  • Water in the morning to early afternoon so all foliage is dry going into the night. Try to keep the foliage dry at all times and avoid handling wet foliage.
  • Water established plants heavily (1½”/week) when needed, but avoid giving little sips every day. Young seedlings need more frequent watering until their root systems expand.
  • Clip off leaves that show early symptoms (yellowing, spotting), and dip your pruners in alcohol when moving from plant to plant.
  • Don’t smoke near the garden, and wash hands thoroughly before working with plants.
  • Rotate your crops. Don’t plant a member of the Solanaceae family where any members have grown in the past 3-4 years. There’s more about crop rotation on Page 4.

All plants grown with good soil preparation, good air circulation, proper watering techniques, adequate sun, and appropriate fertilization are less stressed. Less stress equates to lower infection rates.

Growing Heirloom Seedlings


Heirloom tomatoes are always in demand because of their exceptionally good flavor. Heirlooms are open pollinated, which means gardeners can save seeds from fully ripened fruits each year for the next season’s garden. Because they’re not F1 hybrids but have been breeding true, for the most part, for many decades, heirlooms retain their traits from one generation to the next.

These varieties, however, don’t have much built-in disease resistance. Nevertheless, I’m growing a few heirlooms, and spacing them 4′ apart for improved air circulation. We’ll see what happens.

Commercially grown tomatoes must be able to survive long distance transportation and handling without damage. They’re picked early, when green or first showing color. Varieties of these tomatoes have skins that normally are tougher.

Heirloom tomatoes have more desirable thinner skins and, therefore, travel poorly. So, you won’t see them in grocery stores unless those stores buy from local farms. Heirloom tomatoes from the grocery store might cost $5.00/lb. or more! So, yes, it is worth growing a couple of heirloom tomato plants in our gardens.

A few prolonged and heavy rainy periods this spring almost wiped out certain tomato varieties, namely ‘Carmello’, ‘Brandywine’, and ‘German Johnson’. I still have a few that show less damage than others. ‘Black Krim’ and ‘Cherokee Purple’ are doing fairly well, although they are heirlooms. Most of the remaining plants will be set in the garden. There’s usually a breeze blowing through the property, and by spacing them appropriately, I should get plenty of fruits.


Basil Downy Mildew
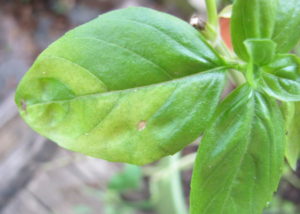
 

basil downy mildew

First symptom of BDM: yellow blotches between the main veins.


Although this dreaded disease targets only basil, it hasn’t appeared yet this year. But I’m prepared.

Last year, I grew ‘Rutgers Obsession DMR’ (DMR = Downy Mildew Resistant), an acceptable substitute for our beloved ‘Genovese’ and other susceptible sweet basils. Last year’s ‘Obsession’ did not develop any basil downy mildew (BDM)—not one speck—although wet and humid weather presented a worthy challenge. Other basil varieties in the ground or in pots succumbed to the disease within a week of infection…even young seedlings.

This year, I’m growing ‘Rutgers Obsession DMR’ and also ‘Rutgers Devotion DMR’ outside all summer. In addition, I’m seeding the old favorites, including ‘Genovese’, ‘Italian Large Leaf’, Thai basil ‘Siam Queen’, ‘Marseillais Dwarf’, and ‘Tuscany’, a lettuce-leaf basil. A few non-resistant basil plants will come indoors at night when warranted, as described below. But I’ll stop seeding susceptible varieties, except for a few pots, and concentrate on the resistant ones for the farmers’ market if the disease appears in the neighborhood.

Several other BDM resistant varieties can be purchased as seeds or as started plants.

Avoid High Humidity
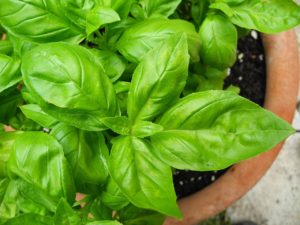
basil seedlings in clay pot

Healthy sweet basil, in a pot.

If you want to grow your favorite basil varieties that are not resistant to BDM, there is a way to prevent a total loss.

BDM spores move up from the south on the breeze or on infected plants shipped into the area. The spores don’t overwinter in cold climates. If spores land on a susceptible variety, they need a relative humidity above 80-85% for a couple of hours in order to germinate.

Even during pleasant weather, the relative humidity can reach 90% or higher in the 2-3 hours around dawn. That’s when the temperature is usually the coolest and, therefore, the relative humidity is the highest.

When plants show early symptoms of BDM, remove the affected leaves. Take potted basil plants indoors for the night, every night. Indoor conditions never reach those high humidity levels, so you can still grow your preferred basil varieties successfully with a little effort. Remember to place the plants back outdoors after the sun has been up for a couple of hours.

Follow this regimen during rainy weather, although the plants might need to spend a day or two inside. Find the brightest spot to keep them during their temporary stay indoors. If possible, provide some artificial light. Unless it’s wilting, avoid watering basil indoors. Less sunlight means the plant won’t be photosynthesizing optimally or using much water, and wet soil can initiate root rot.


Headings

Page 1: 1. Start with clean materials for seedlings. (Pasteurizing Potting Soil), 2. Grow disease resistant varieties… (…Especially Tomato Seedlings, It’s so hot out there!, A Few More Tomato Tips, Growing Heirloom Seedlings, Basil Downy Mildew, Avoid High Humidity)

Page 2: 3. Timing is important for seedlings. (The Fall Growing Season, Keeping Records, The Cooperative Extension Service, Starting Seedlings Outdoors, Don’t Start Seedlings Too Early, Cool Season Crops, Extending the Growing Season, Seedlings Transplanted Into Bigger Pots, Bunching Onions, The Brassicas, Brassicas In My Garden, Lettuce), 4. Is the temperature suitable for seedlings? (Miniature Incandescent Lights For Warmth, Water Temperature)

Page 3: 5. Start seedlings in small batches. (My Simple Infrastructure), 6. Seedlings need strong light. (Growing Seedlings Under Shop Lights), 7. Cull the weaklings and anomalies. 8. Prevent damping-off disease from killing your seedlings. (Actinovate), 9. Seedlings and plants need fertilizer. (The Elements, Read the Label)

Page 4: 10. Prepare the soil for your transplants. (Start With Good Drainage, Air Pore Space, Gypsum and Lime, Add Nutrient-Rich Amendments, Bury It), 11. Try succession planting for maximum yield. (Crop Rotation, Mulch), 12. Stop the pests before they ruin your garden. (Slugs and Snails, Larvae of Moths and Butterflies, Spider Mites and Thrips, Deer and Rabbits), Concluding
Return to the top of Page 1

Daffodils and Birdsong: The Signs of Spring


2020


cherry trees and daffodils for early spring color

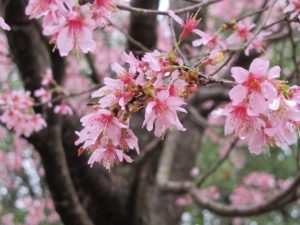
These cherry trees started blooming in January.


Warming Up: The First Daffodils


Early Daffodils

Around the corner, white daffodils bloomed incredibly early—on New Year’s Day! A neighbor’s hellebore, or Lenten rose, was in full flower at the same time, and the local cherry trees (photo, above) have been covered in pink for weeks starting in January. Forsythias are beginning to flower, and the bulbs are coming up thick and healthy after all this rain.


yellow daffodils, cane creek park

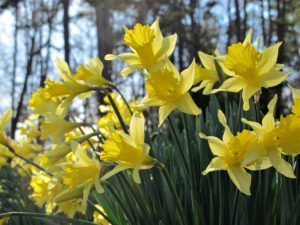
Daffodils in February, Cane Creek Park, Waxhaw NC.


At some point in the early months of the year, seasonal signals indicate the coming of warmer weather to this USDA zone 7b (borderline 8a) area. Flowers popped open this morning that weren’t there yesterday. The grass is greener. Songbirds are more vocal than they were last month. And on blueberries and other shrubs, leaf and flower buds are plumping up, preparing to push those bud scales aside. Mother Nature puts on quite a show in spring, my favorite season.

Maybe there are other indicators that you look for in your landscape. First snake sighting? Migrating birds flying north? Moths flitting around the porch light at night?

The National Oceanic and Atmospheric Administration (the National Weather Service) predicts a greater chance for above normal temperatures over the next 3 months (spring, 2020). This prediction is for the southwest U.S., across the south, and partway up the Atlantic coast. Northern Alaska has a high probability of higher than normal temperatures. Check NOAA’s map for your region’s long-term temperature and precipitation forecasts.


daffodils and other bulbs emerging

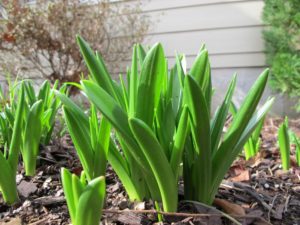
Wood hyacinth, Hyacinthoides hispanica, in January.


Punxsutawney Phil

woodchuck, or groundhog

A woodchuck.

This year, Punxsutawney Phil, the prognosticating rodent, concurred with NOAA’s forecast, calling for an early spring. Phil would be wise to check with NOAA every year before making his Groundhog Day predictions; his accuracy is below 40%. And there are only 2 possibilities: shadow, no shadow!

This tradition, celebrated in the United States and Canada, dates back to 1887, and is a fun, although not terribly accurate, test that helps build anticipation for spring.

Phil is one of several groundhogs, or woodchucks, around the country called upon to presage the coming weather. After being awakened at dawn on February 2, if he does not cast a shadow, the tradition dictates, spring will come early. The alternative is six more weeks of winter. Well…six weeks from Groundhog Day falls in mid-March. So, mid-March (“six more weeks of winter”) and early spring, as I see it, are the same thing. I guess you’d have to define “early”.


What? Snow?!


squirrel in bird feeder

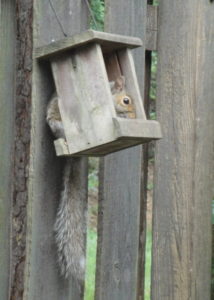
Squirrel takes all.

For a couple of hours on Saturday, I was mesmerized by a wet snow. We haven’t had any snow here this winter, and I just love to watch it. I also have to go outside and feel it. Then a beautiful Cooper’s hawk came for a visit. The question is…would he swoop down for one of the birds at our back yard bird feeder?

Earlier, I put outside a spoonful of peanut butter, suet, more seed, and whatever we had collected in the “bird cup”. This container sits on the kitchen counter, and is where we put crumbs, withered blueberries, strawberry tops, older peanuts, and anything else that might interest the birds. These morsels go into the box (photo, right) near the bird feeder, and the birds share this bounty with squirrels and various marauders in the night.

I didn’t cover the emerging bulbs to protect them from snow. Daffodils, hyacinths, and wood hyacinths get through this time of the year just fine with no help from me.


The Birds are Changing Their Tune


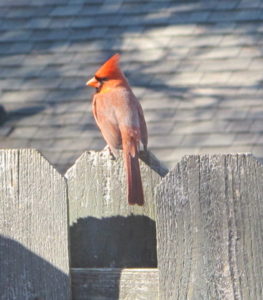
male northern cardinal

A male northern cardinal.

The local birds recently have been singing in what I call “the key of procreation”. When the birds change their tune, spring isn’t far behind. There’s something almost magical about birdsong at this time of the year. I love to hear it.

Northern cardinals, Carolina wrens, tufted titmice…they all have spring calls that are distinctly different from chirps and melodies sung later. These calls help unite young breeding pairs and reunite mated partners after a separation.

The hawk showed up, though, and everything suddenly went very quiet. He sat in the trees for two hours, his plumage camouflaged by the browns and grays of tree trunks and branches. But he did not make an attempt to catch lunch on the fly.

There are plenty of hiding places for the birds, and they were aware of the hawk’s presence. Birds warn each other of this kind of threat by issuing alarm chirps.


Daffodils and Deer


Some of the yellow daffodils on the berm are beginning to bloom, although recent wind (a tornado, actually) laid them nearly flat to the ground. I planted these bulbs several years ago, and it’s always a pleasure to see their green shoots emerge in January or February. But this winter, they began rising in late December.


deer and daffodils

Deer resting among the untouched daffodils.


Deer regularly pass by them as they travel the berm, but they never eat them. All parts of daffodils are poisonous to warm-blooded animals. But bees and other pollinators looking for pollen and nectar when not much is available appreciate the early blooming bulbs, brassicas, and fruit trees.

The bulbs’ foliage is the only ground-level greenery in that area for now. It’s a small thrill to see these bulbs thriving up there, and a bigger one watching the deer walk around them! (***Update***: Several deer rested all morning on the berm, among the blooming daffodils. They sniffed but didn’t eat the flowers. Feb. 14, 2020.)

If deer have eaten every one of your cherished tulips, you’ll have greater success with daffodils.


The Edibles


mini broccoli aspabroc

Miniature broccoli ‘Aspabroc’.

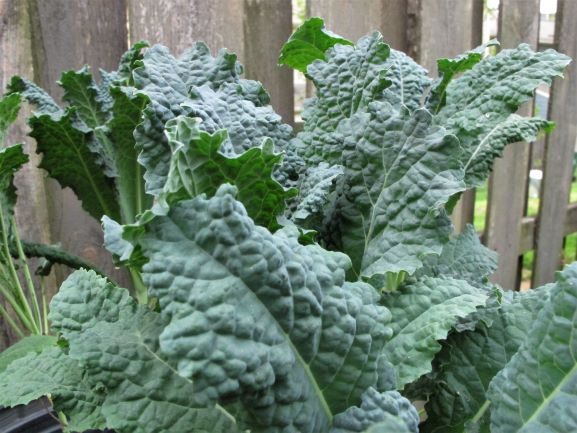
We had a very mild winter. True—it’s not over. But I covered the broccoli, the kale, and the green onions on only a few nights. Although these plants can tolerate temperatures into the teens, I prefer to protect them below 25°F. This keeps their foliage in great shape. And the green onions would be very difficult to pull from frozen soil!

The microclimate created by the corner between the house and the shed keeps the deck a few degrees warmer than out in the open. Maybe there’s a sunny corner where you can tuck in a few pots of winter greens. Or you might be able to dig a small garden next to a south-facing brick wall.

It won’t be long before you’ll see small pots of hardy cool season greens showing up at the garden center. You can get a head start and plant seeds indoors now for many of these plants.

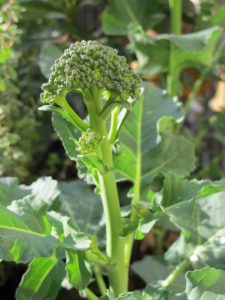
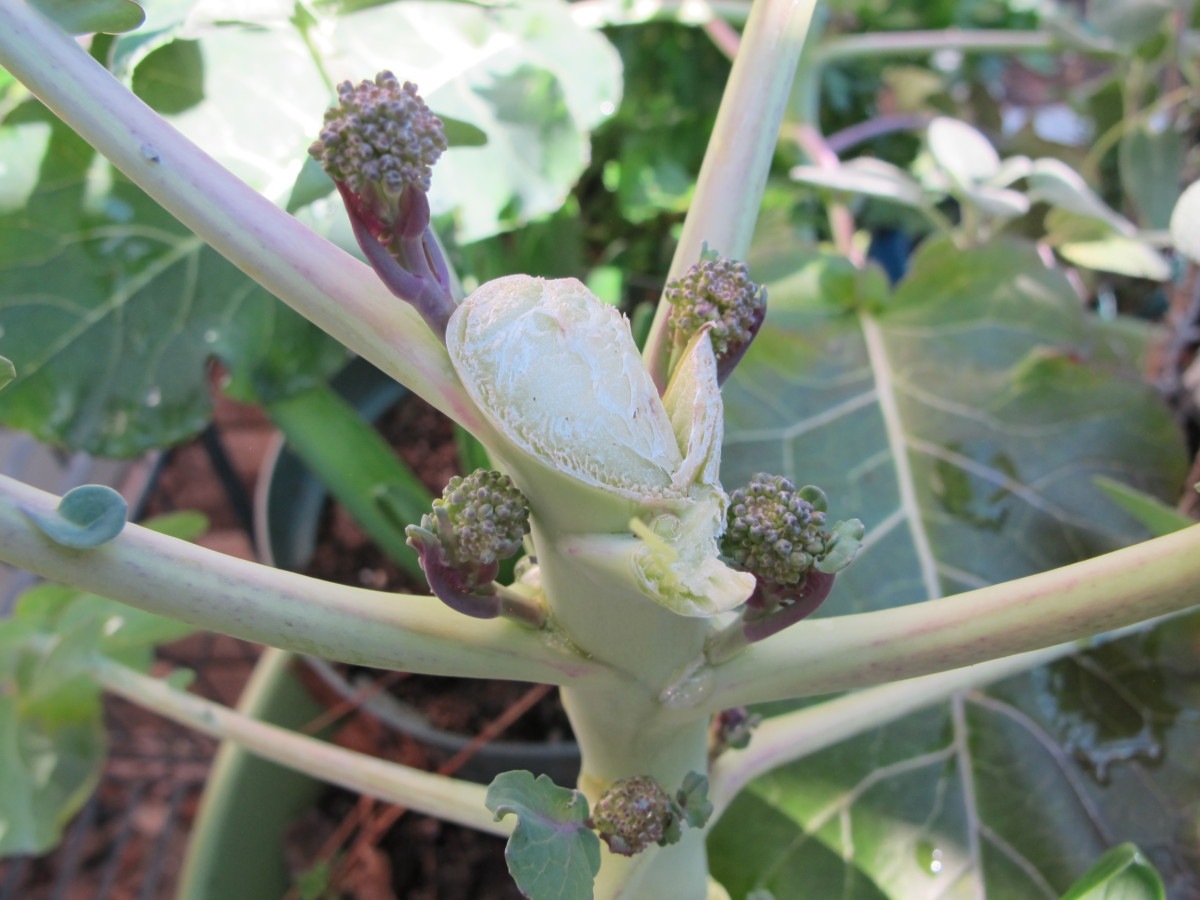
Mustard greens from last year’s spring garden volunteered in the front garden by mid-summer. The Italian parsley is growing large, and, recently, I picked a few substantial stems of ‘Aspabroc’ miniature broccoli for dinner. The ‘Arcadia’ broccoli heads were harvested in December, but side shoots will provide additional harvests for the next 2 or 3 months. Broccoli leaves are edible, too, and highly nutritious.

Frequent heavy rainstorms washed away much of the soil’s fertility, so I fertilized the pots a few times through the winter. Without it, the broccoli heads would have been much smaller and the greens…well, less green. When the temperatures were more moderate, I used SeaPlus (seaweed and fish emulsion). In cooler soil, though, when microorganisms aren’t active, a soluble synthetic fertilizer works better. Microbes break down the nutrients in organic fertilizers and make them available to plant roots, but they’re dormant in cold soil.


A Few Simple Chores In the Garden


As you make your rounds through the garden, note the chores that need to be done. Maybe the mulch needs a refresh by simply turning it over with a garden rake. Are chickweed and other winter-germinating weeds about to go to seed? Don’t let them! Just one seedpod can turn into dozens of weeds next year.


yellow bulb leaves from shade

Yellowed leaves caused by shade.


A thick blanket of last year’s fallen leaves will block light from the daffodils and hyacinths emerging from the ground. Although the shaded spears look yellowed now, they’ll quickly green up when exposed to sunlight. Take some of the leaves to the compost pile, or to the brush pile where insects and other animals find refuge in inclement weather.

Have you noticed the first bulbs emerging from your lasagna pot (photo, above)? Be sure to water them if they’ve been under cover, and give them sunlight to green up etiolated foliage. Gardeners in colder climates still need to protect the pots from alternate freezing and thawing, which could kill the bulbs. Their roots don’t have the benefit of insulation provided by the mass of soil around them, as do bulbs planted in the garden.


Even though it’s still chilly, these stirrings in our gardens point to nature’s own impatience to get the show on the road. So, bundle up, and take the kids, the dog, or your thermos to the garden. For me, the thought of going out in the cold is worse than actually being there. Besides, if you stay indoors, you could miss the first act!


Return to the top

Tips For Planting a Wire Hanging Basket


2019


Tips For Planting a Wire Hanging Basket


hanging basket, zinnia, calibrachoa, yellow, purple

The 16″ wire hanging basket with purple calibrachoa, yellow and white zinnias, and yellow mecardonia.


Now that the weather has settled, it’s time to plant the hanging basket. Okay, it’s 43°F in Helena, Montana, so you’ll have to wait a while. But here in Charlotte, it’s already 90°. We’ve had beautiful spring weather for weeks now, and gardens all over town are showing new life.

It is confirmed once again that I could never move back to a colder winter climate. Picking tomatoes here in early June is commonplace rather than a rarity. In the past, I’ve lived where a ripe tomato for a Fourth of July barbecue won neighborhood kudos! It’s not the summer heat I look forward to but rather the longer growing season and greens that grow through the winter.

I bought several pots of annuals two weeks ago but haven’t planted them. The plan is to refresh the wire hanging basket, and to fill the front beds with color. Complicating matters, though, is when the new siding will be installed. Our building has been rescheduled to a much earlier date, so no gardening will take place until the work has been completed.


A Few Preliminaries


Can I Reuse Old Potting Soil In the New Hanging Basket?

The hanging basket that held blooming violas and a few perennials over the winter will be emptied. The old soil, which still has value in the garden, will be dug into one of the flower beds. Organic components (peat moss and fine pine bark, primarily) break down, enriching the soil.

Used potting soil can be broken up and thrown under the shrubs or topdressed in a thin layer on the lawn. More options include adding it to the compost pile and using it in the backfill when planting trees and shrubs. I never throw away old potting soil, and, of course, I’ll save the perennials. But for new hanging baskets, use fresh potting soil for the best results.

Soil in large planters can be used again if it still has good tilth and hasn’t been waterlogged. It’s good idea, however, to replace the top third of soil. If diseased plants grew in it, I would discard the soil.


Refresh/Reuse

paint colors

If the metal frame looks a bit tattered, now is the time to clean and dry it. Buy a can of spray paint, in the color of your choice, and freshen it up. Look for one that will stick to the finish on the frame. Some are metal; others are vinyl-covered metal.

Maybe your mother the artist has some ideas about color. Jazz it up a little in a shady spot, or color-coordinate the paint color with the flower colors. If you prefer classic black or bright white, those are fine, too. By the way, wire hanging baskets are also called “English Garden” baskets.

For a frame that looks only a little scuffed, try using a solution of horticultural oil (more concentrated than you would use for insects) wiped over the frame. I’ve used the oil to freshen used plastic pots, which often looked like new again. Be careful—horticultural oil makes surfaces slippery.


Line the Liner

Wire baskets are available with reinforced green sheet moss, but more often with a coconut fiber liner. I’ve used both, and have found the coco liners to be more durable, although I prefer the color of the moss.

If you need a new liner, garden centers stock both pre-formed liners and bulk rolls that can be cut to the length desired. Before shopping, measure the curve of your hanging basket, adding a bit extra, for a proper fit.

A Simple Trick

Here’s a trick I’ve used for many years: line the inside of the coco liner with a sheet of plastic. Reuse an empty mulch or potting soil bag, cut so it extends above the rim. The excess will be trimmed after planting. Now, punch several holes around the bottom third of the plastic to allow for drainage. In hot or dry climates, consider leaving the bottom 1″ to 1 1/2″ of the plastic intact. The soil and plants will absorb water that collects in the reservoir.

coconut

Coconut: source of coir for potting soils and coco liners for baskets.

This offers a few advantages. First, the plastic prevents soil contact with the coco fiber, delaying decomposition. A thick liner, made from coconut husks, will last an additional year or two.

Second, plastic prevents rapid evaporation of moisture from the soil. Plastic stops the hot dry wind from reaching the soil.

Third, plastic slows down infiltration of icy cold wind, delaying chilling of the soil in winter combinations.

And, fourth, soil won’t be lost through the thin, loosely woven spots in the liner. See if you can double up on the coco liner in those spots. And face the dark side of the plastic, if there is one, outward. This is less conspicuous than a bright yellow beacon peering out from the between the fibers.

Other Options

Perhaps you have other materials hanging around the shed that can substitute for a coco liner. A few layers of burlap, landscape fabric, an old blanket, or that unused fiber grow pot could work for this growing season. Still, I would line it with a plastic sheet for the reasons stated above.


wire basket, fabric liner

A repurposed grow pot, now used as a liner for the hanging basket.


Where To Place the Hanging Basket


bracket for hanging basket

Notice how weight is distributed along the vertical part on the left, pushing bracket against the wall.


Have you decided where the shepherd’s hook will be placed? Have you already installed a sturdy bracket on the fence or deck post? Well-constructed wrought iron is costly, but it lasts a long time. Look for the thicker, heavier hooks and brackets. Visit the hardware store for special anchors and instructions if attaching the bracket to a brick surface.

Make sure the bracket or the hook is large enough to accommodate your hanging basket. This isn’t a concern with smaller baskets but is often overlooked for the large ones. Hardware is available in different sizes, so measure first, or you might find that the large hanging basket you want to use won’t fit onto the shepherd’s hook you already have.

Sometimes it’s hard to determine whether the vertical part of the bracket should be placed above or below the horizontal part. Securing the vertical side below the horizontal arm, as in the image above, helps direct the force against the wall. The bracket is less likely to pull away from the wall or post.


Sun Or Shade?


House, tree in front


Pay close attention to the number of hours of direct sunlight the chosen location will receive. As the sun changes its path across the sky from one month to the next, the amount of sunlight will vary. A location near the front door might get lots of sun in April but could be in almost full shade once the trees leaf out.

Don’t expect a blazing burst of color from plants that need 7 or 8 hours of sun if you place the hanging basket under the semi-shady deck. Plant tags often erroneously indicate “partial sun/full sun” for plants that really need full sun. Partial sun to us gardeners, by the way, is 4 hours of sun.

Ask salespeople at the garden center for advice about light requirements. Petunia, verbena, calibrachoa, lantana, zinnia, and scaevola need full sun. Lobelia, bacopa, browallia, torenia, and some of the begonias will do well in morning sun and bright afternoon shade in this hot climate. Caladium, anthurium, ‘Non-Stop’ tuberous begonias, ferns, and foliage plants can take various levels of shade.


Choosing Plants For Your Hanging Basket


Plants have upright, mounding, or trailing habits. For smaller baskets, perhaps only mounding and trailing plants will fit. If single-variety monoculture is your preference (for example, a 12″ pot of purple Wave petunias or a 10″ pot of sky blue lobelias), go for it.


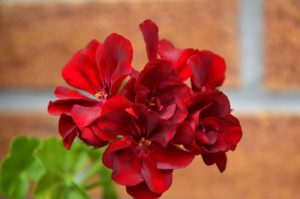
Geranium flower.


If you want a pot of zonal geraniums, avoid hanging it so high that all you see is the bottoms of the leaves and the pot. Place it with the flowers at eye level or enhance it with some trailing vinca vine and a few mounding white or yellow calibrachoas. Adding a trailing element creates greater interest.

salvia black and bloom

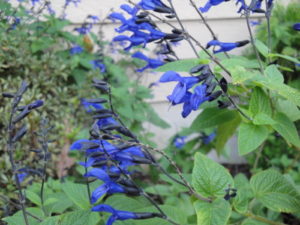
Stately Salvia ‘Black and Bloom’ attracts hummingbirds, butterflies, and bees.

The 16″ wire hanging basket, for the shepherd’s hook in the front garden, can hold 6 to 10 plants. A large perennial Salvia ‘Black and Bloom’ (photo, right; hummingbirds visit every morning!) grows in the bed behind the basket, next to a yellow-tipped arborvitae.

So, the color scheme will include blue ‘Laguna’ (heat-tolerant) Lobelia, purple calibrachoa (million bells, a small cousin of petunia), little yellow Mecardonia, and a few golden yellow and white (powdery mildew resistant) Zinnia angustifolia.

A Heuchera with orange-ish foliage might remain in the pot, if the color plays nicely with others. (A passionflower I had bought earlier in Hendersonville survived the summer in a tiny 2″ pot.)

I use this color combination in the fall, sometimes, when planting violas. It borrows from both the warm and the cool color palettes. When in doubt, combine colors next to each other on the color wheel (for example, red-orange-yellow [warm colors], or pink-blue-purple [cool colors]) or opposite each other (red-green, blue-orange, purple-yellow). Adding white calms everything down when using several colors.

(***Update***: While the annuals awaited completion of the siding installation, a few of them perished. It happens. I plugged the survivors into the basket and fertilized them. Six weeks later, you can see how nicely it filled out. That’s the basket, at the top of this article. And I planted the passionflower, a vigorous vine, in the garden for the gulf fritillary butterflies. Autumn, 2019.)


zinnia ang.

Zinnia angustifolia ‘Star’ series, disease resistant.


Consider These Color Combinations:

  • red-white
  • yellow-white. These first two options make clean, crisp combinations.
  • chartreuse, green, orange, and white look good together
  • shades of yellow-orange-cream
  • blue-yellow-white
  • red-white-yellow
  • silver or gray and shades of pink
  • purple-blue-silver-pink-white
  • lavender-purple-white
  • warm maroon-peach-coral-cream-sky blue

Generally, I avoid using gray/silver with pale yellow. Orange and pink together don’t do anything for me.

We tend to gravitate toward our favorite colors, so try adding varieties you haven’t tried before. See if you can introduce foliage color (caladium, coleus, lysimachia, heuchera, sweet potato vine, begonia) that echoes the color of a flower.

A contrast between flower and foliage forms might also bring greater interest. Adding fine foliage or delicate flowers (nierembergia, diascia, bacopa, lobelia, alyssum, euphorbia ‘Diamond Frost’, mondo grass) contrasts effectively with bolder textures.


Headings

Page 1: Tips For Planting a Wire Hanging Basket, A Few Preliminaries (Can I Reuse Old Potting Soil In the New Hanging Basket?, Refresh/Reuse, Line the Liner), Where To Place the Hanging Basket (Sun Or Shade?), and Choosing Plants For Your Hanging Basket (Consider These Color Combinations)

Page 2: Ready to Start?, Time To Play In the “Dirt”, Timed-Release Fertilizer, and Maintaining the Hanging Basket (Water, Soluble Fertilizer, Deadheading, New Varieties, Pruning Your Hanging Basket, Insects and Spider Mites, Slugs, Deer!)

Return to the top

Plan Now for Spring-Flowering Bulbs

2018


Time For Spring-Flowering Bulbs


colorful tulips, daffodils, muscari

Spring-flowering bulbs in a public garden.


In a few days, we finally will see some almost normal temperatures in this part of the southeast. It’s time to think about spring-flowering bulbs that will be planted over the next 2 or 3 months. Get comfortable; this is a long essay on the big topic of spring-flowering bulbs.

It often happens: when the daffodils, tulips, and wonderfully fragrant hyacinths bloom in February, March, and April, that’s when many customers ask for the bulbs. But most bulbs are planted in the fall and into early winter. Their roots develop as the soil cools in late summer and autumn, but growth above ground is delayed until months later.

It is no longer uncommon for garden centers to sell potted bulbs in spring. So, if you missed out on the fall planting season, or if you want to see the flower colors before planting, inquire with the growers. Vendors at spring home and garden shows and farmers’ markets also sell pots of budded or blooming bulbs.


yellow daffodils, cane creek park

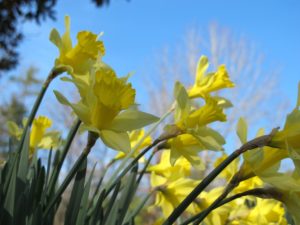
Daffodils are reliable, easy to grow, and not eaten by animals.


Many thousands of varieties of bulbs are available to gardeners. Each region of the country has its favorites, based on ease of culture, resistance to hungry animals, and familiarity with what people “usually” grow there.

If you want something more unusual but your local sources don’t carry it, you can probably find it online or through mail order catalogs. Find out what the bulbs require before investing in 2,000 pink tulips that can’t take the heat in your back yard.


On the Subject of Tulips


pink tulips

Tulips are not deer-proof.

Large-flowering hybrid tulips grow in the cooler northern half of the United States, down to Zone 7. A few will perennialize in slightly warmer climates. The smaller species tulips will grow a bit farther into the South.

Tulip bulbs planted among the roots of trees and shrubs might work slightly better than those in open beds. The soil there is somewhat cooler and dryer. They’re not fond of warm temperatures and high moisture levels.

Many gardeners here in the piedmont of North Carolina plant tulips with the expectation of only one glorious show, and then tear them out when flowers fade. Beautiful as they are, tulips in zone 8 or warmer usually do not come back for an encore performance the next year. Even zone 7 is a challenge for them.

And that’s okay with a lot of people, including designers of public parks and municipal common spaces. But, wow, what a show...if you can keep the deer and rabbits away from them! They are especially fond of tulips, and I highly recommended using deer repellents. When using a solution in a sprayer, set the nozzle to a fine mist. A coarse droplet will simply bead off the waxy foliage and flowers without sticking.
Voles, too, eat tulip bulbs. Planting tulips with PermaTill (small, expanded gravel used for drainage) around them usually deters the voles. Stainless steel mesh planting baskets will exclude burrowing animals from the root zone. And squirrels have been known to do a little transplanting of their own. Products are available to help prevent these problems.


How Bulbs Work


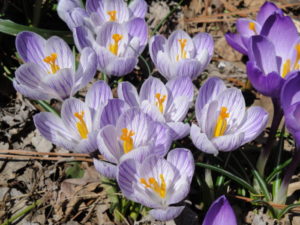
crocus pickwick, white with purple stripes

Striped ‘Pickwick’ and purple ‘Remembrance’ crocus, in the Maryland garden.


A bulb is a shortened stem, with roots that emerge from the basal plate when the temperature cools in the fall. The basal plate, clearly visible on hyacinths, is a rounded disc of tissue at the bottom of the bulb. Tightly folded undeveloped leaves surrounding the flower shoot contain food for the plant during dormancy. A bulb has all the parts necessary to complete its life cycle: root initials in the basal plate, a growing tip, leaves, stems, and flowers.

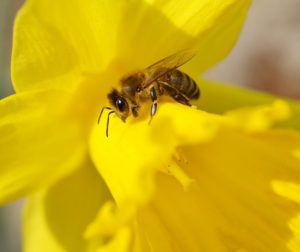
daffodil and beeThe rooting bulbs remain safely tucked underground until the soil begins to warm up in spring. That signals the plants to burst from the ground with their beautiful, cheerful flowers. We bid another winter adieu! Hungry bees and other pollinators emerging on warm spring days feed on pollen and nectar from spring-flowering bulbs, when little else is in bloom.
The foliage must be given enough time to photosynthesize and to store carbohydrates in the bulbs. This food will sustain the plant during dormancy, and ensure that more buds will develop for next year’s flowers. So, after the flowers finish up, let the plants wither naturally. Foliage can be removed after at least half of it has yellowed.


First, a few words on summer- and fall-blooming bulbs


Garden centers stock most of the summer-blooming bulbs in spring to early summer. You can find bulbs, corms, tubers, and rhizomes of lilies, gladiolus, canna, caladium, iris, and calla at that time of the year. Nurseries also offer potted specimens as they come into growth.


Elephant Ears

For dramatic foliage plants, look for elephant ears (Alocasia and Colocasia spp.), which grow only a foot tall to over 6′ tall. These are tropical plants and will die with frost, unless the tubers are dug and stored over winter. Planted in the ground in regions where frost doesn’t penetrate the soil, they usually survive the winter.


Caladium

caladium

Caladium, in late spring.

The colorful caladiums are tropical and need warmer soil temperatures in winter in order to survive, even when dormant. Some gardeners dig up and save the tubers every year, but most purchase new tubers or potted plants in spring to mid summer.

Foliage colors include green, white, chartreuse, pink, peach, and red, and can be mottled, edged in a contrasting color, streaked, or spotted. Their spathe-like flowers are not showy and usually removed.

For the past four years, I’ve kept a large Italian terra cotta pot outdoors in the summer. It contains a white caladium, a few kinds of brake (Pteris) ferns, and trailing clumps of Pilea ‘Aquamarine’, with its reddish stems and incredible pewter-blue, rounded leaves. It’s also home to whatever else dropped in. This year: some bulbs of tender Ledebouria socialis (leopard lily), a miniature African violet, and Dendrobium kingianum, a small orchid that has lived in a 3″ clay pot for over 4 decades.

Dormant Caladium

When the weather cools, the whole pot comes indoors to the sunny kitchen, where the caladium goes dormant. One by one, the leaves turn yellow, and the caladium sleeps through the winter. At average indoor temperatures, it remains dormant.

Instead of digging out the tubers, I leave them in the soil, caring for the rest of the plants as needed. Every couple of years, some potting soil is added under the plants, and the pot goes outdoors to light shade. And each year, the caladium comes back after about a month of warm weather. It’s a heavy feeder, so fertilize caladium every 2-3 weeks while it’s in leaf.

Dormant caladium tubers that remain surrounded by soil over the winter are more likely to return the next year than dry, loose tubers kept in a bag. Keep them dry if by themselves in a pot; damp is okay, if in company with other plants.


amaryllis

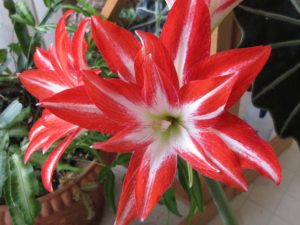
This variety is always the first amaryllis to bloom.


Amaryllis

Amaryllis (photo, above) is a beautiful late fall to spring flowering plant. Dormant bulbs can be found at garden centers at this time of year, alongside the spring-flowering bulbs. Potted in the fall, Amaryllis bulbs begin blooming indoors around the holidays.


Colchicum Autumnale


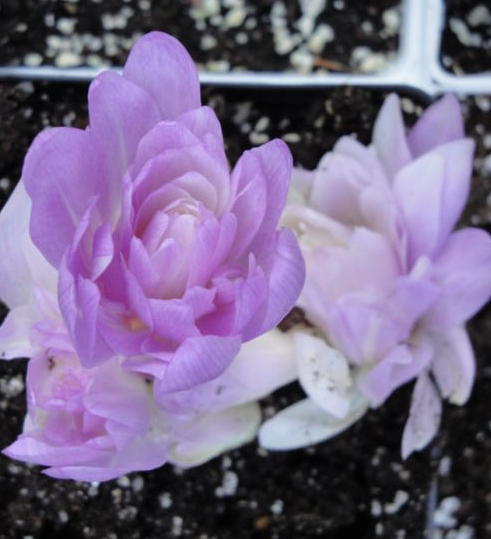
This is one of my favorites partly because the plant is animal-proof and partly because it blooms in the fall. Sometimes slugs can be a problem. Scattering Sluggo granules near the Colchicum will take care of that.

The bulbs will appear in some, but not many, garden centers, along with the daffodils and other spring-flowering bulbs. Left on a windowsill, the bulb produces flowers with no encouragement necessary! But I prefer to plant these hardy bulbs in the garden. Colchicum is the source of a potentially toxic pharmaceutical component, so grow with care.

Only the flowers make an appearance in autumn; colchicum foliage arrives in spring and lasts a short period of time.

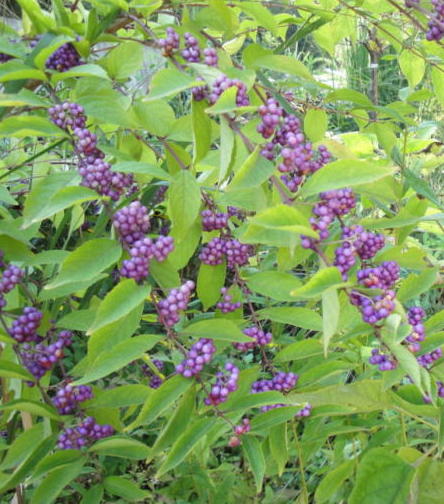
Placed near a shrub called Purple Beautyberry (Callicarpa dichotoma or C. americana), the Colchicum ‘Waterlily’ flowers perfectly echo the color of the shrub’s berries (photo, above).

Once planted, they soon begin blooming in white (‘Alba’) and shades of lavender-pink. ‘Waterlily’, available from Wayside Gardens, has many petals, pale in color until exposed to light. It has the appearance of a water lily, but it is not an aquatic plant. After 2 years in the ground, one bulb will produce dozens of flowers. This plant is sometimes called “fall crocus”, but it is not to be confused with…


…Fall Crocus

Species crocus bulbs, with saffron on the left.


A few hardy crocuses bloom in the fall. One is saffron crocus, Crocus sativus, which gives us our most expensive spice, harvested from the female flower part, the red style and stigma. Only 3 threads of saffron are laboriously harvested from each flower, explaining its very high cost. Incidentally, saffron has been used as a spice for 3500 years. And for more trivia–saffron crocus is a sterile triploid whose ancestry is open to speculation.

There are other bluish (C. speciosus ‘Cartwrightianus’) and white (C. kotschyanus) fall crocuses available. The lavender-blue color positively glows in the setting sun. This color is rare in the garden at this time of the year, and a welcome surprise when the flowers emerge through the Liriope and other short groundcovers.

Crocus, technically, grows from a corm, but, for simplicity, is often called a bulb.


Return to the top

Headings

Page 1: Time For Spring Flowering Bulbs, On the Subject of Tulips, How Bulbs Work, and First, a few words on summer- and fall-blooming bulbs (Elephant Ears, Caladium, Amaryllis, Colchicum Autumnale, Fall Crocus)

Page 2: Color Effects, Formal and Informal, Naturalizing in Lawns, Naturalizing in Meadows, If You’re New To Spring-Flowering Bulbs, When Planting Drifts of Bulbs (Microclimates and Timing, Laying Out the Beds), and Aftercare

Page 3: Galanthus, Crocus (Snow Crocus, Giant Dutch Crocus), Eranthis, Muscari, and Puschkinia

Page 4: Hyacinthoides, Tulipa (Tulips In Zones 7 and South, Species Tulips), Hyacinthus, Narcissus (Buying Daffodil Bulbs, Linnaeus, the RHS, and the ADS, Planting Daffodils, Fragrant Daffodils), and Allium

Page 5: Maintenance, Tricks to Hide Maturing Foliage, Stinzenplanten, Forcing Spring-Flowering Bulbs, Rock Gardens, and Don’t Overlook the Little Ones


Dealing With Deer: A Multi-Pronged Approach


Dealing With Deer: A Multi-Pronged Approach


Today’s garden projects include adding netting and tall stakes around the tomato plants that the deer have nibbled. There are lots of fruits on the ‘Big Beef’ tomato, and I don’t want to lose any of them as these animals tug on the vines.

Your perception that there are more and more deer roaming our neighborhoods is valid. Several accounts I’ve read over the years claim that there are far more white-tailed deer now than there were in colonial days.


deer


The Costs Add Up


Damage to our landscapes, to farm produce, and to our vehicles is staggering. The Insurance Institute for Highway Safety reports that 1.3 million vehicular collisions with deer cause more than 150 human deaths and tens of thousands of injuries per year. The damage amounts to over $3500 per vehicle. Add the suffering from Lyme disease and other diseases caused by infected deer ticks, and the toll climbs.

Deer are most active at dawn and dusk, so be especially vigilant then. Mating season occurs in the fall, and there’s only one thing on their minds at that time of the year. This is when accidents are more likely to happen, so, in the absence of oncoming traffic, use your high beams to warn the deer and to light up the edges of the road.

About a decade ago, I was driving slowly through known deer territory (Brookeville Rd. in Brookeville, Maryland) when one of them came flying off the bank and over the hood of my pick-up truck. I missed him by an inch. Or he missed me. Two other times, in Thurmont, Maryland, and in Charlotte, North Carolina, my truck did make contact, but there was no damage. They walked away apparently unharmed, but I’m not sure the deer didn’t suffer at least a little.


Keep Your Distance


Deer are powerful animals; do not attempt to approach them to scare them away or to “make friends”. They’re becoming bolder and more comfortable in our suburban neighborhoods, even in mid-day. Years ago, in my almost-enclosed back yard, I startled 2 large animals, who reacted by thundering randomly through the yard, looking for an exit. They were unseen, blending in with the background, and perfectly still, until suddenly…they weren’t.

I was able to back up and reach the kitchen door just in time. This incident was a vivid reminder that they can kill you!


young deer

Yeah, adorable…


Changing Diets


Don’t get me wrong. I love animals. But the damage to our landscapes and vegetable gardens is enormously frustrating! The time, effort, and money invested in our gardens are wasted if we can’t realize the benefits.

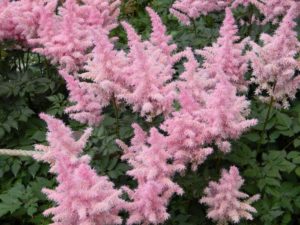
pink astilbe

Astilbe.

Numerous websites have lists of plants that describe those species severely, sometimes, or rarely damaged by deer. These are guidelines only. Deer that eat Astilbe, Asarum, and Brunnera in one part of the country might not touch it in another state—not yet. When they’re desperate for food, they’ll try almost anything.

Deer might be more likely to feed on plant species they evolved with, in other words, native species. When deer pressure builds (a large population in a limited area or during drought), they will sample the exotics, or imported species. If they don’t die or get sick, they’ve found another item they will teach their offspring is safe to keep on the menu.

In fact, some studies indicate that deer prefer imported flowers, trees and shrubs, which compose a greater percentage of our landscapes. Even though they had passed up the Asarum europaeum (European ginger) in the Rockville, Maryland, garden for 25 years, they decided in year 26 and afterward that it was perfectly yummy!

Deer are now accustomed to browsing in residential communities, where there’s an abundance of well-maintained plant material. We fertilize and water on a regular basis, making them that much more tender and palatable to animals.

The formerly common native wildflowers have almost entirely been consumed by deer and are not regenerating. The rapid increase in deer populations, from lack of predators, is changing the character of both our native and cultivated landscapes.


Decades of Observation


multi-pronged deer antlers


After watching deer for many years, I can confidently assert that taking a “multi-pronged approach” is the most effective way to keep deer at a distance. Sure, one product will work pretty well for a short while. But the key to long-term success is to use several different repellents or barriers at a time. Mix it up a little!

Dozens of products can be found in garden centers, hardware stores, online, and at home and garden shows. There are sprays that smell like rotten eggs, mint, and rosemary. Others taste bad. You can buy capsules containing dried coyote urine, giving the impression that there are predators around. And then there are the barriers that prevent access to the plants.

Although it is often said that deer do not climb steps, a Maryland neighbor discovered that they do. After finding a large potted hibiscus on Julie’s deck, they regularly climbed the 5 or 6 steps to get to it.


Headings

Page 1: The Costs Add Up, Keep Your Distance, Changing Diets, Decades of Observation

Page 2: Deer Repellents (Sprays and Tablets, Repellex, More Spray Repellents, Devices, Granules, Barriers, Deer Netting, Gravel and Santolina, Got Milk?, Eggs, And A Few More)

Page 3: Plants That Deer Love (Hosta = Deer Bait), Plants Deer “Might Not Eat”, and What To Do

Return to the top of Page 1


Tomatoes: Stake, Water, and Prune

2018


How Are the Tomatoes Doing?


'Rutgers' tomatoes on a staked plant

A staked ‘Rutgers’ tomato.


The recent stretch of warm, sunny weather has helped the tomatoes and peppers double in height. It’s time to secure them to stakes or to cage them if you haven’t already done so. Once the last of the broccoli side shoots have been harvested from our garden, a zucchini will go there. And cucumber ‘Diva’ will be planted after the cauliflower has been picked, but that’s a while off.

Check with your local Master Gardeners office to see what else is safe to plant now, or look online for a handy planting schedule available from your local agricultural extension office. Keep in mind, though, that these are only guidelines. Weather trends and microclimates will dictate what’s safe to plant.


And Peppers?


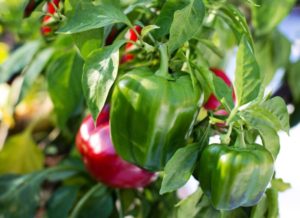
Healthy pepper plant with red and green fruits

Sweet bell pepper.

Since the varieties of peppers that I planted don’t grow taller than 3′, the tomato cages will be used to support them. The metal cages are only about 3′ tall, once the prongs are anchored into the ground. These short cages are useless for tall tomatoes.

Peppers and tomatoes are in the same family (Solanaceae), by the way, so they need many of the same growing conditions.

As the plants grow, steer the young side shoots through the openings. A sweet bell pepper loaded with 5″ fruits will appreciate the extra support for the limbs. A high wind or a pelting rainstorm can cause heavy branches to split from the main stem. Small-fruited pepper plants can be staked, caged, or allowed to grow without support.

Keep an eye on the weather, though. A forecast calling for windy conditions might prompt you to put something in place before the storm arrives.


Determinate Or Indeterminate Tomatoes


Tomato varieties are categorized as either determinate or indeterminate. This pertains to their habit of growth and when they set fruit.

Determinate tomatoes generally stay short and set fruit within a concentrated period of time. Varieties such as ‘Roma’, ‘Celebrity’, and ‘Patio’ permit the grower to harvest most of the fruits at once—good for canning or making sauce. Although determinates tend to be short, some varieties will grow quite vigorously and might require staking.

Indeterminate tomatoes, such as ‘Big Beef’, ‘Sun Gold’, ‘Nepal’, and ‘Cherokee Purple’, continue growing throughout the season, and often produce right up to frost.

Even though both the cherry tomato ‘Sun Gold’ and the heirloom ‘Cherokee Purple’ are indeterminate tomatoes, the latter may grow to only 5′, whereas ‘Sun Gold’ can grow twice as tall. Learning about the different varieties you want to grow will indicate what kind of staking or caging you’ll have to do. You can always add a taller stake later, if needed.


Staking


trellis

Because we grow indeterminate tomatoes, we use 7′ or 8′ tall vinyl-covered metal stakes. Oak or bamboo stakes are available, as are collapsible wire cages. A decorative trellis is both attractive and functional. Anchor the supports far enough into the ground to prevent them from falling over.

Shoe laces make perfect ties for tomato plants. They’re soft and they can be retied as the stems grow in girth. You can also use twine, twist-ems, clothesline, or anything else that won’t cut into the stem. Some gardeners use ties in a figure-8 fashion, around the stake and around the stem. Or simply loop it once or twice around the stem and stake.

Check frequently through the summer to make sure the stem isn’t being constricted by the ties. Don’t tie so tightly that there is no room for movement or growth. Some bending and swaying in the breeze strengthens the plants.

Staking elevates foliage off the moist soil, decreasing the likelihood of disease.


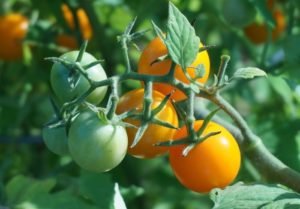
orange cherry tomatoes

‘Sun Gold’ cherry tomatoes.


Young Plants


Consider the balance between the amount of foliage and the number of fruits. A young tomato plant with only a few leaves will not be able to support ripening fruits. It could show early symptoms of nutrient deficiency.

Examine the newest growth at the top of the plant. The tip growth of a very young plant might show signs of withering, or turn tan in color, or simply refuse to grow if it is also trying to supply nutrients to ripening fruit. Boron, a micronutrient needed in tiny amounts, is critical for new growth. The growth tip will sacrifice itself and future growth in order to do what a plant wants to do, which is to set seed in its fruits.

It’s best to remove all fruits on a very young plant. A sparsely-leaved plant struggles to get enough carbohydrates (the products of photosynthesis) into the fruits. This contributes to slow growth and mediocre flavor.


Suckers


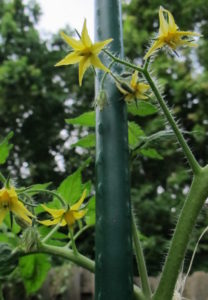
As the tomato plants grow, add more ties, every foot or so, to prevent the tops from flopping over. At the same time, take a look at the stems, and decide which suckers will have to be pruned. Don’t confuse the suckers with the flower stalks that arise from the stems. The flowers are yellow and quite conspicuous.


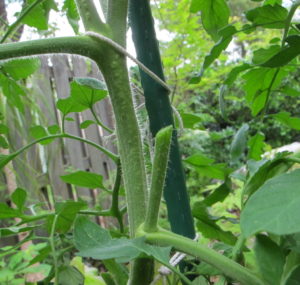
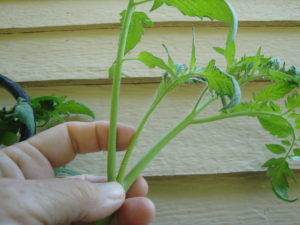
Some more basic terminology: A sucker is the common name for the new shoot emerging from the angle between the top of a leafstalk (the petiole) and the stem (photo, above left). The side branch starts out as an axillary bud and grows rapidly. There are axillary buds above most leaves, and the branches, too, will sprout even more suckers. So, you see why it’s important to inspect your tomato vines frequently.

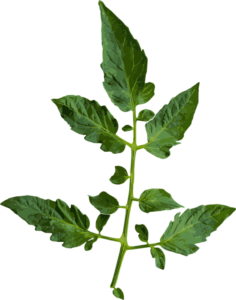
tomato leaf

A tomato’s compound leaf.

Suckers that are not removed will soon become main stems. The main reason I sucker tomatoes is for increased air circulation. This helps prevent many kinds of diseases from infecting the plants in this humid area. Many gardeners have commented that limiting the number of stems results in fewer, but larger, fruits.

Also, tomatoes will develop better color and flavor, and contain more antioxidants, if they’re exposed to gentle rays of the sun. This is especially true for the “black” tomatoes, such as ‘Black Krim’, ‘Kakao’, and ‘Cherokee Purple’.

A few more terms for you: The tomato leaf is a compound leaf, composed of the petiole and several leaflets, attached by petiolules. And the main rib of the leaf is called a rachis.


How Many Main Stems?

tomato sucker

Index finger points to a sucker.

Tomatoes are weedy plants and will grow lots of side branches. For most of the growing season, I keep only 3 or 4 main stems growing on each plant. Near the end of the season, I’m less particular about controlling growth. By then, I’m thrilled to harvest anything off the vines.

Since each of those side branches will try to grow, any suckers that I don’t want to grow into main stems will be removed.

Limiting the growth of foliage encourages better air circulation, helping prevent diseases from ruining your crop. Some growers permit only 1 or 2 stems to grow, but I don’t believe enough products of photosynthesis get to the ripening tomatoes. Just a hunch.

The plant has one thing on its mind, and that is to procreate! In order to do that—well, yes, after pollination—the fruits have to be adequately nourished until the seeds mature. And since all nourishment comes from photosynthesis, the plant needs to have enough leaf surface, and enough direct sunlight, to carry out this vital function.


Can I Root Those Suckers?

If, in early summer, you wish you had planted more tomatoes, you can root healthy 4″ to 5″ long suckers. They root quickly in 3″ or 4″ pots of moist soil, kept humid and in light shade. Simply bury the whole stem in each pot, keeping only a couple of leaves above the soil surface. You can also root them directly into the garden, kept moist and shaded until roots become established.

If it wilts all the time, remove a leaf or two from the bottom of the stem, or cut large leaves in half. A big, leafy cutting won’t be able to root or absorb water fast enough to keep the leaves turgid. Make sure the cutting has good contact with moist soil. Perhaps rooting cuttings in a glass of water will work better for you.

When the cuttings start growing, gradually introduce them to more sun before they’re finally planted out. Tomato suckers root fast, so if you don’t see results within 10 days, start new ones.

The sucker is genetically identical to the parent plant, so the fruits will be the same. This applies to both heirlooms and hybrids.


Limb It Up


Since the first suckers will appear near the bottom of the plant, you might be inclined to let them develop as Main Stem #2 and Main Stem #3. Always keep disease prevention in mind when dealing with tomatoes. I prefer to snip out those bottom suckers and, instead, let the plant start branching 10″ or 12″ above ground level.

As the stem grows taller, remove the bottom leaves, too. That’s right; this permits free air flow underneath the plant. And the soil surface will dry faster, further decreasing the incidence of disease.


red tomatoes

Headings

Page 1: How Are the Tomatoes Doing?, And Peppers?, Determinate Or Indeterminate Tomatoes, Staking, Young Plants, Suckers (How Many Main Stems?, Can I Root Those Suckers?), and Limb It Up

Page 2: Sun Scald, Blossom End Rot: Tomatoes and Peppers, Watering Tomatoes, Deer, and They’re Weeds, After All!

Return to the top


Tips For Growing a Tomato Plant


A Tomato Plant For Your Garden


tomatoes


Anyone who has grown a tomato plant and experienced sublime sun-ripened perfection understands the joy that awaits those new to this endeavor. But it takes a little skill. Starting with light, I’ll explain the basics here. And be sure to read related posts to get the full picture.


How Much Sun For a Tomato Plant?


young 'Cherokee Purple' tomato on the vine

‘Cherokee Purple’ tomato.

A tomato plant requires at least 7 hours of direct sun. Sure, many sources of information recommend 6 hours, and you’ll certainly have some success. But, for best performance, give it 7 or 8 hours or more.

Tomatoes produce more flowers in a sunnier location. And their leaves will make more “food” (carbohydrates resulting from photosynthesis) that keeps plants growing and producing. More hours of sun maintains drier foliage for a longer period of time. And drier foliage means fewer problems with disease.

Now if you don’t have a spot that gets 7 hours of sun, but it gets 5, you might be able to get fruits from a cherry tomato plant. Instead of being disappointed with the lower-yielding but yummy heirlooms or the big beefsteaks, try ‘Sun Gold’ or the other cherry tomatoes. ‘San Marzano’ and ‘Juliet’ also are worth considering for five or six hours of sun. Because they are high-yielding, you’ll probably harvest something.

But, in full sun, cherry tomatoes produce so many fruits that you’ll be giving them away by the bowlful. Really…they’ll have produced hundreds of fruits on a tall vine by the end of summer.


cherry tomato photo

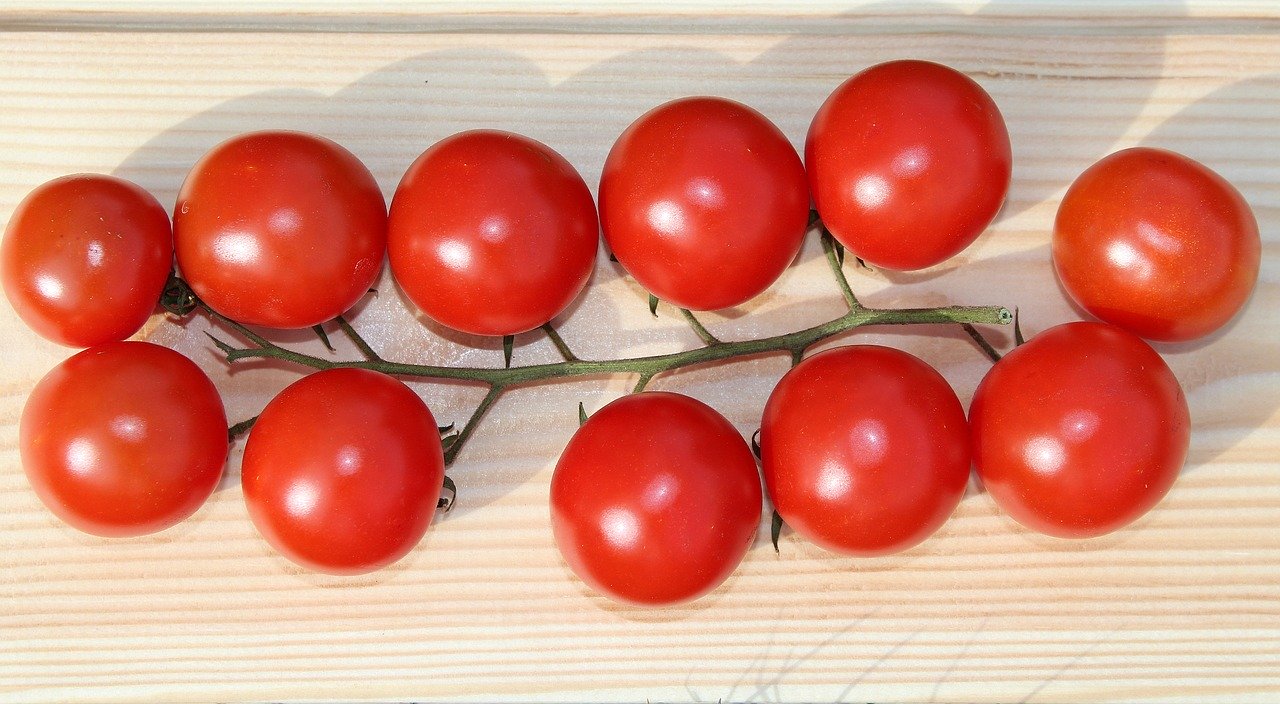
A “hand” of cherry tomatoes.


Options

If you have the space, some experimentation might yield promising results. Try growing tomatoes in large pots on the sunny patio, and plant greens where there isn’t enough sun for tomatoes. Or perhaps a corner of the sunny rose garden can be given over to edibles that need full sun, if the soil hasn’t been treated with chemicals.

I don’t often recommend cutting down trees. Removing a silver maple that seeded near the vegetable garden, however, will make the garden more productive, and, if permitted, that’s the way to go. When selecting trees for an average size property, choose small-growing trees and locate them far from gardens requiring full sun. Consider their mature size and where the shade will fall from one season to the next.


More Light For a Tomato Plant


Here are some tricks to coax more production out of your edible plants if the sun exposure is less than ideal:

  • Plant in as sunny a spot as you have, perhaps near a white or light-colored wall, which will reflect more light toward the tomatoes. Or, using a little resourcefulness, create a reflective wall with tall stakes and white fabric.
  • Lay repurposed light-colored empty mulch or potting soil bags on the soil, on the sunny side of the plants. Anchor them with stones or bricks. Punch lots of holes in the plastic so the plants will get enough water from rain or irrigation. Don’t allow water to collect for more than a few days or you’ll have trouble with mosquitoes.
  • Porous synthetic or woven mulches are available from garden supply companies. White mulch helps reflect the light and also keeps soil cooler. Additionally, a source of light from below the plant confuses insect pests and might cause them to take up residence elsewhere.
  • Use a few stakes instead of one, or a wide trellis, for a tomato plant, tying main stems farther out from the core of the plant. This will get more light onto leaves that otherwise would have been heavily shaded.


Crop Rotation


zucchini with yellow flowers

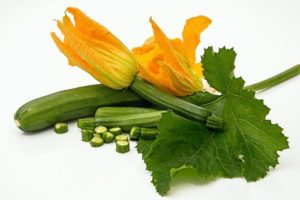
Zucchini.

If space allows, locate your tomatoes, peppers, potatoes, and eggplants (all members of the nightshade family) where none of them have been grown for the last 3 or 4 years. This crop rotation lessens the likelihood of heavy insect and disease outbreaks from one year to the next. It prevents disease spores and insect larvae from building up in the soil and infecting new foliage.

Tomatoes and other members of the nightshade family (Solanaceae) are affected by certain insects and diseases that generally do not bother other families of vegetables. Cucurbits (zucchini, cucumber, squash) and brassicas (broccoli, kale, cauliflower) have their own problems, as do the other plant families.


Disease Resistance


You’ll notice on seed packets, labels, and in catalog descriptions, a series of capital letters after the cultivar’s name. Those letters are initials for the diseases to which that cultivar is resistant. For example, ‘Big Beef’ tomato has the letters AS, F2, L, N, TMV, and V after its name. They represent the diseases Alternaria stem canker, Fusarium wilt (races 1 and 2), Grey leaf spot, Nematodes (not a disease but a tiny worm), Tobacco mosaic virus, and Verticillium wilt, respectively.

Most hybrids have been bred to withstand some disease pressure. Heirlooms are more susceptible to disease, but the flavor of their fruits is superior to that of many varieties commonly found at garden centers. If you have the space, try growing one or two heirlooms in addition to disease resistant varieties.

(***Update***: In 2019, I grew 2 heirloom tomato plants in large pots, and both succumbed to disease well before the end of the summer. We had an especially wet and humid season, but I knew the odds when I’d bought them. Still, each one produced several dozen fruits before removal.)

Susceptibility to disease varies from one area of the country to another, so you might never see some of the diseases that pop up elsewhere.


red tomatoes


Weather plays an important role, too, and there’s nothing we can do about that. Choosing at least one disease resistant tomato plant is wise.

To a certain degree, we can manage the environment and our gardening practices in ways that discourage insects and diseases. I almost always include an heirloom tomato plant in my garden, knowing that it is more vulnerable to disease, but it’s worth the effort.


Disease Prevention For a Tomato Plant


For gardeners with limited garden space, crop rotation is not an option. In that case, consider mulching your plants with coarse, chunky material, such as pine bark mulch. Having a dry surface under the plants, as opposed to a moist surface that can harbor disease organisms, is another line of defense. Those large chunks will dry faster than the surface of clay soil or shredded hardwood mulch. Several inches of seed-free straw or dry oak leaves also work.

Porous landscape fabric is another barrier you can use. This product is available in both biodegradable and synthetic materials.

Using pine mulch or fabric will help keep dormant spores of soil-borne diseases, deposited from previous crops, from splashing up onto the low-growing foliage, infecting new plants. Always remove diseased foliage to the trash. Spores can, of course, be blown in from elsewhere, but it’s always best to exercise that ounce of prevention when we can.

Yes, problems can crop up. But usually there is enough fresh produce harvested from your own back yard to consider the garden a worthwhile project.


Air Circulation and Suckers

tomato sucker removed

Tomato sucker removed.

Air circulation around each plant is another factor in disease prevention. I plant tomatoes 4 feet apart in the garden and permit only 3 or 4 main stems to develop on each one. Some growers limit the number of stems to just 2 and space the plants closer together.

A tomato plant is a weedy thing, and, left to its own devices, will create a tangled twining mess of stems and leaves. That doesn’t mean it won’t produce fruit. However, controlling the growth improves air circulation, which keeps the foliage healthier.

As tomato plants grow, suckers grow from axillary buds in the angle between the leaf and the stem. Those suckers will grow into more main stems if not limited. Simply snip out the suckers that have been selected for removal.

Tie stems to tall, sturdy stakes to lift tall plants off the ground. Removing suckers and staking a tomato plant increases the air circulation around and through the foliage, prolonging the plant’s life.

When the plants have been established for a few weeks, and they’re growing vigorously, remove the bottom leaves to get more air circulating underneath the plants. I keep about 12″ of the stem leaf-free. Keep the foliage as dry as possible and avoid handling wet plants.


When Disease Strikes


tomato disease septoria?

‘Rutgers’ tomato infected with disease (Septoria?).


Diseased plants will start losing foliage, generally from the bottom up. Leaves become yellow, spotted, puckered, or crispy brown. Widespread disease requires removal of the plants.

If a disease has just been noticed, though, remove to the trash all spotty, blighted leaves with clippers that have been dipped in a 10% bleach solution before going to the next plant. Disease can spread from plant to plant on infected tools and hands.

Spraying the plants with an appropriate remedy might save the plants. Several copper-, bicarbonate-, and microbe-based fungicides are available for organic growers.

Prevent the deadly tobacco mosaic virus from infecting tomatoes and peppers by never smoking near the vegetable garden, and by washing hands thoroughly before working there. Tobacco is related to tomatoes and peppers, and disease spores might be present in the product.

Occasionally we see tomato plants with leaves at the top all twisted and contorted. Sometimes they’re discolored as well. This can result from the application of herbicides, if not on your property, then from a few houses away. The chemical is carried on the breeze, and it takes minute quantities to affect tomatoes. Either cut the plants back to healthy foliage or replace with new transplants. Check also for leafhoppers and aphids inside curled leaves.


Sun Scald


sun scald on peppers

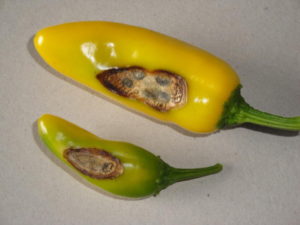
Sun scald on sweet peppers.


On Peppers

Strong sun hitting the fruits on very hot afternoons can cause sun scald. Keeping enough leaf cover will protect the fruits. Patches of sun scald are the parts of the fruit that were perpendicular to the hottest rays of the sun.

Don’t thin pepper plants; they’re especially vulnerable to sun scald. These fruits (photo, above) from a young and sparsely-leaved ‘Lemon Dream’ pepper were not adequately shaded. But the good parts don’t have to go to waste. Simply remove the affected parts.


Tomatoes Exposed To Sun

ingredients for tomato basil salad, cherokee purple tomato

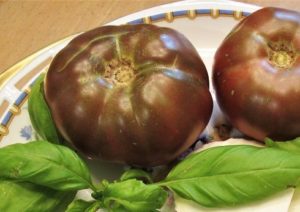
‘Cherokee Purple’ tomatoes and basil.

I prefer 3 or 4 stems on a tomato plant instead of 2; there are more leaves to lessen the sun’s intensity without entirely shading the fruits.

The flavor is more intense in some varieties (such as ‘Cherokee Purple’, ‘Black Krim’, and other “black” tomatoes) if the fruits are exposed to some direct sunlight. Morning sun is more gentle than hot afternoon sun. But on hot days, exposed tomatoes can get sun scald. Pick those tomatoes, remove the mushy parts affected by sun scald, and eat them right away, before they start rotting.

Sunlight gives fruits a richer color, increasing levels of anthocyanins. What are they? Anthocyanins, the blue and red pigments in fruits and vegetables, are powerful antioxidants, which help fight inflammation and play an important part in cancer prevention.

When you consider how much effort is required to support large amounts of ripening fruit on a mature tomato plant, it seems rational that 3 or 4 leafy stems will be able to produce a lot more “food” (carbohydrates from photosynthesis) for the developing fruits. This will help the fruits achieve full size and, more importantly, full flavor.


Return to the top


Headings

Page 1: It’s Time To Plant Tomatoes!, How Much Sun For a Tomato Plant? (Options), More Light For a Tomato Plant, Crop Rotation, Disease Resistance, Disease Prevention For a Tomato Plant (Air Circulation and Suckers, When Disease Strikes), and Sun Scald (On Peppers, Tomatoes Exposed To Sun)

Page 2: Time to Plant!, Plant Tomatoes Deeper, Trichomes, Stake or Cage a Tomato Plant?, And Water, and Deer