Page 3
5. Start seedlings in small batches.
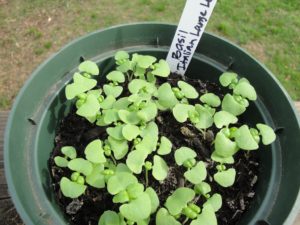
A small quantity of ‘Italian Large Leaf’ basil in a 6″ pot, ready for transplant.
A typical seed packet contains more seeds than you’ll need in one season. There might be 500 lettuce seeds in that packet! Kept refrigerated and dry, leftover seeds can remain viable one to several more years. Large seeds tend to stay alive for a longer period than small seeds.
Some of these seeds are tiny, and it’s easy to spill too many into the pot. Maybe you have friends or family members who would appreciate a few plants for their gardens. I don’t recommend picking out extra seeds from the soil and putting them back into the packet.
Put some pots of healthy plants out at the next yard sale and see how fast they disappear. This could be a budding entrepreneurial endeavor for your kids, or perhaps you could donate the surplus to neighbors, a local school, or a charity. For 29 years from my former residence, I offered trick-or-treaters the choice of plants or candy on Halloween. Believe it or not, over half chose plants, including seedlings!
My Simple Infrastructure
For fast-growing plants seeded a few or several times each year (basil, dill, cilantro, parsley, cucumber, zucchini, cool season greens), I start smaller batches as needed, one labeled variety per pot. In the photo, above, this 6″ pot of basil seedlings turned into a flat of 18 3½” pots, with 3 seedlings in each one. I started them indoors, under artificial light. When the weather warms, I’ll sell them at the farmers’ market.
After transplanting the seedlings, I placed them outside on the warm, sunny front porch and took them back inside every day until it was warm enough to keep them outdoors. On days that were too cold outside—but sunny—I placed them in clear bins or under loosely draped clear plastic. Basil is very sensitive to chilly temperatures (below 60-65°), and it grows fast, so don’t start it too early.
I sowed several varieties of tomatoes and peppers in separate 9-cell packs or multi-seeded into 4½” pots, each unit labeled with the variety’s name. Tomatoes germinate within a week and peppers a week after that. Because several pots fit in a flat, it was easy enough to carry them outside to the sun and then back indoors later in the day.
After transplanting each seedling into a pot of its own, the labor involved in ferrying all those flats outside…and then inside…every day during chilly weather…grew considerably more tiresome. “Exercise”, I called it. I’ll come up with something more efficient this summer.
6. Seedlings need strong light.

A common problem when starting seedlings indoors is insufficient sunlight. Provide direct sunlight the day the seeds germinate. Don’t coddle them in shade! Because seedlings grow rapidly, one or two days with insufficient light can weaken them. Plants develop thin stems and small leaves as they stretch toward a source of stronger light. Needless to say, they won’t make the best specimens to transplant into the garden.
The window might appear sunny enough but consider that the light comes from only one direction. And much of the sun’s energy is absorbed or reflected by the glass. When in doubt, give your seedlings more sun!
If your house doesn’t have large unobstructed windows that receive at least 6 hours of direct sunlight, you can supplement the light you do have or grow plants exclusively under artificial light.
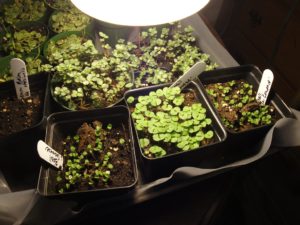
A few pots of basil seedlings and Pilea ‘Aquamarine’ and Peperomia string of turtles (houseplants) under a desk lamp.
That pot of basil seedlings in Tip #5 grew under an inexpensive desk lamp with a 12-watt compact fluorescent bulb. (In the photo above, 2023 seedlings receive supplemental light from that lamp. After enclosing the front porch, basil and other warm season plants get an earlier start in sunnier conditions there. Some move indoors in late afternoon for a few more hours of light.)
I kept the light on all day—24 hours—until the time of transplant, which was only a couple of weeks after germination. The bulb also provided warmth for the basil in this chilly house. The little plants were compact and healthy, and their seed leaves grew unusually large. A small light fixture like this one is sufficient to start a few small pots of seedlings. Larger quantities do well under shop lights.
Growing Seedlings Under Shop Lights
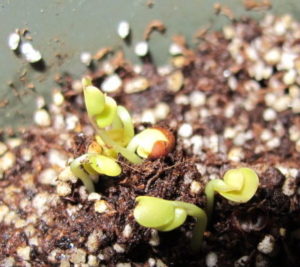
Dinosaur kale germinating overnight will turn darker green in sunlight.
The basement was too cold over the winter to start seedlings there. Later, though, as it warmed up, I rooted cuttings and grew seedlings under 4′ long fluorescent shop lights, each with 2 “daylight” tubes. Most days, I turn off the lights during part of the daytime hours and keep them on through the night.
Check the seed packet to see if your seeds require light or dark conditions for germination to take place. For most, it doesn’t matter.
The same day the seeds germinate, provide as much light as you can. Keep the lights on 14-18 hours per day. Place the plants only a few inches under the tubes, as long as they can’t feel the heat. Light intensity drops significantly with every inch of distance from the fixture.
Well-grown seedlings under artificial light look just as healthy as greenhouse-grown plants, provided they’re close enough to the lights and the lights are kept on long enough. You don’t need fancy red or blue wavelengths; “daylight” tubes work fine.
Matte white surfaces reflect light back to the plants. Shop lights often have reflectors, or construct an apparatus that serves the same purpose. Be careful when using water and electricity close together. If you need it, ask a licensed electrician for help.
Although some gardeners use 2′ long tubes in the home, they emit less light. You can make up for the loss of light by keeping them on additional hours or by using more tubes. Move the plants as close as possible to the source of light. Plants not receiving enough light energy will grow spindly and tall. Some might recover once they’re planted outside, or they might be too feeble to grow on.
7. Cull the weaklings and the anomalies.
All seed packets I’ve read recommend sowing more seeds than are required and thinning out the weakest ones. While this is a good practice, the current cost of seeds causes me to think twice. Besides, most seeds produce vigorous seedlings. Occasionally there will be a few that don’t grow properly. After you’ve grown seedlings a few times, you’ll know what they should look like.
Crowding the seedlings is not recommended. Sure, they can be thinned soon after germination, but many that otherwise would have made good garden plants end up being trashed because there simply were too many competitors. Remove plants that are weak, damaged, or misshapen, and those that have poor color.
Sometimes a seedling won’t develop an apical meristem, or a growing tip. Those, of course, should be culled since they’re not going anywhere. Out of curiosity, I sometimes grow them on to see what they would do. Often, the seed leaf (or cotyledon) just keeps growing, and eventually fails (photo, below, left).
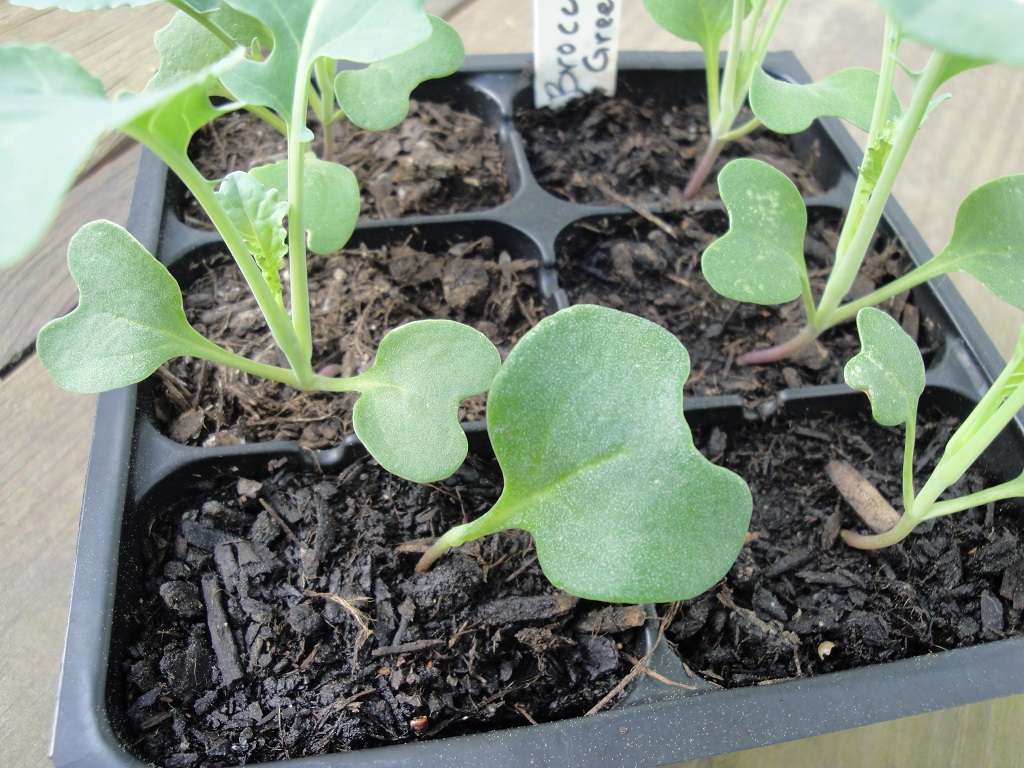
In another broccoli plant grown last year, only 3 leaves grew before the growing tip stopped functioning (photo, below, right). The last leaf grew to triple its normal size, and then the plant was removed. It’s odd that most of these anomalies I’ve seen have occurred in broccoli plants, although pepper and tomato seedlings also have shown aberrations.
-

- Seedling in lower left cell grew only 1 large seed leaf and produced no new growth.
-
- This broccoli grew only 3 leaves, one very large, and lost its growing tip.
8. Prevent damping-off disease from killing seedlings.
Right after your seeds germinated, they keeled over and died. How disappointing!
Ah, yes…they’ve probably got damping-off disease. Damping-off is caused by a few fungal pathogens whose spores float in the air or water. Spores also can be carried on seeds, in soil, and on hands.
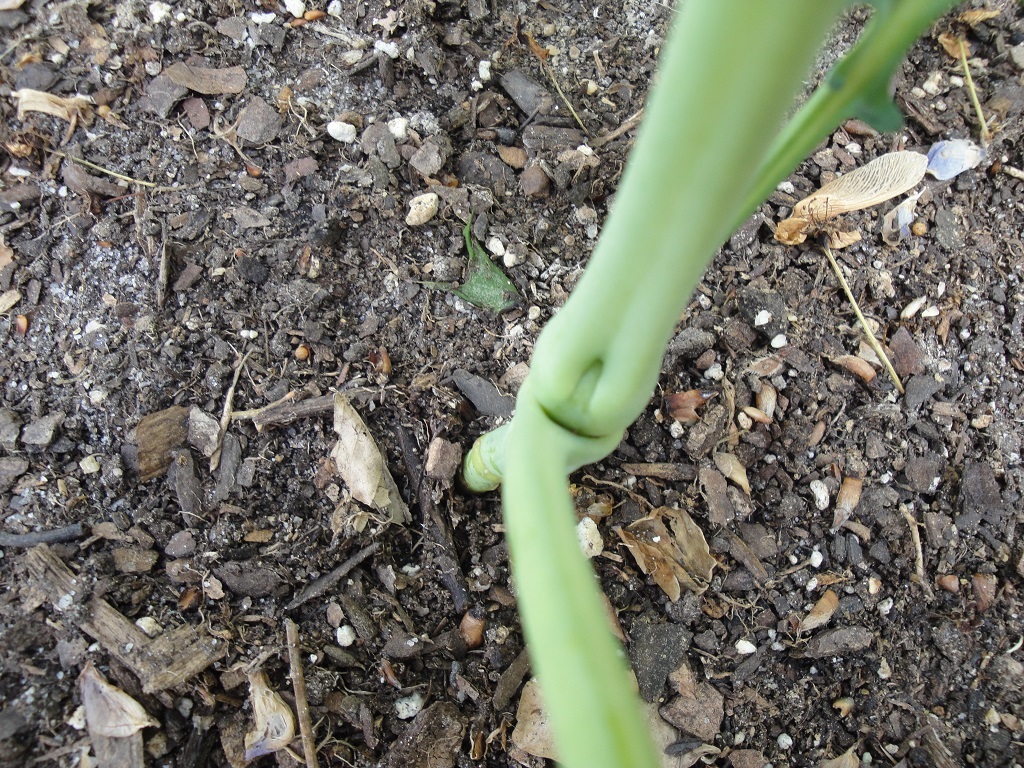
A fine tan line on the seedling’s stem is diagnostic for damping-off disease. The top falls over, wilts, and never recovers. Those plants are dead; off to the compost pile they go! But if you spotted the disease early, you might be able to save some of the other seedlings. Gently remove the few infected plants and a margin of soil and plants around them.
If many plants show the disease, don’t try to save them. Instead of trashing the old soil, compost it or bury it in the garden, but not where you plan to sow seeds. Use a bleach solution to sanitize the pot before replanting.
The best way to deal with damping-off is to prevent it in the first place. Vegetable and flower seeds need moisture and some humidity to sprout—the same conditions needed by those fungal spores.
If you’re using a clear dome on the plant tray, crack it open to allow air circulation. Remove it immediately when the seeds germinate. Expose the seedlings to direct sunlight and lightly moving air on Day 1. Be careful not to overwater, and water in the morning so the foliage and the soil surface can dry before nightfall.
Use room temperature or lightly warmed water and keep the seedlings at a comfortable temperature. Once the spores are present, damping-off is initiated by cool, stagnant air, overcrowded seedlings, high humidity, and overwatering.
Actinovate
Because I rely on healthy seedlings and plants for an income, I use an organic biological fungicide on all pots and cell packs after sowing the seeds. Actinovate contains live cultures of Streptomyces lydicus WYEC 108. It’s quite expensive and does not have a long shelf life, so it isn’t economical for small seed-starting projects.
Actinovate also effectively prevents a few other diseases, so I use it when rooting cuttings. Never dispose of unused portions near bodies of water. Exercise caution when working with Actinovate. Read the label. For best results, use this product before problems occur.
9. Seedlings and plants need fertilizer.

Trees, shrubs, and flowers growing outdoors expand their root systems in order to procure nutrients needed for all their cellular activities. On the other hand, plants confined to cell packs or small pots rely on us to provide all of their nutrients. In only 2-3 weeks, seedling mixes and many potting soils begin running out of nutrients.
Fertilizer helps sustain rapidly growing plants. But plants won’t show obvious symptoms of nutrient depletion until they’re “starving”. Instead of waiting for a sign, fertilize young seedlings every 2 weeks while they’re in cell packs or small pots.
Read the label and see how much product should be diluted in a volume of water. Increasing the concentration will not help the plants grow faster but could kill them very quickly! If in doubt, increase the dilution rate (the amount of water).
Make up a fresh batch of fertilizer when it’s needed. Don’t store it for more than a couple of days, but certainly don’t pour the leftover solution down the drain, either. Think about protecting our water sources and preventing any source of nutrients—in other words, all fertilizers and even grass clippings—from reaching a stream or the storm drain down the street.
Fertilizing plants will not make up for lack of sunlight or reverse any disease. In fact, plants growing in less than ideal light should be fertilized less often.
The Elements
Plants require 16 elements to function, and some species utilize a few more. Three macronutrients, taken from air and water, needed in the largest amounts are:
- C (carbon)
- O (oxygen)
- H (hydrogen)
On a fertilizer package, you’ll see 3 numbers on the label, for example, 24-8-16, 21-5-14, or 5-1-1. There are dozens of formulations available to consumers and commercial growers. Each product has an indicated purpose (for flowering plants, trees, acid-loving plants, vegetables, orchids, or lawns, etc.), although there’s a great deal of overlap in application. In general, most plants—whether flowering or leafy—do well enough with formulations having ratios of 3:1:2. Those numbers represent additional macronutrients, and they’re always listed in this order, N-P-K:
- N (nitrogen)
- P (phosphorus, or phosphate)
- K (potassium, or potash)
Those first 6 elements are the primary macronutrients.
Most fertilizers also contain secondary macronutrients, needed in moderate amounts:
- Ca (calcium)
- S (sulfur)
- Mg (magnesium)
Fertilizers include varying amounts of micronutrients that plants use in small or minute quantities. Those include:
- Fe (iron)
- Mn (manganese)
- B (boron)
- Mo (molybdenum)
- Cl (chlorine)
- Zn (zinc)
- Cu (copper)
In addition to those listed above, a few species function better with these added micronutrients:
- Co (cobalt)
- Na (sodium)
- Ni (nickel)
- Si (silicon)
- V (vanadium)
Read the Label

Fertilizer label, with nutrients formulated for tomatoes, peppers, and cucurbits (cucumber, squash, melon).
On the fertilizer package, you’ll see a list of ingredients and the percentages of the amounts included. The 3 numbers prominently displayed on the label (N-P-K) help determine the product’s main purpose. Organic fertilizers might or might not list all the nutrients in their products.
For example, a high first number, representing nitrogen, fosters steady foliage growth, cell formation, and healthy green color in the foliage. Phosphorus helps root growth, flowers, and fruit formation. Potassium contributes resistance to disease and water regulation.
In the photo of the label, above, notice that nitrogen is included in this product in 2 forms, ammoniacal and nitrate nitrogen. Urea N also is included in some products. A larger percentage of nitrate N compared to ammoniacal N or urea N helps prevent plants from stretching.
This is general information, and most elements influence many processes within plant tissues. There are thousands of chemical reactions occurring within plant tissues, from protein synthesis, carbohydrate metabolism, and hormone production to cell wall formation, DNA replication, and flower color. And you thought plants were simple organisms?!
Headings
Page 1: 1. Start with clean materials for seedlings. (Pasteurizing Potting Soil), 2. Grow disease resistant varieties… (…Especially Tomato Seedlings, It’s so hot out there!, A Few More Tomato Tips, Growing Heirloom Seedlings, Basil Downy Mildew, Avoid High Humidity)
Page 2: 3. Timing is important for seedlings. (The Fall Growing Season, Keeping Records, The Cooperative Extension Service, Starting Seedlings Outdoors, Don’t Start Seedlings Too Early, Cool Season Crops, Extending the Growing Season, Seedlings Transplanted Into Bigger Pots, Bunching Onions, The Brassicas, Brassicas In My Garden, Lettuce), 4. Is the temperature suitable for seedlings? (Miniature Incandescent Lights For Warmth, Water Temperature)
Page 3: 5. Start seedlings in small batches. (My Simple Infrastructure), 6. Seedlings need strong light. (Growing Seedlings Under Shop Lights), 7. Cull the weaklings and anomalies. 8. Prevent damping-off disease from killing your seedlings. (Actinovate), 9. Seedlings and plants need fertilizer. (The Elements, Read the Label)
Page 4: 10. Prepare the soil for your transplants. (Start With Good Drainage, Air Pore Space, Gypsum and Lime, Add Nutrient-Rich Amendments, Bury It), 11. Try succession planting for maximum yield. (Crop Rotation, Mulch), 12. Stop the pests before they ruin your garden. (Slugs and Snails, Larvae of Moths and Butterflies, Spider Mites and Thrips, Deer and Rabbits), Concluding