Tag Archive | parsley

Herb Gardens: How To Grow Herbs In Pots


2021

updated 3/14/2024


Herb Gardens: The Scents and Flavors of Summer


herb gardens


Fresh ‘Genovese’ basil for the garden salad…savory French thyme on grilled fish…chives and flat parsley to enliven the egg salad and browned potatoes. Yummy! This lengthy article describes how you can plant and enjoy growing herb gardens in containers. Growing potted herbs on the balcony or the sunny patio is the perfect solution if you have no garden space.

Potted herb gardens can be moved around to get just the right amount of sunlight the plants need. They can enjoy the morning sun on one side of the deck, and a few additional hours of afternoon sun on the other. As the sun’s arc changes from one season to the next, you can reposition the plants to capture the most light.

Several years ago, a gentleman asked me to pot herbs into a large strawberry jar. He traveled frequently between his residence and a summer home at the beach. Because he was a keen cook, he planned to take this herb garden with him to the next kitchen, wherever it was. So, if not prohibited where you’ll be traveling, consider taking your herb garden with you on your next road trip!


The Gift That Keeps On Giving

Place herb gardens on the picnic table for family and guests to sample as they enjoy the day’s barbecue. And then, in autumn, you can continue the harvest by growing them in sunny windows indoors.

Using herbs to flavor foods might help you kick the salt habit, or at least decrease its consumption. In addition to their wonderful flavors, herbs have high concentrations of beneficial antioxidants, which contribute to our well-being. In decreasing order, oregano, rosemary, parsley, basil, and thyme contain the most antioxidants among the common herbs.

I’ve sold herb gardens as wedding or birthday presents, for Mother’s Day, Father’s Day, Christmas, and as housewarming gifts. Families purchased herb gardens for retiring parents, who planned to devote more time to gardening. Over decades of selling potted plants, I estimate that about half of these delightful combinations were given as gifts.


Choosing the Right Containers for Herb Gardens


clay pots


Style and Size

Visit any well-stocked garden center and you’ll see an extensive selection of terra cotta (clay), stoneware, ceramic, wood, and inexpensive plastic pots. Containers are available in all sizes and shapes. Plain or ornate finishes reflect modern, rustic, or classic styles. You’ll also find containers specially fitted for deck railings or for hanging on a wall. Plant a half whiskey barrel with one or more mint varieties, and let them take over…in the pot, that is.

Some ceramics are glazed with materials that should not be used with edible plants. There might be a sticker on the bottom indicating this.

rabbit

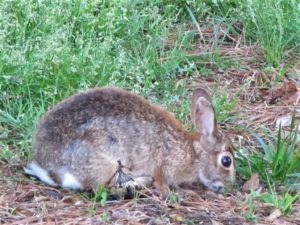
Rabbits are cute, but…

Small clay pots dry out faster than large non-porous pots. Just one day too many in direct sun without water could kill the plants. Lining a clay pot with food-grade plastic and poking a few holes in the bottom will slow the evaporation to a degree. To be sure, your herb gardens—especially small ones—will need daily checking.

Potting herbs in hanging baskets is a great solution if you live where deer and rabbits are waiting for the instant you turn your back. They’re particularly attracted to parsley, cilantro, and dill.

Herbs need excellent drainage, so always choose pots that have holes in the bottom. Other than that requirement, just select the pots that appeal to you. Many gardeners look for a consistent style, favoring pots that harmonize with each other and with the setting.


Window Boxes


clay pots for herb gardens

Clay pots for herb gardens.


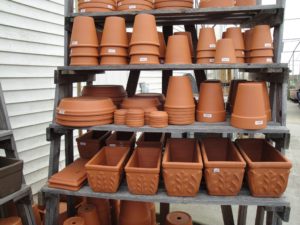
A popular container for herb gardens is the window box. Window boxes come in many styles, from quite simple to highly ornate. They’re available in terra cotta (lower shelf in photo, above), plastic, and lined or unlined wood. Plastic containers often have plugs in the drainage holes; remove them to ensure proper drainage.

You can hang them outside windows in securely anchored frames; lighter weight containers are a safer bet. Or simply place them on a brick wall, along a sidewalk, or at the edge of a sunny patio. Several herbs in clay pots look charming clustered together on a table. Where wind is a concern, use heavier pots, but don’t place them where they could blow off the balcony to the sidewalk and harm someone.

Cracking
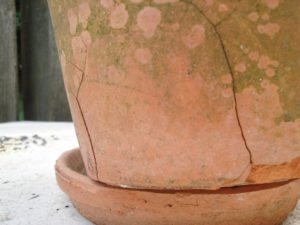
Handle clay pots carefully so they won’t crack. Clay pots might tolerate one or a few seasons of freezing weather; eventually most will begin to spall or crack. When clay absorbs water, and the water expands as it freezes, the clay degrades. Denser terra cotta (Italian for “baked earth”) survives more winters than softer clay.

This clay pot (photo, right) spent almost a decade outside, and it cracked this past winter. Until it crumbles, it will serve some purpose in the garden. I usually used Italian clay pots for my plant business and acknowledge that even better-quality pottery has limits.

Switching herbs into frost-resistant pots where winters are cold is one option. Other options include growing them indoors, in a cold frame, or in a conservatory—in other words, where the pots won’t freeze.

Tuscan Style

Years ago, I planted two herb gardens for a customer in Potomac, Maryland. They sat on a low stone wall surrounding a sunny Mediterranean-style garden. The Italian clay window boxes were over 4′ long and weighed more than 50 pounds empty. They were beautiful when finished—all those shades of green, purple, gray, variegated white and yellow—and the fragrances!

Even without flowers, potted herb gardens have their own unmistakable charm. Green algae and that white coating (efflorescence, from mineral salts) building up on clay pots won’t harm the plants but will amplify the rustic factor. And, yes, you can clean it off if you prefer.


Long Toms

Long toms, also called rose pots, are taller than they are wide (top shelf and part of next one, in photo under “Window Boxes”). Variegated lemon thyme or prostrate rosemary cascading over the side are perfect choices.

These pots are available in tiny sizes only 2″ wide, but 4″, 5″, and 6″ pots are more useful. Offer small herb containers as party favors for special occasions or use them to assign seating around the table.

While in Maryland, I potted herbs into 3″ stainless steel long toms for the tables at a popular seafood restaurant. I switched them out every couple of weeks.

I used to purchase clay long toms from a wholesale supplier in Baltimore. They normally came without drainage holes, so I added them, using a reversible drill and a masonry bit. Easy.


Plain Pots
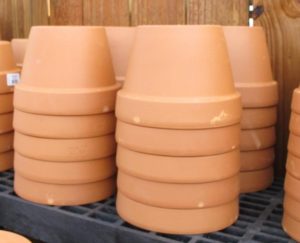
azalea pots for herb gardens

“Azalea” pots are 3/4 as tall as they are wide.

Reusing what you have sitting around the garage is most economical.

Clean out those 12″ hanging baskets that held annuals last year, and repurpose them for herb gardens, with or without the wires. Green plastic pots last longer than white ones, which degrade faster in direct sun.

Empty the tired old soil into the shrub gardens and purchase new potting soil for your project. Some plants, particularly basil, are susceptible to several soil borne diseases. Starting with clean materials, therefore, is critical for their success. Wipe down used pots with a 10% bleach solution, rinse, and air-dry…for basil, at least.

Azalea pots are a bit shorter than they are wide and lend a more anchored look to potted plants. I prefer azalea pots over standard pots (height = width). It’s a personal choice, of course. You can pot them up with one plant or use a larger pot for a few plants.

Topiary

Rosemary and lavender topiary standards (the lollipop shape) look great in clay azalea pots, with some moss growing on the soil surface. Grow them indoors, in full sun, where they’re protected from hard winter freezes. But keeping them outdoors—even in chilly weather—ensures they get enough direct sunlight.

Try training the woody herbs “quasi-bonsai” style, with knobby stems, a few little weeds, and a fallen “log” embedded in the moss. Allowing the clay to mellow with algae and efflorescence, and those pots aren’t so plain after all.


Strawberry Pots


herbs in a strawberry jar

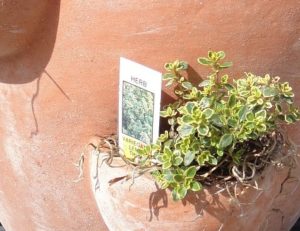
Lemon thyme in a clay strawberry jar.


Planting a strawberry jar is a bit more complicated, so it deserves a post of its own. If your attempts at planting a strawberry pot have been less than successful, refer to this article for solutions.


Pot Color

A fine point often overlooked in container gardening is the color of the pot. In summer, with scorching sun bearing down on a dark pot, that heat transfers to the soil. Consequently, the root system will be sparse on the hot side of the pot. Plants are happier without this stress.

You can alleviate their discomfort by shading the root system in summer with smaller pots of heat tolerant plants, such as dwarf zinnias or vinca. Or use white pots in hot weather to lower the temperature.

In autumn, I plant cool season greens and herbs in black nursery pots. Dark colors absorb more energy from the sun. Warming the soil a moderate amount helps limit the deep freeze in winter. The longer the roots can function, the more foliage I’ll be able to pick.

Curiously, clay pots with moist soil can feel cooler to the touch. This is due to evaporative cooling, where the temperature decreases as water evaporates from the surface. So, even in hot weather, a clay pot won’t feel as hot as most other pots. Your skin performs the same function.

Choosing pot colors might not be an option. Alternatively, plant herbs that dislike heat (such as cilantro) on the cooler north (northern hemisphere) or east side of the pot.


Choosing the Right Plants for Herb Gardens


A Proper Fit

First, decide which herbs you want to grow. Look for smaller varieties of the herbs you use in cooking, choosing young but well-rooted transplants. These will adapt better to containers than full size varieties. Sometimes there’s not much choice; maybe only ‘Italian Large Leaf’ basil is available. Okay, I’d rather have it than no basil at all, so there are 4 options when using large-growing herbs:

  1. use fewer herbs in the herb garden to make room for the big basil
  2. keep the basil in the combination pot, but cut it back more frequently
  3. find a larger pot for the herb garden
  4. grow this large basil by itself

We need to find a balance between plant size and available space relative to what other plants need. You can fit a few plants together, but they suffer when cramming all the herbs you like into too small a container. Plants growing in pots, however, don’t grow as large as those in the ground.


Seeds and Transplants

Seeds can be sown directly in the pots, but thin them once they sprout. Remember that some species are very slow to germinate, and you most likely will have better success with transplants. For new gardeners, I suggest buying young plants for now, and perhaps experimenting with seeds during the summer. But if the herbs you need are available only as seed, go for it.

Garden centers and farmers’ markets offer a wide variety of herbs grown as transplants. Some growers start them from seed, cuttings, or plugs (very young plants) several times a year. In one growing season, you might find dozens of varieties of basil alone! So, shop around for the local herb lady, and request certain plants she might grow for you.

I included a section on Propagating Herbs, which you’ll find on Page 5.


What’s the Difference Between Herbs and Spices?


Although we use the two terms interchangeably, there is a difference between them. Herbs are leaves of edible plants, and the focus of this article. Spices comprise all other parts of edible plants—bark, seeds, roots, fruits, and flower parts.

Cilantro leaves and coriander seeds come from the same plant, but those interested in this minor technicality differentiate between the herb and the spice.

Turmeric, ginger, vanilla extract, nutmeg, cinnamon, and black pepper are spices that we keep in the pantry. Saffron, the world’s most expensive spice, comes from the 3 threadlike female parts in a fall-blooming Crocus sativus flower.


Return to the top of Page 1

Headings:

Page 1: The Gift That Keeps On Giving, Choosing the Right Containers for Herb Gardens (Style and Size, Window Boxes, Long Toms, Plain Pots, Pot Color), Choosing the Right Plants for Herb Gardens (A Proper Fit, Seeds and Transplants, What’s the Difference Between Herbs and Spices?)

Page 2: Which Herbs Are Annuals? Biennials? Perennials?

Page 3: Herb Gardens Close To the Kitchen, Combination Pots, Potting Up Herb Gardens, How To Maintain Herb Gardens (Light, Natural Sunlight, Artificial Light)

Page 4: Tips For Watering Herb Gardens (Transpiration, Why Plants Wilt, Testing for Moisture, From Season To Season, Water Temperature), Fertilizing Herb Gardens (Organic or Synthetic?, Macronutrients and Micronutrients, How Often To Fertilize Herbs, When We Don’t Fertilize, The Taste Test), Temperature (As Temperatures Change)

Page 5: Common Pests (Better Options To Eradicate Pests, Bacillus Thuringiensis, Horticultural Oil, Organic Sluggo, Plain Water), Girth Control (It’s Thyme For Drying, Which Herbs Dry Well?), Renovating Herb Gardens (Propagating Herbs)
 

More Quick Tips for Today’s Garden


More Quick Tips For Today’s Garden


Here are several more quick tips for the gardens in early spring. Several links have been provided, where you’ll find more details.


1. Fertilize Violas and Pansies


It’s no wonder these cold-hardy little biennials are seen all around town. They’re planted in median strips, at neighborhood entrances, around shopping centers, and in our gardens.

They live through the winter, delighting all of us with their colorful, cheerful appearance. Cold is what they like; in late spring or early summer, they will fail in the heat. This year, we had a very mild winter in zone 7b Charlotte, so they looked beautiful all season.


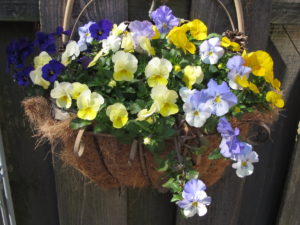
wire basket with cool wave pansies

A wire basket with hardy violas and ‘Cool Wave’ pansies.


Quick tips: As long as they’re in active growth, fertilize every 6 or 8 weeks, even in the winter! Use fertilizer that has a higher percentage of phosphorus, the middle number on a package. A ratio of 1-2-1 or 1-3-1 will work. Those three numbers represent the percentages of nitrogen, phosphorus (phosphate), and potassium (potash) in the product. They are always listed in that order: N-P-K.

Keep in mind that violas and pansies need acidic soil. You can mix peat moss into the bed in preparation for planting, also incorporating pine fines (soil conditioner) to improve drainage. Or use a product (Soil Acidifier) that will lower the pH, if your soil tests on the high side. Soil that has been limed might be too alkaline for violas, which prefer a pH level around 5.5 to 6.0.

If you have a spare hour or so, deadhead (pinch off) the old faded flowers. Whether or not that actually helps promote bloom, it certainly will improve the appearance of the plants, especially for pansies.


2. Harvest Greens


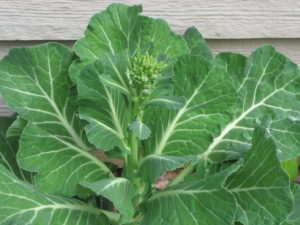
collards

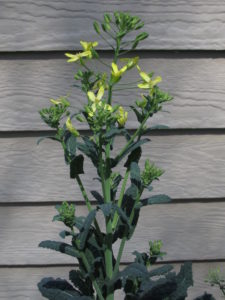
Collards, with flower bud.


Recently I cleaned the vegetable garden. I harvested most, but not all, of the greens that have been producing since last fall.

Later today or tomorrow, I will wash and sauté the greens down to “wilt”. Then they will be divided into portions and frozen in plastic zip lock bags. The next time I make soup from scratch (or from a can), a rice dish with rotisserie chicken, lasagna, or buy a store-bought pizza, one or two of those bags of greens will be added to the dish. That’s an easy way to add greens to a meal, and increase the nutritional content.

The two large clumps of collards will make a fabulous Collards Soup. For that, I use a large stockpot, which makes about a gallon of soup. I also freeze some of it in plastic containers for later use.

tokyo bekana

Chinese cabbage ‘Tokyo Bekana’.

In addition to the collards, I harvested mustard greens and dinosaur and ‘Red Russian’ kales. The light green Chinese cabbage ‘Tokyo Bekana’ will be added to the next salad. Swiss chard ‘Bright Lights’ remains in the garden, and should last until autumn if it’s partially shaded.

The vegetable garden next to the house is becoming increasingly shaded. The trees on the berm to the south have grown larger and wider over the past 5 years. At this point I’m seriously considering growing a couple of tomato plants in containers on the enclosed deck, safe from the deer.

The sweet pepper plant did well enough in the garden, so it will go there again this year. But most of that garden will contain a variety of greens, green onions, leeks, and probably a cucumber. It’s still the perfect place for fall and winter greens because it’s a warm microclimate, being right next to the house. And at that time, the trees are leafless, so there’s more sun.


The Beneficials

Quick tips: Several of the brassicas are in flower, so I left a few of them in the garden for the honey bees and the tiny braconid wasps. During late winter and early spring, few food sources are available for these beneficial insects, so I like to help when I can. And you can add some flowers to a salad or as a garnish.


3. Plant More Cool Season Greens and Vegetables


dinosaur kale in flower

Dinosaur kale in bloom.

Broccoli ‘Happy Rich’ is ready! So I made a trip to the garden center a few days ago to pick up a few pots of this delicious miniature broccoli. Ordering seeds is just not feasible right now; I’d have lost 4 or 5 weeks of growing time, so I went for the quick fix: transplants!

Broccoli ‘Imperial’ is one of the varieties recommended for growing in the spring and late summer. This crop will be able to tolerate the warmth of the late spring season, when it will be harvested. I love broccoli. So many vitamins, minerals, phytonutrients…and protein too.

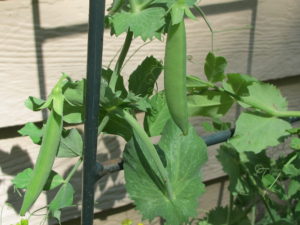
Carrot, radish, and beet seeds can be planted now, even before frost has retreated north. Pea seeds could have gone into the ground weeks ago, but the ones I planted in the fall made it through the winter, and are now flowering and making pea pods (photo, below).

As space opens up in the garden, I’ll sow seeds of mesclun, tatsoi, leeks, and maybe ‘Scarlet Frills’ mustard for its beautiful and fairly spicy foliage, adding some spark to salads!


pea vine

Fast growing edible-podded peas on a trellis.


Check with your local agricultural extension service for a chart describing what can be planted when. It wouldn’t be a bad idea to get a soil test, to remove doubt about the pH or which nutrients need to be added.


Lettuce


Salanova lettuce

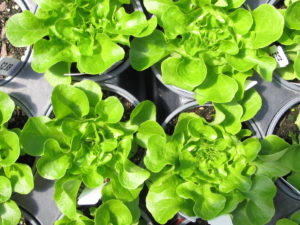
Pots of ‘Salanova’ lettuce ready for the garden.


A few pots and market packs of lettuce purchased over the past week will supplement the patch of lettuce seedlings that survived the winter in the garden. Smaller plants will continue to grow after the mature heads have been harvested.

A red butterhead lettuce called ‘Skyphos’ is reliable even in warm temperatures, up to a point. It retains very good flavor when others turn bitter in the heat.

When trying to extend the lettuce harvest, look for varieties that tolerate high temperatures. Varieties listed for planting at this time include ‘Nancy’ (green butterhead), ‘Vulcan’ (red leaf), ‘Sparx’ (Romaine), ‘Muir’ and ‘Magenta’ (summer crisp), and ‘Skyphos’, of course, one of the favorites I’ve grown for years. The heirloom ‘Black Seeded Simpson’, a loose-leaf lettuce, and ‘Outredgeous’ Romaine are more options for a spring garden.


healthy greens--AllStar Gourmet lettuce mix

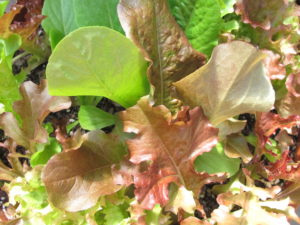
Johnny’s Selected Seeds’ Allstar Gourmet lettuce mix.


Quick tips: ‘Red Sails’ lettuce is too pretty to pass up, and it can grow well into spring. Leafy vegetables with deep green color and red pigments, the anthocyanins, have more antioxidants. These nutrients help us fight many illnesses, including cancer and inflammation. So, I always prefer richly colored varieties.

More Quick Tips: How To Grow Lettuce

Lettuce seed germinates readily at a soil temperature in the 60’s F. It will take longer, but seeds will even germinate at 45°. They won’t, however, do anything above 75° or so.

Lettuce appreciates very rich, moist soil. Fertilize every couple of weeks with high nitrogen fish emulsion, earthworm castings, or compost if the soil temperature has increased. And provide ground limestone for calcium and to raise the pH, which prevents tip burn. If a soil test indicates proper pH for greens, add gypsum instead, which also provides calcium but doesn’t change the pH. It’s best to deal with pH months ahead of planting crops.

Organic products rely on soil microbes to break them down and to make their nutrients available to plant roots. But, in winter, microbes are dormant, so I use a synthetic soluble fertilizer.

As the weather warms up, give lettuce morning sun, which is less harsh than hot afternoon sun. You can plant a quick crop between young tomato plants, in partial shade.

Watch out for slugs; scatter granules of organic Sluggo outside the lettuce bed, to draw them away from their intended meal. Slugs can transmit a form of meningitis when ingested, so… And aphids can be a problem, too, but you can just wash them away.


4. Pick the Parsley


parsley for chicken soup

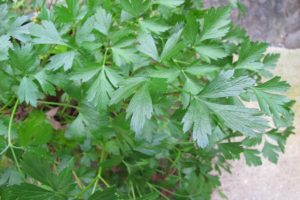
Italian (flat-leaf) parsley.

This versatile herb gives fresh flavor to meat, fish, and poultry dishes, sauces, soups, potatoes, eggs, salads, sandwiches, garlic bread, mayonnaise, and herb butter.

The addition of vitamin- and mineral-rich parsley enhances just abut anything you cook. But add it late in the cooking process, in the last few minutes, as you would most leafy herbs. Cooked for a long time, the flavors will evaporate away.

Concerned about your breath? Chew on a couple of leaves; the chlorophyll will freshen it.

There are two main groups of parsley:

  1. flat-leaf, plain, or Italian (‘Giant of Italy’, a new improved sweeter ‘Peione’, and smaller ‘Titan’)
  2. curled leaf parsley (‘Favorit’, ‘Double moss curled’, ‘Paramount’), famous as a garnish and pretty as a garden edging, but also edible.

Decades ago, as a kid, I remember seeing my grandmother in her Englewood, New Jersey, kitchen, holding a huge bunch of flat-leaf parsley inside her arm. Nanny was the real thing—Sicilian-born and a great cook—so for those looking for real parsley flavor, go for the flat-leaf.

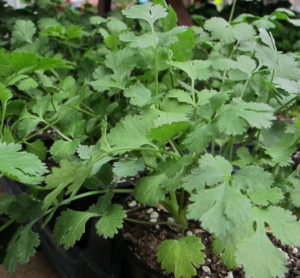
When I was growing up, my mother (Nanny’s daughter) always used curly parsley. Several years ago, I asked her why she used the curled and not the flat-leaf. She said the Italian parsley always tasted funny, so she preferred the curled. Do you know which other herb looks like flat-leaf parsley? That’s right…she must have bought cilantro! Neither of us likes this herb at all! So, if you’ve been reluctant to buy or grow flat-leaf parsley, see if its resemblance to cilantro might be the root of that problem.


Here’s good news: it’s easy to grow!

Parsley (Petroselinum crispum) is a biennial member of the Apiaceae family, a cousin of dill, cilantro, carrot, and fennel. Set young transplants into the garden in early spring, through the summer, and in the fall. Fertilize every few weeks with a high nitrogen product, such as fish emulsion. Parsley also is adaptable to growing in potted herb gardens.

In areas with moderately cold winters, it will tolerate freezing temperatures. The foliage will stay in better condition if it receives some protection from a warmer microclimate, such as next to a south-facing wall. Or grow it in a cold frame in colder climates.

parsley with flower stems

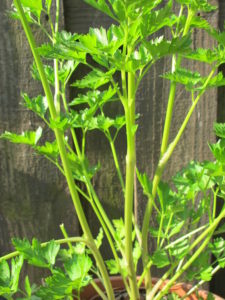
Flat leaf parsley, going to flower.

Quick tips: Plant parsley in rich soil. Amended with compost or aged manure to a depth of 12″ or more, parsley will develop a large root system when grown in the ground. ‘Gigante’ (or ‘Giant of Italy’) grows into a massive mound of dark green leaves, 2′ tall and wider than that. In spring, the stems begin to grow tall, preparing for its blooming phase (photo, right).

This is parsley’s natural cycle of growth as a biennial. It’s seeded in one year, grows, overwinters once, and then flowers the next spring or early summer. Sometimes parsley goes to flower the first year if it was seeded very early.

Harvest the plant before it goes to flower, or when you notice that the stems are growing tall (photo, right). If you wait much longer than that, the sweet flavor will become strong or bitter. Cut the stem at soil level, and remove any yellow or pale green leaves.

Cut parsley stems will stay fresh for a few days in a glass of water on the counter or in the refrigerator.


Prepare the rest this way:

  • Wash the parsley thoroughly in cool running water. Shake off as much water as you can, or put it through a salad spinner.
  • Have a couple of 1- or 2-cup plastic containers handy.
  • Remove thick stems. Cut and reserve the leaflets, and keep them intact.
  • Transfer leaflets to the plastic containers, packing them in tightly.
  • Freeze the containers.
  • The next time you need some parsley for soup or tomato sauce or roasted vegetables, simply flake off the quantity you need. Chop them before adding to cooking.
  • Simple! Although it doesn’t look like fresh parsley (it looks wilted), the flavor is better than the dried option. And it takes up less space than chopped parsley frozen in ice cubes.


Who’s eating all the parsley?

Deer and Rabbits

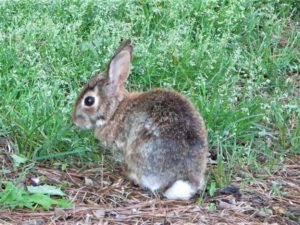
quick tips: dont feed the rabbits!


Does this sound familiar? The parsley is growing beautifully, it has great color, and it’s providing lots of clippings for the kitchen. All of a sudden, the leaves disappeared…overnight! Well, we’re not the only ones who are fond of parsley. Deer and rabbits like it, too. They can do a lot of damage in one sitting.

Quick tips: You can’t use chemical deer repellents, but you can construct a frame around the parsley plants. If you have a big old lamp shade with “ribs”, remove the fabric and replace it with bird (deer) netting. The bigger the shade, the better. Anchor it to the ground so it can’t be kicked over. Or fabricate something yourself from hardware cloth or chicken wire. Make sure young rabbits won’t be able to squeeze through the openings. The goal is to physically exclude animals from reaching the parsley, cilantro, and dill.

Black Swallowtail Butterfly Caterpillars


black swallowtail butterfly egg on parsley

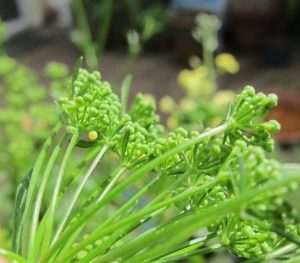
Yellow egg, left of center, on parsley flower bud.


If the parsley looks smaller than it did last week, look for little caterpillars feeding on the leaves. The female black swallowtail lays tiny yellow eggs on plants in the Apiaceae family (parsley, cilantro, fennel, dill). She deposits them primarily on the bottoms of the leaves. They’re hard to spot, but once you’ve learned to recognize them, you can simply rub them off.

Quick tips: Look for young caterpillars a few days or a week later, in case you missed a few of the eggs. The young brown and white larvae look like bird droppings, appearing less appealing to predators. An organic approach is to spray with Bt (Bacillus thuringiensis), a naturally occurring bacterium. Bt causes caterpillars of moths and butterflies to stop feeding, and they’ll die a day or two later.

But I like butterflies!

caterpillar on fennel

Black swallowtail larva on fennel.

Quick tips: Now, if you would rather keep the butterflies, as I do, simply transfer caterpillars from the parsley to a bronze fennel plant. Bronze fennel is a large growing and pretty perennial herb, and a food source for this insect. The fennel is edible for us as well, in salads or to garnish fish.

As the larvae grow, they turn into large black and green striped caterpillars (photo, right). These parsley worms, as they’re sometimes called, will consume more and more of the foliage. Not a problem for the vigorous bronze fennel, but a smaller parsley plant can disappear in a flash.


5. Weed!


Dandelions, chickweed, and hairy bittercress top the list of winter weeds around here. In untended fields, the bright yellow flowers of wintercress cover acres of ground, not unattractive at all!

Your local garden center can help with products that prevent weed seeds from germinating or that will kill weeds after they sprout. Don’t use them, though, near the edibles. Bring fresh samples with you. Diligent weeding and mulch are recommended.


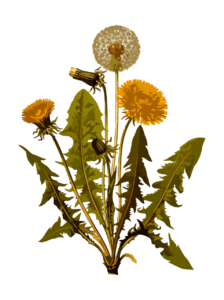
Dandelion


Derived from the French “dent de lion”, dandelion refers to the toothed (dent) edges of the leaves. Bright yellow flowers dot the landscape from late winter on. If they are not killed or removed, each of those flowers will develop into a cluster of seeds. This method of seed dispersal, by the wind, is called anemochory.

Quick tips: This weed develops a taproot sometimes more than a foot deep. Leaving part of the taproot behind after “pulling” the weed will result in a new dandelion regrowing from the root. Either remove the entire root (there’s a tool for that), spot treat with a non-selective herbicide, or use a broadleaf weed killer. Always read the labels. Keep weed killers away from herbs and vegetables.

The dandelion in our lawns (Taraxacum officinale) looks similar to edible “dandelion greens”, in the species Cichorium intybus, a type of chicory.


Chickweed


chickweed, quick tips: remove the seeds

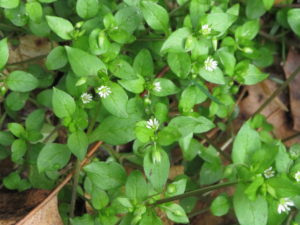
Common chickweed, with small white daisy flowers.


Chickweed grows close to the ground, spreading about 1 1/2′ wide. Thick mats of this weed will hide among the lawn grasses, winter greens, and last year’s fallen leaves. Their seeds germinate in cool seasons, and the plants grow fast, lodging against walls and other objects that trap winter warmth.

If you pull the top, the roots have such a strong hold on the soil that the stem will stretch and break off. In a couple of weeks, you’ll have the pleasure of pulling it again. Grasp firmly under the crown of the plant, just below where the stem meets the soil, and make sure you get the roots.

Two species that often grow here in North Carolina are common chickweed and the more hairy mouse-ear chickweed.

Quick tips: Don’t wait as long as I did for this garden chore. Next winter, there will be an even bigger crop of chickweed. That’s not such a bad thing, though, because tender young greens are edible. Like many greens, common chickweed (Stellaria media) is very high in vitamins and minerals. One website claims it is fairly high in oxalic acid; for those with certain health conditions, check with your doctor. Add it to salads, soups, sandwiches, and stir-fries.


Hairy Bittercress

bitter cress. Quick tip: remove weeds before they seed about.

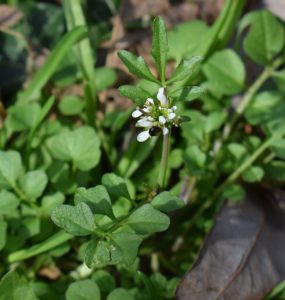
Hairy bittercress.

This species of cress (Cardamine hirsuta) is a short but abundant winter annual that grows a small rosette of edible bitter foliage, topped by a cluster of white flowers. It is related to broccoli and cabbage, in the Brassicaceae family. Disturbed seedpods open explosively, dispersing seeds in every direction. Ballochory is the name of this method of seed dispersal.

The “ounce of prevention is worth a pound of cure” axiom certainly holds true with weeds. Many times more weeds will grow in the next season if they are allowed to go to seed.

Not all of them will germinate, though. Seeds can remain viable for decades, patiently waiting underground for that moment when the soil is disturbed. Exposing the seed to favorable conditions, such as light, water, and the right temperature, is all they need to germinate.


6. Take a Moment to Just Enjoy Spring


There will always be more quick tips for the garden, but they can wait. Take the kids or the dog or yourself outside, listen to the sounds of nature, and just enjoy being!


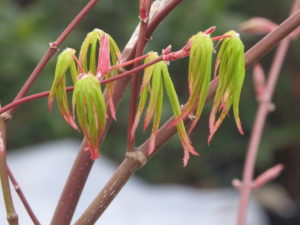
Japanese maple, new leaves. Quick tip: enjoy spring!

New leaves on Japanese maple.


Return to the top