Page 2
Transplanting the Tomato
-

- Fill pot with soil. I’m adding some aged cow manure.
-

- Scoring the root ball encourages rapid re-rooting.

Fill the pot almost to the rim, firming the soil as you go. Remove the moistened tomato transplant from the pot. Pushing up the bottom of the pot will release its hold on the plant. The tomato is one of few plants that can be planted lower in the soil than it was growing in its original pot. This is advantageous for the plant simply due to the more extensive root system that grows early in the plant’s development.
Score the root ball, or loosen the outer roots to stimulate new root growth.
An overgrown, leggy tomato should be planted deeply or in a trough below the soil surface, right up to the healthy leaves. In a few days, the buried stem will start sprouting roots from the root initials, those little bumps on the stem. Tomatoes usually recover and resume growth quickly after transplanting. Firm the soil around the root system.
Last Year’s Soil?
At the end of the tomato season, you could grow a cool-season crop in the fall, or parsley and green onions over the winter. Some gardeners empty the entire pot and start with fresh potting soil for each crop. If you don’t, it’s a good idea to amend the existing soil to replenish the nutrient content, in addition to fertilizing regularly. Potting soil has gotten fairly expensive, so I do not empty the pots every season.
Over time, potting soil loses volume as organic matter decomposes. What’s left is mineral matter, such as sand and perlite, and pine fines, but the rich compost has been used up. So, if the soil’s texture is less “spongy” than it used to be, change the soil or at least some of it.
Don’t throw away the old soil, though. It still has value as organic matter that can be added to flower beds, under the shrubs, or as backfill for new trees.
Vegetables that are susceptible to disease (tomato, pepper, eggplant, basil), however, should be planted in fresh soil every year. That’s the recommendation we often hear. Or, you can take your chances, as I often do, and replace just the top layer of soil. As a test, I replanted an heirloom tomato in a pot which had held a diseased heirloom tomato. The second tomato had no problems. As a caution, though, prudence calls for planting a different kind of crop in the refreshed old soil.
When the pots are empty, use a 10% bleach solution to thoroughly clean them. Let the pots stay wet for a few minutes, then rinse well.
Water
Large soil volumes dry out more slowly and they hold fertilizer for a longer period of time. A full-grown plant in sunny weather, though, might require daily watering. Maybe twice a day!
If your summer plans call for long weekends at the beach, you’ll want to invest in an automatic drip watering system that delivers a daily dose of water. This also is a huge convenience for people on tight schedules. Be sure to calibrate correctly. A 20″ pot with an established plant might require between 1 and 3 gallons of water daily. Experiment with water quantity before you leave town for a week.
Soil composition, plant size, and weather determine watering schedules. Water until you see it begin to weep out from the bottom of the pot. If that water is soaked up from the saucer in a few minutes, give it some more. But don’t let vegetables in containers sit in water long-term.
Going Away?
- If you don’t have drip irrigation, you might ask a neighbor to water your plants while you’re away and offer to do the same for her.
- I used to take care of customers’ gardens—and fill the bird baths—when they were away, so you might find someone near you who offers that service.
- Experiment with placing a large container of water near and above your plants, and run one or more wicks from the water into the soil.
- Garden centers have plant nannies that can deliver a bottle’s worth of water through a clay or plastic spike.
- Add a one- or two-inch layer of mulch on top of the soil to slow evaporation.
- Shade the hoses to prevent hot water from injuring the plants.
- Shade the root system to keep the soil cooler.
- Secure a canopy of knitted shade cloth around the plants to lower the temperature.
- Secure the plants to prevent them from blowing over.
- Moving the potted plants to a spot where they get dappled sunlight or morning sun, instead of full sun, might keep them in better shape while you’re gone.
- Consider cutting back large plants, thinning tomatoes, and picking ripe or almost ripe fruits.
- If the plants are very potbound, perhaps repotting them into larger pots before you leave will preserve them.
- For well-established plants, fill their saucers with water. This is okay to do now and then, but I wouldn’t do it routinely. Don’t plunge them into a deep tub of water.
These tips should help keep the plants alive until you return. Get the weather forecast, and plan accordingly.
Staking

‘Black Prince’ tomato (June, 2019) sets a heavy crop. These fruits will darken in a few days.
Tall indeterminate tomatoes need to be staked. Use a 7′ or 8′ tall vinyl-clad metal stake (photo, above) or one made of sturdy bamboo or oak, inserted all the way to the bottom of the pot. Or use a tripod style of staking, using 3 stakes tied together at the top, with twine encircling the poles in a few locations.
Decorative trellises are available from garden centers. Before purchasing a trellis, make sure it will fit in the pot, or that it can be anchored in the ground behind the pot.
Use soft ties (twine, shoelaces, strips of cloth) to secure the stem to the stake, every foot or so, as it grows. Limit the number of main stems to 3 or 4 by pinching out the “suckers” that grow in the axils.
Stake the tomatoes at planting time, or plant the stake first. Don’t wait too long after planting to stake it because some of the roots will be damaged. If the stake seems unstable, you’ll need to pack the soil more firmly for the stake to stand upright. Once the roots get growing, they’ll hold the stake in place.
Bush Tomatoes
Bush tomatoes, which are usually determinate, bear most of their fruit over a limited period of time. These generally shorter plants can be staked or caged if necessary. Determinates are often preferred by those who want to preserve a crop (canned tomatoes, juice, sauce), and then grow something else, or a second crop if the climate permits it. Bush tomatoes don’t need to have suckers removed.
Fertilizing Vegetables In Containers
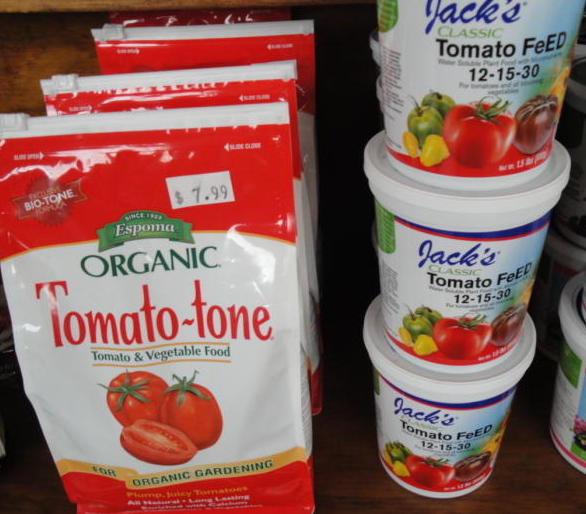
Tomato-tone and Tomato Feed for most vegetables in containers.
Vegetables in containers will not prosper throughout the entire season without a nutritional boost now and then. If the plant is growing quickly, you’ll need to fertilize every 2 or 3 weeks according to package directions. In rainy weather or with heavy watering, apply fertilizer every 2 weeks.
Garden centers stock many brands of fertilizer made specifically for tomatoes and peppers, but look for products that have at least 6% calcium to prevent blossom end rot. Espoma’s organic Tomato-tone has been around a long time and many experienced gardeners rely on it. Espoma products also contain beneficial microbes.
Another fertilizer I like is Jack’s Tomato Feed. This balanced fertilizer has most of the trace minerals needed by vegetables in containers. It also works with cucumbers and squash. The micronutrient boron helps maintain a healthy growing tip and aids fruit development. Plants need several nutrients for full-flavored fruits.
Scheduling the Fertilizer
For many of the vegetables in containers, alternate between Tomato-tone and Tomato Feed. I start with the Tomato Feed. In a few weeks, when the plant is in flower, the Tomato-tone will give young fruits the calcium they need to prevent blossom-end rot. Use these two products, or something similar, every 2 to 3 weeks. Ask someone at the garden center for other fertilizer recommendations. After some experimenting with various products, you’ll find your favorites.
Fertilizing regularly replaces nutrients that have been depleted from the soil. Lack of fertility rates near the top of the list of reasons for failing with vegetables and, frankly, with most plants in containers. This is one practice that many gardeners skip…but shouldn’t.
Blossom-End Rot
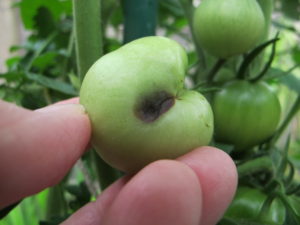
Blossom-end rot on ‘Black Prince’ tomato.
Tomatoes, peppers, eggplants, and zucchini need additional calcium to prevent blossom-end rot. BER is a black, rotting area where the blossom used to be attached. A rapidly growing fruit demands a lot of calcium. Without it, cells lose structure and collapse. Calcium is available to the vegetables only if it is in solution (dissolved in water). So, avoid letting the plants dry out completely, to the point of wilt.
The ‘Black Prince’ tomato in the photo (above) was wedged between a main stem and the stake, so water and calcium uptake were compromised. Only this one fruit developed BER (May, 2019).
More Organic Fertilizers
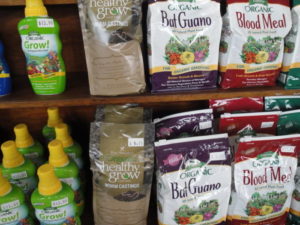
Organic fertilizers.
Fish emulsion, bat guano, earthworm castings, and chicken manure are excellent high nitrogen fertilizers. They’re especially good for the brassicas, and for leafy greens and herbs.
Nitrogen is a key element in chlorophyll (green pigment) production, but too much can make your tomatoes grow huge, leafy masses of foliage at the expense of flowers and fruits.
I prefer to use the products mentioned earlier, but I have supplemented with fish emulsion to use up any solution on hand.
On PH
PH, basically, is a measure of the potential of hydrogen to acidify the soil. The scale runs from 0 to 14, with 7 being neutral. Low numbers are acidic, and numbers higher than 7 are alkaline. Most of our vegetable crops need a pH between 5.5 and 7.4. Tomatoes prefer a range of 6.0 to 6.8.
Extreme pH of the soil, either high or low, ties up certain nutrients and makes them unavailable to the plant’s roots. The plant will begin to show signs of distress and could ultimately fail. Foliage might turn pale green, purple, wrinkled, or it will stop growing. High or low levels of several minerals can show up as very pale areas between veins or patchy yellow or brown necrotic (dead) patches in the leaves.
PH Over Time
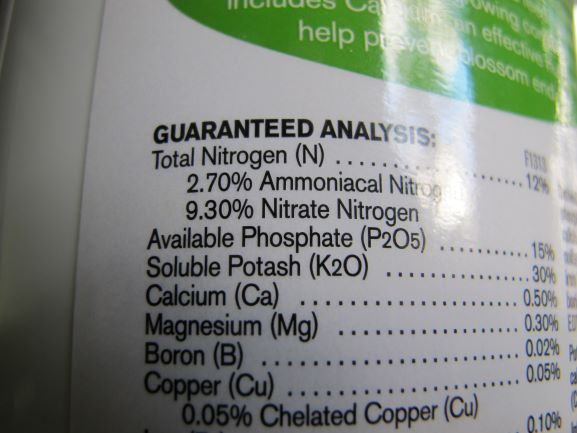
Tomato fertilizer label, showing types of nitrogen.
Potting soils are pH adjusted in production, but a few factors can influence the pH over time. The proportions of forms of nitrogen (ammoniacal, nitrate, or urea) and phosphorus in the fertilizer, and the pH of the water supply and of the rain are a few of those factors.
Most fertilizers I use have a larger percentage of nitrate nitrogen compared to ammoniacal or urea nitrogen. Nitrates keep plants more compact and raise soil pH, while ammoniacal nitrogen acidifies the soil and causes stems to stretch.
If a plant looks “sickly”, don’t fertilize it unless fertilizer is what it needs. Feeding an unhealthy plant can exacerbate its problems.
If in doubt, have the soil tested. Check with your local Master Gardeners through the cooperative extension service. Some nurseries will test it for you. PH testing instruments are available, but get a good one; inexpensive models are not as accurate.
The pH of soil that is watered only with tap water will rise over time. Tap water from municipal water systems runs alkaline to protect the plumbing.
Houseplants that I’ve kept for a long time get an occasional application of acid-based fertilizer to help lower the pH. When most of the plants go outside for the summer, however, the more acidic rain naturally adjusts the pH. Vegetables planted in packaged potting soil and grown outdoors usually present no problems with pH. Blueberries require very acidic soil, and need to be fertilized with acid-based products to maintain the proper pH.
Water from softening systems should be analyzed for salts before using.
Pollination
Most of our vegetables rely on pollinating insects for complete pollination. During cool or wet weather, or when skies are overcast, an occasional honey bee or butterfly might come along to do the job. But if fruits are not developing, or if they grow for a while and then turn yellow and fall off, perhaps not enough pollen grains are sticking to the stigma. That’s called incomplete pollination. The plant won’t invest resources in fruits that have only a few seeds developing.
Try this. If the bees are not visiting, you can tickle the flowers. Gently brush your fingertip a few times against the central flower parts (photos, below). Make sure the flowers are fully open; the pollen and the stigma have to be mature. You might notice some very fine yellow or white pollen on your finger. Tomato and pepper flowers can be pollinated simply by vibrating the flowers.
-
- Sweet bell pepper.

-
- Cherokee Purple tomato.
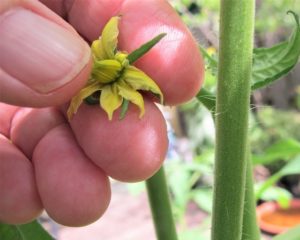
Tapping the mature flowers will work, if the bumble bees aren’t around. Tomatoes and peppers have “complete” flowers, with both male and female parts in each flower. They easily self-pollinate. Some gardeners use a soft paintbrush for this purpose, but the flower parts are so tightly confined (especially in tomatoes) that it might be difficult to get the brush inside the flower.
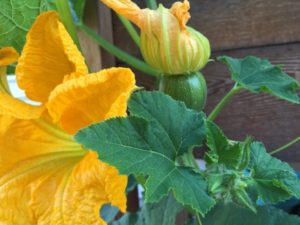
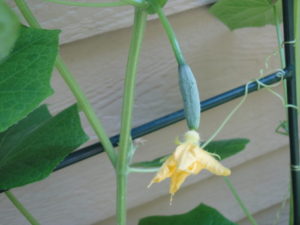
A fruit growing below the female flower.
Most squashes have separate male and female flowers on the same plant. Male flowers, sitting on narrow stems, appear first, sometimes a couple of weeks before the female flowers. Under the female flower is a rounded swelling (photo, above); this is how you can easily tell a male flower from a female one. If you need to help get the flowers pollinated, snip off a male flower and transfer the pollen to the female flower’s stigma.
‘African Blue’ Basil
Plant an ‘African Blue’ basil in a sunny spot near your potted vegetables. Or keep one in a pot on the deck. This, more than just about any other plant, will attract bees foraging for pollen and nectar. There are more flavorful basil varieties used in the kitchen, so this one is allowed to flower. It’s a sterile variety and doesn’t set seed, so it blooms non-stop. Young transplants are available in spring and summer.
Avoid wholesale use of chemicals, which kill pollinators and upset nature’s balance. And stop swatting them!
Peppers and Eggplants
Peppers
Like tomatoes, peppers are easily grown vegetables in containers. Peppers and eggplants are related to tomatoes—in the nightshade family, or Solanaceae—and take similar care. Plant them with the top of the root ball flush with the surrounding soil surface, not buried as for tomatoes.

Lunchbox peppers.
‘Lunchbox’ peppers (photo, right) are small, sweet, prolific, and ripen to yellow, orange, or red. Just one full size ‘Lunchbox’ fruit has 100% of the RDA for Vitamin C. Hot peppers also grow well in containers.
Customers often asked for plants that grew red sweet peppers. Colorful peppers are simply ripe peppers that started as a green pepper. It takes almost 3 weeks for a green bell, such as ‘California Wonder’ or ‘Candy Apple’, to turn into a red sweet pepper.
Seed catalogs list many pepper cultivars. Fruits ripen to different colors, depending on the cultivar. ‘Gourmet’, for example, starts green and ripens to bright orange. ‘Flavorburst’ begins lime green and ripens to golden yellow. Ripe, colorful fruits have significantly higher vitamin and antioxidant content than green peppers. Orange bell peppers have an extremely high level of zeaxanthin, an antioxidant important for eye health.
You might have noticed how a plant with a few ripening peppers fails to grow additional flowers. That’s because the plant is directing resources to the ripening fruit, and especially to the seeds inside. This fulfills the plant’s biological imperative—to make seeds for the next generation. You’ll start seeing flowers again two weeks after picking all the ripe fruit. The same thing happens with eggplants and other vegetables. For continued harvests, avoid letting more than 1 or 2 fruits ripen on a plant, although hot peppers can support many ripening fruits.
Eggplants
Try ‘Hansel’ eggplants breaded, seasoned, and sautéed. But pick them young, at 3-4″. ‘Hansel’ and ‘Gretel’ are miniature cultivars that grow many fruits per plant. All eggplants get seedy if overripe or if they’ve been hanging around the kitchen too long.
Harvest the larger Italian eggplants, such as ‘Beatrice’ and ‘Black Beauty’, at full size but before they lose their luster. They make a fabulous Eggplant Parmigiana.
Cucumbers
Here’s our little ‘Diva’.
My favorite cucumber for salads is ‘Diva’. This variety is powdery mildew resistant and is parthenocarpic (doesn’t require pollination to set fruit). ‘Diva’ has thin, tender skin, so it doesn’t have to be peeled (more vitamins, fiber, and antioxidants). And it is seedless. Well, you might see some seeds in larger fruits or where other cucumber varieties are growing nearby. At 5″ to 7″ long, flavor is wonderful and non-bitter.
‘Diva’ is growing up the trellis in the garden, and in a few days, it will be ready. It grows well in a pot, either snaking around on the deck or using its tendrils to cling to a support.
Bush cucumbers grow on shorter vines. Some are grown for gherkins or pickles, and others can be harvested at over a foot long. ‘Lemon’ grows slightly smaller than a baseball and has yellow skin. Look online or at farmers’ markets to see all the different cultivars. Trying new varieties every year is part of the fun.
One vining plant in a 12″ or 14″ pot will do well. Follow fertilizing instructions as you would for tomatoes. Cucumber germinates within days in warm soil, around 85°F, and can be seeded directly into the pot. Always keep it moist.
Squash
Summer squash, including zucchini, is a fast-growing crop that can be grown in 14″ (minimum) containers. It, too, can be seeded directly into the pot.
Squash Vine Borers
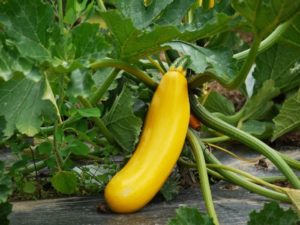
Yellow zucchini.
It can be frustrating when squash vine borers find your squash plants. The adult insect is a grayish-black and orange moth. The female lays eggs on the stems or the petioles, close to the ground. After the young caterpillar hatches, it eats a hole through the stem, crawls in, and continues to feed on the soft tissues inside. This causes the entire plant to collapse.
Find the frass (it looks like wet sawdust) deposited by the caterpillar, and make a longitudinal slit through the stem. Locate the caterpillar and destroy it. Pile some potting soil over the stem to encourage rooting. Once in a while, the plant recovers, but usually not.
Cover the stem with foil or plastic wrap (I haven’t tried this) to prevent the eggs from being laid on the plant.
Using Bt
Or, you can spray the stems with Bt every day or two (tried, and worked) until the moths go away in mid to late summer. Bt (Bacillus thuringiensis), an organic, naturally occurring bacterium, safely and effectively kills young caterpillars of moths and butterflies. The caterpillar must ingest some of the Bt before it gets inside the stem.
If the Bt doesn’t work, you might have enough time before fall frost to grow a new transplant if the first one fails. And, by then, there will be fewer of those pesky moths around causing trouble.
Squash vine borers look for zucchini, Patty Pan and yellow summer squashes, some of the winter squashes, and pumpkins. Because cucumbers, Butternut winter squash, and most melons have solid stems, the moths avoid them.
Green Onions
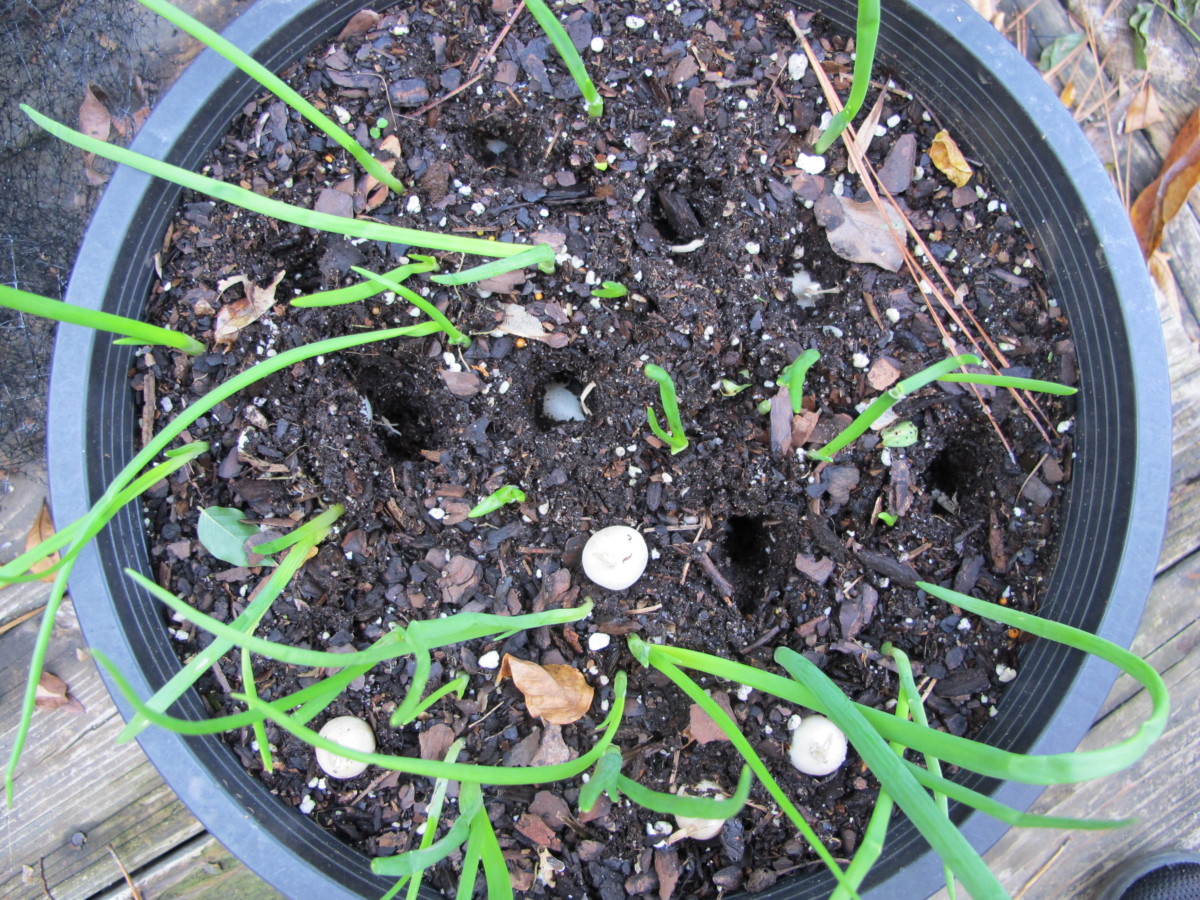
Green onions, and more sets to be planted.
The quickest way to grow green onions in containers is by using “onion sets”. These are young onion bulbs, and I usually see them in garden centers or hardware stores in spring and late summer.
Simply fill a 12″ or 14″ pot with potting soil, and poke little holes about 3″ deep and 1″ to 1 1/2″ apart. Insert one bulb per hole, pointed end up. Wait a few weeks, and then pull the entire plant from the soil when needed. Both the white and the green parts are edible.
If you want a longer white stem, don’t fill the pot all the way. Instead, leave about 3″ between the surface of the soil and the rim of the pot. Plant the sets a few inches deep. As the greens grow, add more soil against the stems. Some leaves will turn brown, but new growth will replace them. You might need a trowel to pry the green onions out of the soil without breaking them. The longer the plants stay in the soil, the larger the round bulbs grow at the base.
Grow onions moist and fertile. Animals don’t bother them. And in this climate (USDA plant hardiness zone 7b), we can grow green onions year-round. Although they slow down in winter, we can still harvest them all season.
***Update***: Now living in northern North Carolina, in slightly cooler zone 7, I enclosed the sunny porch and can grow many plants there, including edibles and succulents, through the winter. 12/8/2022
Bunching Onions from Seed

‘Evergreen’ bunching onions.
To get straight-sided bunching onions (like those in the grocery store), you’ll need to start seeds. ‘Nabechan’ Japanese bunching onion is my favorite variety, and must be started from seed. Bunching onions and bulbing onions belong to 2 different species.
Because I couldn’t get ‘Nabechan’ seeds this year, I grew ‘Evergreen’ bunching onions (photo, right), as well as 2 varieties of onion sets. Growing bunching onions from seed takes more time, and the delicate seedlings must be handled gently.
As the seedlings grow (photo, right), I’ll periodically add more potting soil for longer white stems. That’s why they’re growing low in the pot. Another option is to sow seeds closer together, and then transplant the seedlings farther apart. To harvest sustainable bunching onions, don’t pull out the entire plant. Instead, cut the stem 1/2″ above the roots. Roots and the small stem remaining in the soil will grow a new green onion!
Leafy Greens

Setting up the cold frame in autumn, with mini lights for warmth.
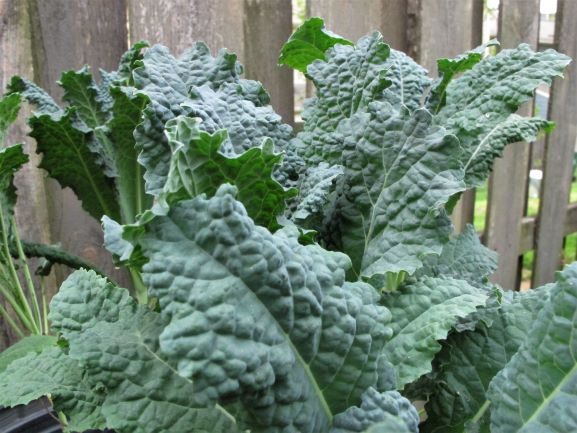
We grow a few leafy greens during the summer, but, in the cool months of autumn and winter, these vegetables really shine. Tender-leaved kales (dinosaur and ‘Red Russian’), lettuce, collards, arugula, miniature broccoli, mustard greens, komatsuna, pac choi, spinach, and Swiss chard provide greens for soups, sauces, veggie omelets, stir-fries, and pasta dishes. Greens, particularly the brassicas, are famous for their high concentrations of vitamins, minerals, and phytonutrients.
Leafy greens need well enriched soil that stays moist and fertile. They grow especially well with aged manure, compost, fish emulsion, Sea-Plus, and other high nitrogen products. In cold weather, however, when dormant microbes can’t break down organic fertilizers, I use synthetic fertilizer.
Because they grow outside during freezing weather, I plant them in black nursery pots. Dark colors absorb more energy from the sun and prevent the soil from freezing through on most winter nights here in North Carolina.
If you live in a colder climate, consider providing some protection to keep the vegetables in better condition. A cold frame (photo, above), a lean-to, or simply a large sheet of clear plastic will coax more harvests from your crops. There are many ways to protect plants in winter, making this season more bearable for those who can’t wait for spring to return.
When I need some greens, I walk a few paces outside and pick them! What could be more convenient?
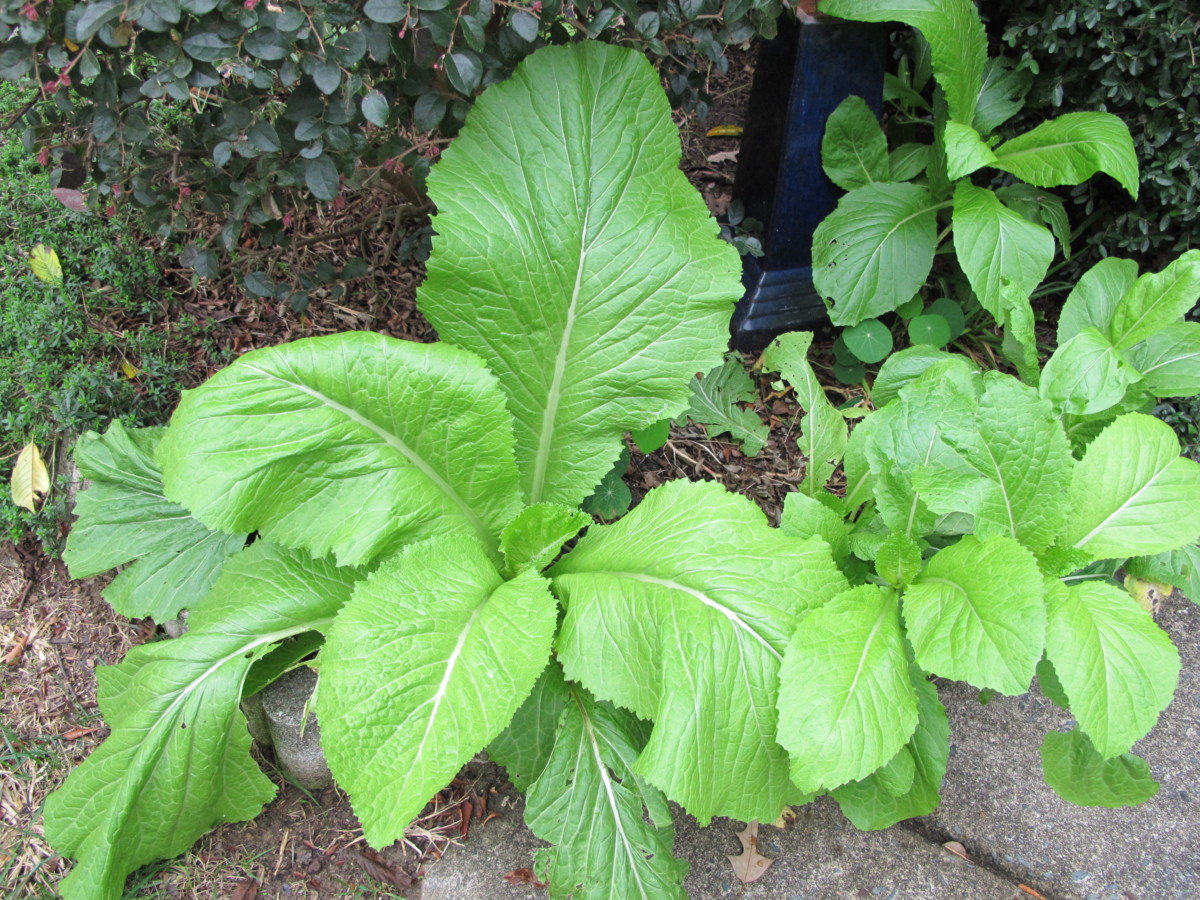
-
- Mustard greens ‘Florida Broadleaf’.
-
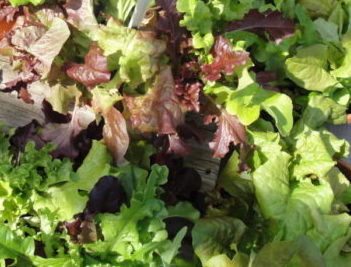
- A mixture of lettuces.
-
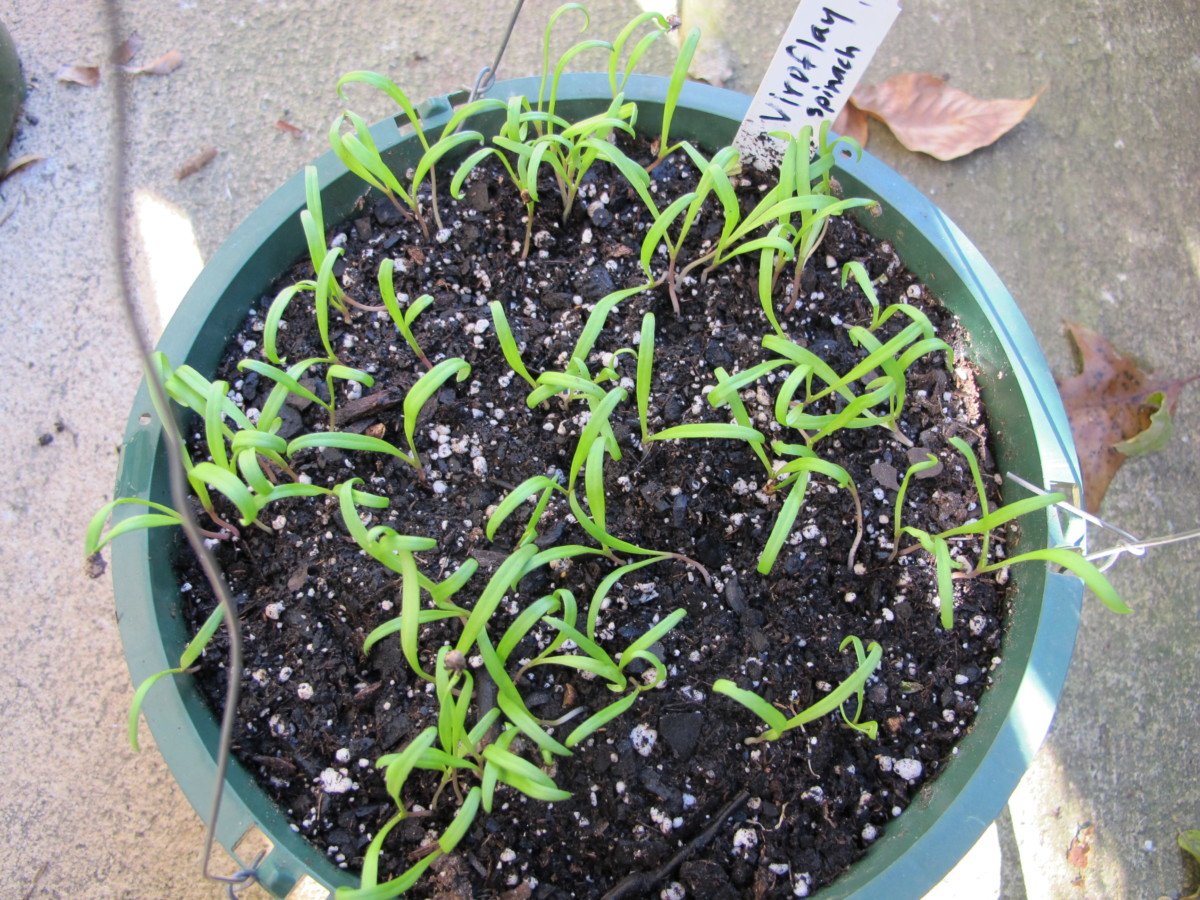
- Spinach ‘Monstrueux de Viroflay’ seedlings will be thinned.
-
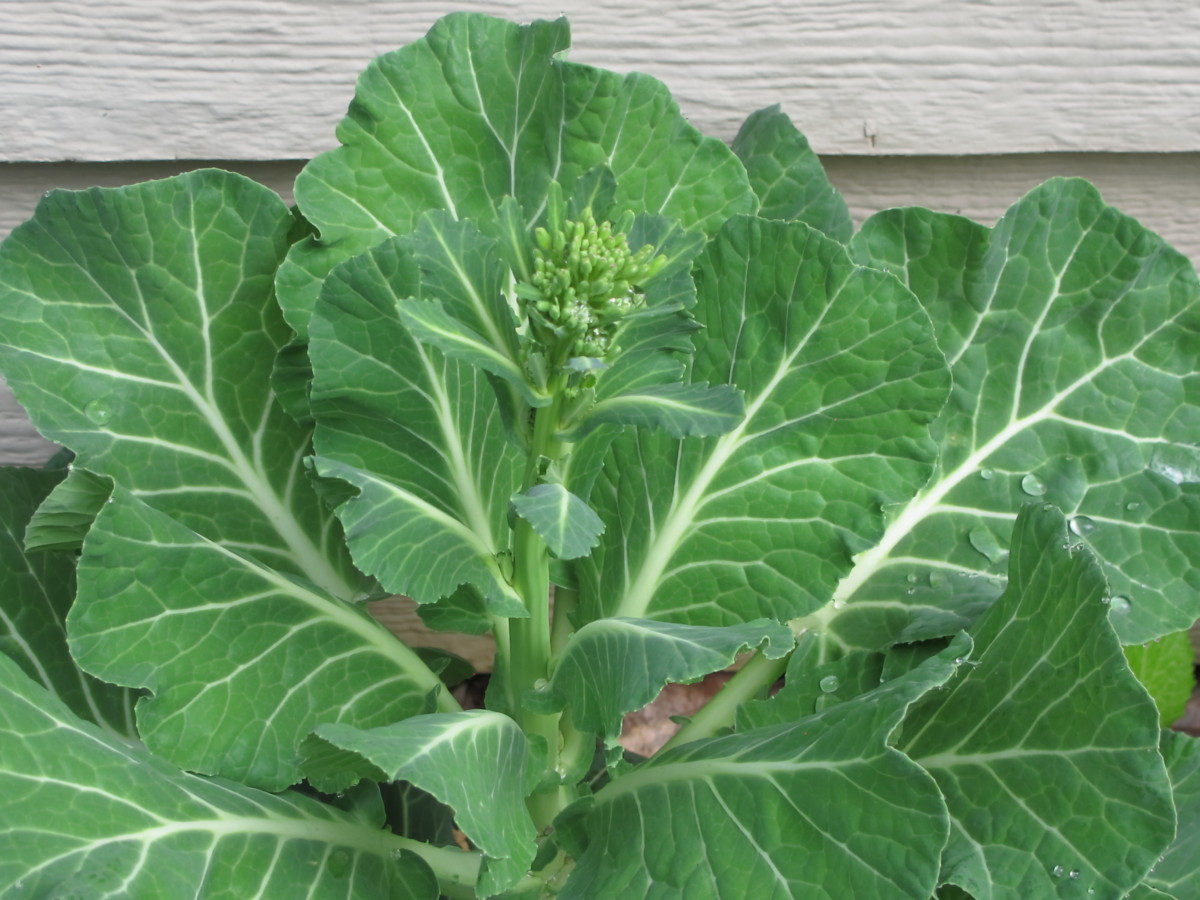
- Collards.
-
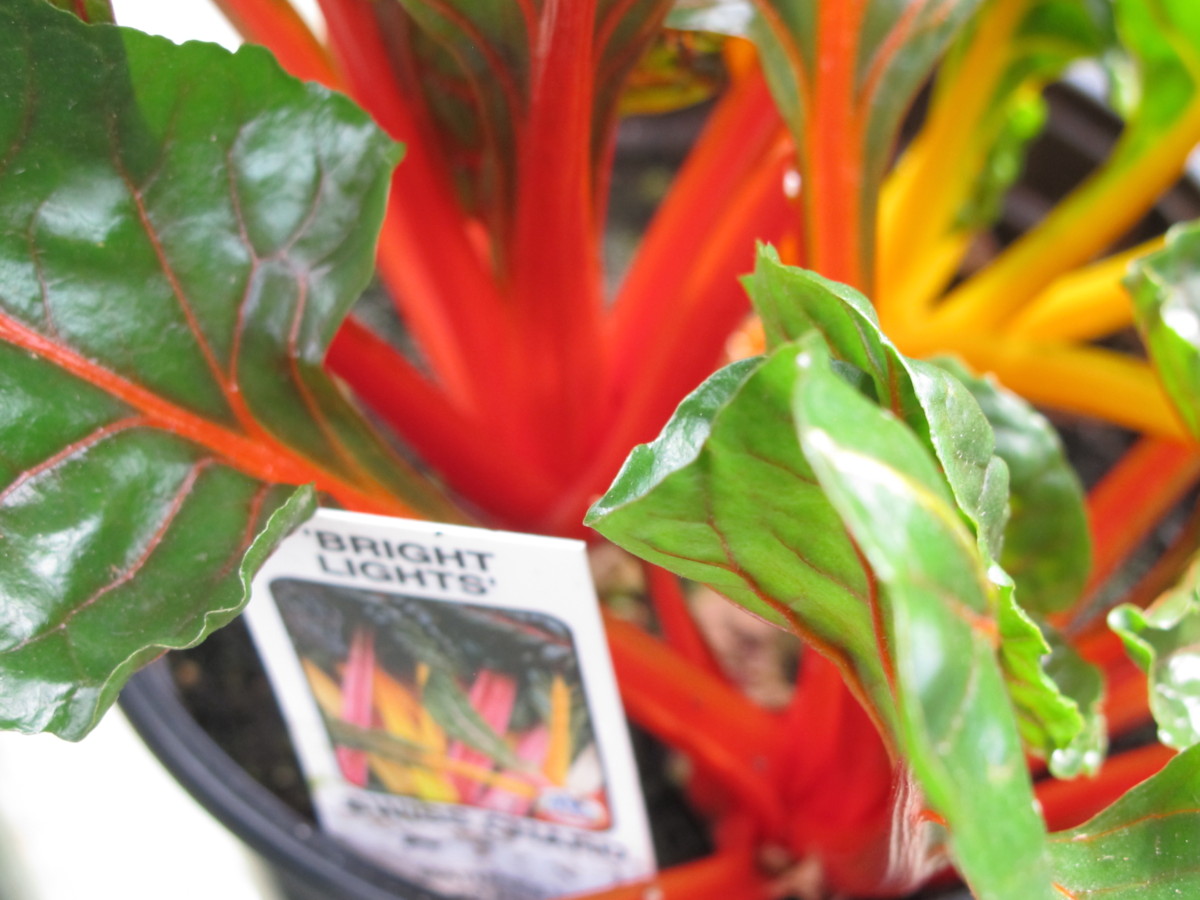
- ‘Bright Lights’ Swiss chard.
-
- Dinosaur (‘Lacinato’ or ‘Toscano’) kale.
Picking Vegetables In Containers
Pick the fruits when they’re ripe or when they’re young, as with cucumbers, squash, and eggplant. Allowing over-ripe fruits to cling to the plant will discourage new flowers to form, and make the fruits go seedy. “Mission accomplished”, they’ll think.
Use scissors or pruners to snip large fruits from the plants’ stems. Pulling could break their branches. Small fruits, such as cherry tomatoes, can be harvested with a gentle tug. Keep them on the kitchen counter for a day or two, but avoid refrigerating warm-season vegetables, especially tomatoes. Temperatures below 50° disrupt the enzymes that help ripen fruits, altering their texture and flavor.
Most produce distributors purchase green, unripened tomatoes. It’s no wonder store-bought tomatoes are generally flavorless after they’ve traveled hundreds or thousands of miles. Their skins have to be tough to endure all the handling. (To be fair, some grocery stores stock locally grown produce, with information about the growers.)
That’s the beauty of home-grown vegetables. You can grow all these delicious tender-skinned varieties that would never survive transportation. Once you’ve had successful harvests of sun-ripened ‘Black Krim’ or ‘Nepal’ tomatoes, or tender golden zucchini, you’ll want to grow them every year. Don’t be surprised if there’s less seating and more seeding on your deck next year.
So there’s a quick study on growing vegetables in containers. Certainly worth a try!

Headings
Page 1: Growing Vegetables In Containers, Sun? Not So Much, Vegetables In Containers: Which Ones?, and Starting With Tomatoes (Vegetables In Containers: Types Of Pots, Reservoirs and Other Considerations, Mosquitoes and Tree Roots, Saucers, Potting Soil (Amending the Potting Soil)…
Page 2: Transplanting the Tomato, Water, Going Away?, Staking, Fertilizing Vegetables In Containers, Blossom End Rot, On PH, Pollination), Peppers and Eggplants, Cucumbers, Squash (Squash Vine Borers), Green Onions (Bunching Onions from Seed), Leafy Greens, and Picking Vegetables In Containers