Page 2
Soil Preparation For Trees
While your soil might be composed of sticky clay with little organic matter, you can create soil with excellent tilth. Rocky soil will require more effort, but the exertion will reward you with beautiful, healthy plants. Choosing the right species—avoiding those that are known to be difficult in your region—makes this task easier.
Slope
Before digging that first hole in the ground, call 8-1-1 to mark underground utilities.
Check the slope. Surface water should always drain away from the house, not toward it. You can either build up the soil or create a swale to direct water away from the house. A carpenter’s level and a straight 2 x 4 might help.
Outline the Bed
According to the landscape plan you’ve drawn, outline the bed with a garden hose or rope. As you proceed, you might decide to enlarge the bed, alter the curve, or continue the planting down the side of the house. That’s fine; you’ll probably make a few changes throughout the process.
A wide, sweeping bed across that part of the house and around the corner provides ample space for the tree and an underplanting. For a more pleasing composition, place the tree diagonally off the corner rather than lined up with a wall. This arrangement, with the garden under it, extends the dimensions of the house. Avoid the temptation to move it closer.
Drive a stake into the ground to mark the tree’s proposed location. If in doubt about the right spot, set the tree there and step back to see how it looks from a distance. Carry the tree by the pot, not by the trunk. Decide which side of the tree will face front.
Moist soil is easier to dig than dry compacted soil. But don’t dig wet soil because walking on it compresses the air channels and compacts it all over again. It’s best to wait a few days after heavy rain for the soil to drain.
Heavy Clay
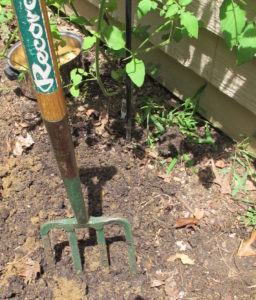
A garden fork.
Remove existing mulch to other gardens or pile it nearby if it’s usable. Remove existing vegetation, such as grass, weeds, and plants you don’t intend to keep.
Shovel the dark topsoil, within 1-2′ of the foundation, away from the house. You’ll see that the top few inches look darker than the soil in lower levels. Higher oxygen levels near the soil surface contribute to greater biological activity. The deeper color is from decayed organic matter, or humus, derived from leaves, mulch, and once-living organisms. Reserve the rich topsoil for the bed, where plants will appreciate it.
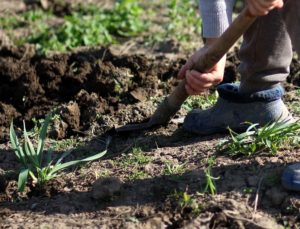
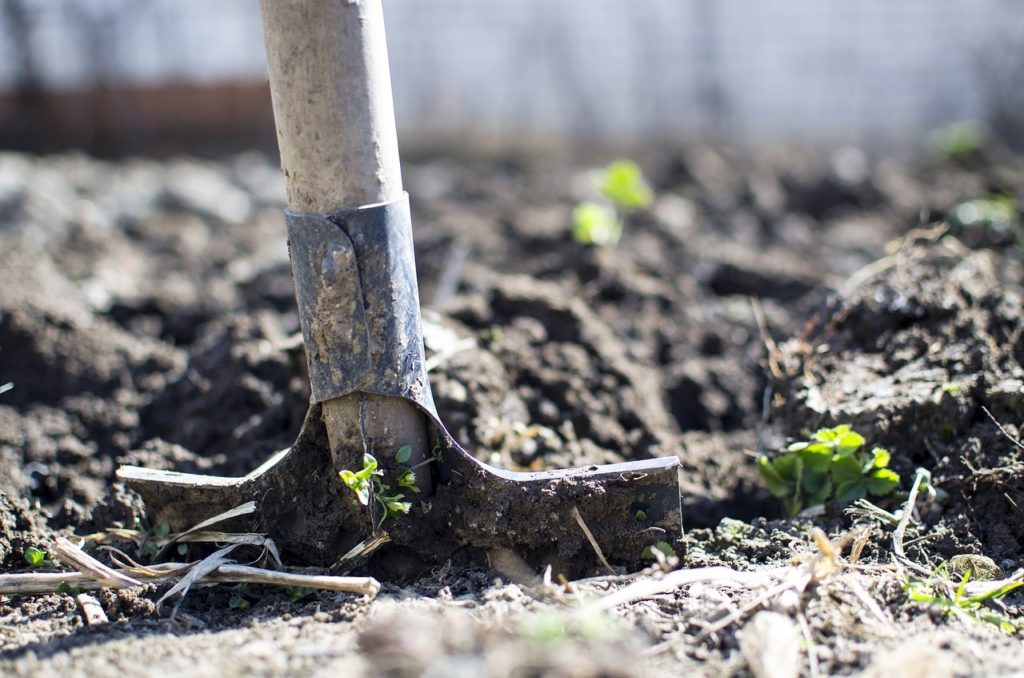
With a tiller or a sturdy garden fork, start loosening the soil. A round-point shovel works in friable soils, but the fork more easily cuts through heavy clay.
“How Deep?”
Continue digging the soil and breaking up the clods until the top 12-16″ of the bed has been loosened. Where the tree will be planted, you might need to dig deeper than that.
An impervious layer of compacted clay, called hardpan, under the top layers of soil should be broken up with the garden fork. Applying gypsum into the hardpan or annually throughout the garden for several years will help create soil with better tilth and drainage.
If the soil is especially “impossible”, bring in a load of clean, screened topsoil that has been mixed with compost and/or pine fines. Inspect it first or solicit help from a reputable landscaper. Topsoil quality can range between “really good stuff” to “that was a huge mistake”.
While digging the soil, gather some heavy clay and pack it against the foundation about 1-2′ out from it. That fills the void created when you removed the dark topsoil. Don’t cover the siding. Small rocks, under 2″, can be left in the soil, but don’t pile them against the foundation. The large spaces between the rocks attract water, which we don’t want next to the house. And never dispose of them at the base of a tree, either.
Sometimes builders dump roofing shingles, lumber, and other debris near the house. Remove it if you see it. Years ago, the sourwood tree I planted in the front yard stopped growing after the first few years. When digging around the tree, I found a thick layer of discarded shingles which nothing could grow or drain through. Problem solved.
Existing Plants
For existing shrubs you want to keep, protect the roots from damage while digging near them. If you plan to elevate the bed, you might also have to raise the shrubs, or move them to another location. Their stems and roots should not be buried under added soil. Not an easy task, although elevating the bed above the surrounding surfaces improves the presentation.
If the shrubs are old and not an asset in the garden, remove them.
Adding Amendments
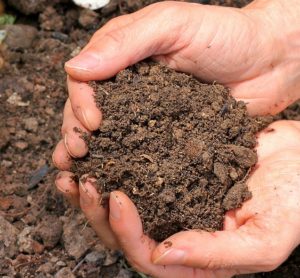
Except for a few years residing in West Virginia, I’ve never had the pleasure of working with soil that looks like the garden at the top of this page. But, yes, we can create good soil. I prefer to get landscape plants off to a great start by amending the soil. And yet others recommend not amending it at all.
As you loosen the soil in the garden, you’ll notice that the surface fluffs up a few inches higher than it was originally. The next step will raise it even higher, although over time it will settle somewhat lower.
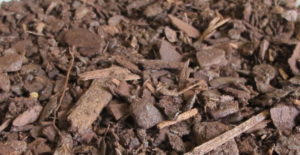
Pine fines.
For heavy clay soil, add 3-5″ of pine fines (or soil conditioner) and an inch or two of large-grained coarse sand (optional) over the surface of the bed. These materials promote drainage. Now, incorporate them (don’t layer them) into the full depth of loosened soil, breaking up the clods.
Pine fines are partially composted small bits of pine bark, and they won’t significantly alter the soil’s pH. Pine fines decompose very slowly in soil and can stay intact for many years, allowing better drainage.
For sandy soil, you’ll need to add amendments that hold water, such as peat moss, planting mixes, compost, and pasteurized loam.
Certain shrubs, such as azaleas, rhododendrons, blueberries, and hollies, need acidic soil. These plants love moist peat moss incorporated into the soil along with the other amendments.
Organic Matter
In addition to the materials that promote drainage, trees and shrubs need organic matter that supplies nutrients and fungal mycorrhizae. Mycorrhizae are mostly beneficial fungal microorganisms that form a symbiotic relationship in and around the roots. They help plants gain access to water and minerals and fend off pathogens. In return, they receive carbohydrates. Only a few groups of plants do not have this relationship with mycorrhizae, notably brassicas. Ericaceous plants, such as azalea, rhododendron, and blueberries, have limited or no associations with mycorrhizae.
Compost is an excellent amendment. But you won’t have to dig it deeply into the soil. Instead, incorporate 2-3″ of finished compost into the top 6-8″ of loosened soil. Nutrients lower than that will be wasted as they’re leached deeper into the soil, beyond the roots’ reach.
For shallowly rooted perennials and ground covers, incorporate compost into the top 4″ of soil.
Microorganisms, earthworms, and soil insects break down organic matter and supply simpler nutrient compounds that the roots can absorb. Fall plantings should not require additional fertilizer; wait until the next year.
Rake the soil fairly smooth, grading a slope slightly downward toward the edge of the planting bed. Are you satisfied with the shape of the garden? Now the soil is fully prepared, and it’s time to begin planting.
Time To Plant Trees
Because trees root fairly close to the soil surface, you don’t need to dig a huge deep hole. Generally, I prepare a hole 1-2″ deeper than the depth of the root ball, but deeper for trees in small pots.
In soil that drains poorly, dig a hole 3 or 4 times the width of the pot. For this plant, you’ll need to loosen more soil in the garden and mix amendments into the root zone.
For trees growing in the lawn, decrease the ratio of amendments-to-clay toward the edge of the excavation. Mulch decomposes over time, and as it does, it adds organic matter to the soil. As the tree grows, a wider mulched area will improve the soil farther from the tree. And earthworms help distribute this richness in the soil as they tunnel through the clay.
If you’re fortunate to have deep topsoil, a hole twice the width of the pot should suffice.
Trees In Pots
Excavate a hole for the tree, saving enough for the backfill and raking the extra soil over the bed. Firm the bottom of the hole so the tree won’t settle. Avoid smoothing the sides; a rough-sided hole helps direct roots toward the new soil. Use the shovel to jab angled cuts into the sides of the hole.
Carefully remove the tree from the pot. Moist soil usually slides out of the pot when the pot is tilted, but avoid pulling the trunk. Let gravity, and maybe another pair of hands, work with you. Cut roots growing out of the drainage holes if they’re holding back the plant. Keep the root ball intact.
If the tree won’t budge, roll the pot on the ground while applying some weight on the pot. Slide an old knife between the pot and the root ball. If that doesn’t work, cut the pot away from the root ball. Once it’s free, set the tree next to the hole but not in it.
Those large sturdy nursery pots make great planters for cool season greens and vegetables or as inserts in ceramic containers. They’re also handy when weeding or gathering rocks. If you can’t use the pot, see if the nursery will take it back (hosed clean).
Find the Top Of the Root Ball
A cultivator.
Before lowering the tree into the hole, use a cultivator or a trowel to gently scrape surface soil off the top of the root ball. Work from the trunk outward, but don’t damage the trunk. Nurseries often grow trees in the ground for the first few years, and then pot them up. Rows between trees are tilled to control weeds. In the process, or when the trees are potted, extra soil often is dumped on top of the original root ball. That should be removed.
Look for the flare, where the trunk widens and which should be above ground. A graft union also needs to be above soil level. Cut off roots growing from the trunk near the flare or above the graft.
Measure the depth of the hole and compare that to the “true” depth of the root ball. The top of a large root ball should be 1-2″ above the surrounding soil surface. This is especially important where soil has a lot of clay. Add soil as needed to bring the bottom of the hole to the correct level, and tamp it quite firmly. It’s better to plant the tree a bit high than a bit low. Planting trees deeply will cause problems later.

Lower, Gently
Okay so far? Now, holding the root ball, gently lower the tree into the hole. Prevent the root ball from breaking apart. Cut away broken or dead roots, and tease out roots on the outside of the root ball with a cultivator or a spade.
Cut back long stringy roots, and direct them away from the trunk. Slight injury to a root stimulates the plant to make new lateral roots from a layer of cells called the pericycle. Roots branch out just as stems do when cut.
B&B Trees
Large trees are often balled and burlapped, and most b&b trees I’ve planted had extra soil on top. Remove twine tied around the trunk, and all the nails or pins holding the top half of the burlap. Now, roll down the burlap and remove excess soil. Also, look for the trunk flare and the graft union, if there is one.
Measure the depth of the roots and the depth of the hole as described for trees in pots. Adjust if necessary, and firm the added soil. Lower the tree into the hole by holding the burlap, but not the trunk. Keep 1-2″ of the root ball above the surrounding soil surface.
You’ll need to know if the burlap is natural jute or a synthetic look-alike. Sometimes, though, natural burlap has been treated to preserve it. If you’re absolutely sure it’s untreated natural burlap, and shows signs of deterioration, it can be left at the bottom to rot in the soil. Treated burlap and synthetic material must be entirely removed. If in any doubt, take it all out. Incidentally, natural burlap burns if you hold a match to it, while synthetic material melts.
The wire basket surrounding the burlap also should be removed. Once the tree is in position, use bolt cutters to remove a section at a time. Wear protective glasses in case the wire springs back. Removing the wire while the tree is above ground risks breaking the root ball.
Backfill, Edge, Mulch
Now that the tree is in place, and the trunk is straight, start adding the amended backfill. Add a few shovelfuls, then tamp it down. Adjust any stray roots by pointing them out from the trunk. Don’t wind roots around in the hole or around the trunk. I often cut simple shallow trenches radiating out from the trunk for the long roots I didn’t want to cut. Avoid letting exposed roots dry out.
Add more backfill and tamp it again. Importantly, fill all spaces with soil, using the shovel and a boot to fill every gap. Pack soil up against the protruding top of the root ball. Loose backfill could result in a leaning trunk in the future, or a tree dropping lower into the soil.
Once that’s done, rake the surface, but keep soil away from the flare. Some gardeners create a dam a few inches high around the tree above the root ball. This catches water before it trickles off down the slope. After the first year, you can level the dam if it’s still there.
If you planted the tree in the lawn, use a spade to cut edging around the tree about 3″ deep, and 1-2′ outside the root ball, or more if you prefer. Remove extra soil from the site.
Mulch the tree about 2-3″ deep, but always keep mulch off the trunk. I prefer undyed shredded hardwood mulch, but it’s advised to alternate with pine products every few years.
I don’t normally stake the new tree, but in windy weather, it might be necessary. If you do stake it, letting the trunk sway a bit helps the tree grow stronger. Avoid tight ties around the trunk and limbs, which damage the bark.
Prune only broken or dead branches close to but not flush with the trunk. Leave the branch collar, a line of cells between limb and trunk. I never recommend topping a tree or heading back branches. This results in an enormous overgrowth of new stems, none of which is securely attached. This is what happens when a tree is topped:
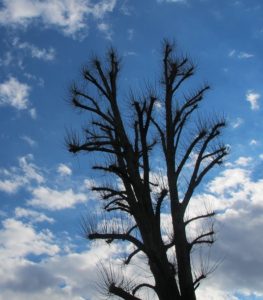
Epicormic shoots resulting from topping a tree.
And Water
Now water the tree. Somewhere around 5 to 10 gallons should be sufficient for a leafless tree, or more for large specimens. Make sure the water isn’t hot from a hose sitting in the sun.
If the tree still has foliage, and the weather is mild or warm, check the soil moisture every day or two. The object is to keep the root ball damp to lightly moist, but not soggy. Dry soil, especially clay, surrounding the new tree can wick much of the moisture out of the root ball, so water the area around the tree as well.
You probably won’t need to water at all after mid fall in a temperate climate, unless there’s severe drought. Avoid using lawn chemicals anywhere near the tree or its roots.
Concluding
As the years pass, and the trees grow larger, you’ll notice less demand on the air conditioner to cool your home. Spending time outdoors dining or relaxing is more comfortable under the trees’ canopy.
Another benefit is less heat stress on your home’s siding, roof, and paint. With plastic and vinyl materials replacing wooden frames around windows and doors, shade helps keep them operable for a longer period of time. Those materials degrade over time from the blistering sun. Plastic window locks crumble (after a couple of decades) and vinyl siding can warp where there’s no relief from sweltering sun.
Job well done. Now you can admire the fall color while imagining the rest of the garden. Maybe a few trees on the east side, incorporating native perennials and removing more lawn. Or a grove of Amelanchier trees with Viburnum and hollies to shelter and feed the birds. As long as there’s grass to mow, there’s room for gardens.

Headings:
Page 1: Are You Ready To Plant Trees?, Native Plants vs. the Non-Natives (The Benefits of Native Species, Native Species and Nativars, Red Leaves and Wildlife, The Untold Story), Deciduous Trees For the Eastern U.S. (The Hollies, The Curious Case of Crape Myrtle, Evergreens), Good Looks, and Before Planting Trees
Page 2: Soil Preparation For Trees (Slope, Outline the Bed, Heavy Clay, “How Deep?”, Adding Amendments, Organic Matter, and Time To Plant Trees (Trees In Pots, B&B Trees, Backfill, Edge, Mulch, And Water)