2019
Annuals That Can Take the Heat

Happy 4th Of July!
Well, it looks as though the heat is on, as we celebrate our nation’s 243rd birthday. And summer just got started! Enjoy your Independence Day barbecues with family and friends, but don’t neglect the garden annuals and other potted plants. They’re going to need more frequent watering at these temperatures.
Here are some things we can do to mitigate problems that come with extreme heat, followed by a list of heat tolerant annuals.
Mulch the Beds
Mulching the gardens will keep annuals and shrub borders looking fresh all summer. Mulch serves several purposes:
- it retains moisture in the soil
- the soil stays cooler without the sun beating down on it
- it helps prevent weeds from germinating
- mulch helps prevent soil erosion
- it prevents mud and dormant disease spores from splashing onto the plants
- long term, it breaks down and adds organic matter to the soil
- and it looks good
If bags of mulch have been hanging around for a while, gases can build up that might damage tender young annuals. So, open the bags and let the gases escape. I recall mulching newly planted alyssum many years ago, and by the next morning, they looked as if they’d been fried!
Sometimes, termites are found in old bags of hardwood mulch. Once the contents are spread around the gardens, though, the termites probably will die from exposure or due to separation from the colony.
Types of Mulch
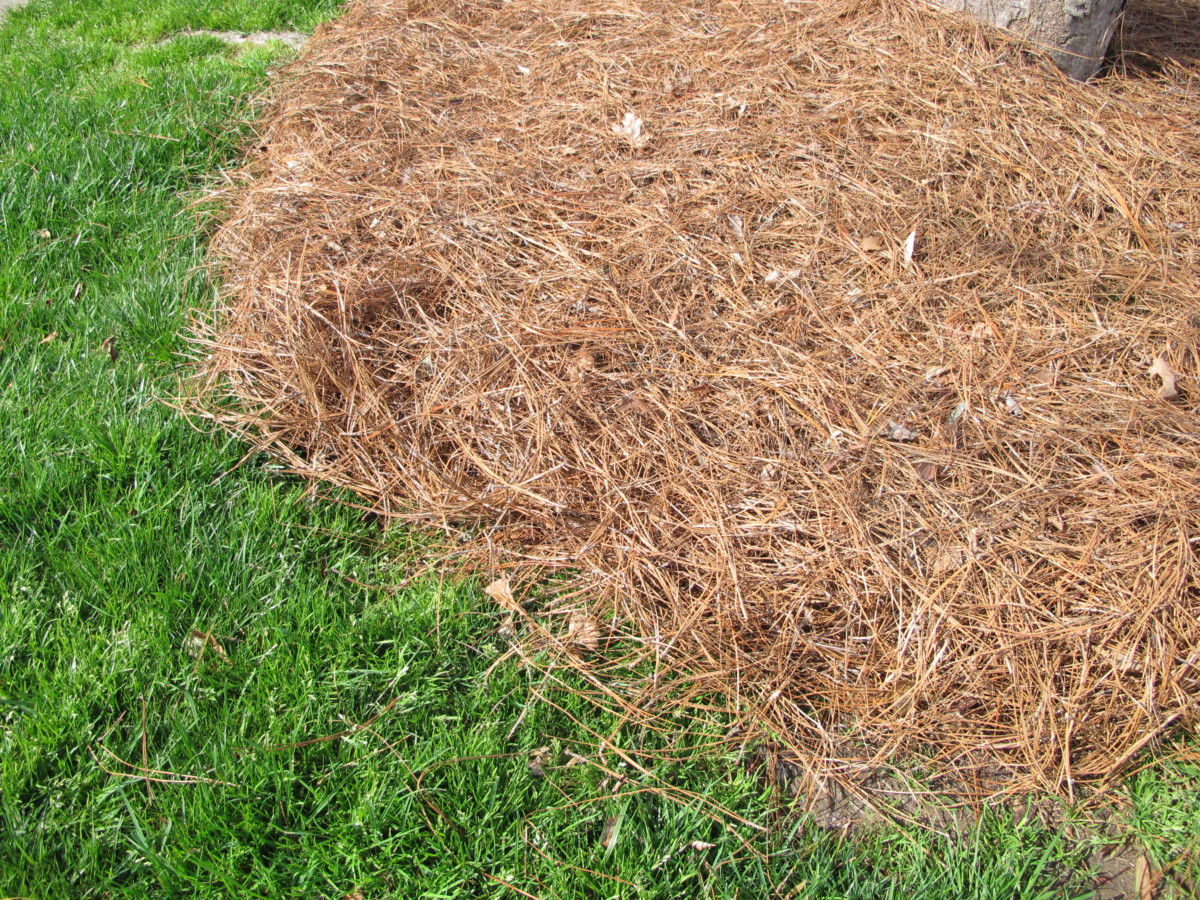
Pine straw under a tree.
There are many kinds of mulch available from garden centers. I’ve always liked the look of dark brown shredded hardwood mulch. On a slope, it holds better than pine bark nuggets because the fibers interlock. Large quantities of shredded hardwood used repeatedly, however, can cause manganese toxicity and it can drive up the soil’s pH. Limit the depth to only 1″ in flower gardens or 2″ around shrubs and trees.
It’s a good idea to switch to a pine bark product for a few years to avoid these imbalances. Rhododendrons, azaleas, blueberries, hollies, and other acid-loving plants prefer pine products. But, if you want to use shredded hardwood around these plants, don’t pile it on and use an acidifying fertilizer.
Grass clippings break down quickly when used as a mulch by itself or under another mulch product. They contain some nitrogen, gently released as it decomposes. Use a very thin layer around your plants because it can heat up significantly as decomposition begins. But grass clippings can carry residue from weed killers and other chemicals used on the lawn, so maybe the best thing to do is to leave them on the lawn itself.
Pine bark nuggets can last a few years, but, if you’re a tidy gardener, you’ll have to blow away or pick out fallen leaves. It’s graded according to particle size, from pine fines, to small and large nuggets. Pine straw is new to me, since moving to North Carolina, but I still prefer shredded hardwood.
Mulch should not be piled high in the garden. Two inches suffices for most applications, although pine straw is applied more thickly. Keep it away from the stems and trunks of the plants.
Tree leaves that fall in autumn make a protective layer for garden plants, although many will blow around in high wind. This is more acceptable in rural areas or where the gardens aren’t open to public view. Most homeowner associations will find this free source of natural mulch objectionable. You could use a mulching mower to chop the leaves into smaller pieces, rake them into gardens, and cover with an inch of a more attractive mulch. Earthworms and decomposition will make them disappear.
Gravel In the Garden
I’ve never used gravel as a mulch around plants, except for potted lavender or succulent dish gardens. It settles into the mud, and “gravel travels” on an incline.
In certain circumstances, such as in the desert southwest and in dry rock gardens, gravel is a good choice. Around dry stream beds and in paths, gravel and rocks add natural elements, but should be laid over landscape fabric to prevent settling into the soil. If using gravel on the surface of a walkway, look for the kind with angular rather than rounded edges; it is less likely to sink underfoot.
Landscape Fabric
I am not a fan of using landscape fabric under mulched plants. This barrier interrupts the natural decomposition that occurs where the mulch meets the soil. Without the fabric, earthworms ingest the partially decomposed material next to the soil surface, and deposit fertile castings (excrement) into lower levels of soil, improving it in the process. This is how it works in nature, accompanied by thriving populations of various microbes.
Leaves, fallen trees, and dead insects and animals contribute to a healthy environment on the forest floor as they decompose. Microbes, earthworms, rain, and freeze-thaw cycles help distribute nutrients through the soil profile.
As the mulch breaks down over the fabric, weed seeds blowing into the beds will readily germinate in this rich medium. So, most gardeners using landscape fabric will be disappointed when they see those dandelions, plantains, and weedy maple trees taking root there. Mulch, with or without landscape fabric, doesn’t entirely prevent weeds, but it will greatly reduce their numbers.
Water the Garden Beds

Marigolds planted by volunteers in Arbourgate Meadows, Charlotte NC.
Make sure the flower beds and the shrubs, especially new ones, get a deep soak now and then if rain is scarce. Unless your area receives a prolonged period of rain, passing showers will moisten only the mulch. In most soils, 1″ to 2″ of water per week ensures that deeply growing roots will get their share.
Watering a little bit every day or two will not produce deeply rooted plants. Unfortunately, shallow roots are susceptible to stress from not only dry soil but also from hot soil.
It’s always best to water early in the morning, so the foliage is dry going into the night. This lessens the likelihood of diseases infecting annuals and other plants. Some of the water applied during the heat of mid-day will be wasted because of rapid evaporation. But if you’ve forgotten, and the plants are wilting, water as soon as possible, regardless of the time of day!
For busy families, watering with soaker hoses or tubes and emitters saves time. By placing the water directly on the soil, or under the mulch, very little is lost to evaporation. These systems can be attached to a computerized control center at the faucet. Just be doubly careful, though, when digging nearby, that the spade doesn’t land on the soaker hose. But if it does, there are repair kits for that.
The kids might enjoy a sprinkler or Slip ‘n’ Slide on a hot Fourth of July, especially the ones under 35. For a softer landing on the slippery strip, water the lawn underneath it first.
About the Hose
A garden hose kept in the sun will significantly heat the water inside it. Spray it out over the grass until it’s cool enough to apply to the gardens. Water under the canopy and beyond the drip line of the plants. Watering heavily as needed will cool the soil…for a while, anyway.
Water and Potting Soil
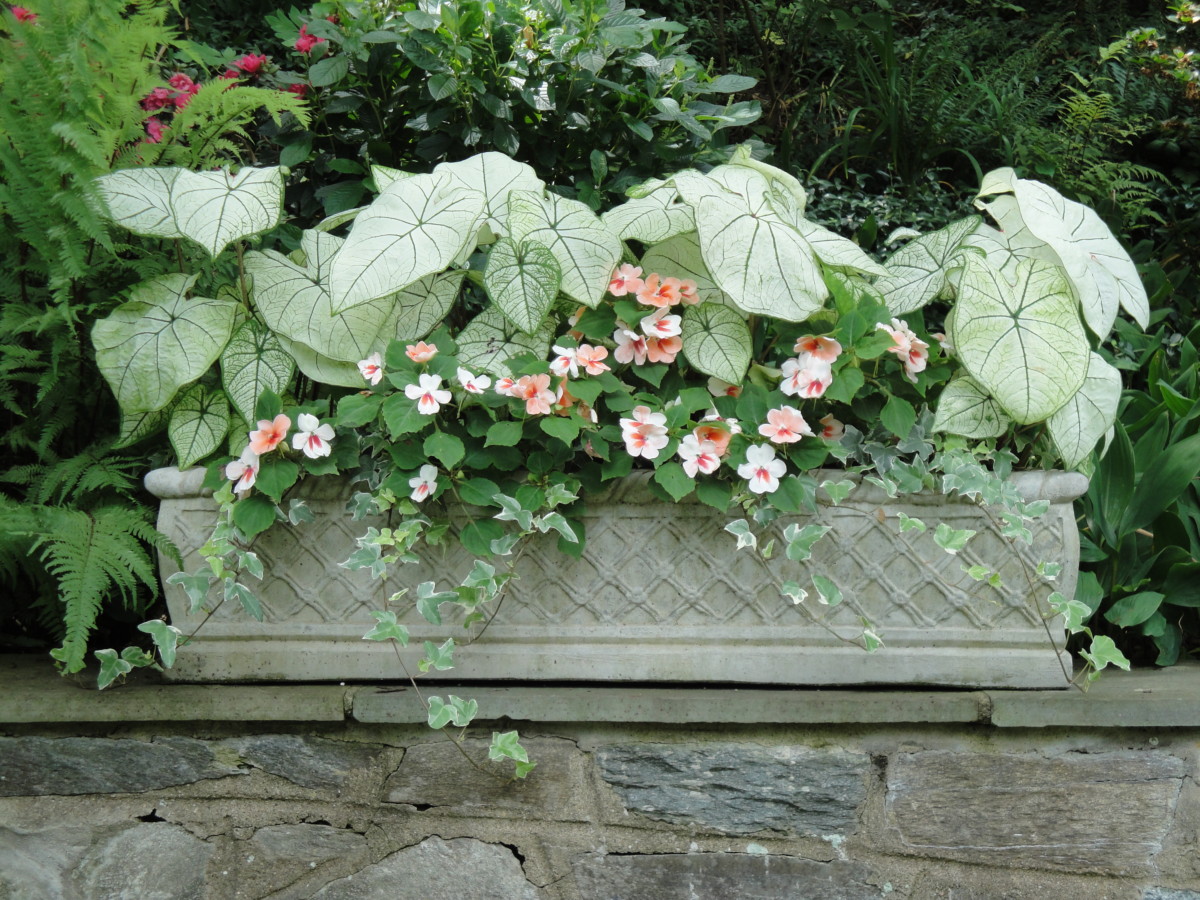
Caladium, variegated English ivy, and ‘Prizm’ impatiens, before impatiens downy mildew came along. The new ‘Imara’ impatiens is downy mildew resistant.
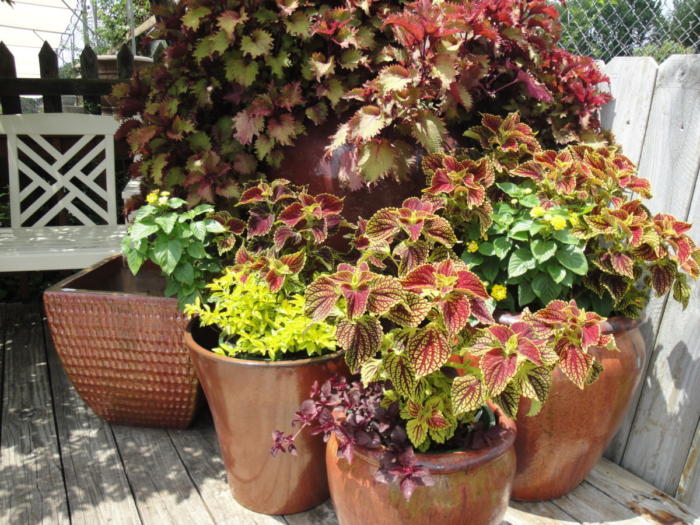
The trend in gardening over the years leans toward growing annuals in pots for key areas around the yard. Gardeners also are decreasing the square footage devoted to annual garden beds.
Container gardening requires vigilance, because soil in pots generally dries faster than garden soil. Hanging baskets filled with thirsty annuals and small blooming pots on the picnic table probably will need daily watering in areas with intense summer heat. For this reason, I prefer using larger pots when possible, such as 12″ to 18″ hanging baskets.
Strawberry jars introduce verticality and a unique appearance. Look for smaller varieties of plants to fill these containers.
Adding a thin layer of mulch to potted plants has the same advantages as mulching the garden. I use 1/2″ of pine fines, and sometimes shredded hardwood.
Amendments For Annuals
Potting soil with a high percentage of coarse drainage material, such as pine fines or perlite, tends to dry quickly. The soil doesn’t hold water, due to the large air pore space between the particles. Supplementing the potting soil with compost, peat moss, fine coir, or even some clean loamy topsoil from the garden adds more particle surface area where water can cling. You don’t want to create a heavy soil, though, that doesn’t drain well enough.

Planting mix, above, with high levels of pine fines, is best used to improve garden soil. Potting soil tends to have more finely textured materials.
When I lived in Maryland, Leaf-gro was readily available to amend potting soil and garden beds. I used tons of it! It was pure, rich compost, and was the end product of all that yard debris (weeds, grass, leaves) sent to the recycling center.
An additional benefit of using garden loam is the introduction of root-friendly microbes and micro nutrients, although you might have to pull a weed now and then. I can see you shaking your finger and warning of soil pathogens and worms…yes, true. If you’re concerned, you can buy bagged products that have been pasteurized. Ask to see the contents, though. The last bag of “sandy loam” I purchased contained mostly finely ground pine bark and sawdust.
Water-holding crystals are another option for potted plants and garden beds. Read directions carefully. Don’t add dry crystals to a pot; they need to be pre-moistened. I never found them to be that effective, but these new potting soils with all those pine fines might be improved with them.
Amending After the Fact
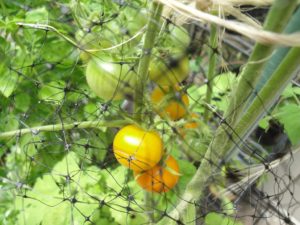
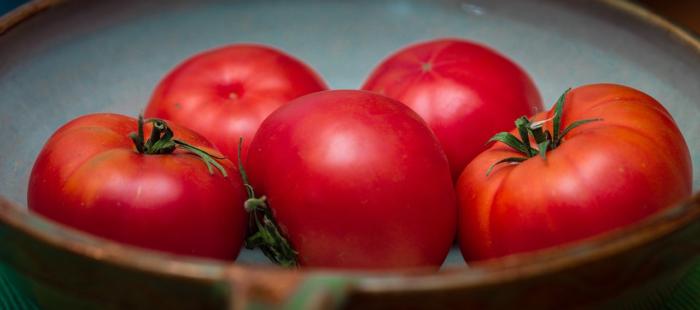
Supplementing bagged potting soil is becoming common practice for my pots these days. For the potted tomatoes that were drying too fast, I scratched about a gallon of clay loam from the vegetable garden into the top layer of soil in each 20″ pot. With each watering, the fine particles will sift down through the pot, filling some of the pore spaces.
It seems to have worked. The tomatoes aren’t beginning to wilt by mid afternoon after watering in the morning. And, on some days, I can even skip a watering. Much better.
Fertilizing Annuals
Heat-tolerant plants growing in pots will run out of fertilizer within just 2 to 4 weeks, depending on soil quality. Frequent watering and rainstorms leach nitrogen, in particular, through the soil. And, once nitrogen levels drop too low, older leaves will turn yellow, the plant might become pale overall, and growth will slow down. Nitrogen is the macronutrient that is needed in greater quantities than any of the other nutrients.
Each plant species is different. Some need more phosphorus or iron or magnesium. Check the label for a comprehensive list of ingredients.
Many annuals are particular about soil pH; some need acidic soil, while others tolerate a higher pH. At either end of the scale, certain nutrients become unavailable to plants. Most plants, however, grow well enough over a fairly broad range. But, if you notice yellowing, consider taking a soil test and having the chemistry analyzed.
Garden centers stock many kinds of fertilizers. They’re available as soluble crystals, dry granules, liquid concentrates, and as slow-release (or timed-release) prills.
Fast growing annuals need regular applications of nutrients. Rather than a feast-or-famine regimen, put the plants on a schedule so they never show the effects of “hidden hunger”. This and other good horticultural practices will keep your plants in prime condition until the end of the season.
Slow-Release Fertilizer
At high temperatures, slow-release fertilizer is consumed faster than the label might indicate. So, a 6-month product might be depleted after 4 months at 85°. Instead of simply placing the prills on the hot soil surface in a pot, dig a few small holes between plants, add the prills, and cover them with about an inch of soil. This will keep them cooler and prevent rapid release of the fertilizer.
In gardens, slow-release fertilizer can be placed under the mulch, scattered over the root zone. A small amount is released as water percolates through the medium.
Pot Colors
As these plants grow, they will shade part of the pots’ surfaces as summer temperatures rise.
Roots growing on the sunny side of dark pots, in hot summers, can heat to the point of death. So, most plants prefer light colored pots that reflect energy from the sun. If you really want to use the new rust-brown pots by the front door, add plants that trail over the side of the pot, shading enough of it to make a difference.
Another option is to use an insert, a plastic pot that sits inside the pretty pot, with space for hot air to escape. Maybe your beautiful teal pots can be tucked under the tree near the pool and planted with shade loving annuals.
This isn’t a concern in most parts of the country, but in southern states, the plants will appreciate this detail. Choose heat tolerant annuals that are less likely to be damaged by these conditions.
Winter Pots
Conversely, in chilly winter climates, dark pots absorb the sun’s warmth, delaying freezing of the soil. Find out if your pots will tolerate frost, and make sure they drain freely. “Frost resistant” does not mean “frost proof”.
When I potted large planters for customers’ winter gardens, I included sheets of styrofoam in the shoulders and on the sides of the pot, which absorbed the soil expansion as it froze. Pots with straight or sloping sides, with no curved shoulders, allow freezing soil to heave upward, usually avoiding breakage. In Maryland winters, expensive concrete pots were most likely to survive the cold.
Evaporative Cooling

Efflorescence on clay pots.
Most terra cotta pottery is porous, allowing air and water to pass through the sides of the pot. Some clay pots, though, are fired at higher temperatures, making them non-porous.
A clay pot with moist soil stays relatively cool, as moisture wicks through the pot. As water evaporates, the surface of the pot feels cooler. The same principle applies to perspiration evaporating from your skin. So, decorative clay pots in the summer are another alternative. But, they dry out faster because of the moisture loss through the pot.
The pots in the photograph have a white mineral coating called efflorescence. When fertilizer salts in solution migrate through the clay, they crystallize as the water evaporates. It can be removed or enjoyed.
Nursery-Grown Landscape Plants

Because containerized nursery plants are watered daily in warm weather, growers use a mix comprising mostly fast-draining pine fines, sand, and perlite, with some organic matter (peat moss, ground coir, compost) for water retention.
During hot summer weather, it is important to get transplants established as quickly as possible. New roots reluctantly grow into the native soil, but can be encouraged to do so by scoring the root ball or by teasing out some of the roots on the sides. This causes slight injury to the roots, and stimulates the plant to quickly form new side roots from the pericycle, a layer of cells inside the root.
Also, amending garden soil with organic matter, such as nutrient-rich compost, and pine fines for better drainage creates a welcoming habitat for new roots. Heavy clay soil is not very accommodating and hinders rapid rooting. You want to give your plants soil that drains well and entices roots to grow deeply. If you’ve ever tried to dig in dry, compacted clay soil, you know why plants are slow to establish. Good soil preparation makes a huge difference!
Why New Plants Sometimes Fail
A newly planted ‘Soft Touch’ holly, azalea, or autumn fern needs to have water replenished in the root ball every day in hot breezy weather. Until new roots expand into the soil, plants are entirely dependent on you for their daily dose. Make sure the water isn’t too hot.
I often consulted with homeowners when their new plants failed. When the shrubs were unearthed, their roots often were quite dry.
One landscape I visited here in Charlotte had very large evergreens newly planted in front of the house. All were dead or dying during a prolonged drought. After a little digging, I saw that 95% of the root system on each plant was bone dry because there was no organic matter mixed into the heavy clay soil. And only one irrigation emitter was placed on the side of the root ball. Each plant this size would have required a few emitters.
To make matters worse, the soil had been backfilled in large clods, and not broken up at all. Any water that flowed from the emitter drained right into the crevices, bypassing the root system. Those large air-filled gaps dried exposed roots even more. Any moisture in the root ball was quickly wicked away by the clay. This costly disaster illustrates the need for thorough soil preparation: breaking up heavy soils, incorporating amendments (drainage materials, organic matter) for improved tilth, and firming the soil around the root ball.
The problem is this…
…and it’s a point that doesn’t get a lot of attention. Water is sucked into the tiny spaces between clay particles by capillarity. And what’s abundant in soils throughout much of the country? Clay! So, when the shrub’s potting soil that is mostly pine fines (with large air pore spaces) sits next to native soil that’s composed of mostly clay (with tiny air pore spaces) what happens to the water? That’s right! It’s pulled from the shrub’s potting soil into the surrounding clay.
Clay always wins! This is one explanation for nursery plants that fail, even though the surrounding soil in the bed feels damp.
The remedy for a shrub with a high percentage of pine fines and perlite in the pot is to work some of the native clay into the root ball. Poke some holes a few inches deep (try using a dibble) on the surface of the root ball and fill with a few handfuls of clay or loamy clay; water it in.
This improves the water-holding capacity of the soil inside the root ball. Granted, this is a fine point. But the principle was effective for the potted tomatoes, mentioned in “Amending After the Fact”, above.
When Can I Plant?
Shrubs and trees establish in the landscape faster in autumn, when soil temperatures are still warm enough to promote root growth. Even in chilly soil, in the 40’s F, roots can grow. Air temperatures are more moderate then, and rain falls more predictably. The next best time is early to mid spring, as the soil begins to warm and before the trees leaf out.
But plants can settle into the landscape during the summer, too, as long as soil preparation was adequate and water is provided when needed. That ‘Jelena’ witch hazel would much rather be in the ground than sitting in a black pot at the nursery on this Independence Day.
Summer annuals root quickly, but give them enough water to prevent wilt. They’ll probably need water every day until their roots grow more extensively through the soil. And give them enough to moisten the entire root ball and the surrounding soil. It takes only one sunny 90° day to dry that new plant to a crisp!
Reservoirs and Saucers
 Most hanging baskets and large plastic pots have a reservoir or an attached saucer at the bottom. It holds an inch or two of water that the plant’s soil will gradually absorb by capillarity.
It isn’t necessary to drain it off in the summer, if the plant is full of foliage. Any water the soil can’t absorb within 30 minutes, however, should be poured off.
For young plants and for succulents or plants that like dry soil, the reservoir or the saucer should be drained. Pour the excess water onto other plants instead of wasting the nutrients. Even worse is to let dissolved fertilizer wash down the street to the storm drain, eventually polluting the local creek.
Another option is to remove the saucer and allow water to drain freely into the flower beds or the shrub border.
Planting Wire Baskets
When I plant a wire basket, I line the inside of the coco liner with a “repurposed” sheet of plastic, such as an empty mulch bag. The plastic prevents evaporation through the coco liner, and slows decomposition of the coco liner.
Be sure to punch holes through the plastic in several places to allow drainage. But leave the bottom inch or so intact, forming a reservoir to hold water a bit longer, until it’s absorbed by the plants.
(For decades, as owner of Wellspring Garden, I never bought trash bags. I saved all the empty bags from potting soil, amendments, and mulch for that purpose. Using less plastic is the way to go!)
So, It’s Your Turn To Host the Party

A trip to the garden center reveals plenty of options to dress up the landscape for the holiday:
- full grown, colorful blooming baskets for the deck or the porch
- a potted combination “drop-in” worthy of that gorgeous ceramic container near the front door
- some large annuals, in 6″ or 8″ pots, for the garden, looking as if they’d been growing there for months
- a potted herb garden that guests can pinch to customize their salads (basil, chives, and others), and some mint ‘Julep’ or ‘Kentucky Colonel’ for iced tea, or other beverages.
Finally, string some lights for evening ambiance, and add red, white, and blue accents to celebrate Old Glory. Don’t forget to bring greenery into the powder room, in a pretty pot, adorned with a small flag.
Headings
Page 1: Happy 4th of July!, Mulch the Beds (Types of Mulch, Gravel In the Garden, Landscape Fabric), Water the Garden Beds (About the Hose), Water and Potting Soil (Amendments For Annuals, Amending After the Fact, Fertilizing Annuals, Slow-Release Fertilizer), Pot Colors (Winter Pots, Evaporative Cooling), Nursery-Grown Landscape Plants (Why New Plants Sometimes Fail, When Can I Plant?), Reservoirs and Saucers (Planting Wire Hanging Baskets), and So, It’s Your Turn To Host the Party
Page 2: Heat-Tolerant Annuals
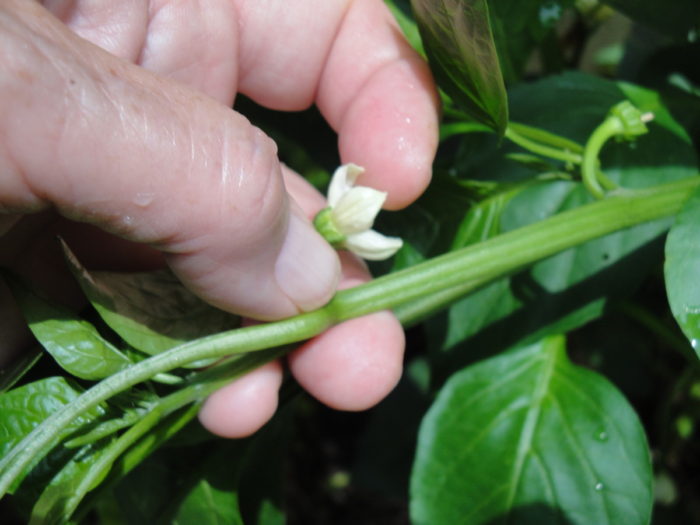
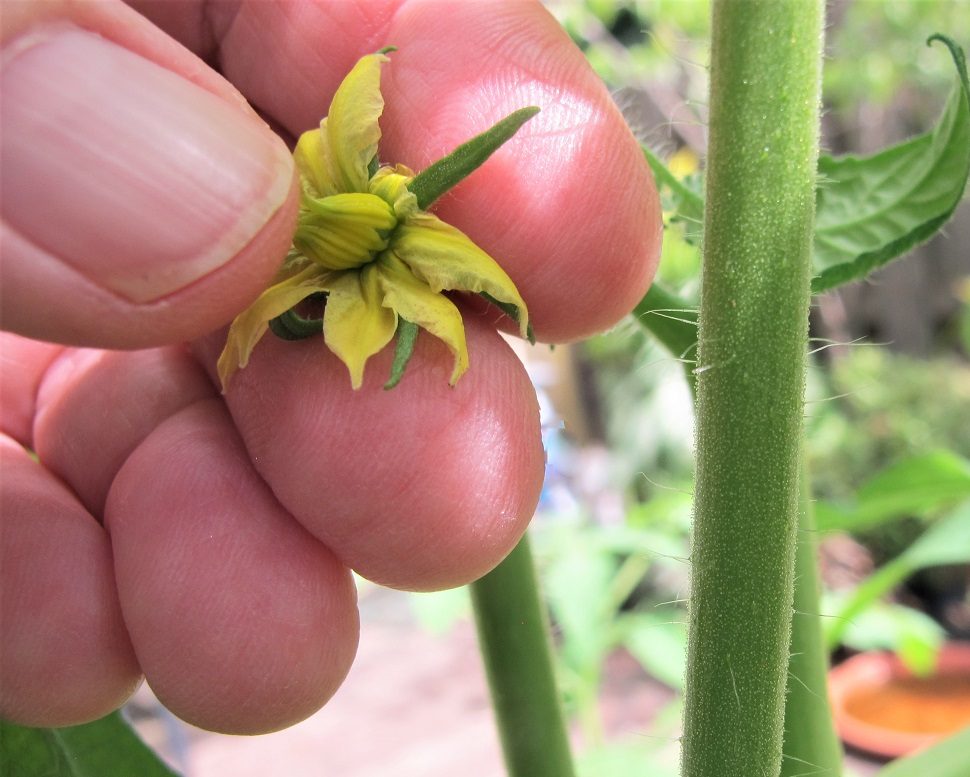
 The crop that home gardeners are most concerned about is the tomato. But this could happen to peppers, eggplants, and other vegetables as well. When temperatures soar into the 90’s F, the pollen produced in the flower is “denatured”, or, essentially, killed. No pollen means no fruits!