Tag Archive | edible landscaping

Dividing Chives: Easily Done!


Updated 5/31/2025


Here’s How To Divide and Rejuvenate Chives


Potted chives, about to be divided.


There are few plants that are easier to manage than chives. This herb, in the onion family (Amaryllidaceae), benefits from an occasional division. And as autumn approaches, a rejuvenated plant will reward you with a fresh crop of flavorful leaves until the snow flies.

Chives (Allium schoenoprasum) is super hardy, growing as a perennial in USDA plant hardiness zones 3 to 9. In the colder zones, it behaves as a herbaceous perennial, dying back to the soil after some hard freezes. Several months later, new leaves emerge from dormant bulbs in the ground when the soil begins warming up. Wherever I’ve lived, it has always been the first herb to sprout new foliage in late winter.

Here in zone 7 North Carolina, pot-grown chives has some usable foliage through most of the winter. If grown in a protected area or next to a south-facing wall (northern hemisphere), it will retain some foliage in cold weather. Potted chives is less winter hardy, by one or two zones, than those grown in the ground because the roots are fully exposed to cold air temperatures.

The term, “chives”, is from the French word cive, which derives from the Latin word for onion, cepa.

Some gardeners use the singular form of the word, “chive”, and others prefer using “chives” for both singular and plural applications. Similar to the terms “species” (as a biological term, not referring to money) and “impatiens”, which correctly add the last “s”, I add the “s” at the end.


Why Divide Chives?


After a few years of growth, the small bulbs in the soil become very crowded. One year, the chives will look fine, and the next year it might fail to emerge at all. By dividing the clump every 2-3 years, the younger and more vigorous bulbs will have a chance to grow. Those old bulbs might already have decomposed, so you won’t see them in the soil.

Wet soil exacerbates any problems it might have, so plant it where the drainage is good, in a raised bed, or in a clay pot. In fact, chives can tolerate quite dry soil, and it doesn’t mind being potbound. But for the best growth, keep potted chives damp to lightly moist. It needs full sun—6 hours or more each day—to grow well.

Another reason to divide chives is to provide more plants for the garden, to give away, or to sell at the neighborhood yard sale. Perhaps you’d like to add a division to the strawberry jar you’re filling with herbs. Chives responds very quickly after division, as long as the weather hasn’t turned cold.

If onion aphids have weakened your chives early in the season, removing all the foliage is an option. That would be another good time to divide the plant, perhaps waiting until after the blooms fade. I’ve never had a problem with onion aphids after spring.

***Update***: These tiny young onion aphids (photo, below) hitched a ride on the potted chives brought indoors last month. So, I cut back the plant and moved it outside, after feeding a few aphids to the betta. The other chives on the deck already show new leaves. 2/5/2021


onion aphids

Onion aphids from chives.


How To Divide Chives


The Pot

This process begins with digging up the clump or unpotting the potted chives. The plant in the photos has been growing in a 6½” clay azalea pot (shorter than wide—about 5″ tall). I’ll replant the same pot with one of the divisions, after cleaning it. Replanting in a dirty pot makes the next plant more difficult to remove. The new root ball will get stuck on the debris tightly clinging to the walls.

Another issue to consider when repotting anything is the shape of the pot. If the top curves inward, the root ball won’t slip beyond the narrow section, and you’ll have to cut straight or tapering sides to get the root ball out of the pot.

If you want to use Grandma’s ceramic pot, simply grow the chives in a plastic pot, with holes, that fits inside the prettier one. Cutting the top off a plastic pot might make it fit better. While double-potting lets you use a decorative pot without a drainage hole, remember to empty water collecting in the bottom after 10 minutes or so.

Plastic or frost resistant ceramic pots are fine, but use one that is small to medium in size. A big pot holds a large volume of soil that stays wet in a rainy period or in the cold. The excess moisture could kill your chives unless you’ve mixed extra drainage material into the soil. Chives grows nicely with a few other herbs in a window box.

Incidentally, some ceramics have chemicals in the glaze, so make sure they’re safe for edible plants. A new pot might have a sticker on the bottom indicating it’s “not safe for contact with food”. If in doubt, line the pot with a couple layers of food-safe plastic bags, and punch holes in the bottom for drainage.


Cut It Back


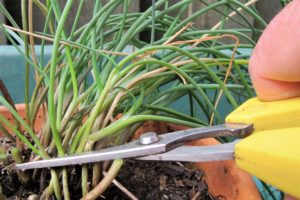
cutting chives' leaves

Cutting leaves right above soil level.


Cut off all the foliage, down to about 1/2″ from the soil surface. While it might appear extreme, this plant won’t skip a beat. Already, a day after cutting back this plant, it has grown 1/3″ (photo at the end).

Removing the foliage makes the process easier and neater. Also, there’s less stress on the roots because they won’t have to supply water to the foliage. Take the good leaves to the kitchen, and add them to baked potatoes for dinner, or to eggs, a salad, or soup. You’ll have long leaves to snip from rejuvenated plants within a couple of weeks, depending on weather.

Look for leek moth larvae, immature insects that sometimes bore into the hollow leaves or burrow inside and destroy the bulbs. This insect is native to Europe and Asia, but is also found in North America, where it can become invasive.


Divide and Multiply

If you’re removing your chives from the ground, dig a few inches from the base of the clump, and about 8″ deep. Tease off loose soil and put the earthworms back in the garden. Don’t worry about some lost roots; chives’ roots regrow very fast.


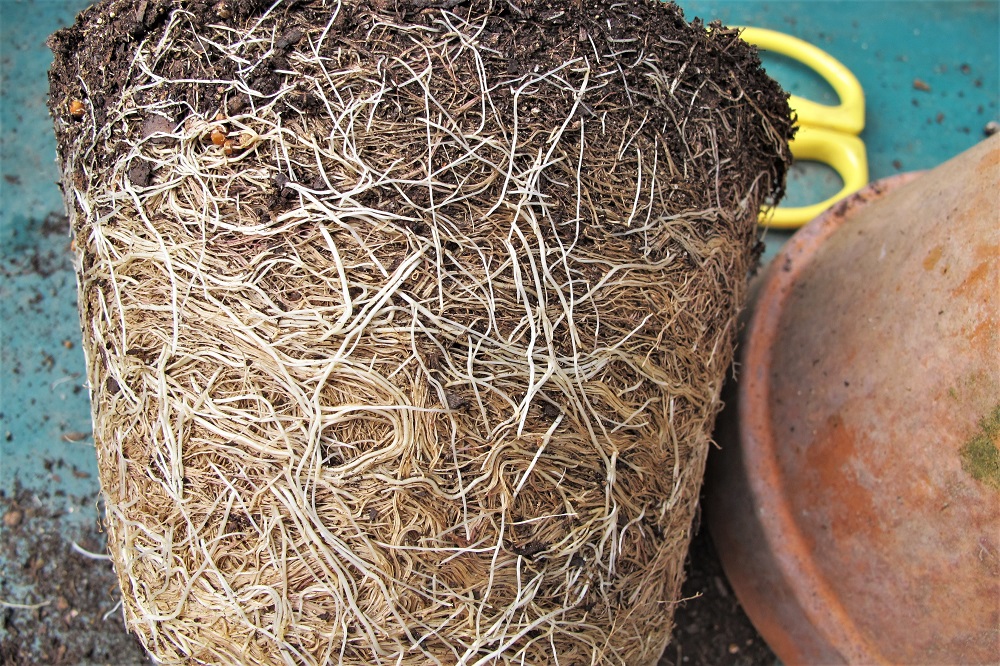
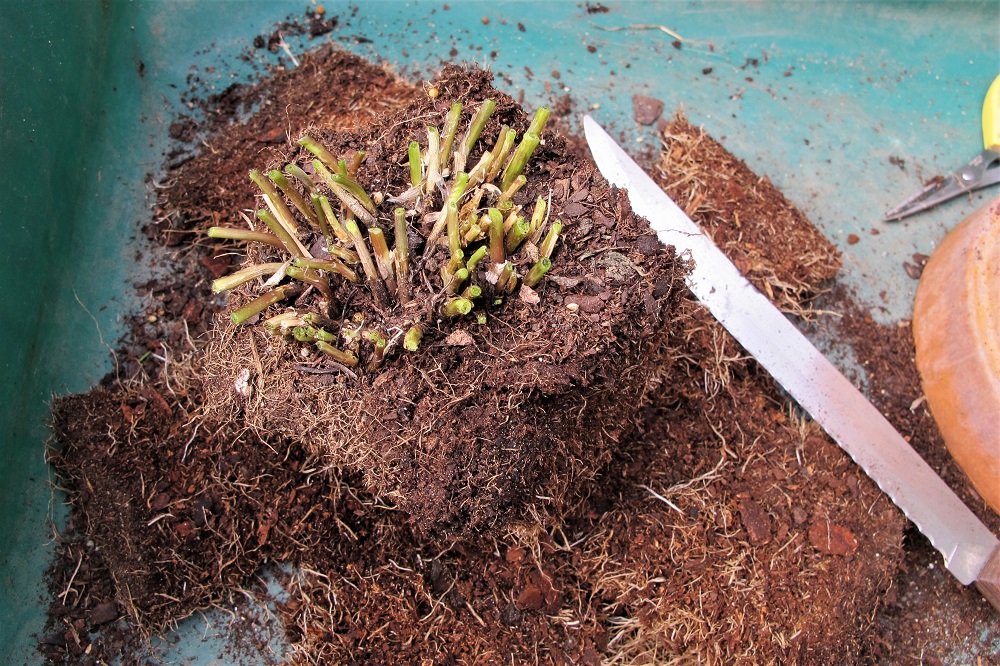
The root ball in a potted plant will become very congested with tightly packed roots, both dead and alive. Use an old serrated knife to slice off the outer edges of the root system. And remove that center part if there are no bulbs there. Compost this tired soil or toss it under the shrubs.

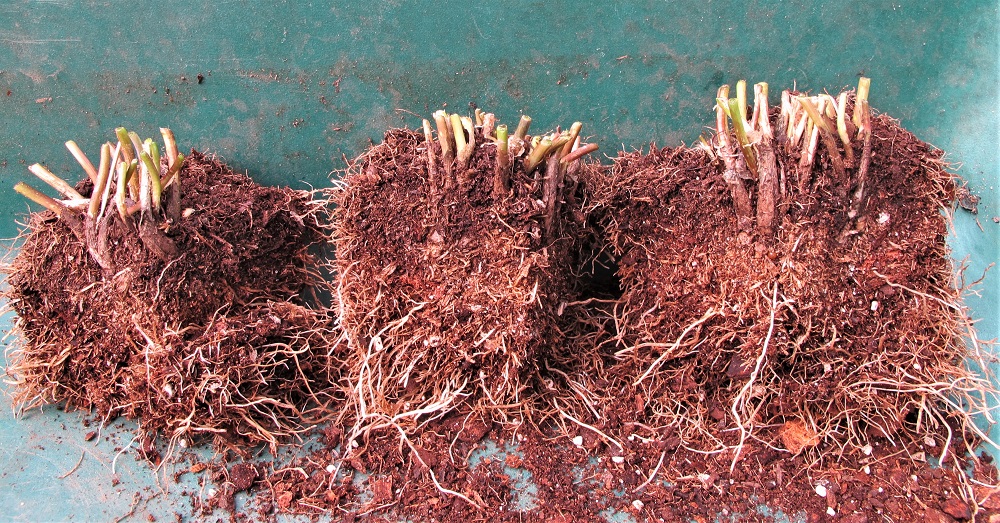
An old clump of chives often grows outward, while the center dies out. Identify the places where natural divisions can be separated. Now divide the plant. Use the knife to make a few or several divisions. I kept 12 to 15 shoots in each division. If you want, you could cut smaller divisions for more plants.


Potting Up


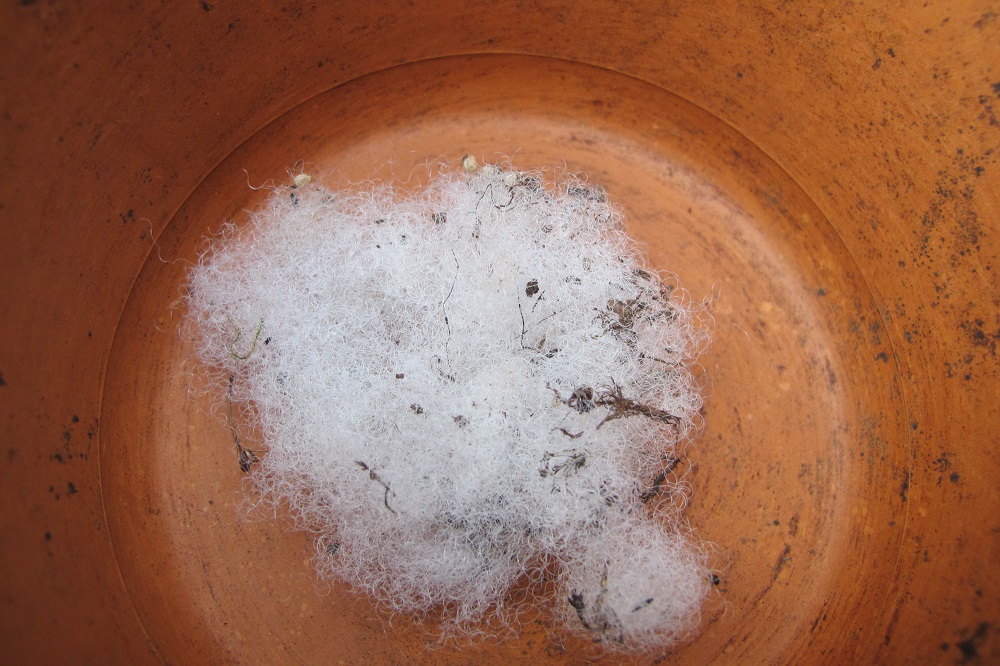
Place a wad of polyester fiberfill over the pot’s drainage hole. A small bag can be purchased for a few dollars at hobby shops. Because it’s synthetic, it doesn’t break down and can be reused. The PF prevents soil erosion when watering, keeping all the soil in the pot. Also, sowbugs, earthworms, and other critters won’t be able to gain entrance to the soil through the drainage hole. But water will drain freely.

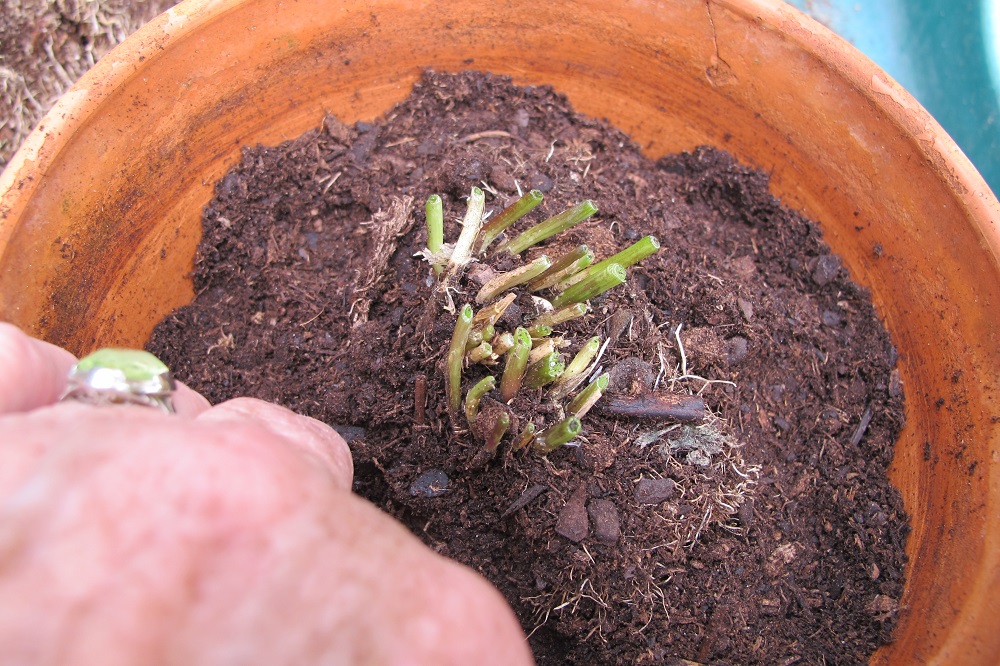
Add some potting soil to the pot and hollow out a depression for the fresh division. The soil line should be about 1/2″ to 1″ below the rim of the pot. Firm the soil around the roots to prevent settling or air channels through the soil. Add more soil if needed. But don’t bury the crown of the plant any deeper than it was growing before the division.

Water the plant and place the pot in the sun. Done! Wasn’t that easy?


Growing Chives Indoors


Light

Chives grows easily in a sunny window, where it gets at least 6 hours of direct sun. Abundant sunshine allows optimal photosynthesis and keeps the plant growing strong. Lack of adequate sun causes thin, weak growth that falls over.

Artificial light can help on cloudy days. Place the plant within a few inches of the light source, such as a shop light, to supplement the natural light it gets, but not so close that it can feel the heat. Increase the number of hours of exposure to light for more efficient photosynthesis.

Indoor sun is considerably weaker than outdoor sun because much of the sun’s energy is reflected or absorbed by window glass.


Temperature

Even if the windowsill is chilly on winter nights, the plant should thrive there. Chives growing indoors should stay in leaf all season, even though those growing outdoors will go dormant. Cooler indoor temperatures (45° to 65°F) keep the plant shorter and in better condition. It will bloom in spring only if it has received enough cold, so don’t expect flowers.

If you must keep chives indoors in the summer, set the pot back several inches from the glass so it doesn’t overheat.


Water

Keep the soil damp. Water thoroughly, and then let it dry a bit. After 10 or 15 minutes, empty excess water that remains in a saucer. Chives can grow in a pot as small as 4″ across and doesn’t mind being potbound for some time. A full plant in a small pot requires water more often.


Fertilizer

Every 6 weeks, from mid-fall through winter, apply a dilute (1/4 to 1/2 strength) solution of fertilizer if the plant continues growing.

From spring through early fall, fertilize every 3 or 4 weeks at about half the strength recommended on the package. Chives just isn’t that fussy. Wait 5 or 6 weeks after dividing before starting to fertilize the potted herb. Chives planted in the garden might need fertilizer only once or twice during the growing season. In well-amended soil, though, it might not need any supplemental fertilizer.


Tips for Harvesting Chives


When cutting the leaves, cut the entire leaf, almost down to the soil. The bulbs will soon generate new growth. If you cut the tips off a bunch of leaves, all the ends of those leaves will turn yellow.

Intercalary meristematic tissues right above the bulbs permit regrowth of the leaf from the ground up, just like grass.


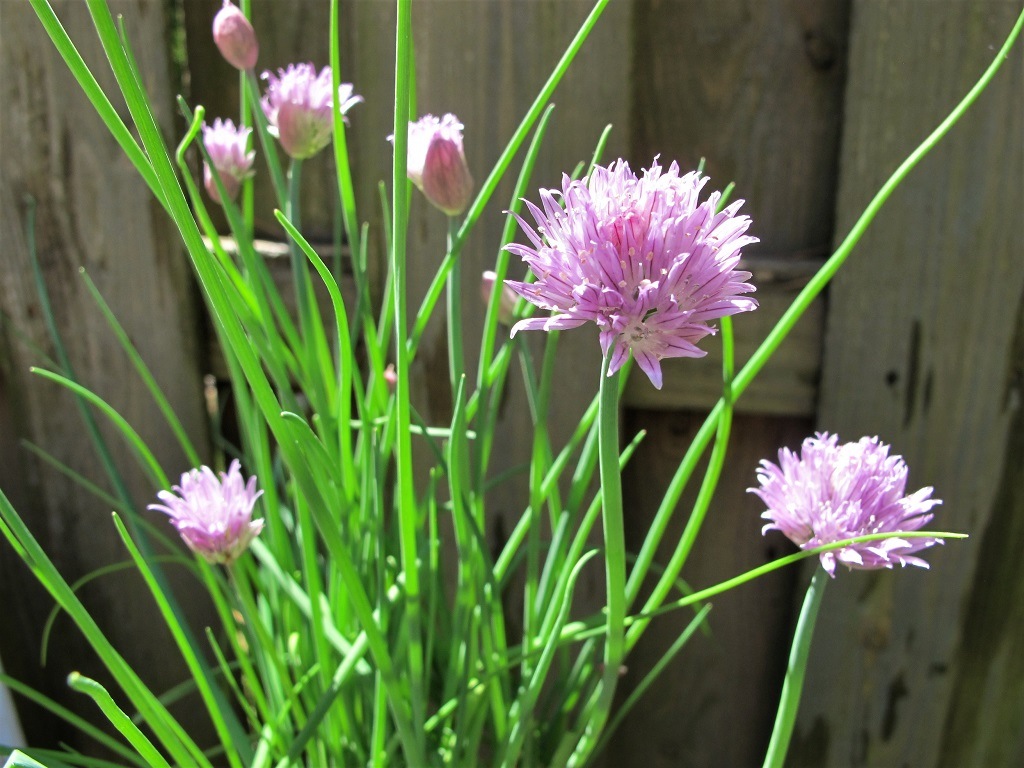
chives in flower

Chives in flower.


Chives flowers in spring (or early summer in northern zones) after being exposed to several weeks of a cold winter. It’s very pretty in bloom, with pinkish purple flowers on sturdy stalks. It looks like their cousins, the ornamental Alliums, grown from bulbs planted in autumn. Chives can be planted among shrubs or in a perennial garden as an element in edible landscaping.

This herb’s flowers produce generous amounts of nectar, attracting beneficial insects. Chives’ flowers are edible. Simply pull some of the little florets off the head and use as a garnish. Young flowers have a milder flavor than those that have been open for a few days. Add chopped young leaves and florets to cream cheese as a spread.

The stalk, or peduncle, that the flower is attached to is quite tough, and not edible for most purposes. Hold the base of the plant and pull out the entire flower stem.


Chives from Seed


As a monocot, chives produces flower parts in multiples of threes. So, each floret has 6 petals and the seed capsule is 3-lobed.

Different varieties of chives have similar flavor, but some have finer foliage than others. ‘Dolores’ and ‘Nelly’ have thin foliage, while ‘Purly’ and ‘Staro’ have wider leaves.


garlic chives going to seed

Garlic chives going to seed.


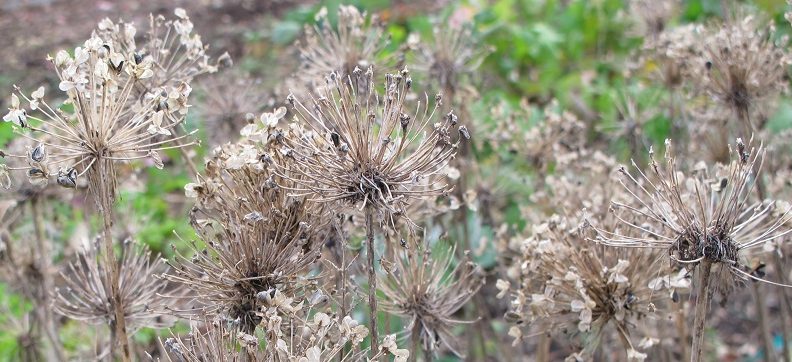
And there’s garlic chives (Allium tuberosum), with a distinct mild garlic flavor. Very nice in salads, but it will spread all over the place if the seedheads are not removed (photo, above). It also spreads underground more vigorously than onion chives.

Garlic chives grows in zones 4 through 9. Its pretty white flowers appear later than those of onion chives. Enjoy the flowers for a few days but remove them before seeds develop. Most wild animals do not feed on chives, so it’s safe from deer and rabbits.

Garlic chives has leaves that are flattened, while onion chives has leaves that are hollow and cylindrical in cross-section.

Growing chives from seed is quite easy. Sow chives about 1/4″ deep in moist potting soil. You can use market packs or individual 3½-4″ pots, with 10 or so seeds sown together. Some growers sow dozens of seeds in one pot for a faster sale.

As soon as the seeds germinate, give them full direct sun for strong plants. They can be planted out after hardening off the seedlings, and they’ll tolerate light frost at a young age.


                               *     *     *     *     *     *     *     *


Chives has been used for 5,000 years by civilizations in both the Old World and the New World. The foliage is high in Vitamin C, carotenoids, and manganese. It’s very high in Vitamin K. Because we normally don’t consume chives in large quantities, it’s not considered a major source of nutrients.

Freshly harvested greens contain the highest levels of nutrients. Dried herbs lose much of their flavor as volatile oils evaporate to the air.

Dividing chives is an easy project for a cool end-of-summer day. Or you might prefer to divide your plants in late winter or early spring, as they first emerge from the ground.

Clipped fresh chives is very nice on a chilly day with a baked potato, melted cheese, crumbled bacon, topped with barely cooked broccoli…and butter… Enjoy!
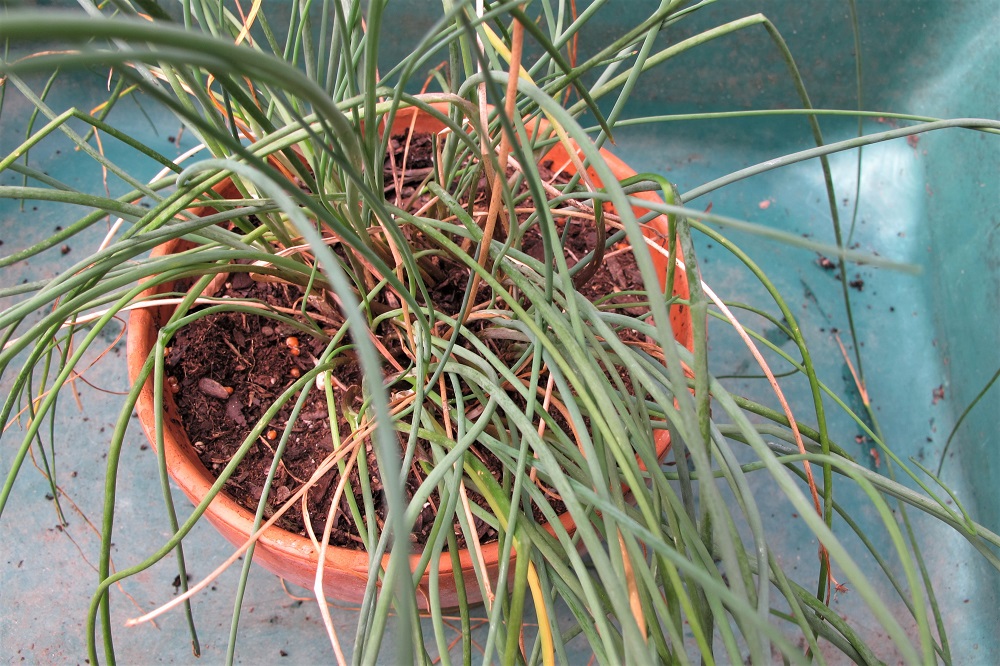


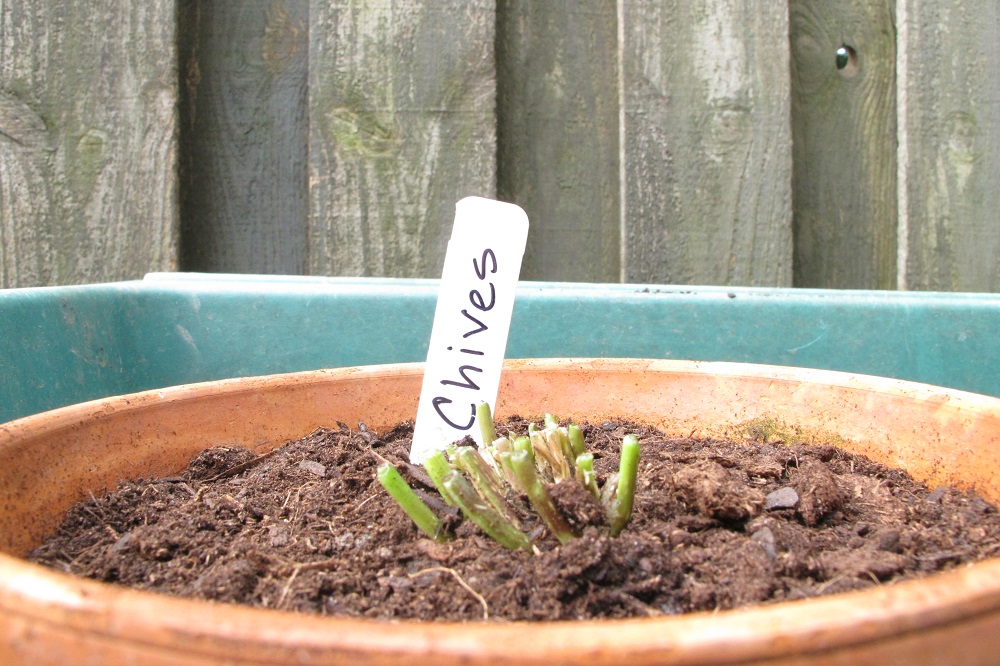
chives, the day after division

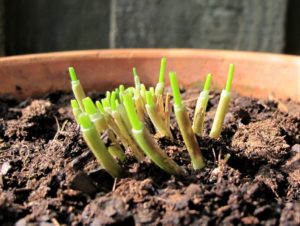
Chives, a day after dividing the original plant.


Return to the top

Fig Trees: How To Grow Edible Figs

2019

Updated 5/13/2025


Delectable, Edible Figs


The plant wish list grows longer each day. Within the next couple of years, I hope to move to a property with larger garden space, so I can shrink that list. First to be planted will be a couple of fig trees…blonde figs, purple figs…


figs


Many years ago, our local Derwood, Maryland grocery store brought in fresh figs. I couldn’t believe it. So, I indulged in the extravagance, and bought a small box, at $9.00 or $10.00 per pound. The last time I had had fresh figs was about 25 years earlier, in Oradell, New Jersey… …

As a young girl, my first introduction to the delectable fig was when my maternal grandfather picked them from trees growing in his Englewood garden, two towns over. A substantial brick wall surrounded the back yard, as I recall, just beyond the monstrous cast iron stove in the kitchen.

My grandfather’s figs grew on the right side of the garden. On the left were my grandmother’s tomatoes, herbs, and where she threw out bread for the birds. I can still hear them—sparrows, tons of sparrows!


sparrows


Papa’s Fig Trees


Salvatore and Catherina D’Arrigo married in Sicily, after, according to tradition, his sisters had been married and settled into their homes. Now, in 1906, they sailed across the Atlantic, to enjoy a new life of freedom and opportunity in the United States. After passing through Ellis Island, they settled near extended family members in Bergen County, New Jersey.

Nanny, Papa

Nanny and Papa D’Arrigo, before setting sail for America.

Industrious and self-sufficient, Nanny and Papa wasted no time getting down to business. They opened a tavern/restaurant and purchased a house. I imagine that, like Johnny Appleseed, wherever my grandfather landed, a fig tree grew. That part of the eastern seaboard, though, is quite cold in the winter, and not considered “fig country”.

But my grandfather had some tricks that worked, apparently, for his fig trees. In addition to his skills in business, Papa was also a landscape gardener. Must be in the DNA!

Every autumn, after the trees went dormant, he surgically severed part of the root system near the base of the tree. He bent over the trunk of the fig tree until it was just above the ground. Then he covered the trunk and branches with piles of leaves and burlap…all tucked in for the winter. In early spring, each fig tree was raised, pruned, and staked. (Other family members recall the standing trees simply being cloaked in layers of burlap, so he might have tried different methods.)

Recently I read that this was a common practice in Boston, New York City, Philadelphia, and other cold cities where the fig tree could not survive without a little manipulation.


Second Helping

It was a full half century after my grandparents had arrived on these shores when I had my first… fresh… fig from their garden. Papa passed away when I was 10 or 11, and Nanny, 5 years after that. So, we didn’t have too many years to enjoy those figs, but they certainly made an impression.

A quarter century after the last of Papa’s figs, those fresh figs showed up at the grocery store in Maryland. And yes! They tasted exactly as I had remembered them!


fig tree


Origins Of the Fig Tree


The common fig (Ficus carica) is native to Turkey. By 5,000 B.C., it had been distributed throughout the Middle East and the Mediterranean region by Greek and Roman traders. Fig trees readily adapted to hot, dry summers and mildly cool winters, and they also made their way to England and China. They grow from sea level up to over 5,000′ in elevation.

map, Turkey, Mediterranean

But its roots go back much further than that. At a Neolithic archaeological site called Gilgal I, in the Jordan Rift Valley, evidence shows that fig trees were cultivated 11,400 years ago.

Remains of a plant found in a home dating to that period indicate that early populations knew how to vegetatively propagate fig trees from cuttings. The parthenocarpic “mutant” they grew was a sterile form that bore fruit without pollination.

Cultivated for human consumption, figs are probably the oldest domesticated crop. Figs predate by a thousand years the earliest agricultural grains—wheat, barley, and rye.

Sumerian stone tablets from 2500 B.C. recorded culinary uses of the fruit. For thousands of years, before sugar gained widespread use, figs sweetened foods and desserts.

Legendary twins Romulus and Remus have been depicted under the bough of a fig tree as they were fed by the mother wolf. The forbidden fruit, of Bible fame, was probably the fig and not the apple. Figs have long figured in religious symbolism, associated with peace, prosperity, and fertility.

The term “fig” was first used in the English language in the 13th century. It is derived from the Old French figue, and the Romance fica (Ficus is the genus name for edible figs and for the hundreds of tropical species).


The Fig Moves To The New World

Early explorers brought fig trees to the New World as early as the 15th century. And the Spanish Franciscan missionaries are credited with planting figs in southern California from 1769. ‘Mission’ is a well-known variety, with excellent flavor and sweetness. It is parthenocarpic, not requiring pollination to set fruits.


Worldwide Production

Worldwide, Turkey produces the most figs, with 26% of the crop. Egypt, Algeria, Morocco, Iran, and the U.S. round out the rest of the top 6 producers. California, with a climate similar to the tree’s native land, grows almost the entire American commercial crop. Texas comes second.


Figs as Houseplants


weeping fig

Variegated weeping fig.


This article describes the edible fig, which grows outdoors. The weeping fig (Ficus benjamina), the creeping fig (Ficus pumila), the rubber plant (Ficus elastica), and the ever-popular fiddle-leaf fig (Ficus lyrata) are primarily tropical houseplants, but they don’t produce edible figs for humans.

The edible fig tree does not grow well or produce fruit indoors.


Inside the Box

My father’s career centered around food photography, mostly with the Nabisco cookie company. We kids were delighted when he brought home samples of Fig Newtons, first becoming available in 1891. In fact, as a teenager, I spent one summer at the Fair Lawn NJ Nabisco plant deftly packing boxes of chocolate chip cookies and Fig Newtons.

This explains not only my fondness for these cookies, but also my complete aversion to anything sticky. Dirt’s okay; sticky is not.


figs


If It’s Too Cold


Okay, I was determined to grow a fig tree. Most experts at the time said they wouldn’t survive Maryland’s cold winters. Much later, with a little research, I learned that there are several hardier varieties of fig trees. Most fig trees grow in USDA plant hardiness zones 7 through 9, with a few growing in zone 6, and several tolerating warmer zones. ‘Chicago Hardy’ is hardy to zone 5. Before choosing a particular variety, check its hardiness zone from a few sources. There are over 200 varieties to choose from.

A garden center called Behnke’s Nursery was the go-to place for plant nerds like me. But it was some distance around the clogged Beltway circling Washington, D.C., in Beltsville, Maryland. They retailed more species of plants than I had ever seen. Certainly, they’d have figs!

I bought a variety called ‘Brown Turkey’, one of two types available. The next year, I transplanted it into a bigger pot. Smaller varieties of figs can grow in 20-gallon pots or larger. The plan was to grow it outside in the summer, let it drop its leaves in the fall, and then move it into the unheated garage for the winter. There, it wouldn’t suffer from the lowest winter temperatures. And, because the fig tree bears fruit even when growing in a large container, this small effort would have fruitful dividends.

This routine served us well for several years, until that killer winter. One year, the temperatures dropped to lows we had rarely seen, and the wind blew its icy breath through the gaps around the garage door. My fault—I didn’t raise the fig tree off the floor or move it inside. Consequently, it froze solid and died. When the garage door was replaced, I went for the more expensive well-insulated model with gaskets around the edges.


A Nod To Behnke’s

Just a few weeks ago, I read in one of the trade magazines that, sadly, Behnke’s is about to close its doors. Another pillar collapses. Many in the gardening world, it seemed, knew this company.

In fact, recently at the Hendersonville Garden Jubilee, Larry Morton, the bonsai vendor at Bella Bonsai Nursery, told me that he had worked there for a few years in the ’60’s. Small world… Here’s to Albert and Rose Behnke, German immigrants, who opened this nursery almost 90 years ago.


Headings

Page 1: Delectable, Edible Figs, Papa’s Fig Trees, Origins Of the Fig Tree (The Fig Moves To The New World, Worldwide Production, Figs as Houseplants, Inside the Box), and If It’s Too Cold (A Nod To Behnke’s)

Page 2: How To Plant and Grow Fig Trees, Hardiness, Sun, Soil Preparation For Fig Trees, Time To Plant (Mulch), Watering Fig Trees, Fertilizing, Pruning Fig Trees, Foliage, Fruits Of Fig Trees, That Little Fig Wasp, Problems, Types of Fig Trees, and Varieties of Fig Trees

Return to the top


How To Grow the Best Blueberry Plants


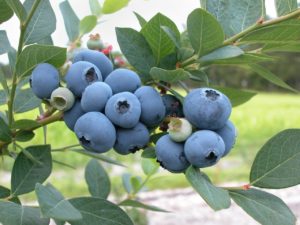
blueberries maturing on the plant


Planting a Blueberry Patch?


July is National Blueberry Month, but it’s a rare day when I don’t consume blueberries. For many years, breakfast 5 or 6 days per week consisted of plain Cheerios, a handful of English walnuts, a handful of fresh strawberries, and a handful of fresh blueberries. Throw in half a nectarine or peach in season, or part of a banana, and I’m “doin’ the body good”. More fruit and nut than anything else.


Today is Day One


Until today. This morning, when I was researching nutritional information on the luscious little berry, I read the caution about eating blueberries and dairy, especially high-fat dairy, at the same time. The super-healthy antioxidants found in blueberries (strawberries, too) lose their desired effect when dairy and berries are eaten together.

Eating a lot more blueberries will increase the level of antioxidant activity, even in the presence of dairy. Apparently, this goes for strawberries as well. But this can get expensive, especially when berries are out of season.

So, all of you smoothie drinkers out there who use yogurt as a base might consider saving the blueberries until a few hours later. Or skip the yogurt. And today, the blueberry partnership comes to an end in my kitchen. At breakfast, anyway.


Blueberry Nutrients

A few berries in the bowl won’t hurt, and they certainly have other healthful reasons for including them. A ½-cup serving contains:

  • 40 calories
  • 1 g. protein
  • <1 g. fat
  • 11 g. carbohydrate
  • 7 g. sugars (blueberries have a low glycemic index of 53)
  • 2 g. fiber
  • high amounts of vitamins A, C, K (blood clotting, bone health, heart health), and the mineral, manganese

But it’s the antioxidant benefit I’m after more than anything else. Blueberries contain huge numbers of antioxidants, including the flavonols, quercetin (linked to lower blood pressure and reduced heart disease) and myricetin (cancer, diabetes).

Anthocyanins include malvidin and delphinidin, found predominantly in the blueberry skins.


blueberry, raspberry, strawberry photo


What Antioxidants Do


Blueberries have the highest antioxidant levels among commonly found fruits and vegetables—when they’re not eaten with dairy products. Anthocyanins are one group of antioxidants, the pigments that give red, blue, and purple fruits and vegetables their colors.

Antioxidants are health-promoting flavonoids belonging to a huge group of polyphenols. They circulate through our vascular system and help protect us from the damaging effects of free radicals. Those free radicals are produced as normal products of metabolism. They also help prevent free radical cell damage due to exposure to alcohol, cigarette smoke, and other pollutants.

A free radical, lacking an electron or two in the molecule’s outer orbit, is unstable as it tries to steal an electron from a nearby molecule, replicating the instability. This can lead to the development of cancerous cells if it happens in DNA. Antioxidants neutralize the unstable molecules.


More Benefits


blueberries in shape of heart


In addition to helping prevent oxidative DNA damage, potentially leading to cancer, and slowing down the aging process by 2½ years, antioxidants in blueberries are also linked to lower LDL cholesterol, the “bad” cholesterol that can lead to heart disease. But there are many other factors that contribute to this illness. One of those factors is inflammation, and blueberries—you guessed it—are also anti-inflammatory.

Many studies point to the positive effects blueberries have on blood pressure, type 2 diabetes, urinary tract infections, brain function, and muscle damage after strenuous workouts. Antioxidants help our bodies produce more nitric oxide and can relax blood vessels, helping to lower blood pressure.

This little fruit also slows the progression of age-related macular degeneration and glaucoma. There are plenty of reasons to include blueberries and other colorful plant pigments in the diet.

One clue to their growing popularity is the fact that per capita blueberry consumption tripled between 2000 and 2015, to just over 3 pounds per person per year. When I move to a place with more land, planting a blueberry patch is high on the list of garden projects.


Prepare for Planting Your Blueberry


Sun

First, locate your blueberries where they’ll receive at least 6 or 7 hours of direct sunlight. In areas with hot summers, dappled shade in mid-afternoon helps prevent stress. Consider the tree canopy and how soon it might begin to cast too much shade on your blueberry garden.

For all permanent plantings, I like to give plants an excellent base to root into. The section in Soil Prep 101 for Your Vegetable Garden headed “Prepare for Soil Prep” offers details on getting started, with a few exceptions for blueberries. Blueberries, in particular, require very acidic soil.

A soil test is recommended to get an accurate reading of the soil’s fertility, pH, and tilth. Proper planting and management will reward you with perhaps 20-30 years of blueberry harvests.


Drainage


Rountree's potting soil

Planting mix composed primarily of pine fines.


Very dry soil is difficult to dig, so watering the area a few hours or the day before starting the process will make it easier. I usually use a sturdy garden fork for the initial dig.

Loosen the soil 15-20″ deep, and 3 or 4 times the width of the root ball. Add a cubic foot or more, depending on how bad the soil is, of partially composted pine bark chips, also called soil conditioner or pine fines (photo, above) to facilitate drainage. Don’t layer the pine fines; instead, incorporate them into the full depth of excavated soil.

If you have sandy loam to begin with, you might not need as much soil conditioner. Here in the piedmont of North Carolina, however, we have heavy, sticky clay. Clay soil holds moisture and fertility, but it requires amendments to improve the drainage.

Coarse sand (not play sand, which is too fine) is another material that can improve drainage, but it should be used in conjunction with organic matter.

Loosening the soil and adding amendments and plants raises the finished level of the bed. Take this into consideration as you sculpt the land. Blueberries need good drainage, and you want to make sure you didn’t create a berm where the water has nowhere to drain. Hire a professional gardener, if you prefer, to till and prepare the soil according to how you want it done.

If you’re planting the shrubs in a row or in a group, the plants will thank you if you dig the entire bed instead of just the area around each plant. Remember to place the tallest-growing varieties on the north side of the garden (northern hemisphere). Concentrate the peat moss and compost near the plants, but add some peat and pine fines between them as well.


Gypsum

Gypsum (calcium sulfate) can be added annually for several years to soils that are especially intractable. It works by “flocculating”, or gathering, tiny particles of clay soil into larger particles, opening up minute channels through the soil profile. The larger air pore space allows water, air, and roots to more easily penetrate the soil.

Unlike lime (no lime for blueberries!), gypsum doesn’t raise the pH of the soil. Pelleted gypsum can be incorporated into the soil at the beginning of the process and applied as a top dressing in subsequent years. Water will carry it lower into the soil.


Soil PH 

Because blueberries are sensitive to high salt content, do not add mushroom compost or composted manure to the garden. Manure also can raise the pH of the soil.

Our soils in the eastern U.S. tend to be acidic, but not acidic enough for blueberries. Blueberry plants need a pH below 5.5, even as low as 4.3. Peat moss is very acidic, and blueberries love it. In addition to the pine fines, add at least one cubic foot of pre-moistened peat moss per plant. Again, thoroughly incorporate the peat with the top 12″ to 15″ of soil, breaking up the clods as much as possible.

Pockets of dry peat moss buried in soil will remain dry for a long period of time because it resists absorbing water. Clay readily absorbs water; you need to thoroughly mix the clay particles into the peat moss. Pre-moistened peat moss is easier to work with.

A moderate amount of aged compost can be incorporated into the top 6-8″ of soil. The amended soil should be at least 3 times the width of the root ball. Sure, that sounds like work, and the plants probably would survive with a lesser effort, but greater effort equals greater rewards!

Rake the area smooth.


Time to Plant Your Blueberry


Before removing the blueberry plant from its pot, water it. This will help the root ball slide out of the pot. Don’t pull the plant by the stem; this could damage the delicate root system. Avoid heavily damaging the roots of blueberries because they lack root hairs. Keep the label for each plant with the plant.

Let gravity help you. Tilt the pot almost upside-down and see if the plant comes out without too much coaxing. Be ready to catch it before it lands on the ground; stems are brittle and easily broken. If the roots still won’t let go of the pot, cut away the plastic pot with a utility knife or sharp pruners. Or use an old bread knife along the inside of the pot, separating the pot from the outside of the root ball.

Know how large the plants will grow when they reach maturity in order to gauge how far apart they should be planted. Plants often grow larger than the size indicated on labels. And to maintain the health of the foliage, spacing them farther apart assures good air circulation.


Grab Your Shovel


garden tools


Hollow out a hole in the prepared garden. The depth should be almost the height of the root ball. Allowing ½” to 1″ of the root ball to protrude above the finished grade is advised.

Never cover the original root ball with new soil; doing so would suffocate the roots and damage the stem. Blueberries prosper when planted in a raised bed, ensuring good drainage and high oxygen content at the crown of the plant.

Use a cultivator to loosen some of the roots on the outside of the root ball, or score it several times with a knife, slicing shallowly from top to bottom. This light damage will stimulate the root system to quickly send out new roots.

You want to encourage the plant to grow roots away from the plant and into the amended soil instead of circling around the original root ball.  Whenever you add anything into the landscape, do not dig a bowl with a smooth surface. Use a shovel to create jagged edges, which will direct growing roots into new territory.

Now plant the blueberry, backfilling with amended soil. Guide the loosened roots out into the prepared ground. Using medium pressure, firm the soil. Loosely packed soil will settle, possibly dragging the plant too deep into the ground.


First Pruning


blueberry branch


With young plants, remove very thin twigs, crossing or damaged stems, and cut back long stems to remove most flowers. Mature plants at the nursery, grown in large pots—okay, experts still recommend pruning them, but I’ve had no problems letting them set some fruit the first year when the plants are well cared for.


Label the Blueberry Plant

For new plants, bury the label on the north side of the stem. This way, you’ll know where to find the label if you need to know the cultivar’s name. Plastic labels that are shaded will last a long time. It’s not a bad idea to take pictures or to record this information in a journal. Keep track of the plants’ names in case one or two should perish, because…

…blueberries are particular about their pollinizers—the plants that provide the pollen. So, you’ll want to know the names of plants that need to be replaced. All blueberries bear fruit, but you don’t want to create a gap in bloom cycles by guessing which varieties to buy. Ensuring an uninterrupted succession of flowers and mature pollen throughout the bloom season yields an abundant harvest of beautiful berries.


Mulch

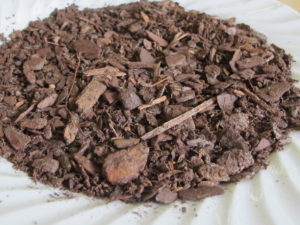
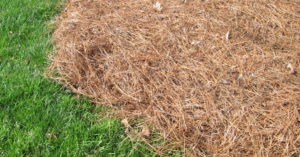
Once all the blueberries have been planted and the soil raked smooth, apply the mulch. I prefer to use pine products, such as 4″ of pine straw or 2″ to 3″ of pine bark nuggets for blueberries. An inch of pine fines also works. Don’t apply mulch against the stems.

Avoid walking over the newly prepared garden to prevent compressing the soil.


pine straw mulch for blueberry patch

Pine straw.


Mulch helps cool the soil and hold in moisture. It also helps prevent most weeds from growing, which compete with blueberries for moisture and nutrients. More mulch will be needed as it decomposes, but pine bark chunks can last a few years.

Shredded hardwood mulch is attractive and readily available. And it holds well on a slope, except during heavy rains. A thin layer, an inch or so, is acceptable. But too much hardwood will raise the pH of the soil. As long as you can maintain the pH that blueberries require, using a thin layer of shredded hardwood is okay. But pine straw and pine nuggets are preferred.

If the soil pH is too high, switch from shredded hardwood to pine bark nuggets. In fact, specialists recommend alternating between pine products and hardwood every several years. Changing the pH with mulch is a very slow process. So, you’ll need soil acidifier, which is available at garden centers, to lower the pH if it drifted too high.


Water

blueberry in a pot

Blueberry ‘Patriot’, in a pot for several years.

If you can’t plant the blueberries right away, they might require water every day.

Water the new garden well. For the next 2 weeks, or until the plants root in, the only water available to them is the moisture held by the original root ball. Naturally, if ample rain falls while they’re rooting in, you might not need to water. Dry clay soil in the bed will steal moisture from the plant’s root ball.

If the plant was being watered daily at the nursery, it might require daily watering after planting. Large leafy plants dry fast in warm, breezy conditions. New growth on the tips of the stems visibly wilts if the roots have been damaged or if the soil is dry. Having no root hairs subjects blueberries to early wilting if moisture levels drop too low. Water immediately, or those tender new leaves will turn brown.

Direct water from the hose over the original root ball. Feel the water first, to make sure it’s not hot. Give each plant at least 3 gallons of water, more for larger specimens. Water the soil a few inches beyond the root system to encourage new roots to grow toward the moisture. Monitor soil moisture levels for the first growing season.

Tap water has a high pH, so regularly irrigated soil will require acidifying.


How Are They Looking? 

Do they wilt every day although you water every day or two? Water deeply so that the entire root system is moistened. Shallow watering might satisfy roots near the surface, while those deep in the soil remain dry. As new roots grow into the soil, water more widely around the plants. The original root ball often resists absorbing moisture if it has gone too dry. That’s why we recommend pre-moistening peat moss and watering the potted plant before planting.

Overwatering also can cause wilt. Don’t overdo it. Too much water in clay soil prevents air from reaching the roots. Essentially, they drown. An overwatered plant is less likely to recover. I can’t over-emphasize the importance of good drainage… and that means amending clay soil.

Excessive root injury sustained when planting will cause the plants to wilt. You might need to lightly shade them for a few days to ease the stress. After a week or two, prune off branches that didn’t recover, or leave them for a while longer to see if dormant buds sprout from live wood.

Check to see if the root ball has settled too deeply into the soil. Raise it up if that’s the case. The crown of the plant should be flush with the surrounding soil level, or, preferably, raised a little above it. And make sure all air pockets around the roots have been filled with soil.

If your new blueberries are looking good and starting to grow, congratulations! Blue star!


Settled In


water from the hose


Once the plants begin to root in, after a couple of weeks, you can decrease the frequency of watering. It’s tempting to assume that the recent gentle rain is enough for the next few days. But it might have been only ¼”, which dampens the mulch but not the soil.

If in doubt, dig several inches into the soil near the edge of the original root ball to see whether the soil is running dry or is sopping wet. You don’t want either of those conditions.

One inch of water throughout the garden will moisten the top 4-6″ of soil. Every week during the growing season, the entire garden should receive 1½” of water, and more than that in sandy soil. After the plants have become established, water less often, if you need to at all, but water deeply when you do.


Family Likeness


our potted blueberry 'Patriot'

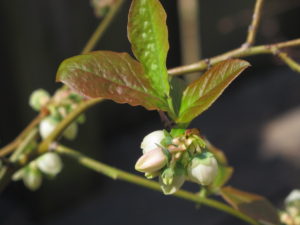
Early season flowers and leaves on our potted ‘Patriot’ blueberry.


Looking at the flowers in late winter to late spring, you might have noticed the similarity between blueberry (Vaccinium spp.) flowers and the flowers of Pieris japonica, and those of the sourwood tree, Oxydendrum arboreum. Their flowers resemble little bells.

All of them belong to the family Ericaceae, which includes heaths, heathers, azaleas, and rhododendrons, although these shrubs’ flowers bear less similarity to those of blueberries. Cranberry, bilberry, and huckleberry also belong to the Vaccinium genus.

Gardeners cultivate 50 or 60 species of blueberries around the world. Several species native to the United States and Canada formed the basis for almost all of the many blueberry varieties available today.

New dwarf cultivars of blueberries feel right at home in foundation plantings. Edible landscaping highlights both the ornamental and the edible aspects of growing blueberries.


Headings

Page 1: Planting a Blueberry Patch?, Today Is Day One, What Antioxidants Do (Blueberry Nutrients, More Benefits), Prepare for Planting Your Blueberry (Sun, Drainage, Gypsum, Soil PH), Time To Plant Your Blueberry (Grab Your Shovel, First Pruning, Label the Blueberry Plant, Mulch, Water, How Are They Looking?, Settled In), Family Likeness

Page 2: The 5 Major Groups of Blueberries (Lowbush Blueberry, Northern Highbush Blueberry, Southern Highbush Blueberry, Rabbiteye Blueberry, Half-High Blueberry), Blueberry Maintenance (Water, Mulch, Fertilizer, Pruning, Blueberry Pollination, Disease, Picking), Woodchucks and Friends, Plant Protection, Cage Your Blueberries


Return to the top